


00
113984
Weather Station |
EWS-870 |
|
Wetterstation |
|
|
|
Operating Instructions |
GB |
|
Bedienungsanleitung |
D |
|
Руководство по эксплуатации |
RUS |
|
Istruzioni per l‘uso |
I |
|
Návod k použití |
CZ |
|
Návod na použitie |
SK |

1
2
18
A
3 |
4 |
|
|
9 |
8 |
13 |
||
|
|
|
|
5 |
10 |
|
|
14 |
|
|
|
|
|
|
|||
|
|
|
|
11 |
|
|
15 |
|
|
|
|
|
6 |
|
|
||
|
|
|
|
12 |
|
|
16 |
|
|
|
|
|
|
|
|
||
|
|
|
|
7 |
|
|
|
17 |
|
|
|
|
|
|
|
||
|
|
|
|
|
|
|
|
|
B
MADE IN CHINA
19
RESETCH 1 2 3
20
 21
21
433 MHz
THERMO SENSOR
 22
22

GOperating instruction
Controls and Displays
A Base station
1.Time
2.Channel display
3.Alarm symbol
4.Radio symbol
5.Measuring station radio symbol
6.Outdoor temperature
7.Room temperature
8.SNOOZE/LIGHT button
=stop the alarm/activate the backlight (approx. 5 seconds)
9.ALARM SET button
=display/set alarm mode
10.CH+ button
=select channel/increase the current set value
11.°C/°F slide switch
=switch between °C and °F
12.SENSOR button
=manual search for a signal from the measuring station
13.DISPLAY SET button
=settings/confirm the set value
14.MEM– button
=access the saved maximum/minimum values/reduce of the current set value
15.RESET button
=restore factory settings
16.RCC button
=activate/deactivate manual radio signal reception
17.Battery compartment
B Measuring station
18.Transmission indicator lamp
19.Opening for wall mounting
20.RESET button = restore factory settings
21.CH slide switch = channel selection
22.Battery compartment
2
Thank you for choosing a Hama product.
Take your time and read the following instructions and information completely. Please keep these instructions in a safe place for future reference. If you sell the device, please pass these operating instructions on to the new owner.
1. Explanation of Warning Symbols and Notes
Warning
This symbol is used to indicate safety instructions or to draw your attention to specific hazards and risks.
 Note
Note
This symbol is used to indicate additional information or important notes.
2. Package Contents
•Weather station EWS-870
(base station for indoors/measuring station for outdoors)
•4 x AA batteries
•These operating instructions
3. Safety Instructions
•The product is intended for private, non-commercial use only.
•Do not operate the product outside the power limits given in the specifications.
•Do not use the product in moist environments and avoid splashes.
•Do not use the product in the immediate vicinity of heaters or other heat sources or in direct sunlight.
•Do not use the product in areas where the use of electronic devices is not permitted.
•Do not place the product near interference fields, metal frames, computers, TVs, etc. Electronic devices and window frames can negatively affect the product’s functionality.
•Do not drop the product and do not expose it to any major shocks.
•Do not open the device or continue to operate it if it becomes damaged.
•Do not attempt to service or repair the product yourself. Leave any and all service work to qualified experts.
3

•Keep the packaging material out of the reach of children due to the risk of suffocation.
•Dispose of packaging material immediately according to locally applicable regulations.
•Do not modify the product in any way. Doing so voids the warranty.
Warning – Batteries
•Immediately remove and dispose of dead batteries from the product.
•Only use batteries (or rechargeable batteries) that match the specified type.
•Do not mix old and new batteries or batteries of a different type or make.
•When inserting batteries, note the correct polarity (+ and - markings) and insert
the batteries accordingly. Failure to do so could result in the batteries leaking or exploding.
•Do not charge batteries.
•Keep batteries out of the reach of children.
•Do not short circuit the batteries/rechargeable batteries and keep them away from uncoated metal objects.
4.Getting Started
4.1. Measuring station
•Open the battery compartment (22) and insert two AA batteries with the correct polarity.
•Move the CH slide switch (21) to the left or right to select the channel on which the measuring station transmits.
•Once the channel is assigned to one transmitter, you can only change it by removing the batteries or resetting the unit.
•Close the battery compartment.
 Note
Note
Before use, ensure you insert the batteries in the measuring station first and then in the base station.
4.2. Base station
•Remove the screen protector from the display.
•Open the battery compartment (17) and insert two AA batteries with the correct polarity.
4

5. Installation
 Note – Installation
•We recommend initially placing the base and measuring stations in the intended locations without installing them and making all the settings described in
6. Operation – to do.
•Only install the stations once the appropriate settings have been made and a stable wireless connection is established.
 Note
Note
•The wireless transmission range between the measuring and base stations is up to 50 m in open spaces.
•Before installation, ensure that wireless transmission will not be disrupted by interference or obstacles like buildings, trees, vehicles, high-voltage lines, etc.
•Before the final installation, ensure that there is sufficient reception between the intended installation locations.
•When installing the measuring station, ensure that it is protected from direct sunlight and rain.
•The international standard height for measuring air temperature is 1.25 m (4 ft) above ground.
 Warning
•Buy special or suitable installation material from a specialised dealer for wall-mounting.
•Ensure that no faulty or damaged parts are installed.
•Never apply force during installation. This could damage the product.
•Before installation, ensure that the chosen wall is suitable for the weight to be mounted, and make sure that there are no electrical wires, water, gas or other lines at the installation site on the wall.
5
5.1. Base station
• Use the base to position the base station on a level surface.
5.2. Measuring station
•You can also position the measuring station on a level outdoor surface.
•We recommend installing the measuring station securely on an outdoor wall using the opening (19).
•Install an anchor, screw, nail, etc. in the wall of your choice.
•Hang the measuring station using the opening intended for this purpose (19).
6. Operation
 Note – Input
Hold down the CH+ button (10) or the MEM– button (14) to select the values faster.
6.1. Connection to the measuring station
•After you insert the batteries, the base station automatically searches for a connection to the measuring station and performs initial setup.
 Note
Note
•Initial setup takes approx. 5 minutes.
•During connection, the wireless symbol on the measuring station will flash (5).
•Do not press any buttons during setup. Otherwise, values may not be transmitted correctly and there is a risk of value errors and inaccuracies.
•The setup process is completed when the indoor (7) and outdoor (6) measurement data is displayed.
•If the base station still does not receive a signal from the measuring station, press the SENSOR button (12) to start the manual search for the signal. During the connection attempt, the measuring station radio symbol (5) will flash.
•During the manual search, press and hold the SENSOR button (12) for approx. 3 seconds to end the search. The radio symbol (4) disappears.
6
6.2. Selecting the channel/other measuring stations
 Note
Note
•You can install two more measuring stations in addition to the included measuring station. Ensure that the base and measuring stations are set to the same channel.
Visit www.hama.com for suitable measuring stations.
•Press the CH+ button (10) repeatedly to set the channel to that set on the respective measuring station – see 4.1. Measuring station. Either 1, 2 or 3 (2) is displayed.
•The base station now shows the data measured (6) on the selected measuring station (2).
•Press and hold the CH+ button (10) to select the channel scan. The measurement values of the individual measuring stations/channels (2) are displayed consecutively for 4 seconds each.
•Press the CH+ button (10) again to return to normal mode.
6.3. Basic and manual settings Automatic setting using the DCF signal
After the first time the base station is switched on and successful transmission is established between the base station and the measuring station, the clock will automatically search for a DCF signal. During the search, the wireless symbol (7) will flash.
When the radio signal is received, the date and time are automatically set.
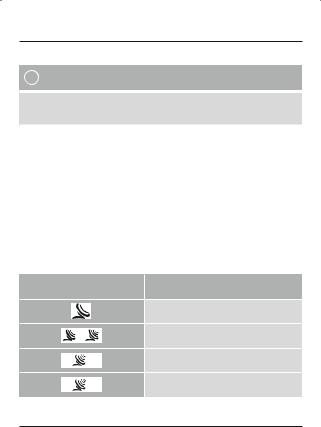
Radio icon |
Signal strength |
No reception
Poor
Fair
Excellent
7
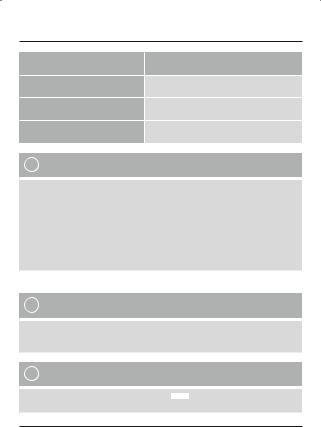
Anzeige Funksymbol |
Searching for the DCF signal |
Flashing display |
Active |
Constant display |
Successful – signal is being received |
No display |
Error – signal search ended |
 Note – Time settings
•If, during initial setup of the device, a DCF radio signal is not received within the first few minutes, the search is aborted. The radio symbol disappears.
•If there are reception problems, we recommend leaving the clock to sit overnight, since interference is generally less at night.
•In the meantime, you can start a manual search for the DCF radio signal at another location or you can manually set the time and date.
•The clock automatically continues to search for the DCF radio signal on a daily basis (2:00 a.m., 8:00 a.m., 2:00 p.m. and 8:00 p.m.). If the signal is received successfully, the manually set time and date are overwritten.
•Press the RCC button (16) to start the manual search for the DCF radio signal.
 Note – Manual search
•The manual search is automatically aborted after 6-16 minutes.
•Using the RCC button (16) frequently will drain the battery. We recommend only using this function to seek out an optimal location for the device.
 Note – Summer time
•The clock automatically switches to summer time DST appears on the display as long as summer time is activated.
8

Manually setting
•Press and hold the DISPLAY SET button (13) for approx. 3 seconds to make the following settings one after the other:
•12/24-hour format (1)
•Hours (1)
•Minutes (1)
•Seconds (only zeros possible) (1)
•Time zone (1)
•To select the individual values, press the CH+ button (10) or the MEM– button (14) and confirm each selection by pressing the DISPLAY SET button (13).
•If you do not make an entry for 60 seconds, you automatically exit the setup mode.
 Note – Time zone
•The DCF signal can be received over long distances, but always transmits the current Central European Time in Germany. Make sure you account for the time difference in countries with another time zone.
•If you are in Moscow, the time is 3 hours later than in Germany. This means that you should set +3 for the time zone. The clock then automatically sets the time to 3 hours after the DCF signal received or relative to the manually set time.
Alarm
•Press and hold the ALARM SET button (9) for approx. 3 seconds to set the time of the alarm displayed. The hours display begins to flash.
•Press the CH+ button (10) or the MEM– button (14) to select the hour for the alarm time and confirm your selection by pressing the ALARM SET button (9). The minutes display begins to flash.
•Repeat the process to set the minutes for the alarm time.
•If you do not make an entry for 60 seconds, you automatically exit the setup mode.
•The alarm function is automatically activated when you set the alarm time.
•Alternatively, you can press the ALARM SET button (9) to display the alarm time (AL).
•Press the ALARM SET button (9) as needed to activate/deactivate the alarm.
•The alarm symbol (3) will either be displayed or not displayed accordingly.
•When the alarm is triggered, the alarm symbol (3) begins to flash and an alarm sounds.
•Press the ALARM SET button (9) to stop the alarm. Otherwise, it will stop automatically after 2 minutes.
9
 Note – Snooze function
•While the alarm is sounding, press the SNOOZE/LIGHT button (8) to activate the snooze function. The alarm symbol (3) begins to flash on the display. The alarm is stopped for 5 minutes, after which it will sound again.
•The snooze function can be used over a 24-hour period.
Celsius/Fahrenheit
• Move the °C/°F slide switch (11) to the °C or °F position to display the temperature (6,7) in the respective unit.
6.4. Maximum and minimum temperature and humidity values
• The base station automatically stores the maximum and minimum outdoor/indoor temperature values.
• Repeatedly press the MEM– button (14) to switch between the current temperature, minimum temperature (MIN) and maximum temperature (MAX).
• The maximum and minimum values are displayed for 5 seconds.
• Press and hold the MEM– button (14) to reset the stored maximum and minimum values.
6.5. Frost warning |
|
|
|
• |
If the outdoor temperature (6) is between -2°C and ~ 3°C, the frost warning symbol |
appears |
|
|
on the LCD and flashes continuously. |
|
|
• |
The frost warning symbol |
disappears once the temperature rises above this range. |
|
6.6. Backlight
 Note – Backlight
• If you press the SNOOZE/LIGHT button (8), the display will light up for approx. 5 seconds.
6.7. Low battery charge
As soon as the battery symbol 

 appears on the display of the base station, the capacity of the batteries in the measuring station is very low. Replace the batteries immediately.
10

 Note – Replacing the batteries
•Note that the stations have to be resynchronised each time after you change the batteries in the measuring or base station.
•To do this, remove the batteries from the other station and then reinsert them, or change them as required.
6.8. Reset
•If displays/transmissions continually fail to appear or are incorrect, use a pointed object (paper clip, etc.) to press the RESET button (15) on the base station and the RESET button (20) on the measuring station to carry out a restart.
•The base station returns to the factory settings and all stored information is lost.
7. Care and Maintenance
Only clean this product with a slightly damp, lint-free cloth and do not use aggressive cleaning agents. Make sure that water does not get into the product.
8. Warranty Disclaimer
Hama GmbH & Co KG assumes no liability and provides no warranty for damage resulting from improper installation/mounting, improper use of the product or from failure to observe the operating instructions and/or safety notes.
9. Service and Support
Please contact Hama Product Consulting if you have any questions about this product. Hotline: +49 9091 502-115 (German/English)
Further support information can be found here: www.hama.com
11

10. Technical Data |
|
|
|
|
Base station |
Measuring station |
|
Power supply |
3.0 V |
3.0 V |
|
2 x AA batteries |
2 x AA batteries |
||
|
|||
Measuring range |
-40°C - 70°C/ |
-40°C – +70°C/ |
|
Temperature |
-40°F - 158°F |
-40°F – +158°F |
|
Measuring increments |
0,1°C / °F |
0,1°C / °F |
|
Temperature |
|||
|
|
||
Temperature |
60-64 s |
60-64 s |
|
measurement cycle |
|||
|
|
||
Radio-controlled |
Yes |
No |
|
DCF clock |
|||
|
|
||
Radio-controlled |
Yes |
Yes |
|
DCF clock |
|||
|
|
||
Max. number of |
|
3 |
|
measuring stations |
|
||
|
|
||
Frequency |
|
433 MHz |
|
Range |
|
≤ 50 m |
12
11. Recycling Information
Note on environmental protection:
After the implementation of the European Directive 2012/19/EU and 2006/66/EU in the
national legal system, the following applies: Electric and electronic devices as well as
batteries must not be disposed of with household waste. Consumers are obliged by law to return electrical and electronic devices as well as batteries at the end of their service lives to the public collecting points set up for this purpose or point of sale. Details to this are
defined by the national law of the respective country. This symbol on the product, the instruction manual or the package indicates that a product is subject to these regulations. By recycling, reusing the materials or other forms of utilising old devices/batteries, you are making an important contribution to protecting our environment.
12. Declaration of Conformity
Hereby, Hama GmbH & Co KG declares that the radio equipment type [00113984] is in compliance with Directive 2014/53/EU. The full text of the EU declaration of conformity is available at the following internet address: www.hama.com -> 00113984 -> Downloads.
Frequency band(s) |
433 MHz |
|
Maximum radio-frequency |
6,31mW |
|
power transmitted |
||
|
13

DBedienungsanleitung
Bedienungselemente und Anzeigen
A Basisstation
1.Uhrzeit
2.Kanalanzeige
3.Alarmsymbol
4.Funksymbol
5.Funksymbol Messstation
6.Außentemperatur
7.Raumtemperatur
8.SNOOZE / LIGHT-Taste
=Unterbrechung des Wecksignals / Aktivierung der Hintergrundbeleuchtung (ca. 5 Sekunden)
9.ALARM SET-Taste
=Anzeige/ Einstellung Alarm-Modus
10.CH+-Taste
=Kanalauswahl / Erhöhung des aktuellen Einstellungswertes
11.°C/°F-Schiebeschalter
=Wechsel zwischen °C und °F
12.SENSOR-Taste
=manuelle Suche nach Signal von der Messstation
13.DISPLAY SET-Taste
=Einstellungen / Bestätigung des Einstellungswerts
14.MEM– Taste
=Abruf der gespeicherten Höchst-/ Tiefstwerte /
Verringerung des aktuellen Einstellungswertes
15.RESET-Knopf = Zurücksetzung auf Werkseinstellung
16.RCC-Taste = Aktivierung/ Deaktivierung manueller Funksignal-Empfang
17.Batteriefach
B Messstation
18.Kontrollleuchte Übertragung
19.Aussparung für Wandmontage
20.RESET-Knopf = Zurücksetzung auf Werkseinstellung
21.CH-Schiebeschalter = Kanalauswahl
22.Batteriefach
14

Vielen Dank, dass Sie sich für ein Hama Produkt entschieden haben!
Nehmen Sie sich Zeit und lesen Sie die folgenden Anweisungen und Hinweise zunächst ganz durch. Bewahren Sie diese Bedienungsanleitung anschließend an einem sicheren Ort auf, um bei Bedarf darin nachschlagen zu können. Sollten Sie das Gerät veräußern, geben Sie diese Bedienungsanleitung an den neuen Eigentümer weiter.
1. Erklärung von Warnsymbolen und Hinweisen
Warnung
Wird verwendet, um Sicherheitshinweise zu kennzeichnen oder um Aufmerksamkeit auf besondere Gefahren und Risiken zu lenken.
 Hinweis
Wird verwendet, um zusätzlich Informationen oder wichtige Hinweise zu kennzeichnen.
2. Packungsinhalt
•Wetterstation EWS-870
(Basisstation für den Innenbereich / Messstation für den Außenbereich)
•4 AA Batterien
•diese Bedienungsanleitung
3. Sicherheitshinweise
•Das Produkt ist für den privaten, nicht-gewerblichen Haushaltsgebrauch vorgesehen.
•Betreiben Sie das Produkt nicht außerhalb seiner in den technischen Daten angegebenen Leistungsgrenzen.
•Verwenden Sie das Produkt nicht in einer feuchten Umgebung und vermeiden Sie Spritzwasser.
•Betreiben Sie das Produkt nicht in unmittelbarer Nähe der Heizung, anderer Hitzequellen oder in direkter Sonneneinstrahlung.
•Benutzen Sie das Produkt nicht in Bereichen, in denen elektronische Produkte nicht erlaubt sind.
•Positionieren Sie das Produkt nicht in der Nähe von Störfeldern, Metallrahmen, Computern und Fernsehern etc. Elektronische Geräte sowie Fensterrahmen beeinträchtigen die Funktion des Produktes negativ.
15
•Lassen Sie das Produkt nicht fallen und setzen Sie es keinen heftigen Erschütterungen aus.
•Öffnen Sie das Produkt nicht und betreiben Sie es bei Beschädigungen nicht weiter.
•Versuchen Sie nicht, das Produkt selbst zu warten oder zu reparieren. Überlassen Sie jegliche Wartungsarbeit dem zuständigen Fachpersonal.
•Halten Sie Kinder unbedingt von dem Verpackungsmaterial fern, es besteht Erstickungsgefahr.
•Entsorgen Sie das Verpackungsmaterial sofort gemäß den örtlich gültigen Entsorgungsvorschriften.
•Nehmen Sie keine Veränderungen am Produkt vor. Dadurch verlieren sie jegliche Gewährleistungsansprüche.
Warnung - Batterien
•Entfernen und entsorgen Sie verbrauchte Batterien unverzüglich aus dem Produkt.
•Verwenden Sie ausschließlich Akkus (oder Batterien), die dem angegebenen Typ entsprechen.
•Mischen Sie alte und neue Batterien nicht, sowie Batterien unterschiedlichen Typs oder Herstellers.
•Beachten Sie unbedingt die korrekte Polarität (Beschriftung + und -) der Batterien und legen Sie diese entsprechend ein. Bei Nichtbeachtung besteht die Gefahr des Auslaufens oder einer Explosion der Batterien.
•Laden Sie Batterien nicht.
•Bewahren Sie Batterien außerhalb der Reichweite von Kindern auf.
•Schließen Sie Akkus/Batterien nicht kurz und halten Sie sie von blanken Metallgegenständen fern.
4.Inbetriebnahme
4.1. Messstation
•Öffnen Sie das Batteriefach (22) und legen Sie zwei AA Batterien polrichtig ein.
•Schieben Sie den CH-Schiebeschalter (21) nach links oder rechts, um den Kanal, auf dem die Messstation sendet, auszuwählen. Sobald der Kanal einem Sender zugewiesen wurde, kann dieser nur geändert werden, wenn Sie die Batterien entnehmen oder das Basisgerät zurücksetzen.
•Schließen Sie die Batteriefachabdeckung anschließend.
 Hinweis
Beachten Sie, dass Sie bei der Inbetriebnahme immer zuerst die Batterien in die Messstation, und dann in die Basisstation einlegen.
16
4.2. Basisstation
•Entfernen Sie die Schutzfolie auf dem Display.
•Öffnen Sie das Batteriefach (17) und legen Sie zwei AA Batterien polrichtig ein.
5. Montage
 Hinweis – Montage
•Es wird empfohlen, die Basisund Messstation zunächst an den gewünschten Aufstellorten ohne Montage zu platzieren und alle Einstellungen - wie in 6. Betrieb beschrieben – vorzunehmen.
•Montieren Sie erst nach korrekter Einstellung und stabiler Funkverbindung die Station/en.
 Hinweis
•Die Reichweite der Funkübertragung zwischen der Messund Basisstation beträgt im freien Gelände bis zu 50m.
•Achten Sie vor der Montage darauf, dass die Funkübertragung nicht durch Störsignale oder Hindernisse wie Gebäude, Bäume, Fahrzeuge, Hochspannungsleitungen, u.a. beeinflusst wird.
•Stellen Sie vor der endgültigen Montage sicher, dass zwischen den gewünschten Aufstellorten ausreichender Empfang besteht.
•Achten Sie bei der Montage der Messstation darauf, dass diese vor direkter Sonne und Regen geschützt positioniert ist.
•Die internationale Standardhöhe für die Messung der Lufttemperatur beträgt 1,25 m (4 ft) über Grund.
17
Warnung
•Besorgen Sie sich spezielles bzw. geeignetes Montagematerial im Fachhandel für die Montage an der vorgesehenen Wand.
•Stellen Sie sicher, dass keine fehlerhaften oder beschädigten Teile montiert werden.
•Wenden Sie bei der Montage niemals Gewalt oder hohe Kräfte an. Diese können das Produkt beschädigen.
•Prüfen Sie vor Montage die Eignung der vorgesehenen Wand für das anzubringende Gewicht und vergewissern Sie sich, dass sich an der Montagestelle in der Wand keine elektrischen Leitungen, Wasser-, Gasoder sonstige Leitungen befinden.
5.1. Basisstation
• Stellen Sie die Basisstation mithilfe des Standfußes auf einer ebenen Fläche auf.
5.2. Messstation
•Die Messstation können Sie ebenfalls auf einer ebenen Fläche im Außenbereich aufstellen.
•Es wird empfohlen, die Messstation sicher und fest an einer Außenwand mithilfe der Aussparung (19) zu montieren.
•Befestigen Sie Dübel, Schraube, Nagel, etc. in der dafür vorgesehenen Wand.
•Hängen Sie die Messstation mit der dafür vorgesehenen Aussparung (19) daran ein.
6. Betrieb
 Hinweis – Eingabe
Halten Sie die CH+-Taste (10) oder die MEM– -Taste (14) gedrückt, um die Werte schneller auswählen zu können.
6.1. Verbindung zur Messstation
•Nach dem Einlegen der Batterien sucht die Basisstation automatisch nach einer Verbindung zur Messstation und führt die Ersteinrichtung durch.
18
 Hinweis
•Die Ersteinrichtung dauert ca. 5 Minuten.
•Während dem Verbindungsversuch blinkt das Funksymbol Messstation (5) auf.
•Vermeiden Sie in dieser Zeit jegliche Betätigung der Tasten! Andernfalls können Fehler und Ungenauigkeiten bei den Werten und deren Übertragung entstehen.
•Der Vorgang ist beendet, sobald die Messdaten für Innen- (7) und Außenbereich (6) angezeigt werden.
•Wird wiederholt kein Signal von der Messstation empfangen, drücken Sie die SENSOR-Taste (12), um die manuelle Suche nach dem Signal zu starten. Während dem Verbindungsversuch blinkt das Funksymbol Messstation (5) auf.
•Drücken und halten Sie während der manuellen Suche die SENSOR-Taste (12) für ca. 3 Sekunden, um diese zu beenden. Das Funksymbol (4) erlischt.
6.2. Kanalauswahl/ Weitere Messstationen
 Hinweis
•Sie können zusätzlich zu der mitgelieferten Messstation zwei weitere Messstationen installieren. Achten Sie hierbei auf die identische Kanaleinstellung an Basisund jeweiliger Messstation. Passende Messstationen finden Sie unter www.hama.com
•Drücken Sie wiederholt die CH+-Taste (10), um denselben Kanal wie an der jeweiligen Messstation - siehe 4.1. Messstation - einzustellen. Es wird 1, 2 oder 3 (2) angezeigt.
•Die Basisstation zeigt nun die gemessenen Daten (6) der ausgewählten Messstation (2) an.
•Drücken und halten Sie die CH+-Taste (10) gedrückt, um den Kanaldurchlauf auszuwählen. Die Messwerte der einzelnen Messstationen/ Kanäle (2) werden nacheinander für jeweils 4 Sekunden angezeigt.
•Drücken Sie die CH+-Taste (10) erneut, um in den normalen Modus zurückzukehren.
19
6.3. Grundeinstellungen und manuelle Einstellungen Automatische Einstellung nach DCF-Signal
Nach dem ersten Einschalten der Basisstation und erfolgreicher Übertragung zwischen Basisund Messstation, beginnt die Uhr automatisch die Suche nach einem DCF-Signal. Während des Suchvorgangs blinkt das Funksymbol (4) auf.
Bei Empfang des Funksignals werden Datum und Uhrzeit automatisch eingestellt.
Funksymbol |
Signalstärke |
|
Kein Empfang |
|
Schlecht |
|
Annehmbar |
|
Hervorragend |
Anzeige Funksymbol |
Suche nach DCF-Funksignal |
Blinkende Anzeige |
Aktiv |
Dauerhafte Anzeige |
Erfolgreich – Signal wird empfangen |
Keine Anzeige |
Inaktiv |
20

 Hinweis – Uhrzeiteinstellung
•Wird innerhalb der ersten Minuten während der Ersteinrichtung kein DCF-Funksignal empfangen, wird die Suche beendet. Das Funksymbol erlischt.
•Bei Empfangsstörungen wird empfohlen, die Uhr über Nacht stehen zu lassen, da hier die Störsignale in der Regel geringer sind.
•Sie können währenddessen eine manuelle Suche nach dem DCF-Funksignal an einem anderen Aufstellungsort starten oder die manuelle Einstellung von Uhrzeit und Datum vornehmen.
•Die Uhr sucht automatisch weiterhin täglich (02:00, 08:00, 14:00 und 20:00 Uhr) nach dem DCF-Funksignal. Bei erfolgreichem Signalempfang werden die manuell eingestellte Uhrzeit und das Datum überschrieben.
•Drücken Sie die RCC-Taste (16), um die manuelle Suche nach dem DCF-Funksignal zu starten.
 Hinweis – Manueller Suchvorgang
•Der manuelle Suchvorgang schaltet sich automatisch nach 6 – 16 Minuten ab.
•Eine häufige Nutzung der RCC-Taste (16) geht zu Lasten der Batteriekapazität. Es wird empfohlen, diese Funktion nur zur Ausmachung eines optimalen Aufstellungsorts zu nutzen.
 Hinweis – Sommerzeit
•Die Uhrzeit stellt sich automatisch auf die Sommerzeit um. Solange die Sommerzeit aktiv ist, wird auf dem Display DST angezeigt.
(Manuelle) Einstellungen
•Drücken und halten Sie die DISPLAY SET-Taste (13) für ca. 3 Sekunden, um folgende Einstellungen nacheinander vorzunehmen:
•12/24-Stunden-Format (1)
•Stunden (1)
•Minuten (1)
•Sekunden (nur Nullen möglich) (1)
•Zeitzone (1)
21

•Drücken Sie zum Auswählen der einzelnen Werte die CH+-Taste (10) oder
die MEM– -Taste (14) und bestätigen Sie die jeweilige Auswahl durch Drücken der DISPLAY SET-Taste (13).
•Erfolgt 60 Sekunden keine Eingabe, wird der Einstellungsmodus automatisch verlassen.
 Hinweis – Zeitzone
•Das DCF-Signal kann weitläufig empfangen werden, entspricht jedoch immer der MEZ, die in Deutschland gilt. Beachten Sie daher, dass Sie in Ländern mit anderer Zeitzone die Zeitverschiebung beachten.
•Befinden Sie sich in Moskau, ist es dort bereits 3 Stunden später als in Deutschland. Stellen Sie daher bei der Zeitzone +3 ein. Die Uhr stellt sich dann immer nach Empfang des DCF-Signals bzw. in Bezug auf die manuell eingestellte Uhrzeit automatisch 3 Stunden weiter.
Wecker
•Drücken und halten Sie die ALARM SET-Taste (9) für ca. 3 Sekunden, um die Weckzeit des angezeigten Alarms einzustellen. Die Stundenanzeige beginnt zu blinken.
•Drücken Sie die CH+-Taste (10) oder die MEM– -Taste (14), um die Stunden der Weckzeit auszuwählen und bestätigen Sie die Auswahl durch Drücken der ALARM SET-Taste (9). Die Minutenanzeige beginnt zu blinken.
•Wiederholen Sie diesen Vorgang für die Minuten der Weckzeit.
•Erfolgt 60 Sekunden keine Eingabe, wird der Einstellungsmodus automatisch verlassen.
•Die Weckfunktion wird beim Einstellen der Weckzeit automatisch aktiviert.
•Alternativ drücken Sie die ALARM SET-Taste (9), um sich die Weckzeit (AL) anzeigen zu lassen.
•Durch wiederholtes Drücken der ALARM SET-Taste (9), wird der Alarm aktiviert/ deaktiviert.
•Das Alarmsymbol (3) wird angezeigt/ nicht angezeigt.
•Wird der Wecker entsprechend ausgelöst, beginnt das Alarmsymbol (3) zu blinken und ein Wecksignal ertönt.
•Drücken Sie die ALARM SET-Taste (9), um den Alarm zu beenden. Andernfalls endet dieser automatisch nach 2 Minuten.
22
 Loading...