Sony DSC-RX100M3 Help Guide
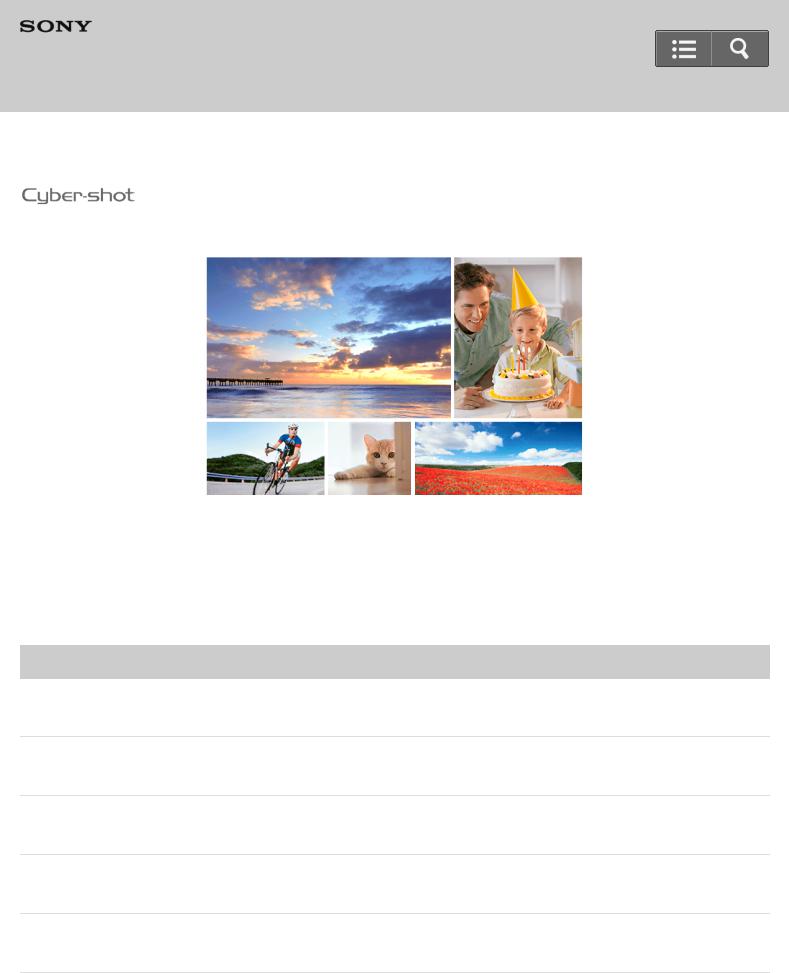
Help Guide
Digital Still Camera
DSC-RX100M3
Use this manual if you encounter any problems, or have any questions about your product.
Go to Page Top
 How to Use
Before Use
Preparing the camera
Confirming the operation method
Shooting
Using shooting functions

Viewing
Changing settings
Using Wi-Fi functions
Adding applications to the product
Viewing on computers
Precautions/This product
Go to Page Top
 Troubleshooting
If you have problems
Troubleshooting
Messages
Situations this product has difficulty handling
Go to Page Top
 List of Topics
How to Use
Troubleshooting
Table Of Contents
Help Guide DSC-RX100M3


 i Before Use


 1 Names of parts


 32 Checking the camera and the supplied items


 108 Identifying parts


 110 Icons and indicators


 33 List of icons on the screen


 113 Using the strap


 34 Using the wrist strap


 119 Using the shoulder strap (sold separately)


 120 Adjusting the viewfinder


 35
35
Adjusting the viewfinder (diopter-adjustment) 


 121 In-Camera guide


 36 About the [In-Camera Guide]


 123 Preparing the camera


 2 Charging the battery pack


 37 Charging the battery pack while it is inserted in the camera


 124 Charging by connecting to a computer


 127 Inserting the battery pack into the camera


 129
129
Battery life and the number of images that can be recorded/played back using
a battery pack 


 131 Supplying power using a wall outlet (wall socket)


 133 Removing the battery pack


 134 Inserting a memory card (sold separately)


 38 Inserting a memory card


 135 Removing the memory card


 137
137
Setting the date and time 


 39 Setting the date and time


 139 Confirming the operation method


 3 Confirming the operation method


 40 Using the control wheel


 141 Using the control ring


 143 Using MENU items


 144 Using the Fn (Function) button


 146 Using the "Quick Navi"


 148
148
Shooting


 4
4
TOC-1
Shooting still images/movies


 41 Shooting still images


 150 Shooting movies


 153 Selecting a shooting mode


 42 List of mode dial functions


 155 Intelligent Auto


 157 Superior Auto


 159 About Scene Recognition


 160 The advantages of automatic shooting


 161 Program Auto


 162 Sweep Panorama


 163 Scene Selection


 166 Shutter Priority


 170
170
Aperture Priority 


 172 Manual Exposure


 173 BULB


 174 Memory recall


 176 Movie


 177
177
Using shooting functions 


 5 Using the zoom


 44 Zoom


 179 The zoom features available with this product


 180 Zoom Setting


 182 About zoom scale


 183 Zoom Func. on Ring


 184 Using the flash


 45 Using flash


 185 Flash Mode


 187
187
Flash Comp.


 189 Selecting a screen display mode


 46 Switching the screen display (Shooting)


 190 Switching between the viewfinder and the screen


 193 DISP Button (Finder)


 195 DISP Button (Monitor)


 196 Selecting still image size/image quality


 47 Image Size (still image)


 198 Aspect Ratio (still image)


 200 Quality (still image)


 201
201
TOC-2
Help Guide
 How to Use
Digital Still Camera
DSC-RX100M3
Back |
|
Back to Top |
|
Before Use
Names of parts
Icons and indicators
Using the strap
Adjusting the viewfinder
In-Camera guide
Go to Page Top
Notes on use
4-539-041-13(1)
Copyright 2014 Sony Corporation
1

Help Guide
 How to Use
Digital Still Camera
DSC-RX100M3
Back |
|
Back to Top |
|
Preparing the camera
Charging the battery pack
Inserting a memory card (sold separately)
Setting the date and time
Go to Page Top
Notes on use
4-539-041-13(1)
Copyright 2014 Sony Corporation
2

Help Guide
 How to Use
Digital Still Camera
DSC-RX100M3
Back |
|
Back to Top |
|
Confirming the operation method
Confirming the operation method
Go to Page Top
Notes on use
4-539-041-13(1)
Copyright 2014 Sony Corporation
3

Help Guide
 How to Use
Digital Still Camera
DSC-RX100M3
Back |
|
Back to Top |
|
Shooting
Shooting still images/movies
Selecting a shooting mode
Go to Page Top
Notes on use
4-539-041-13(1)
Copyright 2014 Sony Corporation
4

Help Guide
 How to Use
Digital Still Camera
DSC-RX100M3
Back |
|
Back to Top |
|
Using shooting functions
Using the zoom
Using the flash
Selecting a screen display mode
Selecting still image size/image quality
Adjusting the focus
Adjusting the exposure
Selecting a drive mode (Continuous shooting/Self-timer)
Taking pictures of yourself by monitoring the screen
Selecting the ISO sensitivity
Correcting the brightness or contrast
Adjusting color tones
5


Help Guide
 How to Use
Digital Still Camera
DSC-RX100M3
Back |
|
Back to Top |
|
Viewing
Viewing still images
Deleting images
Playing back movies
Viewing panoramic images
Printing
Using viewing functions
Viewing images on a TV
Go to Page Top
Notes on use
4-539-041-13(1)
Copyright 2014 Sony Corporation
7

Help Guide
 How to Use
Digital Still Camera
DSC-RX100M3
Back |
|
Back to Top |
|
Changing settings
Setup menu
Go to Page Top
Notes on use
4-539-041-13(1)
Copyright 2014 Sony Corporation
8
Help Guide
 How to Use
Digital Still Camera
DSC-RX100M3
Back |
|
Back to Top |
|
Using Wi-Fi functions
Connecting this product and a Smartphone
Controlling this product using a Smartphone
Transferring images to a Smartphone
Transferring images to a computer
Transferring images to a TV
Changing the settings of Wi-Fi functions
Go to Page Top
Notes on use
4-539-041-13(1)
Copyright 2014 Sony Corporation
9
Help Guide
 How to Use
Digital Still Camera
DSC-RX100M3
Back |
|
Back to Top |
|
Adding applications to the product
PlayMemories Camera Apps
Installing the applications
Starting the applications
Managing the applications
Go to Page Top
Notes on use
4-539-041-13(1)
Copyright 2014 Sony Corporation
10
Help Guide
 How to Use
Digital Still Camera
DSC-RX100M3
Back |
|
Back to Top |
|
Viewing on computers
Recommended computer environment
Using the software
Connecting this product and a computer
Creating a movie disc
Go to Page Top
Notes on use
4-539-041-13(1)
Copyright 2014 Sony Corporation
11
Help Guide
 How to Use
Digital Still Camera
DSC-RX100M3
Back |
|
Back to Top |
|
Precautions/This product
Precautions
Cleaning this product
Number of recordable still images and recordable time of movies
Using this product abroad
Other information
Trademarks
Go to Page Top
Notes on use
4-539-041-13(1)
Copyright 2014 Sony Corporation
12

Help Guide
 Troubleshooting
Digital Still Camera
DSC-RX100M3
Back |
|
Back to Top |
|
If you have problems
If you have problems
Go to Page Top
Notes on use
4-539-041-13(1)
Copyright 2014 Sony Corporation
13
Help Guide
 Troubleshooting
Digital Still Camera
DSC-RX100M3
Back |
|
Back to Top |
|
Troubleshooting
Battery pack and power
Shooting still images/movies
Viewing images
Wi-Fi
Computers
Memory cards
Printing
Others
Go to Page Top
Notes on use
4-539-041-13(1)
Copyright 2014 Sony Corporation
14

Help Guide
 Troubleshooting
Digital Still Camera
DSC-RX100M3
Back |
|
Back to Top |
|
Messages
Messages
Go to Page Top
Notes on use
4-539-041-13(1)
Copyright 2014 Sony Corporation
15

Help Guide
 Troubleshooting
Digital Still Camera
DSC-RX100M3
Back |
|
Back to Top |
|
Situations this product has difficulty handling
Situations this product has difficulty handling
Go to Page Top
Notes on use
4-539-041-13(1)
Copyright 2014 Sony Corporation
16

Help Guide
 List of Topics
Digital Still Camera
DSC-RX100M3
Back |
|
Back to Top |
|
How to Use
Before Use
Names of parts
Checking the camera and the supplied items
Identifying parts
Icons and indicators
List of icons on the screen
Using the strap
Using the wrist strap
Using the shoulder strap (sold separately)
Adjusting the viewfinder
Adjusting the viewfinder (diopter-adjustment)
In-Camera guide
About the [In-Camera Guide]
Preparing the camera
Charging the battery pack
Charging the battery pack while it is inserted in the camera
Charging by connecting to a computer
Inserting the battery pack into the camera
Battery life and the number of images that can be recorded/played back using a battery pack
Supplying power using a wall outlet (wall socket)
Removing the battery pack
17
 Loading...


 203 Panorama: Direction


 204 Adjusting the focus


 48 Focus Mode


 205 Focus Area


 207 Center Lock-on AF


 208 Focus-lock


 210 Manual Focus


 211 Direct manual focus (DMF)


 213 MF Assist (still image)


 214 Focus Magnifier


 215 Focus Magnif. Time


 216 Peaking Level


 217
217


 219 Pre-AF (still image)


 220 AF/MF control


 221 AF Illuminator (still image)


 222 Eye AF


 223
223


 50 Exposure Comp.


 225 Metering Mode


 226 AE lock


 227 AEL w/ shutter (still image)


 228 Zebra


 229 Exposure Set. Guide


 230
230


 51 Drive Mode


 231 Cont. Shooting


 233
233


 234 Self-timer


 235 Self-timer(Cont)


 236 Cont. Bracket


 237 Single Bracket


 239 WB bracket


 241 DRO Bracket


 242 Bracket order


 243
243


 53 Self-portrait/ -timer


 244
244


 54 ISO


 245 Multi Frame NR


 247 Correcting the brightness or contrast


 55 D-Range Opt. (DRO)


 248 Auto HDR


 249 Adjusting color tones


 56 White Balance


 250 Capturing a basic white color in [Custom Setup] mode


 252 Selecting an effect mode


 57 Picture Effect


 253 Creative Style


 255 Recording movies


 58
58


 257 File Format (movie)


 258 Record Setting (movie)


 259 Dual Video REC


 262 SteadyShot (movie)


 263 Audio Recording


 264 Micref Level


 265 Wind Noise Reduct.


 266 Auto Slow Shut. (movie)


 267 MOVIE Button


 268
268


 60 Memory


 269 Function Menu Set.


 271 Custom Key Settings


 272 Function of the control ring


 273
273


 274 Function of the center button


 275 Function of the left button


 276 Function of the right button


 277 Setting the other functions of this product


 62 Photo Creativity


 278 Smile/Face Detect.


 280 Soft Skin Effect (still image)


 282 Face Registration (New Registration)


 283 Face Registration (Order Exchanging)


 284
284


 285 Red Eye Reduction


 286 Auto Obj. Framing (still image)


 287 SteadyShot (still image)


 288 Long Exposure NR (still image)


 289 High ISO NR (still image)


 290 Write Date (still image)


 291 Color Space (still image)


 292 Grid Line


 293 Auto Review


 294 Live View Display


 295 FINDER/MONITOR


 296 Wheel Lock


 297
297


 298 ND Filter


 299 Viewing


 7 Viewing still images


 65 Playing back images


 300 Playback zoom


 301 Image Index


 302 Switching the screen display (during playback)


 303 Deleting images


 66 Deleting a displayed image


 304 Deleting multiple selected images


 305 Playing back movies


 67 Playing back movies


 307 Motion Shot Video


 309 Viewing panoramic images


 68
68


 310 Printing


 69 Specify Printing


 311 Using viewing functions


 70 View Mode


 312 Display Rotation


 313 Slide Show


 314 Rotate


 315 Protect


 316 4K Still Image PB


 317
317


 319 Viewing images on a TV


 71 Viewing images on an HD TV


 321 Viewing images on a “BRAVIA” Sync-compatible TV


 323 Changing settings


 8 Setup menu


 72 Monitor Brightness


 325 Viewfinder Bright.


 326 Finder Color Temp.


 327 Volume Settings


 328 Audio signals


 329 Upload Settings(Eye-Fi)


 330 Tile Menu


 332
332


 333 Delete confirm.


 334 Display Quality


 335 Pwr Save Start Time


 336 PAL/NTSC Selector


 337 Demo Mode


 338 HDMI Resolution


 339 CTRL FOR HDMI


 340 HDMI Info. Display


 341 USB Connection


 342 USB LUN Setting


 343 USB Power Supply


 344 Language


 345 Date/Time Setup


 346 Area Setting


 347
347


 348 File Number


 349 Select REC Folder


 350 New Folder


 351 Folder Name


 352 Recover Image DB


 353 Display Media Info.


 354 Version


 355 Certification Logo (Overseas model only)


 356 Setting Reset


 357
357


 9 Connecting this product and a Smartphone


 76 PlayMemories Mobile


 358 Connecting an Android smartphone to this product


 359 Connecting the product to an iPhone or iPad


 361 Calling up an application using [One-touch(NFC)]


 363 Controlling this product using a Smartphone


 77 Smart Remote Embedded


 364
364


 366 Transferring images to a Smartphone


 78 Send to Smartphone


 368 Sending images to an Android smartphone (NFC One-touch Sharing)


 370
370


 79 Send to Computer


 372 Transferring images to a TV


 80 View on TV


 373 Changing the settings of Wi-Fi functions


 81 Airplane Mode


 375 WPS Push


 376 Access Point Set.


 377 Edit Device Name


 380 Disp MAC Address


 381 SSID/PW Reset


 382 Reset Network Set.


 383
383


 10 PlayMemories Camera Apps


 82 PlayMemories Camera Apps


 384
384


 385 Installing the applications


 83 Opening a service account


 386 Downloading applications


 387 Downloading applications directly to the product using the Wi-Fi function


 389 Starting the applications


 84
84


 390 Managing the applications


 85 Uninstalling applications


 391
391


 392 Confirming the account information of PlayMemories Camera Apps


 393 Viewing on computers


 11 Recommended computer environment


 86 Recommended computer environment


 394 Using the software


 87 PlayMemories Home


 395 Installing PlayMemories Home


 396 Software for Mac computers


 398 “Image Data Converter”


 399 Installing “Image Data Converter”


 400 Accessing “Image Data Converter Guide”


 401 Connecting this product and a computer


 88
88


 402 Importing images to the computer


 404 Disconnecting the product from the computer


 405 Creating a movie disc


 89 Disc type


 406 Selecting the disc creation method


 408 Creating a disc with a device other than a computer


 409 Creating Blu-ray Discs


 410 Precautions/This product


 12 Precautions


 90 Precautions


 411 On the internal rechargeable battery


 414 Notes on the battery pack


 415 Charging the battery pack


 417 Memory card


 418
418


 91 On cleaning


 421 Number of recordable still images and recordable time of movies


 92 Number of still images


 422 Recordable time of movies


 424 Using this product abroad


 93 Plug adaptor


 427 On TV color systems


 428 Other information


 94 ZEISS lens


 429
429


 430 Trademarks


 95 Trademarks


 431 If you have problems


 13
13


 96 Troubleshooting


 433 Troubleshooting


 14 Battery pack and power


 97 You cannot insert the battery pack into the product.


 434 You cannot turn on the product.


 435 The power turns off suddenly.


 436 The remaining battery level indicator shows an incorrect level.


 437 The charge lamp on the product flashes when charging the battery pack.


 438 The battery pack inserted in the camera is not charging.


 439 The battery pack is not charged.


 440 The monitor does not turn on even when the product is turned on.


 441 Shooting still images/movies


 98 You cannot record images.


 442 Recording takes a long time.


 443 The image is out of focus.


 444 Zoom does not work.


 445 The flash does not work.


 446 Fuzzy white circular spots appear on images shot using the flash.


 447 The close-up shoot function (Macro) does not work.


 448 The recording date and time are not displayed on the screen.


 449 The date and time are recorded incorrectly.


 450 The aperture value and/or shutter speed and/or metering indicator flashes.


 451 The image colors are not correct.


 452 Noise appears in the image when you view the screen in a dark place.


 453 Dark shadow appears on the image.


 454 The eyes of the subject come out red.


 455 Dots appear and remain on the screen.


 456 You cannot shoot images continuously.


 457 The image is not clear in the viewfinder.


 458 The image is blurred.


 459 The LCD screen darkens after a short period of time passed.


 460
460


 461 The control wheel does not work.


 462 Viewing images


 100 Images cannot be played back.


 463 The date and time are not displayed.


 464 The image cannot be deleted.


 465 The image was deleted by mistake.


 466 A DPOF mark cannot be put.


 467
467


 101 You cannot find the wireless access point to be connected.


 468 [WPS Push] does not work.


 469 [Send to Computer] is canceled halfway.


 470 You cannot send movies to a smartphone.


 471
471


 472 The shooting screen for [Smart Remote Embedded] is not displayed


 473 You cannot use One-Touch connection (NFC).


 474 Computers


 102 The computer does not recognize this product.


 475 You cannot import images.


 476
476


 477 Images exported from a computer cannot be viewed on this product.


 478 Memory cards


 103 Formatted the memory card by mistake.


 479 Printing


 104
104


 480 The color of the image is strange.


 481 Images are printed with both edges cut off.


 482 You cannot print images with the date.


 483 Others


 105 The lens gets fogged.


 484
484


 485 The product becomes warm when you use it for a long time.


 486 The Clock Set screen appears when you turn on the product.


 487
487


 488 The product does not work properly.


 489 “--E-” appears on the screen.


 490
490


 15 Messages


 106 Self-diagnosis display


 491 Warning messages


 493 Situations this product has difficulty handling


 16 Situations this product has difficulty handling


 107 Situations this product has difficulty handling


 495 How to Use


 17
17


 27
27


 30
30