


RBC30SES / RBC30SBS
F
GB
D
E
I
P
NL
S
DK
N
FIN
GR
HU
CZ
RU
RO
PL
SLO
HR
TR
EST
LT
LV
SK
BG
COUPE-BORDURES / DÉBROUSSAILLEUSE |
MANUEL DʼUTILISATION |
1 |
STRING TRIMMER / BRUSHCUTTER |
USERʼS MANUAL |
12 |
KANTENSCHNEIDER / FREISCHNEIDEGERÄT |
BEDIENUNGSANLEITUNG |
21 |
RECORTADORA DE HILO / CORTADORA DE MALEZA |
MANUAL DE UTILIZACIÓN |
32 |
TAGLIABORDI / DECESPUGLIATORE |
MANUALE DʼUSO |
42 |
APARADOR DE RELVA / CORTA-SEBES |
MANUAL DE UTILIZAÇÃO |
53 |
GRASTRIMMER / BOSMAAIER |
GEBRUIKERSHANDLEIDING |
63 |
TRIMMER / RÖJSÅG |
INSTRUKTIONSBOK |
73 |
TRÅDTRIMMER / BUSKRYDDER |
BRUGERVEJLEDNING |
82 |
TRÅDTRIMMER / KRATTRYDDER |
BRUKSANVISNING |
91 |
SIIMALEIKKURI/RUOHORAIVURI |
KÄYTTÄJÄN KÄSIKIRJA |
100 |
ΧΟΡΤΟΚΟΠΤΙΚΟ / ΘΑΜΝΟΚΟΠΤΙΚΟ |
ΟΔΗΓΙΕΣ ΧΡΗΣΗΣ |
109 |
SZEGÉLYVÁGÓ / BOZÓTVÁGÓ MOTOROS KASZA |
HASZNÁLATI ÚTMUTATÓ |
120 |
STRUNOVÁ SEKAČKA / KŘOVINOŘEZ |
NÁVOD K OBSLUZE |
130 |
ЕЦзбйдйлД / нкаееЦк |
кмдйЗйСлнЗй ий щдлигмДнДсаа 139 |
|
TRIMMER / APARAT PENTRU TUNS TUFIŞURI |
MANUAL DE UTILIZARE |
148 |
PODKASZARKA DO OBRZEŻY/ŚCINACZ KRZEWÓW |
INSTRUKCJA OBSŁUGI |
157 |
KOSILNICA Z NITKO / OBREZOVALNIK GRMOVJA |
UPORABNIŠKI PRIROČNIK |
168 |
©I©A»/REZA»ICA |
KORISNI»KI PRIRU»NIK |
177 |
BORDÜR KESİCİ / ÇALI MAKİNESİ |
KULLANMA KILAVUZU |
186 |
TRIMMER-VÕSALÕIKUR |
KASUTAJAJUHEND |
195 |
ŽOLIAPJOVĖ / KRŪMAPJOVĖ |
NAUDOJIMO VADOVAS |
204 |
ROKAS PĻAUJMAŠĪNA / KRŪMGRIEZIS |
LIETOTĀJA ROKASGRĀMATA |
213 |
STRUNOVÁ KOSAČKA/KROVINOREZ |
NÁVOD NA POUŽITIE |
222 |
нкаеЦк / нкаеЦк бД кДбуалнЗДзЦ |
кцдйЗйСлнЗй бД мийнкЦЕД |
231 |
RBC30SES |
RBC30SBS |
960643004-02.indd AI |
12/13/03 2:27:33 PM |

Attention ! |
Il est indispensable que vous lisiez les instructions contenues dans ce manuel avant |
|
le montage et la mise en service de l’appareil. |
Important! |
It is essential that you read the instructions in this manual before mounting and operating |
|
this machine. |
Achtung! |
Bitte lesen Sie unbedingt vor Montage und Inbetriebnahme die Hinweise dieser Bedienungsanleitung. |
¡Atención! |
Es imprescindible que lea las instrucciones de este manual antes del montaje y de la |
|
puesta en servicio. |
Attenzione! |
Prima di procedere al montaggio e alla messa in funzione, è indispensabile leggere |
|
attentamente le istruzioni del presente manuale. |
Atenção! |
É indispensável ler as instruções deste manual antes de montar e pôr em serviço. |
Let op ! |
Het is absoluut noodzakelijk vóór montage en inbedrijfstelling de aanwijzingen in deze |
|
handleiding te lezen. |
Observera! |
Det är nödvändigt att läsa instruktionerna i denna bruksanvisning före montering och |
|
driftsättning. |
OBS! |
Denne brugsanvisning skal læses igennem inden montering og ibrugtagning. |
Advarsel! |
Vennligst les instruksjonene i denne bruksanvisningen før du monterer og tar i bruk |
|
maskinen. |
Huomio! |
On ehdottoman välttämätöntä lukea tässä käyttöohjeessa annetut ohjeet ennen |
|
asennusta ja käyttöönottoa. |
Προσοχή! |
Είναι απαραίτητο να διαβάσετε τις συστάσεις των οδηγιών αυτών πριν τη |
|
συναρμολόγηση και τη θέση σε λειτουργία |
Figyelem! |
Feltétlenül fontos, hogy a jelen használati útmutatóban foglalt előírásokat az |
|
összeszerelés és az üzembe helyezés ellőt elolvassa! |
Důležité upozornění! |
Před montáží nářadí a uvedením do provozu je nutné si přečíst následující pokyny. |
ÇÌËχÌËe! |
иe e‰ Т·У НУИ Л Б‡ФЫТНУП ЛМТЪ ЫПeМЪ‡ МeУ·ıУ‰ЛПУ Ф У˜eТЪ¸ ЛМТЪ ЫНˆЛЛ ЛБ М‡ТЪУfl˘e„У |
|
ÛÍÓ‚Ó‰ÒÚ‚‡. |
Atenţie! |
Este indispensabil sã citiţi instrucţiunile conţinute în acest mod de utilizare înainte de montaj |
|
şi de punerea în funcţiune. |
Uwaga! |
Przed montowaniem i uruchomieniem, koniecznie musicie się Państwo zapoznać |
|
z zaleceniami zawartymi w niniejszym sposobie użycia. |
Pomembno! |
Zelo pomembno je, da pred namestitvijo in prvo uporabo te naprave preberete |
|
navodila v tem priročniku. |
Upozorenje! |
Vaæno je da upute u ovom KorisniËkom priruËniku proËitate prije postavljanja i uporabe ovog alata. |
Dikkat! |
Montajdan ve aletin kullanımına başlamadan bu kılavuzda bulunan talimatları |
|
okumanız gerekmektedir. |
Tähtis! |
Lugege enne seadme kokkupanekut ja kasutamist kindlasti läbi selles juhendis |
|
sisalduvad eeskirjad ja juhised! |
Dėmesio! |
Prieš surinkdami ir paleisdami aparatą į darbą, reikia, kad jūs perskaitytumėte šiame |
|
vadove esančias instrukcijas. |
Uzmanību! |
Ir ļoti būtiski, lai jūs izlasītu norādījumus, kas sniegti šajā rokasgrāmatā, pirms ķeraties |
|
pie ierīces montēšanas un iedarbināšanas! |
Upzornenie! |
Je dôležité, aby ste si pred montážou a spustením zariadenia prečítali pokyny, ktoré sa |
|
nachádzajú v tomto návode. |
ÇÌËχÌËÂ! |
и В‰Л Т„ОУ·fl‚‡МВ Л ФЫТН‡МВ М‡ П‡¯ЛМ‡Ъ‡ В ‚‡КМУ ‰‡ Ф У˜ВЪВЪВ ЛМТЪ ЫНˆЛЛЪВ ‚ |
|
˙ÍÓ‚Ó‰ÒÚ‚ÓÚÓ Á‡ ÛÔÓÚ Â·‡. |
960643004-02.indd AII |
12/13/03 2:27:42 PM |

Sous réserve de modifications techniques / Subject to technical modifications / Technische Änderungen vorbehalten / Bajo reserva de modificaciones técnicas / Con riserva di eventuali modifiche tecniche / Com reserva de modificações técnicas /
Technische wijzigingen voorbehouden / Med förbehåll för tekniska ändringar / Med forbehold for tekniske ændringer / Med forbehold om tekniske endringer / Tekniset muutokset varataan / Υπό την επιφύλαξη τεχνικών τροποποιήσεων /
A műszaki módosítás jogát fenntartjuk / Změny technických údajů vyhrazeny / åÓ„ÛÚ ·˚Ú¸ ‚ÌeÒeÌ˚ ÚeıÌ˘eÒÍËe ËÁÏeÌeÌËfl /
Sub rezerva modificaţiilor tehnice / Z zastrzeżeniem modyfikacji technicznych / Tehnične spremembe dopuščene
Podloæno tehniËkim promjenama / Teknik düzeltmeler hakkı saklıdır / Tehnilised muudatused võimalikud / Pasiliekant teisę daryti techninius pakeitimus / Paturam tiesības mainīt tehniskos raksturlielumus / Technické zmeny vyhradené /
èÓ‰ÎÂÊË Ì‡ ÚÂıÌ˘ÂÒÍË ÏÓ‰ËÙË͇ˆËË
960643004-02.indd AIII |
12/13/03 2:27:44 PM |

F GB D E I P NL S DK N FIN GR HU CZ RU RO PL SLO HR TR EST LT LV SK BG
English
SYMBOLS
Important: Some of the following symbols may be used on your tool. Please study them and learn their meaning. Proper interpretation of these symbols will allow you to operate the tool better and more safely.
SYMBOLS |
NAME |
EXPLANATION |
|
Safety Alert Symbol |
Indicates danger, warning or caution. it means attention!!! |
|
|
Your safety is involved. |
|
Read Your Operator's Manual |
Your manual contains special messages to bring attention to |
|
|
potential safety concerns as well as operating and servicing |
|
|
information. Please read all the information carefully to ensure |
|
|
satification and safe use. |
|
Wear eye, hearing |
Wear eye, hearing and head protection when operating this |
|
and head protection |
equipment. |
|
Keep bystanders away |
Keep all bystanders at least 15m (50 ft) away. |
|
Ricochet |
Danger of Ricochet. |
|
Tri-Arc blade |
Tri-Arc blade is appropriate for this unit and is suited for cutting |
|
|
pulpy weeds and vines. |
|
Do not use toothed blade |
This unit is not intended for use with a toothed saw type blade. |
|
RPM Decal |
Rotational direction and maximum speed of the shaft for the |
|
|
cutting attachment. |
|
Boots |
Wear non-slip safety footwear when using this equipment. |
|
Gloves |
Wear non-slip, heavy-duty gloves. |
|
No Smoking |
Do not smoke when mixing fuel or filling fuel tank. |
|
Petrol |
Use unleaded petrol intended for motor vehicle use with an |
|
|
octane rarting of 87([R+M]/2) or higher. |
|
Lubricant |
Use 2-stroke lubricant for air cooled engines. |
|
Mix Petrol and Lubricant |
Mix the fuel mix thoroughly and also each time before refuelling. |
|
|
Conforms to all regulatory standards in the country in the EU |
|
|
where the product is purchased. |
|
|
12 |
960643004-02.indd |
12 |
12/13/03 2:27:50 PM |

F GB D E I P NL S DK N FIN GR HU CZ RU RO PL SLO HR TR EST LT LV SK BG
English
Thank you for buying a Ryobi trimmer/brushcutter.
Your new trimmer/brushcutter has been engineered and manufactured to Ryobiʼs high standard for dependability, ease of operation, and operator safety. Properly cared for, it will give you years of rugged, trouble-free performance.
WARNING
To reduce the risk of injury, the user must read and understand the operatorʼs manual.
WARNING
Do not attempt to operate this trimmer/brushcutter until you have read thoroughly and understood completely all instructions, safety rules etc contained in this manual. Failure to comply may result in accidents involving fire, electric shock or serious personal injury. Save operatorʼs manual and review frequently for continuing safe operation, and instructing others who may use this tool.
READ ALL INSTRUCTIONS.
GENERAL SAFETY RULES
■For safe operation, read and understand all instructions before using the trimmer/brushcutter. Follow all safety instructions. Failure to follow all safety instructions listed below, can result in serious personal injury.
■Do not allow children or untrained individuals to use this unit.
■Never start or run the engine in a closed or poorly ventilated area; breathing exhaust fumes can kill.
■Clear the work area before each use. Remove all objects such as rocks, broken glass, nails, wire, or string which can be thrown or become entangled in the string head or blade.
■Wear full eye and hearing protection while operating this unit.
■Wear heavy long pants, boots, and gloves. Do not wear loose fitting clothing, short pants, jewellery of any kind, or use with bare feet.
■Secure long hair so it is above shoulder level to prevent entanglement in any moving parts.
■Keep all bystanders, children, and pets at least 15 m away.
■Do not operate this unit when you are tired, ill, or under the influence of alcohol, drugs, or medication.
■Do not operate in poor lighting.
■Keep firm footing and balance. Do not overreach. Overreaching can result in loss of balance or
exposure to hot surfaces.
■Keep all parts of your body away from any moving part.
■Do not touch area around the muffler or cylinder of the trimmer/brushcutter, these parts get hot from operation.
■Always stop the engine and remove the spark plug wire before making any adjustments or repairs except for carburetor adjustments.
■Inspect the unit before each use for loose fasteners, fuel leaks, etc. Replace any damaged parts before use.
■The string head or blade will rotate during carburetor adjustments.
■It has been reported that vibrations from hand-held tools may contribute to a condition called Raynaudʼs Syndrome in certain individuals. Symptoms may include tingling, numbness and blanching of the fingers, usually apparent upon exposure to cold. Hereditary factors, exposure to cold and dampness, diet, smoking and work practices are all thought to contribute to the development of these symptoms. It is presently unknown what, if any, vibrations or extent of exposure may contribute to the condition. There are measures that can be taken by the operator to possibly reduce the effects of vibration:
a)Keep your body warm in cold weather. When opera-ting the unit wear gloves to keep the hands and wrists warm. It is reported that cold weather is a major factor contributing to Raynaudʼs Syndrome.
b)After each period of operation, exercise to increase blood circulation.
c)Take frequent work breaks. Limit the amount of exposure per day.
If you experience any of the symptoms of this condition, immediately discontinue use and see your physician about these symptoms.
■Keep the tool well maintained, fasteners tightened and worn parts replaced.
■Mix and store fuel in a container approved for fuel.
■Mix fuel outdoors where there are no sparks or flames. Wipe up any fuel spillage. Move 9 m away from refueling site before starting engine.
■Stop the engine and allow to cool before refueling or storing the unit.
■Allow the engine to cool; empty the fuel tank and secure the unit from moving before transporting in a vehicle.
13
960643004-02.indd 13 |
12/13/03 2:27:51 PM |

F GB D E I P NL S DK N FIN GR HU CZ RU RO PL SLO HR TR EST LT LV SK BG
English
SPECIFIC SAFETY RULES FOR TRIMMER USE
■Replace string head if cracked, chipped, or damaged in any way. Be sure the string head or blade is properly installed and securely fastened. Failure to do so can cause serious injury.
■Make sure all guards, straps, deflectors and handles are properly and securely attached.
■Use only the manufacturer's replacement line in the cutting head. Do not use any other cutting attachment.
■Never operate unit without the grass deflector in place and in good condition.
■Maintain a firm grip on both handles while trimming. Keep string head below waist level. Never cut with the string head located over 76 cm or more above the ground.
SPECIFIC SAFETY RULES FOR
BRUSHCUTTER AND BLADE USE
■After engine stops, keep rotating blade in heavy grass or pulpy weeks until it stops.
■Do not operate the brushcutter unless the blade guard is firmly secured in place and in good condition.
■Use heavy gloves while installing or removing blades.
■Always stop the engine and remove the spark plug wire before attempting to remove any obstruction caught or jammed in the blade or before removing and installing the blade.
■Do not attempt to touch or stop the blade when it is rotating.
■A coasting blade can cause injury while it continues to spin after the engine is stopped or throttle trigger released. Maintain proper control until the blade has completely stopped rotating.
■Replace any blade that has been damaged. Always make sure blade is installed correctly and securely fastened before each use. Failure to do so can cause serious injury.
■Use only the manufacturer's replacement TRI-ARC blade intended for use on this brushcutter. Do not use any other blade.
■The TRI-ARC blade is suited for cutting pulpy weeds and vines only. Do not use for any other purpose. Never use the TRI-ARC blade to cut woody brush.
■Exercise extreme caution when using the blade with this unit. Blade thrust is the reaction that may occur when the spinning blade contacts anything it cannot cut. This contact may cause the blade to stop for an instant, and suddenly “thrust” the unit away from the object that was hit. This reaction can be violent
enough to cause the operator to lose control of the unit. Blade thrust can occur without warning if the blade snags, stalls, or binds. This is more likely to occur in areas where it is difficult to see the material being cut. For cutting ease and safety, approach the weeds being cut from the right to the left. In the event an unexpected object or woody stock is encountered, this could minimize the blade thrust reaction.
■Never cut any material over 13 mm diameter.
■Always wear the shoulder strap when using the brushcutter and adjust to a comfortable operating position. Maintain a firm grip on both handles while cutting with a blade. Keep the blade away from body and below waist. Never use the brushcutter with the blade located 76 cm or more above the ground level.
■Cover the blade with the blade protector before storing the unit, or during transportation. Always remove the blade protector before using the unit. If not removed, the blade protector could become a thrown object as the blade begins to turn.
14
960643004-02.indd 14 |
12/13/03 2:27:51 PM |

F GB D E I P NL S |
DK N |
FIN GR HU CZ RU RO PL SLO HR |
TR EST LT LV SK BG |
||
|
|
|
|
|
|
|
|
English |
|
|
|
|
|
|
|
|
|
|
|
SPECIFICATIONS |
|
|
|
|
|
|
|
|
|
|
|
|
|
RBC30SES |
RBC30SBS |
Weight |
|
(kg) |
|
|
|
- Without fuel, cutting attachment and guard |
|
|
5.63 |
6.79 |
|
- Without fuel with string head |
|
|
|
5.80 |
6.96 |
- Without fuel with blade |
|
|
|
5.80 |
6.96 |
|
|
|
|
|
|
Fuel tank volume |
|
[cm3 or (L)] |
|
415 or (0.415) |
415 or (0.415) |
Cutting swath |
|
(mm) |
|
|
|
- String head |
|
|
|
457 |
457 |
- Blade |
|
|
|
200 |
200 |
Recommended torque for blade |
|
(Nm) |
|
>=13 |
>=13 |
|
|
|
|
|
|
Engine displacement |
|
(cm3 / cc) |
|
30 |
30 |
Line diameter for Reel EasyTM Head |
|
(mm) |
|
2.4 |
2.4 |
Line diameter for Pro Cut llTM Head |
|
(mm) |
|
2.7 |
2.7 |
Maximum engine performance |
|
|
|
|
|
(in accordance with ISO 8893) |
|
(kW) |
|
0.75 |
0.75 |
Maximum rotational frequency |
|
|
|
|
|
of the the spindle |
|
(min-1) |
|
10,000 |
10,000 |
Engine speed (rotational frequency) |
|
|
|
|
|
at recommended max. spindle |
|
|
|
|
|
rotational frequency |
|
(min-1) |
|
12,000 |
12,000 |
Engine speed (rotational frequency) |
|
|
|
|
|
at idle |
|
(min-1) |
|
2,800-3,500 |
2,800-3,500 |
Fuel consumption (in accordance |
|
|
|
|
|
with ISO 8893) at max. engine performance [kg/h or (L/h)] |
|
0.48 or (0.66) |
0.48 or (0.66) |
||
Specific fuel consumption |
|
|
|
|
|
(in accordance with ISO 8893) |
|
|
|
|
|
at max. engine performance |
[g/kW.h or (L/kW.h)] |
|
640 or (0.87) |
640 or (0.87) |
|
Vibration level idling (Trimmer) |
|
(m/s2) |
|
|
|
- Front handle / Left handle |
|
|
|
5.7 |
6.0 |
- Rear handle / Right handle |
|
|
|
3.4 |
6.5 |
Vibration level racing (Trimmer) |
|
(m/s2) |
|
|
|
- Front handle / Left handle |
|
|
|
11.4 |
9.0 |
- Rear handle / Right handle |
|
|
|
18.4 |
11.4 |
Vibration level idling (Brush Cutter) |
|
(m/s2) |
|
|
|
- Front handle / Left handle |
|
|
|
5.9 |
6.3 |
- Rear handle / Right handle |
|
|
|
2.6 |
6.6 |
Vibration level racing (Brush Cutter) |
|
(m/s2) |
|
|
|
- Front handle / Left handle |
|
|
|
12.6 |
6.9 |
- Rear handle / Right handle |
|
|
|
17.1 |
8.9 |
Sound pressure level at operator's ear |
|
|
|
|
|
(in accordance with EN 27917) |
|
dB (A) |
|
103.4 |
103 |
|
|
|
|
|
|
Sound power level (in accordance |
|
|
|
|
|
with ISO 10884) |
|
dB (A) |
|
110 |
110 |
|
|
|
|
|
|
15
960643004-02.indd 15 |
12/13/03 2:27:52 PM |
F GB D E I P NL S DK N FIN GR HU CZ RU RO PL SLO HR TR EST LT LV SK BG
English
DESCRIPTION
1.Primer Bulb
2.Choke Dail
3.Fuel Cap
4.Starter Grip
5.Throttle Lock
6.On / Off Switch
7.Throttle Trigger
8.Rear Handle (RBC30SES)
9.Front Handle (RBC30SES)
10.Shoulder Strap
11.Shaft
12.Blade Guard
13.Tri-arc Blade
14.Grass Deflector
15.Cutting Line
16.Idle Speed Screw
17.Knob
18.Hanger Cap
19.Trigger Handle (RBC30SBS only)
20.Left Handle (RBC30SBS only)
21.Throttle interlock (RBC30SBS only)
22.Pro Cut llTM
23.Reel EasyTM
ASSEMBLY
Please refer to Fig. 2a - 2d.
WARNING
If any parts are damaged or missing, do not operate this tool until the parts are replaced. Failure to heed this warning could result in serious personal injury.
WARNING
Do not attempt to modify this product or create accessories not recommended for use with this product. Any such alteration or modification is misuse and could result in a hazardous condition leading to possible serious personal injury.
WARNING
To prevent accidental starting that could cause serious personal injury, always disconnect the engine spark plug wire from the spark plug when assembling parts.
WARNING
Never attach or adjust any attachment while power head is running. Failure to stop the engine may cause serious personal injury.
WARNING
Be certain the knob is fully tightened before operating equipment; check it periodically for tightness during use to avoid serious injury.
OPERATION
Read the operation manual and follow all warnings and safety instructions.
Wear eye, hearing, and head protection.
Keep all bystanders, especially children and pets, at least 15 m from the operating area.
FUEL AND REFUELING
HANDLING THE FUEL SAFELY
■Always handle fuel with care, it is highly flammable.
■Always refuel outdoors where there are no sparks and flames. Do not inhale fuel vapors.
■Do not let petrol or lubricant come in contact with your skin.
■Keep petrol and lubricant away from the eyes. If petrol or lubricant comes in contact with the eyes, wash them immediately with clean water. If irritation is still present, see a doctor immediately.
■Clean up spilled petrol immediately.
MIXING THE FUEL (Fig. 3)
■This product is powered by a 2-stroke engine and requires pre-mixing petrol and 2-stroke lubricant. Premix unleaded petrol and 2-stroke engine lubricant in a clean container approved for petrol.
■This engine is certified to operate on unleaded petrol intended for automotive use with an octane rating of 87 ([R + M] / 2) or higher.
■Do not use any type of pre-mixed petrol / lubricant from fuel service stations, this includes the pre-mixed petrol / lubricant intended for use in mopeds, motorcycles, etc.
■Use synthetic 2-stroke lubricant only. Do not use automotive lubricant or 2-stroke outboard lubricant.
■Mix 2% synthetic 2-stroke lubricant into the petrol. This is a 50:1 ratio.
■Mix the fuel thoroughly and also each time before fueling.
■Mix in small quantities. Do not mix quantities larger than usable in a 30 day period. Synthetic 2-stroke lubricant containing a fuel stabilizer is recommended.
16
960643004-02.indd 16 |
12/13/03 2:27:52 PM |

F GB D E I P NL S DK N FIN GR HU CZ RU RO PL SLO HR TR EST LT LV SK BG
English
FILLING THE TANK
■Clean surface around fuel cap to prevent contamination.
■Loosen fuel cap slowly to release pressure and to keep fuel from escaping around the cap.
■Carefully pour fuel mixture into the tank. Avoid spillage.
■Prior to replacing the fuel cap, clean and inspect the gasket.
■Immediately replace fuel cap and hand tighten. Wipe upany fuel spillage. Move 9 m away from refueling site before starting engine.
Note: It is normal for smoke to be emitted from a new engine during and after first use.
WARNING
Always shut off engine before fueling. Never add fuel to a machine with a running or hot engine. Move at least 9 m from refueling site before starting engine. Do not smoke!
1 |
Litre |
+ |
20 ml |
= |
} |
|
2 |
Litres |
+ |
40 ml |
= |
|
|
3 |
Litres |
+ |
60 ml |
= |
50:1 (2%) |
|
4 |
Litres |
+ |
80 ml |
= |
|
|
5 |
Litres |
+ |
100 ml |
= |
|
STARTING AND STOPPING (Fig. 4a - 4b)
WARNING
Never start or run the engine inside a closed or poorly ventilated area; breathing exhaust fumes can kill.
NOTE: Be sure to return the stop switch to the "I" (RUN) position before trying to start unit.
OPERATING THE TRIMMER (Fig. 5)
RBC30SES : Hold the trimmer with the right hand on the rear handle and the left hand on the front handle.
RBC30SBS: Hold the trimmer with the right hand on the trigger handle and the left hand on the left handle.
Keep a firm grip with both hands while in operation. Trimmer should be held at a comfortable position with the trigger handle about hip height.
Always operate trimmer at full throttle. Cut tall grass from the top down. This will prevent grass from wrapping around the shaft housing and string head which may
17
cause damage from overheating. If grass becomes wrapped around the string head, stop the engine, disconnect the spark plug wire, and remove the grass. Prolonged cutting at partial throttle will result in lubricant dripping from the silencer.
CUTTING TIPS (Fig. 6)
ADVANCING THE LINE (Fig. 7)
For Reel EasyTM Only
OPERATING THE BRUSHCUTTER (Fig. 5)
RBC30SES: Hold the brushcutter with the right hand on the rear handle and the left hand on the front handle.
RBC30SBS: Hold the brushcutter with the right hand on the trigger handle and the left hand on the left handle.
Keep a firm grip with both hands while in operation. Brushcutter should be held at a comfortable position with the trigger handle about hip height. Maintain your grip and balance on both feet. Position yourself so that you will not be drawn off balance by the kick-back reaction of the cutting blade.
Adjust the shoulder strap to position the brushcutter at a comfortable operating position and to assure that the shoulder strap will reduce the risk of operator contact with the blade.
Exercise extreme caution when using the blade with this unit. Blade thrust is the reaction which may occur when the spinning blade contacts anything it cannot cut. This contact may cause the blade to stop for an instant, and suddenly “thrust” the unit away from the object that was hit. This reaction can be violent enough to cause the operator to lose control of the unit. Blade thrust may occur without warning if the blade snags, stalls or binds. This is more likely to occur in areas where it is difficult to see the material being cut. For cutting ease and safety, approach the weeds being cut from the right to the left. In the event that an unexpected object or woody stock is encountered, this could minimise the blade thrust reaction.
CUTTING TECHNIQUE - BLADE (Fig. 8)
WARNING
Extreme care must be taken when using blades to ensure safe operation. Read the safety information for safe operation using the blade, refer to “Specific Safety Rules for Brushcutter and Blade Use” earlier in this manual.
960643004-02.indd 17 |
12/13/03 2:27:53 PM |

F GB D E I P NL S DK N FIN GR HU CZ RU RO PL SLO HR TR EST LT LV SK BG
English
MAINTENANCE
WARNING
Use only original manufacturer's replacement parts, accessories and attachments. Failure to do so can cause possible injury, poor performance and may void your warranty.
■The cutting attachment must not work in idle mode. If this requirement is not satisfied, the clutch has to be adjusted or the machine needs an urgent maintenance by a qualified technician.
■You may make adjustments and repairs described here. For other repairs, have the trimmer serviced by an authorized service agent.
■Consequences of improper maintenance may include excess carbon deposits resulting in loss of performance and discharge of black lubricant residue dripping from the muffler.
■Make sure all guards, straps, deflectors and handles are properly and securely attached to avoid the risk of personal injury.
STRING REPLACEMENT (Fig. 9)
For Reel EasyTM Only
BLADE PROTECTOR (Fig. 10)
CLEANING THE EXHAUST PORT AND MUFFLER
Depending on the type of fuel used, the type and amount of lubricant used, and/or your operating conditions, the exhaust port and muffler may become blocked with carbon deposits. If you notice a power loss with your petrol powered tool, a qualified service technician will need to remove these deposits to restore performance.
SPARK ARRESTOR
The spark arrestor must be cleaned or replaced every 25 hours or yearly to ensure proper performance of your product. Spark arrestors may be in different locations depending on the model purchased. Please contact your nearest service dealer for the location of the spark arrestor for your model.
ATTACHING THE STORAGE HANGER (Fig. 11)
CLEANING THE AIR FILTER SCREEN (Fig. 12)
FUEL CAP
WARNING
A leaking fuel cap is a fire hazard and must be replaced immediately.
SPARKING PLUG (Fig. 13)
This engine uses a Champion RCJ-6Y or equivalent spark plug with 0.63 mm electrode gap. Use an exact replacement and replace annually.
STORAGE (1 MONTH OR LONGER)
■Drain all fuel from tank into a container approved for fuel. Run engine until it stops.
■Clean all foreign material from the trimmer. Store it in a well-ventilated place that is inaccessible to children. Keep away from corrosive agents such as garden chemicals and de-icing salts.
■Abide by all ISO and local regulations for the safe storage and handling of fuel. Excess fuel should be used up in other 2-stroke engine powered equipment.
18
960643004-02.indd 18 |
12/13/03 2:27:53 PM |
F GB D E I P NL S DK N FIN GR HU CZ RU RO PL SLO HR TR EST LT LV SK BG
English
TROUBLESHOOTING
IF THESE SOLUTIONS DO NOT SOLVE THE PROBLEM, CONTACT YOUR AUTHORISED SERVICE DEALER.
PROBLEM |
POSSIBLE CAUSE |
SOLUTION |
|
||||
|
|
|
|||||
Engine will not start. |
No spark. |
Check spark. Remove spark plug. Reattach the spark |
|||||
|
|
plug cap and lay spark plug on metal cylinder. Pull the |
|||||
|
|
starter rope and watch for spark at spark plug tip. If |
|||||
|
|
there is no spark, repeat test with a new spark plug. |
|||||
|
No fuel. |
Push primer bulb until bulb is full of fuel. If bulb does |
|||||
|
|
not fill, primary fuel delivery system is blocked. Contact |
|||||
|
|
a servicing dealer. If primer bulb fills, engine may be |
|||||
|
|
flooded, proceed to next item. |
|
||||
|
Engine is flooded. |
Remove spark plug, turn unit so spark plug hole is |
|||||
|
|
aimed at the ground. Rotate the choke dial to “ |
” |
||||
|
|
position and pull starter cord 10 to 15 times. This will |
|||||
|
|
clear excess fuel from engine. Clean and reinstall spark |
|||||
|
|
plug. Pull starter three times with choke dial at “ |
”. If |
||||
|
|
engine does not start, rotate choke dial to “ |
|
|
|
” position |
|
|
|
|
|
||||
|
|
and repeat normal starting procedure. If engine still fails |
|||||
|
|
to start, repeat procedure with a new spark plug. |
|
||||
|
Starter rope pulls harder now |
Contact a servicing dealer. |
|
||||
|
than when new. |
|
|
|
|
|
|
|
|
|
|||||
Engine starts but will not |
Engine requires |
Allow engine to completely warm up. If engine does |
|||||
accelerate. |
approximately three minutes |
not accelerate after three minutes, contact a servicing |
|||||
|
to warm up. |
dealer. |
|
||||
|
|
|
|
||||
Engine starts but will only run at |
Carburetor requires |
Contact a servicing dealer. |
|
||||
high speed at half choke. |
adjustment. |
|
|
|
|
|
|
|
|
|
|||||
Engine does not reach full speed |
Check lubricant fuel mixture. |
Use fresh fuel and the correct 2-stroke lubricant mix. |
|||||
and emits excessive smoke. |
Air filter is dirty. |
Clean air filter. Refer to Cleaning the Air Filter Screen |
|||||
|
|
earlier in this manual. |
|
||||
|
Spark arrestor screen is dirty. |
Contact a servicing dealer. |
|
||||
|
|
|
|
||||
Engine starts, runs, and |
Idle speed screw on |
Turn idle speed screw clockwise to increase idle |
|
||||
accelerates but will not idle. |
carburetor requires adjustment |
speed. (Fig. 14) |
|
||||
|
|
|
|
||||
Blade continues to rotate |
Carburetor requires. |
Contact a servicing dealer. |
|
||||
at idle speed. |
adjustment. |
|
|
|
|
|
|
|
|
|
|
||||
Line will not advance. |
1. Line welded to itself. |
1. Lubricate with silicone spray. |
|
||||
|
2. Not enough line on |
2. Install more line. Refer to “Line Replacement” |
|
||||
|
spool. |
earlier in this manual. |
|
||||
|
3. Line worn too short. |
3. Pull lines while alternately pressing down on |
|
||||
|
|
and releasing bump head. |
|
||||
|
4. Line tangled on spool. |
4. Remove line from spool and rewind. Refer to |
|
||||
|
|
“Line Replacement” earlier in this manual. |
|
||||
|
5. Engine speed too slow. |
5. Advance line at full throttle. |
|
||||
|
|
|
|
|
|
|
|
19
960643004-02.indd 19 |
12/13/03 2:27:54 PM |

F GB D E I P NL S DK N FIN GR HU CZ RU RO PL SLO HR TR EST LT LV SK BG
English
TROUBLESHOOTING
IF THESE SOLUTIONS DO NOT SOLVE THE PROBLEM, CONTACT YOUR AUTHORISED SERVICE DEALER.
PROBLEM |
POSSIBLE CAUSE |
SOLUTION |
||
|
|
|
|
|
Grass wraps round shaft |
1. |
Cutting tall grass at |
1. |
Cut tall grass from the top down. |
housing and string head. |
|
ground level. |
|
|
|
2. |
Operating trimmer at |
2. |
Operate trimmer at full throttle. |
|
|
part throttle. |
|
|
|
|
|
||
Bump knob hard to turn. |
Screws threads dirty or |
Clean threads and lubricate with grease - if no |
||
|
damaged. |
improvement, replace bump knob. |
||
|
|
|
|
|
Lubricant drips from muffler. |
1. |
Operating trimmer at |
1. |
Operate trimmer at full throttle. |
|
|
part throttle. |
|
|
|
2. |
Check lubricant/fuel mixture. |
2. |
Use fresh fuel and the correct synthetic 2-stroke lubricant mix. |
|
3. Air filter dirty. |
3. |
Clean per instruction in Maintenance Section. |
|
|
|
|
|
|
NOTE: If your unit exhibits specific performance problem(s) where the Troubleshooting section recommends a clockwise screw adjustment on the carburetor and no adjustments have been made since original purchase, the unit should be taken to an authorized service center for repair. In most cases, the needed adjustment is a simple task for the trained service representative.
20
960643004-02.indd 20 |
12/13/03 2:27:54 PM |

F GB D E I P NL S DK N FIN GR HU CZ RU RO PL SLO HR TR EST LT LV SK BG
Deutsch
SYMBOLE
Wichtig: Auf Ihrem Gerät können folgende Symbole abgebildet sein. Machen Sie sich mit diesen Symbolen vertraut und merken Sie sich Ihre Bedeutung. Eine korrekte Interpretation dieser Symbole ermöglicht Ihnen eine sicherere und adäquatere Verwendung Ihres Geräts.
SYMBOLE |
NAME |
BEDEUTUNG |
|
Sicherheitswarnsymbol |
Zeigt eine Gefahr oder eine Warnung an, oder ruft zur Vorsicht |
|
|
auf. Es bedeutet: Achtung! Ihre Sicherheit ist gefährdet!!! |
|
Lesen Sie die Bedienungsanleitung |
Die Bedienungsanleitung enthält besondere Warnungen, |
|
sorgfältig durch |
die Sie auf potenzielle Risiken aufmerksam machen sollen, |
|
|
sowie Informationen zum Betrieb und zur Wartung Ihres Geräts. |
|
|
Lesen Sie das vorliegende Handbuch aufmerksam durch, |
|
|
um Ihr Gerät sicher und optimal zu verwenden. |
|
Tragen Sie eine Schutzbrille, |
Tragen Sie bei der Arbeit mit dieser Maschine einen Augenund |
|
einen Gehörschutz und |
Gehörschutz und einen Helm. |
|
einen Helm |
|
|
Achten Sie darauf, dass Besucher |
Achten Sie darauf, dass Besucher mindestens 15 m |
|
fern bleiben |
vom Schnittbereich entfernt bleiben. |
|
Abprellen |
Risiko von abprellenden Objekten. |
|
Schneideblatt mit drei Zähnen |
Dieses Gerät ist auch für die Verwendung als Freischneidegerät |
|
|
mit einem Schneideblatt mit drei Zähnen zum Schneiden von |
|
|
Unkraut und jungen Pflanzen konzipiert. |
|
Verwenden Sie kein Schneideblatt |
Dieses Gerät ist nicht für die Verwendung eines Schneideblatts |
|
für Kreissägen |
für Kreissägen konzipiert. |
|
Rotationsgeschwindigkeit (U./Min.) |
Rotationsrichtung und maximale Rotationsgeschwindigkeit |
|
|
der Schnittvorrichtung am Achsenausgang. |
|
Stiefel |
Tragen Sie bei der Verwendung dieses Geräts |
|
|
rutschfeste Sicherheitsschuhe. |
|
Handschuhe |
Tragen Sie dicke Arbeitshandschuhe mit einer maximalen |
|
|
Rutschfestigkeit. |
|
Rauchverbot |
Rauchen Sie nicht, wenn Sie Kraftstoff mischen oder |
|
|
den Kraftstofftank auffüllen. |
|
Benzin |
Verwenden Sie bleifreies Benzin für Autos mit einem |
|
|
Oktanindex von 87 ([R+M]/2) oder höher. |
|
Öl |
Verwenden Sie ein synthetisches Zweitaktöl für Motoren |
|
|
mit Luftkühlung. |
|
Mischung Benzin + Öl |
Mischen Sie den Kraftstoff vor jeder Füllung des Tanks. |
|
|
Dieses Gerät entspricht allen gesetzlichen Normen des Landes |
|
|
der europäischen Union, in dem es gekauft wurde. |
|
|
21 |
960643004-02.indd |
21 |
12/13/03 2:27:54 PM |

F GB D E I P NL S DK N FIN GR HU CZ RU RO PL SLO HR TR EST LT LV SK BG
Deutsch
Vielen Dank, dass Sie ein Ryobi-Produkt gekauft haben.
Ihr Kantenschneider / Freischneidegerät ist ein von Ryobi entwickeltes und hergestelltes Produkt. Die bei der Entwicklung und Herstellung angewandten hohen Qualitätskriterien machen das Produkt zu einem zuverlässigen, einfach zu verwendenden und sicheren Gerät. Eine korrekte Wartung gewährleistet eine lange Haltbarkeit und Leistungsfähigkeit Ihres Geräts.
WARNUNG
Um die Verletzungsrisiken zu verringern, muss unbedingt die vorliegende Bedienungsanleitung gelesen und verstanden werden.
WARNUNG
Versuchen Sie nicht, dieses Gerät zu verwenden, bevor Sie alle Anweisungen und Sicherheitsvorschriften in diesem Handbuch gründlich gelesen und verstanden haben. Die Missachtung dieser Vorschriften kann zu Unfällen wie Bränden, elektrischen Schlägen oder schweren Körperverletzungen führen. Bewahren Sie dieses Bedienungshandbuch auf und lesen Sie regelmäßig die relevanten Informationen nach, um ein sicheres Arbeiten zu gewährleisten und gegebenenfalls andere Benutzer zu informieren.
LESEN SIE ALLE ANWEISUNGEN.
ALLGEMEINE SICHERHEITSVORSCHRIFTEN
■Um ein sicheres Arbeiten zu gewährleisten, müssen Sie vor der Verwendung Ihres Kantenschneiders / Freischneidegeräts alle Sicherheitsvorschriften gelesen und verstanden haben. Befolgen Sie alle Sicherheitsvorschriften. Die Missachtung der in diesem Handbuch aufgeführten Sicherheitsvorschriften kann zu schweren Körperverletzungen führen.
■Achten Sie darauf, dass Kinder oder unerfahrene Personen dieses Werkzeug nicht verwenden.
■Starten oder lassen Sie den Motor nicht in einem geschlossenen oder schlecht belüfteten Raum laufen, denn die Auspuffgase können tödlich sein.
■Räumen Sie vor jeder Verwendung den Schnittbereich frei. Entfernen Sie Steine, Glassplitter, Nägel, Metall-kabel, Schnüre und andere Objekte, die weggeschleudert werden oder sich im Fadenkopf oder im Schneideblatt verfangen können.
■Tragen Sie bei der Verwendung dieses Geräts eine Schutzbrille und einen Gehörschutz.
■Tragen Sie eine lange und dicke Hose sowie Stiefel und Handschuhe. Tragen Sie weder weite Kleidung, noch Shorts oder Schmuck und arbeiten Sie niemals barfuß.
■Stecken Sie lange Haare auf Schulterhöhe hoch, um zu vermeiden, dass sie sich in den rotierenden Elementen verfangen.
■Achten Sie darauf, dass Kinder, Besucher und Tiere in einem Mindestabstand von 15 m von Ihrem Arbeitsort entfernt bleiben.
■Verwenden Sie dieses Gerät nicht, wenn Sie müde oder krank sind, unter dem Einfluss von Alkohol oder Drogen stehen, oder wenn Sie Medikamente einnehmen.
■Verwenden Sie dieses Gerät nicht, wenn die Beleuchtung des Arbeitsbereichs unzureichend ist.
■Bewahren Sie stets eine Gleichgewichtsposition. Achten Sie auf einen guten Stand und strecken Sie den Arm nicht zu weit aus. Andernfalls können Sie stürzen und/oder mit den heißen Teilen in Berührung kommen.
■Halten Sie Ihren Körper von den rotierenden Elementen fern.
■Bringen Sie Ihre Hände niemals in die Nähe des Auspuffs oder des Zylinders des Kantenschneiders / Freischneidegeräts, denn diese Teile werden während dem Betrieb sehr heiß.
■Schalten Sie stets den Motor aus und ziehen Sie das Zündkerzenkabel ab, bevor Sie Einstellungen oder Reparaturen durchführen, außer wenn Sie den Vergaser einstellen.
■Prüfen Sie Ihr Gerät vor jeder Verwendung, um sicherzustellen, dass sich keine Teile gelöst haben, kein Kraftstoff ausläuft usw. Ersetzen Sie alle beschädigten Teile, bevor Sie Ihr Gerät verwenden.
■Bei der Einstellung des Vergasers ist höchste Vorsicht geboten, denn bei dieser Operation rotiert der Fadenkopf oder das Schneideblatt.
■Bei manchen Personen können die während der Verwendung eines tragbaren Geräts entstehenden Vibrationen zur "Raynaud-Krankheit" führen. Die Symptome sind Kribbeln, Taubheit und weiße Finger, die normalerweise bei Unterkühlung auftreten. Es wird angenommen, dass diese Symptome durch erbliche Faktoren, Kälte und Feuchtigkeit, bestimmte Ernährungsgewohnheiten, Tabak und bestimmte Arbeitsgewohnheiten begünstigt werden. Zum aktuellen Zeitpunkt ist nicht bekannt, wie stark die Vibrationen sein müssen oder wie lange eine Person den Vibrationen ausgesetzt sein muss, um die Krankheit zu verursachen. Treffen Sie jedoch die Vorsichtsmaßnahmen, um die Vibrationen, denen Sie ausgesetzt sind, zu verringern, wie z. B.:
22
960643004-02.indd 22 |
12/13/03 2:27:55 PM |

F GB D E I P NL S DK N FIN GR HU CZ RU RO PL SLO HR TR EST LT LV SK BG
Deutsch
a)Ziehen Sie sich bei Kälte warm an. Tragen Sie bei der Verwendung dieses Geräts Handschuhe, damit Ihre Hände und Handgelenke warm bleiben. In der Tat scheint es, dass Kälte einer der Hauptfaktoren ist, der das Auftreten der Raynaud-Krankheit begünstigt.
b)Machen Sie nach jeder Verwendung einige Übungen, um die Blutzirkulation zu stimulieren.
c)Legen Sie regelmäßig Pausen ein und beschränken Sie den Zeitraum der täglichen Vibrationseinwirkung auf Ihre Hände.
Beenden Sie die Verwendung Ihres Geräts bei Auftreten eines dieser Symptome sofort und suchen Sie einen Arzt auf.
■Achten Sie darauf, dass Ihr Gerät stets in einwandfreiem Zustand ist und alle Teile gut angezogen sind. Lassen Sie alle beschädigten Teile ersetzen.
■Mischen Sie den Kraftstoff und bewahren Sie ihn in einem für Benzin geeigneten Kanister auf.
■Mischen und füllen Sie den Kraftstoff im Freien, in großer Entfernung von Funken oder Flammen ein. Wischen Sie alle Spuren von vergossenem Kraftstoff auf.
Entfernen Sie sich vor dem Einschalten des Motors mindestens 9 m von der Stelle, an der Sie den Kraftstofftank gefüllt haben.
■Schalten Sie den Motor aus und warten Sie, bis er abgekühlt ist, bevor Sie Kraftstoff einfüllen oder das Gerät wegräumen.
■Warten Sie vor dem Transport Ihres Geräts in einem Fahrzeug, bis der Motor abgekühlt ist, leeren Sie den Tank und befestigen Sie das Gerät, damit es während dem Transport nicht verrutschen kann.
SPEZIFISCHE SICHERHEITSVORSCHRIFTEN
FÜR KANTENSCHNEIDER
■Ersetzen Sie den Fadenkopf, wenn dieser Sprünge, Risse oder andere Beschädigungen aufweist. Vergewissern Sie sich, dass der Fadenkopf einwandfrei montiert und gut befestigt ist. Die Miss-achtung dieser Vorschrift kann zu schweren Körperverletzungen führen.
■Vergewissern Sie sich, dass die Schutzabdeckungen, Keilriemen, Ablenker und Griffe korrekt installiert und gut befestigt sind.
■Verwenden Sie bei einem Austausch des Schnittfadens nur einen vom Hersteller empfohlenen Schnittfaden. Verwenden Sie kein anderes Schneidwerkzeug.
■Verwenden Sie Ihr Gerät niemals, wenn der
Grasablenker nicht eingesetzt und nicht in einwandfreiem Zustand ist.
■Halten Sie den Kantenschneider bei der Verwendung fest an beiden Griffen. Halten Sie den Fadenkopf unterhalb der Höhe Ihrer Taille. Versuchen Sie niemals zu schneiden, wenn sich der Fadenkopf in mehr als 76 cm Abstand vom Boden befindet.
SPEZIFISCHE SICHERHEITSVORSCHRIFTEN FÜR FREISCHNEIDEGERÄTE UND DIE VERWENDUNG EINES SCHNEIDEBLATTS
■Halten Sie das rotierende Schneideblatt nach dem Ausschalten des Geräts in dichtem Gras oder Unkraut, bis es zum Stillstand kommt.
■Verwenden Sie das Freischneidegerät nicht, wenn der Schneideblattschutz nicht ordnungsgemäß installiert und montiert bzw. nicht in einwandfreiem Zustand ist.
■Tragen Sie beim Installieren oder Entfernen eines Schneideblatts dicke Handschuhe.
■Bevor Sie versuchen, ein im Schneideblatt verklemmtes Element zu entfernen, und vor jedem Auswechseln oder Entfernen eines Schneideblatts muss der Motor stets ausgeschaltet und das Zündkerzenkabel abgezogen werden.
■Versuchen Sie nicht, das Schneideblatt zu berühren oder anzuhalten, während es rotiert.
■Ein nach dem Ausschalten des Motors oder bei Freigabe des Ein-/Aus-Schalter auslaufendes Schneideblatt kann schwere Verletzungen verursachen. Achten Sie darauf, dass Sie die Kontrolle über Ihr Gerät behalten, bis das Schneideblatt vollständig zum Stillstand gekommen ist.
■Wechseln Sie beschädigte Schneideblätter aus. Vergewissern Sie sich vor jeder Verwendung, dass das Schneideblatt einwandfrei installiert und gut befestigt ist. Die Missachtung dieser Vorschrift kann zu schweren Körperverletzungen führen.
■Verwenden Sie bei einem Austausch des Schneideblatts nur Schneideblätter mit drei Zähnen, die speziell für Ihr Freischneidegerät konzipiert sind. Verwenden Sie kein anderes Schneideblattmodell.
■Die Schneideblätter mit drei Zähnen sind nur zum Schneiden von Unkraut und jungen Pflanzen konzipiert. Verwenden Sie dieses Gerät nicht für andere Anwendungen. Verwenden Sie ein Schneideblatt mit drei Zähnen niemals zum Schneiden von Sträuchern.
23
960643004-02.indd 23 |
12/13/03 2:27:56 PM |

F GB D E I P NL S DK N FIN GR HU CZ RU RO PL SLO HR TR EST LT LV SK BG
Deutsch
■Gehen Sie äußerst vorsichtig vor, wenn Sie dieses Gerät mit einem Schneideblatt verwenden. Wenn das Schneideblatt mit einem Element in Berührung kommt, das es nicht schneiden kann, kann es zu einem Rückprall kommen. Der Kontakt mit einem solchen Element kann dazu führen, dass das Schneidblatt für einen kurzen Moment zu einem heftigen Stillstand kommt und das Gerät plötzlich von dem berührten Objekt weggeschleudert wird. Diese Reaktion kann heftig sein und dazu führen, dass der Bediener die Kontrolle über das Gerät verliert. Ein Rückprall kann auftreten, wenn das Schneideblatt auf ein Hindernis stößt, blockiert oder sich verdreht. Der Rückprall kann in einem Bereich auftreten, in dem das zu schneidende Element nur schwer sichtbar ist. Um gute und sichere Arbeitsbedingungen zu gewährleisten, muss das Unkraut in Bewegungen von rechts nach links geschnitten werden.
Diese Rechts-Links-Bewegung gewährleistet, dass die Auswirkungen eines eventuellen Rückpralls verringert werden, falls sich ein Gegenstand oder ein Stück Holz auf dem Weg des Schneideblatts befindet.
■Schneiden Sie niemals ein Element von mehr als 13 mm Durchmesser.
■Verwenden Sie beim Arbeiten mit dem Freischneidegerät stets den Gurt und stellen Sie ihn so ein, dass eine bequeme Arbeitsposition gewährleistet ist. Halten Sie Ihr Gerät beim Schneiden fest mit beiden Händen. Halten Sie das Schneideblatt weit von Ihrem Körper entfernt und unterhalb der Höhe Ihrer Taille. Verwenden Sie das Freischneidegerät niemals, indem Sie das Schneideblatt mehr als 76 cm vom Boden entfernt halten.
■Schützen Sie das Schneideblatt mit drei Zähnen, indem Sie vor dem Wegräumen oder dem Transport des Geräts die Schutzabdeckung des Schneidblatts aufsetzen. Entfernen Sie stets die Schutzabdeckung, bevor Sie Ihr Gerät verwenden. Wenn die Schutzabdeckung nicht entfernt wurde, kann sie während der Rotation des Schneideblatts weggeschleudert werden.
24
960643004-02.indd 24 |
12/13/03 2:27:57 PM |

|
F GB D |
E I P NL S DK N FIN |
GR |
HU CZ RU RO PL SLO HR TR EST |
LT LV SK BG |
|||
|
|
|
|
|
|
|
|
|
|
|
|
Deutsch |
|
|
|
|
|
|
|
|
|
|
|
|
||
|
|
TECHNISCHE DATEN |
|
|
|
|
||
|
|
|
|
|
|
|
|
|
|
|
|
|
|
RBC30SES |
|
RBC30SBS |
|
|
|
|
|
|
|
|
|
|
|
Gewicht |
|
|
(kg) |
|
|
|
|
|
- ohne Treibstoff, Schnittund Schutzsystem |
|
|
5.63 |
|
6.79 |
|
|
|
- ohne Kraftstoff, mit Fadenkopf |
|
|
5.80 |
|
6.96 |
|
|
|
- ohne Kraftstoff, mit Schneideblatt |
|
|
5.80 |
|
6.96 |
|
|
|
|
|
|
|
|
|
|
|
|
Kapazität des Kraftstofftanks |
|
[cm3 oder (L)] |
415 oder (0.415) |
|
415 oder (0.415) |
|
|
|
Schnittbreite |
|
|
(mm) |
|
|
|
|
|
- Fadenkopf |
|
|
|
457 |
|
457 |
|
|
- Schneideblatt |
|
|
200 |
|
200 |
|
|
|
|
|
|
|
|
|
|
|
|
Empfohlenes Drehmoment für das Schneideblatt |
|
(Nm) |
>=13 |
|
>=13 |
|
|
|
|
|
|
|
|
|
|
|
|
Hubraum |
|
|
(cm3 / cc) |
30 |
|
30 |
|
|
Fadendurchmesser Reel EasyTM Head |
|
(mm) |
2.4 |
|
2.4 |
|
|
|
Fadendurchmesser Pro Cut llTM Head |
|
|
2.7 |
|
2.7 |
|
|
|
Maximale Motorleistung (gemäß der Norm ISO 8893) |
(kW) |
0.75 |
|
0.75 |
|
||
|
|
|
|
|
|
|
|
|
|
Maximale Drehzahl der Welle |
|
(min-1) |
10,000 |
|
10,000 |
|
|
|
Motordrehzahl bei max. Rotationsgeschwindigkeit |
|
(min-1) |
12,000 |
|
12,000 |
|
|
|
Motordrehzahl im Leerlauf |
|
(min-1) |
2,800-3,500 |
|
2,800-3,500 |
|
|
|
Kraftstoffverbrauch (gemäß ISO 8893) bei max. |
|
|
|
|
|
|
|
|
Motorleistung |
|
|
[kg/h oder (l/h)] |
0.48 oder (0.66) |
|
0.48 oder (0.66) |
|
|
|
|
|
|
|
|
||
|
Spezifischer Kraftstoffverbrauch (gemäß ISO 8893) bei |
|
|
|
|
|
||
|
max. Motorleistung |
[g/kW.h oder (L/kW.h)] |
640 oder (0.87) |
|
640 oder (0.87) |
|
||
|
|
|
|
|
|
|
|
|
|
Vibrationspegel im Leerlauf (Kantenschneider) |
|
(m/s2) |
|
|
|
|
|
|
- Vorderer Griff / linker Griff |
|
|
5.7 |
|
6.0 |
|
|
|
- Hinterer Griff / rechter Griff |
|
|
3.4 |
|
6.5 |
|
|
|
|
|
|
|
|
|
||
|
Vibrationspegel auf höchster Stufe (Kantenschneider) |
(m/s2) |
|
|
|
|
||
|
- Vorderer Griff / linker Griff |
|
|
11.4 |
|
9.0 |
|
|
|
- Hinterer Griff / rechter Griff |
|
|
18.4 |
|
11.4 |
|
|
|
|
|
|
|
|
|
|
|
|
Vibrationspegel im Leerlauf (Heckenschneider) |
|
(m/s2) |
|
|
|
|
|
|
- Vorderer Griff / linker Griff |
|
|
5.9 |
|
6.3 |
|
|
|
- Hinterer Griff / rechter Griff |
|
|
2.6 |
|
2.6 |
|
|
|
|
|
|
|
|
|
||
|
Vibrationspegel auf höchster Stufe (Heckenschneider) |
(m/s2) |
|
|
|
|
||
|
- Vorderer Griff / linker Griff |
|
|
12.6 |
|
6.9 |
|
|
|
- Hinterer Griff / rechter Griff |
|
|
17.1 |
|
8.9 |
|
|
|
|
|
|
|
|
|
|
|
|
Schalldruckpegel (gemäß EN 27917) |
|
dB (A) |
103.4 |
|
103 |
|
|
|
|
|
|
|
|
|
|
|
|
Schallleistung (gemäß ISO 10884) |
|
dB (A) |
110 |
|
110 |
|
|
|
|
|
|
|
|
|
|
|
|
|
|
|
25 |
|
|
|
|
960643004-02.indd |
25 |
|
|
|
|
12/13/03 2:27:57 PM |
||
F GB D E I P NL S DK N FIN GR HU CZ RU RO PL SLO HR TR EST LT LV SK BG
Deutsch
BESCHREIBUNG
1.Einspritzpumpe
2.Starterschalter
3.Kraftstofftankdeckel
4.Startergriff
5.Entriegelungsknopf des Ein-/Aus-Schalters
6.Ein-/Aus-Schalter
7.Gashebel
8.Hinterer Griff (RBC30SES)
9.Vorderer Griff (RBC30SES)
10.Schultergurt
11.Rohr
12.Schneideblattschutz
13.Schneideblatt mit drei Zähnen
14.Grasablenker
15.Schnittfaden
16.Leerlaufschraube
17.Sicherungsschraube
18.Lagerhilfe
19.Hauptgriff mit Ein-/Aus-Schalter (nur Modell RBC30SBS)
20.Linker Griff (nur Modell RBC30SBS)
21.Verriegelungsknopf des Ein-/Aus-Schalters (nur Modell RBC30SBS)
22.Pro Cut llTM
23.Reel EasyTM
MONTAGE
Siehe Abb. 2a - 2d.
WARNUNG
Falls ein Teil fehlt oder beschädigt ist, darf dieses Gerät nicht verwendet werden, bevor Sie das entsprechende Teil besorgt haben. Die Missachtung dieser Warnung kann zu schweren Verletzungen führen.
WARNUNG
Versuchen Sie nicht, die Maschine zu verändern oder Zubehörteile hinzuzufügen, deren Verwendung nicht empfohlen wird. Umwandlungen oder Änderungen dieser Art gelten als missbräuchliche Verwendung und können gefährliche Situationen herbeiführen, die schwere Verletzungen zur Folge haben können.
WARNUNG
Ziehen Sie immer das Stromversorgungskabel der Zündkerze ab, bevor Sie Teile montieren. Die Missachtung dieser Anweisung kann zu einem versehentlichen Einschalten und schweren Körperverletzungen führen.
26
WARNUNG
Der Schaft des Zubehörelements darf niemals bei laufendem Motor montiert oder eingestellt werden. Die Missachtung dieser Vorschrift kann zu schweren Körperverletzungen führen.
WARNUNG
Vergewissern Sie sich vor der Verwendung Ihres Geräts, dass die Stellschraube gut angezogen ist, und prüfen Sie regelmäßig, dass sie während dem Betrieb angezogen bleibt, um schwere Körperverletzungen zu vermeiden.
VERWENDUNG
Lesen Sie die Bedienungsanleitung durch und beachten Sie die Warnungen und Sicherheitsvorschriften.
Tragen Sie eine Schutzbrille, einen
Gehörschutz und einen Helm.
Achten Sie darauf, dass Besucher und vor allem Kinder und Tiere in einem Abstand von mindestens 15 m vom Schnittbereich entfernt bleiben.
KRAFTSTOFF UND FÜLLEN DES TANKS
SICHERER UMGANG MIT DEM KRAFTSTOFF
■Handhaben Sie den Kraftstoff stets vorsichtig, da diese Substanz äußerst entzündlich ist.
■Mischen und füllen Sie den Kraftstoff stets im Freien, in großer Entfernung von Funken oder Flammen ein. Atmen Sie die Kraftstoffdämpfe nicht ein.
■Vermeiden Sie jeden Kontakt mit Benzin oder Öl.
■Vermeiden Sie vor allem, dass Benzin oder Öl in ihre Augen gespritzt werden. Falls Benzin oder Öl in Ihre Augen geraten, spülen Sie Ihre Augen sofort mit klarem Wasser aus. Wenn die Augen gereizt bleiben, müssen Sie sofort einen Arzt aufsuchen.
■Wischen Sie alle Spuren von verspritztem Kraftstoff sofort auf.
KRAFTSTOFFMISCHUNG (Abb. 3)
■Ihr Gerät wird mit einem Zweitaktmotor betrieben, der eine Mischung aus Benzin und Zweitaktsyntheseöl benötigt. Mischen Sie bleifreies Benzin und synthetisches Zweitaktöl in einem sauberen Behälter, der für die Verwendung von Benzin zugelassen ist.
■Der Motor läuft mit bleifreiem Benzin für Autos mit einem Oktanindex von 87 ([R + M] / 2) oder höher.
■Verwenden Sie keine Benzin-/Ölmischungen, die an Tankstellen verkauft werden, insbesondere die Mischungen für Motorräder, Mopeds usw.
960643004-02.indd 26 |
12/13/03 2:27:57 PM |
F GB D E I P NL S DK N FIN GR |
HU CZ RU RO PL SLO HR TR EST |
LT LV SK BG |
|
Deutsch |
|
||
■ Verwenden Sie ausschließlich ein synthetisches |
EINUND AUSSCHALTEN DES KANTEN- |
||
Zweitaktöl. Verwenden Sie weder Motoröl für Autos |
SCHNEIDERS (Abb. 4a - 4b) |
|
|
noch Zweitaktöl für Außenborder. |
WARNUNG |
|
|
■ Mischen Sie das synthetische Zweitaktöl und das |
|
||
Schalten Sie den Motor |
nicht in einem |
||
Benzin in einem Verhältnis von 50:1 (2 %). |
|||
geschlossenen oder schlecht belüfteten Raum ein, |
|||
■ Mischen Sie den Kraftstoff vor jeder Füllung des Tanks. |
|||
denn die Auspuffgase können tödlich sein. |
|||
|
|||
■Mischen Sie den Kraftstoff in kleinen Mengen: Hinweis: Vergessen Sie nicht, den Ein-/Aus-Schalter mischen Sie den Kraftstoff nicht für mehr als auf EIN "I" zu stellen, bevor Sie versuchen, den Motor einen Monat. Wir empfehlen Ihnen außerdem die zu starten.
Verwendung eines synthetischen Zweitaktöls,
|
das einen Kraftstoffstabilisator enthält. |
VERWENDUNG DES KANTENSCHNEIDERS |
|||||||||||
|
|
|
|
|
|
|
|
|
|
|
|
(Abb. 5) |
|
|
|
|
|
|
|
|
|
|
|
|
|
RBC30SES: Halten Sie den hinteren Griff des |
|
|
|
|
|
|
|
|
|
|
|
|
|
Kantenschneiders mit Ihrer rechten Hand und den |
|
|
|
|
|
|
|
|
|
|
|
|
|
||
|
|
|
|
|
|
|
|
|
|
|
|
vorderen Griff mit Ihrer linken Hand. |
|
|
|
|
|
|
|
|
|
|
|
|
|
||
FÜLLEN DES TANKS |
|
|
|
|
|
RBC30SBS: Halten Sie den rechten Griff des |
|||||||
|
|
|
|
|
Kantenschneiders mit Ihrer rechten Hand und den linken |
||||||||
■ Reinigen Sie den Tank um den Deckel herum, sodass |
Griff mit Ihrer linken Hand. |
||||||||||||
|
der Kraftstoff nicht verschmutzt werden kann. |
Halten Sie Ihr Gerät während der gesamten |
|||||||||||
■ Schrauben Sie den Tankdeckel langsam ab, um |
|||||||||||||
Verwendungsdauer fest mit beiden Händen. Der Kanten- |
|||||||||||||
|
den Druck entweichen zu lassen und zu vermeiden, |
scheider muss in einer komfortablen Arbeitsposition mit |
|||||||||||
|
dass sich der Treibstoff um den Deckel herum verteilt. |
dem rechten Griff auf Höhe Ihrer Taille gehalten werden. |
|||||||||||
■ Füllen Sie das Kraftstoffgemisch vorsichtig und ohne |
Verwenden Sie Ihren Kantenschneider stets auf der |
||||||||||||
|
es zu vergießen in den Tank ein. |
|
|||||||||||
|
|
höchsten Stufe. Schneiden Sie hohes Gras von oben |
|||||||||||
|
Reinigen Sie vor dem erneuten Aufschrauben des |
||||||||||||
■ |
nach unten, um zu vermeiden, dass das Gras um das |
||||||||||||
|
Deckels die Dichtung und vergewissern Sie sich, |
||||||||||||
|
Rohr und den Fadenkopf gewickelt wird, denn dadurch |
||||||||||||
|
dass sie in einwandfreiem Zustand ist. |
||||||||||||
|
kann es zu einer Überhitzung des Motors kommen. |
||||||||||||
|
Setzen Sie den Tankdeckel sofort wieder auf und |
||||||||||||
■ |
Wenn Gras um den Fadenkopf gewickelt wird, schalten |
||||||||||||
|
ziehen Sie ihn fest an. Wischen Sie alle Spuren von |
||||||||||||
|
Sie den Motor aus, ziehen das Zündkerzenkabel ab und |
||||||||||||
|
vergossenem Kraftstoff auf. Entfernen Sie sich vor |
||||||||||||
|
entfernen das eingeklemmte Gras. Bei einer längeren |
||||||||||||
|
dem Einschalten des Motors mindestens 9 m von |
||||||||||||
|
Verwendung auf mittlerer Stufe kann es zu einem Austritt |
||||||||||||
|
der Stelle, an der Sie den Kraftstofftank gefüllt haben. |
||||||||||||
|
von Öl über den Auspuff kommen. |
||||||||||||
|
Hinweis: Es ist normal, dass während der ersten |
||||||||||||
|
SCHNITTEMPFEHLUNGEN (Abb. 6) |
||||||||||||
|
Verwendung und manchmal auch später Rauch aus |
||||||||||||
|
dem Motor austritt. |
|
|
|
|
|
NACHSTELLEN DES SCHNITTFADENS (Abb. 7) |
||||||
|
WARNUNG |
|
|
|
|
|
|||||||
|
|
|
|
|
|
For Reel EasyTM Only |
|||||||
|
Schalten Sie vor dem Füllen des Tanks stets |
VERWENDUNG DES FREISCHNEIDEGERÄTS |
|||||||||||
|
den Motor aus. Füllen Sie den Kraftstofftank |
||||||||||||
|
eines Geräts niemals auf, wenn der Motor läuft |
(Abb. 5) |
|||||||||||
|
oder wenn er noch heiß ist. Entfernen Sie sich |
RBC30SES: Halten Sie den Griff mit der |
|||||||||||
|
vor dem Einschalten des Motors mindestens 9 |
||||||||||||
|
Beschleunigungstaste des Freischneidegeräts mit Ihrer |
||||||||||||
|
m von der Stelle, an der Sie den Kraftstofftank |
||||||||||||
|
rechten Hand und den vorderen Griff mit Ihrer linken Hand. |
||||||||||||
|
gefüllt haben. Rauchen Sie nicht! |
||||||||||||
|
RBC30SBS: Halten Sie den rechten Griff des |
||||||||||||
|
|
|
|
|
|
|
|
|
|
|
|
||
|
|
|
|
|
|
|
|
|
|
|
|
Freischneidegeräts mit Ihrer rechten Hand und den linken |
|
|
|
|
|
|
|
|
|
|
|
|
|
Griff mit Ihrer linken Hand. |
|
|
|
1 Liter |
+ |
|
20 ml |
= |
|
|
Halten Sie Ihr Gerät während der gesamten |
||||
|
|
|
|
|
Verwendungsdauer fest mit beiden Händen. |
||||||||
|
|
2 Liter |
+ |
|
40 ml |
= |
|
|
Das Freischneidegerät muss in einer bequemen |
||||
|
|
3 Liter |
+ |
|
60 ml |
= |
|
50:1 (2%) |
Arbeitsposition mit dem rechten Griff auf Höhe Ihrer |
||||
|
|
4 Liter |
+ |
|
80 ml |
= |
|
|
Taille gehalten werden. Halten Sie Ihr Gerät gut fest und |
||||
|
|
5 Liter |
+ |
|
100 ml |
= |
|
|
bewahren Sie eine stabile Position. Dadurch vermeiden |
||||
|
|
|
|
|
|
|
|
|
|
|
|
27 |
|
960643004-02.indd |
27 |
|
|
|
|
|
|
|
12/13/03 2:27:58 PM |
||||

F GB D E I P NL S DK N FIN GR HU CZ RU RO PL SLO HR TR EST LT LV SK BG
Deutsch
Sie, dass Sie bei einem Rückprall des Schneideblatts Ihr Gleichgewicht verlieren.
Stellen Sie den Gurt so ein, dass Sie eine bequeme Arbeitsposition haben. Der Gurt ermöglicht es auch, das Schneideblatt im richtigen Abstand von Ihrem Körper zu halten.
Gehen Sie äußerst vorsichtig vor, wenn Sie dieses Gerät mit einem Schneideblatt verwenden. Wenn das Schneideblatt mit einem Element in Berührung kommt, das es nicht schneiden kann, kann es zu einem Rückprall kommen. Der Kontakt mit einem solchen Element kann dazu führen, dass das Schneidblatt für einen kurzen Moment zu einem heftigen Stillstand kommt und das Gerät plötzlich von dem berührten Objekt weggeschleudert wird. Diese Reaktion kann heftig sein und dazu führen, dass der Bediener die Kontrolle über das Gerät verliert. Ein Rückprall kann auftreten, wenn das Schneideblatt auf ein Hindernis stößt, blockiert oder sich verdreht. Der Rückprall kann in einem Bereich auftreten, in dem das zu schneidende Element nur schwer sichtbar ist. Um gute und sichere Arbeitsbedingungen zu gewährleisten, muss das Unkraut in Bewegungen von rechts nach links geschnitten werden. Diese Rechts-Links-Bewegung gewährleistet, dass die Auswirkungen eines eventuellen Rückpralls verringert werden, falls sich ein Gegenstand oder ein Stück Holz auf dem Weg des Schneideblatts befindet.
EMPFEHLUNGEN FÜR DEN SCHNITT MIT DEM SCHNEIDEBLATT
WARNUNG
Gehen Sie bei der Verwendung eines Schneideblatts äußerst vorsichtig vor. Lesen Sie den Abschnitt "Spezifische Sicherheitsvorschriften für Freischneidegeräte und die Verwendung eines Schneideblatts" in diesem Handbuch gründlich durch.
WARTUNG
WARNUNG
Verwenden Sie für die Wartung nur Originalteile, Originalzubehör und Originalwerkzeuge. Die Missachtung dieser Vorschrift kann zu einer Betriebsstörung des Geräts führen und Verletzungen verursachen. Außerdem wird dadurch die Garantie ungültig und verfällt.
■Verwenden Sie das Schnittsystem nicht, wenn der Motor im Leerlauf läuft. Bei Missachtung dieser Vorschrift ist eine Einstellung der Kupplung oder eine Notfallreparatur durch einen qualifizierten Techniker erforderlich.
28
■Führen Sie nur die in diesem Handbuch beschriebenen Einstellungen und Reparaturen selbst aus. Lassen Sie alle anderen Arbeiten durch einen autorisierten Ryobi-Kundendienst ausführen.
■Bei einer unzureichenden Wartung des Geräts kann es zu einer übermäßigen Kohleablagerung kommen und dies kann die Effizienz der Geräts verringern und zu einem Austritt von schwarzem Restöl aus dem Auspuff führen.
■Vergewissern Sie sich, dass die Schutzabdeckungen, Keilriemen, Ablenker und Griffe einwandfrei installiert und befestigt sind. Durch Befolgung dieser Anweisung vermeiden Sie die Risiken von schweren Körperverletzungen.
AUSWECHSELN DES FADENS (Abb. 9)
SCHNEIDEBLATTSCHUTZ (Abb. 10)
REINIGEN DER AUSPUFFÖFFNUNG UND DES AUSPUFFS
Je nach verwendetem Kraftstofftyp, dem Typ und der Menge des verwendeten Öls und/oder den Verwendungsbedingungen können die Auspufföffnung und der Auspuff durch Kohleablagerungen verstopft sein. Wenn Sie eine Leistungsverminderung Ihres Geräts feststellen, müssen Sie es von einem qualifizierten Techniker reinigen lassen.
FUNKENSCHUTZ
Der Funkenschutz muss nach 25 Betriebsstunden oder einmal pro Jahr gereinigt oder ausgewechselt werden, um einen einwand-freien Betrieb Ihres Geräts zu gewährleisten. Der Funkenschutz kann sich je nach Modell Ihres Geräts an verschiedenen Stellen befinden. Wenden Sie sich an den nächsten autorisierten RyobiKundendienst, um zu ermitteln, an welcher Stelle sich der Funkenschutz bei Ihrem Modell befindet.
BEFESTIGUNG DER LAGERHILFE (Abb. 11)
R E I N I G U N G D E S D E C K E L S D E S LUFTFILTERFACHS (Abb. 12)
DECKEL DES KRAFTSTOFFTANKS
WARNUNG
Ein nicht dichter Kraftstoffbehälterdeckel kann einen Brand verursachen und muss sofort ersetzt werden.
ZÜNDKERZE (Abb. 13)
Der Motor funktioniert mit einer Zündkerze Champion RCJ-6Y mit einem Elektrodenabstand von 0,63 mm (oder äquivalentes Produkt). Verwenden Sie nur das empfohlene Modell und wechseln Sie die Zündkerze einmal pro Jahr aus.
960643004-02.indd 28 |
12/13/03 2:27:58 PM |
F GB D E I P NL S DK N FIN GR HU CZ RU RO PL SLO HR TR EST LT LV SK BG
Deutsch
LAGERUNG (FÜR 1 MONAT ODER LÄNGER)
■Geben Sie den gesamten im Tank verbleibenden Kraftstoff in einen Kanister, der für die Aufbewahrung von Benzin zugelassen ist. Lassen Sie den Motor laufen, bis er zum Stillstand kommt.
■Reinigen Sie den Kantenschneider sorgfältig. Lagern Sie ihn an einem gut belüfteten Ort und außerhalb der Reichweite von Kindern. Lagern Sie ihn nicht in der Nähe von ätzenden Stoffen, wie z. B. chemischen Gartenprodukten oder Salzen zum Enteisen.
■Schützen Sie das Schneideblatt, indem Sie die Schutzabdeckung auf das Schneideblatt aufsetzen, bevor Sie Ihr Gerät aufräumen oder transportieren.
■Befolgen Sie die ISO-Normen und örtlichen Bestimmungen über die Lagerung und die Handhabung von Kraftstoff. Sie können den verbleibenden Kraftstoff mit einem anderen Gerät verwenden, das mit einem Zweitaktmotor ausgestattet ist.
29
960643004-02.indd 29 |
12/13/03 2:27:59 PM |

F GB D E I P NL S DK N FIN GR HU CZ RU RO PL SLO HR TR EST LT LV SK BG
Deutsch
FEHLERBEHEBUNG
WENN SIE DEN AUFGETRETENEN FEHLER MIT DIESEN LÖSUNGEN NICHT BEHEBEN KÖNNEN, WENDEN SIE SICH AN IHREN AUTORISIERTEN Ryobi-KUNDENDIENST.
|
FEHLER |
MÖGLICHE URSACHE |
LÖSUNG |
|
||||
|
|
|
|
|
||||
|
Der Motor startet nicht. |
1. Kein Zündfunken. |
1. Prüfen Sie den Zustand der Zündkerze. Entfernen |
|
||||
|
|
|
Sie die Zündkerze. Setzen Sie den Zündkerzen- |
|
||||
|
|
|
deckel ein und setzen Sie die Zündkerze auf den |
|
||||
|
|
|
Metallzylinder. Ziehen Sie am Starter und achten |
|
||||
|
|
|
Sie darauf, ob an der Elektrode der Zündkerze ein |
|
||||
|
|
|
Funken entsteht. Wenn kein Funken entsteht, führen |
|
||||
|
|
|
Sie den Test mit einer neuen Zündkerze durch. |
|
||||
|
|
2. Kein Kraftstoff. |
2. Betätigen Sie die Einspritzpumpe, bis sie mit |
|
||||
|
|
|
Kraftstoff gefüllt ist. Wenn sich die Einspritzpumpe |
|
||||
|
|
|
nicht füllt, ist das Kraftstoffzuleitungssystem |
|
||||
|
|
|
verstopft. Wenden Sie sich an Ihr Reparatur- |
|
||||
|
|
|
zentrum. Wenn sich die Einspritzpumpe füllt, |
|
||||
|
|
|
ist der Motor möglicherweise abgesoffen |
|
||||
|
|
|
(siehe folgender Abschnitt). |
|
||||
|
|
3. Abgesoffener Motor. |
3. Entfernen Sie die Zündkerze und drehen Sie |
|
||||
|
|
|
das Gerät um, sodass die Zündkerzenöffnung |
|
||||
|
|
|
zum Boden hin gerichtet ist. Stellen Sie den |
|
||||
|
|
|
Starterschalter auf die Position “ ” und ziehen |
|
||||
|
|
|
Sie 10 bis 15 Mal am Starter. Normalerweise wird |
|
||||
|
|
|
dadurch der überschüssige Kraftstoff aus dem Motor |
|
||||
|
|
|
entfernt. Reinigen und setzen Sie die Zündkerze |
|
||||
|
|
|
wieder ein. Stellen Sie den Starterschalter auf die |
|
||||
|
|
|
Position “ ” und ziehen Sie 3 Mal am Starter. Wenn |
|
||||
|
|
|
der Motor nicht startet, stellen Sie den Starterschalter |
|
||||
|
|
|
auf die Position “ |
|
|
|
” und wiederholen die normale |
|
|
|
|
|
|
||||
|
|
|
Startprozedur. Wenn der Motor immer noch nicht |
|
||||
|
|
|
startet, die verschiedenen Schritte mit einer neuen |
|
||||
|
|
|
Zündkerze wiederholen. |
|
||||
|
|
4. Das Ziehen des Starters ist |
4. Wenden Sie sich an Ihr Reparaturzentrum. |
|
||||
|
|
schwieriger als am Anfang |
|
|
|
|
|
|
|
|
beim neuen Gerät. |
|
|
|
|
|
|
|
|
|
|
|
||||
|
Motor springt an, |
Der Motor braucht etwa 3 |
Warten Sie, bis der Motor vollständig warm ist. Wenn |
|
||||
|
beschleunigt aber nicht. |
Minuten zum Aufwärmen. |
der Motor nach 3 Minuten nicht beschleunigt, müssen |
|
||||
|
|
|
Sie sich an einen Reparaturdienst wenden. |
|
||||
|
|
|
|
|
||||
|
Der Motor springt an, läuft |
Vergaser muss eingestellt |
Wenden Sie sich an Ihr Reparaturzentrum. |
|
||||
|
beihalb geöffneter |
werden. |
|
|
|
|
|
|
|
Drosselklappe aber |
|
|
|
|
|
|
|
|
nur bei Nenndrehzhl. |
|
|
|
|
|
|
|
|
|
|
|
|
||||
|
Der Motor erreicht seine |
1. Das Kraftstoffgemisch muss |
1. Verwenden Sie ein frisches Kraftstoffgemisch, |
|
||||
|
volle Drehzahl nicht und es |
geprüft werden. |
das die richtige Menge an synthetischem |
|
||||
|
entwickelt sich übermäßig |
|
Zweitaktöl enthält. |
|
||||
|
viel Rauch. |
2. Der Luftfilter ist schmutzig. |
2. Reinigen Sie den Luftfilter. Lesen Sie die |
|
||||
|
|
|
Informationen im Abschnitt “Austausch und |
|
||||
|
|
|
Reinigung des Luftfilters”. |
|
||||
|
|
|
|
|
|
|
|
|
|
|
30 |
|
|
|
|
|
|
960643004-02.indd 30 |
|
|
|
|
|
12/13/03 2:27:59 PM |
||

F GB D |
E I P |
NL |
S DK N FIN GR HU |
CZ |
RU RO |
PL SLO HR TR EST LT LV SK BG |
|
|
|
|
|
|
|
|
|
|
|
|
Deutsch |
|
|
|
|
|
|
|
|
|
|
|
|
|
|
|
FEHLERBEHEBUNG |
|
|
||
|
|
|
|
|
|
||
FEHLER |
|
MÖGLICHE URSACHE |
LÖSUNG |
|
|
||
|
|
|
|
|
|
|
|
|
|
3. |
Das Funkenschutzsieb ist |
3. |
Wenden Sie sich an Ihr Reparaturzentrum. |
|
|
|
|
|
verschmutzt. |
|
|
|
|
Der Motor startet, läuft und |
Die Leerlaufschraube des |
Drehen Sie die Leerlaufschraube nach rechts, um die |
|
||||
beschleunigt, bleibt jedoch |
Vergasers muss eingestellt |
Leerlaufgeschwindigkeit zu erhöhen (Abb. 14). |
|
||||
nicht im Leerlauf. |
|
werden. |
|
|
|
|
|
|
|
|
|
||||
Das Schneideblatt läuft |
Der Vergaser muss |
Wenden Sie sich an Ihr Reparaturzentrum. |
|
||||
weiter, wenn sich der Motor |
eingestellt werden. |
|
|
|
|
||
im Leerlauf befindet. |
|
|
|
|
|
|
|
|
|
|
|
|
|
||
Der Faden kann nicht |
1. |
Der Faden ist verklebt. |
1. |
Schmieren Sie den Faden mit einem Produkt |
|
||
abgewickelt werden. |
|
|
|
auf Silikonbasis. |
|
||
|
|
2. |
Es ist nicht mehr genügend |
2. |
Setzen Sie den Faden wieder ein. Lesen Sie die |
|
|
|
|
|
Faden auf der Spule. |
|
Anweisungen im Abschnitt "Auswechseln |
|
|
|
|
|
|
|
des Fadens". |
|
|
|
|
3. |
Die Fadenenden sind |
3. |
Ziehen Sie an den Fadenenden und drücken Sie |
|
|
|
|
|
abgenutzt und zu kurz. |
|
gleichzeitig auf den Fadenausgabeknopf und |
|
|
|
|
|
|
|
geben Sie |
ihn danach frei. |
|
|
|
4. |
Der Faden ist auf der Spule |
4. |
Entfernen Sie den Faden von der Spule und wickeln |
|
|
|
|
|
verwickelt. |
|
Sie ihn erneut auf. Lesen Sie die Anweisungen |
|
|
|
|
|
|
|
im Abschnitt "Auswechseln des Fadens". |
|
|
|
|
5. |
Der Motor läuft zu langsam. |
5. |
Wickeln Sie Faden ab, während der Motor |
|
|
|
|
|
|
|
bei voller Drehzahl läuft. |
|
|
Das Gras wickelt sich um |
1. |
Sie schneiden hohes Gras |
1. |
Schneiden Sie hohes Gras von oben nach unten. |
|
||
das Rohr und den Fadenkopf. |
|
zu nah am Boden. |
|
|
|
|
|
|
|
2. |
Sie verwenden Ihren |
2. |
Verwenden Sie Ihren Kantenschneider |
|
|
|
|
|
Kantenschneider |
|
auf der höchsten Stufe. |
|
|
|
|
|
auf mittlerer Stufe. |
|
|
|
|
Der Fadenausgabeknopf |
Das Gewinde ist verschmutzt |
Reinigen Sie das Gewinde und schmieren Sie es. |
|
||||
lässt sich nur schwierig lösen. |
oder beschädigt. |
Wenn dies keine Abhilfe schafft, wechseln Sie |
|
||||
|
|
|
|
den Fadenausgabeknopf aus. |
|
||
Über den Auspuff tritt Öl aus. |
1. |
Sie verwenden Ihren |
1. |
Verwenden Sie Ihren Kantenschneider |
|
||
|
|
|
Kantenschneider |
|
auf der höchsten Stufe. |
|
|
|
|
|
auf mittlerer Stufe. |
|
|
|
|
|
|
2. |
Das Kraftstoffgemisch |
2. |
Verwenden Sie ein frisches Kraftstoffgemisch, |
|
|
|
|
|
muss geprüft werden. |
|
das die richtige Menge an synthetischem Zweitaktöl |
|
|
|
|
|
|
|
enthält. |
|
|
|
|
3. |
Der Luftfilter ist verschmutzt. |
3. |
Reinigen Sie den Luftfilter. Lesen Sie die |
|
|
|
|
|
|
|
Informationen im Abschnitt "Austausch |
|
|
|
|
|
|
|
und Reinigung des Luftfilters". |
|
|
|
|
|
|
|
|
|
|
Hinweis: Wenn Sie Funktionsstörungen feststellen, für die im Abschnitt “Fehlerbehebung” das Drehen einer Vergaserschraube nach rechts empfohlen wird und seit dem Kauf des Geräts keine Einstellung vorgenommen wurde, sollten Sie diese Einstellung von einem autorisierten Reparaturzentrum ausführen lassen. In den meisten Fällen stellen die erforderlichen Einstellungen für unsere qualifizierten Techniker eine Routinearbeit dar.
31
960643004-02.indd 31 |
12/13/03 2:27:59 PM |

F GB D E I P NL S DK N FIN GR HU CZ RU RO PL SLO HR TR EST LT LV SK BG
Magyar
SZIMBÓLUMOK
Fontos: A következő szimbólumok közül némelyek szerepelhetnek a szerszámon. Tanulmányozza át leírásukat, ismerje fel őket, és tanulja meg jelentésüket. Az alábbi szimbólumok helyes értelmezése elősegíti, hogy a szerszámot biztonságosabban és megfelelő módon tudja használni.
SZIMBÓLUMOK NÉV |
JELENTÉS |
Biztonságra nézve veszélyt |
Veszélyt, figyelmeztetést vagy figyelemfelhívást jelölnek. |
jelző szimbólumok |
Jelentése: figyelem, az Ön biztonsága van érintve!!! |
Figyelmesen olvassa el a |
A használati útmutató olyan figyelmeztetéseket tartalmaz, |
használati útmutatót |
melyeknek az a rendeltetése, hogy felhívják figyelmét |
|
a potenciális veszélyekre, valamint olyan információk |
|
is szerepelnek itt, melyek a szerszám használatára és |
|
karbantartására vonatkoznak. Kérjük, figyelmesen olvassa el a |
|
jelen használati útmutatót a szerszám teljesen biztonságos és |
|
optimális használata érdekében. |
Hordjon biztonsági |
Viseljen szemés hallásvédő eszközt (fülvédő, füldugó) és |
védőszemüveget, hallásvédő |
védősisakot a szerszám használata közben. |
eszközt és védősisakot |
|
Tartsa távol a nézelődő |
A munkafolyamatot szemlélő személyeket tartsa legalább |
személyeket |
15 m-es távolságban a munkaterülettől. |
Kidobódás |
Kövek, növényrészek stb. kidobódásának, kirepítésének |
|
veszélye. |
3 fogú vágótárcsa |
Ez a szerszám a 3 fogú vágótárcsával bozótvágóként |
|
működik, mely kizárólag gyomés lágyszárú növények |
|
kaszálására szolgál. |
Ne használjon a szerszámmal |
Erre a szerszámra nem szabad körfűrészekhez való |
fűrésztárcsát |
fűrésztárcsát felhelyezni. |
Fordulatszám (ford. / perc) |
Vágóeszköz forgásiránya és maximális fordulatszáma a |
|
tengely kimenetén. |
Csizma |
Viseljen csúszásgátló talppal ellátott, biztonsági lábbelit a |
|
szerszám használata során. |
Kesztyű |
Viseljen vastag anyagból készült, maximális tapadású |
|
munkakesztyűt. |
Tilos a dohányzás |
Tilos a dohányzás az üzemanyag keverése és az |
|
üzemanyagtartály feltöltése közben. |
Benzin |
Használjon 87-es ([R + M] / 2) vagy ennél magasabb |
|
oktánszámú ólommentes motorbenzint. |
Olaj |
Használjon kétütemű, léghűtéses motorokhoz való |
|
szintetikus olajat. |
|
120 |
960643004-02.indd 120 |
12/13/03 2:29:04 PM |

F GB D E I P NL S DK N FIN GR HU CZ RU RO PL SLO HR TR EST LT LV SK BG
Magyar
SZIMBÓLUMOK
Fontos: A következő szimbólumok közül némelyek szerepelhetnek a szerszámon. Tanulmányozza át leírásukat, ismerje fel őket, és tanulja meg jelentésüket. Az alábbi szimbólumok helyes értelmezése elősegíti, hogy a szerszámot biztonságosabban és megfelelő módon tudja használni.
SZIMBÓLUMOK |
NÉV |
JELENTÉS |
||||
|
|
|
|
|
|
|
|
|
|
|
|
Benzin - olaj keverék |
Alaposan keverje meg az üzemanyagot a tartály minden egyes |
|
|
|
|
|
||
|
|
|
|
|
|
feltöltése előtt. |
|
|
|
|
|
|
|
|
|
|
|
|
|
|
|
|
|
|
|
|
Ez a szerszám minden, a vásárlás európai uniós országában |
|
|
|
|
|
|
hatályos szabványnak megfelel. |
|
|
|
|
|
|
|
Köszönjük, hogy Ryobi terméket vásárolt.
Az Ön által vásárolt szegélyvágó / bozótvágó motoros kaszát a Ryobi magas követelményszintje alapján terveztük és gyártottuk, ez biztosítja, hogy a szerszám működése megbízható, használata könnyű és biztonságos legyen. Ha a szerszám előírt karbantartási munkálatait mindig megfelelőképpen elvégzi, akkor hosszú éveken keresztül használhatja ezt az ellenálló és nagy teljesítményű eszközt.
FIGYELMEZTETÉS
A s é r ü l é s v e s z é l y e k e l k e r ü l é s e v é g e t t feltétlenül fontos, hogy olvassa el és alaposan tanulmányozza át a jelen használati útmutatót.
FIGYELMEZTETÉS
Ne vegye használatba a szerszámot egészen addig, amíg a jelen használati útmutatóban foglalt utasításokat és biztonsági előírásokat el nem olvasta és teljes egészében meg nem értette. Ezeknek az előírásoknak a be nem tartása baleseteket, azaz tüzet, áramütést és súlyos testi sérüléseket idézhet elő. A teljesen biztonságos munkavégzés érdekében őrizze meg a jelen használati útmutatót, és lapozza fel rendszeresen, valamint tájékoztassa az itt leírtakról azokat is, akik esetlegesen szintén használni szeretnék a szerszámot.
OLVASSA EL AZ ÖSSZES UTASÍTÁST.
ÁLTALÁNOS BIZTONSÁGI ELŐÍRÁSOK
■A szegélyvágó / bozótvágó motoros kasza használata előtt a maximális biztonság érdekében kérjük, hogy olvassa el és értse meg az összes utasítást. Tartsa be az összes biztonsági előírást. Az alábbi biztonsági előírások be nem tartása súlyos testi sérüléssel járó baleseteket okozhat.
■Ne hagyja, hogy gyermekek ill. olyan személyek használják a szerszámot, akik nem rendelkeznek megfelelő gyakorlattal.
■Soha ne indítsa be és ne járassa a motort zárt vagy rosszul szellőző helyiségben, mivel a felhalmozódott kipufogógáz életveszélyes lehet.
■Mielőtt a szerszám használatához fogna, tisztítsa meg a nyírásra kerülő munkaterületet, mindent távolítson el onnan. Gyűjtse össze a köveket, üvegdarabokat, s z ö g e k e t , a c é l d r ó t o k a t , k ö t é l d a r a b o k a t é s általánosságban minden olyan tárgyat, amelyet a damilfej / vágótárcsa kidobhat vagy bekaphat.
■Használjon védőszemüveget és hallásvédő eszközt (fülvédőt, füldugót) munkavégzés közben.
■Viseljen hosszú szárú, vastag anyagból készült nadrágot is, valamint csizmát és kesztyűt. Munka közben ne hordjon bő ruhát, rövidnadrágot és ékszert, valamint soha ne dolgozzon mezítláb.
■Amennyiben hosszú a haja, gondoskodjon a védelméről, azaz tűzze fel a vállak vonala felett, hogy a szerszám mozgó részei ne kaphassák be.
■A gyermekeket, más személyeket és a háziállatokat tartsa legalább 15 m-es távolságban a munkavégzés helyétől.
■Ne használja a szerszámot, ha fáradt, beteg, alkohol vagy kábítószer hatása alatt áll, illetve ha orvosságot szed.
■Ne használja ezt a szerszámot, ha nincs elég világos a munkához.
■Ügyeljen arra, hogy munka közben stabilan, egyensúlyban álljon. Álljon fél-terpesz állásban, és ne nyújtsa túl messze a karját. Ellenkező esetben eleshet vagy a forró részekhez érhet.
■Tartsa távol testétől a szerszám mozgó részeit.
■Ne közelítsen a kezével a szegélyvágó / bozótvágó kipufogójához és hengeréhez, mivel ezek a részek használat közben felforrósodnak.
121
960643004-02.indd 121 |
12/13/03 2:29:05 PM |

F GB D E I P NL S DK N FIN GR HU CZ RU RO PL SLO HR TR EST LT LV SK BG
Magyar
■Ügyeljen arra, hogy a motort mindig állítsa le, valamint a gyertya vezetékét mindig húzza ki, mielőtt beállításokhoz vagy javításokhoz kezdene, kivéve a porlasztó beállítása esetén.
■Minden használat előtt vizsgálja át a szerszámot, ellenőrizze hogy egyetlen alkatrész sem lazult meg, nem folyik a benzin stb. Cseréljen ki bármilyen sérült alkatrészt, mielőtt elkezdené használni a szerszámot.
■Rendkívül óvatosan járjon el a porlasztó beállításakor, mivel a damilszál forog közben.
■Bizonyos személyeknél a vibráló szerszámok használatakor elszenvedett rázkódások az un. "Raynaud-jelenséget" ill. "Raynaud-betegséget" válthatják ki, melynek főbb tünetei: szúró érzések, zsibbadások és az - általában hideg hatására látszó - ujjak elszíneződése. A jelek arra mutatnak, hogy kialakulását az örökletes tényezők, a hidegnek és a nedvességnek való kitétel, a dohányzás, valamint bizonyos táplálkozásiés munkavégzési szokások segítik elő. A tudomány jelenlegi állása szerint nem lehet tudni, hogy milyen mértékű vibrálás és ennek milyen hosszú ideig való kitettség válthatja ki ezt a szindrómát. Mindezek ellenére ügyeljen arra, hogy hozzon meg bizonyos óvintézkedéseket a vibrációnak való kitettség csökkentése érdekében:
a)Ha hideg van, öltözzön fel melegen. Amikor ezt a szerszámot használja, viseljen kesztyűt a kéz és a csukló melegen tartása végett. Minden jel arra mutat, hogy a hideg az egyik legfőbb tényező a Raynaud-betegség kialakulásában.
b)Minden használat után végezzen néhány testgyakorlatot a vérkeringés felélénkítésére.
c)Rendszeresen tartson szünetet és korlátozza a rezgésnek kitettség napi mértékét.
Amennyiben a fentiek közül valamely szimptóma fellépését észlelné, azonnal hagyja abba a szerszám használatát, és forduljon orvoshoz.
■Tartsa a szerszámot jó, működőképes állapotban: ellenőrizze, hogy az alkatelemek jól meg vannak-e szorítva és ha meghibásodtak, cseréltesse ki őket.
■Az üzemanyagot egy benzines marmonkannában keverje ill. tárolja.
■Az üzemanyagot a szabadban, minden szikraés gyújtóforrástól távol keverje és öntse. Amennyiben kiömlött az üzemanyag, gondosan törölje le a foltokat. Mielőtt a motort beindítaná, legalább 9 m-re távolodjon el attól a helytől, ahol az üzemanyagtartály feltöltését végezte.
■Állítsa le a motort és várja meg hogy lehűljön, mielőtt üzemanyaggal feltöltené vagy elrakná a szerszámot.
■Mielőtt a szerszámot járműbe rakná, várja meg hogy a motor lehűljön, ürítse ki az üzemanyagtartályt és rögzítse, hogy ne mozogjon szállítás közben.
A SZEGÉLYVÁGÓKRA VONATKOZÓ
SPECIÁLIS BIZTONSÁGI ELŐÍRÁSOK
■Cserélje ki a damilfejet ha megrepedt, berepedezett vagy bármilyen módon megsérült. Bizonyosodjon meg arról, hogy a damilfej megfelelően van-e beszerelve és jól van-e rögzítve. Ennek az előírásnak a be nem tartása súlyos testi sérüléssel járó balesetet vonhat maga után.
■Ellenőrizze, hogy a védőelemek, gépszíjak, terelőlemezek és fogantyúk megfelelőképpen vannak-e felszerelve és jól rögzítve vannak-e.
■A vágószál cseréje esetén kizárólag a gyártó által előírt damilszálat használjon. Semmilyen más vágóeszközt nem szabad a szerszámmal használni.
■Soha ne használja a szerszámot, ha a védőtárcsa (fű terelőlemez) nincs a helyén, vagy nincs jó állapotban.
■Használat közben erősen fogja a kezében a szerszámot a két fogantyújánál tartva. Vigyázzon arra, hogy a damilfejet a derék vonala alatt tartsa. Soha ne vágjon, ha a damilfej 76 cm-nél magasabbra van a talajtól.
A BOZÓTVÁGÓKRA ÉS A TÁRCSA HASZNÁLATÁRA
VONATKOZÓ BIZTONSÁGI ELŐÍRÁSOK
■Miután leállította a motort, a forgásban lévő tárcsát tartsa a dús fűben vagy gyomban, amíg le nem áll.
■Ne használja a bozótvágót, ha a tárcsa védőeleme nincs jó állapotban, megfelelőképpen felszerelve és rögzítve.
■Viseljen vastag védőkesztyűt ha felvagy leszereli a tárcsát.
■Mindig ügyeljen arra, hogy állítsa le a motort és a gyertya vezetékét húzza ki, mielőtt bármilyen, a tárcsába beszorult dolgot kivesz, valamint ha tárcsát cserél, ill. szerel le.
■Ne próbálja a forgó vágótárcsát megérinteni ill. leállítani.
■A motor leállítása vagy a ravasz felengedése után a tehetetlenségből kifolyólag még forgó vágótárcsa súlyos baleseteket okozhat. Ügyeljen arra, hogy a szerszámot erősen fogja, amíg a tárcsa forgása teljesen le nem áll.
■Cserélje ki a vágótárcsát ha meghibásodott. Minden használat előtt bizonyosodjon meg arról, hogy a tárcsa megfelelőképpen lett-e felszerelve és stabilan lett-e rögzítve. Ennek az előírásnak a be nem tartása súlyos testi sérüléssel járó balesetet vonhat maga után.
■Tárcsacsere esetén kizárólag speciálisan a bozótvágóhoz készített, 3 fogú vágótárcsát használjon. Ne használjon semmilyen más típusú tárcsát.
122
960643004-02.indd 122 |
12/13/03 2:29:06 PM |

F GB D E I P NL S DK N FIN GR HU CZ RU RO PL SLO HR TR EST LT LV SK BG
Magyar
■A 3 fogú vágótárcsákkal kizárólag gyomés lágyszárú növényeket szabad vágni. Soha ne használja a szerszámot más alkalmazásra. Soha ne használja a 3 fogú vágótárcsát cserjék, fák vágására.
■Legyen rendkívül óvatos, ha tárcsával felszerelt szerszámot használ. A szerszám visszarúghat / megugorhat, ha a tárcsa olyan anyagba ütközik, amit nem tud elvágni. Egy ilyen kontaktus átmenet nélkül, egy pillanat alatt leállíthatja a tárcsát és emiatt a szerszám váratlanul messzire repülhet az adott tárgytól. Egy ilyen visszarúgás olyan erős lehet, hogy a gép használója elvesztheti uralmát a
szerszám felett. A szerszám akkor is visszarúghat, ha a tárcsa akadályba ütközik, beszorul vagy elgörbül. A v i s s z a r ú g á s n a g y o b b v a l ó s z í n ű s é g g e l következhet be akkor, ha olyan területen dolgozunk, ahol nehezebben látható a vágásra kerülő növényzet. Nemcsak teljes biztonságban, de jobban is vághatja a gyomnövényeket, ha jobbról balra kaszál. Amennyiben valamilyen tárgy vagy fadarab kerülne a tárcsa útjába, ez az oldalmozgás a visszarúgás hatását is lecsökkenti.
■Soha ne vágjon 13 mm-nél nagyobb átmérőjű szárat.
■Használja mindig a hevedert, ha bozótvágóként használja a gépet, és állítsa be úgy, hogy kényelmes legyen vele dolgozni. Tartsa erősen a szerszámot a két fogantyúnál fogva kaszálás közben.
Tartsa testétől távol, a derék vonala alatt a tárcsát. Soha ne használja a bozótvágót úgy, hogy tárcsája 76 cm-nél magasabbra legyen a talajtól.
■Óvja a 3 fogú vágótárcsa élét az élvédő helyére tételével, mielőtt a szerszámot eltárolná vagy szállítaná. A szerszám használata előtt mindig vegye le az élvédőt. Amennyiben az élvédő a helyén marad, a forgó tárcsa kidobhatja azt.
123
960643004-02.indd 123 |
12/13/03 2:29:06 PM |

|
F GB D E |
I P NL S DK N FIN |
GR HU |
CZ RU RO PL SLO HR TR EST |
LT LV |
SK BG |
||
|
|
|
|
|
|
|
|
|
|
|
|
Magyar |
|
|
|
|
|
|
|
|
|
|
|
|
|
|
|
|
MŰSZAKI ADATOK |
|
|
|
|
||
|
|
|
|
|
|
|
|
|
|
|
|
|
|
RBC30SES |
RBC30SBS |
|
|
|
|
|
|
|
|
|
|
|
|
Súly |
|
|
(kg) |
|
|
|
|
|
- üzemanyag, vágószerszám és védőelemek nélkül |
|
5.63 |
6.79 |
|
|||
|
- üzemanyag nélkül, damilfejjel |
|
|
5.80 |
6.96 |
|
||
|
- üzemanyag nélkül, vágótárcsával |
|
|
5.80 |
6.96 |
|
||
|
Üzemanyagtartály űrtartalom |
|
[cm3 vagy (l)] |
415 vagy (0.415) |
415 vagy |
(0.415) |
|
|
|
Vágásszélesség |
|
(mm) |
|
|
|
|
|
|
- Damilfej |
|
|
|
457 |
457 |
|
|
|
- Vágótárcsa |
|
|
200 |
200 |
|
||
|
|
|
|
|
|
|
||
|
Előírt forgatónyomaték a vágótárcsához |
|
(Nm) |
>=13 |
>=13 |
|
||
|
|
|
|
|
|
|
||
|
Hengerűrtartalom |
|
(cm3 / cc) |
30 |
30 |
|
||
|
Szál átmérő Reel EasyTM Head |
|
(mm) |
2.4 |
2.4 |
|
||
|
Szál átmérő Pro Cut llTM Head |
|
(mm) |
2.7 |
2.7 |
|
||
|
Motor maximális teljesítménye (az ISO 8893 szabvány |
|
|
|
|
|
||
|
szerint) |
|
|
(kW) |
0.75 |
0.75 |
|
|
|
|
|
|
|
|
|
||
|
Tengely maximális fordulatszáma |
|
(perc-1) |
10,000 |
10,000 |
|
||
|
Motor fordulatszám a maximális fordulatszámon |
|
(perc-1) |
12,000 |
12,000 |
|
||
|
Motor fordulatszám alapjáraton |
|
(perc-1) |
2,800-3,500 |
2,800-3,500 |
|
||
|
Üzemanyag-fogyasztás (az ISO 8893-nak megfelelően) |
|
|
|
|
|
||
|
a motor csúcsteljesítményén |
[kg/h vagy (l/h)] |
0.48 vagy (0.66) |
0.48 vagy (0.66) |
|
|||
|
|
|
|
|
|
|
||
|
Specifikus üzemanyag-fogyasztás (az ISO 8893-nak |
|
|
|
|
|
||
|
megfelelően) a motor csúcsteljesítményén |
[g/kW.h vagy (l/kW.h)] |
640 vagy (0.87) |
640 vagy (0.87) |
|
|||
|
|
|
|
|
|
|
|
|
|
Rezgésszint alapjáraton (szegélyvágó) |
|
(m/s2) |
|
|
|
|
|
|
- Elülső fogantyú / bal oldali fogantyú |
|
|
5.7 |
6.0 |
|
||
|
- Hátsó fogantyú / jobb oldali fogantyú |
|
|
3.4 |
6.5 |
|
||
|
|
|
|
|
|
|
|
|
|
Rezgésszint max. fordulatszámon (szegélyvágó) |
|
(m/s2) |
|
|
|
|
|
|
- Elülső fogantyú / bal oldali fogantyú |
|
|
11.4 |
9.0 |
|
||
|
- Hátsó fogantyú / jobb oldali fogantyú |
|
|
18.4 |
11.4 |
|
||
|
|
|
|
|
|
|
|
|
|
Rezgésszint alapjáraton (bozótvágó) |
|
(m/s2) |
|
|
|
|
|
|
- Elülső fogantyú / bal oldali fogantyú |
|
|
5.9 |
6.3 |
|
||
|
- Hátsó fogantyú / jobb oldali fogantyú |
|
|
2.6 |
6.6 |
|
||
|
|
|
|
|
|
|
|
|
|
Rezgésszint max. fordulatszámon (bozótvágó) |
|
(m/s2) |
|
|
|
|
|
|
- Elülső fogantyú / bal oldali fogantyú |
|
|
12.6 |
6.9 |
|
||
|
- Hátsó fogantyú / jobb oldali fogantyú |
|
|
17.1 |
8.9 |
|
||
|
Hangnyomás (az EN 27917 szabványoknak megfelelően) |
dB (A) |
103.4 |
103 |
|
|||
|
|
|
|
|
|
|||
|
Hangteljesítmény (az ISO 10884 szabványnak megfelelően) |
dB (A) |
110 |
110 |
|
|||
|
|
|
|
|
|
|
|
|
|
|
|
124 |
|
|
|
|
|
960643004-02.indd |
124 |
|
|
|
12/13/03 2:29:07 PM |
|||

F GB D E I P NL S DK N FIN GR HU CZ RU RO PL SLO HR TR EST LT LV SK BG
Magyar
A KÉSZÜLÉK RÉSZEI
1.Indító befecskendező gomb
2.Indító (szívató) üzemmódváltó gomb
3.Üzemanyagtartály sapka
4.Indító (indítózsinór)
5.Ravasz kireteszelő gomb
6.Be / ki kapcsológomb
7.Gázszabályozó ravasz
8.Hátsó fogantyú (RBC30SES)
9.Elülső fogantyú (RBC30SES)
10.Heveder (vállszíj)
11.Cső
12.Védőelem
13.3 fogú vágótárcsa
14.Védőtárcsa (fű terelőlemez)
15.Vágószál
16.Alapjárati fordulatszám-szabályozó csavar
17.Rögzítőcsavar
18.Tároló tartórész
19.Markolat a ravasszal (csak RBC30SBS)
20.Bal oldali fogantyú (csak RBC30SBS)
21.Ravasz rögzítőgomb (kizárólag RBC30SBS típus)
22.Pro Cut llTM
23.Reel EasyTM
ÖSSZESZERELÉS
Lásd 2a - 2d. ábra.
FIGYELMEZTETÉS
Amennyiben hiányzik ill. megrongálódott a gép valamely alkateleme, ne használja ezt a szerszámot addig, amíg a kérdéses alkatelemet be nem szerezte. Ennek a figyelmeztetésnek a be nem tartása súlyos testi sérülésekkel járó balesetet vonhat maga után.
FIGYELMEZTETÉS
Ne próbáljon a szerszámon módosítást / átalakítást végrehajtani, és ne használjon olyan tartozékokat, melyek használatát a gyártó nem javasolja előírásszerűen. Az ilyen átalakítások és módosítások végrehajtása helytelen, nem rendeltetésszerű használatnak minősül, veszélyes helyzeteket idézhet elő és súlyos testi sérülésekkel járó balesetet vonhat maga után.
FIGYELMEZTETÉS
Mindig szüntesse meg a gyertya tápvezetékének csatlakoztatását (azaz húzza ki), ha valamilyen alkatelemet szerel fel a gépre. Ezen előírás be nem tartása a gép véletlenszerű beindítását idézheti elő, és súlyos sérüléseket okozhat.
125
FIGYELMEZTETÉS
Soha ne végezze a tartozék csövének felhelyezését és beállítását járó motornál. Ezen előírás be nem tartása súlyos sérülésekkel járó balesetet idézhet elő.
FIGYELMEZTETÉS
Bizonyosodjon meg arról, hogy a rögzítőcsavar jól meg legyen szorítva, mielőtt a szerszámot elkezdené használni. A súlyos testi sérülések elkerülése érdekében rendszeresen ellenőrizze a használat során, hogy maradjon ez jól megszorítva.
HASZNÁLAT
Olvassa el a használati útmutatót és tartsa be a figyelmeztetéseket és a biztonsági előírásokat.
Hordjon biztonsági védőszemüveget, hallásvédő eszközt és védősisakot.
A munkafolyamatot szemlélő személyeket - különösen a gyermekeket -, valamint a háziállatokat tartsa legalább 15 m-es távolságban a munkaterülettől.
ÜZEMANYAG, A TARTÁLY FELTÖLTÉSE
AZ ÜZEMANYAG BIZTONSÁGOS KEZELÉSE
■Az üzemanyagot mindig elővigyázatosan kezelje, mivel ez az anyag rendkívül gyúlékony, tűzveszélyes.
■Az üzemanyagot a szabadban, minden szikraés gyújtóforrástól távol keverje és öntse. Ne szívja be a benzingőzt.
■Kerüljön bármilyen érintkezést a benzinnel és az olajjal.
■Leginkább arra ügyeljen, hogy a benzin és az olaj ne menjen a szemébe. Ha a benzin vagy olaj mégis a szemébe került, azonnal öblítse ki tiszta vízzel. Ha ezek után továbbra is irritálja a szemét, forduljon azonnal orvoshoz.
■Haladéktalanul törölje le a kiömlött üzemanyag által hagyott foltokat.
AZ ÜZEMANYAG KEVERÉSE (3. ábra)
■A szerszámban kétütemű motor van, mely benzin és kétütemű, szintetikus olaj keverék üzemanyagával működik. Az ólommentes benzint és a kétütemű, szintetikus olajat egy olyan tiszta, homologizált benzintartályban keverje össze, melyet erre a célra gyártottak és hagytak jóvá.
■A motor 87-es ([R + M] / 2) vagy magasabb oktánszámú ólommentes motorbenzinnel működik.
■Ne használjon semmiféle, a benzinkutakon kapható előkevert üzemanyagot, ideértve a motorkerékpárokhoz, segédmotor-kerékpárokhoz stb.
960643004-02.indd 125 |
12/13/03 2:29:07 PM |
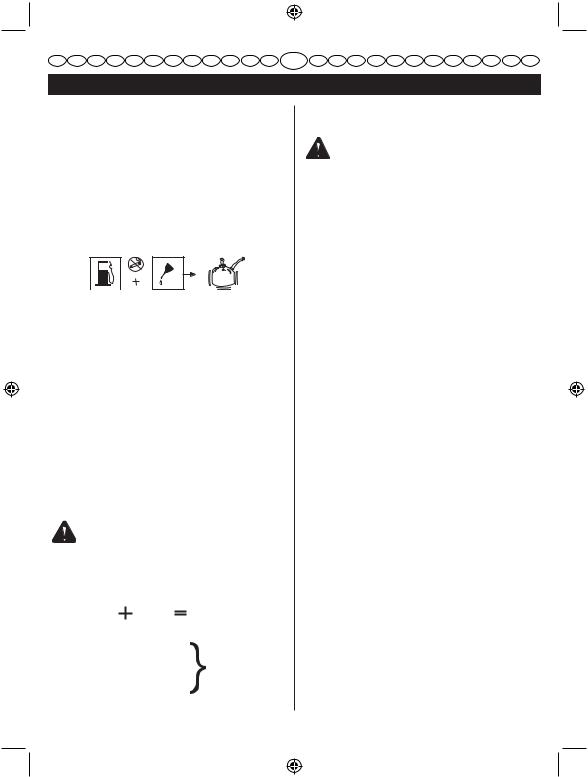
F GB D E I P NL S DK N FIN GR HU CZ RU RO PL SLO HR TR EST LT LV SK BG
Magyar
árusított keverék benzint is.
■Kizárólag kétütemű motorokhoz való szintetikus olajat használjon. Ne használjon gépkocsihoz való motorolajt, se pedig csónak-motorhoz való kétütemű olajt.
■Adagoljon a benzinhez kétütemű, szintetikus olajt 50:1 (2%) arányban.
■Alaposan keverje meg az üzemanyagot a tartály minden egyes feltöltése előtt.
■A benzint kis mennyiségekben keverje: ne keverjen üzemanyagot több mint egy hónapra előre. Előírás szerint kétütemű, szintetikus motorolaj használata kötelező, mely üzemanyag-stabilizáló adalékot tartalmaz.
A TARTÁLY FELTÖLTÉSE
■Törölje le a tartályt a benzinsapka körül, ily módon az üzemanyag nem szennyeződik be.
■Lassan csavarja le az üzemanyag tartály sapkáját, hogy a nyomáskülönbség kiegyenlítődjön és ne folyjon benzin a sapka köré.
■Óvatosan öntse a keverék üzemanyagot a tartályba, hogy ne folyjon mellé.
■Mielőtt a sapkát visszacsavarná, törölje le a tömítést és bizonyosodjon meg arról, hogy jó állapotban van.
■Azonnal helyezze vissza a tartályra a sapkát és jól szorítsa meg. Amennyiben kiömlött az üzemanyag, gondosan törölje le a foltokat. Mielőtt a motort beindítaná, legalább 9 m-re távolodjon el attól a helytől, ahol az üzemanyagtartály feltöltését végezte. Megjegyzés: Amennyiben az első használat során (esetleg a későbbiekben is) füst távozik a motorból, ez normális jelenség.
FIGYELMEZTETÉS
Mindig állítsa le a motort az üzemanyagtartály feltöltése előtt. Soha ne töltse fel a tartályt járó vagy még meleg motornál. Mielőtt a motort beindítaná, legalább 9 m-re távolodjon el attól a helytől, ahol az üzemanyagtartály feltöltését végezte. Tilos a dohányzás!
1 liter |
+ |
20 ml |
= |
|
2 liter |
+ |
40 ml |
= |
|
3 liter |
+ |
60 ml |
= |
50:1 (2%) |
4 liter |
+ |
80 ml |
= |
|
5 liter |
+ |
100 ml |
= |
|
126
A SZEGÉLYVÁGÓ BEÉS KIKAPCSOLÁSA (4a - 4b. ábra)
FIGYELMEZTETÉS
Soha ne indítsa be a motort zárt vagy rosszul szellőző helyiségben, mivel a felhalmozódott kipufogógáz életveszélyes lehet.
Megjegyzés: Ne feledje a kapcsolót BE ("I") pozícióba helyezni, mielőtt a motort beindítaná.
A SZEGÉLYVÁGÓ HASZNÁLATA (5. ábra)
RBC30SES: Fogja meg a szegélyvágó hátulsó fogantyúját a jobb kezével, az elülső fogantyút pedig a bal kezével.
RBC30SBS: Fogja meg a szegélyvágó jobb oldali fogantyúját a jobb kezével, a bal oldali fogantyút pedig a bal kezével.
A használat során végig fogja a szerszámot erősen a két kezével. A szegélyvágót kényelmes pozícióban kell fogni úgy, hogy a jobb oldali fogantyú a csípő magasságába essen.
A szegélyvágót mindig maximális fordulatszámon használja. A magas füvet fentről lefelé vágja, hogy a fű ne csavarodjon a csőre és a damilfejre, mivel ez a motor túlmelegedését okozhatja. Ha a fű mégis a damilfej köré csavarodna, állítsa le a motort, húzza ki a gyertya vezetékét és vegye ki a beszorult füvet. Ha hosszabb időn keresztül használja a szerszámot közepes fordulatszámon, ez azt eredményezheti, hogy olaj folyik ki a kipufogón.
TANÁCSOK A FŰ VÁGÁSÁHOZ (6. ábra)
A VÁGÓSZÁL ADAGOLÁSA (7. ábra)
For Reel EasyTM Only
A BOZÓTVÁGÓ HASZNÁLATA (5. ábra)
RBC30SES: Fogja a hátsó, ravaszos markolatot a jobb kezével, az elülső fogantyút pedig a bal kezével.
RBC30SBS: Fogja a bozótvágó jobb oldali fogantyúját a jobb kezével, a bal oldali fogantyút pedig a bal kezével.
A használat során végig fogja a szerszámot e r ő s e n a k é t k e z é v e l . A b o z ó t v á g ó t k é n y e l m e s p o z í c i ó b a n k e l l f o g n i ú g y , hogy a jobb oldali fogantyú körülbelül a csípő magasságába essen.
Fogja erősen a szerszámot a stabil pozíciót fenntartva. Ily módon elkerülhető az, hogy elveszítse az egyensúlyát, ha a vágótárcsa visszarúg.
Állítsa be a hevedert olyan pozícióba, hogy a munkavégzés kényelmes legyen. A heveder azt is
960643004-02.indd 126 |
12/13/03 2:29:08 PM |
 Loading...