


Andrew Burrows Distribution / Detailed view 13/02/16
Timing assembly, exploded view
1 / 1
Andrew Burrows Distribution / Removal 13/02/16
Timing assembly, removal
The item numbers indicated in the text refer to the drawing on page .
Remove starter motor.
See pages .
Remove compressor.
See pages .
Remove steering pump.
See pages .
Remove flywheel.
See pages .
Remove the crankshaft rear seal.
See pages .
Remove the oil sump.
See pages .
Remove upper timing casing (1).
See pages .
Remove brackets (2 - 3).
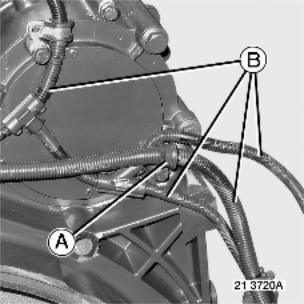
Remove clamp (A).
1 / 7
Andrew Burrows Distribution / Removal 13/02/16
Disengage wiring harnesses (B).
Remove clamp (A).
Remove pipes (B).
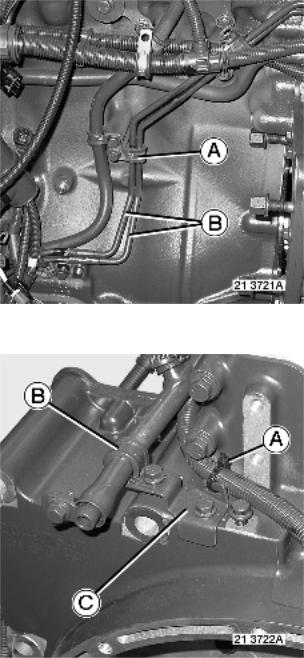
Cut cable tie (A).
2 / 7
Andrew Burrows Distribution / Removal 13/02/16
Remove flange (B).
Remove bracket (C).
Remove bolts (A - B) M8.
Remove bolts (A) M8.
3 / 7

Andrew Burrows Distribution / Removal 13/02/16
Depending on the assembly.
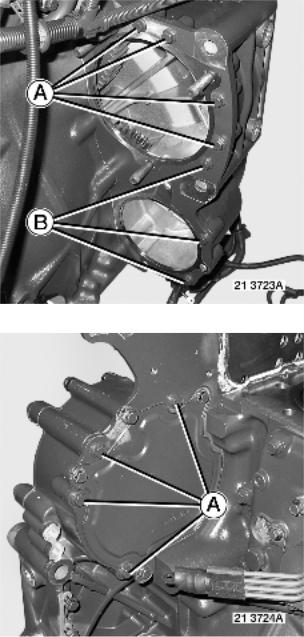
Remove bolts (4) M10 - (5) M14 by loosening them in the reverse sequence to tightening. See pages , .
Remove flywheel (6). Depending on the assembly.
Assembly type A
Remove pinion (7).
Assembly type B
Remove bolt. Remove pinion (7). Remove gasket (8).
Loosen bolts (9 - 10 - 11) proceeding in the reverse sequence to tightening. See pages .
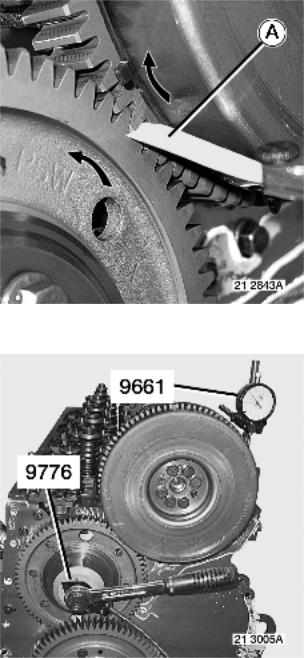
Remove vibration damper (12) and camshaft pinion (13). Remove washer (14).
Remove pinions (15 - 16). Remove half-rings (17 - 18). Remove hub (19).
4 / 7

Andrew Burrows Distribution / Removal 13/02/16
Remove bolts (20).
Remove pinion (21).
Use tool 0843.
Remove gasket (22).
Place locating tools 8267 in position and tighten them to 60 Nm.
Remove stud holder unit (A).
Remove gasket (B).
Depending on the assembly.
Remove bolts (23) by loosening them in the reverse sequence to tightening.
See pages , .
Remove timing plate (24).
Tools
Specific tools
Illustration |
RENAULT |
Designation |
Manufacturer's |
Manufacturer's code N° |
Scale |
Qty |
|
TRUCKS part N° |
|
reference N° |
|
|
|
|
5000260843 |
PULLER |
|
|
2 |
1 |
5 / 7

Andrew Burrows Distribution / Removal 13/02/16
|
|
|
|
|
|
|
|
7409998267 |
GUIDE |
|
|
2 |
1 |
|
|
|
|
|
|
|
Timing assembly, exploded view
6 / 7

Andrew Burrows Distribution / Removal 13/02/16
7 / 7
Andrew Burrows Distribution / Fitting 13/02/16
Timing assembly, fitting
The item numbers indicated in the text refer to the drawing on page . Clean the joint faces.
Depending on the assembly. Apply a bead of silicone. See pages , .
Fit timing plate (24).
Replace O-ring (B) with a new O-ring.
Fit stud holder unit (A).
Depending on the assembly.
Fit bolts (23).
Tighten to torque.
Follow the tightening sequence.
See pages , .
Withdraw the locating tools 8267.
1 / 24
Andrew Burrows Distribution / Fitting 13/02/16
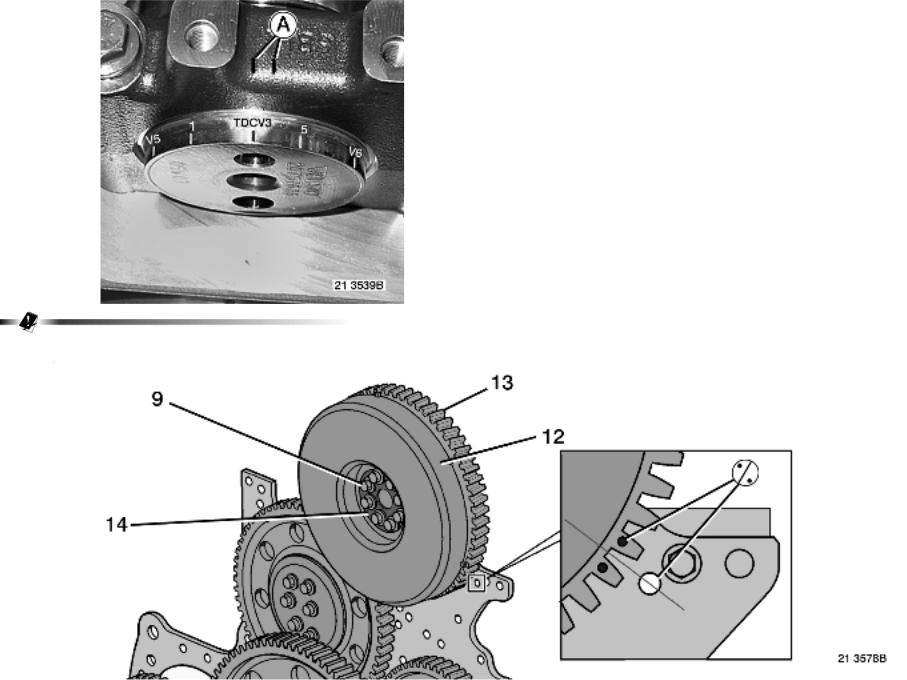
The camshaft top dead centre mark (TDC) must be positioned between the marks (A) on the camshaft front bearing cap.
Fit pinion (13).
2 / 24
Andrew Burrows Distribution / Fitting 13/02/16
Check the position of marks. Fit vibration damper (12). Fit the washer (14).
Fit bolts (9).
Tighten to torque.
See pages .
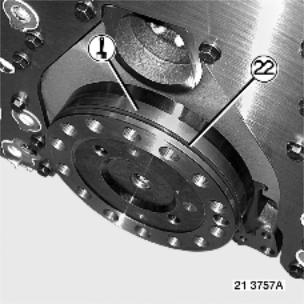
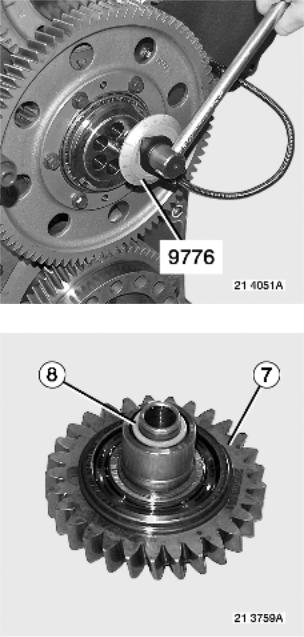
Use tool 9776.
Lubricate hub (19).
Use engine oil.
Position hub (19) in pinion (16).
Install thrust half-rings (17 - 18).
Fit pinion (16).
Start bolts (10) but do not tighten.
3 / 24
Andrew Burrows Distribution / Fitting 13/02/16
Slide a feeler gauge (A) with a thickness of 0.1 mm between the teeth contact faces of pinions (13 - 16).
Preliminary tighten bolts (10) to a torque of 10 Nm.
Check the backlash . Use tool 9661.
4 / 24
Andrew Burrows Distribution / Fitting 13/02/16
For values, see "Technical data" chapter. See pages .
If the backlash is correct, tighten bolts (10) to torque (see page(s) ). Use tool 9776.
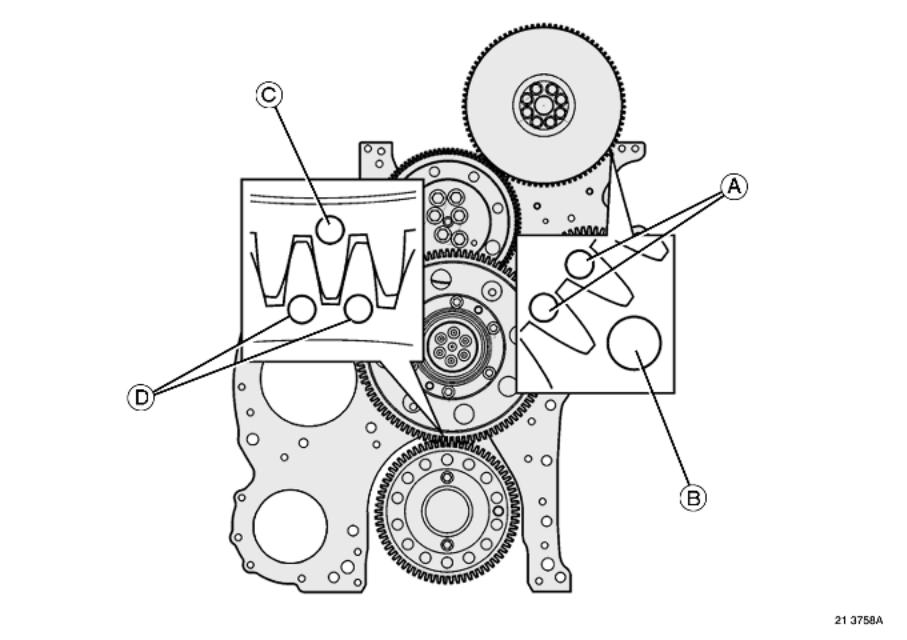
Lightly oil a new O-ring (22) and install.
Fit pinion (21).
Tighten bolts (20) to torque.
See pages .
5 / 24
Andrew Burrows Distribution / Fitting 13/02/16
Fit pinion (15) ensuring the position of marks (A - B) / (C - D). Tighten bolts (11) to torque following the tightening sequence.
See pages .
6 / 24
Andrew Burrows Distribution / Fitting 13/02/16
Use tool 9776.
Replace O-ring (8) with a new O-ring. Depending on the assembly.
Assembly type A
7 / 24
 Loading...