


KX-TGA571S
Installation Manual
5.8 GHz Expandable Digital Cordless Handset
Model No.
Model No. KX-TGA571
Model shown is KX-TGA570.
Thank you for purchasing a Panasonic cordless telephone.
This handset is an accessory handset for use with Panasonic base units
KX-TG5761/KX-TG5766/KX-TG5767/KX-TG5771/KX-TG5776/
KX-TG5777. You must register this handset with your base unit before it
can be used.
This installation manual describes only the steps needed to register and
begin using the handset. Please read the base unit’s operating
instructions for further details.
KX-TGA570
Charge the battery for 7 hours before initial use.
Please read this Installation Manual before using the unit and save for
future reference.
For assistance, visit our website:
http://www.panasonic.com/phonehelp for customers in the U.S.A. or
Puerto Rico.
PQQX15022ZA DM0206SN1046
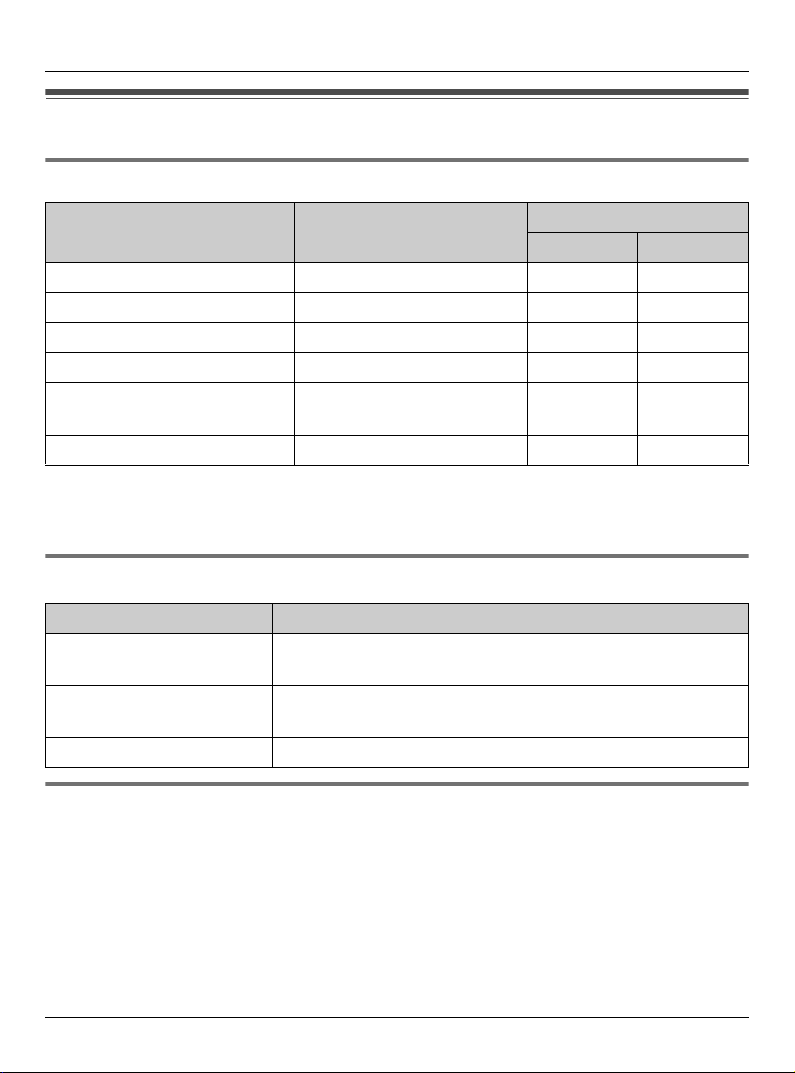
Accessory information
Included accessories
Accessory item Order number
Charger PQLV30043ZS 1 1
AC adaptor for charger PQLV207Z 1 1
Battery HHR-P105 1 1
Handset cover
USB cable PQJA10166Z or
CD-ROM
*1 The handset cover comes attached to the handset.
*2 Both of the USB cables function well.
*3 Allows you to install the GIGARANGE USB Utility software on a compatible computer.
*1
*3
PQYNTG5771SR 1 1
PQJA10177Z
PQJKTG5776Z – 1
Quantity
KX-TGA570 KX-TGA571
*2
–1
Additional/replacement accessories
Accessory item Order number
Rechargeable nickel metal
hydride (Ni-MH) battery
Headset KX-TCA60, KX-TCA86, KX-TCA88HA, KX-TCA91,
Belt clip PQKE10457Z1
HHR-P105
KX-TCA92, or KX-TCA98
Sales and support information
L To order additional/replacement accessories, call 1-800-332-5368.
L TTY users (hearing or speech impaired users) can call 1-866-605-1277.
2 For assistance, please visit http://www.panasonic.com/consumersupport
Setting up the handset
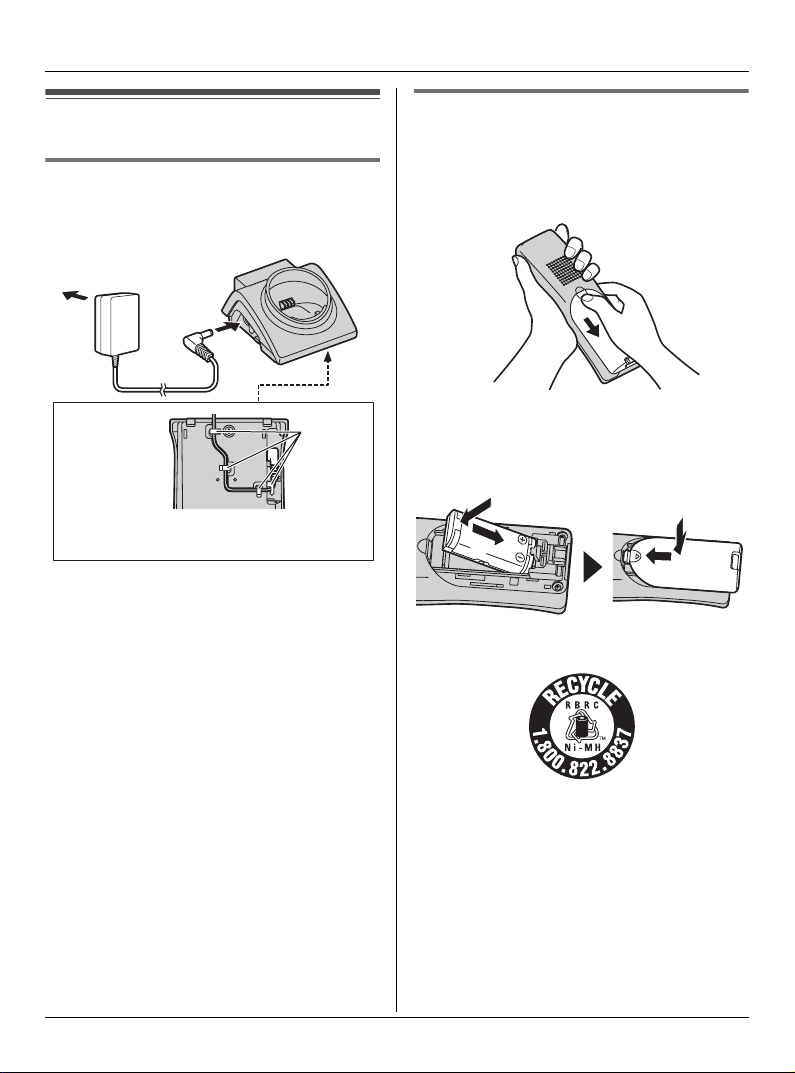
Connecting the charger
L Use only the included Panasonic AC
adaptor PQLV207.
(120 V AC, 60 Hz)
Battery installation
1 Press the notch of the handset cover
firmly, and slide it in the direction of the
arrow.
Bottom of
the charger
Fasten the AC adaptor cord to prevent
it from being disconnected.
Note:
L The AC adaptor must remain connected
at all times. (It is normal for the adaptor
to feel warm during use.)
L The AC adaptor should be connected to
a vertically oriented or floor-mounted AC
outlet. Do not connect the AC adaptor to
a ceiling-mounted AC outlet, as the
weight of the adaptor may cause it to
become disconnected.
Hooks
2 Insert the battery (A), and press it
down until it snaps into position (B).
Then close the handset cover (C, D).
B
C
A
D
Attention:
A nickel metal hydride battery that is
recyclable powers the product you have
purchased.
Please call 1-800-8-BATTERY (1-800822-8837) for information on how to
recycle this battery.
For assistance, please visit http://www.panasonic.com/consumersupport 3
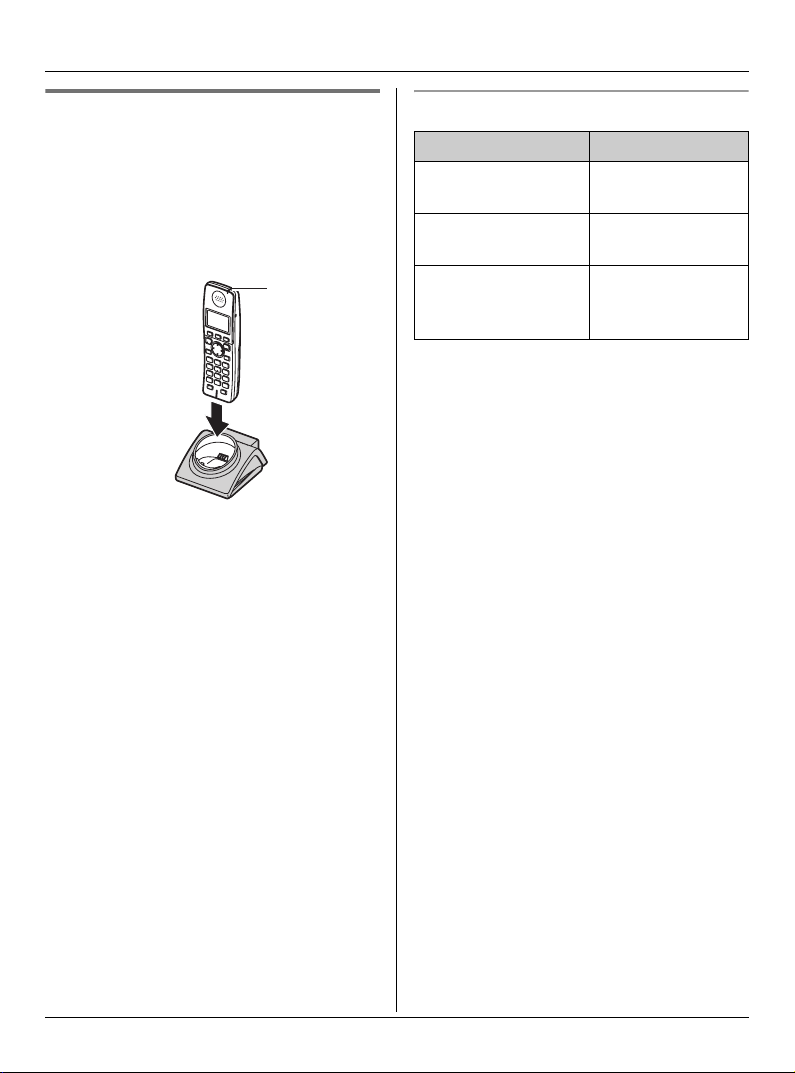
Battery charge
Place the handset on the charger for 7
hours before initial use.
While charging, the charge indicator on the
handset lights in amber. When the battery
is fully charged, the indicator lights in
green.
Charge
indicator
L Handset shown is KX-TGA570.
Note:
L If you want to use the handset
immediately, charge the battery for at
least 15 minutes.
L To ensure that the battery charges
properly, clean the charge contacts of
the handset and charger with a soft, dry
cloth once a month. Clean more often if
the unit is subject to the exposure of
grease, dust, or high humidity.
Panasonic battery performance
Operation Operating time
While in use
(talking)
While not in use
(standby)
While using the
clarity booster
feature
Note:
L The handset can be left on the charger
without any ill effect on the battery.
L The battery level may not be displayed
correctly after you replace the battery. In
this case, place the handset on the
charger and let charge for 7 hours.
Up to 5 hours
Up to 7 days
Up to 3 hours
4 For assistance, please visit http://www.panasonic.com/consumersupport

Registration
Register the handset to a KX-TG5761/KXTG5766/KX-TG5767/KX-TG5771/KXTG5776/KX-TG5777 base unit.
1 Base unit:
Press and hold {INTERCOM} until the
IN USE indicator flashes.
L After the IN USE indicator starts
flashing, the rest of the procedure
must be completed within 90
seconds.
2 Handset:
Press {OK}, then wait until a beep
sounds.
Changing the display language
1 {MENU} (middle soft key) i
{#}{1}{1}{0}
2 Select the desired setting.
3 Press the middle soft key to save. i
{OFF}
For assistance, please visit http://www.panasonic.com/consumersupport 5

Headset (optional)
Wall mounting
Connecting a headset to the handset
allows hands-free phone conversations.
We recommend using the Panasonic
headset noted on page 2.
L Headset shown is KX-TCA86.
L Handset shown is KX-TGA570.
1 Drive the screws (not included) into the
wall using the wall mount template as a
guide.
25.4 mm
(1 inch)
Screws
(120 V AC, 60 Hz)
2 Mount the charger (A), then slide it
down (B) and to the right (C) until it is
secure.
A
B
C
Wall mount template for the charger
25.4 mm
(1 inch)
6 For assistance, please visit http://www.panasonic.com/consumersupport
 Loading...