


Color LaserJet Pro |
2 |
MFP M477 |
|
Getting Started Guide |
|
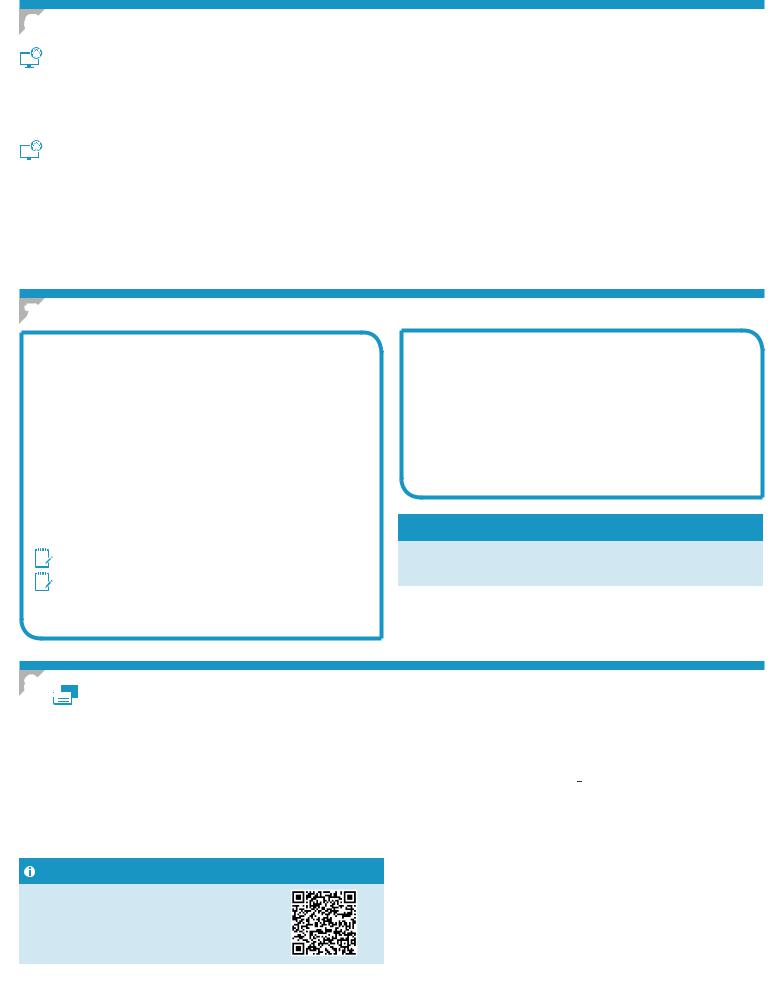
IMPORTANT:
Follow Steps 1 - 3 on the printer hardware setup poster, and then continue with Step 4.
1
www.hp.com/support/colorljM477MFP |
www.register.hp.com |
4. Initial setup on the control panel
After turning on the printer, wait for it to initialize. To navigate the control panel, use touch, swipe, and scrollgestures.Followthepromptsonthecontrolpaneltoconfigurethesesettings:
•Language
•Location
•Default Settings
Under Default Settings select one of these options:
•Self-managed: Optimized default settings for most users that include guided setup and configuration steps and automatic updates.
•IT-managed: Optimized default settings for fleet manageability.
are fully customizable after initial setup.
NOTE: Select Print Information Page to print a page that instructs how to change the default settings.
NOTE: Touch the Help button on the printer control panel to access help topics.
English.............. |
1 |
Français............. |
6 |
Español............ |
12 |
Português........ |
18 |
5. Select a connection method and prepare for software installation
USB connection directly between the printer and the computer
Use an A-to-B type USB cable (not included with all models).
Windows
1.Do not connect the USB cable before installing the software. If the cable is already connected, disconnect it before continuing. The installation process prompts to connect the cable at the appropriate time.
Continue with “6.Locateordownloadthesoftwareinstallationfiles.”
NOTE: During software installation, select the option to Directly connect this computer using a USB cable. (Windows only)
Mac
1.For Mac, connect the USB cable between the computer and the printer before installing the software.
2.Continue with “6.Locateordownloadthesoftwareinstallationfiles.”
Wired (Ethernet) network connection
Use a standard network cable. (Cable not included.)
1.Connect the network cable to the printer and to the network. Wait a few minutes for the printer to acquire a network address.
2.On the control panel, touch the Connection Information 


 button. If an IP address is listed, the network connection has been established. If not, wait a few more minutes and try again. Note the IP address for use during software installation. Example IP address: 192.168.0.1
TomanuallyconfiguretheIPaddress,see“ManuallyconfiguretheIP address.”
3.Continue with “6.Locateordownloadthesoftwareinstallationfiles.”
NOTE: During software installation, select the option to Connect through a network. (Windows only)
Built-in wireless network connection
1.Touch the Connection Information 


 button.
2.Touch the Network Wi-Fi OFF button.
3.Touch the Settings button.
4.Touch the Wireless Setup Wizard item.
5.Select the correct network SSID from the list. If you do not see the SSID, touch Enter SSID and provide the network SSID manually.
6.Use the keyboard to enter the passphrase, and then touch the OK button.
7.Wait while the printer establishes a network connection.
8.Touch the Connection Information 


 button. If an IP address is listed, the network connection has been established. If not, wait a few more minutes and try again. Note the IP address for use during software installation. Example IP address: 192.168.0.1
9.To print from a computer, continue with “6. Locate or download the softwareinstallationfiles.”To print from a phone or tablet only, continue with “8.Mobileandwirelessprinting.”
NOTE: During software installation, select the option to Connect through a network. (Windows only)
 ManuallyconfiguretheIPaddress
See the printer user guide for information on how to manually configure the IP address. See the “Troubleshooting” section of this guide.
1
6. Locateordownloadthesoftwareinstallationfiles
 Method 1: Download from HP Easy Start (Windows and OS X)
1.Go to 123.hp.com/laserjet, and click Download.
2.Followtheonscreeninstructionsandpromptstosavethefiletothecomputer.
3.Launchthesoftwarefilefromthefolderwherethefilewassaved,andcontinue with “7.Installthesoftware.”
 Method 2: Download from printer support Web site (Windows and OS X)
1.Go to www.hp.com/support/colorljM477MFP.
2.Select Software and drivers.
3.Download the software for your printer model and operating system.
4.Launchtheinstallationfilebyclickingonthe.exeor.zipfileasnecessary,and continue with “7.Installthesoftware.”
 Method 3: Install from the printer CD (Windows only)
1.Insert the printer CD into the computer.
2.Continue with “7.Installthesoftware.”
7. Install the software
Windows solution
1.The software installer detects the language of the operating system, and then it displays the main menu of the installation program in the same language. When installing from the CD, if the installer program does not start after 30 seconds, browse the CD drive on the computer and launch thefilenamedSETUP.EXE.
2.The Software Selection screen details the software to be installed.
•The recommended software installation includes the print driver and software for all available printer features.
•To customize the software installed, click the Customize software selections link.Whenfinished,clicktheNext button.
3.Follow the on-screen instructions to install the software.
4.When prompted to select a connection type, select the appropriate option for the type of connection:
•Directly connect this computer using a USB cable
•Connect through a network
Helpmesetupafirst-timewirelessconnection
 NOTE: When connecting through a network, the easiest way to detect the printer is to select Automaticallyfindmyprinteronthenetwork.
 NOTE: For wireless installation, select the option to Help me set up afirst-timewirelessconnection, and then select Yes, retrieve the wireless settings on my computer.
OS X solution
1.The software installer detects the language of the operating system, and then it displays the main menu of the installation program in the same language.
2.Follow the on-screen instructions to install the software. When prompted, connect the printer using the appropriate cable for the connection type, or ensure that the printer is prepared for wireless communication.
3.At the end of the software installation process, use the HP Utility Setup Assistant toconfigureprinteroptions.
 Install Notes
Not all software components are available for all operating systems.
Formoreinformation,seetheinstallnotesfileontheprinterCD.
8.  Mobile and wireless printing (optional)
To print from a phone or tablet, connect the device to the same wireless network as the printer.
Apple iOS devices (AirPrint): Open the item to print, and select the Action icon. Select Print, select the printer, and then select Print.
Newer Android devices (4.4 or newer): Open the item to print, and select the Menu button. Select Print, select the printer, and select Print.
Some devices require downloading the HP Print Service plugin app from the Google Play store.
Older Android devices (4.3 or older): Download the HP ePrint app from the Google Play store.
Windows Phone: Download the HP AiO Remote app from the Windows Store.
Learn More About Mobile Printing
To learn more about other mobile printing options, including additional ePrint solutions, scan the QR code, orseethe“Mobileprinting”sectionoftheuserguide.
Wi-Fi Direct
Wi-Fi Direct enables close-proximity printing from a wireless mobile device directly to a Wi-Fi Direct-enabled printer without requiring a connection to a network or the Internet.
Enable Wi-Fi Direct
1.Touch the Connection Information 


 button.
2.Touch the Wi-Fi Direct OFF button.
3.Touch the Settings button.
4.Select the On/Offitem, and then select On.
5.For secure printing, select Security, and then select On. Note the passphrase that displays. Use this passphrase to allow access to the mobile devices.
To allow unsecured printing, select Security, and then select Off.
 For more information on wireless printing and wireless setup, go to www.hp.com/go/wirelessprinting.
2

9. Set up HP ePrint via email (optional)
Use HP ePrint via email to print documents by sending them as an email attachment to the printer’s email address from any email-enabled device, even from devices that are not on the same network.
To use HP ePrint via email, the printer must meet these requirements:
•The printer must be connected to a wired or wireless network and have Internet access.
•HP Web Services must be enabled on the printer, and the printer must be registered with HP Connected.
Enable HP Web Services


 NOTE: Before enabling HP Web Services, verify that the printer is connected to a network.
1.Touch the Apps  button.
2.In the Enable Web Services screen, touch OK.
The printer enables Web Services. Use the Print button to print an information page. The information page contains a printer code necessary to register the HP printer at HP Connected.
3.Go to www.hpconnected.com com to create an HP ePrint account and complete the setup process.
10. Set up scan features for printers on a network (optional)
TheprinterincludesScantoEmailandScantoNetworkFolderfeaturesthatscanfilesandsendthemasanemailattachmentorsavetheminafolderonthenetwork.Theprinter must be connected to a wired or wireless network.
• For the Scan to Email feature, obtain the SMTP server name, SMTP port number, and authentication information. Contact the email/Internet service provider or system administratorforthisinformation.SMTPservernamesandportnamesaretypicallyeasytofindbydoinganInternetsearch.
Forexample,searchfortermslike“gmailsmtpservername”or“yahoosmtpservername.”
• For the Scan to Network Folder feature,confirmthatasharednetworkfolderwithproperpermissionsissetup,andknowthepathtothatfolderonthenetwork.

 NOTE: For more help on setting up Scan to Email and Scan to Network Folder, see the user guide, or go to www.hp.com/support/colorljM477MFP and search using keywords“scantoemail”or“scantonetworkfolder.”
Windows
The set up wizards for Windows 7, Windows 8.1, and Windows 10 include the optionsforbasicconfiguration
Set up Scan to Network Folder
1.Start the Scan to Network Folder Wizard.
Windows 7
a.Click Start, and then click Programs.
b.Click HP, click the name of the printer, and then click Scan to Network Folder Wizard.
c.In the NetworkFolderProfilesdialog, click the New button. The Scan to Network Folder Setup dialog opens.
Windows 8.1, Windows 10
a.FromthecomputerStartscreen,eithertype“HPAIORemote”andthen select the HP AIO Remote app in the search results, or click the existing HP AIO Remote icon.
b.Scroll or swipe to the right. In the Toolbox section, select Set Preferences.
c.In the Scan section, select Scan to Network Folder.
2.Follow the onscreen instructions and enter the necessary information that you noted earlier to complete the process.
3.On the Finish page or screen, select Finish or Save tofinishthesetup process.
OS X
TosetupthescanfeaturesinOSX,openHPUtility.HPUtilityislocatedinthe
Applications/HP folder.
Set up Scan to Email
1.In HP Utility, click the Scan to E-mail icon.
2.Click Begin Scan to E-mail Setup toopentheHPEmbeddedWebServer (EWS).
3.IntheEWS,clicktheSystem tab, click the Administrationlink, and then set the Scan to Email option to On.
4.Click the Scan tab, click the OutgoingE-mailProfileslink, and then click the New button.
5.In the E-mail Address area,fillintherequiredfields.
6.In the SMTP Server Settings area,fillintherequiredfields.


 NOTE: In most cases, the default port number does not need to be changed.
7.Review all the information, and then click Save and Test.
Set up Scan to Email
1.StarttheScantoEmailWizard.
Windows 7
a.Click Start, and then click Programs.
b.Click HP, click the name of the printer, and then click Scan to Email Wizard.
c.In the OutgoingEmailProfilesdialog, click the New button. The Scan to Email Setup dialog opens.
Windows 8.1, Windows 10
a.FromthecomputerStartscreen,eithertype“HPAIORemote”andthen select the HP AIO Remote app in the search results, or click the existing HP AIO Remote icon.
b.Scroll or swipe to the right. In the Toolbox section, select Set Preferences.
c.In the Scan section, select Scan to Email.
d.Confirmorchangethesystemsettings,andthenselectSave. The
ConfigureEmailscreen opens.
2.Follow the onscreen instructions and enter the necessary information that you noted earlier to complete the process.


 NOTE: In the 2. Authenticate page (Windows 7) or the SMTP Settings screen (Windows 8.1, 10), if you are using Google™ Gmail for email service, select the check box that ensures that you use an SSL/TLS secure connection.
3.On the Finish page or screen, select Finish or Save tofinishthesetup process.
Set up Scan to Network Folder
1.In HP Utility, click the Scan to Network Folder icon.
2.Click Register My Shared Folder toopentheHPEmbeddedWebServer (EWS).
3.IntheEWS,clicktheSystem tab, click the Administration link, and then set the Scan to Network Folder option to On.
4.Click the Scan tab, and then make sure that the Network Folder Setup link is highlighted.
5.On the NetworkFolderConfigurationpage, click the New button.
6.In the NetworkFolderConfigurationarea,fillintherequiredfields.Creating a security PIN is optional.
7.In the Scan Settings area,fillintherequiredfields.
8.Review all the information, and then click Save and Test.
3
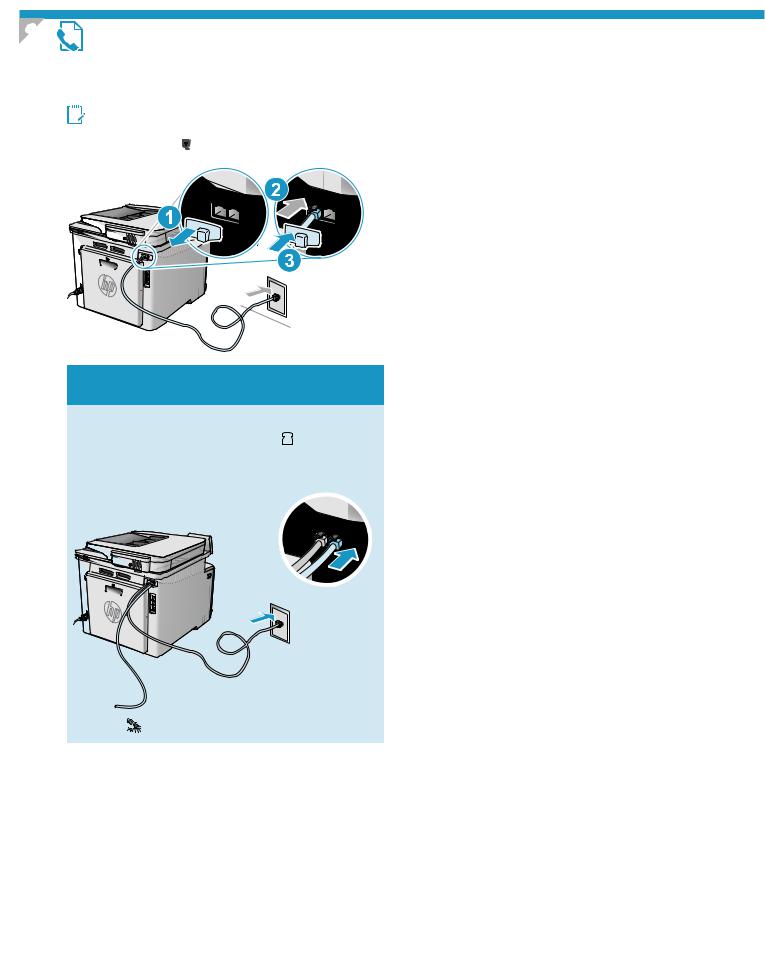
11 Set up fax (optional)
11.1 Connect the printer |
11.2 Configuretheprinter |
|||
The printer is an analog device. HP recommends using the printer on a |
Configuring the fax time, date, and header settings is required to use |
|||
dedicated analog telephone line. |
the fax feature. The easiest method is to use the Fax Set-Up Utility. |
|||
NOTE: Some countries/regions might require an adapter for the |
Alternately, configure these and other basic fax settings in the Basic |
|||
phone cord that came with the printer. |
Setup menu. |
|
||
Remove the cover from the fax ports. Connect the phone cord that came |
Fax Set-Up Utility |
|
||
with the printer to the fax port on the printer and to the telephone |
1. |
From the Home screen on the printer control panel, swipe to and |
||
jack on the wall. Reinstall the fax port cover. |
||||
|
touch the Setup |
button. |
||
|
|
|||
|
2. |
Select Fax Setup, and then select Fax Set-Up Utility. |
||
|
3. |
Follow the on-screen prompts to configure the essential |
||
|
|
fax settings. |
|
|
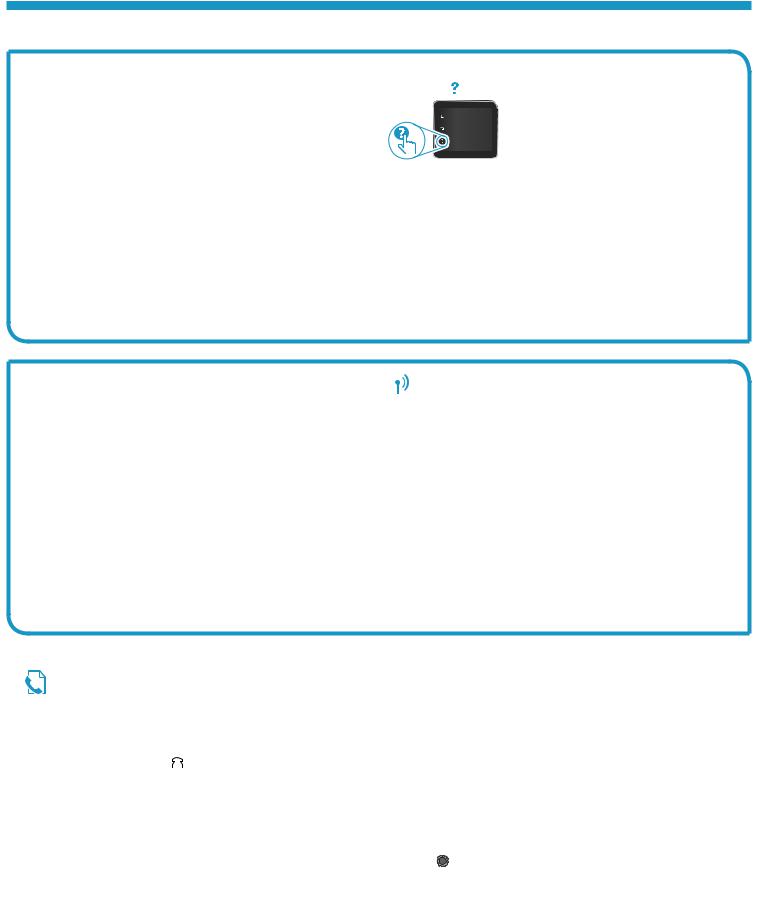
 How do I connect an answering machine or extension phone?
1.Remove the cover from the fax ports.
2.Disconnect the answering machine phone cord from the phone
jack, and then connect it to the phone port on the printer.
3.Connect the phone cord that came with the printer to the fax port on the printer and to the telephone jack on the wall.
4.Reinstall the fax port cover.
Basic Setup menu
1.From the Home screen on the printer control panel, swipe to and touch the Setup  button.
2.Select Fax Setup, and then select Basic Setup.
3.Select Time/Date.
4.Select the 12-hour clock or 24-hour clock.
5.Use the keypad to enter the current time, and then touch the OK button.
6.Select the date format.
7.Use the keypad to enter the current date, and then touch the OK button.
8.Select Fax Header.
9.Use the keypad to enter the fax number, and then touch the OK button.


 NOTE: The maximum number of characters for the fax number is 20.
10.Use the keypad to enter your company name or header, and then touch the OK button.
To enter special characters that are not on the standard keypad, touch the @#$ button to open a keypad that contains special characters.
 NOTE: The maximum number of characters for the fax header is 40.
 How do I set up HP printers in digital phone environments?
HPprintersaredesignedspecificallyforusewithtraditionalanalogphone services.Foradigitalphoneenvironment(suchasDSL/ADSL,PBX,ISDN, orFoIP),digital-to-analogfiltersorconvertersmightbenecessarywhen setting up the printer for fax.
Note: Depending on the phone company, the printer might not be compatible with all digital service lines or providers, in all digital environments, or with all digital-to-analog converters. Contact the phone company to determine which setup options are best.
Note: WhensettingupringpatterndetectioninaPBXphonesystem thathasdifferentringpatternsforinternalandexternalcalls,makesure to dial the printer fax number using an external number for recording the ring pattern.
 Learn more!
For more information about other ways to send faxes, such as scheduling a fax to be sent later or sending faxes from a computer, see the user guide on the printer CD or go to www.hp.com/support/colorljM477MFP.
The user guide also includes information about configuring the printer as a stand-alone fax machine, or for use with an answering machine or extension phone.
4
Troubleshooting
User guide
The user guide includes printer usage and troubleshooting information. It is available on the printer CD and on the Web:
1.Go to www.hp.com/support/colorljM477MFP.
2.Click Manuals.
For Windows, the user guide is copied to the computer during the recommended software installation.
Windows® XP, Windows Vista®, and Windows® 7:
Click Start, select Programs or All Programs, select HP, select the folder for the HP printer, and then select Help.
Windows® 8:
On the Start screen, right-click an empty area on the screen, click All Apps on the app bar, click the icon with the printer’s name, and then select Help.
Checkforfirmwareupdates
1.On the control panel, swipe the control panel screen and touch the Setup button.
2.Open the Service menu.
3.Select LaserJet Update.
4.Select Check for Updates Now.
Control panel help
Touch the Help button on the printer control panel to access help topics.
Additional support resources
For HP’s all-inclusive help for the printer, go to www.hp.com/support/colorljM477MFP:
•Solve problems
•Find advanced configuration instructions
•Download software updates
•Join support forums
•Find warranty and regulatory information
•Access mobile printing resources
 Wired (Ethernet) network connection
•Verify that the printer is attached to the correct network port using a cable of the correct length.
•Verify that the lights next to the network port are lit.
•Verify that the print driver is installed on the computer.
•Test the network connection by pinging the printer:
Windows: Click Start > Run. Type cmd, and press Enter. Type ping, type a space, type the printer IP address, and then press Enter. Example IP address: 192.168.0.1
OS X: Open the Network Utility, and type the IP address in the ping pane. Press Enter. Example IP address: 192.168.0.1
•If the window displays round-trip times, the network is working.
•If the ping does not work, try restarting the printer and recheck all of the connection steps.
 Wireless network connection
•Verify that the network cable is not connected. The printer cannot connect to a wireless network when a network cable is connected.
•Verify that the printer and wireless router are turned on and have power. Also make sure the wireless switch is turned on.
•Verify that the printer is within the range of the wireless network. For most networks, the printer must be within 30 m (100 ft) of the wireless access point (wireless router).
•Verify that the print driver is installed on the computer.
•Verify that the computer and printer connect to the same wireless network.
•For Mac, verify that the wireless router supports Bonjour.
•Restart the wireless router.
Perform the wireless diagnostic test
1.On the control panel, swipe the control panel screen and touch the Setup button.
2.Select Self Diagnostics, and then select Run Wireless Test.
Fax troubleshooting
Verify the physical connection
•Verify that the phone cord is connected to the fax  port on the back of the printer and to the wall jack.
•For an extension phone or other additional device, verify that the phone cord
is connected to the telephone |
port on the back of the printer and to the |
device. |
|
•If outgoing phone calls fail because no dial tone is detected or the line is busy, connecttoadifferentphoneline.
•ForFaxoverIPservice,reducethefaxspeedandturnoffError Correction Mode from the Fax Settings menu on the printer control panel.
Verify the printer fax settings
•To use a voice-mail service from the phone company or service provider, make sure that the printer Rings to Answer setting is set to be fewer rings than the telephone answering machine.
•If multiple phone numbers are assigned to the same physical phone line and the line is shared by multiple devices, make sure that the printer is set to the correct distinctive ring setting. Use a setting in which the printer answers faxes and ignores other ring types.
•ConfiguringtheFax Speed setting to Medium (V.17) or Slow (V.29) also can improve your ability to send a fax.
Perform the fax diagnostic test
1. From |
Home screen on the printer control panel, swipe to and touch the |
Setup |
button. |
2.Select Self Diagnostics, and then select Run Fax Test.
5

English.............. |
1 |
Français............. |
6 |
Español............ |
12 |
Português........ |
18 |
Guide de démarrage Color LaserJet Pro MFP M477
 IMPORTANT:
Suivez les étapes1
à 3 sur l’affiche de configuration matérielle de l’imprimante, puis passez à l’étape4.
1
www.hp.com/support/colorljM477MFP |
www.register.hp.com |
4.Configurationinitialesurlepanneaude commande
Après avoir allumé l’imprimante, attendez son initialisation. Pour naviguer dans le panneau de commande, utilisez des gestes de toucher, glissement et défilement. Suivez les instructions sur le panneau de commande pour configurer ces paramètres :
•Langue
•Emplacement
•Paramètres par défaut
Dans Paramètres par défaut, sélectionnez l’une des options suivantes :
•Autogéré : paramètres par défaut optimisés pour la plupart des utilisateurs qui incluent des étapes d’installation et de configuration guidées et des mises à jour automatiques.
•Géré par le service informatique : paramètres par défaut optimisés pour la facilité de gestion de la flotte.
paramètres sont entièrement personnalisables après la configuration initiale.
 REMARQUE:Sélectionnez la page Informations relatives à l’impression pour imprimer une page qui indique comment modifier les paramètres par défaut.
REMARQUE:Appuyez sur le bouton Aide sur le panneau de commande de l’imprimante pour accéder aux rubriques d’aide.
5. Sélection d’une méthode de connexion et préparation à l’installation du logiciel
Connexion USB directement entre l’imprimante et l’ordinateur
Utilisez un câble USB de type A-à-B (inclus uniquement avec certains modèles).
Windows
1.Ne connectez pas le câble USB avant d’installer le logiciel. Si le câble est déjà branché, débranchez-le avant de continuer. Le processus d’installation vous invite à connecter le câble au moment opportun.
2.Passez à la section « 6. Localiser ou télécharger les fichiers d’installation du logiciel. »
 REMARQUE:Lors de l’installation du logiciel, sélectionnez l’option pour Connecterdirectementcetordinateuràl’aided’uncâbleUSB. (Windows uniquement)
Mac
1.Pour Mac, branchez le câble USB entre l’ordinateur et l’imprimante avant d’installer le logiciel.
2.Passez à la section « 6. Localiser ou télécharger les fichiers d’installation du logiciel. »
Connexionàunréseaufilaire(Ethernet)
Utilisez un câble réseau standard. (Câble non inclus.)
1.Branchez le câble réseau à l’imprimante et au réseau. Attendez quelques minutes que l’imprimante acquière une adresse réseau.
2.Sur le panneau de commande, appuyez sur le bouton Informations relatives à la connexion 


 . Si une adresse IP est indiquée, la connexion au réseau a été établie. Si ce n’est pas le cas, patientez quelques minutes et réessayez. Notez l’adresse IP à utiliser lors de l’installation du logiciel. Exemple d’adresse IP : 192.168.0.1
Pour configurer manuellement l’adresse IP, reportez-vous à la section « Configurer manuellement l’adresse IP. »
Connexionauréseausansfilintégrée
1.Appuyez sur le bouton des informations de connexion 


 .
.
2.Appuyez sur le bouton Réseau Wi-Fi DÉSACTIVÉ.
3.Appuyez sur le bouton Paramètres.
4.Appuyez sur l’élément Assistantdeconfigurationsansfil.
5.Sélectionnez le SSID du réseau approprié dans la liste. Si vous ne voyez pas le SSID, appuyez sur Saisir SSID et entrez le SSID du réseau manuellement.
6.Entrez la phrase secrète à l’aide du clavier, puis appuyez sur OK.
7.Patientez pendant que l’imprimante établit une connexion réseau.
8.Appuyez sur le bouton des informations de connexion 


 . Si une adresse IP est indiquée, la connexion au réseau a été établie. Si ce n’est pas le cas, patientez quelques minutes et réessayez. Notez l’adresse IP à utiliser lors de l’installation du logiciel. Exempled’adresseIP: 192.168.0.1
9.Pour imprimer depuis un ordinateur, passez à l’étape « 6. Localiser ou télécharger les fichiers d’installation du logiciel. » Pour imprimer à partir d’un téléphone ou d’une tablette uniquement, poursuivez avec la section « 8. Impression mobile et sans fil. »
REMARQUE:Lors de l’installation du logiciel, sélectionnez l’option
Seconnecterviaunréseau. (Windows uniquement)
 Configurermanuellementl’adresseIP
Consultez le Guide l’utilisateur de l’imprimante pour obtenir des informations sur la configuration manuelle de l’adresse IP. Reportez-vous à la section
« Dépannage » de ce guide.
3.Passez à la section « 6. Localiser ou télécharger les fichiers d’installation du logiciel. »
REMARQUE:Lors de l’installation du logiciel, sélectionnez l’option Se connecter via un réseau. (Windows uniquement)
6
6. Localiseroutéléchargerlesfichiersd’installationdulogiciel
 Méthode1:TéléchargementdepuisHPEasyStart
(Windows et OS X)
1.Visitez la page 123.hp.com/laserjet et cliquez sur Télécharger.
2.Suivez les instructions affichées à l’écran pour enregistrer le fichier sur l’ordinateur.
3.Lancez le fichier logiciel à partir du dossier dans lequel il a été enregistré, puis passez à l’étape « 7. Installer le logiciel ».
 Méthode2:TéléchargementdepuislesiteWeb
d’assistance de l’imprimante (Windows et OS X)
1.Visitez la page www.hp.com/support/colorljM477MFP.
2.Sélectionnez Logiciel et pilotes.
3.Téléchargez le logiciel correspondant au système d’exploitation et au modèle de votre imprimante.
4.Lancez le fichier d’installation en cliquant sur le fichier .exe ou .zip, le cas
échéant, et passez à l’étape « 7. Installer le logiciel ».
 Méthode 3:InstallationavecleCDdel’imprimante
(Windows uniquement)
1.Insérez le CD de l’imprimante dans votre ordinateur.
2.Passez à l’étape « 7. Installer le logiciel ».
7. Installation du logiciel
Solution Windows
1.Le logiciel d’installation détecte la langue du système d’exploitation, puis affiche le menu principal du programme d’installation dans la même langue. Lors de l’installation à partir du CD, si le programme d’installation ne démarre pas après 30 secondes, parcourez le lecteur du CD de l’ordinateur et lancez le fichier nommé setup.exe.
2.L’écran Sélection de logiciels indique les logiciels à installer.
•L’installation logicielle recommandée inclut le pilote d’impression et les logiciels pour toutes les fonctionnalités de l’imprimante disponibles.
•Pour personnaliser le logiciel installé, cliquez sur le lien
Personnaliser les sélections de logiciel. Lorsque vous avez terminé, cliquez sur le bouton Suivant.
3.Suivez les instructions à l’écran pour installer le logiciel.
4.Lorsque vous êtes invité à sélectionner un type de connexion, sélectionnez l’option appropriée pour le type de connexion :
•Se connecter directement à cet ordinateur à l’aide d’un câble USB
•Se connecter via un réseau
Aidez-moiàétabliruneconnexionsansfilpourlapremièrefois
REMARQUE:Lors de la connexion à travers un réseau, la meilleure façon de détecter l’imprimante est de sélectionner Trouver automatiquement mon imprimante sur le réseau.
 REMARQUE:Pour une installation sans fil, sélectionnez l’option
Aidez-moiàétabliruneconnexionsansfilpourlapremièrefois, puis sélectionnez Oui,récupérerlesparamètressansfilsurmon ordinateur.
Solution OS X
1.Le logiciel d’installation détecte la langue du système d’exploitation, puis affiche le menu principal du programme d’installation dans la même langue.
2.Suivez les instructions à l’écran pour installer le logiciel. Lorsque vous y êtes invité, connectez l’imprimante en utilisant le câble approprié au type de connexion, ou assurez-vous que l’imprimante est prête pour la communication sans fil.
3.À la fin du processus d’installation du logiciel, utilisez l’assistant deconfigurationdeHPUtility pour configurer les options de l’imprimante.
Notes d’installation
Les composants logiciels ne sont pas tous disponibles dans tous les systèmes d’exploitation. Pour plus d’informations, consultez le fichier des notes d’installation sur le CD de l’imprimante.
7
8.  Imprimeràpartird’unpériphériquemobileousansfil(facultatif)
Pour imprimer depuis un téléphone ou une tablette, connectez le périphérique au même réseau sans fil que l’imprimante.
Périphériques Apple iOS (AirPrint) : ouvrez le document à imprimer, puis sélectionnez l’icône Action. Sélectionnez Imprimer, puis l’imprimante et appuyez sur Imprimer.
Périphériques Android les plus récents (4.4 ou plus récent) : ouvrez le document
à imprimer, puis sélectionnez le bouton Menu. Sélectionnez Imprimer, puis l’imprimante et appuyez sur Imprimer.
Certains périphériques nécessitent le téléchargement de l’appli plugin HP Print Service, disponible sur Google Play.
Périphériques Android plus anciens (4.3 ou plus ancien) : téléchargez l’application HP ePrint sur Google Play.
WindowsPhone: téléchargez l’application HP AiO Remote dans le Windows Store.
En savoir plus sur l’impression mobile
Pour en savoir plus sur les autres options de l’impression mobile, consultez la section relative à l’impression mobile dans le Manuel de l’utilisateur.
Wi-Fi Direct
La fonctionnalité Wi-Fi Direct permet d’imprimer en proximité immédiate depuis un périphérique mobile sans fil directement sur une imprimante disposant de cette même fonctionnalité sans vous connecter à un réseau ou Internet.
Activer Wi-Fi Direct
1.Appuyez sur le bouton des informations de connexion 


 .
.
2.Appuyez sur le bouton Réseau Wi-Fi DÉSACTIVÉ.
3.Appuyez sur le bouton Paramètres.
4.Sélectionnez l’élément Activé/Désactivé, puis Activé.
5.Pour l’impression sécurisée, sélectionnez Sécurité, puis Activée.
Notez la phrase secrète qui apparaît. Utilisez cette phrase pour autoriser l’accès aux appareils mobiles.
Pour permettre l’impression non sécurisé, sélectionnez Sécurité, puis Désactivée.
Pour obtenir plus d’informations sur l’impression sans fil et la configuration sans fil, accédez à www.hp.com/go/wirelessprinting.
9. ConfigurerHPePrintviamessagerieélectronique(facultatif)
Utilisez HP ePrint via messagerie électronique pour imprimer des documents en les envoyant en pièce jointe à l’adresse électronique de l’imprimante depuis n’importe quel périphérique activé pour cette fonction, même ceux qui ne sont pas sur le même réseau.
Pour utiliser HP ePrint via messagerie électronique, l’imprimante doit répondre aux exigences suivantes :
•L’imprimante doit être connectée à un réseau câblé ou sans fil et avoir accès à
Internet.
•Les services Web HP doivent être activés sur l’imprimante et celle-ci doit être enregistrée auprès de HP Connected.
Activer les Services Web HP

 REMARQUE:Avant d’activer les services Web HP, vérifiez que l’imprimante
 est connectée à un réseau.
1.Appuyez sur le bouton Apps  .
.
2.Dans l’écran Activer les services Web, appuyez sur OK.
L’imprimante active les services Web. Utilisez le bouton Imprimer pour imprimer une page d’informations. Celle-ci contient le code de l’imprimante nécessaire pour enregistrer le produit HP sur HP Connected.
3.Rendez-vous sur www.hpconnected.com pour créer un compte HP ePrint et terminer le processus de configuration.
10. Configurerdesfonctionsdenumérisationpourdes
imprimantes sur un réseau (facultatif)
L’imprimante comprend les fonctions Numériser vers la messagerie et Numériser vers un dossier réseau qui permettent de numériser les fichiers et de les envoyer en pièce jointe à une adresse électronique ou de les sauvegarder dans un dossier sur le réseau. L’imprimante doit être connectée à un réseau câblé ou sans fil.
•Pour la fonction Numériser vers la messagerie, obtenez le nom du serveur SMTP, le numéro de port SMTP et les informations d’authentification. Contactez le fournisseur d’accès Internet/de messagerie ou votre administrateur système pour obtenir ces informations. Les noms de serveur SMTP et les noms de port sont généralement faciles à trouver en effectuant une recherche sur Internet.
Recherchez par exemple des mots-clés du type « nom de serveur smtp gmail » ou « nom de serveur smtp yahoo ».
•Pour la fonction Numériser vers un dossier réseau, confirmez qu’un dossier réseau partagé avec des autorisations appropriées est configuré et que vous connaissez
le chemin de ce dossier sur le réseau.

 REMARQUE:Pour obtenir de l’aide sur la configuration des options de numérisation vers la messagerie et de numérisation vers un dossier réseau, consultez le Manuel de l’utilisateur, ou accédez à www.hp.com/support/colorljM477MFP et effectuez une recherche en utilisant les mots-clés « numériser vers messagerie » ou « numériser vers dossier réseau ».
8
 Loading...