


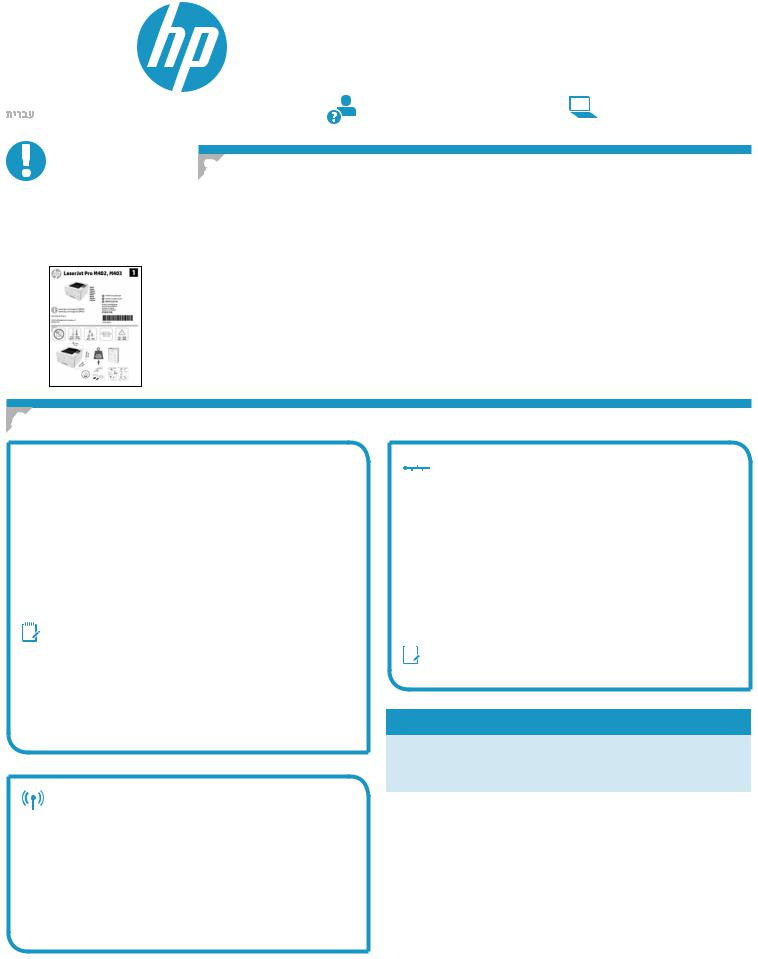
LaserJetProM402,M403 |
2 |
..............English |
1 |
|||
|
|
|
||||
Français |
4 |
|||||
Getting Started Guide |
||||||
Español.............. |
7 |
|||||
|
|
|
Português........ |
10 |
||
|
www.hp.com/support/ljM402 |
www.register.hp.com |
............... |
13 |
||
IMPORTANT: |
www.hp.com/support/ljM403 |
|
|
|
|
|
|
|
|
|
|
||
|
|
|
|
|
||
Follow Steps 1 - 2 on the printer hardware setup poster, then continue
with Step 3.
3. Initial setup on the control panel
Afterturningontheprinter,waitforittoinitialize.Followthepromptsandusethearrowkeysonthecontrolpaneltoconfigure these settings:
•Language
•Location
•Default settings
Under Default Settings select one of these options:
•Self-managed: Optimizeddefaultsettingsforaguidedexperienceonsetups,configurations,andupdates.
•IT-managed: optimizeddefaultsettingsforfleetmanageabilitywithenhancedsecurity.
Settingsarefullycustomizableafterinitialsetup.
4.Select a connection method and prepare for software installation
 USB connection directly between the printer and the computer
UseanA-to-BtypeUSBcable.
Windows
1.ForWindows7orlower,donotconnecttheUSBcablebeforeinstalling thesoftware.Theinstallationprocesspromptstoconnectthecableat theappropriatetime.Ifthecableisalreadyconnected,restarttheprinter wheninstallationpromptstoconnectthecable.
2.Continue with “5.Locateordownloadthesoftwareinstallationfiles.”
NOTE: During software installation, select the option to Directly connect this computer using a USB cable.
Mac
1.ForMac,connecttheUSBcablebetweenthecomputerandtheprinter beforeinstallingthesoftware.
2.Continue with “5.Locateordownloadthesoftwareinstallationfiles.”
Built-in wireless network connection (dw wireless model only)
1.To connect the printer to a wireless (Wi-Fi) network, make sure that the printer, access point, and computer are all turned on, and that the computer is connected to the wireless network.
2.AUSBcablewillberequired.
3.DisconnectanyUSBorEthernetcablethatisconnectedtotheprinter.
4.To print from a computer, continue to “5. Locate or download the softwareinstallationfiles.”
Wired (Ethernet) network connection
 Useastandardnetworkcable.
1.Connectthenetworkcabletotheprinterandtothenetwork.Waitafew minutesfortheprintertoacquireanetworkaddress.
2.On the printer control panel, press the OK button.OpentheNetwork Setup menu.ThecontrolpanelwillshowtheIPaddressbydefault.Note theIPaddressforuseduringsoftwareinstallation.ExampleIPaddress: 192.168.0.1
If the printer does not display the network address on the Home screen, manuallyconfiguretheIPaddressonthecontrolpanel.Tomanually configuretheIPaddress,see“ManuallyconfiguretheIPaddress.”
3.Continue with “5.Locateordownloadthesoftwareinstallationfiles.”


 NOTE: During software installation, select the option to Connect through a network.
 ManuallyconfiguretheIPaddress
For information on how to manually configure the IP address, see the printer
User Guide www.hp.com/support/ljM402 or www.hp.com/support/ljM403.
1
5. Locateordownloadthesoftwareinstallationfiles
 Method1:DownloadfromHPEasyStart(Windows
and OS X)
1.Go to 123.hp.com/laserjet, and click Download.
2.Followtheonscreeninstructionsandpromptstosavethefiletothecomputer.
3.Launchthesoftwarefilefromthefolderwherethefilewassaved,andcontinue with “6.Installthesoftware.”
3.Download the software for your printer model and operating system.
4.Launchtheinstallationfilebyclickingonthe.exeor.zipfileasnecessary,and continue with “6.Installthesoftware.”
 Method 3: Install from the printer CD (Windows only)
1.Insert the printer CD into the computer.
2.Continue with “6.Installthesoftware.”
 Method 2: Download from printer support Web site (Windows and OS X)
1.Go to www.hp.com/support/ljM402 or www.hp.com/support/ljM403.
2.Select Software and drivers.
6.Install the software
Windows solution
1.InserttheprinterCDintothecomputer,orlaunchthesoftwareinstallationfiledownloadedfromtheWeb.
2.The software installer detects the language of the operating system, and then it displays the main menu of the installation program in the same language. When installingfromtheCD,iftheinstallerprogramdoesnotstartafter30seconds,browsetheCDdriveonthecomputerandlaunchthefilenamedSETUP.EXE.
3.The Software Selection screendetailsthesoftwaretobeinstalled.
•The recommended software installation includes the print driver and software for all available printer features.
•To customize the software installed, click the Customize software selections link.Whenfinished,clicktheNext button.
4.Follow the on-screen instructions to install the software.
5.When prompted to select a connection type, select the appropriate option for the type of connection:
•Directly connect this computer using a USB cable
•Connect through a network
Helpmesetupafirst-timewirelessconnection
NOTE: When connecting through a network, the easiest way to detect the printer is to select Automaticallyfindmyprinteronthenetwork.
 NOTE: For wireless installation, select the option to Helpmesetupafirst-timewirelessconnection, and then select Yes,retrievethewirelesssettings onmycomputer.
OS X solution
1.The software installer detects the language of the operating system, and then it displays the main menu of the installation program in the same language.
2.Follow the on-screen instructions to install the software.
3.At the end of the software installation process, use the HPUtilitySetupAssistanttoconfigureprinteroptions.
7.  Mobile and wireless printing (optional)
7.1 Connectthedevicetothewirelessnetwork
Toprintfromaphoneortablet,connectthedevicetothesamewireless network as the printer.
AppleiOSdevices(AirPrint):Open the item to print, and select the Action icon. Select Print, select the printer, and then select Print.
NewerAndroiddevices(4.4ornewer):Open the item to print, and select the
Menu button.SelectPrint, select the printer, and select Print.
SomedevicesrequiredownloadingtheHPPrintServicepluginappfromthe GooglePlaystore.
OlderAndroidDevices(4.3orolder):DownloadtheHPePrintappfromthe GooglePlaystore.
WindowsPhone:DownloadtheHPAiORemoteappfromtheWindowsStore.
Learn more about mobile printing
Tolearnmoreaboutothermobileprintingoptions, includingadditionalePrintsolutions,scantheQRcode, orseethe“Mobileprinting”sectionoftheUserGuide.
7.2 Wi-Fi Direct (dw wireless model only)
Wi-FiDirectenablesclose-proximityprintingfromawirelessmobiledevice directlytoanWi-FiDirect-enableprinterwithoutrequiringaconnectingtoa network or the Internet.


 NOTE: Theprintermightrequireafirmwareupdatetousethisfeature.
Enable Wi-Fi Direct
1.PrintaNetworkConfigurationPagetoidentifytheprinterIPaddress.On thecontrolpanel,pressandholdtheCancel(X)buttonuntilthereadylight startstoblink,andthenreleasethebutton.Thetestpageprints.
2.EntertheprinterIPaddressintotheaddresslineofyourWebbrowser. TheEmbeddedWebServer(EWS)screendisplays.ExampleIPaddress: 192.168.0.0
3.Click the Networking tab.
4.Click Wi-Fi Direct Setup.
5.SelectthecheckboxnexttoWi-FiDirectPrintingName(SSID), and then enterthenetworknameSSIDinthefield.
6.Click Apply.TheIPaddressofthemobiledevicedisplaysonthe
Networking tab.


 NOTE: Tofindthenetworkname(SSID),clicktheWirelessConfiguration menufromtheNetworking tab.
 For more information on wireless printing and wireless setup, go to www.hp.com/go/wirelessprinting.
2

8. SetupHPePrintviaemail(optional)
UseHPePrintviaemailtoprintdocumentsbysendingthemasanemailattachment totheprinter’semailaddressfromanyemailenableddevice,evenfromdevicesthat are not on the same network.
TouseHPePrintviaemail,theprinter must meet these requirements:
•The printer must be connected to a wired or wireless network and have
Internet access.
•HP Web Services must be enabled on the printer, and the printer must be registered with HP Connected.
EnableHPWebServices(nanddwmodelsonly)
1.On the printer control panel, press the OK button.
2.Scroll to the HPWebServices menu, and press the OK button.
3.Scroll to the PrintInformationSheetoption, and press the OK button. The information page contains the printer code that you use to registger your HP printer at HP Connected.
4.Go to www.hpconnected.com to create an HP ePrint account and complete the setup process.
Troubleshooting
User Guide
TheUserGuideincludesprinterusageandtroubleshootinginformation.Itis availableontheprinterCDandontheWeb:
1.Go to www.hp.com/support/ljM402 or www.hp.com/support/ljM403.
2.Click Manuals.
For Windows, the User Guide is copied to the computer during the recommended software installation.
Windows® XP,WindowsVista®,andWindows® 7
Click Start, select Programs or AllPrograms, select HP, select the folder for the HP printer, and then select Help.
Windows® 8
On the Start screen, right-click an empty area on the screen, click AllApps on the app bar, click the icon with the printer’s name, and then select Help.
Checkforfirmwareupdates
1.On the printer control panel, press the OK button.
2.Scroll to the Servicesmenu, and press the OK button.
3.Select LaserJet Update.
4.Select Check for Updates Now.
 Wired (Ethernet) network connection
•Verifythattheprinterisattachedtothecorrectnetworkportusingacableof the correct length.
•Verify the lights next to the network port are lit.
•Verifytheprintdriverisinstalledonthecomputer.
•Testthenetworkconnectionbypingingthenetwork:
Windows
Click Start > Run. Type cmd, and press Enter. Type ping,
typeaspace,typetheprinterIPaddress,andthenpressEnter.
ExampleIPaddress: 192.168.0.1
OS X
OpentheNetworkUtility,andtypetheIPaddressintheping pane.Press
Enter. ExampleIPaddress: 192.168.0.1
•If the window displays round-trip times, the network is working.
•If the ping does not work, try restarting the printer and recheck all of the connection steps.
Additionalsupportresources
ForHP’sall-inclusivehelpfortheprinter,gotowww.hp.com/support/ljM402 or www.hp.com/support/ljM403.
•Solve problems
•Find advanced configuration instructions
•Download software updates
•Join support forums
•Find warranty and regulatory information
•Mobile printing resources
Wireless network connection (dw wireless model only)
•Verifythatthenetworkcableisnotconnected.Theprintercannotconnectto awirelessnetworkwhenanetworkcableisconnected.
•Verifythattheprinterandwirelessrouterareturnedonandhavepower. Alsomakesure thewirelessswitchisturnedon.
•Verify that the printer is within the range of the wireless network. For most networks,theprintermustbewithin30m(100ft)ofthewirelessaccess point (wireless router).
•Verifytheprintdriverisinstalledonthecomputer.
•Verify that the computer and printer connect to the same wireless network.
•ForMac,verifythatthewirelessroutersupportsBonjour.
•Restartthewirelessrouter.
3
English.............. |
1 |
Guidededémarrage |
|
|
|
|
|
Français |
4 |
|
|
LaserJetProM402,M403 |
|
||
|
|
|
|
Español |
7 |
|
|
|
|
||
Português........ |
10 |
|
|
|
13 |
www.hp.com/support/ljM402 |
www.register.hp.com |
............... |
www.hp.com/support/ljM403 |
|
|
|
|
|
IMPORTANT:
Suivez les étapes1à2 surl’affichedeconfiguration matérielle de l’imprimante puis passez à l’étape3.
3. Configurationinitialesurlepanneaudecommande
Après avoir allumé l’imprimante, attendez son initialisation. Suivez les invites et utilisez les touches fléchées du panneau de commande pour configurer ces paramètres :
•Langue
•Emplacement
•Paramètrespardéfaut
Dans Paramètres par défaut, sélectionnez l’une des options suivantes :
•Autogéré: paramètres par défaut optimisés pour une expérience guidée sur les installations, les configurations et les mises à jour.
•Géréparleserviceinformatique: paramètres par défaut optimisés pour la facilité de gestion de la flotte avec une sécurité renforcée.
Les paramètres sont entièrement personnalisables après la configuration initiale.
4.Sélectiond’uneméthodedeconnexionetpréparationàl’installationdulogiciel
 Connexion USB directement entre l’imprimante et l’ordinateur
Utilisez un câble USB de type A-à-B.
Windows
1.Pour Windows 7 ou systèmes plus anciens, ne branchez pas le
câble USB avant d’installer le logiciel. Le processus d’installation vous invite à connecter le câble au moment opportun. Si le câble est déjà connecté, redémarrez l’imprimante lorsque le processus d’installation vous invite à connecter le câble.
2.Poursuivez avec «5.Localiseroutéléchargerlesfichiers d’installationdulogiciel.»
 REMARQUE:Lors de l’installation du logiciel, sélectionnez l’option pour
Connecterdirectementcetordinateuràl’aided’uncâbleUSB.
Mac
1.Pour Mac, branchez le câble USB entre l’ordinateur et l’imprimante avant d’installer le logiciel.
2.Poursuivez avec «5.Localiseroutéléchargerlesfichiers d’installationdulogiciel.»
Connexionréseausansfilintégrée (modèlesdwuniquement)
1.Pour connecter l’imprimante à un réseau sans fil (Wi-Fi), assurez-vous que l’imprimante, le point d’accès et l’ordinateur soient tous sous tension, et que l’ordinateur est connecté au réseau sans fil.
2.Un câble USB sera nécessaire.
3.Débranchez tout câble USB ou Ethernet connecté à l’imprimante.
4.Pour imprimer à partir d’un ordinateur, passez à la section
«5.Localiseroutéléchargerlesfichiersd’installationdulogiciel.»
 Connexionàunréseaufilaire(Ethernet)
 Utilisez un câble réseau standard.
1.Branchez le câble réseau à l’imprimante et au réseau. Attendez quelques minutes que l’imprimante acquière une adresse réseau.
2.Sur le panneau de commande de l’imprimante, appuyez sur le bouton OK. Ouvrez le menu Configurationduréseau. Le panneau de commande affiche l’adresse IP par défaut. Notez l’adresse IP à utiliser lors de l’installation du logiciel. Exemple d’adresse IP : 192.168.0.1
Si l’imprimante n’affiche pas l’adresse du réseau sur l’écran d’accueil, configurez manuellement l’adresse IP sur le panneau de commande. Pour configurer manuellement l’adresse IP, reportez-vous à la section
«Configurermanuellementl’adresseIP.»
3.Poursuivez avec «5.Localiseroutéléchargerlesfichiers d’installationdulogiciel.»


 REMARQUE:Lors de l’installation du logiciel, sélectionnez l’option
Seconnecterviaunréseau.
 Configurermanuellementl’adresseIP
Consultez le Guide de l’utilisateur de l’imprimante pour obtenir des informations sur la configuration manuelle de l’adresse IP www.hp.com/support/ljM402 ou www.hp.com/support/ljM403.
4
5. Localiseroutéléchargerlesfichiersd’installationdulogiciel
 Méthode1:TéléchargementdepuisHPEasyStart
(Windows et OS X)
1.Visitez la page 123.hp.com/laserjet et cliquez sur Télécharger.
2.Suivez les instructions et les invites à l’écran pour enregistrer le fichier sur l’ordinateur.
3.Lancez le fichier logiciel à partir du dossier dans lequel il a été enregistré, puis passez à l’étape « 6. Installer le logiciel ».
 Méthode2:TéléchargementdepuislesiteWeb
d’assistance de l’imprimante (Windows et OS X)
1.Rendez-voussurwww.hp.com/support/ljM402 ou www.hp.com/support/ljM403.
2.Sélectionnez Pilotesetlogiciels.
3.Téléchargez le logiciel adapté à votre modèle d’imprimante et à votre système d’exploitation.
4.Lancez le fichier d’installation en cliquant sur le fichier .exe ou .zip, le cas échéant, et passez à l’étape « 6. Installer le logiciel ».
 Méthode3:InstallationavecleCDdel’imprimante
(Windowsuniquement)
1.Insérez le CD de l’imprimante dans votre ordinateur.
2.Passez à l’étape « 6. Installer le logiciel ».
6. Installation du logiciel
Solution Windows
1.Insérez le CD de l’imprimante dans l’ordinateur, ou lancez le fichier d’installation du logiciel téléchargé à partir du Web.
2.Le logiciel d’installation détecte la langue du système d’exploitation, puis affiche le menu principal du programme d’installation dans la même langue. Lors de l’installation à partir du CD, si le programme d’installation ne démarre pas après 30 secondes, parcourez le lecteur du CD de l’ordinateur et lancez le fichier nommé setup.exe.
3.L’écran Sélectiondelogiciels indique les logiciels à installer.
•L’installation logicielle recommandée inclut le pilote d’impression et les logiciels pour toutes les fonctionnalités de l’imprimante disponibles.
•Pour personnaliser le logiciel installé, cliquez sur le lien Personnaliserlessélectionsdelogiciel. Lorsque vous avez terminé, cliquez sur le bouton Suivant.
4.Suivez les instructions à l’écran pour installer le logiciel.
5.Lorsque vous êtes invité à sélectionner un type de connexion, sélectionnez l’option appropriée pour le type de connexion :
•Se connecter directement à cet ordinateur à l’aide d’un câble USB
•Seconnecterviaunréseau
•Aidez-moiàétabliruneconnexionsansfilpourlapremièrefois
 REMARQUE:Lors de la connexion à travers un réseau, la meilleure façon de détecter l’imprimante est de sélectionner Trouverautomatiquementmon
imprimantesurleréseau.
 REMARQUE:Pour une installation sans fil, sélectionnez l’option Aidez-moiàétabliruneconnexionsansfilpourlapremièrefois, puis sélectionnez
Oui,récupérerlesparamètressansfilsurmonordinateur.
Solution OS X
1.Le logiciel d’installation détecte la langue du système d’exploitation, puis affiche le menu principal du programme d’installation dans la même langue.
2.Suivez les instructions à l’écran pour installer le logiciel.
3.À la fin du processus d’installation du logiciel, utilisez l’assistantdeconfigurationdeHPUtilitypour configurer les options de l’imprimante.
7.  Imprimeràpartird’unpériphériquemobileousansfil(facultatif)
7.1 Connexionduproduitàunréseausansfil
Pour imprimer depuis un téléphone ou une tablette, connectez le périphérique au même réseau que celui sur lequel l’imprimante est connectée.
PériphériquesAppleiOS(AirPrint): ouvrez le document à imprimer, puis sélectionnez l’icône Action. Sélectionnez Imprimer, puis l’imprimante et appuyez sur Imprimer.
PériphériquesAndroidlesplusrécents(4.4ouplusrécent): ouvrez le document à imprimer, puis sélectionnez le bouton Menu. Sélectionnez Imprimer, puis l’imprimante et appuyez sur Imprimer.
Certains périphériques nécessitent le téléchargement de l’appli plugin HP Print Service, disponible sur Google Play.
PériphériquesAndroidplusanciens(4.3ouplusancien): téléchargez l’application HP ePrint à partir de Google Play.
WindowsPhone: téléchargez l’appli HP AiO Remote disponible dans le Windows Store.
 Ensavoirplussurl'impressionmobile
Pour en savoir plus sur les autres options d'impression mobile, notamment les solutions ePrint supplémentaires, numérisez le code QR ou consultez la section « Impression mobile » du Guide de l'utilisateur.
7.2 Wi-FiDirect(modèlesansfildwuniquement)
La fonctionnalité Wi-Fi Direct permet d’imprimer en proximité immédiate depuis un périphérique mobile sans fil directement sur une imprimante disposant de cette même fonctionnalité sans vous connecter à un réseau ou Internet.


 REMARQUE:Il peut s’avérer nécessaire de mettre à jour le micrologiciel de l’imprimante pour pouvoir utiliser cette fonction.
ActiverWi-FiDirect
1.Imprimez une page de configuration pour identifier l’adresse IP de l’imprimante. Sur le panneau de commande, appuyez et maintenez le bouton Annuler (X) jusqu’à ce que le témoin lumineux se mette à clignoter, puis relâchez le bouton. La page de test s’imprime.
2.Entrez l’adresse IP de l’imprimante dans la barre d’adresse de votre navigateur Web. Le serveur EWS HP s’ouvre. Exempled’adresseIP: 192.168.0.0
3.Cliquez sur l’onglet Réseau.
4.Cliquez sur ConfigurationWi-FiDirect.
5.Activez la case en regard de Nom de l’impression Wi-Fi Direct (SSID), puis entrez le nom du réseau SSID dans le champ.
6.Cliquez sur Appliquer. L’adresse IP du périphérique mobile s’affiche dans l’onglet Réseau.
 REMARQUE:Pour trouver le nom du réseau (SSID), cliquez sur le menu
Configurationsansfil dans l’onglet Réseau.
 Pour obtenir plus d’informations sur l’impression sans fil et la configuration sans fil, accédez à www.hp.com/go/wirelessprinting.
5
 Loading...