HEIDENHAIN SW 548328-05 User Manual
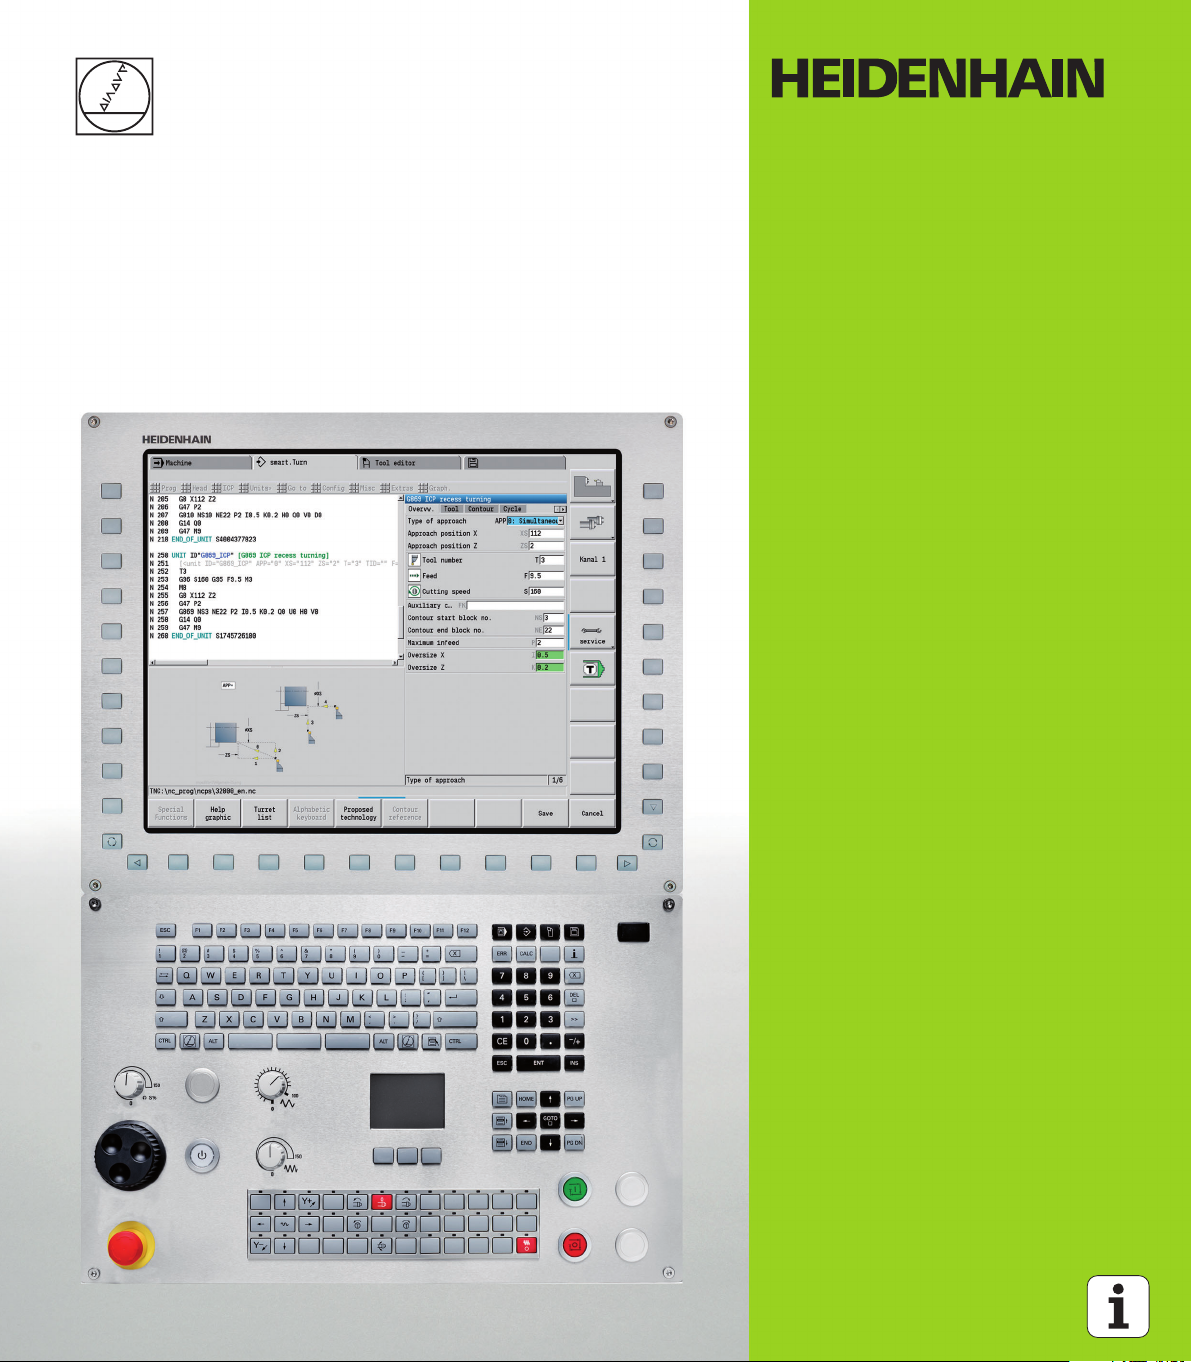
User’s Manual
MANUALplus 620
CNC PILOT 620/640
smart.Turn and
DIN Programming
NC Software
548328-05
548430-01
548431-01
688945-03
688946-01
688947-01
HEIDENHAIN MANUALplus 620, CNC PILOT 620/640 1
English (en)
8/2013

smart.Turn and DIN PLUS programming
This manual describes functions and features provided by lathe
controls as of the following NC software numbers.
Control NC software number
MANUALplus 620E 548328-05
MANUALplus 620 (HEROS 5) 548430-01
MANUALplus 620E (HEROS 5) 548431-01
CNC PILOT 620E 688945-03
CNC PILOT 640 (HEROS 5) 688946-01
CNC PILOT 640E (HEROS 5) 688947-01
The suffix E indicates the export version of the control. The export
version of the control has the following limitations:
Simultaneous linear movement in up to 4 axes
HEROS 5 identifies the new operating system of HSCI-based controls.
Machine operation and cycle programming are described in the
MANUALplus 620 (ID 634864-xx) and CNC PILOT 620/640 (ID
730870-xx) User's Manuals. Please contact HEIDENHAIN if you
require a copy of one of these manuals.
The machine manufacturer adapts the features offered by the control
to the capabilities of the specific machine tool by setting machine
parameters. Therefore, some of the functions described in this manual
may not be among the features provided by the Control on your
machine tool.
Some of the Control functions which are not available on every
machine are:
Positioning of spindle (M19) and driven tool
Operations with the C or Y axis
Please contact your machine manufacturer for detailed information on
the features that are supported by your machine tool.
Many machine manufacturers and HEIDENHAIN offer programming
courses. We recommend these courses as an effective way of
improving your programming skill and sharing information and ideas
with other Control users.

HEIDENHAIN also offers the DataPilot programming station for PCs,
which is designed for use with the respective control. The DataPilot
is excellently suited for both shop-floor programming as well as offlocation program creation and production planning. It is also ideal for
training purposes. The DataPilot can be run on PCs with WINDOWS
operating systems.
Control
Programming
station
NC Software
MANUALplus 620 DataPilot MP620 634132-05
CNC PILOT 620 DataPilot CP620 729665-03
CNC PILOT 640 DataPilot CP640 729666-01
Intended place of operation
The MANUALplus 620, CNC PILOT 620/640 complies with the limits
for a Class A devices in accordance with the specifications in
EN 55022, and is intended for use primarily in industrially-zoned areas.
Legal information
This product uses open source software. Further information is
available on the control under
Organization mode of operation
Second soft-key row
LICENSE INFO soft key
HEIDENHAIN MANUALplus 620, CNC PILOT 620/640 3

New functions of software 548328-03
The simulation function now also provides a 3-D view of the
workpiece blank and finished part. Workpieces can be depicted as a
solid-body model or transparent. The graphic can be both rotated
around the main axes and displayed in a three-quarter section view
(see the User’s Manual).
Simplified contour editing with ICP: When graphically supported
interactive contour description with ICP is active, contour-element
editing can now be selected directly by soft key (see the User’s
Manual).
Recessing with cut segmentation: Cut segmentation for recessing
depth is now available for the contour recessing cycle G860. (see
page 71)
The parameters XA and ZA (starting point of blank) were added to
the roughing cycles G810, G820, G830 and G835. This makes it
possible to start the cutting process at any desired diameter of the
contour by entering a starting point. (see page 60)
Workpiece measurement: The Control now supports workpiece
measurement with touch probes. A sample cycle for measurement
of workpieces is available in the control. Additionally, the machine
manufacturers can offer specially developed measuring cycles that
are individually adapted to the machine series (see the User’s
Manual).
A speed limit that is only effective for the respective cycle can now
be defined for the parting cycle in Teach-in mode and smart.Turn
(see page 75)
In the roughing and drilling cycles, an intermittent feed rate can now
be entered for chip breaking. (see page 60)
The approach angle and departure angle have been added to the ICP
cutting cycles. (see page 65)
The graphic window can now be activated automatically when the
cursor is located in the contour description. (see page 44)
4

New functions of software 688945-02 and 548328-04
In the program simulation, the current contour description (of
workpiece blank and finished part) can be mirrored and saved. In
smart.Turn, these contours can be reinserted (see User's Manual)
On machines with counterspindle, the workpiece spindle can now
be selected in the TSF menu (see User’s Manual)
On machines with a counterspindle, it’s datum can be shifted (see
User’s Manual)
The user documentation is now also in the context-sensitive help
system TURNguide (see User’s Manual)
You can make your own project folder in the project management,
so that you can centrally manage associated files (see User’s
Manual)
With a manual tool change system it is possible to insert tools that
are not in the turret during a program run (see User’s Manual)
Engraving cycles are now available in the Teach-In mode of
operation (see User’s Manual)
During tool data backup, you can now select in a dialog window the
data to be saved or restored (see User’s Manual)
The G30 function is now available for converting G functions, M
functions or spindle numbers, as well as for mirroring traverse paths
and tool dimensions (see "Converting and mirroring G30" on page
378)
The "traverse to a fixed stop" function (G916) is now available for
transferring the workpiece to the second traversable spindle or for
pressing the tailstock against the workpiece.(see "Traversing to a
fixed stop G916" on page 382)
The G925 function makes it possible to define and monitor the
maximum contact force for an axis. This function can be applied to
use the opposing spindle as a mechatronic tailstock, for example
(see "Force reduction G925" on page 385)
Controlled parting using servo-lag monitoring (G917) can now be
activated to prevent collisions caused by incomplete parting
processes.(see "Controlled parting using lag error monitoring G917"
on page 384)
HEIDENHAIN MANUALplus 620, CNC PILOT 620/640 5

The spindle synchronization option G720 synchronizes the shaft
speeds of two or more spindles so that they rotate synchronously
with a gear ratio or a defined offset.(see "Spindle synchronization
G720" on page 380)
In combination with the synchronization (G720) of main spindle and
tool spindle, the new "Hobbing" cycle (G808) is available for milling
external teeth and profiles.(see "Hobbing G808" on page 520)
With G924, a "fluctuating speed" can now be programmed to
prevent resonance (see "Fluctuating spindle speed G924" on page
374)
6

New functions of software 548328-05, 54843x-01, 688945-03 ad 688946-01
On machines with a B axis it is now also possible to drill, bore, and
mill in oblique planes. In addition to this, the B axis enables you to
use tools even more flexibly during turning (see "Tilted working
plane" on page 558).
The control now provides numerous touch probe cycles for various
applications (see "General information on touch probe cycles
(software option)" on page 430):
Calibrating a touch trigger probe
Measuring circles, circle segments, angle and position of the
C axis
Misalignment compensation
Single- point and double-point measurement
Finding a hole or stud
Zero point setting in the Z or C axis
Automatic tool measurement
The new TURN PLUS function automatically generates NC
programs for turning and milling operations based on a fixed
machining sequence (see "TURN PLUS mode of operation" on page
530).
The G940 function now provides a way to calculate the tool lengths
in the basic (definition) position of the B axis (see "Calculate variables
automatically G940" on page 375)
For machining operations that require rechucking, you can define a
separation point on the contour description with G44 (see
"Separation point G44" on page 215).
The G927 function enables you to convert tool lengths to the
reference position of the tool (B axis = 0) (see "Convert lengths
G927" on page 375).
Recesses that were defined with G22 can now be machined with
the new Cycle 870 ICP Recessing (see ""ICP recessing" unit" on page
77).
HEIDENHAIN MANUALplus 620, CNC PILOT 620/640 7

8
About this manual
The symbols used in this manual are described below.
This symbol indicates that important information about the
function described must be considered.
This symbol indicates that there is one or more of the
following risks when using the described function:
Danger to workpiece
Danger to fixtures
Danger to tool
Danger to machine
Danger to operator
This symbol indicates that the described function must be
adapted by the machine tool builder. The function
described may therefore vary depending on the machine.
This symbol indicates that you can find detailed
information about a function in another manual.
About this manual
Do you want any changes, or have you found any errors?
We are continuously striving to improve our documentation for you.
Please help us by sending your requests to the following e-mail
address: tnc-userdoc@heidenhain.de.
HEIDENHAIN MANUALplus 620, CNC PILOT 620/640 9

About this manual
10
Contents
„NC programming”
1
„smart.Turn units”
2
„smart.Turn units for the Yaxis”
3
„DIN programming”
4
„Touch probe cycles”
5
„DIN programming for the Y axis”
6
„TURN PLUS”
7
„B axis”
8
„Overview of units”
9
„Overview of G functions”
10


1 NC programming ..... 33
1.1 smart.Turn and DIN (ISO) programming ..... 34
Contour follow-up ..... 34
Structured NC program ..... 35
Linear and rotary axes ..... 36
Units of measure ..... 36
Elements of an NC program ..... 37
1.2 The smart.Turn editor ..... 38
Menu structure ..... 38
Parallel editing ..... 39
Screen layout ..... 39
Selecting the editor functions ..... 39
Shared menu items ..... 40
1.3 Program section code ..... 46
HEADER section ..... 47
CHUCKING EQUIPMENT section ..... 48
TURRET section ..... 48
BLANK section ..... 49
AUXIL_BLANK section ..... 49
FINISHED section ..... 49
AUXIL_CONTOUR section ..... 49
FACE, REAR sections ..... 49
LATERAL section ..... 49
FRONT_Y, REAR_Y sections ..... 49
LATERAL_Y section ..... 50
MACHINING section ..... 51
END code ..... 51
SUBPROGRAM section ..... 51
RETURN code ..... 51
CONST code ..... 52
VAR code ..... 52
1.4 Tool programming ..... 53
Setting up a tool list ..... 53
Editing tool entries ..... 54
Multipoint tools ..... 54
Replacement tools ..... 55
HEIDENHAIN MANUALplus 620, CNC PILOT 620/640 13

2 smart.Turn units ..... 57
2.1 smart.Turn units ..... 58
"Units" menu ..... 58
The smart.Turn unit ..... 58
2.2 Units—Roughing ..... 65
"Longitudinal roughing in ICP" unit ..... 65
"Transverse roughing in ICP" unit ..... 66
"Contour-parallel roughing in ICP" unit ..... 67
"Bidirectional roughing in ICP" unit ..... 68
"Longitudinal roughing with direct contour input" unit ..... 69
"Transverse roughing with direct contour input" unit ..... 70
2.3 Units—Recessing ..... 71
"ICP contour recessing" unit ..... 71
"ICP recess turning" unit ..... 72
"Contour recessing with direct contour input" unit ..... 73
"Recess turning with direct contour input" unit ..... 74
"Parting" unit ..... 75
"Undercutting (H, K, U)" unit ..... 76
"ICP recessing" unit ..... 77
2.4 Units—Centric drilling ..... 78
"Centric drilling" unit ..... 78
"Centric tapping" unit ..... 80
"Boring, centric countersinking" unit ..... 81
2.5 Units—Drilling in C axis ..... 82
"Single hole, face" unit ..... 82
"Linear pattern drilling, face" unit ..... 84
"Circular pattern drilling, face" unit ..... 86
"Tapping, face" unit ..... 88
"Linear tapping pattern, face" unit ..... 89
"Circular tapping pattern, face" unit ..... 90
"Single hole, lateral surface" unit ..... 91
"Linear pattern drilling, lateral surface" unit ..... 93
"Circular pattern drilling, lateral surface" unit ..... 95
"Tap hole, lateral surface" unit ..... 97
"Linear tapping pattern, lateral surface" unit ..... 98
"Circular tapping pattern, lateral surface" unit ..... 99
"ICP drilling, C axis" unit ..... 100
"ICP tapping, C axis" unit ..... 101
"ICP boring/countersinking, C axis" unit ..... 102
14

2.6 Units—Predrilling in C axis ..... 103
"Predrill, contour mill, figures on face" unit ..... 103
"Predrill, contour mill, ICP on face" unit ..... 105
"Predrill, pocket mill, figures on face" unit ..... 106
"Predrill, pocket mill, ICP on face" unit ..... 108
"Predrill, contour mill, figures on lateral surface" unit ..... 109
"Predrill, contour mill, ICP on lateral surface" unit ..... 111
"Predrill, pocket mill, figures on lateral surface" unit ..... 112
"Predrill, pocket mill, ICP on lateral surface" unit ..... 114
2.7 Units—Finishing ..... 115
"ICP contour finishing" unit ..... 115
"Longitudinal finishing with direct contour input" unit ..... 117
"Transverse finishing with direct contour input" unit ..... 118
"Relief turns (undercut) type E, F, DIN76" unit ..... 119
"Measuring cut" unit ..... 121
2.8 Units—Threads ..... 122
Overview of thread units ..... 122
Handwheel superimposition ..... 122
"Thread, direct" unit ..... 123
"ICP thread" unit ..... 124
"API thread" unit ..... 126
"Tapered thread" unit ..... 127
2.9 Units—Milling, face ..... 129
"Slot, face" unit ..... 129
"Linear slot pattern, face" unit ..... 130
"Circular slot pattern, face" unit ..... 131
"Face milling" unit ..... 132
"Thread milling" unit ..... 133
"Contour milling, figures, face" unit ..... 134
"ICP contour milling, face" unit ..... 136
"Pocket milling, figures, face" unit ..... 137
"ICP pocket milling, face" unit ..... 139
"Engraving, face" unit ..... 140
"Deburring, face" unit ..... 141
HEIDENHAIN MANUALplus 620, CNC PILOT 620/640 15

2.10 Units—Milling, lateral surface ..... 142
"Slot, lateral surface" unit ..... 142
"Linear slot pattern, lateral surface" unit ..... 143
"Circular slot pattern, lateral surface" unit ..... 144
"Helical slot milling" unit ..... 145
"Contour milling, figures, lateral surface" unit ..... 146
"ICP contour milling, lateral surface" unit ..... 148
"Pocket milling, figures, lateral surface" unit ..... 149
"ICP pocket milling, lateral surface" unit ..... 151
"Engraving, lateral surface" unit ..... 152
"Deburring, lateral surface" unit ..... 153
2.11 Units—Special operations ..... 154
"Program beginning (START)" unit ..... 154
"C axis ON" unit ..... 156
"C axis OFF" unit ..... 156
"Subprogram call" unit ..... 157
"Program section repeat" unit ..... 158
"Program end" unit ..... 159
16

3 smart.Turn units for the Y axis ..... 161
3.1 Units—Drilling in the Y axis ..... 162
"ICP drilling, Y axis" unit ..... 162
"ICP tapping, Y axis" unit ..... 163
"ICP boring/countersinking, Y axis" unit ..... 164
3.2 Units—Predrilling in Y axis ..... 165
"Predrill, contour mill, ICP in XY plane" unit ..... 165
"Predrill, pocket mill, ICP in XY plane" unit ..... 166
"Predrill, contour mill, ICP in YZ plane" unit ..... 167
"Predrill, pocket mill, ICP in YZ plane" unit ..... 168
3.3 Units—Milling in Y axis ..... 169
"ICP contour milling in XY plane" unit ..... 169
"ICP pocket milling in XY plane" unit ..... 170
"Single-surface milling, XY plane" unit ..... 171
"Centric polygon milling, XY plane" unit ..... 172
"Engraving in XY plane" unit ..... 173
"Deburring in XY plane" unit ..... 174
"Thread milling in XY plane" unit ..... 175
"ICP contour milling in YZ plane" unit ..... 176
"ICP pocket milling in YZ plane" unit ..... 177
"Single-surface milling, YZ plane" unit ..... 178
"Centric polygon milling, YZ plane" unit ..... 179
"Engraving in YZ plane" unit ..... 180
"Deburring in YZ plane" unit ..... 181
"Thread milling in YZ plane" unit ..... 182
HEIDENHAIN MANUALplus 620, CNC PILOT 620/640 17

4 DIN programming ..... 183
4.1 Programming in DIN/ISO mode ..... 184
Geometry and machining commands ..... 184
Contour programming ..... 185
NC blocks of the DIN program ..... 186
Creating, editing and deleting NC blocks ..... 187
Address parameters ..... 188
Fixed cycles ..... 189
Subprograms, expert programs ..... 190
NC program conversion ..... 190
DIN/ISO programs of predecessor controls ..... 191
"Geometry" pull-down menus ..... 193
"Machining" pull-down menus ..... 193
4.2 Definition of workpiece blank ..... 194
Chuck part bar/tube G20-Geo ..... 194
Cast part G21-Geo ..... 194
4.3 Basic contour elements ..... 195
Starting point of turning contour G0-Geo ..... 195
Machining attributes for form elements ..... 195
Line segment in a contour G1-Geo ..... 196
Circular arc of turning contour G2/G3-Geo ..... 198
Circular arc of turning contour G12/G13-Geo ..... 199
4.4 Contour form elements ..... 200
Recess (standard) G22-Geo ..... 200
Recess (general) G23-Geo ..... 202
Thread with undercut G24-Geo ..... 204
Undercut contour G25-Geo ..... 205
Thread (standard) G34-Geo ..... 209
Thread (general) G37-Geo ..... 210
Bore hole (centric) G49-Geo ..... 212
4.5 Attributes for contour description ..... 213
Feed rate reduction factor G38-Geo ..... 213
Attributes for superimposed elements G39-Geo ..... 214
Separation point G44 ..... 215
Oversize G52-Geo ..... 215
Feed per revolution G95-Geo ..... 216
Additive compensation G149-Geo ..... 216
4.6 C-axis contours—Fundamentals ..... 217
Milling contour position ..... 217
Circular pattern with circular slots ..... 220
18

4.7 Front and rear face contours ..... 223
Starting point of front/rear face contour G100-Geo ..... 223
Line segment in front/rear face contour G101-Geo ..... 224
Circular arc in front/rear face contour G102/G103-Geo ..... 225
Bore hole on front/rear face G300-Geo ..... 226
Linear slot on front/rear face G301-Geo ..... 227
Circular slot on front/rear face G302/G303-Geo ..... 227
Full circle on front/rear face G304-Geo ..... 228
Rectangle on front/rear face G305-Geo ..... 228
Eccentric polygon on front/rear face G307-Geo ..... 229
Linear pattern on front/rear face G401-Geo ..... 230
Circular pattern on front/rear face G402-Geo ..... 231
4.8 Lateral surface contours ..... 232
Starting point of lateral surface contour G110-Geo ..... 232
Line segment in a lateral surface contour G111-Geo ..... 233
Circular arc in lateral surface contour G112-/G113-Geo ..... 234
Hole on lateral surface G310-Geo ..... 235
Linear slot on lateral surface G311-Geo ..... 236
Circular slot on lateral surface G312/G313-Geo ..... 236
Full circle on lateral surface G314-Geo ..... 237
Rectangle on lateral surface G315-Geo ..... 237
Eccentric polygon on lateral surface G317-Geo ..... 238
Linear pattern on lateral surface G411-Geo ..... 239
Circular pattern on lateral surface G412-Geo ..... 240
4.9 Tool positioning ..... 241
Rapid traverse G0 ..... 241
Rapid traverse to machine coordinates G701 ..... 241
Setting the tool change position G14 ..... 242
Definition of tool-change point G140 ..... 242
4.10 Linear and circular movements ..... 243
Linear movement G1 ..... 243
Circular path G2/ G3 ..... 244
Circular path G12/G13 ..... 245
4.11 Feed rate, shaft speed ..... 246
Speed limitation G26 ..... 246
Interrupted feed G64 ..... 246
Feed per tooth Gx93 ..... 247
Constant feed rate G94 (feed per minute) ..... 247
Feed per revolution Gx95 ..... 247
Constant surface speed Gx96 ..... 248
Speed Gx97 ..... 248
HEIDENHAIN MANUALplus 620, CNC PILOT 620/640 19

4.12 Tool-tip and cutter radius compensation ..... 249
G40: Switch off TRC/MCRC ..... 249
G41/G42: Switch on TRC/MCRC ..... 250
4.13 Zero point shifts ..... 251
Zero point shift G51 ..... 252
Additive zero point shift G56 ..... 253
Absolute zero point shift G59 ..... 254
4.14 Oversizes ..... 255
Switch off oversize G50 ..... 255
Axis-parallel oversize G57 ..... 255
Contour-parallel oversize (equidistant) G58 ..... 256
4.15 Safety clearances ..... 257
Safety clearance G47 ..... 257
Safety clearance G147 ..... 257
4.16 Tools, compensations ..... 258
Tool call T ..... 258
Correction of cut (switching the tool edge compensation) G148 ..... 259
Additive compensation G149 ..... 260
Compensation of right-hand tool tip G150
Compensation of left-hand tool tip G151 ..... 261
4.17 Contour-based turning cycles ..... 262
Working with contour-based cycles ..... 262
Longitudinal roughing G810 ..... 264
Face roughing G820 ..... 267
Contour-parallel roughing G830 ..... 270
Contour cycle, bidirectional (contour-parallel with neutral tool) G835 ..... 273
Recessing G860 ..... 275
Repeat recessing cycle G740/G741 ..... 277
Recess turning cycle G869 ..... 278
Recessing cycle G870 ..... 281
Finish contour G890 ..... 282
Measuring cut G809 ..... 285
4.18 Contour definitions in the machining section ..... 286
Cycle end / Simple contour G80 ..... 286
Linear slot on front/rear face G301 ..... 287
Circular slot on front/rear face G302/G303 ..... 287
Full circle on front/rear face G304 ..... 288
Rectangle on front/rear face G305 ..... 288
Eccentric polygon on front/rear face G307 ..... 289
Linear slot on lateral surface G311 ..... 289
Circular slot on lateral surface G312/G313 ..... 290
Full circle, lateral surface G314 ..... 290
Rectangle, lateral surface G315 ..... 291
Eccentric polygon, lateral surface G317 ..... 291
20

4.19 Thread cycles ..... 292
Overview of threading cycles ..... 292
Handwheel superimposition ..... 292
Thread cycle G31 ..... 293
Simple thread cycle G32 ..... 297
Thread single path G33 ..... 299
Metric ISO thread G35 ..... 301
Tapered API thread G352 ..... 302
Metric ISO thread G38 ..... 304
4.20 Parting cycle ..... 305
Cut-off cycle G859 ..... 305
4.21 Undercut cycles ..... 306
Undercut cycle G85 ..... 306
Undercut according to DIN 509 E with cylinder machining G851 ..... 308
Undercut according to DIN 509 F with cylinder machining G852 ..... 309
Undercut according to DIN 76 with cylinder machining G853 ..... 310
Undercut type U G856 ..... 311
Undercut type H G857 ..... 312
Undercut type K G858 ..... 313
4.22 Drilling cycles ..... 314
Overview of drilling and boring cycles and contour reference ..... 314
Drilling cycle G71 ..... 315
Boring, countersinking G72 ..... 317
Tapping G73 ..... 318
Tapping G36—Single path ..... 320
Deep-hole drilling G74 ..... 321
Linear pattern, face G743 ..... 324
Circular pattern, face G745 ..... 325
Linear pattern, lateral surface G744 ..... 326
Circular pattern, lateral surface G746 ..... 327
Thread milling, axial G799 ..... 328
4.23 C-Axis commands ..... 329
Reference diameter G120 ..... 329
Zero point shift, C axis G152 ..... 329
Standardize C axis G153 ..... 330
4.24 Front/rear-face machining ..... 331
Rapid traverse on front/rear face G100 ..... 331
Linear segment on front/rear face G101 ..... 332
Circular arc on front/rear face G102/G103 ..... 333
4.25 Lateral surface machining ..... 335
Rapid traverse, lateral surface G110 ..... 335
Line segment on lateral surface G111 ..... 336
Circular arc on lateral surface G112/G113 ..... 337
HEIDENHAIN MANUALplus 620, CNC PILOT 620/640 21

4.26 Milling cycles ..... 338
Overview of milling cycles ..... 338
Linear slot on face G791 ..... 339
Linear slot on lateral surface G792 ..... 340
Contour and figure milling cycle, face G793 ..... 341
Contour and figure milling cycle, lateral surface G794 ..... 343
Area milling, face G797 ..... 345
Helical-slot milling G798 ..... 347
Contour milling G840 ..... 348
Pocket milling, roughing G845 ..... 358
Pocket milling, finishing G846 ..... 364
4.27 Engraving cycles ..... 366
Character set ..... 366
Engraving on front face G801 ..... 368
Engraving on lateral surface G802 ..... 369
4.28 Contour follow-up ..... 370
Saving/loading contour follow-up G702 ..... 370
Contour follow-up on/off G703 ..... 370
22

4.29 Other G functions ..... 371
Chucking equipment in simulation G65 ..... 371
Workpiece blank contour G67 (for graphics) ..... 371
Period of dwell G4 ..... 371
Precision stop G7 ..... 371
Precision stop off G8 ..... 372
Precision stop G9 ..... 372
Switch off protection zone G60 ..... 372
Actual values in variables G901 ..... 372
Zero-point shift in variables G902 ..... 372
Lag error in variables G903 ..... 372
Read interpolation information G904 ..... 373
Feed rate override 100% G908 ..... 373
Interpreter stop G909 ..... 373
Spindle override 100% G919 ..... 373
Deactivate zero-point shifts G920 ..... 374
Deactivate zero-point shifts, tool lengths G921 ..... 374
End position of tool G922 ..... 374
Fluctuating spindle speed G924 ..... 374
Convert lengths G927 ..... 375
Calculate variables automatically G940 ..... 375
Misalignment compensation G976 ..... 377
Activating zero-point shifts G980 ..... 377
Activate zero-point shifts, tool lengths G981 ..... 377
Activate direct program-run continuation G999 ..... 378
Converting and mirroring G30 ..... 378
Transformations of contours G99 ..... 379
Spindle synchronization G720 ..... 380
C-angle offset G905 ..... 381
Traversing to a fixed stop G916 ..... 382
Controlled parting using lag error monitoring G917 ..... 384
Force reduction G925 ..... 385
Sleeve monitoring G930 ..... 386
4.30 Data input and data output ..... 387
"WINDOW"—Output window for variables ..... 387
"WINDOW"—Output file for variables ..... 387
"INPUT"—Input of variables ..... 387
Output of # variables PRINT ..... 388
HEIDENHAIN MANUALplus 620, CNC PILOT 620/640 23

4.31 Programming variables ..... 389
Variable types ..... 390
Reading tool data ..... 392
Reading the current NC information ..... 394
Reading general NC information ..... 395
Reading configuration data—PARA ..... 396
Determining the index of a parameter element—PARA ..... 397
Expanded variable syntax CONST – VAR ..... 398
4.32 Conditional block run ..... 400
Program branching IF..THEN..ELSE..ENDIF ..... 400
Requesting variables and constants ..... 401
WHILE..ENDWHILE program repeat ..... 402
SWITCH..CASE—program branching ..... 403
4.33 Subroutines ..... 404
Subprogram call: L"xx" V1 ..... 404
Dialog texts in subprogram call ..... 405
Help graphics for subprogram calls ..... 406
4.34 M commands ..... 407
M commands for program-run control ..... 407
Machine commands ..... 408
4.35 G functions from previous controls ..... 409
Contour definitions in the machining section ..... 409
Simple turning cycles ..... 411
Thread cycles (4110) ..... 416
4.36 DINplus program example ..... 418
Example of a subprogram with contour repetitions ..... 418
4.37 Connection between geometry and machining commands ..... 421
Turning ..... 421
C-axis machining—front/rear face ..... 422
C-axis machining—lateral surface ..... 422
4.38 Full-surface machining ..... 423
Fundamentals of full-surface machining ..... 423
Programming of full-surface machining ..... 424
Full-surface machining with opposing spindle ..... 425
Full-surface machining with single spindle ..... 427
24

5 Touch probe cycles ..... 429
5.1 General information on touch probe cycles (software option) ..... 430
Principle of function of touch probe cycles ..... 430
Touch probe cycles for automatic operation ..... 431
5.2 Touch probe cycles for single-point measurement ..... 433
Single-point measurement for tool compensation G770 ..... 433
Single-point measurement for zero point G771 ..... 435
Zero point C axis, single-point measurement G772 ..... 437
Zero point C-axis object center G773 ..... 439
5.3 Touch probe cycles for two-point measurement ..... 441
Two-point measurement G18 transverse G775 ..... 441
Two-point measurement G18 longitudinal G776 ..... 443
Two-point measurement G17 longitudinal G777 ..... 445
Two-point measurement G19 longitudinal G778 ..... 447
5.4 Calibrating touch probes ..... 449
Calibrate touch probe standard G747 ..... 449
Calibrate touch probe via two points G748 ..... 451
5.5 Measuring with touch probe cycles ..... 453
Paraxial probing G764 ..... 453
Probing in C axis G765 ..... 454
Probing in two axes G766 ..... 455
Probing in two axes G768 ..... 456
Probing in two axes G769 ..... 457
5.6 Search cycles ..... 458
Find hole in C face G780 ..... 458
Find hole in C lateral surface G781 ..... 460
Find stud in C face G782 ..... 462
Find stud in C lateral surface G783 ..... 464
5.7 Circular measurement ..... 466
Circular measurement G785 ..... 466
Determine pitch circle G786 ..... 468
5.8 Measure angle ..... 470
Angular measurement G787 ..... 470
Misalignment compensation after angle measurement G788 ..... 472
5.9 In-process measurement ..... 473
Measure workpieces (option) ..... 473
Switch on measurement G910 ..... 473
Measuring path monitoring G911 ..... 474
Measured value capture G912 ..... 474
End in-process measuring G913 ..... 474
Switch off measuring-path monitoring G914 ..... 474
In-process measurement example: Measuring and compensating workpieces ..... 475
Example of in-process measurement: Measuring and compensating workpieces
measure_pos_move.ncs ..... 476
HEIDENHAIN MANUALplus 620, CNC PILOT 620/640 25

6 DIN programming for the Y axis ..... 477
6.1 Y-axis contours—Fundamentals ..... 478
Position of milling contours ..... 478
Cutting limit ..... 479
6.2 Contours in the XY plane ..... 480
Starting point of contour in XY plane G170 Geo ..... 480
Line segment in XY plane G171 Geo ..... 480
Circular arc in XY plane G172-Geo/G173-Geo ..... 481
Hole in XY plane G370-Geo ..... 482
Linear slot in XY plane, G371-Geo ..... 483
Circular slot in XY plane G372-Geo/G373-Geo ..... 484
Full circle in XY plane G374-Geo ..... 484
Rectangle in XY plane G375-Geo ..... 485
Eccentric polygon in XY plane G377-Geo ..... 485
Linear pattern in XY plane, G471-Geo ..... 486
Circular pattern in XY plane, G472 Geo ..... 487
Single surface in XY plane G376-Geo ..... 488
Centric polygon in XY plane G477-Geo ..... 488
6.3 Contours in the YZ plane ..... 489
Starting point of contour in YZ plane G180-Geo ..... 489
Line segment in YZ plane G181-Geo ..... 489
Circular arc in YZ plane G182-Geo/G183-Geo ..... 490
Hole in YZ plane G380-Geo ..... 491
Linear slot in YZ plane, G381-Geo ..... 491
Circular slot in YZ plane G382-Geo/G383-Geo ..... 492
Full circle in YZ plane G384-Geo ..... 492
Rectangle in YZ plane G385-Geo ..... 493
Eccentric polygon in YZ plane G387-Geo ..... 493
Linear pattern in YZ plane, G481-Geo ..... 494
Circular pattern in YZ plane, G482-Geo ..... 495
Single surface in YZ plane G386-Geo ..... 496
Centric polygon in YZ plane G487-Geo ..... 496
6.4 Working planes ..... 497
Y-axis machining ..... 497
G17 XY plane (front or rear face) ..... 497
G18 XZ plane (turning) ..... 497
G19 YZ plane (lateral view / lateral surface) ..... 497
Tilting the working plane G16 ..... 498
6.5 Tool positioning in the Y axis ..... 499
Rapid traverse G0 ..... 499
Approach tool change point G14 ..... 499
Rapid traverse to machine coordinates G701 ..... 500
26

6.6 Linear and circular movements in the Y axis ..... 501
Milling: Linear movement G1 ..... 501
Milling: Circular movement G2, G3—incremental center coordinates ..... 502
Milling: Circular movement G12, G13—absolute center coordinates ..... 503
6.7 Milling cycles for the Y axis ..... 504
Area milling—roughing G841 ..... 504
Area milling—finishing G842 ..... 505
Centric polygon milling—roughing G843 ..... 506
Centric polygon milling—finishing G844 ..... 507
Pocket milling—roughing G845 (Y axis) ..... 508
Pocket milling—finishing G846 (Y axis) ..... 514
Engraving in XY plane G803 ..... 516
Engraving in the YZ plane G804 ..... 517
Thread milling in XY plane G800 ..... 518
Thread milling in YZ plane G806 ..... 519
Hobbing G808 ..... 520
6.8 Example program ..... 521
Machining with the Y axis ..... 521
HEIDENHAIN MANUALplus 620, CNC PILOT 620/640 27

7 TURN PLUS ..... 529
7.1 TURN PLUS mode of operation ..... 530
TURN PLUS concept ..... 530
7.2 Automatic working plan generation (AWG) ..... 531
Generating a working plan ..... 532
Machining sequence – Fundamentals ..... 533
Editing and managing machining sequences ..... 535
Overview of machining sequences ..... 536
7.3 AWG control graphic ..... 545
Setting the AWG control graphic ..... 545
7.4 Machining information ..... 546
Tool selection, turret assignment ..... 546
Contour recessing, recess turning ..... 547
Drilling ..... 547
Cutting data, coolant ..... 548
Inside contours ..... 548
Shaft machining ..... 551
7.5 Example ..... 553
Creating a program ..... 553
Defining the workpiece blank ..... 553
Defining the basic contour ..... 554
Defining form elements ..... 554
Preparing the machining process, chucking ..... 555
Generating and saving a working plan ..... 556
28

8 B axis ..... 557
8.1 Fundamentals ..... 558
Tilted working plane ..... 558
8.2 Compensation with the B axis ..... 561
Compensation during program run ..... 561
8.3 Simulation ..... 562
Simulation of the tilted plane ..... 562
Displaying the coordinate system ..... 562
Position display with the B and Y axes ..... 563
HEIDENHAIN MANUALplus 620, CNC PILOT 620/640 29

9 Overview of units ..... 565
9.1 Units—"Turning" group ..... 566
"Roughing" group ..... 566
"Finishing" group ..... 566
"Recessing" group ..... 567
"Thread" group ..... 567
9.2 Units—"Drilling" group ..... 568
"Centric drilling" group ..... 568
"ICP drilling, C axis" group ..... 568
"C-axis face drilling" group ..... 568
"C-axis lateral surface drilling" group ..... 569
9.3 Units—"Predrilling in C axis" group ..... 570
"Predrilling in C-axis, face" group ..... 570
"Predrilling in C-axis, lateral surface" group ..... 570
9.4 Units—"Milling in C axis" group ..... 571
"Milling in C-axis, face" group ..... 571
"Milling in C axis, face" group ..... 571
"C-axis lateral surface milling" group ..... 572
"C-axis lateral surface milling" group ..... 572
9.5 Units—"Drilling, predrilling in Y axis" group ..... 573
"ICP drilling, Y axis" group ..... 573
"Predrilling in Y axis" group ..... 573
9.6 Units—"Milling in Y axis" group ..... 574
"Milling in front face" group (XY plane) ..... 574
"Milling in lateral surface" group (YZ plane) ..... 575
9.7 Units—"Special units" group ..... 576
30
 Loading...