


 Loading...
C575
You can find the most up-to-date user guide at
www.gigaset.com/manuals

Contents
Contents
Overview . . . . . . . . . . . . . . . . . . . . . . . . . . . . . . . . . . . . . . . . . . . . . . . . . . . . . . . . . . . . . . . . . . . . . . . . . . . . . .4
Handset . . . . . . . . . . . . . . . . . . . . . . . . . . . . . . . . . . . . . . . . . . . . . . . . . . . . . . . . . . . . . . . . . . . . . . . . . . . . . . . 4 Base . . . . . . . . . . . . . . . . . . . . . . . . . . . . . . . . . . . . . . . . . . . . . . . . . . . . . . . . . . . . . . . . . . . . . . . . . . . . . . . . . . . 5 Illustration in the user guide . . . . . . . . . . . . . . . . . . . . . . . . . . . . . . . . . . . . . . . . . . . . . . . . . . . . . . . . . . . . 6
Safety precautions . . . . . . . . . . . . . . . . . . . . . . . . . . . . . . . . . . . . . . . . . . . . . . . . . . . . . . . . . . . . . . . . . . . . .7 Getting started . . . . . . . . . . . . . . . . . . . . . . . . . . . . . . . . . . . . . . . . . . . . . . . . . . . . . . . . . . . . . . . . . . . . . . . .8
Base . . . . . . . . . . . . . . . . . . . . . . . . . . . . . . . . . . . . . . . . . . . . . . . . . . . . . . . . . . . . . . . . . . . . . . . . . . . . . . . . . . . 9 Handset . . . . . . . . . . . . . . . . . . . . . . . . . . . . . . . . . . . . . . . . . . . . . . . . . . . . . . . . . . . . . . . . . . . . . . . . . . . . . . . 9
Using the telephone . . . . . . . . . . . . . . . . . . . . . . . . . . . . . . . . . . . . . . . . . . . . . . . . . . . . . . . . . . . . . . . . . 12
Getting to know your telephone . . . . . . . . . . . . . . . . . . . . . . . . . . . . . . . . . . . . . . . . . . . . . . . . . . . . . . . 12 Making calls . . . . . . . . . . . . . . . . . . . . . . . . . . . . . . . . . . . . . . . . . . . . . . . . . . . . . . . . . . . . . . . . . . . . . . . . . . 15 Provider-specific functions (network services) . . . . . . . . . . . . . . . . . . . . . . . . . . . . . . . . . . . . . . . . . . 19 Directory . . . . . . . . . . . . . . . . . . . . . . . . . . . . . . . . . . . . . . . . . . . . . . . . . . . . . . . . . . . . . . . . . . . . . . . . . . . . . 23 Call lists . . . . . . . . . . . . . . . . . . . . . . . . . . . . . . . . . . . . . . . . . . . . . . . . . . . . . . . . . . . . . . . . . . . . . . . . . . . . . . . 27 Message lists . . . . . . . . . . . . . . . . . . . . . . . . . . . . . . . . . . . . . . . . . . . . . . . . . . . . . . . . . . . . . . . . . . . . . . . . . . 28 Network mailbox . . . . . . . . . . . . . . . . . . . . . . . . . . . . . . . . . . . . . . . . . . . . . . . . . . . . . . . . . . . . . . . . . . . . . . 30
Additional functions . . . . . . . . . . . . . . . . . . . . . . . . . . . . . . . . . . . . . . . . . . . . . . . . . . . . . . . . . . . . . . . . . 31
Calendar . . . . . . . . . . . . . . . . . . . . . . . . . . . . . . . . . . . . . . . . . . . . . . . . . . . . . . . . . . . . . . . . . . . . . . . . . . . . . . |
31 |
Timer . . . . . . . . . . . . . . . . . . . . . . . . . . . . . . . . . . . . . . . . . . . . . . . . . . . . . . . . . . . . . . . . . . . . . . . . . . . . . . . . |
33 |
Alarm clock . . . . . . . . . . . . . . . . . . . . . . . . . . . . . . . . . . . . . . . . . . . . . . . . . . . . . . . . . . . . . . . . . . . . . . . . . . . |
33 |
Baby monitor . . . . . . . . . . . . . . . . . . . . . . . . . . . . . . . . . . . . . . . . . . . . . . . . . . . . . . . . . . . . . . . . . . . . . . . . . |
34 |
ECO DECT . . . . . . . . . . . . . . . . . . . . . . . . . . . . . . . . . . . . . . . . . . . . . . . . . . . . . . . . . . . . . . . . . . . . . . . . . . . . . |
36 |
Protection against unwanted calls . . . . . . . . . . . . . . . . . . . . . . . . . . . . . . . . . . . . . . . . . . . . . . . . . . . . . |
37 |
SMS (text messages) . . . . . . . . . . . . . . . . . . . . . . . . . . . . . . . . . . . . . . . . . . . . . . . . . . . . . . . . . . . . . . . . . . |
39 |
Expanding the functionality of the telephone . . . . . . . . . . . . . . . . . . . . . . . . . . . . . . . . . . . . . . . . . 45
Multiple handsets . . . . . . . . . . . . . . . . . . . . . . . . . . . . . . . . . . . . . . . . . . . . . . . . . . . . . . . . . . . . . . . . . . . . . 45 Repeater . . . . . . . . . . . . . . . . . . . . . . . . . . . . . . . . . . . . . . . . . . . . . . . . . . . . . . . . . . . . . . . . . . . . . . . . . . . . . . 47 Operation with a router . . . . . . . . . . . . . . . . . . . . . . . . . . . . . . . . . . . . . . . . . . . . . . . . . . . . . . . . . . . . . . . 48 Operation with a PABX . . . . . . . . . . . . . . . . . . . . . . . . . . . . . . . . . . . . . . . . . . . . . . . . . . . . . . . . . . . . . . . . 49
Adjusting the telephone settings . . . . . . . . . . . . . . . . . . . . . . . . . . . . . . . . . . . . . . . . . . . . . . . . . . . . . 51
Handset . . . . . . . . . . . . . . . . . . . . . . . . . . . . . . . . . . . . . . . . . . . . . . . . . . . . . . . . . . . . . . . . . . . . . . . . . . . . . . 51 System . . . . . . . . . . . . . . . . . . . . . . . . . . . . . . . . . . . . . . . . . . . . . . . . . . . . . . . . . . . . . . . . . . . . . . . . . . . . . . . . 57
2

Contents
Appendix . . . . . . . . . . . . . . . . . . . . . . . . . . . . . . . . . . . . . . . . . . . . . . . . . . . . . . . . . . . . . . . . . . . . . . . . . . . . 59
Questions and answers . . . . . . . . . . . . . . . . . . . . . . . . . . . . . . . . . . . . . . . . . . . . . . . . . . . . . . . . . . . . . . . . 59 Service (Customer Care) . . . . . . . . . . . . . . . . . . . . . . . . . . . . . . . . . . . . . . . . . . . . . . . . . . . . . . . . . . . . . . . 61 Manufacturer's advice . . . . . . . . . . . . . . . . . . . . . . . . . . . . . . . . . . . . . . . . . . . . . . . . . . . . . . . . . . . . . . . . . 63 Technical data . . . . . . . . . . . . . . . . . . . . . . . . . . . . . . . . . . . . . . . . . . . . . . . . . . . . . . . . . . . . . . . . . . . . . . . . 65 Display icons . . . . . . . . . . . . . . . . . . . . . . . . . . . . . . . . . . . . . . . . . . . . . . . . . . . . . . . . . . . . . . . . . . . . . . . . . . 68 Menu overview . . . . . . . . . . . . . . . . . . . . . . . . . . . . . . . . . . . . . . . . . . . . . . . . . . . . . . . . . . . . . . . . . . . . . . . 70
Index . . . . . . . . . . . . . . . . . . . . . . . . . . . . . . . . . . . . . . . . . . . . . . . . . . . . . . . . . . . . . . . . . . . . . . . . . . . . . . . . 72
Not all functions described in the user guide are available in all countries or from all network providers.
3

Overview
Overview
Handset
1Display
2Status bar ( p. 68)
Icons display current settings and operating status of the telephone
3Display keys ( p. 13)
Various functions, depending on the operating situation
4End call key / On/off key
|
End call; cancel function; |
Press briefly |
|
one level back |
|
|
Back to idle mode; |
Press and |
|
switch the handset on/off |
hold |
5 |
Hash key / Lock key |
|
|
Lock/unlock the keypad; |
Press and |
|
enter a dialling pause |
hold |
|
Toggle between upper/lower |
Press briefly |
|
case and digits |
|
6 |
Recall key |
|
|
Consultation call (flash) |
Press and |
|
|
hold |
7 |
Microphone |
|
8Star key
|
Switch the ringtone on/off |
Press and |
|
|
hold |
12 |
|
|
Open the table of special char- |
Press briefly |
|
|
acters; switch from pulse dial- |
|
11 |
|
ling to tone dialling |
|
|
9 |
Key 1 |
|
10 |
|
Select network mailbox |
Press and |
|
|
|
||
|
hold |
|
|
10 |
Control key / Menu key ( p. 12) |
|
9 |
|
Open a menu; navigate in menus and entry |
|
|
|
fields; access functions |
|
|
|
(depending on the situation) |
|
|
11 |
Talk key / Handsfree key |
|
|
|
Accept call; dial number |
Press briefly |
|
|
displayed; switch between |
|
|
|
earpiece mode and handsfree |
|
8 |
|
mode; send SMS; open the |
|
|
|
redial list |
|
|
|
Start dialling |
Press and |
|
|
hold |
|
|
12Message key ( p. 28)
Access to the call and message lists;
Flashes: new message or new call
If multiple functions are listed, the button function depends on the situation.
The colour and shape of your device may be different from the illustration.
1
2
INT 1
Calls Calendar
 3
3
 4
4
 5 6
5 6
7
4

Base
Base
ARegistration/paging key
Locate a handset (paging):
Register handsets and other DECT devices (e.g. repeater):
¥
¥
Press briefly
Press and hold
A
The colour and shape of your device may be different from the illustration.
5
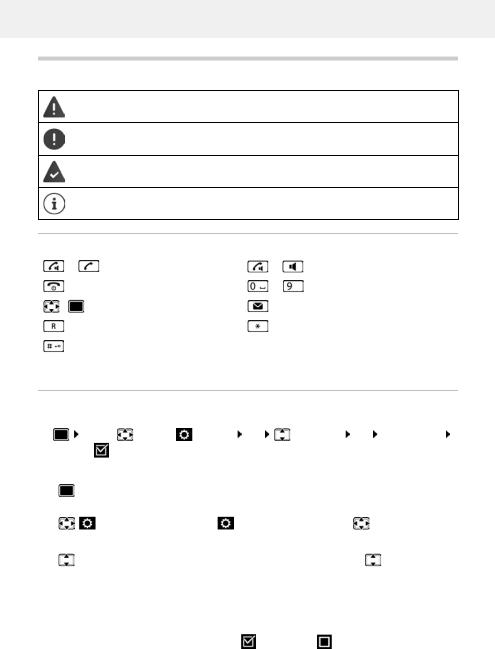
Illustration in the user guide
Illustration in the user guide
Warnings, which, if not heeded, can result in injury to persons or damage to devices.
Important information regarding function and appropriate handling or functions that could generate costs.
Prerequisite for being able to carry out the following action.
Additional helpful information.
Keys
or |
Talk key |
or |
Handsfree key |
|
|
|
|
|
End call key |
to |
Number / letter keys |
|
|
|
|
/ |
Control key rim / centre |
|
Message key |
|
|
|
|
|
Recall key |
|
Star key |
|
|
|
|
|
Hash key |
|
|
|
|
|
|
OK, Back, Select, Change, Save, . . . |
Display keys |
|
|
|
|
|
|
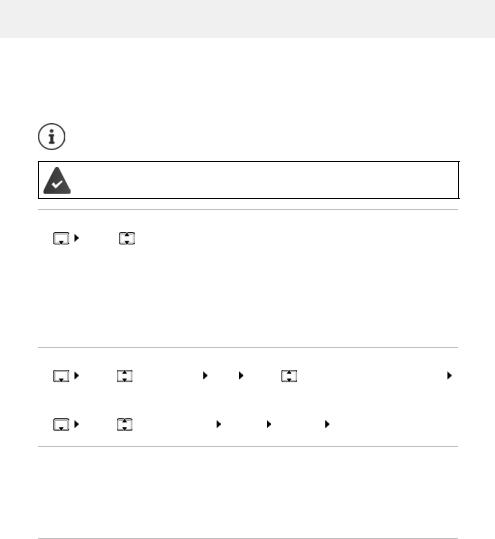
Procedures
Example: Switching Auto answer on/off |
|
|
|
|
|||
¤ |
. . . use |
to select |
Settings |
|
OK |
Telephony OK |
Auto Answer |
|
Change ( = activated) |
|
|
|
|
|
|
|
|
|
|
|
|
|
|
Symbols |
Meaning |
|
|
|
|
|
|
|
|
|
|||||
¤ |
|
When in idle status press the centre of the control key. |
|||||
|
|
The main menu opens. |
|
|
|||
|
|
|
|
|
|||
¤ |
|
Navigate to the |
icon using the control key |
. |
|||
¤ OK |
Select OK to confirm. The submenu Settings opens. |
||||||
¤ |
Telephony |
Select the Telephony entry using the control key |
. |
||||
¤ |
OK |
Select OK to confirm. The submenu Telephony opens. |
|||||
¤ Auto Answer |
The function to switch Auto answer on/off appears as the first menu |
||||||
|
|
item. |
|
|
|
|
|
|
|
|
|||||
¤ Change |
Select Change to activate or deactivate. |
|
|||||
|
|
Function is activated |
/deactivated . |
|
|||
|
|
|
|
|
|
|
|
6

Safety precautions
Safety precautions
Read the safety precautions and the user guide before use.
The device cannot be used in the event of a power failure. In case of a power failure it is also not possible to make emergency calls.
Emergency numbers cannot be dialled if the keypad/display lock is activated!
Use only rechargeable batteries that correspond to the specification (see list of permitted batteries  www.gigaset.com/service). Never use a conventional (non-rechargeable) battery or other battery types as this could result in significant health risks and personal injury. Rechargeable batteries, which are noticeably damaged, must be replaced.
The handset must not be operated if the battery cover is open.
Do not use the devices in environments with a potential explosion hazard (e.g. paint shops).
The devices are not splashproof. For this reason do not install them in a damp environment such as bathrooms or shower rooms.
Use only the power adapter indicated on the device.
Whilst charging, the power socket must be easily accessible.
Remove faulty devices from use or have them repaired by our Service team, as these could interfere with other wireless services.
Do not use the device if the display is cracked or broken. Broken glass or plastic can cause injury to hands and face. Send the device to our Service department to be repaired.
Do not hold the rear of the handset to your ear when it is ringing or when speaker mode is activated. Otherwise you risk serious and permanent damage to your hearing.
The phone may cause interference in analogue hearing aids (humming or whistling) or cause them to overload. If you require assistance, please contact the hearing aid supplier.
Keep small cells and batteries, which can be swallowed, out of the reach of children. Swallowing a battery can lead to burns, perforation of soft tissue and death. Severe burns can occur within 2 hours of swallowing.
In the case of a swallowed cell or battery, seek medical care immediately.
Using your telephone may affect nearby medical equipment. Be aware of the technical conditions in your particular environment, e.g. doctor's surgery. If you use a medical device (e.g. a pacemaker), please contact the device manufacturer. They will be able to advise you regarding the susceptibility of the device to external sources of high frequency energy (for the specifications of your Gigaset product see "Technical data").
7

Getting started
Getting started
Contents of the package
•One base
•One power adapter for the base
•One phone cable
•One handset
•One battery cover
•Two batteries
•One user guide
Models with multiple handsets, per handset:
•One handset
•One charging cradle including power adapter
•Two batteries and one battery cover
The base station and charging cradle are designed for use in closed, dry rooms within a temperature range of +5 °C to +45 °C.
Position the base on a level, non-slip surface at a central point in the flat or house. The device's feet do not usually leave any marks on surfaces. However, due to the multitude of different varnishes and polishes used on furniture, contact marks on the surfaces cannot be completely ruled out.
Never expose the telephone to heat sources, direct sunlight or other electrical devices.
Protect your telephone from moisture, dust, corrosive liquids and vapours.
This device is only suitable for a maximum installation height of 2 m.
8
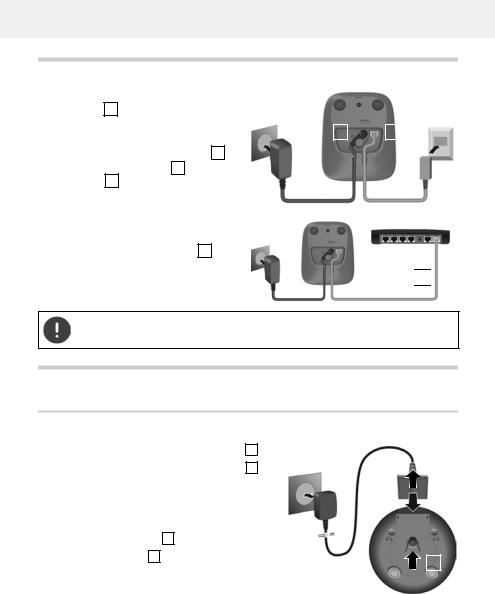
Base
Base |
|
|
|
|
|
|
|
|
¤ |
Insert the phone cable into the connec- |
|
|
|
|
|
|
|
|
tion socket 1 at the rear of the base until |
|
|
|
|
|
|
|
¤ |
it clicks into place. |
|
|
|
|
|
|
|
Insert the power cable from the power |
|
2 |
|
1 |
|
|
||
|
|
|
|
|
|
|
||
¤ |
adapter into the connection socket 2 . |
|
|
|
|
|
|
|
Plug in the power adapter 3 and the |
|
|
|
|
|
|
|
|
3 |
|
|
|
4 |
||||
|
phone jack 4 . |
|
|
|
|
|
|
|
|
|
|
|
|
|
|
|
|
If connecting to a router:
¤Plug the phone cable into the telephone connection socket on the router 5 .
 5
5 
The network cable must always be connected in order to function, as the phone will not operate without a power supply.
Handset
Connecting the charging cradle (if included in the delivery)
¤ Connect the flat plug of the power adapter |
1 . |
|
|
|
|
|
|
|
|
¤ |
Plug the mains unit into your power socket |
2 . |
|
|
|
|
|
|
|
2 |
|
|
|
|
4 |
||||
To remove the plug from the charging cradle again: |
|
||||||||
|
|
|
|
|
|
|
|||
|
|
|
|
|
|
|
|||
|
|
1 |
|
|
|
|
|||
¤ |
Disconnect the power adapter from the mains |
|
|
|
|
|
|||
|
|
|
|
|
|
||||
|
|
|
|
|
|
||||
|
power supply. |
|
|
|
|
|
|
|
|
¤ Press the release button 3 . |
|
|
|
|
|
|
|
|
|
¤ |
Remove the flat plug 4 . |
|
|
|
|
|
|
|
|
|
|
|
|
|
3 |
|
|||
|
|
|
|
|
|
||||
9
Handset
Setting up the handset for use
The display is protected by a plastic film.  Please remove the protective film!
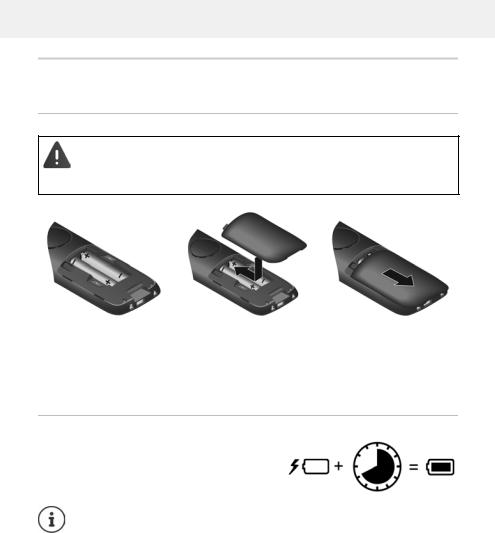
Inserting the batteries
Only use rechargeable batteries, as this could otherwise result in significant health risks and personal injury. For example, the outer casing of the batteries could be destroyed or the batteries could explode. The device could also malfunction or be damaged as a result of using batteries that are not of the recommended type.
¤Insert the batteries
(for correct +/- direction, see diagram).
¤Fit the battery cover from the top.
¤Press the cover until it clicks into place.
Charging the batteries
¤Charge the batteries fully prior to first use in the charging cradle.
The batteries are fully charged when the power icon  disappears from the display.
Batteries may heat up during charging. This is not dangerous.
After a time, the charge capacity of the battery will decrease for technical reasons.
Handsets contained in the package have already been registered to the base. In the event that a handset is not registered however (indicated by Please register handset), register the handset manually ( p. 45).
10
Handset
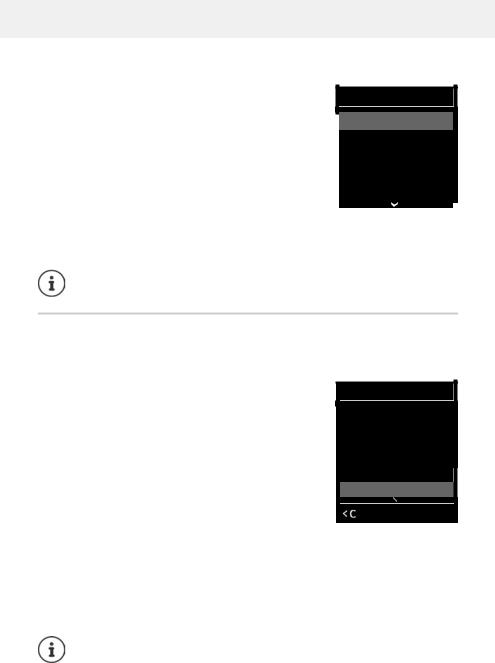
Changing the display language
You can change the display language, if the telephone has been set to an incomprehensible language.
¤ Press the centre of the control key |
. |
|
|
|
|
|
||||
¤ |
Press the keys |
and |
slowly and successively . . . the |
Example |
|
|
||||
|
language settings display appears, the set language |
|
Deutsch |
|
|
|||||
|
(e. g. English) is highlighted ( |
= selected). |
|
|
|
|||||
¤ |
|
|
|
|
|
|||||
|
English |
|
|
|||||||
To select a different language: |
Press the control key |
until |
|
|
||||||
|
|
|
|
|||||||
Francais |
|
|
||||||||
|
the desired language is highlighted on the display, |
|
|
|
||||||
|
|
|
|
|
|
|||||
|
e. g. Francais press the key on the right directly underneath |
|
|
|
|
|||||
¤ |
the display to activate the language. |
|
|
|
|
|
|
|||
To revert to idle status: |
Press and hold the End call key |
|
|
|
|
|
||||
Setting the date and time
Set the date/time so that the correct date and time can be assigned to incoming calls, and to
enable the alarm to be used.
¤
Calls Time
or, if the date and time have already been set: |
|||
¤ |
. . . use |
to select |
Settings OK Date/Time |
OK
The active cursor position flashes  . . . change cursor position with
 . . . switch between cursor positions with
Enter date:
¤ . . . using  enter the day, month and year in 8-digit format
Enter time:
¤ . . . using  enter hours and minutes in 4-digit format.
Save settings:
¤Press the display key Save. . . . Saved is shown in the display and a confirmation tone sounds.
Return to idle status:
¤ Press and hold the End call key 
Date/Time
Date:
15/08/2020
Time:
00:00
Back |
Save |
|
|
The telephone is now ready for use.
11

Getting to know your telephone
Using the telephone
Getting to know your telephone
Switch the handset on/off
Switching on: ¤ When the handset is switched off, press and hold the End call key  Switch off: ¤ When the handset is in idle status, press and hold the End call key
When you place a switched off handset into the base or charging cradle, it switches itself on automatically.
Lock/unlock the keypad
The keypad lock prevents any accidental use of the telephone.
Lock/unlock the keypad: 
 Press and hold
Keypad lock activated: the following symbol appears 
If a call is indicated on the handset, the keypad automatically unlocks and you can accept the call. It then locks again when the call is finished.
It is not possible to call emergency numbers either when keypad lock is activated.
Control key
The control key enables you to navigate the menus and input fields, and also to call up certain functions depending on the situation.
In the description below, the side of the control key (up, down, right, left) that you have to press in the different operating situations is marked in black, e. g.  for "press right on the control key" or
  for "press the centre of the control key".
In idle status |
|
Open the directory |
Press briefly |
Open the main menu |
or |
Open the list of handsets |
|
In submenus, selection and entry fields |
|
Confirm a function |
|
12

Getting to know your telephone
During a conversation
Open the directory
Mute the microphone
Initiate an internal consultation call
Adjust the loudspeaker volume for receiver and handsfree mode
Display keys
The display keys perform a range of functions depending on the operating situation.
Back |
Save |
|
|
Current display key |
|
|
|
|
functions |
Display keys
Display key icons  p. 68
p. 68
The display keys have a function preset by default in idle status. You can change this setting.
Menu guidance
The functions of your telephone are displayed in a menu that consists of several levels.
Selecting/confirming functions
Confirm selection using |
OK or press the centre of the control key |
||
One menu level back using |
Back |
|
|
Change to idle status |
Press and hold |
|
|
Switch function on/off using |
Change |
enabled |
/ disabled |
Activate/deactivate option using |
Select |
activated |
/ not activated |
Main menu
In idle status:  Press the centre of the control key
 . . . use the control key
  to select a submenu
  OK
OK
The main menu functions are shown in the display as icons. The icon for the selected function is highlighted in colour and the name of the associated function appears in the display header.
Example
Settings
|
|
|
|
Back |
OK |
|
|
|
13
Getting to know your telephone
Submenus
The functions in the submenus are displayed as lists.
To access a function:  . . . use the control key
  to select a function
  OK
OK
Return to the previous menu level:
¤ Press the display key Back
or
¤ Press the End call key  briefly
Returning to idle status
¤ Press and hold the End call key 
Example
Settings
 Date/Time
 Audio Settings
 Display
 Language
 Registration
|
|
Back |
OK |
|
|
If a key is not pressed, after 2 minutes the display will automatically change to idle status.
Entering text
Input position
¤Use  to select an entry field. A field is activated when the cursor is blinking inside it.
¤Use  to move the position of the cursor.
Correcting incorrect entries
•Delete characters to the left of the cursor: 
 Press briefly
•Delete words to the left of the cursor: 
 Press and hold
Entering letters/characters
Multiple letters and numbers are assigned to each key between  and
and  and the
  key. As soon as a key is pressed, the
possible characters are displayed at the bottom of the display. The selected character is highlighted.
Example |
New Entry |
First Name: |
Peter| |
Surname: |
Tel.1 - Type: |
Abc |
‚ |
Save |
•Selecting letters/numbers:  Press the key briefly several times in succession
•Switch between lower case, upper case and number entry mode:  Press the hash key
  When editing a directory entry, the first letter and each letter following a space is automatically in upper case.
•Entering special characters:  Press the star key
 . . . use
  to navigate to the desired character
  Insert
The availability of special characters depends on the language setting.
14

Making calls
Making calls
Making calls
¤. . . use  to enter the number
  briefly press the Talk key
or
¤Press and hold the Talk key 
 . . . use
  to enter the number
Cancel dialling:  Press the End call key
Information for Calling Line Identification:  p. 20
p. 20
If the display backlight is deactivated, you can reactivate it by pressing any key. Digit keys that are pressed appear in the display for pre-dialling, other keys have no further function.
Dialling from the directory
¤ . . . use  to open the directory
  . . . use
  to select an entry
  press the Talk key
If multiple numbers are entered:
¤ . . . use  to select a number
  press the Talk key
  . . . the number is dialled
For fast access (quick dial): Assign numbers from the directory to the digit or display keys.
Dialling from the redial list
The redial list contains the 20 numbers last dialled with the handset.
¤Briefly press the Talk key  . . . the redial list is opened
  . . . use
  to select an entry
  press the Talk key
If a name is displayed:
¤View . . . the number is displayed  . . . use
  to browse numbers if necessary
  . . . when the desired number is reached press the Talk key
Managing entries in the redial list
¤Briefly press the Talk key  . . . the redial list is opened
  . . . use
  to select an entry
Options . . . possible options:
Copy an entry to the directory: 
 Copy to Directory
  OK
OK
Copy the number to the display:
¤  Display number
  OK
OK  . . . use
  to amend or add numbers if necessary . . .
use  to save as a new entry in the directory Delete the selected entry:
 Delete entry
  OK Delete all entries:
 Delete List
  OK
OK
15

Making calls
Dialling from the call list |
|
|
||
The call lists ( p. 27) contain the most recent accepted, outgoing and missed calls. |
||||
¤ |
. . . use |
to select |
Call Lists OK . . . use |
to select a list OK . . . |
use |
to select an entry |
Press the Talk key |
|
|
The call lists can be displayed directly by pressing the display key Calls if the relevant function has been assigned to the display key.
The Missed calls list can also be opened by pressing the Message key  .
.
One touch call
A saved number is dialled by pressing any key. This allows children who are not yet able to enter a number to call a certain number, for example.
¤
 . . . use
  to select
  Additional Features
  OK
OK 
 One Touch Call
  OK
OK  . . . use
  to activate Activa-Activate one touch call mode:
tion |
Call to |
. . . use |
to enter the number Save |
|
. . . the active one touch mode is shown in the idle display |
||||
Make a one touch call: |
Press any key . . . the saved number is |
|||
dialled |
|
|
|
|
Cancel dialling: Press the End call key |
. |
|||
End one touch call:  Press and hold the End call key
Example
|
07:15 |
INT 1 |
22 Feb |
|
|
OneTouchCall active
0891234567
OFF
Incoming calls
An incoming call is indicated by ringing, by a display on the screen and by the flashing Talk / Handsfree key ( /
/ ).
).
Accept a call:
•Press the Talk key  or
or  Accept
•If Auto Answer is activated:  Remove the handset from the charging cradle
Switch off ringtone:  Silence . . . the call can be accepted for as long as it is shown on the display
Information about the caller
The caller's number is sent ( p. 20).
The caller's phone number is displayed.
If the caller's number is saved in the local directory, the name is displayed.
16

Making calls
Making internal calls
Multiple handsets have been registered to the base station ( p. 45).
¤  Press briefly . . . the handset list is opened, this handset is indicated by <
  . . . use
  to select handset or Call all (group call)
  Press the Talk key
Fast access for group call:
¤ Press briefly 


or  press and hold
Internal calls to other handsets registered to the same base station are free of charge. You hear the busy tone if:
•There is already an internal connection
•The handset being called is not available (deactivated, outside of range).
•The internal call is not accepted within 3 minutes.
Internal consultation call / Internal transfer
Call an external participant and transfer the call to an internal participant or hold a consultation call with him or her.
¤ 
 . . . the list of handsets is opened
  . . . use
  to select a handset or Call all
  OK
OK
. . . the internal participant(s) are called . . . possible options: Hold a consultation call:
¤Speak to the internal participant Return to the external call:
¤Options 
 End active call
  OK
OK
Transfer the external call when the internal participant has answered:
¤Announce an external call  Press the End call key
  Transfer the external call before the internal participant answers:
¤Press the End call key  . . . the external call is forwarded immediately. If the internal participant does not answer or the line is busy, the external call will
automatically return to you.
End the internal call if the internal participant does ¤ End . . . You return to the external call
not answer or the line is busy:
17

Making calls
Listening in to an external call
You are conducting an external call. An internal participant can listen in to this call and take part in the conversation (conference).
The Listening In function must be activated.
Activating/deactivating internal listening in |
|
|
|||
¤ |
. . . use |
to select |
Settings OK |
Telephony OK |
Listening In |
Change ( = activated)
Internal listening in
The line is engaged with an external call. Your screen will display information to that effect. You can listen in to the external call.
¤ Press and hold  . . . all participants will hear a signal tone
Ending listening in
¤ Press  . . . all participants will hear a signal tone
During a conversation
Handsfree mode
Activating/deactivating handsfree mode during a call and when establishing a connection:
¤ Press the handsfree key 
Placing the handset in the charging cradle during a call:
¤Press and hold down the handsfree key 
 . . . Place the handset in the charging cradle
  . . . hold
  for a further 2 seconds
Call volume
Applies for the mode currently being used (handsfree, receiver or headset):
¤ Press 
 . . . use
  to set the volume
  Save
Save
The setting is automatically saved after around 3 seconds, even if Save is not pressed.
Muting the microphone
When the microphone is switched off, callers will no longer hear you.
Switch the microphone on/off during a call:  press
press  .
.
18

Provider-specific functions (network services)
Provider-specific functions (network services)
Network services depend on the network (analogue fixed line network or IP telephony) and on the network provider (service provider) and must be requested from that provider if required.
You will find a description of the features on your network provider's website or at one of their store branches.
If you require assistance, please contact your network provider.
Requesting network services may incur additional costs. Please consult your network provider.
Network services fall into two distinct groups:
•Network services that are activated when in idle status for the following call or all subsequent calls (for example, "calling anonymously"). These are activated/deactivated via the
 Select Services menu.
•Network services that are activated during an external call, (for example,"consultation call",
"swapping between two callers"). These are made available during an external call either as an option or by using a display key (e.g. Ext. Call).
To activate/deactivate the features, a code is sent to the telephone network.
¤ After a confirmation tone from the telephone network, press  . It is not possible to reprogram the network services.
Switch network provider (Belgium) |
||
¤ |
Select Belgacom (network provider 1): |
¤. . . then |
|
Select Telenet (network provider 2): |
¤ |
19

Provider-specific functions (network services)
Calling Line Identification
During a call, the caller's number is transferred (CLI = Calling Line Identification) and may be displayed on the recipient's display (CLIP = CLI presentation). If the caller's number is withheld, it will not be displayed to the recipient. The call is made anonymously (CLIR = CLI Restriction).
Caller display for incoming calls
Calling Line Identification
The caller's phone number is displayed. If the caller's number is saved in the directory, the name is displayed.
No Calling Line Identification
Instead of name and number, the following is displayed:
•External: No number has been transferred.
•Withheld: Caller has withheld Calling Line Identification.
•Unavailable: Caller has not authorised Calling Line Identification.
Calling Line Identification for outgoing calls
Switching Calling Line Identification on/off for all calls
These settings apply to all registered handsets.
¤ |
. . . use |
to select |
Select Services |
OK |
All Calls Anonym. |
|
Change ( = activated) |
|
|
|
|
Deactivating Calling Line Identification for the next call |
|||||
¤ |
. . . use |
to select |
Select Services |
OK |
Next Call Anonym. OK . . . |
use  to enter the number
  Dial . . . the connection is established without Calling Line Identification
Call waiting during an external call
During an external call, a call waiting tone indicates another external caller. If the number is being transferred, you will see the number or the name of the caller on the display.
Reject waiting caller:
¤Options 
 Reject waiting call
  OK . . . the waiting caller hears the busy tone
Accept the waiting call:
¤ Accept
Once you have accepted the waiting call, you can switch between the two callers (Call swapping  p. 22) or speak to both simultaneously.
Call Waiting
1234567
Accept Options
20
Provider-specific functions (network services)
Activating/deactivating call waiting |
|
|
||||
¤ |
. . . use |
to select |
Select Services OK |
Call Waiting OK . . . then |
||
|
Switch on/off: |
¤ |
Status: . . . use |
to select On or Off |
||
|
Activate: |
¤ |
Send |
|
|
|
Call waiting is activated or deactivated for all registered handsets.
Call divert
When diverting a call, the call is forwarded to another connection.
¤ 
 . . . use
  to select
  Select Services
  OK
OK 
 Call Divert
  OK
OK  . . . then Switch on/off:
  Status: . . . use
  to select On or Off
Enter the number for call diverting:
¤  To Phone Number
  . . . use
  to enter the number Set the time for call divert:
¤  When
When  . . . use
  to select the time for call divert
All Calls: Calls are diverted immediately
No Answer: Calls are diverted if no one accepts the call within several rings.
When Busy: Calls are diverted if the line is busy. Activate:  Send
Send
A connection is established to the telephone network . . . a confirmation is sent from the telephone network  Press the End call key
Diverting calls may incur additional costs. Please consult your network provider.
Calls with three participants |
|
|
|
|||
|
|
|
|
|
||
Consultation calls |
|
|
|
|
||
Make another external call during an external call. The first call is |
|
|
|
|||
Consultation |
||||||
placed on hold. |
|
|
||||
|
|
|
|
|
||
¤ Ext. Call |
. . . use |
to enter the number of the second |
|
|
|
|
participant . . . the active call is placed on hold and the |
|
|
|
|||
second participant is called |
Call to: |
|
|
|||
If the second participant does not answer: End |
12 |
|
|
|||
Ending a consultation call |
On hold: |
|
|
|||
025167435 |
|
|||||
¤ Options |
End active call OK . . . the connection to |
|
||||
|
|
|
||||
End |
Options |
|||||
the first caller is reactivated |
||||||
|
|
|
||||
|
|
|
|
|
|
|
or
¤ Press the End call key  . . . a recall to the first participant is initiated
21

Provider-specific functions (network services)
Call swapping
Switching between two calls. The other call is placed on hold. |
Call Swap |
|
|||
¤ |
During an external call, dial the number of a second |
|
|||
|
|
||||
|
|
||||
|
participant (consultation call) or accept a waiting caller . . . |
|
|
||
|
the display shows the numbers and/or names of both call |
1234567 |
|
||
¤ |
participants, the current participant is marked with . |
|
|||
Use the control key |
to switch back and forth between |
025167435 |
|
||
|
participants |
|
|
08:15 |
|
Ending a currently active call |
|
|
|||
¤ |
Options |
End active call OK . . . the connection to |
Conference |
Options |
|
|
|
||||
the other caller is reactivated
or
¤ Press the End call key  . . . a recall to the first participant is initiated
22

Directory
Directory
The local directory is unique to the handset. However, it is possible to send entries to other handsets.
Opening the directory
¤ Briefly press  in idle status
Directory entries
Number of entries: |
up to 200 |
Information: |
First name and surname, up to three telephone numbers, anniversary |
|
with alert, VIP ringtone with VIP icon |
Length of the entries: |
Numbers: max. 32 digits |
|
First name, surname: max. 16 characters |
Creating an entry |
|
|
¤ |
<New Entry> OK . . . use |
to switch |
between the entry fields Name:
¤. . . use  to enter the first and/or last name Numbers:
¤ Tel.1 - Type
  . . . Use
  to select a number type (Home, Office or Mobile)

 . . . Use
  to enter a number
Enter more numbers:  Use
Use  to toggle between the entry fields Tel.1 - Type/Tel.2 - Type/Tel.3 - Type
  . . . Use
  to enter a number
Anniversary:
¤ . . . use  to activate/deactivate Anniversary
  . . . use
  use
use  to select type of alert (Visual only or a ringtone)
Example
New Entry
First Name:
Robert
Surname:
I
Tel.1 - Type:
Abc
‚
Save
to enter date and time  . . .
. . .
23
Directory
Caller Melody (VIP):
¤ . . . use  to select the ringtone that will indicate a call from the participant . . . if a Caller Melody (VIP) has been assigned, the entry will appear in the directory with the
  icon.
icon.
Save entry:  Save
Save
The entry is only valid if it contains at least one number.
For Caller Melody (VIP): the telephone number of the caller must be supplied.
Searching for/selecting a directory entry |
||
¤ |
. . . use |
to browse searched names |
or
¤ 
 . . . use
  to enter initial letters (max. 8 letters) . . . the display jumps to the first name starting with these initial letters
  . . . use
  to continue browsing to the desired entry, if needed
Scroll through directory: 

 Press and hold
Displaying/changing an entry |
|
|
||
¤ |
. . . use |
to select entry |
View . . . use |
to select the field to be changed |
|
Edit |
|
|
|
or |
|
|
|
|
¤ |
. . . use |
to select an entry |
Options Edit entry OK |
|
Deleting entries
Delete the selected entry:¤ 
 . . . use
  to select an entry
  Options
 Delete
entry  OK
OK
Delete all entries: ¤ 
 Options
 Delete all
  OK
OK  Yes
Yes
Setting the order of the directory entries
Directory entries can be sorted by first name or surname.
¤ 
 Options
 Sort by Surname / Sort by First Name
If no name was entered, the default telephone number is shown in the surname field. These entries appear at the beginning of the list, regardless of how the entries are sorted.
The sort order is as follows:
Space | Digits (0-9) | Letters (alphabetically) | Other characters.
24
Loading...