


A170/A170A
A270/A270A
You can find the most up-to-date user guide at
www.gigaset.com/manuals
User guide online on your
smartphone or tablet:
Download the Gigaset Help app

Contents
Contents
Overview of the handset . . . . . . . . . . . . . . . . . . . . . . . . . . . . . . . . . . . . . . . . . . . . . . . . . . . . . . . . . . . . . . 4 Overview of the A170A/A270A base . . . . . . . . . . . . . . . . . . . . . . . . . . . . . . . . . . . . . . . . . . . . . . . . . . . 5 Illustration in the user guide . . . . . . . . . . . . . . . . . . . . . . . . . . . . . . . . . . . . . . . . . . . . . . . . . . . . . . . . . . . 6 Safety precautions . . . . . . . . . . . . . . . . . . . . . . . . . . . . . . . . . . . . . . . . . . . . . . . . . . . . . . . . . . . . . . . . . . . . 7 Getting started . . . . . . . . . . . . . . . . . . . . . . . . . . . . . . . . . . . . . . . . . . . . . . . . . . . . . . . . . . . . . . . . . . . . . . . 8
Contents of the package . . . . . . . . . . . . . . . . . . . . . . . . . . . . . . . . . . . . . . . . . . . . . . . . . . . . . . . . . . . . . . . . 8 Connecting the base to power supply and telephone network . . . . . . . . . . . . . . . . . . . . . . . . . . . 9 Connecting the base to the router. . . . . . . . . . . . . . . . . . . . . . . . . . . . . . . . . . . . . . . . . . . . . . . . . . . . . . . 9 Connecting the charging cradle (if supplied). . . . . . . . . . . . . . . . . . . . . . . . . . . . . . . . . . . . . . . . . . . . . 9 Setting up the handset for use . . . . . . . . . . . . . . . . . . . . . . . . . . . . . . . . . . . . . . . . . . . . . . . . . . . . . . . . . 10
Operating the handset . . . . . . . . . . . . . . . . . . . . . . . . . . . . . . . . . . . . . . . . . . . . . . . . . . . . . . . . . . . . . . . 12 Making calls . . . . . . . . . . . . . . . . . . . . . . . . . . . . . . . . . . . . . . . . . . . . . . . . . . . . . . . . . . . . . . . . . . . . . . . . . 13
Making a call . . . . . . . . . . . . . . . . . . . . . . . . . . . . . . . . . . . . . . . . . . . . . . . . . . . . . . . . . . . . . . . . . . . . . . . . . . 13 Accepting a call. . . . . . . . . . . . . . . . . . . . . . . . . . . . . . . . . . . . . . . . . . . . . . . . . . . . . . . . . . . . . . . . . . . . . . . . 13 Caller display . . . . . . . . . . . . . . . . . . . . . . . . . . . . . . . . . . . . . . . . . . . . . . . . . . . . . . . . . . . . . . . . . . . . . . . . . . 14 Handsfree mode (A270/A270A only) . . . . . . . . . . . . . . . . . . . . . . . . . . . . . . . . . . . . . . . . . . . . . . . . . . . 14 Automatic network provider selection (Preselection). . . . . . . . . . . . . . . . . . . . . . . . . . . . . . . . . . . . 15
Directory . . . . . . . . . . . . . . . . . . . . . . . . . . . . . . . . . . . . . . . . . . . . . . . . . . . . . . . . . . . . . . . . . . . . . . . . . . . . 16 Message/call lists . . . . . . . . . . . . . . . . . . . . . . . . . . . . . . . . . . . . . . . . . . . . . . . . . . . . . . . . . . . . . . . . . . . . 17
Call list . . . . . . . . . . . . . . . . . . . . . . . . . . . . . . . . . . . . . . . . . . . . . . . . . . . . . . . . . . . . . . . . . . . . . . . . . . . . . . . . 17 Answer machine list (A170A/A270A only) / network mailbox list. . . . . . . . . . . . . . . . . . . . . . . . . 18
Local answer machine (A170A/A270A only) . . . . . . . . . . . . . . . . . . . . . . . . . . . . . . . . . . . . . . . . . . . 19
Setting up the answer machine . . . . . . . . . . . . . . . . . . . . . . . . . . . . . . . . . . . . . . . . . . . . . . . . . . . . . . . . 19 Operation using the handset. . . . . . . . . . . . . . . . . . . . . . . . . . . . . . . . . . . . . . . . . . . . . . . . . . . . . . . . . . . 20 Operation when on the move (remote operation). . . . . . . . . . . . . . . . . . . . . . . . . . . . . . . . . . . . . . . 22
Network mailbox . . . . . . . . . . . . . . . . . . . . . . . . . . . . . . . . . . . . . . . . . . . . . . . . . . . . . . . . . . . . . . . . . . . . 23 Using handsets . . . . . . . . . . . . . . . . . . . . . . . . . . . . . . . . . . . . . . . . . . . . . . . . . . . . . . . . . . . . . . . . . . . . . . 23
Locating a handset – "Paging" (A170A/A270A only) . . . . . . . . . . . . . . . . . . . . . . . . . . . . . . . . . . . . . 23 Registering a handset. . . . . . . . . . . . . . . . . . . . . . . . . . . . . . . . . . . . . . . . . . . . . . . . . . . . . . . . . . . . . . . . . . 23 De-registering the handset . . . . . . . . . . . . . . . . . . . . . . . . . . . . . . . . . . . . . . . . . . . . . . . . . . . . . . . . . . . . 24 Making internal calls. . . . . . . . . . . . . . . . . . . . . . . . . . . . . . . . . . . . . . . . . . . . . . . . . . . . . . . . . . . . . . . . . . . 24
Additional functions . . . . . . . . . . . . . . . . . . . . . . . . . . . . . . . . . . . . . . . . . . . . . . . . . . . . . . . . . . . . . . . . . 26
Alarm clock. . . . . . . . . . . . . . . . . . . . . . . . . . . . . . . . . . . . . . . . . . . . . . . . . . . . . . . . . . . . . . . . . . . . . . . . . . . . 26 ECO DECT . . . . . . . . . . . . . . . . . . . . . . . . . . . . . . . . . . . . . . . . . . . . . . . . . . . . . . . . . . . . . . . . . . . . . . . . . . . . . 26 Quick dial . . . . . . . . . . . . . . . . . . . . . . . . . . . . . . . . . . . . . . . . . . . . . . . . . . . . . . . . . . . . . . . . . . . . . . . . . . . . . 27
2

Contents
Telephone settings . . . . . . . . . . . . . . . . . . . . . . . . . . . . . . . . . . . . . . . . . . . . . . . . . . . . . . . . . . . . . . . . . . . 28
Call volume. . . . . . . . . . . . . . . . . . . . . . . . . . . . . . . . . . . . . . . . . . . . . . . . . . . . . . . . . . . . . . . . . . . . . . . . . . . . 28 Ringtones . . . . . . . . . . . . . . . . . . . . . . . . . . . . . . . . . . . . . . . . . . . . . . . . . . . . . . . . . . . . . . . . . . . . . . . . . . . . . 28 Display language . . . . . . . . . . . . . . . . . . . . . . . . . . . . . . . . . . . . . . . . . . . . . . . . . . . . . . . . . . . . . . . . . . . . . . 29 Music on hold . . . . . . . . . . . . . . . . . . . . . . . . . . . . . . . . . . . . . . . . . . . . . . . . . . . . . . . . . . . . . . . . . . . . . . . . . 29 Key 1 . . . . . . . . . . . . . . . . . . . . . . . . . . . . . . . . . . . . . . . . . . . . . . . . . . . . . . . . . . . . . . . . . . . . . . . . . . . . . . . . . . 29 System PIN . . . . . . . . . . . . . . . . . . . . . . . . . . . . . . . . . . . . . . . . . . . . . . . . . . . . . . . . . . . . . . . . . . . . . . . . . . . . 30 Repeater support (A170A/A270A only) . . . . . . . . . . . . . . . . . . . . . . . . . . . . . . . . . . . . . . . . . . . . . . . . . 30 Resetting the system . . . . . . . . . . . . . . . . . . . . . . . . . . . . . . . . . . . . . . . . . . . . . . . . . . . . . . . . . . . . . . . . . . 31 Operating the base with a PABX/router . . . . . . . . . . . . . . . . . . . . . . . . . . . . . . . . . . . . . . . . . . . . . . . . . 32
Customer Service & Assistance . . . . . . . . . . . . . . . . . . . . . . . . . . . . . . . . . . . . . . . . . . . . . . . . . . . . . . . |
33 |
Questions and answers . . . . . . . . . . . . . . . . . . . . . . . . . . . . . . . . . . . . . . . . . . . . . . . . . . . . . . . . . . . . . . . . 34 Guarantee Certificate - United Kingdom and Ireland . . . . . . . . . . . . . . . . . . . . . . . . . . . . . . . . . . . . 34 Manufacturer warranty (Middle East) . . . . . . . . . . . . . . . . . . . . . . . . . . . . . . . . . . . . . . . . . . . . . . . . . . . 35
Manufacturer's advice . . . . . . . . . . . . . . . . . . . . . . . . . . . . . . . . . . . . . . . . . . . . . . . . . . . . . . . . . . . . . . . 36
Authorisation. . . . . . . . . . . . . . . . . . . . . . . . . . . . . . . . . . . . . . . . . . . . . . . . . . . . . . . . . . . . . . . . . . . . . . . . . . 36 Environment . . . . . . . . . . . . . . . . . . . . . . . . . . . . . . . . . . . . . . . . . . . . . . . . . . . . . . . . . . . . . . . . . . . . . . . . . . 37 Care. . . . . . . . . . . . . . . . . . . . . . . . . . . . . . . . . . . . . . . . . . . . . . . . . . . . . . . . . . . . . . . . . . . . . . . . . . . . . . . . . . . 37 Contact with liquid . . . . . . . . . . . . . . . . . . . . . . . . . . . . . . . . . . . . . . . . . . . . . . . . . . . . . . . . . . . . . . . . . . . . 37
Technical details . . . . . . . . . . . . . . . . . . . . . . . . . . . . . . . . . . . . . . . . . . . . . . . . . . . . . . . . . . . . . . . . . . . . . 38
Entering letters/characters . . . . . . . . . . . . . . . . . . . . . . . . . . . . . . . . . . . . . . . . . . . . . . . . . . . . . . . . . . . . . 38
Not all functions described in the user guide are available in all countries or from all network providers.
3

Overview of the handset
Overview of the handset
1 |
|
|
|
|
|
|
1 |
|
|
|
|
|
|
||
|
|
|
|
|
|||
|
|
|
|
|
|
2 |
|
|
|
|
|||||
|
|
|
|
|
|||
|
|
|
|||||
|
|
|
|
|
|
|
|
11.05.16:52
INT MENU
3
4
5
6
7
8
9
10
11
1 Answer machine icon (A170A/A270A only)
2 Charge level of the batteries
Empty to fully charged
Flashing: Batteries almost empty Flashing: Charge process
3Display keys and functions ( p. 12)
Various functions, depending on the operating situation
4 |
Talk key / Handsfree key |
|
|
|
Handsfree mode (A270/A270A only) |
||
|
Accept call; select number displayed |
||
|
Open the redial list |
¥ |
Press briefly |
|
Start dialling |
¥ |
Press and hold |
5 |
End call key and On/Off key |
|
|
|
End call; cancel function |
¥ Press briefly |
|
|
Go back one menu level |
||
|
Return to idle status |
¥ |
Press and hold |
|
Switch the handset on and |
¥ |
Press and hold |
|
off (in idle status) |
|
|
6 |
Control key |
|
|
|
Navigate through menus and entry fields |
||
|
Open the directory |
¥ |
Press down |
|
Set the call volume |
¥ |
Press up |
7 |
Key 1 |
¥ Press and hold |
|
|
Playback messages on the |
||
|
answer machine |
|
|
|
(A170A/A270A only) / |
|
|
|
network mailbox |
|
|
8 |
Key 0/Recall key |
¥ Press and hold |
|
|
Consultation call (flash) |
||
9 |
Hash key/Lock key |
¥ Press and hold |
|
|
Enable/disable keypad lock |
||
|
(in idle status) |
|
|
|
Toggle between upper/lower ¥ Press briefly |
||
|
case and digits |
|
|
|
(when inputting text) |
¥ Press and hold |
|
|
Insert a dialling pause |
||
10 |
Star key |
¥ Press and hold |
|
|
Switch the ringtones on/off |
||
|
Enter special characters |
¥ |
Press briefly |
|
Switch from pulse dialling to |
¥ |
Press briefly |
|
tone dialling (for the existing |
|
|
|
connection) |
|
|
11 |
Microphone |
|
|
New messages in the call list / network mailbox list ( p. 17) are shown on the display by message New messages.
4

Overview of the A170A/A270A base
Overview of the A170A/A270A base
 A
A
B
C
 D
D
E
 F
F
AVolume keys (– = quieter; + = louder) During message playback:
adjust the speech volume
While the phone is ringing: adjust the ringtone volume
B Delete key
During message playback: Delete current message.
CForward key
During message playback: Go to the next message.
D |
Back key |
|
|
|
During message playback: |
||
|
Go to the start of the |
¤ press once |
|
|
current message: |
¤ press twice |
|
|
Skip to the previous |
||
|
message: |
|
|
E |
On/Off and Playback/Stop key |
||
|
Switch the answer |
¤ |
Press and hold |
|
machine on/off: |
|
|
|
During message playback: |
||
|
Play back messages: |
¤ |
Press briefly |
|
Cancel playback: |
¤ |
Press briefly |
Lights up: Answer machine switched on, no new messages
Flashes: New message; message is being played or recorded
Flashes very quickly:
Memory full
F Registration/paging key
Locate a handset ¤ Press briefly ("paging"):
Register the handset: ¤ Press briefly
5
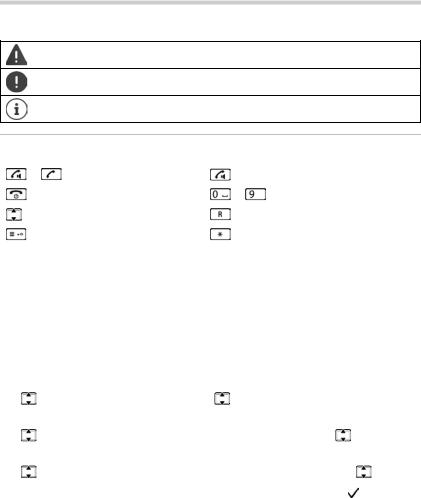
Illustration in the user guide
Illustration in the user guide
Warnings, the non-adherence to which can result in damage to devices or personal injury.
Important information regarding function and appropriate handling or functions that could generate costs.
Additional helpful information.
Keys
or |
Talk key |
|
Handsfree key |
|
|
|
|
|
End call key |
to |
Digit/letter keys |
|
|
|
|
|
Control key |
|
Recall key |
|
|
|
|
|
Hash key |
|
Star key |
|
|
|
|
MENU, OK, INT |
|
Display keys |
|
|
|
|
|
|
|
|
|
Procedures
Example: Switching Auto answer on/off:
¤MENU 
 Settings
  OK
OK 
 Handset
  OK
OK 
 Auto Answer
  OK
OK
( = enabled)
Step |
Follow this procedure |
|
|
|
|
|
|
|
|
||
¤ MENU |
Press the display key MENU. |
|
|
||
¤ |
Settings |
Use the control key |
to navigate to entry Settings. |
|
|
¤ |
OK |
Press OK to confirm. The submenu Settings opens. |
|
||
¤ |
Handset |
Select the Handset entry using the control key |
. |
|
|
¤ |
OK |
Press OK to confirm. The submenu Handset opens. |
|
||
¤ |
Auto Answer |
Select the Auto Answer entry using the control key |
. |
||
¤ OK |
Enable or disable it using OK. Function is enabled . |
|
|||
6

Safety precautions
Safety precautions
Read the safety precautions and the user guide before use.
The device cannot be used in the event of a power failure. In case of a power failure it is also not possible to make emergency calls.
Emergency numbers cannot be dialled if the keypad/display lock is activated!
Use only rechargeable batteries that correspond to the specification (see list of permitted batteries  www.gigaset.com/service). Never use a conventional (nonrechargeable) battery or other battery types as this could result in significant health risks and personal injury. Rechargeable batteries, which are noticeably damaged, must be replaced.
The handset must not be operated if the battery cover is open.
Do not use the devices in environments with a potential explosion hazard (e.g. paint shops).
The devices are not splashproof. For this reason do not install them in a damp environment such as bathrooms or shower rooms.
Use only the power adapter indicated on the device.
Whilst charging, the power socket must be easily accessible.
Remove faulty devices from use or have them repaired by our Service team, as these could interfere with other wireless services.
Do not use the device if the display is cracked or broken. Broken glass or plastic can cause injury to hands and face. Send the device to our Service department to be repaired.
Do not hold the rear of the handset to your ear when it is ringing or when speaker mode is activated. Otherwise you risk serious and permanent damage to your hearing.
The phone may cause interference in analogue hearing aids (humming or whistling) or cause them to overload. If you require assistance, please contact the hearing aid supplier.
Using your telephone may affect nearby medical equipment. Be aware of the technical conditions in your particular environment, e.g. doctor's surgery. If you use a medical device (e.g. a pacemaker), please contact the device manufacturer. They will be able to advise you regarding the susceptibility of the device to external sources of high frequency energy (for the specifications of your Gigaset product see "Specifications").
7

Getting started
Getting started
Contents of the package
•one base
•one power adapter
•one handset
•one phone cable
•two batteries
•one battery cover
•one user guide
If you have purchased a model with multiple handsets, the package should contain two batteries, a battery cover and a charging cradle with power adapter for each additional handset.
Position the base on a level, non-slip surface at a central point in the flat or house. You can also fit the base to a wall.
The range of the base is 300 metres outdoors and 50 metres indoors.
The base and the charging cradle are designed for use in enclosed, dry rooms within a temperature range of +5 °C to +45 °C.
The device's feet do not usually leave any marks on surfaces. However, due to the multitude of different varnishes and polishes used on furniture, contact marks on the surfaces cannot be completely ruled out.
Never expose the telephone to heat sources, direct sunlight or other electrical devices.
Protect your telephone from moisture, dust, corrosive liquids and vapours.
8

Getting started
Connecting the base to power supply and telephone network
¤Connect the power adapter 1 .
¤Connect the phone jack 2 and insert the cables into the cable channels.
A170/A270 |
|
A170A/A270A |
||
|
|
|
|
|
|
1 |
|
2 |
|
1 |
|
2 |
The power adapter must always be connected as the phone does not work without a power supply.
The answer machine (A170A/A270A only) will not be ready for operation until approximately 30 seconds after the base has been connected.
Connecting the base to the router
You can also operate the telephone on the analogue connection of a router. |
|
|
|||||||
¤ Connect the phone jack 1 |
and connect it to the analogue port of a router |
2 . |
|
||||||
A170/A270 |
|
|
A170A/A270A |
|
|
||||
|
|
|
|
|
|
|
|
|
|
|
|
|
|
2 |
|
|
|
|
2 |
|
1 |
|
|
|
|
|
|
|
|
|
|
|
|
|
1 |
|
|
|
|
|
|
|
|
|
|
|
|
|
|
|
|
|
|
|
|||||
|
|
|
|
|
|
|
|||
Any echoes can be reduced by switching on Echo mode ( p. 32). |
|
|
|||||||
Connecting the charging cradle (if supplied)
¤ Connect the flat plug of the power |
|
|
|
adapter 1 . |
|
|
|
¤ Plug the power adapter into the |
|
|
|
|
|
1 |
|
power socket 2 . |
|
|
|
If you have to remove the plug from the |
2 |
|
|
|
|
|
|
charging cradle again: Press the |
|
|
|
release button 3 and disconnect the |
|
|
|
plug 4 . |
|
|
|
 4
4 
 3
3 
9

Getting started
Setting up the handset for use
The display is protected by a plastic film. Please remove the protective film!
Inserting the batteries
Only use rechargeable batteries, as this could otherwise result in significant health risks and personal injury. For example, the outer casing of the batteries could be destroyed or the batteries could explode. The device could also malfunction or be damaged as a result of using batteries that are not of the recommended type.
¤Insert the batteries with the polarity in the correct direction.
The polarity is indicated in the battery compartment.
¤Insert the battery cover from the top.
¤Then slide the cover upwards until it clicks into place.
Charging the batteries
¤Charge the batteries fully prior to first use in the base or the charging cradle.
The batteries are fully charged when the battery icon  on the display stops flashing.
Batteries may heat up during charging. This is not dangerous.
After a time, the charging capacity of the batteries will decrease for technical reasons.
Handsets contained in the package have already been registered to the base. If, however, a handset has not been registered (Register HS or Put into base is displayed), please register it manually ( p. 23).
Changing the display language
You can change the display language, if the telephone has been set to an incomprehensible language.
¤MENU  Press the keys

 slowly in succession . . . the language set (e. g. English) is displayed
¤To select a different language:  Press the control key
  until the language required is selected on the display, e. g. Francais
  OK (
OK ( = selected)
10
Getting started
Setting time and date
Set the date/time so that the correct date and time can be assigned to incoming calls, and to enable the alarm to be used.
¤MENU 
 Settings
  OK
OK  Date/Time
  OK
OK 
 Enter the date in 8 digits (day, month and year)
  OK
OK 
 Enter the time in 4 digits (hours and minutes)
  OK (Display: Saved)
Moving the input position to the left or the right:  Press up or down on the control key
Copying the date and time
If your telephone is sent the date and time in a caller display (for example by your network operator, a router or a PABX) you can specify whether and when this data should be copied.
¤ Press the keys:  MENU
MENU 


. . . You will see the following displayed; the current setting flashes, e.g. 973 SET: [0]
¤Press the key to determine when the data is copied:
 never or
 once, if the date and time are not set in your telephone or
 always
. . . You will see your selection (e.g. 2 for 'always'): 973 SET: [2] |
¤ Press the display key OK. |
11

Operating the handset
Operating the handset
Switching the handset on and off
¤ Press and hold the End call key 
When you place a switched-off handset into the base or the charging cradle, it switches on automatically after about 30 seconds.
When the handset is removed from the base/charging cradle, the display switches off briefly.
Locking/unlocking the keypad
¤ Press and hold the hash key  .
.
Display keys and functions
¤ Press the display key . . . The function shown above it on the display is accessed.
Display |
Meaning on keypress |
|
MENU |
|
INT |
Call another handset internally |
|
|
|
|
|
|
|
|
MENU |
Open the main menu/submenu |
|
|
|
OK |
Confirm menu function / save entry |
|
|
|
|
|
|
|
|
|
Back one menu level |
|
|
|
|
|
|
|
|
|
Delete previous character |
|
|
|
|
|
|
|
|
Display functions accessed from the control key |
|
|||
|
|
|
||
Display |
Meaning on keypress |
|
||
|
Use |
to scroll up/down and to set the volume |
|
|
|
|
|
||
|
Move the cursor left and right with |
|
||
|
|
|
|
|
|
|
|
|
|
Menu navigation
Your phone has many functions, and they are available to you from menus. Select menu function:
¤When the telephone is in idle status press the display key MENU . . . the menu is opened.
¤Use the control key  to scroll to the desired function
  Confirm with OK.
Return to idle status:  Press and hold the key
  .
.
12
Making calls
Making calls
Making a call
¤  Enter the number
  Press the Talk key
  . . . The number is dialled or
¤ Press and hold the Talk key  . . . The dial tone can be heard
 Enter the number
To change the receiver volume during a call: |
Use |
to set the volume |
|
To end call / cancel dialling: Press the End call key |
|
|
|
Provide every number automatically with a network provider prefix: |
p. 15 |
||
Dialling from the directory
¤Open the directory with 
 Use
Use  to scroll to the desired entry.
¤Press the Talk key 
Dialling from the call list
Opening the call list:  MENU
MENU  Messages
  CallsList 01+02
  OK
OK
¤  Select entry
Dialling from the redial list
The list contains the 10 numbers last dialled with the handset. |
||
¤ Press |
briefly |
Select entry |
Managing entries in the redial list
¤ Press  briefly
 Select entry
  MENU
MENU 
 Select function
  OK
OK
Possible functions: Use Number / Copy to Dir. / Delete Entry / Delete List
Accepting a call
¤ Press the Talk key  .
.
Function Auto Answer enabled:  Simply take the handset out of the base/charging cradle
Enabling function Auto Answer:
¤MENU 
 Settings
  OK
OK 
 Handset
  OK
OK 
 Auto Answer
  OK
OK
( = activated)
13
 Loading...