


MPK

1
Akai MPD and MPK Series – Setup With Ableton Live
Contents
Configuring as a Control Surface ...................................................................... 2
Input Output Options ......................................................................................... 4
Custom Assigning Controls ............................................................................... 8
Value Scaling vs. Pick Up Mode...................................................................... 10
Using Note Repeat /Arp with the MPD or MPK’s Internal MIDI Clock ............. 11
Using Note Repeat /Arp with Ableton as Master ............................................. 12
Using a Virtual Instrument in Ableton .............................................................. 13
Technical Support and Warranty Service ........................................................ 16
2
Note: These screenshots were taken on Ableton Live 7.0.15, while there are new
features in 8 the selections that pertain to this setup should remain the same.
Also note they were taken using the MPK on a Mac. All of the options are the
same for the MPD short of the Arp option. So if you own an MPD follow these
same steps. The only difference is you will see MPD instead of MPK. PC users
will see USB Device rather than MPD or MPK.
Configuring as a Control Surface
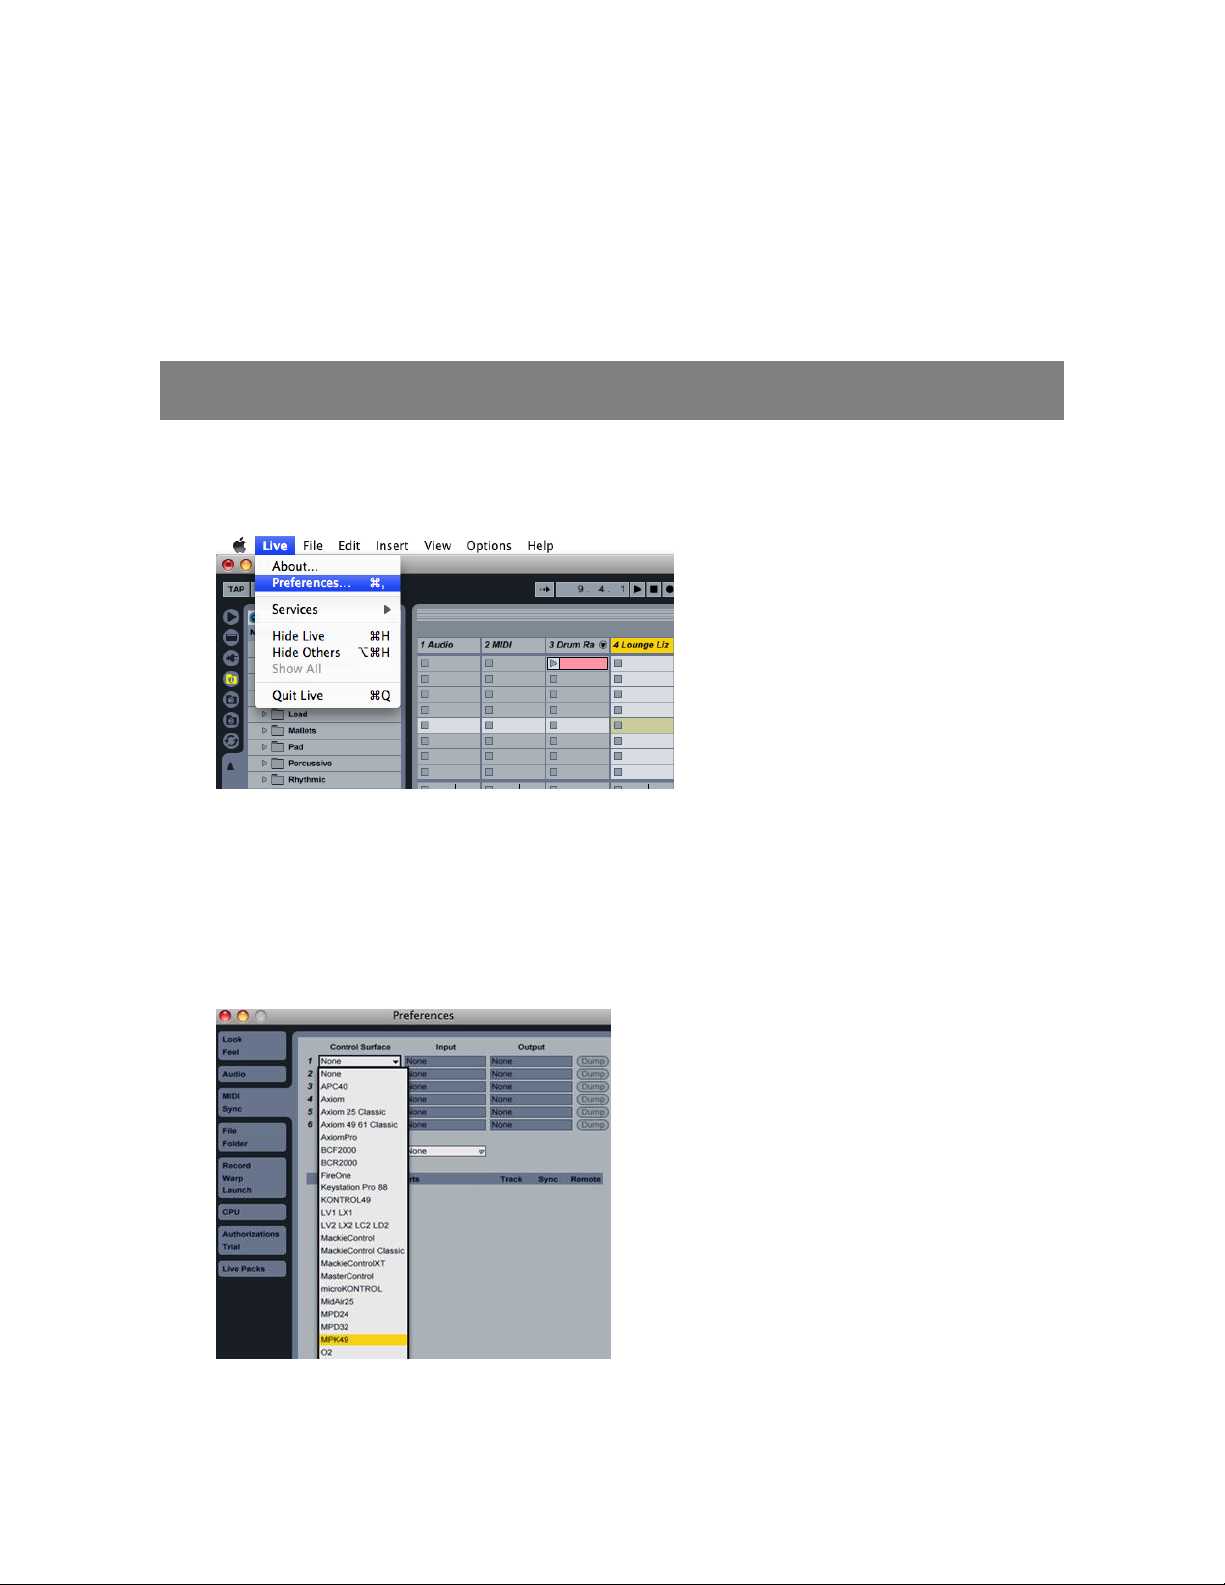
1. First open the software and go to the Live Menu (File Menu on a PC) and
choose Preferences.
2. In the Preferences screen choose the MIDI Sync tab, and then drop down
the Control Surface menu. In here you should see MPD or MPK.
If you do not see these options in the Control Surface menu please upgrade
to the latest version of Ableton 6. Ableton 7 and 8 should have these options
already.
3
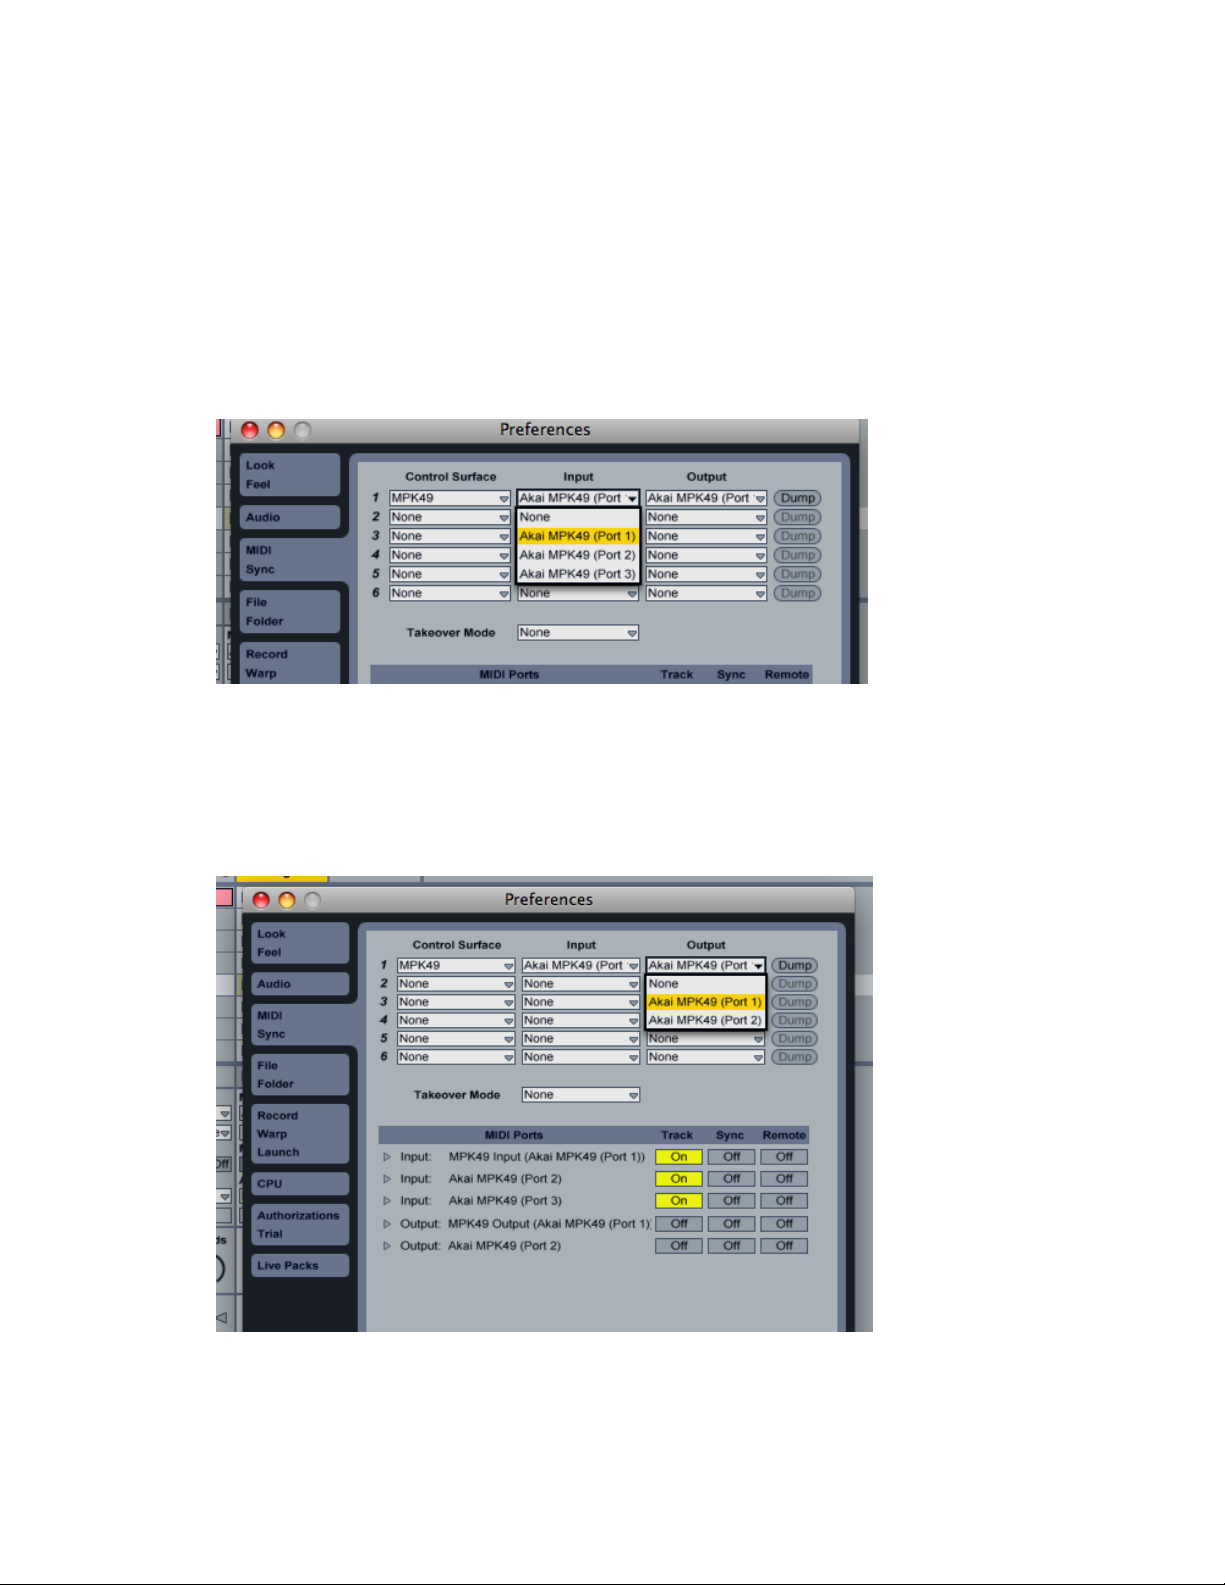
3. After choosing the appropriate Control Surface, turn your attention to the
Input and Output drop-down menus.
On the Input drop-down choose the 1st midi input. (Note: on PC’s you may
see USB Audio Device not MPD or MPK)
4. After choosing the first input drop down the Output menu.
On the Output drop-down menu choose the 1st midi output.
4
Input Output Options
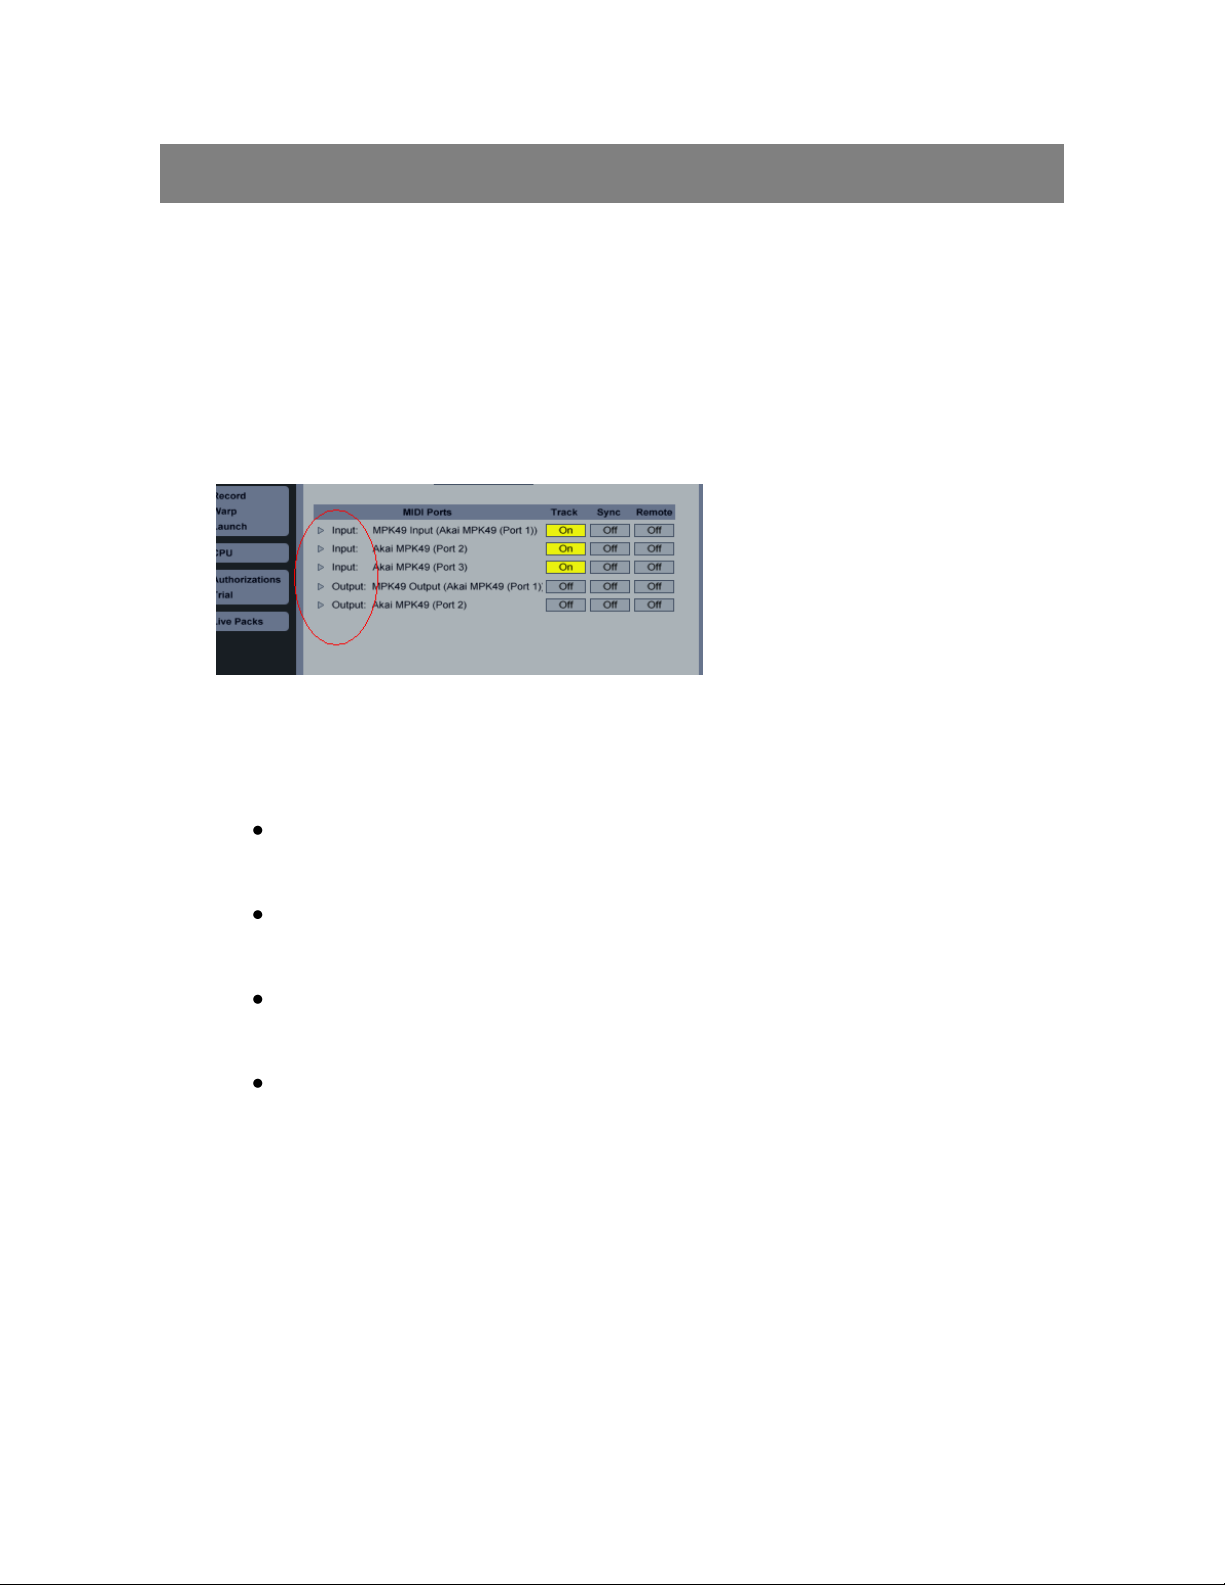
The MPD or MPK should now be selected as the control surface.
Now turn your attention to the MIDI Ports section below. You will see 3 inputs
and 2 outputs. You will also notice the Track, Sync, and Remote options.
* Please ask download our MIDI IO Details Guide from any MPD or MPK
controller’s product page for an explanation on the differences between the 3
inputs and 2 outputs.
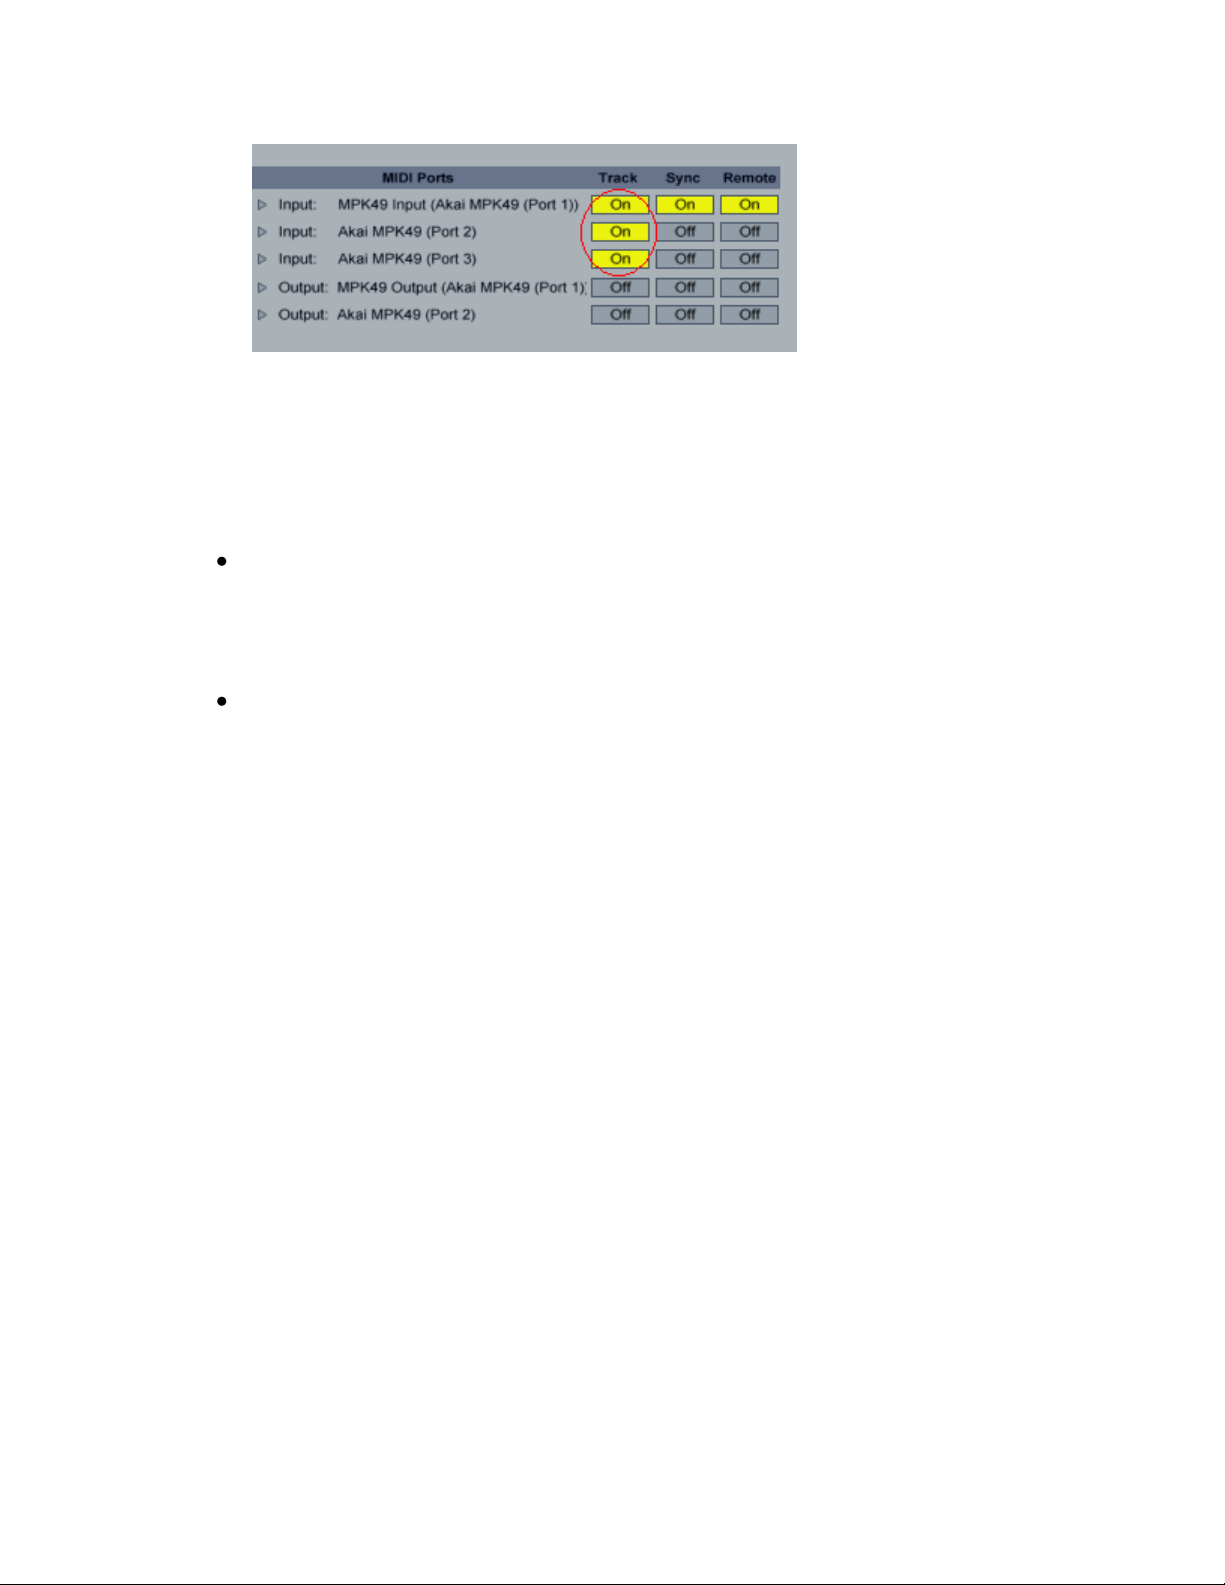
1. The Track option will control any midi notes being sent by the MPD or MPK
or being sent back out to the MPD or MPK. (i.e., the keys and the pads for
playing instruments).
When using the MPD or MPK to trigger virtual instruments in Ableton,
you will want to turn Track On for the 1st input.
If you need to route midi notes from output B on the MPD or MPK then
choose Track On for input 2.
If you would like to use the physical midi in to route midi from another
controller then choose Track On for input 3.
You will see you can do the same on both outputs. Generally you will
not need to turn Track On here. However if you need to route midi
notes back out to an external device, you can do so by turning Track
On for output 2.
5
2. The Sync option is specifically for routing Midi Clock between devices. This
will come into play with Note Repeat and the Arp option.
When using the MPK you may want to use the Note Repeat function on
the pads or the Arp with the keys. The MPD will also allow Note Repeat
with the pads. Both of these options repeat notes at a specific time
division following a specific tempo.
The MPD or MPK has an internal MIDI Clock and the ability to use an
external clock source. This means the tempo of your project, and
inevitably the tempo of Note Repeat and the Arp, can be chosen by
tapping the Tap Tempo button on the MPD or MPK or by having the MPD
or MPK listen to Ableton’s tempo. This is purely based off personal
preference.
 Loading...