


Read this first
On this “First Step Guide”
Software's on-line help
Picture Motion Browser features
Chapter 1: Setting up for the first time
Preparation flow
Installing software
Connecting your camcorder to a computer using a cable
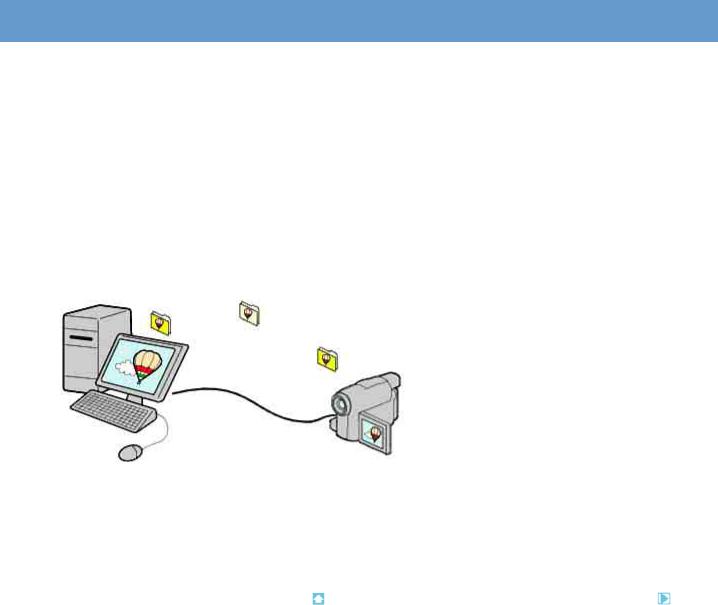
Chapter 2: Importing/viewing videos and still images on a computer
Importing videos on a disc and still images on a “Memory Stick Duo” to a computer Viewing videos and still images imported to a computer
Chapter 3: Editing the imported videos and still images
Editing videos
Editing still images
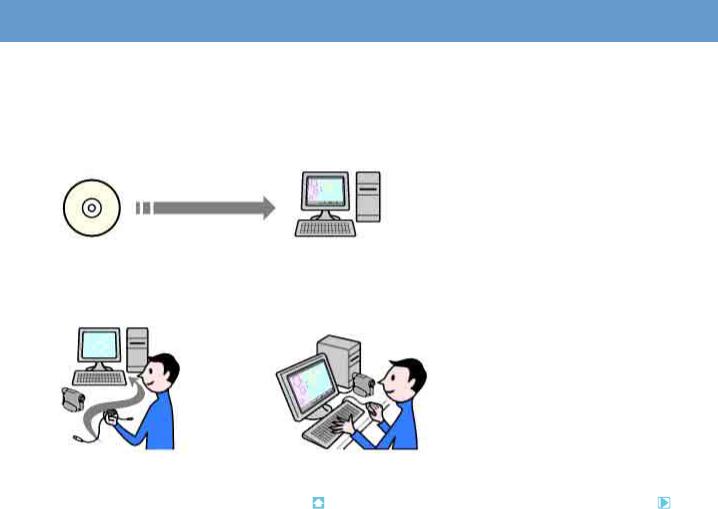
Chapter 4: Creating and copying a disc
Creating a disc
Copying a disc
Types of discs you can use
Chapter 5: Manipulating still images
Manipulating still images
Chapter 6: Using with a Macintosh computer
Connecting your camcorder and a Macintosh computer with a USB cable Copying still images from a “Memory Stick Duo”
Troubleshooting
Symptoms
Cause and/or corrective actions
Additional information
System requirements
Trademarks and regulations
(C) 2007 Sony Corporation
Read this first
 On this “First Step Guide”
This “First Step Guide” describes the connections and settings required to use your camcorder with a computer, and the basic operation of the software on the CD-ROM.
The CD-ROM includes the following software. Picture Motion Browser: Windows computer only
You cannot use Picture Motion Browser on a Macintosh computer. You can only import the still images in the “Memory Stick Duo” with connecting your camcorder on a Macintosh computer (only the models with a “Memory Stick Duo” slot).
Chapters 1 to 5 describe operations with a Windows computer.
When using a Macintosh computer, see “Chapter 6: Using with a Macintosh computer.”
Notes
zThe screenshots in this “First Step Guide” are from Windows XP. The screens may vary depending on the operating system of the computer.
zThe illustrations of the camcorder used in this "First Step Guide" may look different from your camcorder. For the location of the USB jack and POWER switch, etc., refer to the Operating Guide supplied with your camcorder.
zBoth an 8 cm and a 12 cm DVDs are described as a “disc” in this “First Step Guide.”
Top |
Next |
|
|

Read this first
 Software's on-line help
The help provides detailed operating instructions for Picture Motion Browser. Select [Help] in the [Help] menu of the software to start up the on-line help.
Previous |
Top |
Next |
|
|
|

Read this first
 Picture Motion Browser features
Picture Motion Browser is a set of Windows applications with the following features.
If you double-click the [ ] (Picture Motion Browser) icon on the desktop, [Picture Motion Browser] starts up.
Notes
zThe picture may not play back smoothly, depending on specifications of your computer. For details about the recommended specifications, see “System requirements.”
zYou cannot use Picture Motion Browser on a Macintosh computer.
Importing videos recorded on a disc to a computer <Details>
You can import videos recorded on a disc with a simple operation.
Viewing videos and still images imported to a computer <Details>
You can manage videos and still images recorded on a disc or on a “Memory Stick Duo” by date, and select videos or still images you want to view from thumbnails of those videos or still images. These thumbnails can be enlarged and played in a slide show.
Editing videos and still images <Details>
You can edit videos and still images imported to a computer.
Creating a disc <Details>
You can create an original DVD Video by putting together videos and still images taken with your camcorder.
Copying a disc |
Video Disc Copier <Details> |
You can copy all the images on a disc taken with your camcorder.
Previous |
Top |
|
|
Chapter 1: Setting up for the first time
 Preparation flow
Installation of the supplied software is required the first time you use your camcorder with a Windows computer.
For installing the supplied software, see “Installing software.” <Details>
For details on how to connect your camcorder to a computer, see “Connecting your camcorder to a computer using a cable.” <Details>
(For details on how to connect your camcorder to a Macintosh computer, click “Chapter 6: Using with a Macintosh computer.”)
Top |
Next |
|
|

Chapter 1: Setting up for the first time
 Installing software
You need to install the software to your Windows computer to enjoy editing your recorded videos and still images. The installation is required only for the first time.
Before installation, prepare your camcorder and a USB cable.
1
2
Confirm that your camcorder is not connected to the computer.
Turn on the computer.
Log on as Administrators for installation.
Close all applications running on the computer before installing the software.
3 Place the CD-ROM in the disc drive of your computer.
The installation screen appears.
If the screen does not appear
1 Click [Start], then click [My Computer]. (For Windows 2000, double-click [My Computer]. )
2Double-click [SONYPICTUTIL (E:)] (disc drive)*.
*Drive names (such as (E:)) may vary depending on the computer.
4 Click [Install].
5 Confirm the language for the application to be installed, then click [Next].
6 Confirm the area and country/region you live in, then click [Next].
The software to be installed will be configured according to your country/region.
7 Read [License Agreement], check [I accept the terms of the license agreement] if you agree, then click [Next].
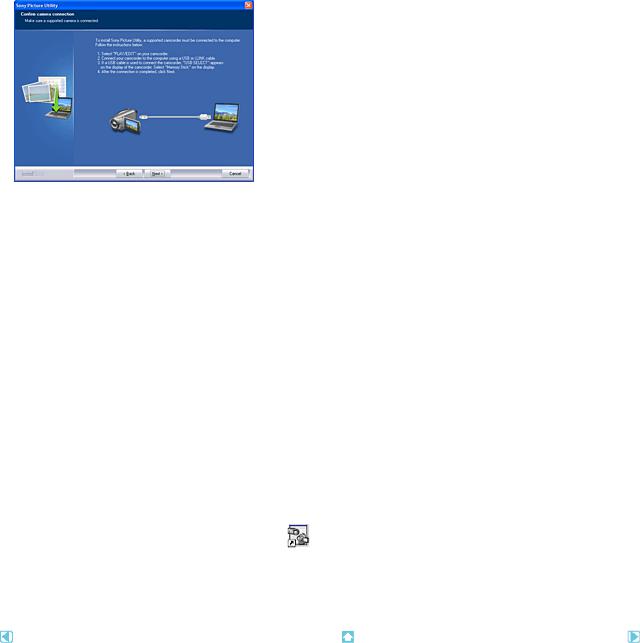
8 When [Confirm camera connection] is displayed, connect your camcorder to the computer using a USB cable, then click [Next]. <Details>
Even if a screen prompting you to restart your computer appears, you do not need to restart it at this time. Restart your computer after completing the installation.
9 Follow the instructions on the screen to install the software.
The following installation screens may be displayed, depending on your operating environment. In this case, follow the instructions on the screen to install the software.
zSonic UDF Reader --- Software required to recognize VR mode discs
zWindows Media Format 9 Series Runtime (Windows 2000 only) --- Software required to create DVD video discs
zMicrosoft DirectX 9.0c --- Software required for handling video
10 Make sure [Yes, I want to restart my computer now.] is selected, then click [Finish].
The computer restarts automatically.
11 Remove the CD-ROM from the disc drive of your computer.
The short-cut icons, such as [ ] (Picture Motion Browser), appear on the desktop.
z The short-cut icon used for Product Registration [ |
] appears on the desktop. By registering your Sony product, you can |
access a range of convenient support and services. |
|
http://www.sony.net/registration/di/ |
|
For the information about Picture Motion Browser, visit the following URL:
http://www.sony.net/support-disoft/
Previous |
Top |
Next |
|
|
|

Chapter 1: Setting up for the first time
 Connecting your camcorder to a computer using a cable
You can connect your camcorder to a computer using a USB cable.
Connection image (USB cable and USB jack)
Note
zWhen connecting your camcorder to a computer, make sure you insert the connector in the correct direction. Do not insert the connector forcibly as it may damage the cable or your camcorder.
Tip
z Your camcorder is compatible with Hi-Speed USB (USB 2.0). You can transfer data at a faster rate using a computer compatible with Hi-Speed USB (USB 2.0). When you connect a USB interface not compatible with Hi-Speed USB (USB 2.0), the data transfer ratio will be that of USB 1.1 (USB Full-Speed).
1 Turn on the computer.
If any software starts on the computer automatically, close it.
2 Connect your camcorder to a power source, and turn on your camcorder.
Use the AC Adaptor as the power source.
For operating the POWER switch, refer to the Operating Guide supplied with your camcorder.
3 Insert a recorded disc or a “Memory Stick Duo” into your camcorder.
4 Connect the USB cable to the USB jack on the camcorder firmly.
For the location of the USB jack, refer to the Operating Guide supplied with your camcorder.
5 Connect the other end of the USB cable to the USB port on your computer.
The [USB SELECT] screen is displayed on the screen of your camcorder.
Tip
zWhen the screen is not displayed, select the item from the menu. For selecting the menu, refer to the operating instructions supplied with your camcorder.
6 When using videos recorded on a disc, select [ COMPUTER]. When using ones in a “Memory Stick Duo,” select [
 COMPUTER].
When you select [ COMPUTER]
The first time you connect your camcorder to a computer and select [ COMPUTER], it takes some time until the computer recognizes your camcorder. When the computer recognizes your camcorder,

the connection is completed and a window used to select videos to import is displayed automatically.
Note
zDepending on the status of the computer, a window that urges you to restart the computer may be displayed. In this case, follow the instructions on the screen to restart the computer.
Tip
z If [Picture Motion Browser] is not displayed, see “Troubleshooting.” <Details>
Recommended USB cable connection
Connect your camcorder as shown in the following illustration.
zConnect the USB cable from your camcorder to the USB port on the computer and make sure no other USB devices are connected.
zIf your computer has a USB keyboard and a USB mouse as standard equipment, leave them connected and connect the camcorder to an available USB jack with the USB cable.
Notes
zOperation is not guaranteed if you connect multiple USB devices to the computer.
zOperation is not guaranteed if you connect the USB cable to the USB port on a keyboard or USB hub.
zMake sure to connect the cable to the USB port on the computer.
zOperation is not guaranteed on all the system requirement.
To disconnect the USB cable
1 Touch [END] on the [ COMPUTER] or [
 COMPUTER] screen on the LCD screen of your camcorder. 2 Click the [Unplug or eject hardware] icon on the task tray.
3 Click [Safely remove USB Mass Storage Device].
4 Click [OK].
5 Touch [YES] on the LCD screen of your camcorder. 6 Disconnect the USB cable from the computer.
Notes
zDo not disconnect the USB cable while the access lamp is lit.
zMake sure to disconnect the USB cable before turning off your camcorder.
zWhen connecting your camcorder to a computer in [ COMPUTER], remove the USB cable according to the correct procedure. Otherwise, files in the “Memory Stick Duo” may not be updated correctly. Also, this may cause a malfunction of

the “Memory Stick Duo.”
To switch the media (disc/“Memory Stick Duo”)
Touch the button of media you want to switch to ([ COMPUTER] or [
 COMPUTER]) in step 5 of “To disconnect the USB cable.” Your camcorder switch to the selected media.
Previous |
Top |
|
|
 Loading...