


TY-ST05K

TQZH338-1
TY-ST05-S
TY-ST05-K
MODEL
Bottenplatta för Bred plasma-monitor
Monteringsanvisningar
Läs dessa anvisningar noggrant innan du monterar samman
dessa tillbehör.
Behåll häftet för framtida referens.
Sokkel til bredformat-plasmaskærm
Monteringsvejledning
Læs hele denne vejledning grundigt, inden du samler dette
tilbehør.
Gem vejledningen til brug i fremtiden.
Pedestal para Pantalla Panorámica
de Plasma
Instrucciones de instalación
Antes del instalar estos accesorios, lea cuidadosamente
estas instrucciones.
Guarde estas instrucciones para futuras referencias.
Piédestal pour l’Ecran plasma 16/9ème
Manuel d’installation
Avant d'essayer d'assembler ces accessoires, veuillez lire
ces instructions complètement.
Veuillez garder ce manuel pour une rèfèrence future.
Piedistallo per lo schermo al plasma16:9
Instruzioni per I’installazione
Prima di iniziare a montare questi accessori, siete pregati di leggere
interamente le presenti istruzioni.
Siete inolte pregati di conservare questo libro per future consultazioni.
Vloerstandaard voor Breedbeeld
Plasmadisplay Monitor
Installatiehandleiding
Lees deze handleiding zorgvuldig door alvorens u probeert deze
accessoires te monteren.
Bewaar de handleiding voor het geval dat u later iets wilt opzoeken.
Sockel für Plasmadisplay
Installationsanleitung
Vor der Installation lesen Sie bitte diese Anleitung sorgfältig
durch.
Diese Anleitung zum späteren Nachschlagen aufbewahren.
Pedestal for Wide Plasma Display
Installation Instructions
Before attempting to assemble these accessories, please
read these instructions completely.
Please retain this book for future reference.
English
Deutsch
Nederlands
Italiano
Français
Español
Svenska
Dansk
プラズマディスプレイ据置きスタンド
取り付け設置説明書
取り付け設置前に、この説明書とワイドプラズマディスプレイの取扱説
明書をよくお読みのうえ、正しい取り付け設置を行ってください。
(移動やメンテナンスのときは、必要になる場合がありますので保存
いただきますようお願いします。)
日本語
日本語
2
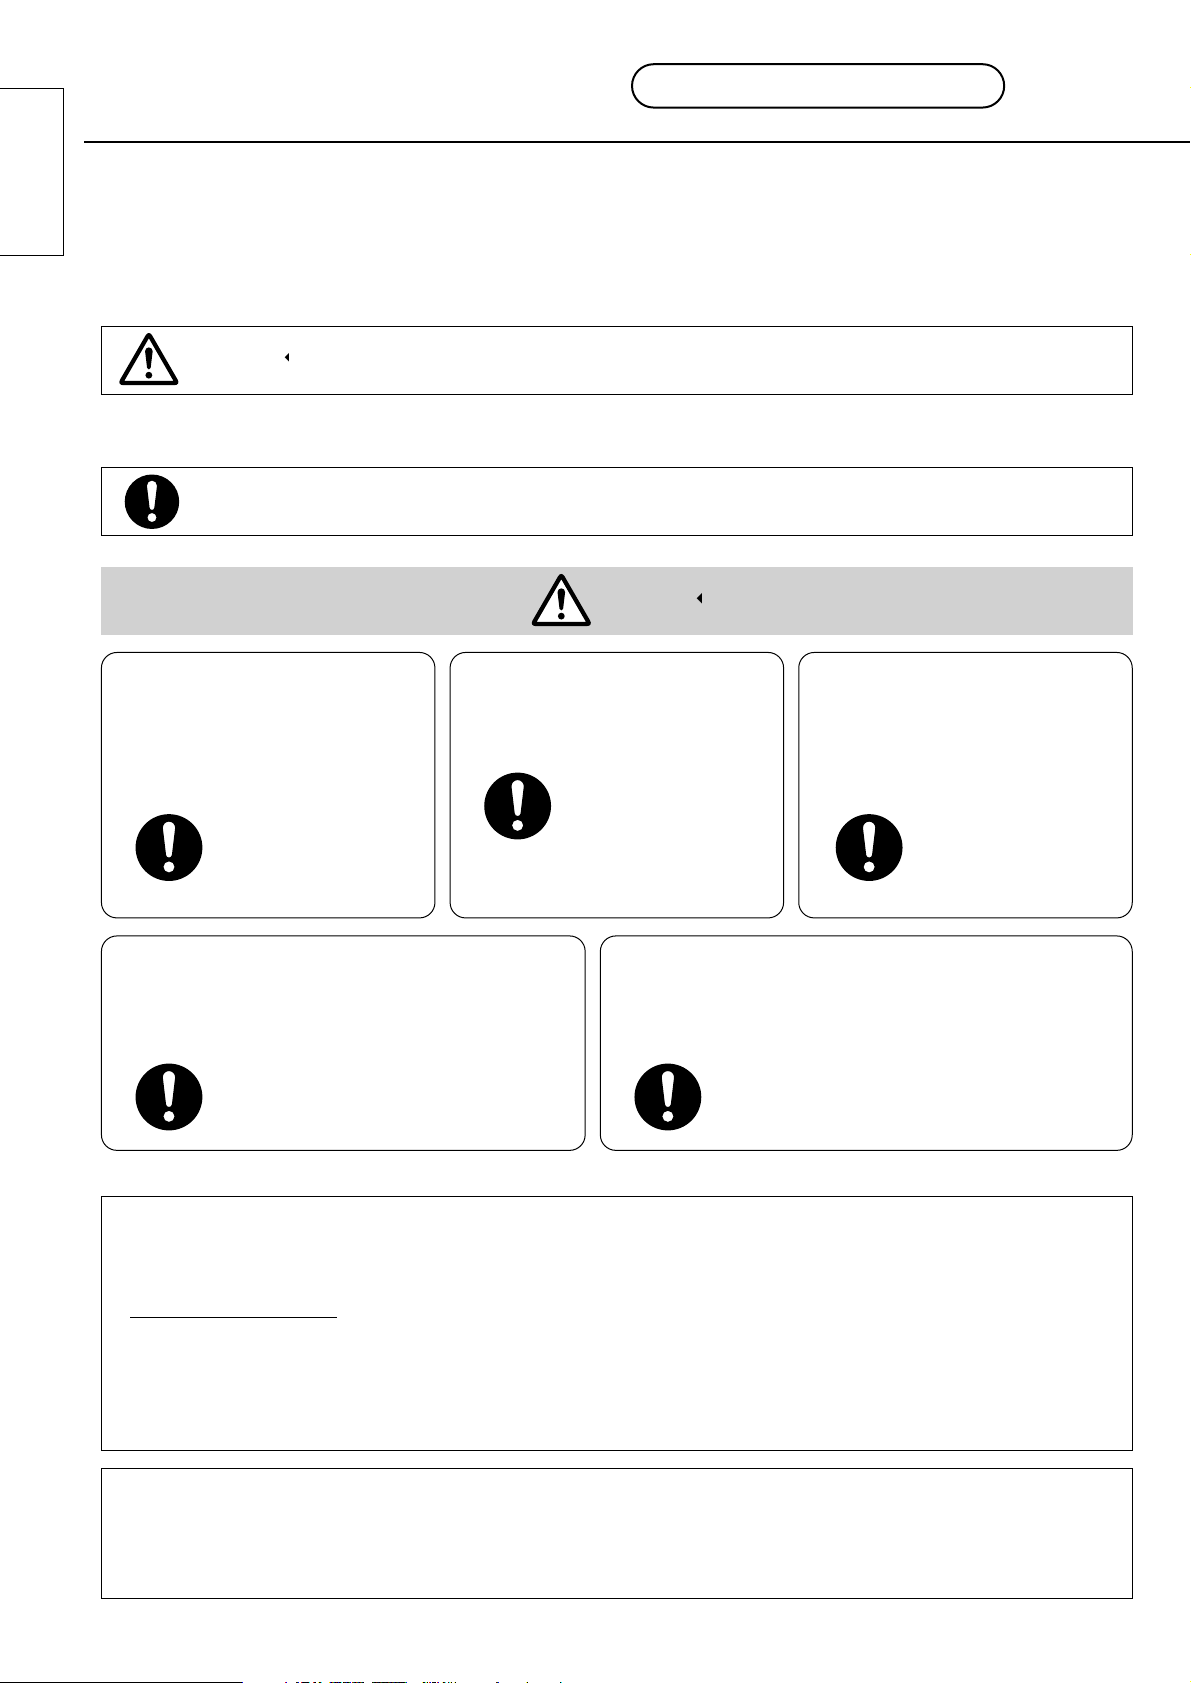
この絵表示は、必ず実行していただきたい「指示」内容です。
■
表示内容を無視して誤った使い方をしたときに生じる危害や物的損害の程度を、次の表示で区分し、説明しています。
■お守りいただきたい内容の種類を、次の絵表示で区分し、説明しています。(下記は、絵表示の一例です。)
安全上のご注意
必ずお守りください
この表示の欄は、「傷害を負うことが想定されるか、または物的損害の発生が想定される
危害・損害の程度」です。
お使いになる人や他の人への危害、物的損害を未然に防止するため、必ずお守りいただきたいことを、次のように
説明しています。
ディスプレイ本体と据置
きスタンドの取り付け、
取り外しは2人以上で
行ってください
組み立て時、ねじ止めを
する箇所は、すべてしっ
かりと止めてください
水平で安定した所に据え
付けてください
ディスプレイ本体が落
下してけがの原因とな
ることがあります。
不十分な組み立てか
たをすると強度が保
てず、倒れたり破損
してけがの原因とな
ることがあります。
倒れたり、破損して
けがの原因となるこ
とがあります。
据置きスタンドに付属している転倒防
止金具を利用し、ディスプレイ本体を
固定してください
ディスプレイ本体より天面・左右は
100mm以上、底面は60mm以上、後面
は70mm以上の空間を確保してください
ディスプレイ本体には、天面に空気吹き出し
孔、底面と後面に吸気孔があり、これらをふ
さぐと火災の原因となることがあります。
地震やお子様がよじ登ったりする
と、転倒しけがの原因となることが
あります。
取り扱い上のお願い
1.直射日光に当てたり、ストーブなどのそばに置くと、光や熱によって変色したり変型することがあります
のでご注意ください。
2.
汚れのふき取りかた
乾いた布でふいてください。ひどく汚れているときは、水でうすめた中性洗剤で汚れを取ってから乾いた
布でふいてください。
なおベンジンやシンナー、家具用ワックスなどは、塗装がはげたりしますので、使用しないでください。
(化学ぞうきんをご使用の際は、その注意書に従ってください。)
3.粘着性のテープやシールをはらないでください。据置きスタンド表面を汚すことがあります。
据置きスタンド設置上の留意点
●
本体の電源プラグは容易に手が届く位置の電源コンセントをご使用ください。
●
機器周囲温度が40℃をこえることがないように空気の流通を確保してください。
ディスプレイ本体内部に熱がこもり、故障の原因となることがあります。
注意
注意
3
日本語
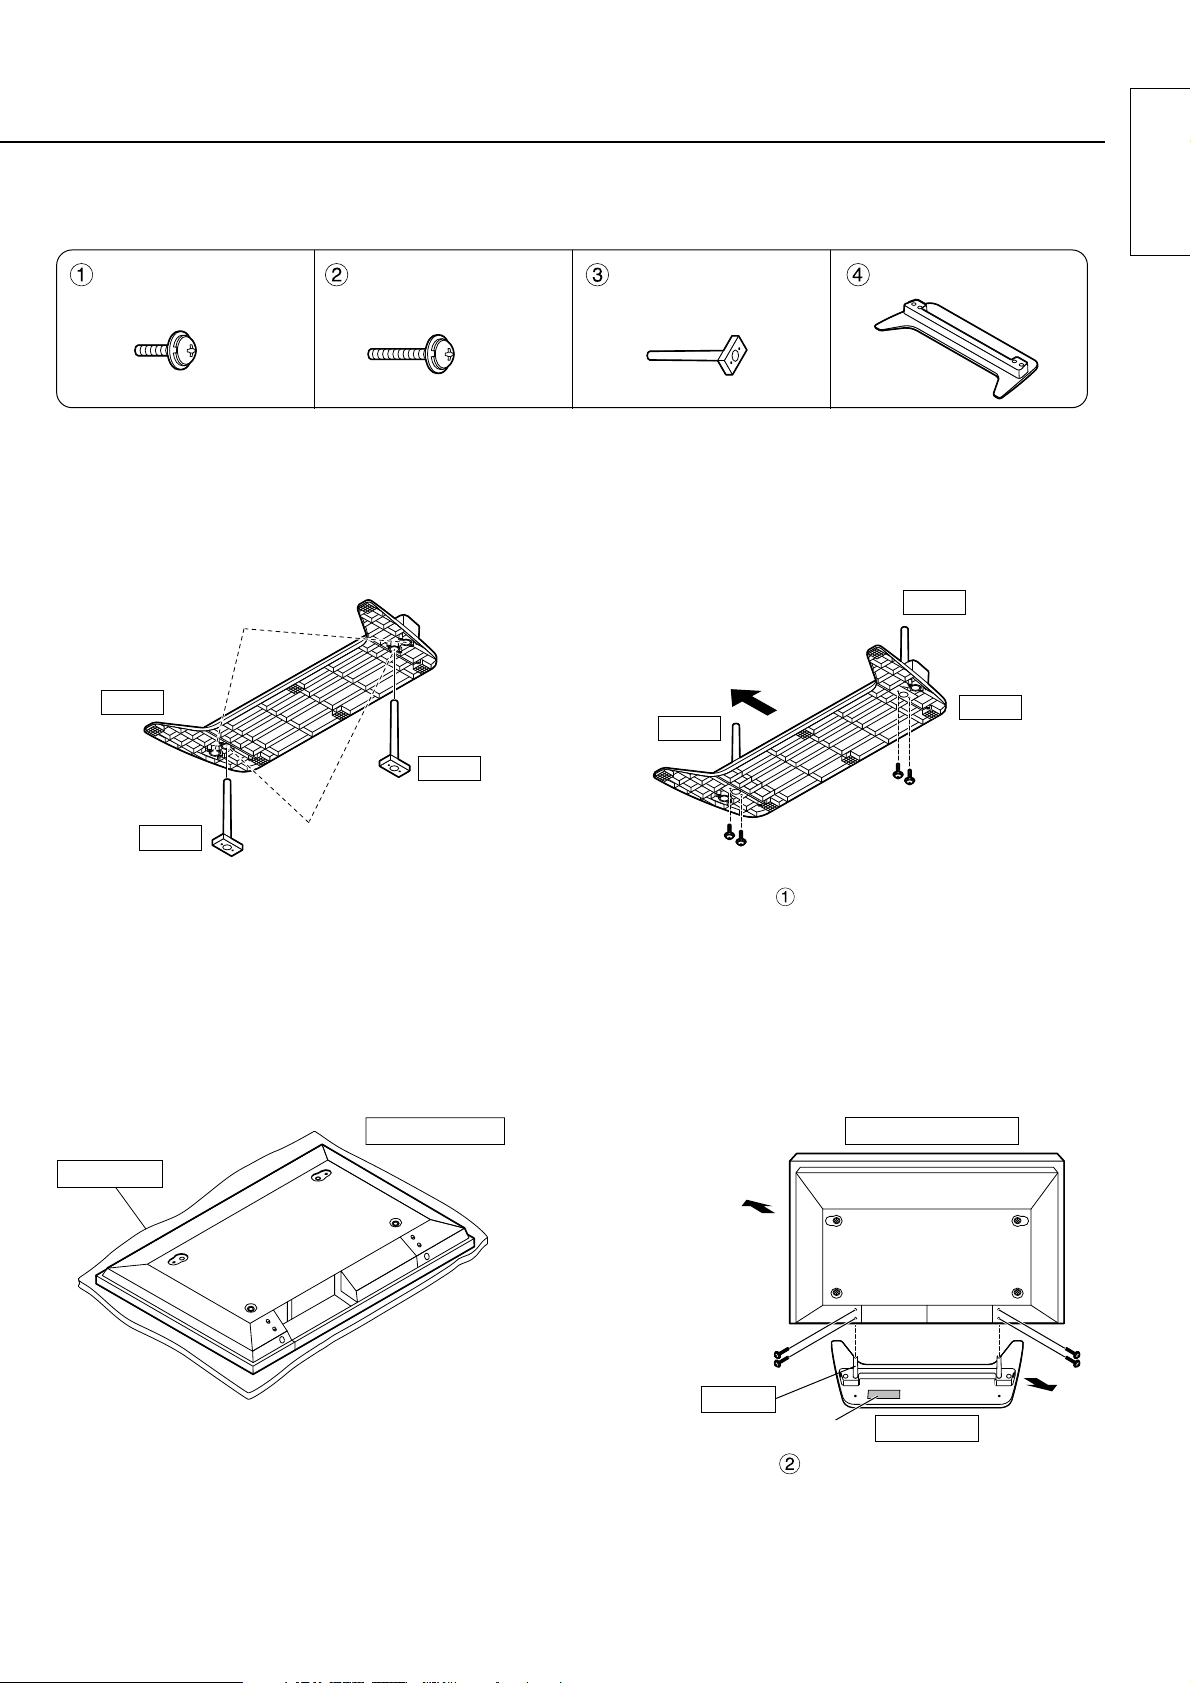
組み立てかた/設置のしかた
組み立て用ねじ
............................4
(短いねじ) (長いねじ)
組み立て用ねじ
(黒ねじ)............4
ポール................2 ベース................1
ベース
ポール
ポール
42"、50"取り付け位置
(外側)
37"取り付け位置(内側)
ベース裏面よりポールを左右とも上図の様に、きっ
ちりとはまり込む方向に、差し込んでください。
2.ポールの固定
ベース
ポール
ポール
前
組み立て用ねじ を使って、ベース裏面よりしっ
かりと固定してください。
スタンド組み立て用部品一覧表
組み立てかた
設置のしかた
1.ポールの取り付け
1.ディスプレイ本体の準備
ディスプレイ本体
毛布など
平らな床や台の上に、きれいな毛布などを敷き、
その上にディスプレイ本体前面を置いてください。
2.ディスプレイ本体の固定
※水平で安定した場
所で作業してくだ
さい。
ディスプレイ本体
ポール
後面
スタンド
前面
品番ラベル
組み立て用ねじ を使って、しっかりと固定して
ください。
品番ラベルが見えるほうを後側にしてディスプレ
イ本体の穴をポールに合わせ止まる位置まで入れ
てください。

日本語
4
ディスプレイ本体の転倒防止について
テレビ台に固定する場合 壁面に固定する場合
前面
前面
黒ねじ
黒ねじ
バンド
ベース
天板
バンド
木ねじ
天板の厚さの中心に取り
付けてください。
木ねじ
クランプ
黒ねじ
クランプ
•準備
スピーカーあり
ねじ穴あり(従来型)
スピーカーなし
;
•固定方法
クランプ
スピーカー
取り付けねじ
クランプ
黒ねじ
木ねじ...........2バンド...........2 クランプ.......4黒ねじ...........4
転倒防止部品
寸法図
29.8
83
119.8
106
194.8
151
320.3
184.5
125.5
67.5
17.5
6.5
62.5
9.6
601(37インチの場合)
684(42、50インチの場合)
806
37
688
601
単位:mm
テレビシステムプロダクツ事業部
〒567-0026 大阪府茨木市松下町1番1号 (0726)22-8181
C Matsushita Electric Industrial Co., Ltd.(松下電器産業株式会社) 2001
M0701-1091
※じょうぶなひも又はクサリなどの市販品をご利用いただき壁
や柱等、堅牢部にしっかりと取り付けてください。

5
English
Precautions with regard to setting up
WARNING
Installation work should only be carried out by a qualified technician.
• If the pedestal is not installed correctly, the Wide Plasma Display may fall over and personal injury may result.
CAUTION
Do not use any displays other than those given in the catalogue.
Do not climb up onto the pedestal or use it as a step. (Young children should be made
particularly aware of this caution.)
• If the unit falls over or becomes damaged through misuse, injury may result.
Do not use the pedestal if it becomes warped or physically damaged.
• If you use the pedestal whilst it is physically damaged, personal injury may result. Contact your
nearest Panasonic Dealer immediately.
Set up on a stable, level surface.
• If this is not done, the unit may fall over and become damaged, and personal injury may result.
Do not use in places with high humidity.
• Long-term usage in such conditions can cause warping or deformation. This can lead to loss of
strength, and the unit may fall over and become damaged, and personal injury may result.
During setting-up, make sure that all screws are securely tightened.
• If sufficient care is not taken to ensure screws are properly tightened during assembly, the
pedestal will not be strong enough to support the Wide Plasma Display, and it might fall over
and become damaged, and personal injury may result.
Use the accessory fall-prevention brackets to secure the Wide Plasma Display.
• If the unit is knocked or children climb onto the pedestal with the Wide Plasma Display installed,
the Wide Plasma Display may fall over and personal injury may result.
Two people are required to install and remove the display.
• If two people are not present, the display may be dropped, and personal injury may result.
• Leave a space of at least 3
15
/16 inches (10 cm) at the top, left and right, at least 2 3/8 inches (6
cm) at the bottom, and at least 2 49/64 inches (7 cm) at the rear.
Notes on handling
1) If the unit is placed in direct sunlight or next to a stove, the light and heat may cause discoloration or deformation.
2) Cleaning
Wipe the unit with a dry cloth. If the unit is particularly dirty, clean it using a cloth soaked with water to which a
small amount of neutral detergent has been added, and then wipe with a dry cloth.
Do not use products such as solvents, thinner or household wax for cleaning, as they can damage the surface
coating.
(If using a chemically-treated cloth, follow the instructions supplied with the cloth.)
3) Do not attach sticky tape or labels, as they can make the surface of the pedestal dirty.
English
6
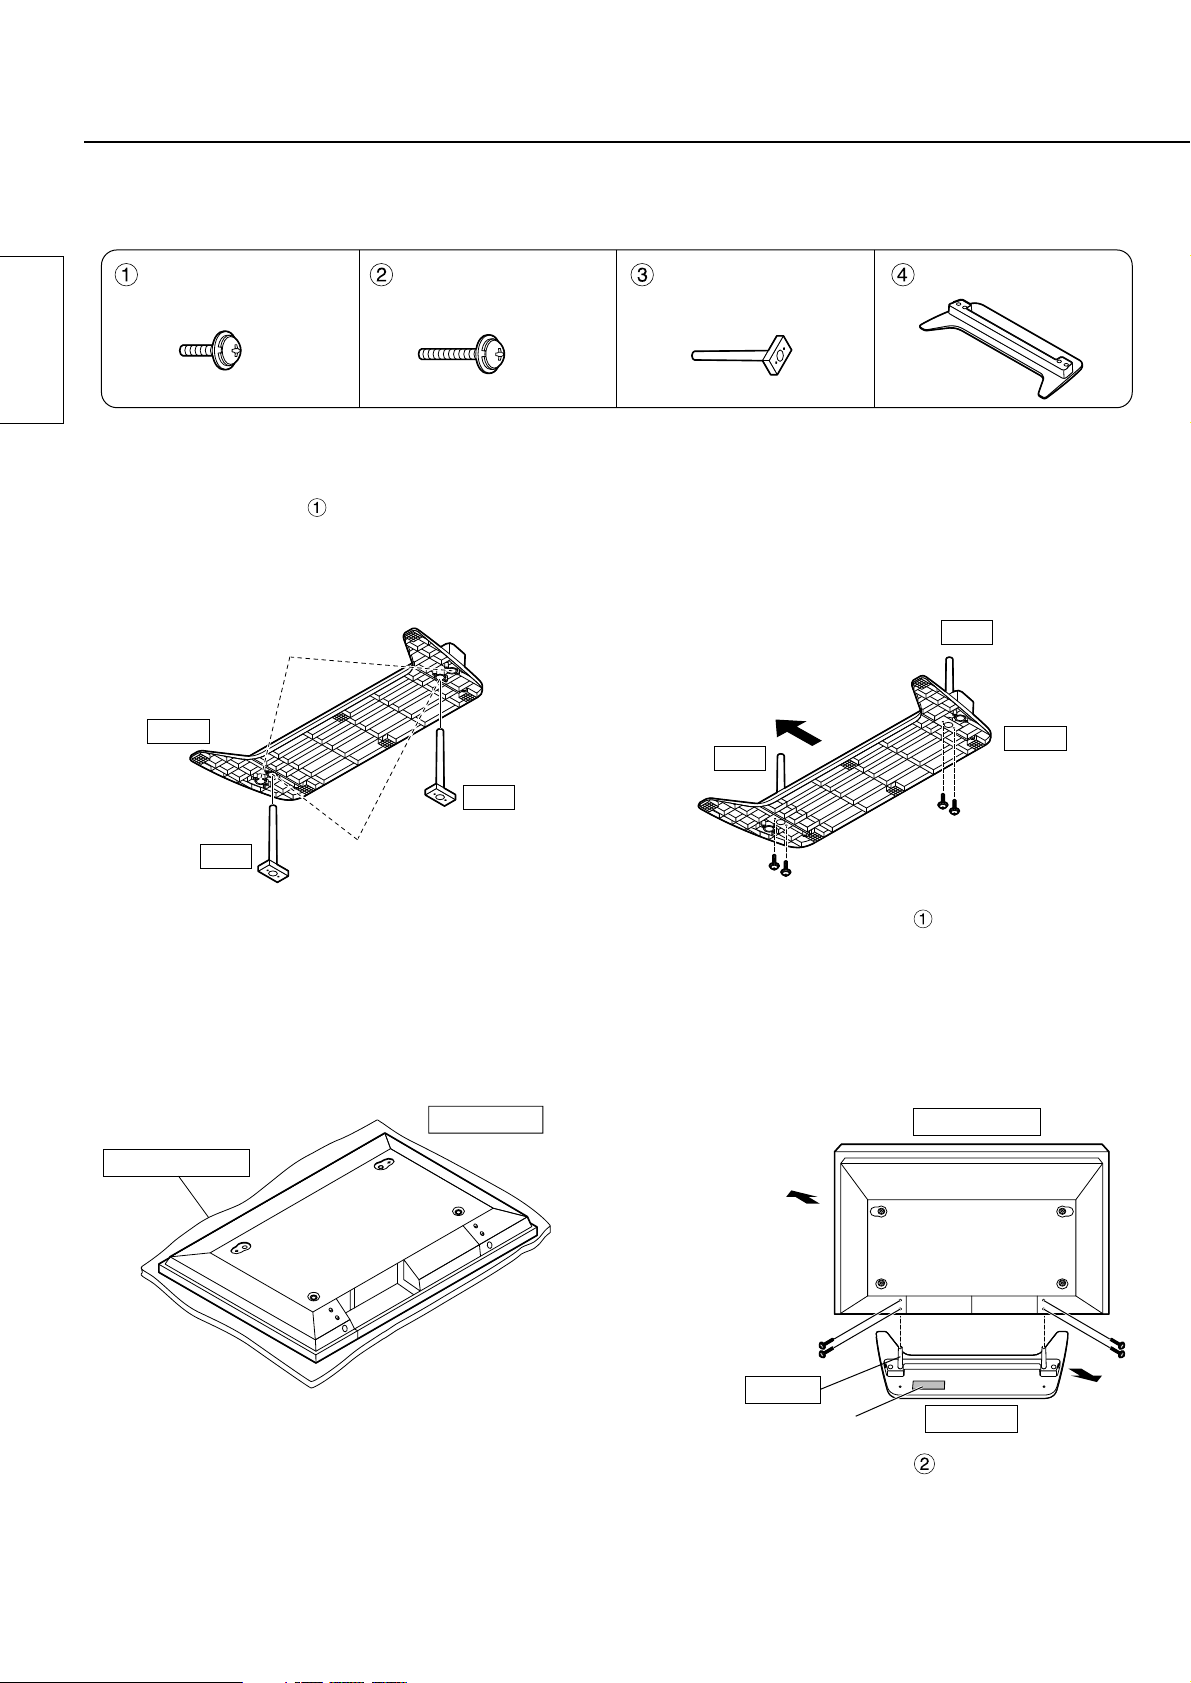
Assembling the pedestal / Setting-up
Assembly screw
...........................4
Assembly screw
(Black screw)....4
Pole ...................2 Base ..................1
Base
Pole
Pole
For 37˝ Display (Inside)
For 42˝, 50˝ Display
(Outside)
Insert the poles into the left and right holes in the
underside of the base so that they fit securely as
shown in the illustration above.
2. Securing the poles
Base
Pole
Pole
Front
Use the assembly screws to secure the poles
firmly to the bottom of the base.
Accessories for pedestal assembly
Assembling the pedestal
The numbers (such as ) in the explanatory text indicate part numbers in the table of accessories.
Setting-up
1. Installing the poles
1. Setting up the display unit
Display unit
Cloth or similar
Spread a clean cloth or similar material over a level
floor or base, and place the display unit on it face
down.
2. Securing the display unit
* Carry out work on
a horizontal and
level surface.
Display unit
Pole
Rear
Pedestal
Front
Nameplate
Use the assembly screws (Black screw) to
fasten securely.
Lift the display unit above the pedestal base, with
the back of the display unit on the same side as
the Nameplate. Then align the holes in the display
unit with the poles of the pedestal and lower the
display unit into place.
Assemble the poles correctly by referring to the illustrations below.

7
English
If securing to the base If securing to a wall
Front
Front
Black
screw
Band
Base
Wood
Worktop
Band
Wood
screw
Wood screw
Black
screw
Screw into the middle of the
back edge of a wood worktop.
;
Black screw
Clamp
Clamp
• Preparation
• Securing method
With speakers
With screw holes
(conventional product)
No speakers
Black screw
Clamp Clamp
Bracket mounting
screw
Fall-prevention brackets
* Use strong wire or chain which is commercially available to secure
the Wide Plasma Display to a solid area of the wall or a pillar.
Stopping the Wide Plasma Display from falling over
M0701-1091
Matsushita Electric Industrial Co., Ltd
Web Site : http://www.panasonic.co.jp/global/
Wood screw.....2Band ................2 Clamp ..............4Black screw .....4
Dimensions
29.8 (1
11
/64)
83 (3
17
/64)
119.8 (4
23
/32)
106 (4
11
/64)
194.8 (7
43
/64)
151 (5
15
/16)
320.3 (12
39
/64)
184.5 (7
17
/64)
125.5 (4
15
/16)
67.5 (2 21/32)
17.5 (
11
/16)
6.5 (
1
/4)
62.5 (2
29
/64)
9.6 (
3
/8)
601 (23 21/32) (When installing a 37˝ display)
684 (26
15
/16) (When installing a 42˝, 50˝ display)
806 (31 47/64)
37 (1
29
/64)
688 (27 5/64)
601 (23
21
/32)
Units : mm (inches)
English
(For U.S.A)
8
Warranty
Panasonic Consumer Electronics Company
Division of Matsushita Electric Corporation
of America
One Panasonic Way
Secaucaus, NJ
07094
RACKS AND STANDS
Panasonic Consumer Electronics Company or Panasonic Sales Company (collectively referred to as “the
warrantor” ), will replace parts in case of defects in materials or workmanship, free of change, in the USA or
Puerto Rico, for ten (10) days from the date of the original purchase.
In-warranty parts in the USA can be obtained during the warranty period be contacting:
Panasonic Services Company (PASC)
20421 84th Avenue South
Kent, Washington 98032
Tel.:1-800-833-9626
Fax.:1-800-237-9080
(6 am to 5 pm Monday-Friday; 6 am to 10:30 am Saturday; PST)
Service in Puerto Rico can be obtained during the warranty period by calling the telephone number listed above.
This warranty is extended only to the original purchaser. A purchase receipt or other proof of the original
purchase is required for replacement parts under the warranty.
This warranty only covers failures due to materials and workmanship and does not cover normal wear. The
warranty does not cover damages which occurred in shipment or failures which result from accidents, misuse,
abuse, neglect, mishandling, misapplication, faulty installation, set-up adjustments, improper maintenance,
alteration, line power surge, lightning damage, modification,or commercial use, such as hotel, office,
restaurant, or other business or rental use of the product, or damage that is attributable to acts of God.
LIMITS AND EXCLUSIONS
There are no express warranties except as listed above.
PANASONIC SHALL NOT BE LIABLE FOR INCIDENTAL OR CONSEQUENTIAL DAMAGE RESULTING
FROM THE USE OF THIS PRODUCT, OR ARISING OUT OF ANY BREACH OF THIS WARRANTY. ALL
EXPRESS AND IMPLIED WARRANTIES. INCLUDING THE WARRANTIES OF MERCHANTABILITY, ARE
LIMITED TO THE APPLICABLE WARRANTY PERIOD SET FORTH ABOVE.
Some states do not allow the exclusion or limitation of incidental or consequential damages, or limitations on
how long an implied warranty lasts, so the above exclusions or limitations may not apply to you.
This warranty gives you specific legal rights and you may also have other rights which vary from state to state.
If a problem with this product develops during or after the warranty period, you may contact your dealer or call
the number listed above.
If the problem is not handled to your satisfaction, then write to the Customer Satisfaction Center at the
Panasonic Consumer Electronics Company address indicated above.
Panasonic Sales Company, Division of
Matsushita Electric of Puerto Rico, Inc.
AVE. 65 de Infanteria, Km 9.5
San Gabriel Industrial Park
Carolina, Puerto Rico 00985

9
Deutsch
Vorsichtsmaßnahmen für die Aufstellung
WARNUNG
Die Installation darf nur von einem qualifizierten Fachmann ausgeführt werden.
• Falls der Sockel nicht richting installiert ist, kann das Plasmadisplay umfallen und dabei
Verletzungen verursachen.
VORSICHT
Nicht für Displays verwenden, die nicht in diesem Katalog aufgeführt sind.
Nicht auf den Sockel klettern oder den Sockel als Tritt verwenden. (Dies gilt besonders für
kleine Kinder.)
•
Beim Umfallen kann das Gerät beschädigt werden und es können Verletzungen verursacht werden.
Den Sockel nicht verwenden, falls er verzogen, gerissen oder gebrochen ist.
• Falls der Sockel in diesem Zustand verwendet wird, kann er noch mehr beschädigt werden und
dabei Verletzungen verursachen. Wenden Sie sich in diesem Fall an das Verkaufsgeschäft.
Auf einer stabilen, ebenen Fläche aufstellen.
• Auf einer instabilen Fläche kann das Gerät umfallen und dabei beschädigt werden oder
Verletzungen verursachen.
Nicht an Orten mit hoher Luftfeuchtigkeit verwenden.
• Bei längerer Verwendung unter solchen Bedingungen kann sich der Sockel verziehen und
verformen. Durch die verminderte Festigkeit kann das Gerät umfallen und dabei beschädigt
werden oder Verletzungen verursachen.
Beim Aufstellen kontrollieren, ob alle Schrauben richtig festgezogen sind.
• Falls beim Aufstellen nicht alle Schrauben richtig festgezogen werden, ist keine ausreichende
Tragfähigkeit für das Plasmadisplay gewährleistet. Das Gerät kann umfallen und beschädigt
werden oder es können Verletzungen verursacht werden.
Venwenden Sie zum Sichern des Plasmadisplays die mitgelieferte Halterung zur
Verhinderung des Umstürzens.
• Im Falle eines Erdbebens oder wenn Kinder auf den Sockel klettern, kann das Plasmadisplay
umstürzen und Verletzungen verursachen.
Für das Aufhängen und das Abnehmen des Displays sind zwei Personen notwendig.
• Falls nicht zwei Personen zur Verfügung stehen, kann das Display herunterfallen und
Verletzungen verursachen.
• Auf der Oberseite und links und rechts muß ein freier Abstand von mindestens 10 cm, auf der
Unterseite ein freier Abstand von mindestens 6 cm und auf der Rückseite ein freier Abstand
von mindestens 7 cm vorhanden sein.
Hinweise für die Handhabung
1) Bei der Aufstellung an einem Ort mit direkter Sonneneinstrahlung oder neben einer Heizung können
Verformungen und Verfärbungen auftreten.
2) Reinigung
Reinigen Sie das Gerät mit einem trockenen Tuch. Bei starker Verschmutzung können Sie das Tuch mit einer
verdünnten Reinigungsmittellösung anfeuchten. Reiben Sie das Gerät nach dem Reinigen mit einem anderen
Tuch trocken.
Verwenden Sie keine Lösungsmittel, Farbverdünner oder Reinigungswachs, weil die Oberfläche beschädigt
werden kann.
(Bei Verwendung von vorbehandelten Reinigungstücherm muß die Anwendungsanleitung des Tuchs genau
beachtet werden.)
3) Bringen Sie keine Kleber oder Klebebänder an, weil sie Spuren auf der Oberfläche des Sockels hinterlassen.

Deutsch
10
Zusammenbauen des Sockels / Aufstellung
Schraube
...........................4
Schraube
(Schwarze Schraube)
...4
Stange...............2 Platte ................1
Platte
Stange
Stange
für 37-Zoll-Display
(Innenseite)
für 42-Zoll-Display oder größer
(Außenseite)
Setzen Sie die Stangen richtig in die beidseitigen
Löcher auf der Unterseite des Sockels ein, wie in
der obenstehenden Abbildung gezeigt.
2. Befestigen der Stangen
Platte
Stange
Stange
Vorderseite
Befestigen Sie die Stangen mit den Schrauben
an der Unterseite der Platte.
Zubehör für Sockel
Zusammenbauen des Sockels
Im Text werden die Teile mit Nummern (wie z.B. ) bezeichnet, die den Nummern in der Zubehörtabelle entsprechen.
Aufstellung
1. Montieren der Stangen
1. Montage am Display
Display
Tuch oder ähnliches
Breiten Sie auf einer ebenen Fläche ein sauberes
Tuch aus und legen Sie das Display mit der
Bildschirmseite nach unten gerichtet darauf ab.
2. Befestigen des Displays
* FührenSie diese
Arbeiten auf einer
ebenen Fläche
aus.
Display
Stange
hinten
Sockel
Vorne
Namensschild
Verwenden Sie zum Befestigen die Schrauben .
Richten Sie das Display so aus, daß die Löcher
für die Stangen nach hinten gerichtet sind.
Richten Sie die Löcher auf die Stangen aus und
stecken Sie die Stangen hinein.
Setzen Sie deshalb die Stangen richtig ein, wie auf der nachstehenden Abbildung gezeigt.
 Loading...