


®
BNC Terminal Board
Model No. TY-42TM4Y
BNC Terminal Board Installation Manual
Installationsanleitung für das BNC-Terminal-Board
Manuel d'installation de la carte de connexion BNC
Manuale d’installazione della scheda di terminali BNC
Manual de instalación del tablero de terminales BNC
Installatiehandleiding voor de BNC aansluitingenkaart
Installationsvejledning for BNC terminalkort
Installationsmanual för BNC uttagsplatta
English
Deutsch
Français
Italiano
Español
Nederlands
Dansk
Svenska
TQBC0285

English
BNC Terminal Board Installation manual
WARNING :
•Users should not attempt to install or remove this product.
•Only a qualified service engineer should perform installation.
•Install this Terminal Board in the specified products only.
This product is a BNC Terminal Board, and must only be installed in the TH-42PW4, TH-42PWD4 models.
This should only be installed in the specified Plasma Display.
Failure to observe this point may result in damage to the projector and may further cause the installed product to malfunction.
Please confirm the model number of your
Plasma Display
R - STANDBY
G POWER ON
TH-42PWD4
model number
•Do not touch the product directly.
Highly sensitive electronic components are fitted in high density.
Touching components or the board directly while installing may cause the product to malfunction.(During installation, ensure static electricity is discharged to earth by suitable means.)
•Always pull out the power cables from the AC socket before commencing installation.
•Do not drop the product or allow any action that may cause damage to it.
•Do not place this product in water or allow it to become wet.
•Do not attempt to modify this product in any way.
This Terminal Board is the following arrangement
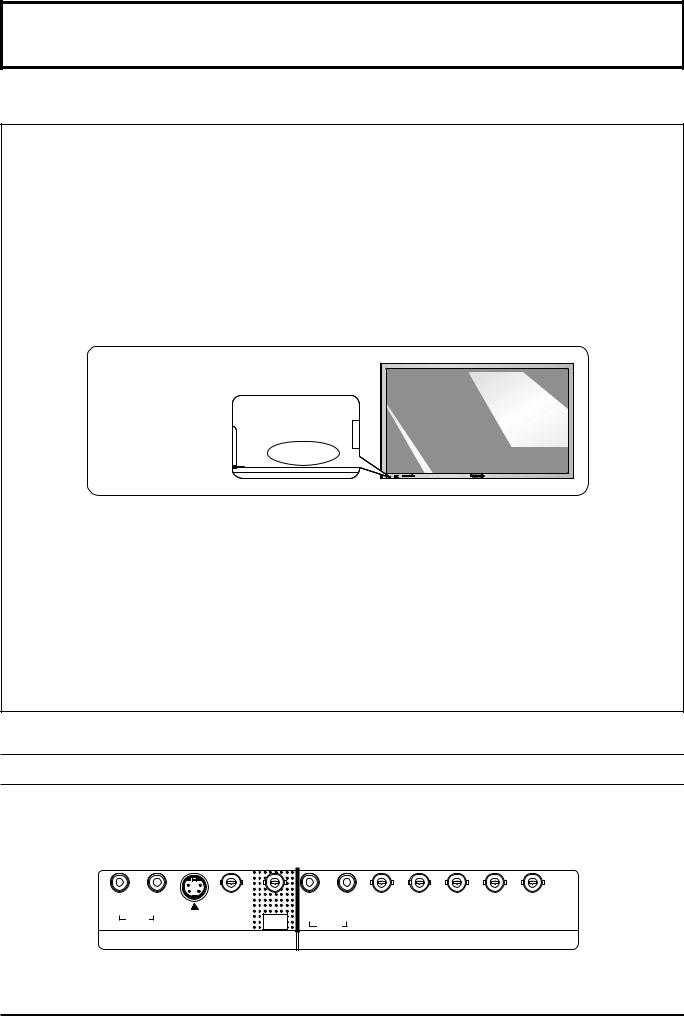
•After installing this product in the Plasma Display (TH-42PWD4 series), AV input and component input signals can be displayed using BNC input Terminals.
R |
L |
|
|
R |
L |
|
AUDIO |
S VIDEO |
VIDEO |
VIDEO |
HD PR/CR/R PB/CB/B Y/G |
||
IN |
IN |
IN |
OUT |
AUDIO |
VD |
|
|
AV |
|
|
|
COMPONENT/RGB IN |
|
2
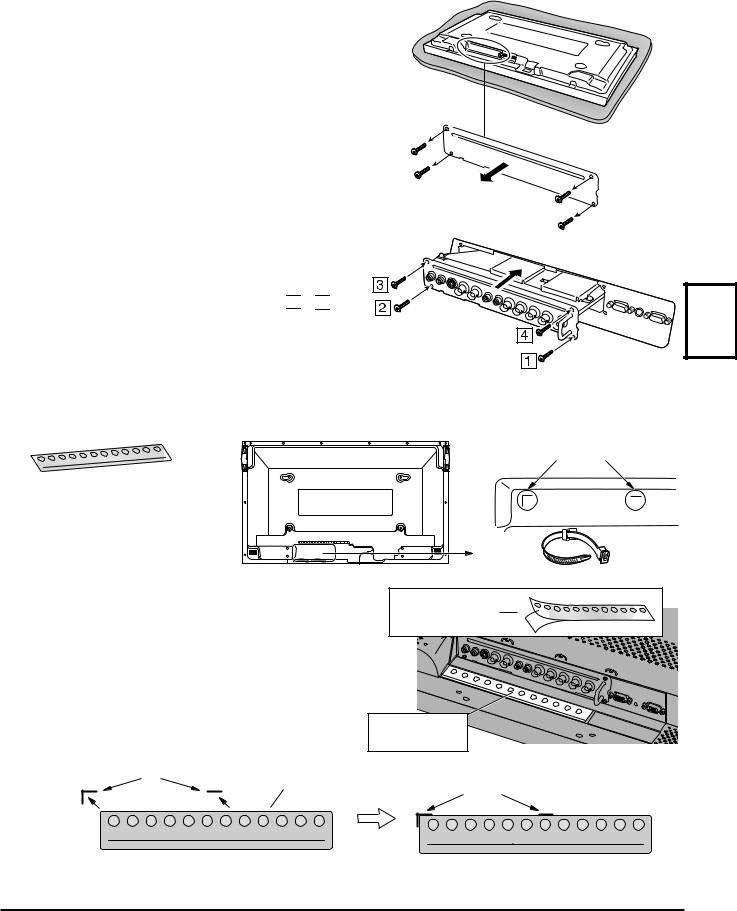
 Install
Install the Terminal Board in the terminal slot at the rear of the Plasma Display.
Before installation
•Turn the power switch off and pull out the plug.
•Disconnect any plugs connected to the Plasma Display.
1Place the Plasma Display upside down on a soft surface, such as a foam mat.
2Remove the 4 screws securing the slot cover or a currently installed terminal board and remove the cover or terminal board.
Note : The 4 screws are required for reassembly so should be retained.
3Confirm that the Terminal Board is correctly orientated then carefully and slowly insert into the slot. Ensure that the Board is completely seated.
4Secure using the 4 screws removed at step 2 above. Tighten screws in the numbered order ( 

 –
– 

 ).
).
Foam mat or thick  soft cloth
Affixing the Terminal name indication label
After completing installation of the Terminal Board, affix the included Terminal name indication label to the Plasma Display.
Rear of Plasma Display |
Affixing location |
|
Molded marks for label location |
For some models of the Plasma
Display, a label is already affixed.
English
To affix the label:
 Peel off the rear protective sheet of the Terminal name indication label.
 For Plasma Display models to which a label is already affixed, position the Terminal name indication label on top of that label.
Terminal name |
indication label |
For models to which a label is not yet attached, affix the Terminal name indication label while aligning with the molded
label locating marks, as shown in the figure. Terminal name indication label
Molded marks
Terminal name |
Molded marks |
|
indication label |
||
|
Note : Retain the cover or terminal board that has been removed in a safe location for potential future use.
3
Deutsch
Installationsanleitung fü r das BNC-Terminal-Board
WARNUNG :
•Dieses Produkt sollte nicht vom Benutzer installiert oder ausgebaut werden.
•Die Installation sollte nur von einem qualifizierten Kundendienst-Techniker ausgeführt werden.
•Dieses Terminal-Board sollte nur in dem dafür vorgesehenen Gerät installiert werden.
Dieses Produkt ist ein BNC-Terminal-Board und sollte nur in den Modellen TH-42PW4 bzw. TH42PWD4 installiert werden.
Dieses Produkt sollte nur in dem dafür vorgesehenen Plasmadisplay installiert werden.
Wenn dieser Hinweis nicht beachtet wird, kann das Gerät beschädigt werden und das installierte Produkt zu Fehlfunktionen führen.
Bitte ü berprü fen Sie die Modellnummer des Plasmadisplays.
R - STANDBY
G POWER ON
TH-42PWD4
Modellnummer 
• Nicht das Produkt direkt berühren.
Auf dem Produkt sind hochempfindliche elektronische Bauteile sind in hoher Dichte vorhanden. Durch das direkte Berühren des Produkts während der Installation kann es zu Fehlfunktionen kommen. (Während der Installation sollte sichergestellt werden, daß statische Elektrizität durch geeignetes Vorgehen abgeleitet wird.)
•Vor der Installation alle Netzkabel von der Steckdose abtrennen.
•Das Produkt nicht fallen lassen oder auf irgendeine Weise beschädigen.
•Dieses Produkt nicht mit Wasser in Berührung kommen lassen und nicht feucht werden lassen.
•Nicht versuchen, dieses Produkt zu modifizieren.
Ansicht des Terminal-Boards
• Nach der Installation dieses Produkts im Plasmadisplay (Serie TH-42PWD4) können AV-Eingangssignale und Komponenten-Eingangssignale unter Verwendung der BNC-Eingangsbuchsen wiedergegeben werden.
R |
L |
|
|
R |
L |
|
AUDIO |
S VIDEO |
VIDEO |
VIDEO |
HD PR/CR/R PB/CB/B Y/G |
||
IN |
IN |
IN |
OUT |
AUDIO |
VD |
|
|
AV |
|
|
|
COMPONENT/RGB IN |
|
4

 Installation
Das Terminal-Board in dem dafü r vorgesehenen Einschub auf der Rü ckseite des Plasmadisplays installieren.
Vor der Installation
•Das Gerät ausschalten und das Netzkabel von der Steckdose abtrennen.
•Alle am Plasmadisplay angeschlossenen Kabel abtrennen.
1Das Plasmadisplay mit der Vorderseite nach unten weisend auf eine weiche Oberfläche legen, z.B. eine Schaumstoffmatte.
2Die vier Schrauben entfernen, mit der die Abdeckung des Einschubs oder ein bereits installiertes Board
befestigt ist und die Abdeckung bzw. das TerminalBoard entfernen.
Hinweis : TDie vier Schrauben werden für die
Installation benö tigt und sollten
|
aufbewahrt werden. |
|
3 |
Sicherstellen, daß |
das Terminal-Board richtig |
|
ausgerichtet ist und es dann vorsichtig und langsam |
|
|
in den Einschub einschieben. |
|
|
Sicherstellen, daß das Board vollständig aufsitzt. |
|
4 |
Das Board mit den im obigen Schritt 2 entfernten vier |
|
|
Schrauben befestigen. Dann die Schrauben in der |
|
|
Reihenfolge – |
anziehen. |
Foam mat or thick soft cloth
Anbringen des Aufklebers mit der Terminal-Bezeichnung
Nach beendigter Installation des Terminal-Boards sollte der mitgelieferte Aufkleber mit der Terminal-Bezeichnung am Plasmadisplay angebracht werden.
Rückseite des Plasmadisplays
Bei einigen Modellen des
Plasmadisplays ist bereits ein
Aufkleber angebracht.
Anbringungsort
Markierungen für den Aufkleber
Deutsch
Anbringen des Aufklebers:
 Das Schutzblatt auf der Rückseite des Aufklebers mit der Terminal-Bezeichnung abziehen.
 Bei Plasmadisplay-Modellen mit bereits angebrachten Aufklebern sollte der Aufkleber mit der TerminalBezeichnung ü ber dem vorhandenen Aufkleber angebracht werden.
Bei Modellen, an denen noch kein Aufkleber angebracht ist, sollte der Aufkleber mit der Terminal-Bezeichnung innerhalb der dafür vorgesehenen Markierungen wie in der Abbildung gezeigt angebracht werden.
Aufkleber mit der |
Terminal-Bezeichnung |
Aufkleber mit der
Terminal-Bezeichnung
Markierungen für Aufkleber |
Aufkleber mit der |
Markierungen für |
|
Aufkleber |
|
|
Terminal-Bezeichnung |
|
|
|
Hinweis : Die entfernte Abdeckung des Terminal-Boards für einen späteren Gebrauch an einem sicheren Ort aufbewahren.
5

Franç ais
Manuel d'installation de la carte de connexion BNC
Avertissement :
•L'utilisateur ne doit pas tenter de supprimer ni d'installer cette carte.
•Seul un technicien d'entretien doit effectuer l'installation.
•N'installez cette carte de connexion que dans les appareils précisés.
Cette carte de connexion BNC ne doit être installée que dans les appareils TH-42PW4 et TH-
42PWD4.
Cette carte de connexion ne doit être installée que dans les écrans à plasma précisés.
Faute de respecter cette disposition, il peut en résulter un endommagement du projecteur et la carte de connexion elle-même peut présenter des anomalies de fonctionnement.
Veuillez avant tout vé rifier le numé ro de modè le de l'é cran à plasma que vous possé dez.
R - STANDBY
G POWER ON
TH-42PWD4
Numéro de modèle
• Ne touchez pas directement la carte de connexion.
Des composants électroniques très sensibles sont implantés sur la carte de connexion, et cela en grande quantité.
Le fait de toucher directement ces composants lors de l'installation de la carte de connexion peut entraîner une anomalie de fonctionnement. (Avant d'installer la carte de connexion, assurez-vous que l'électricité statique que votre corps avait accumulée a bien été déchargée vers la terre par une méthode convenable pour cela.)
•Avant de commencer l'installation, n'oubliez pas deébrancherd la fiche du cordon d'alimentation au niveau de la prise secteur.
•Ne laissez pas tomber la carte de connexion et n'effectuez aucune action qui puisse l'endommager.
•Ne trempez pas la carte de connexion dans l'eau et veillez même à ce qu'elle ne soit pas mouillée.
•Ne tentez pas de modifier la carte de connexion de quelque manière que ce soit.
Cette carte de connexion se pré sente ainsi
•Après installation de cette carte dans l'écran à plasma (série TH-42PWD4), les signaux d'entrée AV et les signaux d'entrée des composantes peuvent être appliqués sur l'écran par le truchement des prises BNC.
R |
L |
|
|
R |
L |
|
AUDIO |
S VIDEO |
VIDEO |
VIDEO |
HD PR/CR/R PB/CB/B Y/G |
||
IN |
IN |
IN |
OUT |
AUDIO |
VD |
|
|
AV |
|
|
|
COMPONENT/RGB IN |
|
6
 Loading...