


ew-ds32
Thank you for choosing a Panasonic Battery‑Powered Toothbrush.
Please read all instructions before use.
Safety Precautions
Warning
• Keep out of the reach of toddlers and infants.
- Failure to do so may result in accidents or accidental ingestion of the
accessories or removable small parts.
• Terminate the usage when there is abnormality or failure.
-
Continued use of the toothbrush may cause fire, electric shock or other injuries.
Caution
• People who have severe periodontal disease should consult a doctor before
use. Failure to do so may cause damage to teeth and gums.
•
Do not use the brush in combination with toothpaste that contains a lot of abrasive.
• Do not force the bristles hard against the teeth or gums, or apply the bristles
to one area for prolonged periods.
• Do not apply the solid part of the brush head or the main unit to teeth.
•
If you have oral health problems such as teeth undergoing treatment, avoid using
the brush on those parts as doing so may cause damage to teeth and gums.
• Never modify, disassemble, or repair the appliance yourself as doing so may
cause unexpected accidents or trouble.
• Use a mild detergent for cleaning.
• Never use thinners, benzine, or alcohol to clean the toothbrush since it may
cause malfunction or cracking/discolouration of the parts.
• Parents and guardians of young children should check to ensure that the
child is using the appliance correctly and does not chew the brush.
- Without proper instruction, children may hurt themselves, damage the
brush, or cause the bristles to drop out. This may result in damage to the
teeth and gums, or in bristles being swallowed.
• Do not disinfect using boiling water, pharmaceutical solutions, or a
microwave oven.
-
Doing so may result in damage to the main unit or brush head and cause
injury.
• Do not continuously aim the LED lamp into the eyes.
- Doing so may cause dizziness.
Parts identification
A Main unit
1 LED lamp
2 Power switch [0/1]
3 Battery cover
B Brush head (x1)
4 Flat bristles
5 LED lamp window
6 Water drainage hole
C Cap
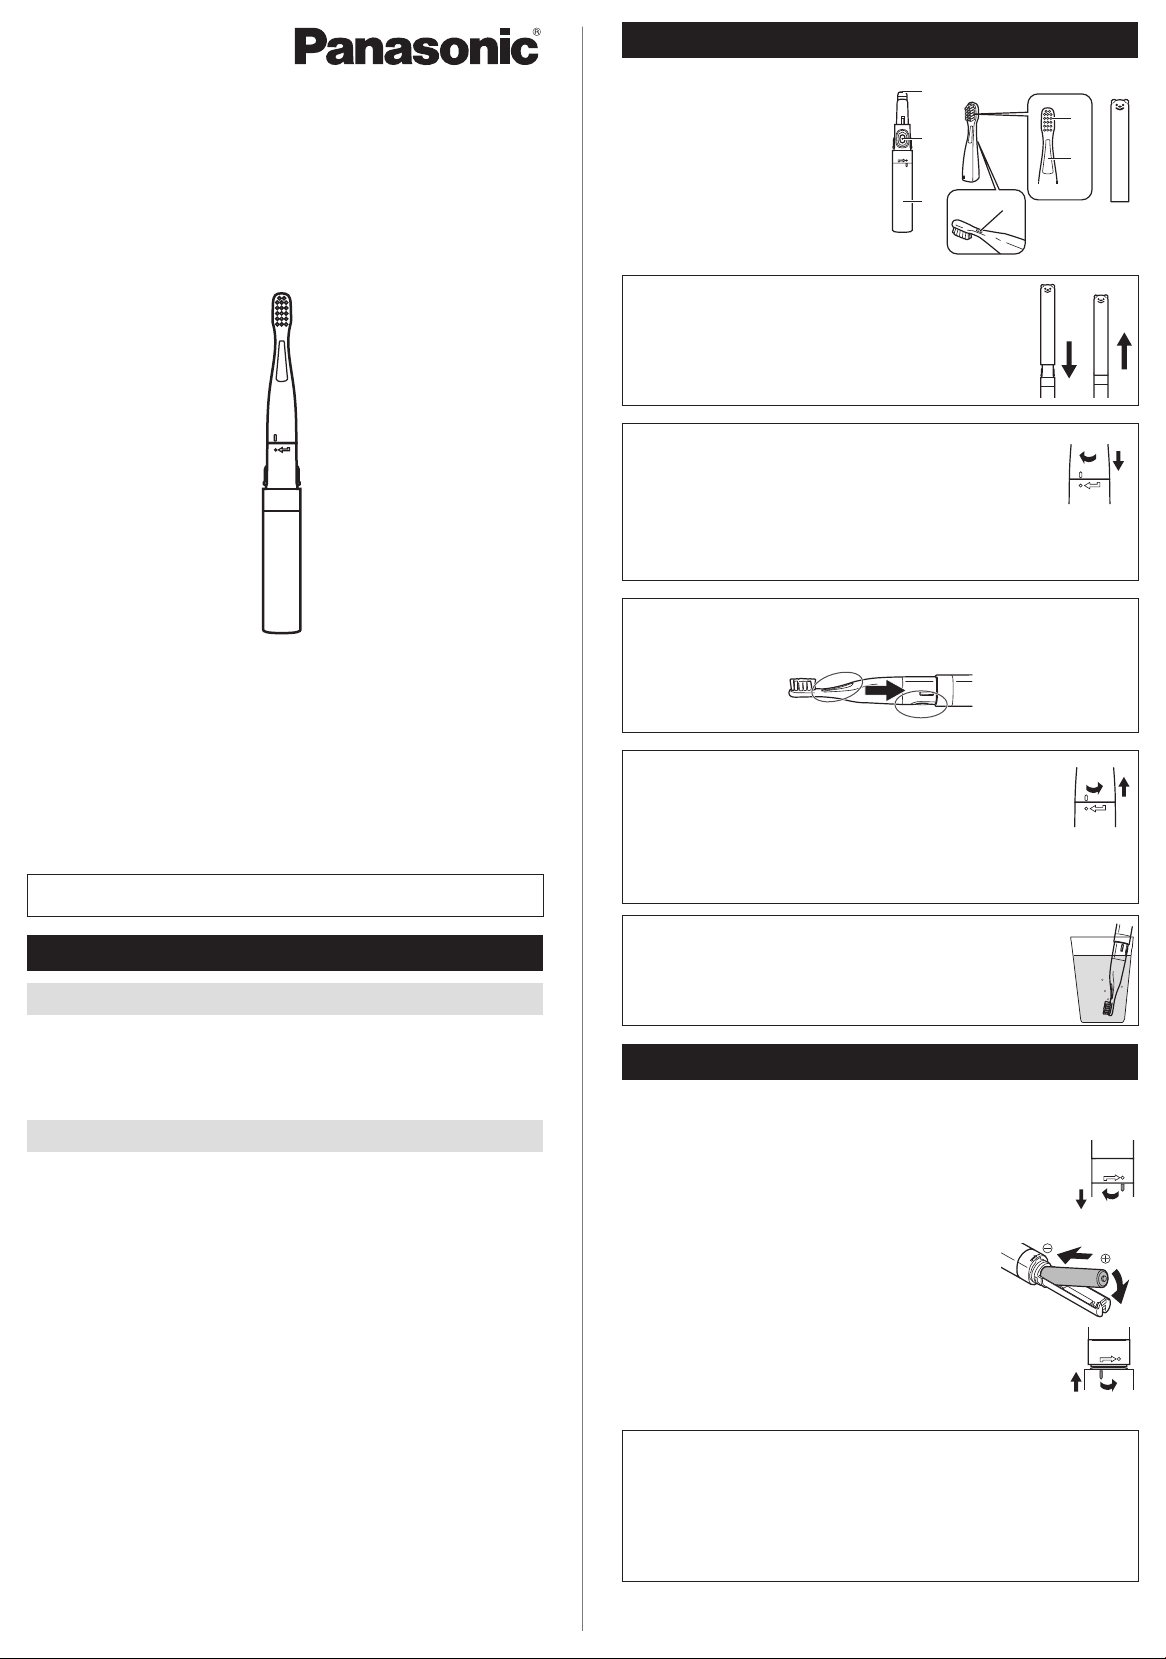
Attaching and removing the cap
Attach and remove the cap as illustrated.
Attaching the brush head
Align the mark on the brush head with the mark on the main
unit, and rotate it in the direction of the arrow until it clicks.
• Inserting the brush head without aligning the mark on the
brush head with the mark on the main unit may damage the
brush head or the main unit.
• Tightening it too much may cause deformation and damage to the main
unit and the brush head.
Note
• When attaching the brush head, ensure that the LED lamp window and
the power switch are on opposite sides.
Removing the brush head
1. Rotate the brush head and align the marks.
2. Pull to remove the brush head.
• Pulling the brush head while it is fastened may damage the
brush head or the main unit.
• When toothpaste gets hard and makes it difficult to remove
the brush head, put it in water or warm water for a while and
then remove.
If the brush head is hard to remove
If the brush head is hard to remove due to hardened toothpaste,
soak the entire brush head in cold or lukewarm water for
approximately 5 minutes and then remove.
Replacing the battery
The LED lamp will turn off and the vibration will gradually weaken. A few
seconds later, operation will stop completely. Please replace the alkaline
battery with a new one.
1. Remove the battery cover by rotating it.
2. Insert LR03 (AAA alkaline battery).
• It is possible to use the appliance for approximately
60 days by using a Panasonic LR03 (AAA alkaline
battery) (when used with the LED lamp turned on,
once a day for 2 minutes).
1
2
3. Attach the battery cover by rotating it.
Caution
• Always follow the cautions printed on the battery.
• Check the polarities (+ and -) of the battery and install it correctly.
• Remove the battery when not using the appliance for an extended period
of time.
• Please dispose of used battery appropriately.
• Do not disassemble the battery or throw it into a fire. Do not short-circuit
the battery.
Operating Instructions
(Household) Battery-Powered Toothbrush
Model No. EW-DS32
Before operating this unit, please read these instructions completely and
save them for future use.
 Loading...