


Operating Instructions Bedienungsanleitung Instructions d’utilisation Istruzioni per l’uso Gebruiksaanwijzing Manual de instrucciones Brugsvejledning Driftsföreskrifter Bruksanvisning Käyttöohjeet
Инструкцияпоэксплуатации Iнструкцiязексплуатації
Cordless Drill & Driver
Akku-Bohrschrauber Perceuse et tournevis sur batterie
Trapano e cacciavite senza filo
Draadloze boor en schroevendraaier Taladro y destornillador sin cable eléctrico Ledningsfri bor og skrutrækker Laddningsbar borr/skruvdragare Oppladbar drill og skrutrekker Ladattava porakone/ruuvinväännin
Аккумуляторная дрель-шуруповерт Аккумуляторний дриль-шуруповерт
Model No: EY7410
Before operating this unit, please read these instructions completely and save this manual for future use.
Vor Inbetriebnahme des Gerätes die Betriebsanleitung bitte gründlich durchlesen und diese Broschüre zum späteren Nachschlagen sorgfältig aufbewahren. Lire entièrement les instructions suivantes avant de faire fonctionner l’appareil et conserver ce mode d’emploi à des fins de consultation ultérieure. Prima di usare questa unità, leggere completamente queste istruzioni e conservare il manuale per usi futuri.
Lees deze gebruiksaanwijzing aandachtig door voor u het apparaat in gebruik neemt en bewaar de gebruiksaanwijzing voor eventuele naslag. Antes de usar este aparato por primera vez, lea todas las instrucciones de este manual y guarde el manual para poderlo consultar en el futuro. Gennemlæs denne betjeningsvejledning før brugen og gem den til fremtidig brug.
Läs igenom hela bruksanvisningen innan verktyget tas i bruk. Spara bruksanvisningen för senare användning.
Før enheten tas i bruk, vennligst les disse alle anvisningene og oppbevar deretter bruksanvisningen for senere bruk. Lue ohjeet huolella ennen laitteen käyttöönottoa ja säilytä tämä käyttöohje tallessa tulevaa tarvetta varten.
Передэксплуатациейданногоустройства,пожалуйста,полностьюпрочтитеданнуюинструкциюисохранитеданноеруководстводляиспользованиявбудущем. Передекплуатацiєюданогопристрою,будьласка,повнiстюпрочитайтедануiнструкцiюiзбережiтьданийпосiбникдлявикористанняумайбутньому.

Index/Index/Index/Indice/Index/Indice/Indeks/Index/Indeks/Hakemisto/
Индекс/Індекс
English: |
Page |
5 |
Dansk: |
Side |
|
56 |
Deutsch: |
Seite |
14 |
Svenska: |
Sid |
|
64 |
Français: |
Page |
22 |
Norsk: |
Side |
|
72 |
Italiano: |
Pagina |
31 |
Suomi: |
Sivu |
|
80 |
Nederlands: Bladzijde |
39 |
Русский |
Страница |
88 |
||
Español: |
Página |
48 |
Українська |
Сторiнка |
|
96 |
FUNCTIONAL DESCRIPTION |
|
|
|
|||
FUNKTIONSBESCHREIBUNG |
|
|
|
|||
DESCRIPTION DES FONCTIONS |
|
|
|
|||
DESCRIZIONE DELLE FUNZIONI |
|
|
|
|||
FUNCTIEBESCHRIJVING |
|
|
|
|
||
DESCRIPCIÓN FUNCIONAL |
|
|
|
|||
FUNKTIONSBESKRIVELSE |
|
|
|
|
||
FUNKTIONSBESKRIVNING |
|
|
|
|
||
FUNKSJONSBESKRIVELSE |
|
|
|
|||
TOIMINTAKUVAUS |
|
|
|
|
||
ФУНКЦИОНАЛЬНОЕ ОПИСАНИЕ |
(H) |
|
|
|||
ФУНКЦIОНАЛЬНИЙ ОПИС |
|
|
|
|||
|
|
(A) |
(B) |
|
|
|
|
(G) |
|
|
(I) |
|
|
|
|
|
|
(C) |
|
|
|
|
|
|
|
|
(J) |
|
|
(F) |
|
|
|
|
|
|
|
|
(D) |
|
|
|
|
(E) |
|
(N) |
(K) |
|
|
|
|
|
|
|
|
|
|
|
(M) |
|
|
|
|
|
|
|
(L) |
|
|
- -

|
Speed selector switch |
|
Main switch lock |
|
Bereichsschalter |
|
Hauptschaltersperre |
|
Sélecteur de vitesse de rotation |
|
Verrou de l’interrupteur principal |
|
Selettore di velocità |
|
Blocco interruttore principale |
|
Snelheidskeuzeschakelaar |
|
Hoofdschakelaarvergrendeling |
(A) |
Conmutador selector de velocidad |
(B) |
Bloqueo de interruptor principal |
Hastighedsvælgeromskifter |
Hoverafbryderlås |
||
|
Varvtalsomkopplare |
|
Strömbrytarspärr |
|
Hastighetsvelger |
|
Hovedbryterlås |
|
Nopeusalueen valitsin |
|
Pääkytkimen lukko |
|
Селекторный переключатель скорости |
|
Блокировка главного переключателя |
|
Селекторний перемикач швидкості |
|
Блокування головного перемикача |
|
|
|
|
|
Main switch |
|
Battery pack (EY9L10) |
|
Hauptschalter |
|
Akku (EY9L10) |
|
Interrupteur principal |
|
Batterie (EY9L10) |
|
Interruttore principale |
|
Pacco batteria (EY9L10) |
|
Hoofdschakelaar |
|
Accu (EY9L10) |
(C) |
Interruptor principal |
(D) |
Bloque de pilas (EY9L10) |
Hoverafbryder |
Batteri (EY9L10) |
||
|
Strömbrytare |
|
Batteri (EY9L10) |
|
Hovedbryter |
|
Batteri-pakke (EY9L10) |
|
Pääkytkin |
|
Akku (EY9L10) |
|
Главный переключатель |
|
Батарейный блок (EY9L10) |
|
Головний перемикач |
|
Батарейний блок (EY9L10) |
|
|
|
|
|
LED light |
|
Clutch handle |
|
LED-Leuchte |
|
Kupplungsring |
|
Lumière DEL |
|
Poignée de l’embrayage |
|
Luce LED |
|
Impugnatura frizione |
|
LED-lampje |
|
Koppelingshandgreep |
(E) |
Luz indicadora |
(F) |
Mango de embrague |
LED-lys |
Koblingshåndtag |
||
|
LED-ljus |
|
Kopplingshandtag |
|
LED-lys |
|
Clutchhåndtak |
|
LED-valo |
|
Kytkimen kahva |
|
Светодиодная подсветка |
|
Рукоятка муфты |
|
Світлодіодне підсвічування |
|
Рукоятка муфти |
|
|
|
|
|
Hexagonal bit chuck |
|
Battery low warning lamp |
|
Sechskantbitfutter |
|
Akkuladungs-Warnlampe |
|
Mandrin de mèche hexagonal |
|
Témoin d’avertissement de batterie basse |
|
Mandrino esagonale per punte |
|
Spia avvertenza batteria scarica |
|
Zeskantboorkop |
|
Waarschuwingslampje voor lage accuspanning |
(G) |
Portador de broca hexagonal |
(H) |
Luz de aviso de baja carga de batería |
Sekskantet borepatron |
Advarselslampes batterieffekt lav |
||
|
Chuck för sexkantsbits |
|
Varningslampa för svagt batteri |
|
Sekskantet borchuck |
|
Varsellampe for at batteriet er for lavt |
|
Kuusioterän kiinnityslaite |
|
Alhaisen akkujännitteen varoituslamppu |
|
Шестигранный зажимной патрон для насадок |
|
Предупреждающая лампочка низкого заряда батареи |
|
Шестигранний затискний патрон для насадок |
|
Попереджувальна лампочка низького заряду батареї |
|
|
|
|
--

|
LED light ON/OFF button |
|
Bit set |
|
LED-Leuchten-EIN/AUS-Taste |
|
Bitsatz |
|
Bouton Marche/Arrêt de la lumière DEL |
|
Jeu de mèches |
|
Tasto di accensione e spegnimento della luce LED |
|
Inserimento punta |
|
Aan/uit-toets (ON/OFF) voor LED-lampje |
|
Bitset |
(I) |
Botón ON/OFF de luz LED |
(J) |
Juego de brocas |
TÆND/SLUK-knap til LED-lys |
Bit |
||
|
Strömbrytare för LED-ljus |
|
Bitsuppsättning |
|
PÅ/AV-knapp for LED-lys |
|
Bitsett |
|
LED-valon kytkin/katkaisupainike |
|
Teräsarja |
|
Кнопка включения/выключения светодиодной подсветки |
|
Набор насадок |
|
Кнопкаввімкнення/вимкненнясвітлодіодногопідсвічування |
|
Набiр насадок |
|
|
|
|
|
Battery charger (EY0L10) |
|
Ni-Cd battery pack dock |
|
Ladegerät (EY0L10) |
|
Ni-Cd-Akkuladeschacht |
|
Chargeur de batterie (EY0L10) |
|
Poste d’accueil de la batterie autonome Ni-Cd |
|
Caricabatterie (EY0L10) |
|
Spazio raccordo pacco batteria Ni-Cd |
|
|
Ni-Cd accuhouder |
|
|
Acculader (EY0L10) |
|
|
|
|
Enchufe de carga de batería Ni-Cd |
|
|
Cargador de la batería (EY0L10) |
|
|
(K) |
(L) |
Ni-Cd batteripakningsdok |
|
|
Batterioplader (EY0L10) |
|
Docka för NiCd-batteri |
|
Batteriladdare (EY0L10) |
|
Dokk for Ni-Cd-batteripakke |
|
Batterilader (EY0L10) |
|
Ni-Cd akun liitin |
|
Akkulaturi (EY0L10) |
|
Углубление для установки никель-кадмиевого |
|
|
батарейного блока |
|
|
Зарядное устройство (EY0L10) |
|
|
|
|
Заглиблення для встановлення нікель- |
|
|
Зарядний пристрiй (EY0L10) |
|
кадмієвого батарейного блоку |
|
|
|
|
|
Battery dock cover |
|
Li-ion battery pack dock |
|
|
Li-Ion-Akkuladeschacht |
|
|
Ladeschachtabdeckung |
|
|
|
|
Poste d’accueil de la batterie autonome Li-ion |
|
|
Couvercle du poste d’accueil de la batterie |
|
|
|
|
Spazio raccordo pacco batteria Li-ion |
|
|
Coperchio vano batteria |
|
|
|
|
Li-ion accuhouder |
|
|
Deksel van accuhouder |
|
|
|
|
Enchufe de carga de batería Li-ión |
|
|
Cubierta de enchufe de carga de batería |
|
|
(M) |
(N) |
Li-ion batteripakningsdok |
|
|
Batteridokdæksel |
|
Docka för litiumjonbatteri |
|
Batteridockningslucka |
|
Dokk for Li-ion-batteripakke |
|
Dokkdeksel til batterilader |
|
Li-ioniakun liitin |
|
Akkuliittimen kansi |
|
Углубление для установки литий-ионного |
|
Крышка углубления для батареи |
|
батарейного блока |
|
|
Заглиблення для встановлення літій-іонного |
|
|
Кришка заглиблення для батареї |
|
|
|
|
батарейного блоку |
|
|
|
|
|
--

Read the Safety Instructions booklet and the following before using.
I. ADDITIONAL
SAFETY RULES
1)Wear ear protectors when using the tool for extended periods.
Prolonged exposure to high intensity noise can cause hearing loss.
2)Be aware that this tool is always in an operating condition, since it does not have to be plugged into an electrical outlet.
3)When drilling into walls, floors, etc., “live” electrical wires may be encountered. DO NOT TOUCH THE CHUCK OR ANY FRONT METAL PARTS OF THE TOOL! Hold the tool only by the plastic handle to prevent electric shock in case you drill into a “live” wire.
4)If the bit becomes jammed, immediately turn the main switch off to prevent an overload which can damage the battery pack or motor.
Use reverse motion to loosen jammed bits.
5)During charging, the charger may become slightly warm. This is normal. Do not leave the battery in the charger for more than 24 hours after charging is completed.
Symbol |
Meaning |
||||||
|
|
V |
Volts |
||||
|
|
|
|
|
|
|
|
|
|
|
|
|
|
|
Direct current |
|
|
|
|
|
|
|
|
|
|
|
|
|
|
|
|
|
|
n0 |
No load speed |
||||
|
|
|
|
|
|
|
|
…/min |
Revolutions or reciprocations per |
||||||
|
|
|
|
|
|
|
minutes |
|
Ah |
Electrical capacity of battery pack |
|||||
|
|
|
|
|
|
|
|
|
|
|
|
|
|
|
Rotation only |
|
|
|
|
|
|
|
|
|
|
|
|
|
|
|
Read the operating instructions |
|
|
|
|
|
|
|
|
|
|
|
|
|
|
|
before use. |
|
|
|
|
|
|
|
|
|
|
|
|
|
|
|
For indoor use only. |
|
|
|
|
|
|
|
|
II. ASSEMBLY &
OPERATION
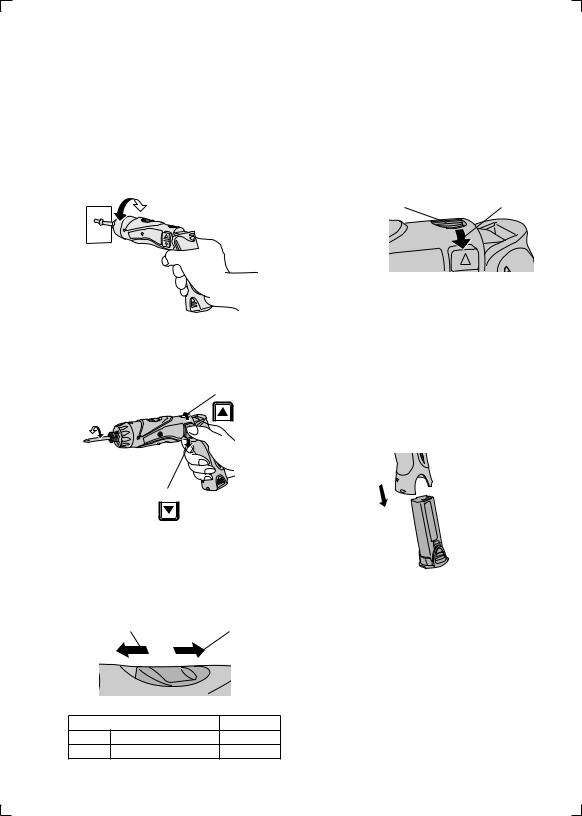
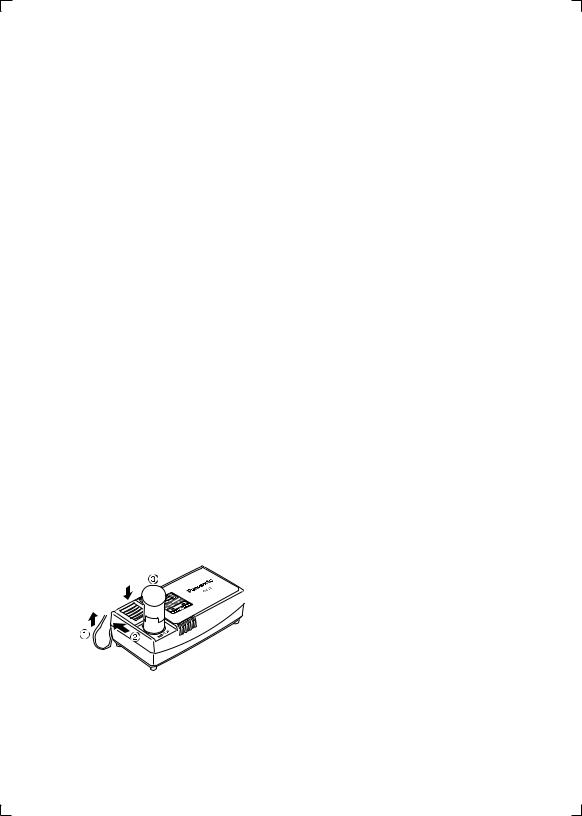
Hexagonal Bit Chuck
Attaching the bits
NOTE:
When attaching or removing drill bits, disconnect the battery pack from the tool and switch the lock button into the lock position.
1.Hold the collar of the chuck and pull it out from the driver.
2.Insert the bit into the chuck. Release the collar.
3.The collar will return to its original position when it is released.
4.Pull the bit to make sure it does not come out.
5.To remove the bit, pull out the collar in the same way.
Bit |
Hexagonal bit chuck |
9.5 mm (3/8") - 13 mm (33/64") 6.35 mm (1/4")
Clutch Handle
(Clutch Torque Setting)
Adjust the torque to one of the 21 possible settings to the job. There is an interval of about 0.13 N·m (1.3 k f-cm or 1.1 in-lbs) between steps.
CAUTION:
Test the setting before actual opera tion.
Set the scale at this mark.
--
Reference for Adjusting Torque
Setting |
Torque |
Use |
1Approx: 0.29 N·m
(3.0 kgf-cm or 2.6 in-lbs)
5Approx: 0.82 N·m
(8.4 kgf-cm or 7.3 in-lbs)
9 |
Approx: 1.35 N·m |
|
|
(13.8 kgf-cm or 12.0 in-lbs) For driving |
|||
|
|||
|
|
screws |
|
13 |
Approx: 1.88 N·m |
||
(19.2 kgf-cm or 16.6 in-lbs) |
|
||
|
|
||
17Approx: 2.41 N·m
(24.6 kgf-cm or 21.3 in-lbs)
21Approx: 2.94 N·m
(30.0 kgf-cm or 26.0 in-lbs)
For powerApprox: 4.4 N·m ful driving (45.0 kgf-cm or 39.0 in-lbs) screws and
drilling
●When using at high speeds, set the clutch at 10 or below. (Operation stops at the maximum torque of 1.5 N·m (15 kgf-cm) when the scale is higher.)
●The auto shut-off function may become inoperable at high clutch settings when battery power drops. Recharge the battery in that case.
NOTE:
The chart is only a reference. The torque settings may differ by materials, types of screws, etc. Please test it at your own conditions before use.
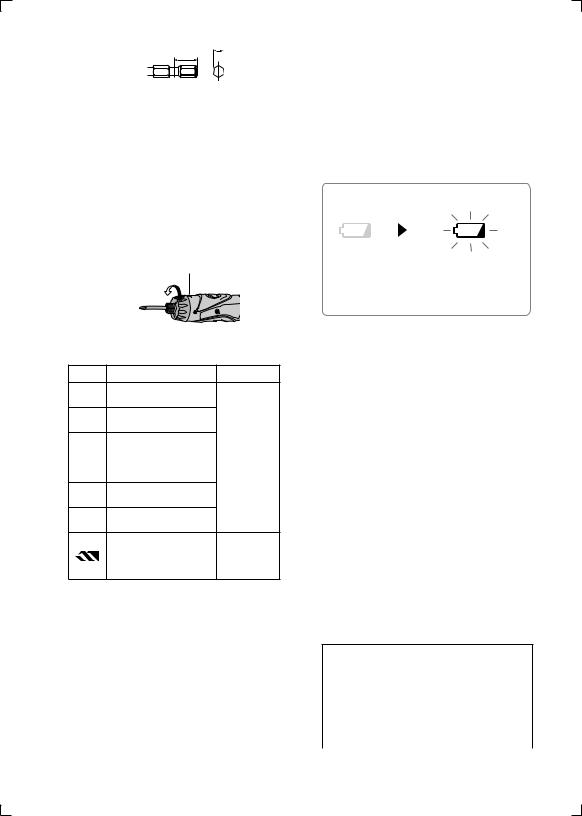
Battery Low Warning Lamp
<Battery low warning lamp>
tery loses its charge, causing the battery low warning lamp to flash.
●If you notice the battery low warning lamp flashing, charge the battery pack immediately.
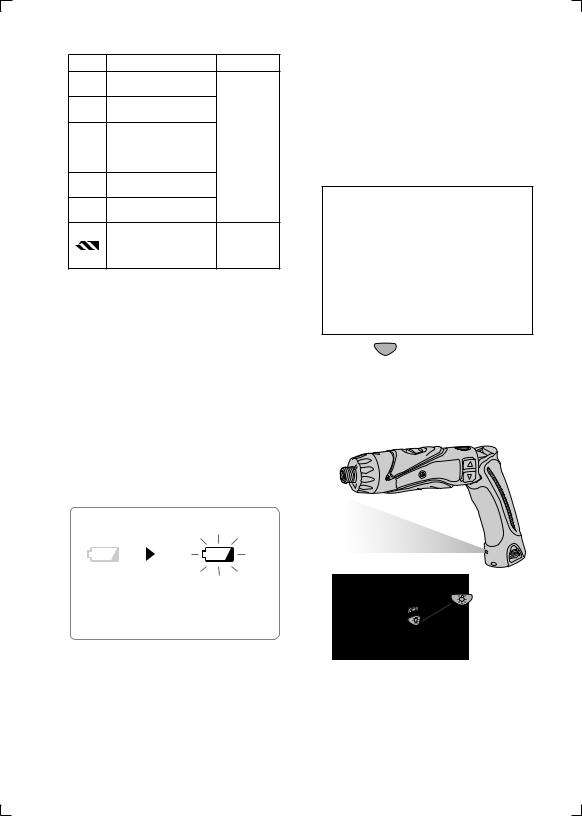
Using the LED Light
Use the LED light on jobs in dark locations such as attics to illuminate your workspace.
 CAUTION
●The LED light is intended for use as a supplemental light source. Do not use it as a flashlight.
Doing so may result in accident or injury.
●Do not look at the light or shine it directly into your eyes. Continuous exposure to the LED light may damage your eyes.
1.Press  to toggle the light on and off.
●To use the light immediately after attaching the battery pack or after the drill has not been used for 5 minutes or more, operate the drill briefly.
Off |
Flashing |
(normal |
(No charge) |
operation) |
Battery |
|
protection |
|
feature active |
Excessive (complete) discharging of Li-ion batteries shortens their service life dramatically. The driver includes a battery protection feature designed to prevent excessive discharging of the battery pack.
●The battery protection feature activates immediately before the bat-
●The light will automatically turn off if the drill is not used for 5 minutes.
●The light uses an extremely small amount of current. Using the light has a negligible effect on the operational capacity of the drill.
--
●The LED is incapable of lighting the tip of the bit when the drill is used in the straight configuration.
Bit-locking Function
With the switch at off and the bit lock ed in place, the tool can be used as a manual screw-driver - up to 14.7 N·m (150 kgf-cm, 130 in-lbs).
There will be a little play in the driving shaft, but this is not a malfunction.
Main Switch (ON/OFF)
Push the upper half of the switch for forward rotation, or the lower half for reverse rotation.
Forward
Forward
Reverse
Reverse
Speed Selector Switch
To suit the application of this tool, two different rotational speeds are available. Depending upon use, either the high or low speed should be selected.
HIGH |
LOW |
|
Speed selection |
Torque |
LOW |
200 /min (rpm) |
High |
HIGH |
600 /min (rpm) |
Low |
CAUTION:
•Check speed selector switch before use.
•Do not operate the speed selector switch while the main switch is on (switch is in the ON position).
Main Switch Lock
After use, set the main switch lock at the lock position to prevent accidental operation.
Main switch lock |
Lock |
|
Battery Pack (EY9L10)
CAUTION:
1.Remove the battery pack away from the tool.
2.Charge the battery pack using the battery charger.
3.After charging has been completed, remove the battery pack from the charger and connect it to the tool.
Disconnect the charger from the power source when not in use.
NOTE:
Use under extremely hot or cold conditions will reduce operating capacity per charge.
--

[Battery Pack]
For Appropriate Use of Bat tery pack
Li-ion Battery pack (EY9L10)
•For optimum battery life, store the Liion battery pack following use without charging it.
•The ambient temperature range is between 0°C (32°F) and 40°C (104°F).
If the battery pack is used when the battery temperature is below 0°C (32°F), the tool may fail to function properly.
•When battery pack is not in use, keep it away from other metal objects like: paper clips, coins, keys, nails, screws, or other small metal objects that can make a connection from one terminal to another.
Shorting the battery terminals together may cause sparks, burns or a fire.
•When operating the battery pack, make sure the work place is well ventilated.
Battery Pack Life
The rechargeable batteries have a limited life. If the operation time becomes extremely short after recharging, replace the battery pack with a new one.
Battery Recycling
ATTENTION:
For environmental protection and recycling of materials, be sure that it is disposed of at an officially assigned location, if there is one in your country.
[Battery Charger] Charging
Common Cautions for the Li- ion/Ni-Cd Battery Pack
NOTE:
•When a cold battery (of about 0°C or less) is to be charged in a warm
room, leave the battery in the room for at least one hour and charge it when it has warmed up to room temperature. (Failing to do so may result in less than a full charge.)
•Cool down the charger when charging more than two battery packs consecutively.
•Do not insert your fingers into contact hole, when holding charger or any other occasions.
CAUTION:
To prevent the risk of fire or damage to the battery charger.
•Do not use power source from an engine generator.
•Do not cover vent holes on the charger and the battery pack.
•Unplug the charger when not in use.
Li-ion Battery Pack
NOTE:
Your battery pack is not fully charg ed at the time of purchase. Be sure to charge the battery before use.
Battery charger (EY0L10)
1. Plug the charger into the AC outlet.
NOTE:
Sparks may be produced when the plug is inserted into the AC power supply, but this is not a problem in terms of safety.
2.Slide the battery dock cover back to allow insertion of the Li-ion battery pack.
●Verify that the cover is locked se curely in place.
3.Insert the battery pack firmly into the charger.
To AC outlet
--

4.During charging, the charging lamp will be lit.
When charging is completed, an internal electronic switch will automatically be triggered to prevent overcharging.
•Charging will not start if the battery pack is warm (for example, immediately after heavy-duty operation).
The orange standby lamp will be flashing until the battery cools down. Charging will then begin automatically.
5.The charge lamp (green) will flash slowly once the battery is approxi mately 80% charged.
6.When charging is completed, the charging lamp will start flashing quickly in green color.
7.If the temperature of the battery pack is 0°C or less, charging takes longer to fully charge the battery pack than the standard charging time. Even when the battery is fully charged, it will have approximately 50% of the power of a fully charged battery at normal operating temperature.
8.If the power lamp does not light im mediately after the charger is plugged in, or if after the standard charging time the charging lamp does not flash quickly in green, consult an authorized dealer.
9.If a fully charged battery pack is in serted into the charger again, the charging lamp lights up. After several minutes, the charging lamp may flash quickly to indicate the charging is completed.
Ni-Cd Battery Pack
NOTE:
When you charge the battery pack for the first time, or after prolonged storage, charge it for about 24 hours to bring the battery up to full capacity.
Battery charger (EY0L10)
1. Plug the charger into the AC outlet.
NOTE:
Sparks may be produced when the plug is inserted into the AC power
supply, but this is not a problem in terms of safety.
2.Slide the battery dock cover back to allow insertion of the Ni-Cd battery pack.
●Verify that the cover is locked securely in place.
3.Insert the battery pack firmly into the charger.
To AC outlet
4.During charging, the charging lamp will be lit.
When charging is completed, an internal electronic switch will automatically be triggered to prevent overcharging.
•Charging will not start if the battery pack is warm (for example, immediately after heavy-duty operation).
The orange standby lamp will be flashing until the battery cools down. Charging will then begin automatically.
5.When charging is completed, the charging lamp will start flashing quickly in green color.
6.If the power lamp does not light immediately after the charger is plug ged in, or if after the standard charging time the charging lamp does not flash quickly in green, consult an authorized dealer.
7.If a fully charged battery pack is in serted into the charger again, the charging lamp lights up. After several minutes, the charging lamp may flash quickly to indicate the charging is completed.
--
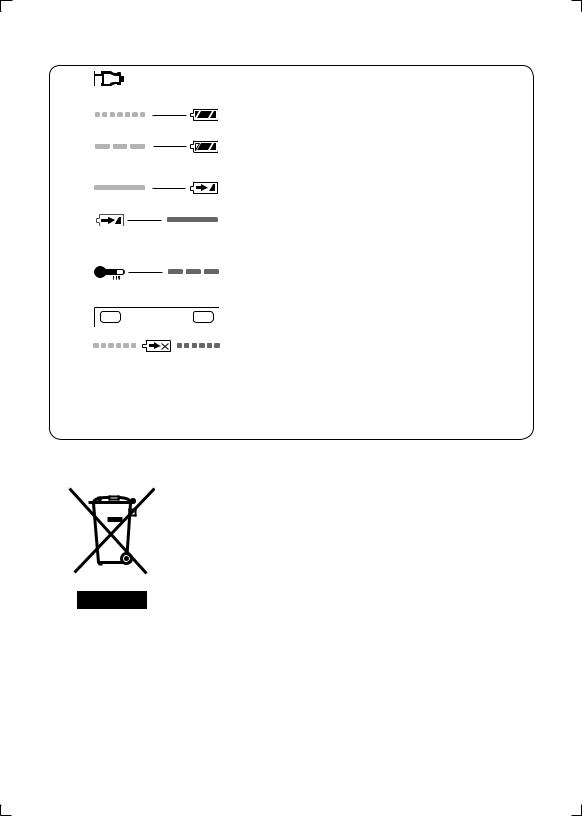
LAMP INDICATIONS
Green Lit
Charger is plugged into the AC outlet.
Ready to charge.
Green Flashing Quickly
Charging is completed. (Full charge.)
Green Flashing
Battery is approximately 80% charged. (Usable charge.
Li-ion only)
Green Lit
Now charging.
Orange Lit
Battery pack is cool.
The battery pack is being charged slowly to reduce the load on the battery. (Li-ion only)
Orange Flashing
Battery pack is warm. Charging will begin when temperature of battery pack drops.
Charging Status Lamp
Left: green Right: orange will be displayed.
Both Orange and Green Flashing Quickly
Charging is not possible. Clogged with dust or malfunction of the battery pack.
If the temperature of the battery pack is –10°C or less, the charging status lamp (orange) will also start flashing.
Charging will begin when the temperature of the battery pack goes up (Li-ion only)
Information on Disposal for Users of Waste Electrical & Electronic Equipment (Private Households)
This symbol on the products and/or accompanying documents means that used electrical and electronic products should not be
mixed with general household waste.
For proper treatment, recovery and recycling, please take these products to designated collection points, where they will be accepted on a free of charge basis. Alternatively, in some countries you may be able to return your products to your local
retailer upon the purchase of an equivalent new product. Disposing of this product correctly will help to save valuable
resources and prevent any potential negative effects on human health and the environment which could otherwise arise from inappropriate waste handling. Please contact your local authority for further details of your nearest designated collection point.
Penalties may be applicable for incorrect disposal of this waste, in accordance with national legislation.
For Business Users in the European Union
If you wish to discard electrical and electronic equipment, please contact your dealer or supplier for further information.
- 10 -
Information on Disposal in Other Countries Outside the Euro pean Union
This symbol is only valid in the European Union.
If you wish to discard this product, please contact your local authorities or dealer and ask for the correct method of disposal.
III. MAINTENANCE
Use only a dry, soft cloth for wiping the unit. Do not use a damp cloth, thinner, benzine, or other volatile solvents for cleaning.
IV. ACCESSORIES
Use only bits suitable for size of drill’s chuck.
V. SPECIFICATIONS
MAIN UNIT
Model |
|
|
|
EY7410 |
Capacity |
Screw driving |
Machine screw |
|
M2.5 - M5 |
Wood screw |
|
ø 3.8 x 38 mm (5/32" x 1-29/64") |
||
|
Drilling |
For metal |
|
ø 5 mm (13/64") spc t = 1.6 mm |
Motor |
|
|
|
3.6 V DC |
No load speed |
|
|
LOW: 200/min (rpm) |
|
|
|
HIGH: 600/min (rpm) |
||
|
|
|
||
Maximum torque |
|
LOW: 4.4 N·m (45 kgf-cm, 39 in-lbs) |
||
|
HIGH: 1.5 N·m (15 kgf-cm, 13 in-lbs) |
|||
|
|
|||
Maximum clutch torque |
3.0 N·m (30 kgf-cm, 26 in-lbs) |
|||
Overall length |
|
|
276 mm (10-55/64") |
|
Weight (with battery pack) |
|
|
0.5 kg (1.1 lbs) |
|
BATTERY PACK
Model |
EY9L10 |
Storage battery |
Li-ion Battery |
Battery voltage |
3.6 V DC (3.6 V x 1 cell) |
Capacity |
1.5 Ah |
- 11 -

BATTERY CHARGER
Model |
|
|
EY0L10 |
|
Weight |
|
|
0.6 kg (1.3 lbs) |
|
Electrical rating |
|
See the rating plate on the bottom of the charger. |
||
|
|
2.4 V |
|
3.6 V |
|
1.2 Ah |
EY9021 |
|
EY9025 |
Charging time |
15 min. |
|
15 min. |
|
|
|
|||
|
|
|
EY9L10 |
|
|
|
|
|
|
|
1.5 Ah |
|
|
Usable: 15 min. |
|
|
|
|
Full: 30 min. |
|
|
|
|
|
NOTE:
•For applicable battery packs to this charger, see the label on the charger or the latest general catalog.
The instruction label on the battery packs also shows the applicable charger.
- 12 -

ONLY FOR U. K.
VI. ELECTRICAL PLUG
INFORMATION
FOR YOUR SAFETY PLEASE READ THE FOLLOWING TEXT CAREFULLY
This appliance is supplied with a moulded three pin mains plug for your safety and convenience.
A 5 amp fuse is fitted in this plug.
Should the fuse need to be replaced please ensure that the replacement fuse has a rating of 5 amp and that it is approved by ASTA or BSI to BS1362.
Check for the ASTA mark or the BSI mark on the body of the fuse.
If the plug contains a removable fuse cover you must ensure that it is refitted when the fuse is replaced.
If you lose the fuse cover the plug must not be used until a replacement cover is obtained.
A r e p l a c e m e n t f u s e c o v e r c a n b e purchased from your local Panasonic Dealer.
IF THE FITTED MOULDED PLUG IS UNSUITABLE FOR THE SOCKET OUTLET IN YOUR HOME THEN THE FUSE SHOULD BE REMOVED AND THE PLUG CUT OFF AND DISPOSED OF SAFELY.
THERE IS A DANGER OF SEVERE ELECTRICAL SHOCK IF THE CUT OFF PLUG IS INSERTED INTO ANY 13 AMP SOCKET.
If a new plug is to be fitted please observe the wiring code as shown below.
If in any doubt please consult a qualified electrician.
IMPORTANT:
The wires in this mains lead are coloured in accordance with the following code:
Blue: Neutral
Brown: Live
As the colours of the wire in the mains lead of this appliance may not correspond with the coloured markings identifying the terminals in your plug, proceed as follows.
The wire which is coloured BLUE must be connected to the terminal in the plug which is marked with the letter N or coloured BLACK.
The wire which is coloured BROWN must be connected to the terminal in the plug which is marked with the letter L or coloured RED.
Under no circumstances should either of these wires be connected to the earth terminal of the three pin plug, marked with the letter E or the Earth Symbol  .
.
How to replace the fuse: Open the fuse compartment with a screwdriver and replace the fuse and fuse cover if it is removable.
Fuse Cover 


This apparatus was produced to BS800.
- 13 -

Lesen Sie bitte vor der ersten Inbetriebnah me dieses Gerätes das separate Handbuch „Sicherheitsmaßregeln“ sorgfältig durch.
I. WEITERE WICHTIGE
SICHERHEITSREGELN
1)Geeigneten Gehörschutz tragen, wenn das Werkzeug längere Zeit im Betrieb ist!
Lange Einwirkung von starkem Lärm kann zu Gehörverlust führen.
2)Denken Sie daran, dass das Werk zeug ständig betriebsbereit ist, da es nicht an die Steckdose angeschlossen werden muss.
3)Beim Bohren oder Schrauben in Wände, Fußböden usw. können stromführende Kabel berührt werden. DAHER NIE DAS SECHS KANTSCHNELLSPANNFUTTER O D E R A N D E R E V O R D E R E METALLTEILE BERÜHREN! Das Werkzeug beim Schrauben nur am Kunststoffgriff halten, um in solchen Fällen vor elektrischen Schlägen geschützt zu sein.
4)Falls der Bit stecken bleibt, lassen Sie sofort den Elektronikschalter los, um eine Überlastung zu verhüten, die den Akku oder Motor beschädigen kann.
Verwenden Sie die Rückwärtsdre hung, um klemmende Bits zu lösen.
5)Beim Aufladen kann sich das Lade gerät etwas erhitzen. Dies ist normal. Lassen Sie den Akku nach Abschluss des Ladevorgangs nicht länger als 24 Stunden im Ladegerät.
Symbol |
Bedeutung |
|||||||
|
|
V |
Volt |
|||||
|
|
|
|
|
|
|
|
|
|
|
|
|
|
|
|
Gleichstrom |
|
|
|
|
|
|
|
|
||
|
|
|
|
|
|
|
|
|
|
|
n0 |
Leerlaufdrehzahl |
|||||
|
|
|
|
|
|
|
|
|
…/min |
Drehzahl oder Hubzahl pro |
|||||||
Minute |
||||||||
|
|
|
|
|
|
|
||
|
|
|
|
|
|
|
|
|
|
Ah |
Akkukapazitat in Ampere |
||||||
|
Stunden |
|||||||
|
|
|
|
|
|
|
||
|
|
|
|
|
|
|
Lesen Sie die |
|
|
|
|
|
|
|
|
Bedienungsanleitung vor |
|
|
|
|
|
|
|
|
Gebrauch. |
|
|
|
|
|
|
|
|
Nur für Inneneinsatz. |
|
|
|
|
|
|
|
|
|
|
II. MONTAGE &
BETRIEB
Sechskantbitfutter
1.Anbringen von Bits
HINWEIS:
Wenn Sie Bohrerbits anbringen oder abnehmen, trennen Sie den Akku vom Werkzeug, und stellen Sie den Sperrknopf auf die Sperr stellung.
1.Die Hülse des Schnellspannfutters hal ten und vom Schrauber herausziehen.
2.Den Bit in das Bohrfutter einsetzen. Die Hülse loslassen.
3.Der Ring springt in seine Ausgangs position zurück, wenn er losgelassen wird.
4.An dem Bit ziehen, um sicherzustellen, dass er nicht abgezogen werden kann.
5.Zum Entfernen des Bits die Hülse auf die gleiche Weise herausziehen.
Bit |
Sechskantbitfutter |
9,5 mm (3/8") - 13 mm (33/64") 6,35 mm (1/4")
- 14 -

Kupplungsring (Einstellung des Kupplungsdrehmoments)
Stellen Sie das Drehmoment für die jeweilige Arbeit auf eine der 21 möglichen Einstellungen ein. Ein Intervall von etwa 0,13 N·m (1,3 kgf·cm) besteht zwischen den Stufen.
VORSICHT:
Testen Sie die Einstellung vor der eigentlichen Arbeit.
Die Skala auf dieses Zeichen ( ) einstellen.
Referenz für die Drehmoment-Einstellung
Position |
Drehmoment |
Anwendung |
1Ca. 0,29 N·m (3,0 kgf-cm)
5Ca. 0,82 N·m (8,4 kgf-cm)
9 |
Ca. 1,35 N·m |
Für |
|
(13,8 kgf-cm) |
|||
|
normales |
||
|
Ca. 1,88 N·m |
||
13 |
Schrauben |
||
(19,2 kgf-cm) |
|||
|
|
17Ca. 2,41 N·m (24,6 kgf-cm)
21Ca. 2,94 N·m (30,0 kgf-cm)
|
Für |
Ca. 4,4 N·m |
kraftvolles |
(45,0 kgf-cm) |
Schrauben |
|
und Bohren |
●Stellen Sie die Kupplung bei hohen Drehzahlen auf 10 oder niedriger. (Bei höherem Skalenwert stoppt der Betrieb beim maximalen Dreh moment von 1,5 N·m (15 kgf-cm).)
●Die automatische Abschaltung kann bei höheren Kupplungseinstellungen funktionsunfähig werden, wenn die Akkuleistung nachlässt. Laden Sie in diesem Fall den Akku auf.
HINWEIS:
Die Tabelle ist nur ein Anhaltspunkt. Die Drehmoment-Einstellung kann je nach Material, Schraubentyp usw. unterschiedlich sein. Bitte testen Sie die Einstellung für Ihre eigenen Bedingungen vor der Benutzung.
Akkuladungs-Warnlampe
<Akkuladungs-Warnlampe>
Aus |
Blinken |
(normaler |
(Keine Ladung) |
Betrieb) |
Akkuschutz |
|
funktion aktiv |
Übermäßiges (vollständiges) Entla den von Li-Ion-Akkus führt zu einer erheblichen Verkürzung ihrer Lebens dauer. Der Schrauber ist mit einer Akku schutzfunktion ausgestattet, die übermäßiges Entladen des Akkus verhindert.
●Die Akkuschutzfunktion wird unmittelbar vor der Erschöpfung des Akkus aktiviert und bewirkt Blinken der Akkuladungs-Warnlampe.
●Wenn die Akkuladungs-Warnlampe blinkt, laden Sie den Akku unverzuglich auf.
Verwendung der LED-Leuchte
Verwenden Sie die LED-Leuchte bei Arbeiten an dunklen Orten, wie z.B. Dachkammern, um den Arbeitsplatz zu beleuchten.
 VORSICHT
●Die LED-Leuchte ist nicht als Leucht quelle vorgesehen. Verwenden Sie die Leuchte nicht als Taschenlampe. Anderenfalls kann es zu einem Unfall oder einer Verletzung kommen.
●Richten Sie die Leuchte nicht direkt auf Ihre Augen.
Fortgesetzte Einwirkung der LEDLeuchte kann Ihre Augen schädigen.
1.Drücken Sie  , um die LEDLeuchte einund auszuschalten.
●Um die Leuchte unmittelbar nach dem Anbringen des Akkus oder nach einer 5-minütigen oder län geren Benutzungspause des Bohrers zu benutzen, betätigen Sie den Bohrer kurzzeitig.
- 15 -

●Die Leuchte schaltet sich automa tisch aus, wenn der Bohrer Mas chine 5 Minuten lang nicht benutzt wird.
●Die Leuchte verbraucht nur sehr wenig Strom. Die Benutzung der Leuchte hat einen vernach lässigbar geringen Effekt auf die Betriebsleistung des Bohrers.
●Die LED ist nicht in der Lage, die Bitspitze zu beleuchten, wenn der Bohrer in der Stabform verwendet wird.
Bitverriegelungsfunktion
Bei ausgeschaltetem Schalter und verriegeltem Bit kann das Werkzeug wie ein manueller Schraubendreher verwendet werden — bis zu 14,7 N·m (150 kgf-cm).
Die Antriebswelle kann etwas Spiel aufweisen, was jedoch keine Funktions störung ist.
Hauptschalter (EIN/AUS)
Drücken Sie die obere Hälfte des Schalters für Vorwärtsdrehung, und die untere Hälfte für Rückwärtsdrehung.
Rechts
Rechts
Links
Links
Drehzahl-Wahlschalter
Um das Werkzeug der jeweiligen Anwendung anzupassen, sind zwei verschiedene Drehzahlen verfügbar. Wählen Sie je nach der Anwendung entweder die hohe oder die niedrige Drehzahl.
HOCH |
NIEDRIG |
Wahl der Drehzahl |
Drehmoment |
|
NIEDRIG |
200 /min (U/min) |
Hoch |
HOCH |
600 /min (U/min) |
Niedrig |
VORSICHT:
•Überprüfen Sie den Drehzahl-Wahl schalter vor Gebrauch.
•Betätigen Sie den Drehzahl-Wahl schalter nicht, während der Haupt schalter eingeschaltet ist (in der EINStellung).
Hauptschaltersperre
Stellen Sie die Hauptschaltersperre nach dem Gebrauch auf die Sperr position, um versehentliche Betätigung zu vermeiden.
Hauptschalter- |
Verriegeln |
sperre |
|
- 16 -

Akku (EY9L10)
VORSICHT:
1.Nehmen Sie den Akku vom Werk zeug ab.
2.Laden Sie den Akku mit dem Ladegerät.
3.Nehmen Sie den Akku nach Abschluss des Ladevorgangs vom Ladegerät ab, und bringen Sie ihn am Werkzeug an.
Trennen Sie das Ladegerät von der Stromquelle, wenn es nicht benutzt wird.
HINWEIS:
D i e Ve r w e n d u n g u n t e r s e h r heißen oder kalten Bedingungen führt zu einer Verringerung der Betriebskapazität pro Ladung.
[Akku]
Für richtigen Gebrauch des Akkus
Li-Ion-Akku (EY9L10)
•Um eine möglichst lange Lebensdauer des Li-Ion-Akkus zu erzielen, lagern Sie ihn nach dem Gebrauch, ohne ihn aufzuladen.
•Der Umgebungstemperaturbereich liegt zwischen 0°C (32°F) und 40°C (104°F).
Wenn das Akkupack bei einer Akku temperatur unter 0°C (32°F) benutzt wird, funktioniert das Werkzeug mögli cherweise nicht einwandfrei.
•Wenn Sie den Akku nicht benutzen, halten Sie ihn von Metallgegenständen fern: Büroklammern, Münzen, Schlüssel, Nägel, Schrauben oder andere kleine Metallgegenstände, welche die Kontakte kurzschließen können.
Das Kurzschließen der Akkukontakte kann Funken, Verbrennungen oder einen Brand verursachen.
•Sorgen Sie bei Benutzung des Akkus für ausreichende Belüftung des Arbeitsplatzes.
Lebensdauer des Akkus
Das Akku hat nur eine begrenzte Le bensdauer. Wenn auch nach einer ordnungsgemäßen Ladung die Betriebszeit extrem kurz ist, muss der Akku erneuert werden.
Batterie-Recycling
ACHTUNG:
Um Umweltschutz und MaterialRecycling zu gewährleisten, müssen Sie die Batterie zur örtlichen Entsorgungsstelle bringen, falls eine solche in Ihrem Land vorhanden ist.
[Ladegerät] Laden
Allgemeine Vorsichtsmaßnahmen für Li-Ion/Ni-Cd-Akkus
HINWEIS:
•Wenn ein kalter Akku (von etwa 5°C (41°F) oder weniger) in einem warmen Raum aufgeladen werden soll, lassen Sie den Akku für min destens eine Stunde in dem Raum und laden Sie ihn auf, wenn er sich auf Raumtemperatur erwärmt hat. Anderenfalls wird der Akku möglicherweise nicht voll aufgeladen.
•Den Akku abkühlen lassen, wenn mehr als zwei Akku-Sätze hintereinander aufgeladen werden.
•Stecken Sie Ihre Finger nicht in die Kontaktöffnung, wenn das Ladegerät festgehalten wird oder bei anderen Gelegenheiten.
VORSICHT:
Um die Gefahr eines Brandes oder Schadens am Ladegerät zu verhindern.
•Keinen Motorgenerator als Span nungquelle benutzen.
- 17 -

•Decken Sie die Entlüftungsöffnun gen des Ladegerätes und den Akku nicht ab.
•Trennen Sie das Ladegerät vom Stromnetz, wenn es nicht benutzt wird.
Li-Ion-Akku
HINWEIS:
Beim Kauf ist Ihr Akku nicht voll auf geladen. Laden Sie daher den Akku vor Gebrauch auf.
Ladegerät (EY0L10)
1.Ladegerät an Wandsteckdose anschlie ßen.
HINWEIS:
Beim Einführen des Steckers in eine Netzsteckdose können Funken erzeugt werden, was jedoch in Bezug auf die Sicherheit kein Problem darstellt.
2.Schieben Sie die Ladeschachtabde ckung zurück, um den Li-Ion-Akku einzuchieben.
●Achten Sie darauf, dass die Abdeckung einwandfrei eingerastet ist.
3.Akku fest in das Ladegerät schieben.
An Netzsteckdose
4.Während des Ladens leuchtet die Lade kontrolllampe.
Mit Erreichen der vollen Ladung spricht automatisch eine interne, elektronische Schaltung an, die ein Überladen verhindert.
•Das Laden beginnt nicht, solange der Akku noch heiß ist (wie z.B. unmittelbar nach intensivem Gebrauch).
Die Bereitschaftslampe blinkt in Orange, bis der Akku abgekühlt ist. Das Laden beginnt dann automatisch.
5.Die Ladekontrolllampe (grün) blinkt langsam, wenn der Akku zu etwa 80% aufgeladen ist.
6.Wenn der Ladevorgang beendet ist, beginnt die Ladekontrolllampe schnell in Grün zu blinken.
7.Falls die Akkutemperatur 0°C oder weniger beträgt, dauert der Ladevor gang bis zur vollen Aufladung des Akkus länger als die normale Ladezeit. Selbst wenn der Akku voll aufgeladen ist, hat er nur etwa 50% der Leistung eines voll aufgeladenen Akkus bei normaler Betriebstemperatur.
8.Falls die Betriebslampe nicht unmittelbar nach dem Anschluss des Ladegeräts aufleuchtet oder die Ladekontrolllampe nach Ablauf der normalen Ladezeit nicht schnell in Grün blinkt, konsultieren Sie einen Vertragshändler.
9.Wird ein voll aufgeladener Akku erneut in das Ladegerät eingesetzt, leuchtet die Ladekontrolllampe auf. Nach einigen Minuten beginnt die Ladekontrolllampe rascher zu blinken und zeigt an, dass der Ladevorgang abgeschlossen ist.
Ni-Cd-Akku
HINWEIS:
Beim ersten Aufladen der Akkus oder beim Aufladen nach längerer Ruhezeit die Akkus etwa 24 Stunden lang aufladen, um die volle Kapazität zu erreichen.
Ladegerät (EY0L10)
1.Ladegerät an Wandsteckdose anschlie ßen.
HINWEIS:
Beim Einführen des Steckers in eine Netzsteckdose können Funken erzeugt werden, was jedoch in Bezug auf die Sicherheit kein Problem darstellt.
2.Schieben Sie die Akkuladeschachtabde ckung zurück, um den Ni-Cd-Akku ein zuschieben.
●Achten Sie darauf, dass die Abdeckung einwandfrei eingerastet ist.
- 18 -

3. Akku fest in das Ladegerät schieben.
An Netzsteckdose
4.Während des Ladens leuchtet die Lade kontrolllampe.
Mit Erreichen der vollen Ladung spricht automatisch eine interne, elektronische Schaltung an, die ein Überladen verhindert.
•Das Laden beginnt nicht, solange der Akku noch heiß ist (wie z.B. un mittelbar nach intensivem Gebrauch). Die Bereitschaftslampe blinkt in Orange, bis der Akku abgekühlt ist. Das Laden beginnt dann automatisch.
5.Wenn der Ladevorgang beendet ist, beginnt die Ladekontrolllampe schnell in Grün zu blinken.
6.Wenn die Ladekontrolllampe nicht unmittelbar nach dem Anschließen des Netzkabels aufleuchtet oder nach Ablauf der normalen Ladezeit nicht erlischt, wenden Sie sich bitte an einen autorisierten Fachhändler.
7.Wird ein voll aufgeladener Akku er neut in das Ladegerät eingesetzt, leuchtet die Ladekontrolllampe auf. Nach einigen Minuten beginnt die Ladekontrolllampe rascher zu blinken und zeigt an, dass der Ladevorgang abgeschlossen ist.
ANZEIGELAMPEN
Leuchten in Grün
Das Ladegerät ist an eine Netzsteckdose angeschlossen. Ladebereitschaft hergestellt.
Schnelles Blinken in Grün
Ladevorgang ist abgeschlossen. (Volle Ladung)
Schnelles Blinken in Grün
Der Akku ist zu etwa 80 % aufgeladen. (Nutzbare Ladung. Nur Li-Ion)
Leuchten in Grün Ladevorgang läuft.
Leuchten in Orange Akku ist kalt.
Der Akku wird langsam geladen, um seine Belastung zu reduzieren.
Blinken in Orange
Der Akku ist warm geworden. Der Ladevorgang beginnt wieder, wenn dieTemperatur des Akku gefallen ist.
Beträgt die Temperatur des Akkus –10°C oder weniger, beginnt die Ladekontrolllampe (orange) ebenfalls zu blinken. Der Ladevorgang beginnt, wenn die Temperatur des
Akkus steigt (nur Li-Ion)
Ladezustandslampe
Links: Grün Rechts: Orange wird angezeigt
Schnelles Blinken in Orange und Grün
Keine Ladung möglich.Verstaubt oder Defekt des Akkus.
- 19 -

Benutzerinformationen zur Entsorgung von elektrischen und elektronischen Geräten (private Haushalte)
Dieses Symbol auf Produkten und/oder begleitenden Doku menten bedeutet, dass verbrauchte elektrische und elektronische Produkte nicht mit gewöhnlichem Haushaltsabfall vermischt
werden dürfen.
Bringen Sie zur ordnungsgemäßen Behandlung, Rückgewinnung und Recycling diese Produkte zu den entsprechenden Sammelstellen, wo sie ohne Gebühren entgegengenommen werden. In einigen Ländern kann es auch möglich sein, diese Produkte beim Kauf eines entsprechenden neuen Produkts bei
Ihrem örtlichen Einzelhändler abzugeben.
Die ordnungsgemäße Entsorgung dieses Produkts dient dem Umweltschutz und verhindert mögliche schädliche Auswirkungen auf Mensch und Umgebung, die aus einer unsachgemäßen Handhabung von Abfall entstehen können. Genauere Informationen zur nächstgelegenen Sammelstelle erhalten Sie bei Ihrer Gemeindeverwaltung.
In Übereinstimmung mit der Landesgesetzgebung können für die unsachgemäße Entsorgung dieser Art von Abfall Strafgebühren erhoben werden.
Für Geschäftskunden in der Europäischen Union
Bitte treten Sie mit Ihrem Händler oder Lieferanten in Kontakt, wenn Sie elektrische und elektronische Geräte entsorgen möchten. Er hält weitere Informationen für sie bereit.
Informationen zur Entsorgung in anderen Ländern außerhalb der Europäischen Union
Dieses Symbol ist nur in der Europäischen Union gültig.
Bitte treten Sie mit Ihrer Gemeindeverwaltung oder Ihrem Händler in Kontakt, wenn Sie dieses Produkt entsorgen möchten, und fragen Sie nach einer Entsorgungsmöglichkeit.
III. WARTUNG
Das Gerät nur mit einem trockenen, weichen Lappen abwischen. Verwenden Sie zum Reinigen keine feuchten Lappen oder flüchtige Lösungsmittel wie Farbverdünner oder Benzin.
IV. ZUBEHÖR
Verwenden Sie nur für die Futtergröße passende Bits.
- 20 -
V. TECHNISCHE DATEN
HAUPTGERÄT
Modell |
|
|
EY7410 |
|
|
Schrauben |
Maschinenschraube |
M2,5 - M5 |
|
Kapazität |
Holzschraube |
ø 3,8 x 38 mm (5/32" x 1-29/64") |
||
|
||||
|
Bohren |
Für Metall |
ø 5 mm (13/64") spc t = 1,6 mm |
|
Motor |
|
|
3,6 V DC |
|
Drehzahl ohne Last |
NIEDRIG: 200 U/min |
|||
|
HOCH: 600 U/min |
|||
|
|
|
||
Maximales Drehmoment |
NIEDRIG: 4,4 N·m (45 kgf-cm, 39 in-lbs) |
|||
HOCH: 1,5 N·m (15 kgf-cm, 13 in-lbs) |
||||
|
|
|||
Maximales Kupplungs |
3,0 N·m (30 kgf-cm. 26 in-lbs) |
|||
drehmoment |
|
|||
|
|
|
||
Gesamtlänge |
|
276 mm (10-55/64") |
||
Gewicht (mit Akku) |
|
0,5 kg (1,1 lbs) |
||
AKKU
Modell |
EY9L10 |
Akku |
Li-Ion-Akku |
Akkuspannung |
3,6 V DC (3,6 V x 1 Zellen) |
Kapazität |
1,5 Ah |
AKKU-LADEGERÄT |
|
|
|
Modell |
|
EY0L10 |
|
Gewicht |
|
0,6 kg (1,3 lbs) |
|
Nennleistung |
Siehe Typenschild auf der Unterseite des Ladegerätes. |
||
|
2,4 V |
3,6 V |
|
1,2 Ah |
EY9021 |
EY9025 |
|
15 Min. |
15 Min. |
||
Ladezeit |
|||
|
EY9L10 |
||
|
|
||
1,5 Ah |
|
Nutzbar: 15 Min. |
|
|
|
Voll: 30 Min. |
|
HINWEIS: |
|
|
|
•Die für dieses Ladegerät geeigneten Akkus sind auf dem Aufkleber am Ladegerät oder im neusten Generalkatalog angegeben.
Der Anweisungsaufkleber auf dem Akku gibt ebenfalls das geeignete Ladegerät an.
- 21 -

Veuillez lire la brochure “Instructions de sécurité” et ce qui suit avant d’utiliser l’appareil.
I. REGLES DE SECURITE
COMPLEMENTAIRES
1)Portez des lunettes lorsque vous utilisez l’outil pendant de longues périodes.
L’exposition prolongée à du bruit de haute densité peut entraîner la perte de l’ouïe.
2)N’oubliez pas que cet outil est toujours en état de fonctionner puisqu’il est alimenté par batterie.
3)Lors du perçage ou du vissage dans des murs, des planchers, etc., des câbles électriques sous tension peuvent être rencontrés. NE TOUCHEZ NI AU MANDRIN HEXAGONAL RAPIDE NI AUX PARTIES METALLIQUES DE L’OUTIL! Tenez l’outil au moyen de la poignée en matière plastique afin d’éviter toute secousse électrique si la mèche venait en contact avec un fil électrique.
4)Si la mèche est coincée, mettez immédiatement le commutateur de la gâchette hors tension afin de prévenir une surcharge pouvant endommager la batterie autonome ou le moteur.
Dégagez la mèche en inversant le sens de rotation.
5)La température du chargeur peut s’élever en cours d’utilisation. Ce n’est pas là le signe d’une anomalie de fonctionnement. Ne laissez pas la batterie dans le chargeur pendant plus de 24 heures après avoir terminé la charge.
Symbole Signification
|
|
V |
Volts |
|||||
|
|
|
|
|
|
|
|
|
|
|
|
|
|
|
|
Courant continu |
|
|
|
|
|
|
|
|
||
|
|
|
|
|
|
|
|
|
|
|
n0 |
Vitesse sans charge |
|||||
|
|
|
|
|
|
|
|
|
…/min |
Révolutions ou alternances par |
|||||||
minute |
||||||||
|
|
|
|
|
|
|
||
|
|
|
|
|
|
|
|
|
|
Ah |
Capacité électrique de la batterie |
||||||
|
autonome |
|||||||
|
|
|
|
|
|
|
||
|
|
|
|
|
|
|
|
|
|
|
|
|
|
|
|
Rotation seulement |
|
|
|
|
|
|
|
|
|
|
|
|
|
|
|
|
|
Lisez les instructions de |
|
|
|
|
|
|
|
|
||
|
|
|
|
|
|
|
fonctionnement avant l’utilisation. |
|
|
|
|
|
|
|
|
|
|
|
|
|
|
|
|
|
Pour l’utilisation à l’intérieur |
|
|
|
|
|
|
|
|
seulement. |
|
II. ASSEMBLAGE &
FONCTIONNEMENT
Mandrin de mèche hexagonal
Fixation des mèches
REMARQUE:
Lors de la fixation ou de l’enlève ment de mèches de perceuse, dé branchez la batterie autonome de l’outil et mettez le bouton de verrouillage dans la position verrouillée.
1.Maintenez le collier du mandrin de connexion rapide et retirez-le de la perceuse.
2.Insérez la mèche dans le mandrin. Relâchez le collier.
3.Le collier reviendra dans sa position d’origine lorsqu’il sera relâché.
4.Tirez sur la mèche pour vérifier qu’elle ne ressort pas.
5.Pour retirer la mèche, tirez le collier vers l’extérieur de la même manière.
Mèche Mandrin de mèche hexagonal
- 22 -
9,5 mm (3/8") - 13 mm (33/64") 6,35 mm (1/4")
Poignée de l’embrayage (Réglage du couple de serrage de l’embrayage)
Ajustez le couple de serrage sur l’un des 21 réglages possibles pour le travail. Il y a un intervalle d’environ 0,13 N·m (1,3 kgf/cm ou 1,1 po-lbs) entre chaque étape.
MISE EN GARDE:
Essayez le réglage avant l’utilisa tion effective.
Réglez l’échelle sur cette marque.
Références pour l’ajustement du couple de serrage
Réglage Couple de serrage Utilisation
1Environ 0,29 N·m (3,0 kgf/cm ou 2,6 po-lbs)
5Environ 0,82 N·m (8,4 kgf/cm ou 7,3 po-lbs)
9 |
Environ 1,35 N·m (13,8 |
|
|
kgf/cm ou 12,0 po-lbs) |
Pour visser |
||
|
|||
13 |
Environ 1,88 N·m (19,2 |
des vis |
|
kgf/cm ou 16,6 po-lbs) |
|
||
|
|
17Environ 2,41 N·m (24,6 kgf/cm ou 21,3 po-lbs)
21Environ 2,94 N·m (30,0 kgf/cm ou 26,0 po-lbs)
Environ 4,4 N·m (45,0 |
Pour un |
vissage et |
|
kgf/cm ou 39,0 po-lbs) |
un perçage |
|
puissants |
●Lors de l’utilisation à hautes vitesses, réglez l’embrayage sur 10 ou plus bas. (Le fonctionnement s’arrête au couple de serrage maximum de 1,5 N·m (15 kgf/cm) lorsque l’échelle est plus élevée.)
●La fonction d’arrêt automatique peut ne pas fonctionner à des réglages de l’embrayage plus élevés lorsque la puissance de la batterie diminue. Dans ce cas, rechargez la batterie.
REMARQUE:
Le tableau n’est qu’une référence. Le réglage du couple de serrage peut différer selon les matériaux, le type des vis, etc. Veuillez effectuer des essais de vos conditions particulières avant l’utilisation.
Témoin d’avertissement de batterie basse
<Témoin d’avertissement de batterie basse>
Arrêt |
Clignotant |
|
(fonction |
(Pas de charge) |
|
nement |
Caractéristique de |
|
normal) |
||
protection de la |
||
|
batterie active. |
Une décharge excessive (totale) des batteries aux ions de lithium réduit leur durée de vie de façon notable. L’outil comprend une caractéristique de protection de la batterie conçue pour empêcher une décharge excessive de la batterie autonome.
●La caractéristique de protection de la batterie s’active automatiquement avant que la batterie ne perde sa charge, entraînant le clignotement du témoin d’avertissement de batterie basse.
●Dès que vous remarquez le clignote ment du témoin d’avertissement de batterie basse, rechargez immédiatement la batterie autonome.
Utilisation de la lumière DEL
Utilisez la lumière DEL pour les travaux effectués dans des endroits sombres comme des greniers pour éclairer votre espace de travail.
 MISE EN GARDE
●La lumière DEL est conçue pour
être utilisée comme une source de lumière supplémentaire. Ne l’utilisez pas comme une lampe torche.
Cela peut entraîner un accident ou des blessures.
- 23 -

●Ne regardez pas la lumière et ne la dirigez pas directement vers vos yeux.
Une exposition continue à la lumière DEL peut endommager vos yeux.
1.Appuyez sur  pour allumer et éteindre la lumière DEL.
●Pour utiliser la lumière immédiatement après avoir installé la batterie autonome ou après que la perceuse n’ait pas été utilisée pendant 5 minutes ou plus, faites brièvement fonctionner la perceuse.
●La lumière s’éteint automatique ment si la perceuse n’est pas utilisée pendant 5 minutes.
●La lumière utilise une infime quan tité de courant. L’utilisation de la lumière n’a qu’un effet négligeable sur la capacité de fonctionnement de la perceuse.
●Le DEL est incapable d’éclairer le bout de la mèche lorsque la per ceuse est utilisée selon la configu ration normale.
Fonction de verrouillage de la mèche
Avec le commutateur sur la position d’arrêt et la mèche verrouillée en place, l’outil peut être utilisé comme un tournevis manuel - jusqu’à 14,7 N·m (150 kgf/cm, 130 po-lbs).
L’arbre d’entraînement présentera un peu de jeu, mais cela n’est pas un mauvais fonctionnement.
Interrupteur principal (ON/ OFF)
Poussez la moitié supérieure de l’inter rupteur pour une rotation vers l’avant ou la moitié inférieure pour une rotation en arrière.
Vers l’avant
Vers l’avant
Vers l’arrière
Vers l’arrière
Commutateur du sélecteur de vitesse
Pour adapter l’application de cet outil, deux vitesses de rotation différentes sont disponibles. En fonction de l’utilisation, sélectionnez soit la haute vitesse, soit la basse vitesse.
HAUT |
BAS |
Sélection de la vitesse |
Couple de |
||
serrage |
|||
|
|
||
BAS |
200 /min (t/mn) |
Haut |
|
HAUT |
600 /min (t/mn) |
Bas |
|
MISE EN GARDE:
•Vérifiez le commutateur du sélec teur de vitesse avant l’utilisation.
- 24 -

•Ne faites pas fonctionner le commutateur du sélecteur de vitesse alors que l’interrupteur principal est sur la position de marche (le commutateur est sur la position ON).
Verrou de l’interrupteur prin cipal
Après l’utilisation, mettez l’interrupteur principal sur la position verrouillée pour empêcher tout fonctionnement accidentel.
Verrou de l’inter- |
Verrou |
rupteur principal |
|
Batterie autonome (EY9L10)
MISE EN GARDE:
1.Retirez la batterie autonome de l’outil.
2.Chargez la batterie autonome en utilisant le chargeur de batterie.
3.Lorsque la charge est terminée, retirez la batterie autonome du chargeur et connectez-la à l’outil.
Déconnectez le chargeur de la source d’alimentation lorsqu’il n’est pas utilisé.
REMARQUE:
L’utilisation dans des conditions extrêmes de chaleur ou de froid réduit la capacité de fonctionnement par charge.
[Batterie autonome]
Pour une utilisation correcte de la batterie autonome
Batterie autonome Li-ion (EY9L10)
•Pour une longévité optimale de la batterie, rangez la batterie autonome Li-ion sans la charger après l’avoir utilisée.
•Le niveau de température ambiante moyenne se situe entre 0°C (32°F) et 40°C (104°F).
Si la batterie autonome est utilisée alors que sa température est inférieure à 0°C (32°F), l’outil pourrait ne pas fonctionner correctement.
•Lorsque vous n’utilisez pas la batterie autonome, éloignez-la d’autres objets métalliques tels que: trombones, pièces de monnaie, clés, clous, vis et autres petits objets métalliques susceptibles de connecter les bornes entre elles.
Si vous court-circuitez les bornes de la batterie, vous risquez de causer des étincelles, de vous brûler ou de provoquer un incendie.
•Lors de l’utilisation de la batterie autonome, assurez-vous de la bonne ventilation du lieu de travail.
Longévité des batteries autonomes
Les batteries rechargeables ont une longévité limitée. Si le temps de fonc tionnement devient très court après la recharge, remplacez la batterie autonome par une neuve.
Recyclage de la batterie autonome
ATTENTION:
Pour la protection de l'environne ment naturel et le recyclage des matériaux, veillez à mettre la batterie au rebut à un endroit prévu officiellement à cet effet, s’il y en a un dans votre pays.
- 25 -

[Chargeur de batterie] Recharge
Mises en garde communes pour la batterie autonome Li-ion/Ni-Cd
REMARQUE:
•Lorsqu’une batterie autonome froide (en-dessous de 0°C) doit être rechargée dans une pièce chaude, laissez la batterie autonome dans la pièce pendant une heure au moins et rechargez-la quand elle a atteint la température ambiante. (Sinon, il est possible que la batterie autonome ne soit pas complètement chargée.)
•Laissez refroidir le chargeur quand vous rechargez plus de deux batteries autonomes à la suite.
•Ne mettez pas vos doigts dans les trous des connecteurs lorsque vous prenez les chargeurs ou à n’importe quelle occasion.
MISE EN GARDE:
Pour éviter les risques d’incendie ou d’endommagement du chargeur de batterie.
•N’utilisez pas de source d’alimenta tion provenant d’un générateur de moteur.
•Ne bouchez pas les trous d’aération du chargeur et de la batterie autonome.
•Débranchez le chargeur lorsque vous ne l’utilisez pas.
Batterie autonome Li-ion
REMARQUE:
Votre batterie autonome n’est pas complètement chargée au moment de l’achat. Veillez à bien charger complètement la batterie avant son utilisation.
Chargeur de batterie (EY0L10)
1.Branchez le cordon d’alimentation du chargeur dans une prise secteur.
REMARQUE:
Des étincelles peuvent être produites lorsque la fiche est introduite dans la prise d’alimentation secteur;
toutefois, ceci ne pose aucun problème de sécurité.
2.Faites glisser le couvercle du poste d’accueil de la batterie vers l’arrière pour permettre l’insertion de la batte rie autonome Li-ion.
●Assurez-vous que le couvercle est bien verrouillé en place.
3.Introduisez soigneusement la batterie autonome dans le chargeur.
Vers la prise
CA
4.Pendant la charge, le témoin s’allume. Lorsque la charge est terminée, un interrupteur électronique s’actionne pour protéger la batterie.
•La charge ne peut pas être réalisée si la batterie autonome est chaude (par exemple, à la suite d’un long travail de perçage).
Le témoin d’attente orange clignote jusqu’à ce que la batterie se soit refroidie.
La charge commence alors auto matiquement.
5.Le témoin de charge (vert) clignote lentement dès que la batterie est chargée à environ 80%.
6.Lorsque la charge est terminée, le témoin de charge se met à clignoter rapidement en vert.
7.Lorsque la température de la batterie autonome est de 0ºC ou moins, la batterie autonome prend plus longtemps à charger que la durée standard. Même lorsque la batterie est complète ment chargée, elle n’aura qu’environ 50% de la puissance d’une batterie complètement chargée à une tempé rature de fonctionnement normale.
8.Lorsque le témoin d’alimentation ne s’allume pas immédiatement après avoir branché le chargeur, ou si après
- 26 -
la durée de charge standard, le témoin de charge ne clignote pas rapidement en vert, consultez un concessionnaire autorisé.
9.Si une batterie complètement chargée est à nouveau insérée dans le chargeur, le témoin de charge s’allume. Après quelques minutes, le voyant de charge risque de clignoter rapidement pour indiquer que la charge est terminée.
Batterie autonome Ni-Cd
REMARQUE:
Chargez une nouvelle batterie auto nome, ou une batterie autonome qui n’a pas été utilisée pendant une période prolongée, pendant 24 heures pour lui redonner sa pleine capacité.
Chargeur de batterie (EY0L10)
1.Branchez le cordon d’alimentation du chargeur dans une prise secteur.
REMARQUE:
Des étincelles peuvent être produites lorsque la fiche est introduite dans la prise d’alimentation secteur; toutefois, ceci ne pose aucun problème de sécurité.
2.Faites glisser le couvercle du poste d’accueil de la batterie vers l’arrière pour permettre l’insertion de la batte rie autonome Ni-Cd.
●Assurez-vous que le couvercle est bien verrouillé en place.
3.Introduisez soigneusement la batterie autonome dans le chargeur.
Vers la prise
CA
4.Pendant la charge, le témoin s’allume. Lorsque la charge est terminée, un interrupteur électronique s’actionne pour protéger la batterie.
•La charge ne peut pas être réalisée si la batterie autonome est chaude
(par exemple, à la suite d’un long travail de perçage).
Le témoin d’attente orange clignote jusqu’à ce que la batterie se soit refroidie. La charge commence alors automatiquement.
5.Lorsque la charge est terminée, le témoin de charge se met à clignoter rapidement en vert.
6.Si le voyant de charge ne s’allume pas immédiatement après le branchement du chargeur ou, si après la durée de charge standard, le voyant ne s’éteint pas, consultez un revendeur agréé pour de l’assistance technique.
7.Si une batterie complètement chargée est à nouveau insérée dans le char geur, le témoin de charge s’allume. Après quelques minutes, le voyant de charge risque de clignoter rapidement pour indiquer que la charge est terminée.
- 27 -

INDICATION DU VOYANT
Allumé en vert
Le chargeur est branché dans la prise secteur.
Prêt pour la charge.
Clignotant rapidement en vert
Chargement terminé. (Pleine charge)
Clignotant en vert
La batterie est chargée à environ 80%. (Charge utile.
Li-ion seulement)
Allumé en vert
Chargement en cours.
Allumé en orange
La batterie autonome est froide
La batterie autonome est chargée lentement pour réduire l’effort de la batterie. (Li-ion seulement)
Clignotant en orange
La batterie autonome est chaude. La charge commence lorsque la température de la batterie autonome descend.
Témoin de l’état de charge
Gauche: vert Droite: orange s’affichent.
Clignotant rapidement en orange et en vert
Impossible de charger. Colmatage par la poussière ou mauvais fonctionnement de la batterie autonome.
Lorsque la température de la batterie autonome est de –10ºC ou moins, le témoin de charge (orange) se met également à clignoter. La charge commence lorsque la température de la batterie autonome augmente (Li-ion seulement).
Informations relatives à l’évacuation des déchets, destinées aux utilisateurs d’appareils électriques et électroniques (appareils ménagers domestiques)
Lorsque ce symbole figure sur les produits et/ou les documents qui les accompagnent, cela signifie que les appareils électriques et
électroniques ne doivent pas être jetés avec les ordures ménagères. Pour que ces produits subissent un traitement, une récupération et un recyclage appropriés, envoyez-les dans les points de pré-collecte
désignés, où ils peuvent être déposés gratuitement. Dans certains pays, il est possible de renvoyer les produits au revendeur local en cas d’achat d’un produit équivalent.
 En éliminant correctement ce produit, vous contribuerez à la conservation des ressources vitales et à la prévention des éventuels effets négatifs sur l’environnement et la santé humaine, pouvant être dus à la manipulation inappropriée des déchets. Veuillez contacter les autorités locales pour connaître le point de précollecte le plus proche.
Des sanctions peuvent être appliquées en cas d’élimination incorrecte de ces déchets, conformément à la législation nationale.
- 28 -

Utilisateurs professionnels de l’Union Européenne
Pour en savoir plus sur l’élimination des appareils électriques et électroniques, contactez votre revendeur ou fournisseur.
Informations sur l’évacuation des déchets dans les pays ne faisant pas partie de l’Union Européenne
Ce symbole n’est reconnu que dans l’Union européenne.
Pour supprimer ce produit, contactez les autorités locales ou votre revendeur afin de connaître la procédure d’élimination à suivre.
III. ENTRETIEN
Nettoyez l’appareil au moyen d’un chiffon sec et propre. N’utilisez ni eau, ni solvant, ni produit de nettoyage volatile.
IV. ACCESSOIRES
Utilisez uniquement des mèches convenant à la taille du mandrin utilisé.
V. CARACTERISTIQUES TECHNIQUES
UNITE PRINCIPALE
Modèle |
|
|
|
EY7410 |
|
Capacité |
Vissage |
Vis pour machine |
|
M2,5 - M5 |
|
Vis à bois |
|
ø 3,8 x 38 mm (5/32" x 1-29/64") |
|||
|
|
||||
|
Perçage |
Pour métal |
|
ø 5 mm (13/64") spc t = 1,6 mm |
|
Moteur |
|
|
|
3,6 V CC |
|
Vitesse sans charge |
|
BAS: 200/min (t/mn) |
|||
|
HAUT: 600/min (t/mn) |
||||
|
|
|
|||
Couple maximum |
BAS: 4,4 N·m (45 kgf/cm, 39 po-lbs) |
||||
HAUT: 1,5 N·m (15 kgf/cm, 13 po-lbs) |
|||||
|
|
||||
Couple de serrage maximum |
3,0 N·m (30 kgf/cm, 26 po-lbs) |
||||
de l’embrayage |
|
||||
|
|
|
|
||
Longueur totale |
|
|
276 mm (10-55/64") |
||
Poids (avec la batterie |
|
|
0,5 kg (1,1 lbs) |
||
autonome) |
|
|
|
||
|
|
|
|
||
BATTERIE AUTONOME
Modèle |
EY9L10 |
Stockage de la batterie |
Batterie Li-ion |
Tension de la batterie |
3,6 V CC (3,6 V x 1 pile) |
Capacité |
1,5 Ah |
- 29 -

CHARGEUR DE BATTERIE
Modèle |
EY0L10 |
Poids |
0,6 kg (1,3 lbs) |
Puissance nominale |
|
Reportez-vous à la puissance nominale indiquée |
||
|
|
au bas du chargeur. |
||
|
|
|
||
|
|
2,4 V |
3,6 V |
|
|
1,2 Ah |
EY9021 |
EY9025 |
|
Durée de chargement |
15 min. |
15 min. |
||
|
||||
|
|
EY9L10 |
||
|
|
|
||
|
1,5 Ah |
|
Utilisable: 15 min. |
|
|
|
|
Plein: 30 min. |
|
REMARQUE:
•Pour les batteries autonome applicables à ce chargeur, reportez-vous à l’étiquette apposée sur le chargeur ou au catalogue général le plus récent.
L’étiquette d’instructions apposée sur les batteries autonomes indique également le chargeur applicable.
- 30 -
 Loading...