

Livarno Z31282-BS User Manual [pl, cs, en, de]
LED LIGHT STRIP
Operation and Safety Notes
LISTWA
OŚWIETLENIOWA LED
Wskazówki dotyczące obsługi
i bezpieczeństwa
LED-FÉNYSOR
Kezelési és biztonsági utalások
LED-SVETLOBNA LETEV
Navodila za upravljanje in
varnostna opozorila
LED SVĚTELNÁ LIŠTA
Pokyny pro obsluhu a
bezpečnostní pokyny
LED SVETELNÁ LIŠTA
Pokyny pre obsluhu a
bezpečnostné pokyny
LED-LICHTLEISTE
Bedienungs- und Sicherheitshinweise
4
Z31282
GB Operation and
Safety Notes Page 7
PL Wskazówki dotyczące
obsługi i bezpieczeństwa Strona 16
HU Kezelési és
biztonsági utalások Oldal 26
SI Navodila za upravljanje
in varnostna opozorila Stran 36
CZ Pokyny pro obsluhu a
bezpečnostní pokyny Strana 47
SK Pokyny pre obsluhu a
bezpečnostné pokyny Strana 56
DE / AT / CH Bedienungs- und
Sicherheitshinweise Seite 65
1
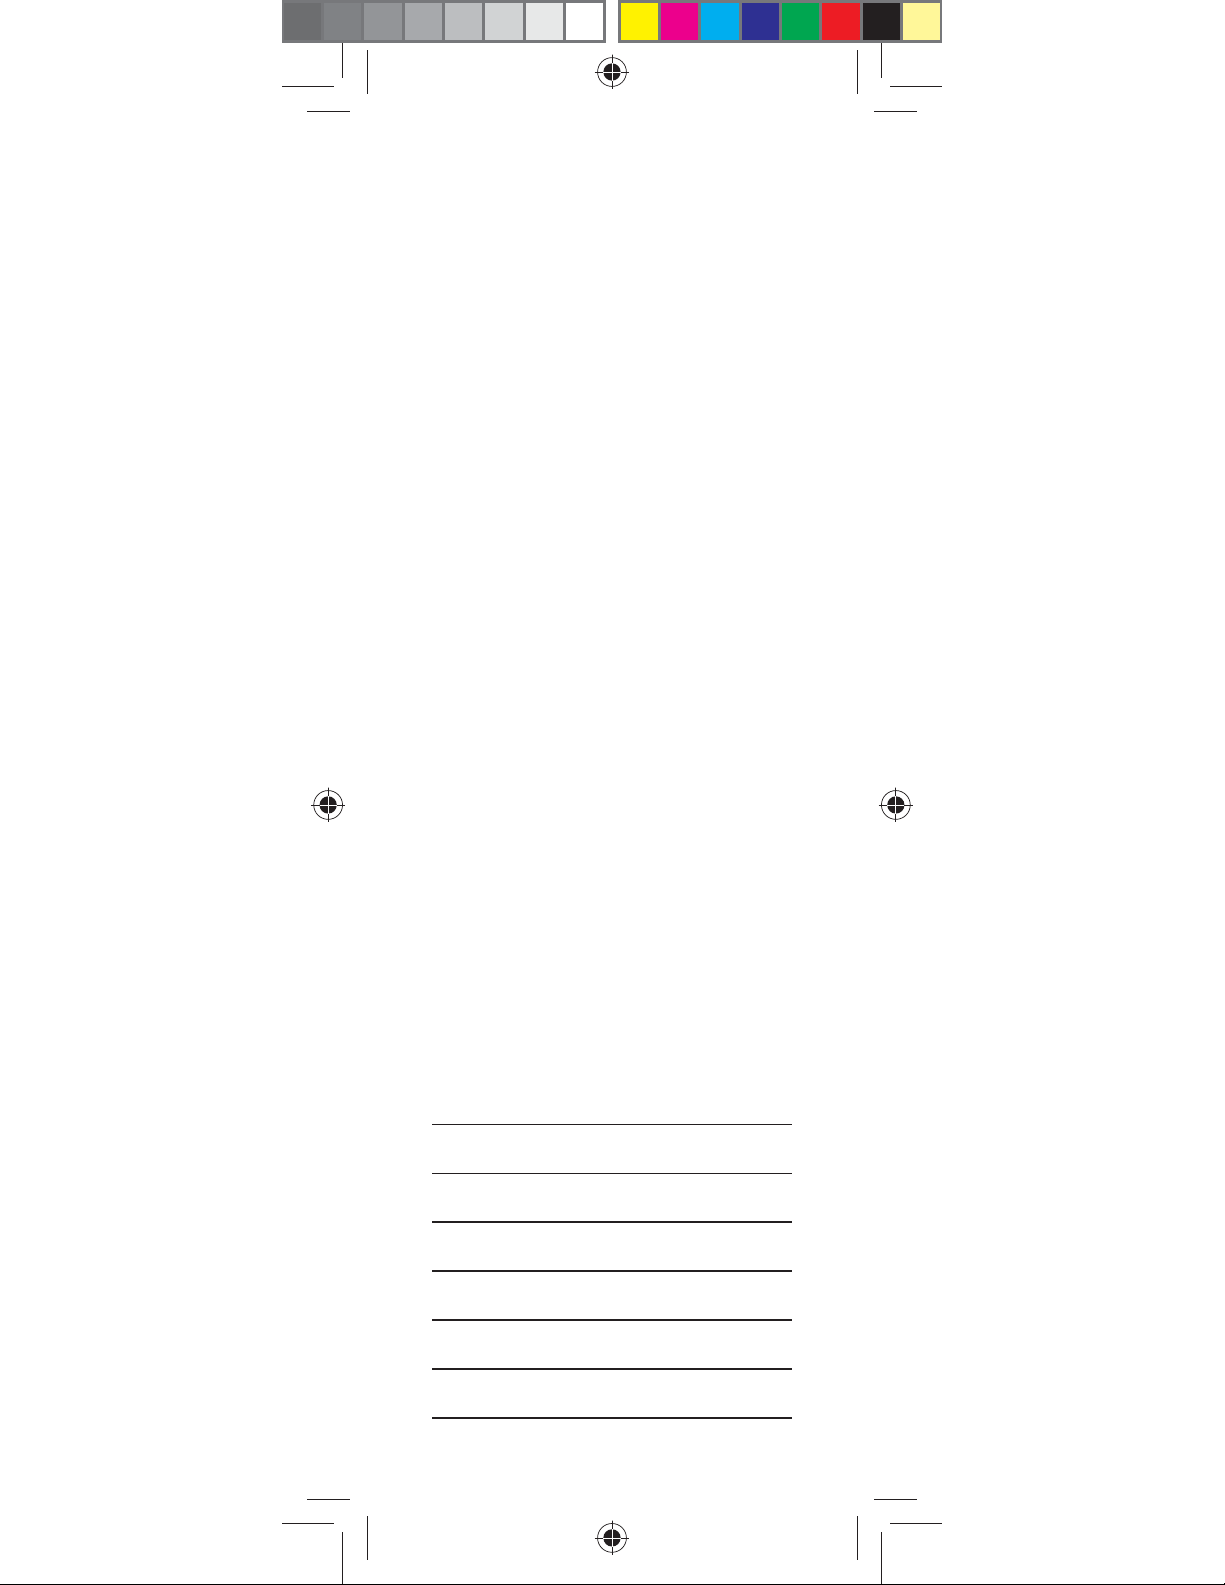
You need
Potrzebujecie
Szüksége van
Potrebujete
Potřebujete
Budete potrebovať
Sie benötigen:
3
A
B
3
4
1
C
D
5
6 2
4
E
F
G
7
1
3 8
H
5
6 2
5

I
2
6

Introduction
Proper use ....................... Page 8
Delivery scope ................ Page 8
Description of parts ........ Page 8
Technical data ................ Page 9
Safety
information
............... Page 9
Installation ................ Page 13
Use ................................... Page 14
Cleaning
and care ...................... Page 14
Disposal ....................... Page 15
7 GB

LED Light Strip
Introduction
Proper use
This light is suitable for use in an indoor
environment. This product is intended
for use in private, domestic enviroment
only and not for commercial purposes.
Delivery scope
1 LED light strip (with mains plug)
2 Attachment clips
4 Screws (2 for cupboard and 2 for
wall mounting)
2 Dowels (ø approx. 6 mm)
1 Operating manual
Description of parts
1
LED light strip
2
Main adapter with cable
3
Attachment clips
4
Screws (for cupboard mounting)
5
Switch (light strip)
6
ON / OFF-Switch (supply lead)
7
Dowel
8
Screws (for wall mounting)
8 GB
Technical data
LED light strip 1:
Operating
voltage: 12 V
Bulb: 20 x LED, 0.1 W
Note: bulbs are
non-replaceable.
Protection Class:
LED light strip (Model No. Z31282)
TÜV / GS tested.
, 2.3 W
Mains adapter
Nominal voltage
primary: 100–240 V ∼,
Nominal voltage
secondary: 12 V
Mains adapter (Model No.
LPS03-120-0250-2)
DEKRA / GS tested.
2
:
50 - 60 Hz
,
0.25 A,
3 W
Safety
information
In the case of damage resulting from
non-compliance with these operating
instructions the guarantee claim becomes invalid! No liability is accepted
for consequential damage! In the case
of material damage or personal injury caused by incorrect handling or
non-compliance with the safety instructions, no liability is accepted!
9 GB
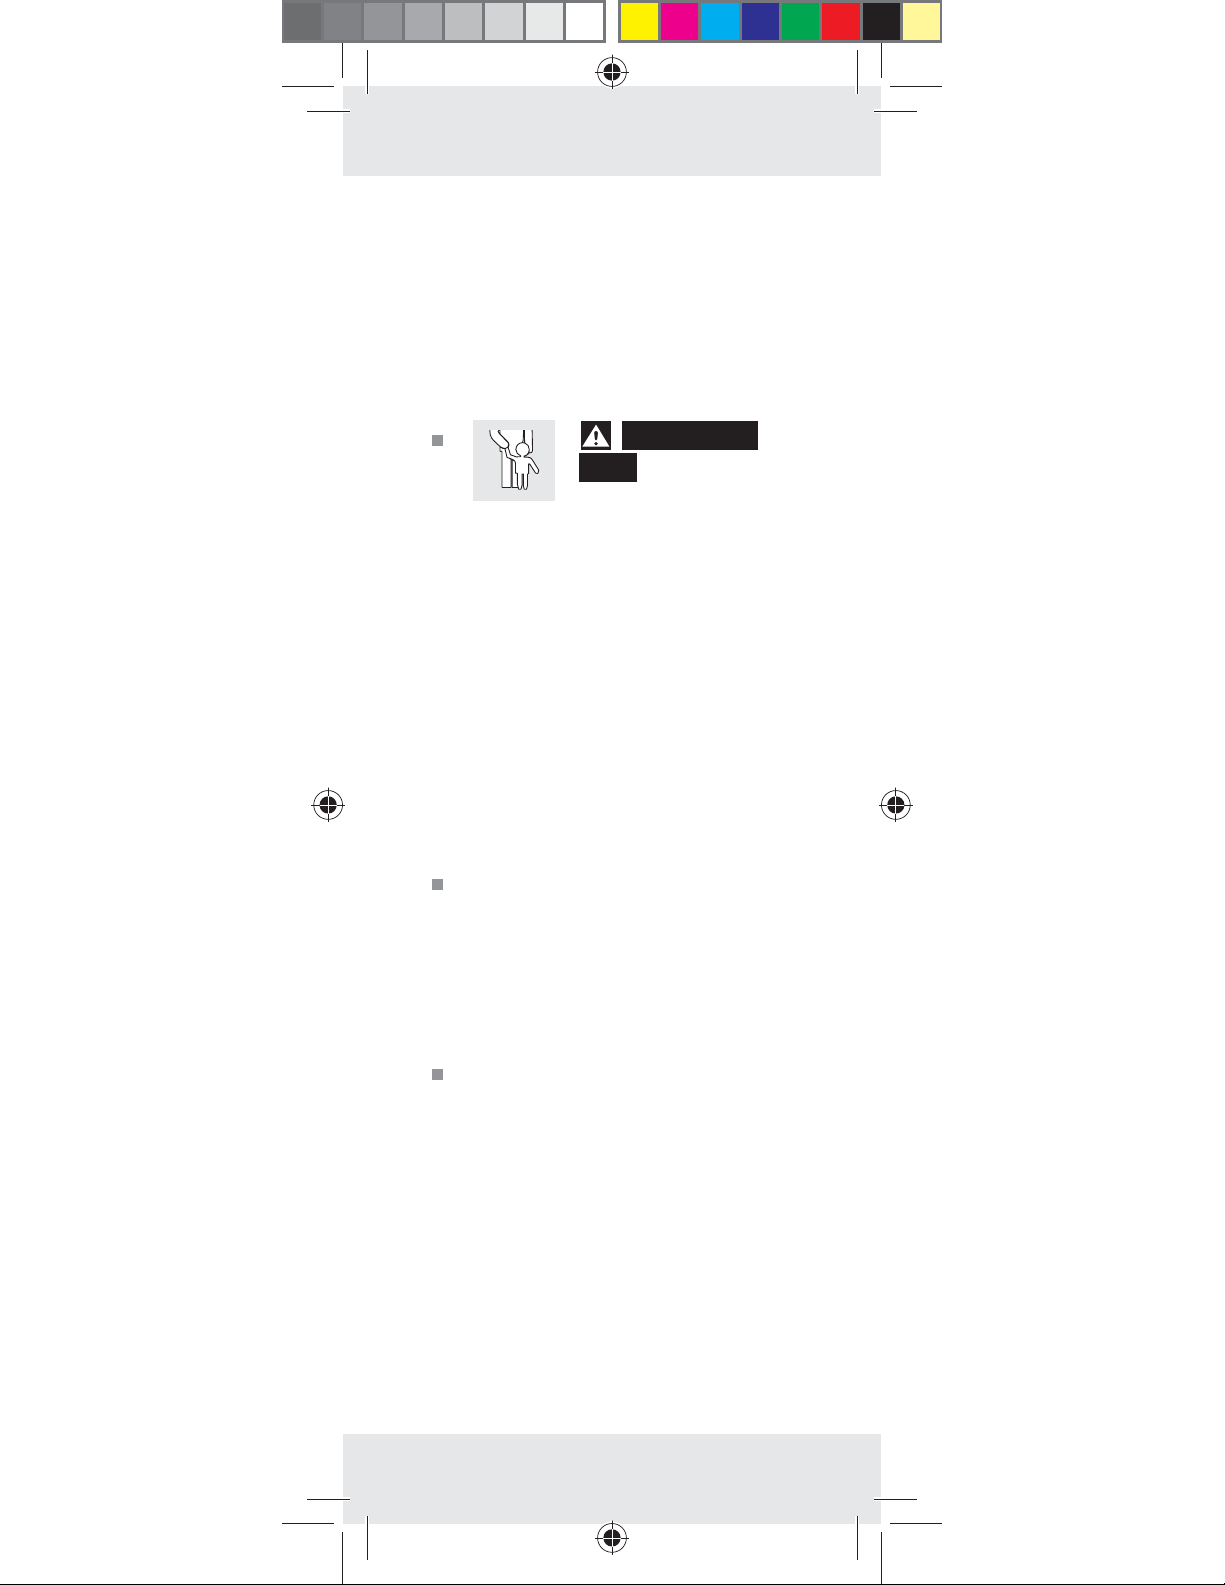
DANGER OF
DEATH AND
ACCIDENTS FOR TODDLERS
AND CHILDREN! Never leave
children unsupervised with the
packaging material. The packaging material represents a
danger of suffocation. Children
frequently underestimate the
dangers. Please keep children
away from the device at all times.
This device is not a toy and should
not be played with by children.
Children are not able to understand the dangers that can occur
when handling this device.
Children or other individuals who
do not know or have no experience of handling this device,
or whose physical, sensory or
mental abilities are restricted,
must not use the device without
supervision or instruction by an
individual responsible for their
safety. Children must be supervised in order to ensure that they
do not play with the device.
Ensure that the product is in-
stalled by suitably experienced
or qualified persons only.
Check before installation that
the supporting surface is suitable
for the fastenings and the weight
of the lighting product. If you
are unsure, please seek the
advice of an electrical equipment specialist.
10 GB
CAUTION! RISK OF OVER-
HEATING! Do not operate the
product whilst it is in the packaging.
Do not pull on the product lead.
Ensure that it is positioned to
avoid creating a trip hazard.
The product can be used on all
surfaces officially classified as
being of normal flammability.
Avoid the danger
of death from
electric shock!
Before use, ensure that the mains
voltage available is the same as
the required operating voltage
for the device (230 V ~).
Before connecting to the mains,
always check the product for
any damage.
Never use the product if you
find damage of any kind.
The connecting cable cannot be
repaired! If the cable is damaged,
the product must be taken out of
use and disposed of in the proper
way.
This article does not contain any
parts which can be serviced by
the user. The bulbs cannot be
replaced.
Never open any of the electrical
parts or insert any kind of object
into them.
11 GB

Protect the product from sharp
edges, mechanical loads and
hot surfaces.
Do not install with sharp fasteners
or nails.
Always remove the mains adapter
from the socket before installing,
dismantling or cleaning.
Never touch the mains adapter
or the product with moist or wet
hands.
Use the lighting product with
only the components described
in these operating instructions.
Disconnect the lighting product
from the mains if you intend not
to use it for an extended period
(e.g. holiday).
If you have any questions about
the product or are unsure about
any of its aspects, please seek
the advice of an electrical
equipment specialist.
Never connect the item directly
to 230 V ~ alternating current.
CAUTION! RISK OF ELEC-
TRIC SHOCK! Make sure that
there are no power, gas or water lines located where you wish
to drill. Check with a cable and
pipe locator if necessary before
you begin drilling.
Avoid excessive bending of the
product. This can damage the
insulation.
12 GB

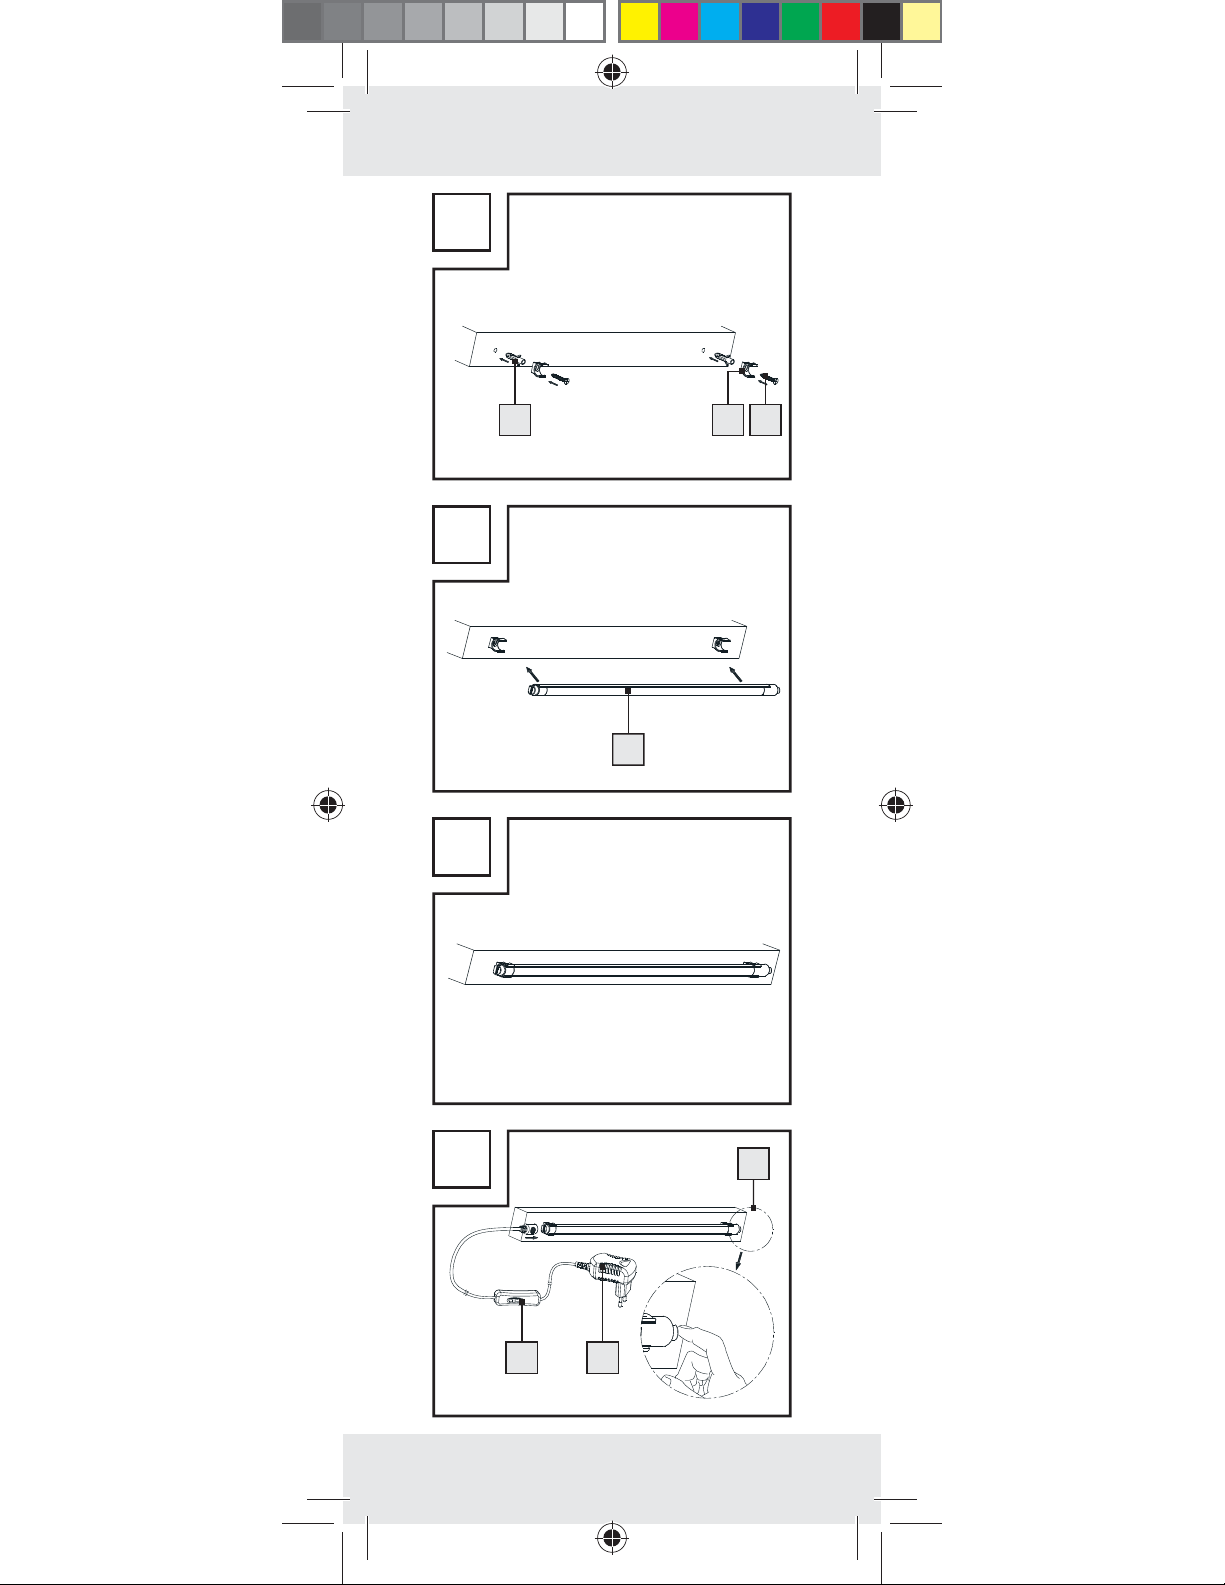
Installation
Note: You will need a crosshead
screwdriver to fit the attachment
3
clips
and screws 4, 8.
Note: The product is suitable for
mounting on walls or cupboards.
Note: Use the flat surface for easy
insert. The stick
1
can be turned
inside the clip for angle adjustment.
Cupboard mounting
(Fig. A–D):
Install the attachment clips in the
desired position with the screws
4
(see Fig. A).
Attach the light strip to the
attachment clips (see Fig. B).
Wall mounting
(Fig. E–H):
Drill the fastening holes in the wall.
CAUTION! Ensure that you do
not damage any cables in the wall.
Insert the dowels 7 into the
drilled holes (see Fig. E).
Fix the attachment clips 3 to
the wall with the screws
8
(see
Fig. E).
Attach the light strip 1 to the
attachment clips (see Fig. F + G).
13 GB

Use
Insert the connector of main
lead to the lamp strip (see. Fig.
D + H.).
Plug the mains plug 2 into the
socket (see Fig. I).
Use the ON- / OFF-switch 6
(supply lead) and the press
switch
on the light strip
5
(light strip) to switch
1
(see Fig. H).
To switch off, pull the mains
plug out of the mains socket or
press the push-button switch
(light strip).
Note: Please be aware that
switching off the light by means
of the push-button switch (light
strip) is intended only for short
periods of time. If you are intending to switch off the light for a
longer period of time, then you
should instead use the ON / OFF
switch (mains lead). Otherwise
the device continues to draw
current.
Cleaning and care
CAUTION! RISK OF
ELECTRIC SHOCK!
First remove the the mains
adapter from the socket.
Do not use any solvents, petrol
or similar items. This would damage the device.
14 GB
Only a dry, lint-free cloth should
be used for cleaning.
Disposal
The packaging is made
entirely of recyclable
materials, which you
may dispose of at local
recycling facilities.
Contact your local refuse disposal
authority for more details of how to
dispose of your worn-out product.
To help protect the environment, please dispose
of the product properly
when it has reached the
end of its useful life and
not in the household waste.
Information on collection
points and their opening
hours can be obtained
from your local authority.
EMC
15 GB
Wstęp
Zastosowanie zgodne
z przeznaczeniem ........Strona 17
Zakres dostawy ............Strona 17
Opis części ...................Strona 17
Dane techniczne ..........Strona 18
Wskazówki
dotyczące
bezpieczeństwa
...Strona 18
Montaż .......................Strona 22
Obsługa .....................Strona 23
Czyszczenie i
konserwacja ..........Strona 24
Usuwanie .................Strona 24
16 PL
Listwa oświetleniowa LED
Wstęp
Zastosowanie zgodne
z przeznaczeniem
Niniejszy produkt nadaje się do
zastosowania w obszarach wewnętrznych. Produkt ten przeznaczony jest
do zastosowania jedynie w prywatnych gospodarstwach domowych,
a nie w celach komercyjnych.
Zakres dostawy
1 listwa LED (z wtyczką sieciową)
2 klamry mocujące
4 śruby (2 do montażu na szafie i
2 do montażu naściennego)
2 kołki (ø ok. 6 mm)
1 instrukcja obsługi
Opis części
1
Listwa LED
2
Zasilacz sieciowy z kablem
3
Klamry mocujące
4
Śruby (do montażu na szafie)
5
Przełącznik wciskowy (listwa
świetlna)
6
Wyłącznik główny (kabel)
7
Kołek
8
Śruby (do montażu naściennego)
17 PL

Dane techniczne
Listwa oświetleniowa LED 1:
Napięcie
robocze: 12 V
Żarόwki: 20 x LED, 0,1 W
Wskazόwka:
Żarόwki nie nadają
się do wymiany.
Klasa ochrony:
Listwa oświetleniowa LED (Nr modelu
Z31282) sprawdzona TÜV / GS.
, 2,3 W
Zasilacz sieciowy
Podstawowe
napięcie
znamionowe: 100-240 V ∼,
50 - 60 Hz
Pomocnicze
napięcie
znamionowe: 12 V
0,25 A, 3 W
Zasilacz sieciowy (model nr
LPS03-120-0250-2) został sprawdzony przez DEKRA / GS.
2
:
,
Wskazówki
dotyczące
bezpieczeństwa
W przypadku szkód, które zostaną
spowodowane nieprzestrzeganiem
niniejszej instrukcji obsługi wygasa
roszczenie gwarancyjne! Za szkody
pośrednie nie będzie przejmowana
żadna odpowiedzialność! W przypadku szkód materialnych lub szkód
18 PL
osobowych, które zostaną spowodowane niewłaściwym posługiwaniem
się urządzeniem lub nieprzestrzeganiem wskazówek bezpieczeństwa
nie będzie przejmowana żadna
odpowiedzialność!
OSTRZEŻE-
NIE!
ZAGROŻE-
NIE ŻYCIA ORAZ
NIEBEZPIECZEŃSTWO
WYPADKU W PRZYPADKU
W MAŁYCH DZIECI! Nigdy
nie należy pozostawiać bez
nadzoru dzieci z materiałem
opakowaniowym. Zachodzi
niebezpieczeństwo uduszenia
się materiałem opakowaniowym.
Dzieci często nie doceniają
zagrożenia. Należy trzymać
dzieci z dala od produktu.
Niniejsze urządzenie nie jest
zabawką i należy trzymać je
z dala od dzieci. Dzieci nie
rozpoznają niebezpieczeństwa
związanego z użytkowaniem
tego urządzenia.
Dzieciom lub osobom, którym
brak wiedzy lub doświadczenia
w obchodzeniu się z urządzeniem, lub które są ograniczone
pod względem ich fizycznych,
sensorycznych lub duchownych
zdolności, nie wolno obsługiwać
urządzenia bez nadzoru lub
wskazówek osoby odpowiedzialnej za ich bezpieczeństwo.
19 PL

Dzieci muszą być nadzorowane,
aby nie bawiły się urządzeniem.
Należy przestrzegać, aby pro-
dukt zmontowany został jedynie
przez osobę fachową.
Przed montażem należy dokonać
kontroli podłoża, czy jest ono
odpowiednie dla materiału
montażowego oraz dla ciężaru
artykułu oświetleniowego. W
przypadku wątpliwości należy
zasięgnąć porady w specjalistycznych sklepie z artykułami
elektrycznymi.
OSTROŻNIE! ZAGROŻENIE
PRZEGRZANIEM! Nie należy
stosować produktu w opakowaniu.
Proszę nie pociągać za przewόd
połączeniowy produktu oraz
zapewnić, aby został on w ten
sposόb ułożony, aby nie wstępowano na niego lub potykano się.
Niniejszy produkt może zostać
zastosowany na wszystkich normalnie palnych powierzchniach.
Unikaj zagrożenia
życia wskutek
porażenia prądem
elektrycznym!
Upewnij się przed użyciem
urządzenia, że istniejące napięcie
sieci jest zgodne z wymaganym
napięciem roboczym urządzenia
(230 V ~).
20 PL

Przed każdym podłączeniem do
sieci należy sprawdzić produkt
pod względem ewentualnych
uszkodzeń.
Nie należy stosować produktu
w przypadku stwierdzenia
jakichkolwiek uszkodzeń.
Przewόd połączeniowy nie może
być naprawiany! W razie uszkodzenia przewodu produkt musi
zostać wycofany z użytku oraz
prawidłowo zbyty.
Niniejszy artykuł nie zawiera
żadnych części, ktόre mogą być
konserwowane przez użytkownika. Żarόwki nie mogą zostać
wymienione.
Nie należy w żadnym przypadku
otwierać jakiejkolwiek elektrycznej części lub wkładać w nie
jakiekolwiek przedmioty.
Produkt należy chronić przed
ostrymi krawędziami, mechanicznym obciążeniem oraz
gorącymi powierzchniami.
Nie mocować za pomocą klamer
lub gwoździ.
Przed montażem, demontażem
lub czyszczeniem zasilacz zawsze wyciągać z gniazdka.
Nigdy nie należy dotykać zasi-
lacza sieciowego ani produktu
wilgotnymi lub mokrymi rękami.
Artykuł oświetleniowy należy
stosować jedynie z częściami
składowymi, opisanymi w niniejszej instrukcji.
21 PL

W przypadku dłuższego okresu
nieużywalności (np. urlop) należy
usunąć artykuł oświetleniowy
od sieci elektrycznej.
W przypadku istnienia pytań
związanych z produktem lub
istnienia wątpliwości, należy
zasięgnąć porady w specjalistycznym sklepie z artykułami
elektrycznymi.
Nie należy podłączać produktu
bezpośrednio do sieci prądu
zmiennego 230 V ∼.
OSTROŻNIE! NIEBEZPIE-
CZEŃSTWO PORAŻENIA
ELEKTRYCZNEGO! Upewnić
się, że podczas wiercenia nie
zostaną uszkodzone przewody
elektryczne, gazowe lub wodociągowe. W razie potrzeby
przed wierceniem użyć przyrządu do odszukiwania przewodów.
Nie zginać nadmiernie pro-
duktu. To grozi uszkodzeniem
izolacji.
Montaż
Uwaga! Do montażu klamer
mocujących
potrzebny wkrętak krzyżowy.
Uwaga! Produkt nadaje się do
montażu na ścianach i szafach.
Uwaga! Do montażu wybrać
gładką powierzchnię. Listwę
świetlną można obracać wewnątrz
22 PL
3
i śrub 4, 8 jest
1

klamer mocujących w celu ustawienia odpowiedniego kąta.
Montaż na szafie (rys. A–D):
Zamontować klamry mocujące
w wybranym miejscu przy
użyciu śrub
4
(patrz rys. A).
Przymocować listwę świetlną na
klamrach mocujących (patrz
rys. B).
Montaż naścienny (rys. E–H):
Wywiercić w ścianie otwory
pod elementy mocujące.
OSTROŻNIE! Zwrócić uwagę
na to, aby nie uszkodzić przewodów znajdujących się w
ścianie.
Włożyć kołki 7 do wywierco-
nych otworów (rys. E).
Przymocować klamry mocujące
3
na ścianie za pomocą śrub
8
(rys. E).
Przymocować listwę 1
świetlną na klamrach mocujących (patrz rys. F + G).
Obsługa
Połączyć kabel sieciowy z listwą
świetlną (patrz rys. D + H).
Włożyć wtyczkę sieciową 2 do
gniazda sieci elektrycznej (rys. I).
Wcisnąć wyłącznik główny 6
(kabel) i przełącznik wciskowy
(listwa świetlna), w celu włączenia listwy
1
świetlnej (rys. H).
5
23 PL
 Loading...