


JVC KD-R441, KD-R441E, KD-R442E, KD-R443E, KD-R451E User Manual
...ENGLISH
FRANÇAIS
KD-R647 / KD-R641 / KD-R547 / KD-R541 / KD-R449 / KD-R447 / KD-R443 / KD-R442 / KD-R441
CD RECEIVER
INSTRUCTION MANUAL
RÉCEPTEUR CD
MANUEL D’INSTRUCTIONS
Please read all instructions carefully before operation to obtain the best possible performance from the unit.
Veuillez lires les instructions attentivement avant d’utiliser l’appareil afin d’obtenir les meilleures performances possibles de l’appareil.
GET0925-001A [E/EN/EU]

Information on Disposal of Old Electrical and Electronic Equipment and Batteries (applicable for EU countries that have adopted separate waste collection systems)
Products and batteries with the symbol (crossed-out wheeled bin) cannot be disposed as household waste.
Old electrical and electronic equipment and batteries should be recycled at a facility capable of handling these items and their waste byproducts.
Contact your local authority for details in locating a recycle facility nearest to you. Proper recycling and waste disposal will help conserve resources whilst preventing detrimental effects on our health and the environment.
Notice: The sign “Pb” below the symbol for batteries indicates that this battery contains lead.
Information sur l’élimination des anciens équipements électriques et électroniques et piles électriques (applicable dans les pays de l’Union Européenne qui ont adopté des systèmes de collecte sélective)
Les produits et piles électriques sur lesquels le pictogramme (poubelle barrée) est apposé ne peuvent pas être éliminés comme ordures ménagères.
Les anciens équipements électriques et électroniques et piles électriques doivent être recyclés sur des sites capables de traiter ces produits et leurs déchets. Contactez vos autorités locales pour connaître le site de recyclage le plus proche. Un recyclage adapté et l’élimination des déchets aideront à conserver les ressources et à nous préserver des leurs effets nocifs sur notre santé et sur l’environnement. Remarque: Le symbole “Pb“ ci-dessous sur des piles électrique indique que cette
pile contient du plomb.
Declaration of Conformity with regard to the EMC Directive 2004/108/EC Manufacturer:
JVC KENWOOD Corporation
3-12, Moriya-cho, Kanagawa-ku, Yokohama-shi, Kanagawa, 221-0022, Japan
EU Representative’s:
JVC Technical Services Europe GmbH
Postfach 10 05 04, 61145 Friedberg, Germany
Déclaration de conformité se rapportant à la directive EMC 2004/108/EC Fabricant:
JVC KENWOOD Corporation
3-12, Moriya-cho, Kanagawa-ku, Yokohama-shi, Kanagawa, 221-0022, Japan
Représentants dans l’UE:
JVC Technical Services Europe GmbH
Postfach 10 05 04, 61145 Friedberg, Allemagne
i

The marking of products using lasers
The label is attached to the chassis/case and says that the component uses laser beams that have been classified as Class 1. It means that the unit is utilizing laser beams that are of a weaker class. There is no danger of hazardous radiation outside the unit.
Marquage des produits utilisant un laser
L’étiquette est attachée au châssis/boîtier de l’appareil et indique que l’appareil utilise des rayons laser de classe 1. Cela signifie que l’appareil utilise des rayons laser d’une classe faible. Il n’y a pas de danger de radiation accidentelle hors de l’appareil.
ii
CONTENTS
BEFORE USE |
2 |
BASICS |
3 |
GETTING STARTED |
4 |
CD / USB / iPod |
5 |
RADIO |
6 |
AUX |
7 |
AUDIO SETTINGS |
8 |
ILLUMINATION |
9 |
MORE INFORMATION |
9 |
TROUBLESHOOTING |
10 |
SPECIFICATIONS |
11 |
INSTALLATION / CONNECTION |
12 |
How to read this manual
•Operations explained mainly using buttons on the faceplate of KD-R547 /
KD-R541 / KD-R449 / KD-R447 / KD-R443 / KD-R442 / KD-R441.
•[XX] indicates the selected items.
•( XX) indicates references are available on the stated page number.
BEFORE USE
 Warning
Do not operate any function that takes your attention away from safe driving.
 Caution
Volume setting:
•Adjust the volume so that you can hear sounds outside the car to prevent accident.
•Lower the volume before playing digital sources to avoid damaging the speakers by the sudden increase of the output level.
General:
•Avoid using the USB device or iPod/iPhone if it might hinder driving safety.
•Make sure all important data has been backed up. We shall bear no responsibility for any loss of recorded data.
•Never put or leave any metallic objects (such as coins or metal tools) inside the unit, to prevent a short circuit.
•If a disc error occurs due to condensation on the laser lens, eject the disc and wait for the moisture to evaporate.
Remote control (RM-RK52):
•Do not leave the remote control in hot places such as on the dashboard.
•The Lithium battery is in danger of explosion if replaced incorrectly. Replace it only with the same or equivalent type.
•The battery pack or batteries shall not be exposed to excessive heat such as sunshine, fire or the like.
•Keep battery out of reach of children and in original package until ready to use. Dispose of used batteries promptly. If swallowed, contact a physician immediately.
Maintenance
Cleaning the unit: Wipe off dirt on the faceplate with a dry silicon or soft cloth.
Cleaning the connector: Detach the faceplate and clean the connector with a cotton swab gently, being careful not to damage the connector.
Handling discs:
•Do not touch the recording surface of the disc.
•Do not stick tape etc. on the disc, or use a disc with tape stuck on it.
•Do not use any accessories for the disc.
•Clean from the center of the disc and move outward.
•Clean the disc with a dry silicon or soft cloth. Do not use any solvents.
•When removing discs from this unit, pull them out horizontally.
•Remove burrs from the center hole and disc edge before inserting a disc.
Connector (on the reverse side of the faceplate)
2

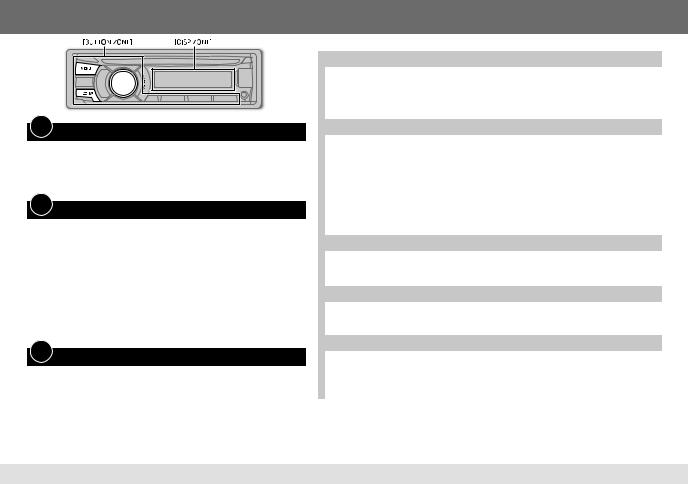
BASICS
Faceplate |
|
|
|
|
|
Remote control (RM-RK52) |
|
KD-R647 |
Volume knob |
|
|
|
Attach |
• Supplied for KD-R647. |
|
(turn/press) |
|
Loading slot |
Display window |
• Need to purchase separately for KD-R641 / KD-R547 / |
|||
KD-R641 |
|
|
|
|
|
KD-R541 / KD-R449. |
|
|
|
|
|
|
|
||
|
|
|
|
|
|
Remote sensor |
|
|
|
|
|
|
|
(Do not expose to bright sunlight.) |
|
|
|
|
|
|
Detach |
|
|
KD-R547 KD-R449 KD-R443 KD-R441 |
|
|
|
||||
KD-R541 |
KD-R447 KD-R442 |
|
|
|
|
||
|
|
|
|
|
How to reset |
Pull out the insulation sheet |
|
|
|
|
|
|
|
when using for the first time. |
|
|
|
|
|
|
|
How to replace the battery |
|
|
|
KD-R547 / KD-R541 |
|
Your preset adjustments |
|
||
Detach button |
|
will also be erased. |
|
||||
To |
|
Do this (on the faceplate) |
|
Do this (on the remote control) |
|||
Turn on the power |
Press L SOURCE. |
|
|
( not available ) |
|||
|
|
• Press and hold to turn off the power. |
|
||||
|
|
|
|
||||
Adjust the volume |
Turn the volume knob. |
|
Press VOL + or VOL –. |
||||
|
|
Press the volume knob to mute the sound or pause playback. |
Press to mute the sound or pause playback. |
||||
|
|
• |
Press again to cancel. |
|
• Press again to cancel. |
||
Select a source |
• |
Press L SOURCE repeatedly. |
|
Press SOURCE repeatedly. |
|||
|
|
• Press L SOURCE, then turn the volume knob within 2 seconds. |
|
||||
Change the display |
Press DISP repeatedly. ( 10) |
|
( not available ) |
||||
information |
• |
Press and hold to scroll the current display information. |
|||||
|
|||||||
|
|
|
|
|
3 |
ENGLISH |
|
GETTING STARTED
1Cancel the demonstration
1 Press and hold MENU.
2 Press the volume knob to select [DEMO].
3 Turn the volume knob to select [DEMO OFF], then press the knob. 4 Press MENU to exit.
2Set the clock
1 Press and hold MENU.
2 Turn the volume knob to select [CLOCK], then press the knob.
3 Turn the volume knob to select [CLOCK SET], then press the knob. 4 Turn the volume knob to select the day, then press the knob.
5 Turn the volume knob to adjust the hour, then press the knob. 6 Turn the volume knob to adjust the minute, then press the knob. 7 Turn the volume knob to select [24H/12H], then press the knob.
8 Turn the volume knob to select [24 HOUR] or [12 HOUR] then press the knob.
9 Press MENU to exit.
3
Set the basic settings
1 Press and hold MENU.
2Turn the volume knob to make a selection, then press the knob.
• See the following table for selection.
3Press MENU to exit.
To return to the previous hierarchy, press G T/P.
|
|
Default: XX |
|
|
|
|
|
||
|
|
|
|
|
CLOCK |
|
|
|
|
|
|
|
|
|
|
24H/12H |
24 HOUR/ 12 HOUR: Selects the clock format. |
|
|
|
|
|
|
|
|
CLOCK ADJ |
AUTO: The clock time is automatically set using the Clock Time (CT) data in FM Radio Data |
|
|
|
|
System signal. ; OFF: Cancels. |
|
|
|
CLOCK DISP |
ON: The clock time is shown on the display even when the unit is turned off. ; OFF: Cancels. |
|
|
|
|
|
|
|
DIMMER |
|
|
|
|
|
|
|
|
|
|
DIMMER SET |
Selects the display and button illumination adjusted in the [BRIGHTNESS] setting. |
|
|
|
|
AUTO: Changes between the day and night adjustments when you turn off or on the car |
|
|
|
|
headlights.*1 ; ON: Selects the night adjustments. ; OFF: Selects the day adjustments. |
|
|
|
BRIGHTNESS |
Sets the display and button brightness for day and night separately. |
|
|
|
|
1 DAY/ NIGHT: Select day or night. |
|
|
|
|
2 BUTTON ZONE/ DISP ZONE: Select the zone for setting. |
|
|
|
|
3 Set the brightness level (00 to 31). |
|
|
|
|
(Default: BUTTON ZONE: DAY: 25 ; NIGHT: 9 / DISP ZONE: DAY: 31 ; NIGHT: 12 ; |
|
|
|
|
For KD-R647 / KD-R641: DAY: 31 ; NIGHT: 11) |
|
|
DISPLAY |
|
|
|
|
|
|
|
|
|
|
SCROLL*2 |
ONCE: Scrolls the display information once. ; AUTO: Repeats scrolling at 5-second |
|
|
|
|
intervals. ; OFF: Cancels. |
|
|
|
TAG DISPLAY |
ON: Shows the TAG information while playing MP3/WMA files. ; OFF: Cancels. |
|
|
IPOD SWITCH*3 : For KD-R647 / KD-R641 / KD-R547 / KD-R541 only |
|
|||
|
|
HEAD MODE: Controls music playback only from this unit. ; IPOD MODE: Controls music |
|
|
|
|
playback from both the unit and iPod/iPhone. ; EXT MODE: Controls music playback only |
|
|
|
|
from the iPod/iPhone. |
|
|
SRC SELECT |
|
|
|
|
|
|
|
|
|
|
AM*4 |
ON: Enables AM in source selection. ; OFF: Disables. |
|
|
|
AUX*4 |
ON: Enables AUX in source selection. ; OFF: Disables. ; BT ADAPTER: Select when the |
|
|
|
|
KS-BTA100 Bluetooth adapter is connected to the AUX jack ( 7). The source name will |
|
|
|
|
change to BT AUDIO. |
|
|
*1 The illumination control wire connection is required. ( 13)
*2 Some characters or symbols will not be shown correctly (or will be blanked). *3 Displayed only when the source is USB-IPOD.
*4 Not displayed when the corresponding source is selected.
4
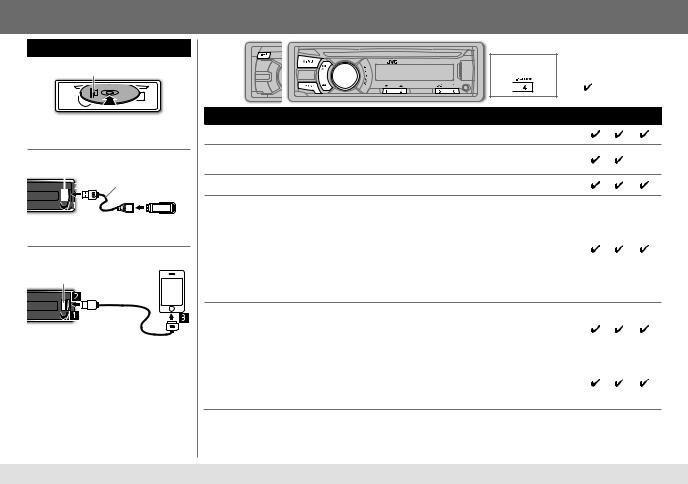
CD / USB / iPod
Start playback
CD
Label side
The source changes to CD and playback starts.
• To eject a disc, press 0.
USB |
|
|
|
|
|
|||
USB input terminal |
|
USB 2.0 cable*1 |
||||||
|
|
|
|
|
(commercially available) |
|||
|
|
|
|
|
||||
|
|
|
|
|
|
|
|
|
|
|
|
|
|
|
|
|
|
The source changes to USB and playback starts.
iPod/iPhone (KD-R647 / KD-R641 / KD-R547 / KD-R541 only)
USB input terminal
USB 2.0 cable*1  (accessory of the iPod/iPhone)
The source changes to USB-IPOD and playback starts.
•You can also change the source from the other source to iPod by pressing iPod.
Press 4 iPod MODE repeatedly to select the control mode ([HEAD MODE] / [IPOD MODE] / [EXT MODE]) directly.
• See also [IPOD SWITCH]. ( 4)
*1 Do not leave the cable inside the car when not using.
KD-R647 / |
|
|
KD-R641 |
KD-R647 / KD-R641 |
|
|
|
|
|
KD-R547 / KD-R541 |
|
|
|
: Applicable |
|
|
— : Not applicable |
To |
Do this |
CD USB iPod |
Select a track/file |
Press E/ F (or 2/3 on RM-RK52). |
*2 |
Select a folder |
Press 1 ∞/2 5 (or 5/∞ on RM-RK52). |
— |
(MP3/WMA) |
|
|
|
|
|
Reverse/Fast-forward |
Press and hold E/ F (or 2/3 on RM-RK52). |
*2 |
Select a track/file |
1Press MENU |
|
from a list |
2Turn the volume knob to make a selection, then press the knob. |
|
•MP3/WMA file: Select the desired folder, then a file.
•iPod or JVC Playlist Creator (JPC) / JVC Music Control (JMC) file*3: Select
the desired file from the list (PLAYLISTS, ARTISTS, ALBUMS, SONGS, |
*5 |
PODCASTS*4, GENRES, COMPOSERS*4). |
|
•To return to the previous hierarchy, press G T/P.
•To cancel, press MENU.
Note: Turn the volume knob quickly to fast-search.
Repeat play |
Press 6 B repeatedly to make a selection. |
|
|
• Audio CD or JPC / JMC file: TRACK RPT, RPT OFF |
*5 |
|
• MP3/WMA file: TRACK RPT, FOLDER RPT, RPT OFF |
|
|
|
|
|
• iPod: ONE RPT, ALL RPT |
|
|
|
|
Random play |
Press 5 A repeatedly to make a selection. |
|
|
• Audio CD: ALL RND, RND OFF |
*5 |
|
• MP3/WMA file or JPC / JMC file: FOLDER RND, ALL RND, RND OFF |
|
|
|
• iPod: SONG RND, ALBUM RND*6, RND OFF
*2 |
Applicable under [HEAD MODE] and [IPOD MODE] only. ( 4) |
*4 |
Only for iPod. |
*3 |
Only for files registered in the database created with JPC / JMC. |
*5 |
Applicable under [HEAD MODE] only. ( 4) |
|
( 10) |
*6 |
Not applicable for some iPod/iPhone. |
|
5 |
|
ENGLISH |
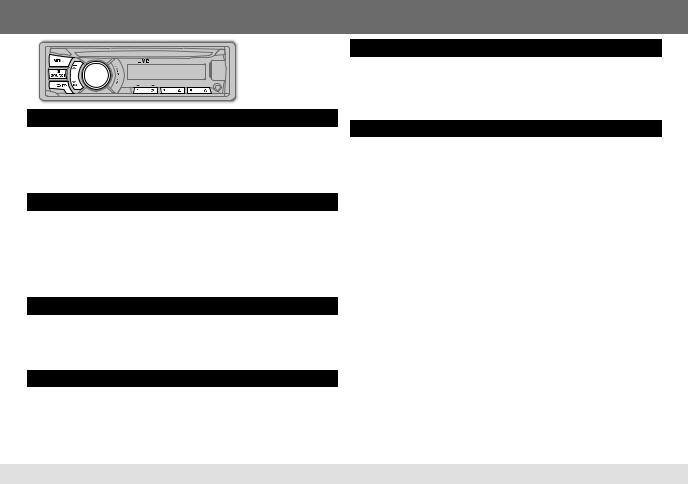
RADIO
“ST” lights up when receiving an FM stereo broadcast with sufficient signal strength.
Search for a station
1 Press L SOURCE to select FM or AM.
2Press E/F (or 2/3 on RM-RK52) to search for a station automatically. (or)
Press and hold E/ F (or 2/3 on RM-RK52) until “M” flashes, then press repeatedly to search for a station manually.
Store a station
You can store up to 18 stations for FM and 6 stations for AM. While listening to a station....
Press and hold one of the number buttons (1 to 6) to store. (or)
1 Press and hold the volume knob until “PRESET MODE” flashes.
2Turn the volume knob to select a preset number, then press the knob.
The preset number flashes and “MEMORY” appears.
Select a stored station
Press one of the number buttons (1 to 6). (or)
1 Press MENU.
2 Turn the volume knob to select a preset number, then press the knob.
Search for your favorite program (PTY Search)
Available only for FM Radio Data System stations.
1 Press and hold G T/P.
2Turn the volume knob to select a PTY code ( 7), then press the knob.
If there is a station broadcasting a program of the same PTY code as you have selected, that station is tuned in.
Activate TA Standby Reception
Available only for FM Radio Data System stations.
Press G T/P.
The unit will temporarily switch to Traffic Announcement (TA) (if available) from any source other than AM.
• To deactivate, press G T/P again.
Other settings
1 Press and hold MENU.
2 Turn the volume knob to select [TUNER], then press the knob.
3Turn the volume knob to make a selection (see the table below and on page 7), then press the knob.
4 Press MENU to exit.
|
Default: XX |
SSM |
For KD-R641 / KD-R541 / KD-R443 / KD-R442 / KD-R441: |
|
FM: SSM 01 – 06 / SSM 07 – 12 / SSM 13 – 18 |
|
Automatically preset up to 18 stations for FM. |
|
“SSM” stops flashing when first 6 stations are stored. |
|
Select SSM 07 – 12 / SSM 13 – 18 to store the following 12 stations. |
|
For KD-R647 / KD-R547 / KD-R449 / KD-R447: |
|
FM: SSM 01 – 06 / SSM 07 – 12 ; FM-LO: SSM 01 – 06 |
|
Automatically preset up to 12 stations for FM and 6 stations for FM-LO. |
|
“SSM” stops flashing when first 6 stations are stored. |
|
Select SSM 07 – 12 to store the following 6 stations for FM. |
|
|
AF-REG* |
AF ON: Automatically searches for another station broadcasting the same program |
|
in the same Radio Data System network with better reception when the current |
|
reception is poor. ; AF-REG ON: Switches to another station only in the specific |
|
region using the AF control. ; AF OFF: Cancels. |
NEWS-STBY* Displayed only when the source is FM. |
|
|
ON: The unit will temporarily switch to News Programme if available. ; |
|
OFF: Cancels. |
P-SEARCH* |
ON: When the signal of a preset station you have selected is weak, this unit searches |
|
for another station possibly broadcasting the same programme as the original preset |
|
station is broadcasting. ; OFF: Cancels. |
|
|
* Only for FM Radio Data System stations.
6

RADIO AUX
|
Default: XX |
MONO |
Displayed only when the source is FM. |
|
MONO ON: Improves the FM reception, but the stereo effect will be lost. ; |
|
MONO OFF: Cancels. |
|
|
IF BAND |
AUTO: Increases the tuner selectivity to reduce interference noises from adjacent |
|
stations. (Stereo effect may be lost.) ; WIDE: Subjects to interference noises from |
|
adjacent stations, but sound quality will not be degraded and the stereo effect will |
|
remain. |
|
|
RADIO TIMER Turns on the radio at a specific time regardless of the current source.
1 ONCE/ DAILY/ WEEKLY/ OFF: Select how often the timer will be turned on.
2Select the band.
For KD-R641 / KD-R541 / KD-R443 / KD-R442 / KD-R441:
FM/ AM
For KD-R647 / KD-R547 / KD-R449 / KD-R447:
FM/ FM-LO/ AM
3Select the preset station.
For KD-R641 / KD-R541 / KD-R443 / KD-R442 / KD-R441:
01 to 18 (for FM)/ 01 to 06 (for AM)
For KD-R647 / KD-R547 / KD-R449 / KD-R447:
01 to 12 (for FM)/ 01 to 06 (for FM-LO/AM) 4 Set the activation day and time.
• “M” lights up when complete.
Radio Timer will not activate for the following cases.
•The unit is turned off.
•[OFF] is selected for [AM] in [SRC SELECT] after Radio Timer for AM is selected.
( 4)
PTY code:
NEWS, AFFAIRS, INFO, SPORT, EDUCATE, DRAMA, CULTURE, SCIENCE, VARIED, POP M (music), ROCK M (music), EASY M (music), LIGHT M (music), CLASSICS, OTHER M (music),
WEATHER, FINANCE, CHILDREN, SOCIAL, RELIGION, PHONE IN, TRAVEL, LEISURE, JAZZ, COUNTRY, NATION M (music), OLDIES, FOLK M (music), DOCUMENT
Use a portable audio player
1 Connect a portable audio player (commercially available).
3.5 mm stereo mini plug with “L” shaped connector (commercially available)
Portable audio player
Auxiliary input jack
2 Select [ON] for [AUX] in [SRC SELECT]. ( 4)
3 Press L SOURCE to select AUX.
4 Turn on the portable audio player and start playback.
Use a 3-core plug head stereo mini plug for optimum audio output.
Use a Bluetooth® device
1 Connect the Bluetooth adapter, KS-BTA100 (separately purchased).
Wiring harness of the unit
( 13)
Blue/white
Blue/white: Remote
Black
Black: Ground
Brown
Brown: Tel muting
Auxiliary input jack
2 Register (pair) the Bluetooth device with KS-BTA100.
3 Select [BT ADAPTER] for [AUX] in [SRC SELECT]. ( 4).
4 Press L SOURCE to select BT AUDIO
5 Start using the Bluetooth device.
For details, refer to the instruction manual of KS-BTA100.
7 |
ENGLISH |
|
|
 Loading...