


LaserJet Pro MFP M227-M229 |
2 |
|
|
LaserJet Ultra MFP M230-M231 |
|
Getting Started Guide |
|
www.hp.com/support/ljmfpM227 |
www.register.hp.com |
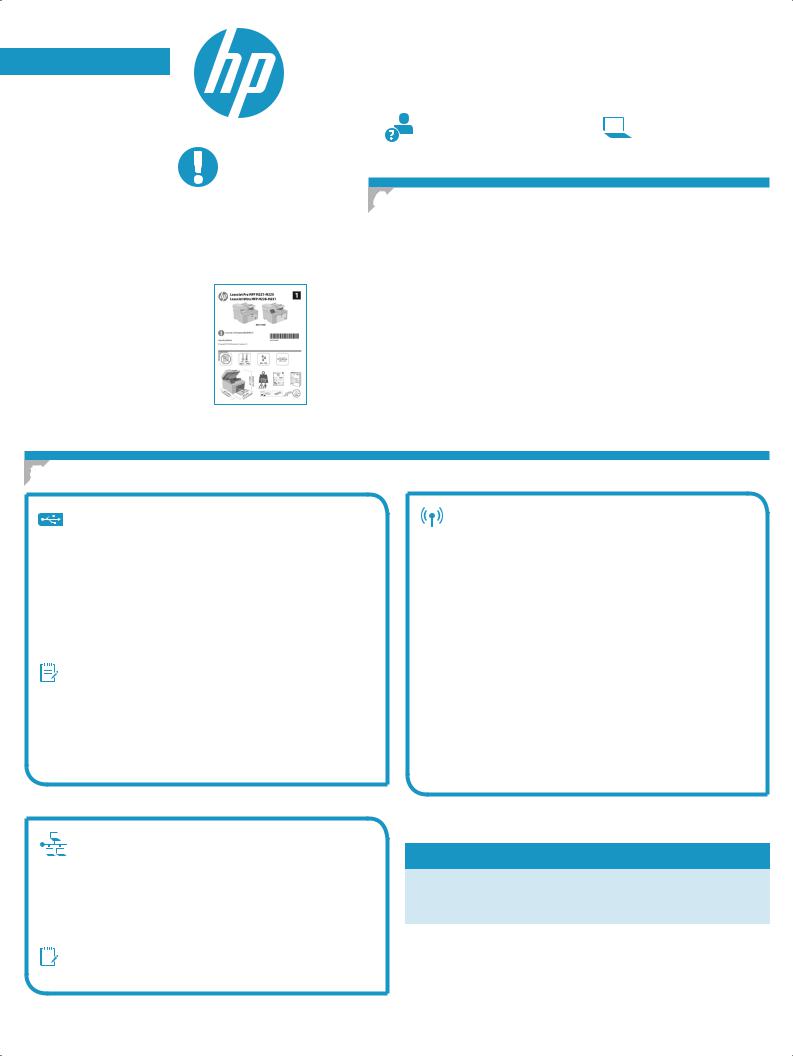
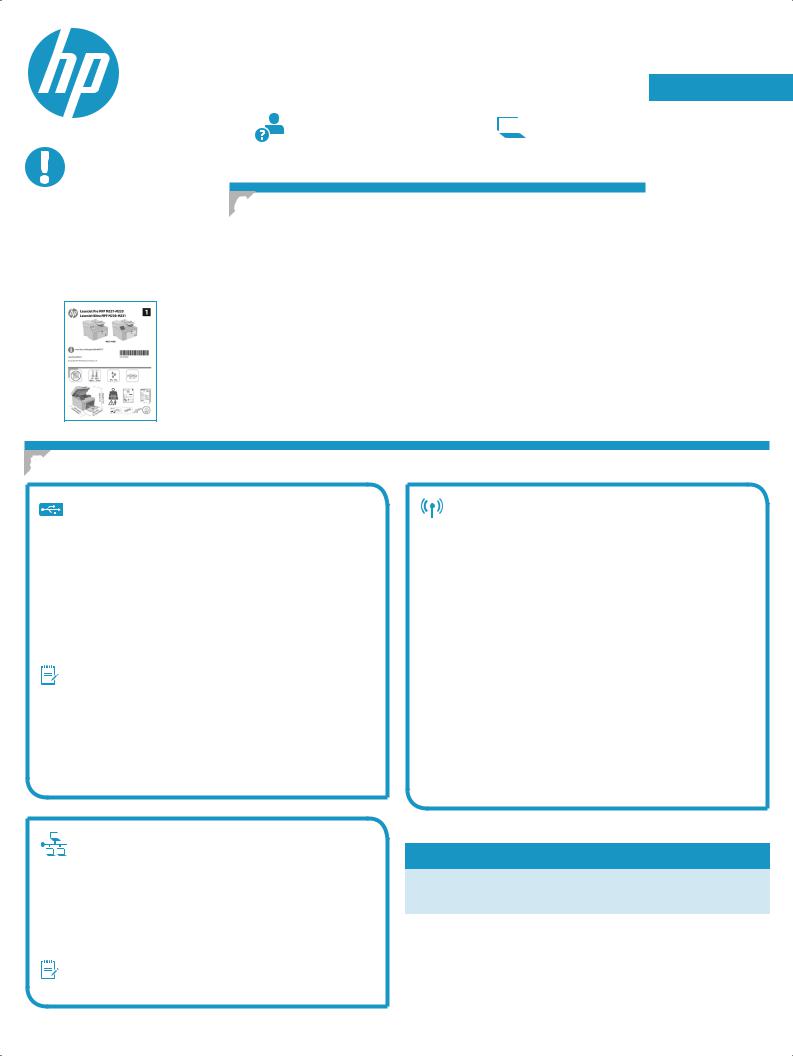
IMPORTANT:
Follow Steps 1 - 3 on the printer hardware setup poster, then continue
with Step 4.
4. Initial setup on the control panel
After turning on the printer, wait for it to initialize. To navigate the control panel, use the arrow buttons and the OK button.Followthepromptsonthecontrolpaneltoconfigurethesesettings:
•Language
•Location
•DefaultSettings
Under Default Settings select one of these options:
•Self-managed: Optimized default settings for most users that include guided setupandconfigurationstepsandautomaticupdates.
•IT-managed:Optimizeddefaultsettingsforfleetmanageability.
Settings are fully customizable after initial setup.
NOTE: Select Print Information Page to print a page that instructs how to change the default settings.
English.............. |
1 |
Français............. |
4 |
Deutsch............. |
7 |
Italiano............ |
10 |
Español............ |
13 |
Català.............. |
16 |
Dansk.............. |
19 |
Nederlands...... |
22 |
Eesti................ |
25 |
Suomi.............. |
28 |
Latviešu........... |
31 |
Lietuvių........... |
34 |
Norsk............... |
37 |
Português........ |
40 |
Svenska........... |
43 |
5. Select the connection method
USB connection directly between the printer and the computer
Use an A-to-B type USB cable.
Windows
1.Do not connect the USB cable before installing the software. The installation process prompts to connect the cable at the appropriate time. If the cable is already connected, restart the printer when installation prompts to connect the cable.
2.Continue to “6.Locateordownloadthesoftwareinstallationfiles.”
NOTE: During software installation, select the option to Directly connect this computer using a USB cable.
OS X
1.For OS X, connect the USB cable between the computer and the printer before installing the software.
2.Continue to “6.Locateordownloadthesoftwareinstallationfiles.”
Wireless network connection (wireless models only)
Touchscreen control panels
1.To connect the printer to a wireless (Wi-Fi) network, on the printer control panel, touch the Wireless button.
2.Touch Wireless Menu, and then touch Wireless Setup Wizard. Select the network name from the SSID list, or enter the network name if it is not listed.
3.Use the keyboard to enter the passphrase, and then touch the OK button.
4.Wait while the printer establishes a network connection.
5.On the printer control panel, touch the Network button. If an IP address is listed, the network connection has been established. If not, wait a few more minutes and try again. Note the IP address for use during software installation. Example IP address: 192.168.0.1
6.To print from a computer, continue with “6. Locate or download the softwareinstallationfiles.”To print from a phone or tablet only, continue with “8.Mobileandwirelessprinting(optional).”
Wired (Ethernet) network connection
(optional)
Use a standard network cable.
1.Connect the network cable to the printer and to the network. Wait a few minutes for the printer to acquire a network address.
2.Continue to “6.Locateordownloadthesoftwareinstallationfiles.”
NOTE: For Windows, during software installation, select the option to
Connect through a network.
 ManuallyconfiguretheIPaddress
See the printer user guide for information on how to manually configure the IP address. See the “Troubleshooting” section of this guide.
*G3Q74-90924* *G3Q74-90924*
G3Q74-90924
6. Locateordownloadthesoftwareinstallationfiles
 Method 1: Download HP Easy Start (Windows and OS X)
1.Go to 123.hp.com/laserjet, and click Download.
2.Followtheon-screeninstructionsandpromptstosavethefiletothecomputer.
3.Launchthesoftwarefilefromthefolderwherethefilewassaved,andcontinue with “7. Install the software.”
3.Download the software for your printer model and operating system.
4.Launchthesoftwarefilefromthefolderwherethefilewassaved,andcontinue with “7. Install the software.”
 Method 3: Install from the printer CD (Windows only)
1.Insert the printer CD into the computer.
2.Continue with “7. Install the software.”
 Method 2: Download from printer support website (Windows and OS X)
1.Go to www.hp.com/support/ljmfpM227P.
2.Select Software and drivers.
 Install Notes
For more details about the software for the printer, see the install notes file on the printer CD.
7. Install the software
Windows solution
1.Insert the printer CD into the computer, or launch the software installationfiledownloadedfromtheWeb.
2.The software installer detects the language of the operating system, and then it displays the main menu of the installation program in the same language. When installing from the CD, if the installer program does not start after 30 seconds, browse the CD drive on the computer and launch thefilenamedSETUP.EXE.
3.The Software Selection screen details the software to be installed.
•The recommended software installation includes the print driver and software for all available printer features.
•To customize the software installed, click the Customize software selections link.Whenfinished,clicktheNext button.
4.Follow the on-screen instructions to install the software.
5.When prompted to select a connection type, select the appropriate option for the type of connection:
•Directly connect this computer using a USB cable
•Connect through a network
•Helpmesetupafirst-timewirelessconnection
 NOTE: When connecting through a network, the easiest way to detect the printer is to select Automaticallyfindmyproductonthenetwork.
 NOTE: For wireless installation, select the option to Help me set up afirst-timewirelessconnection, and then select Yes, retrieve the wireless settings on my computer.
OS X solution
1.OpenHPEasyStart.
2.Follow the instructions provided to complete device setup and software installation.
Readiris Pro 15 for HP
Readiris Pro provides your HP product with advanced OCR and scanning features.Easilyconvertyourpaperdocumentsintoeditableandsearchable PDFfiles,readytobestoredandshared.
To download the software from the Web, go to: www.hp.com/support/ljmfpM227P
Select Drivers, select the appropriate operating system, and click Next. Click
Application - 3rd Party, and then click the Download button.
2
8.  Mobile and wireless printing (optional)
8.1 Connect the device to the wireless network
To print from a phone or tablet, connect the device to the same wireless network as the printer.
Apple iOS devices (AirPrint): Open the item to print, and select the Action icon. Select Print, select the printer, and then select Print.
Newer Android devices (4.4 or newer): Open the item to print, and select the
Menu button. Select Print, select the printer, and select Print.
8.2 Wi-Fi Direct
(wireless models only)
Wi-Fi Direct allows Wi-Fi capable devices, such as smart phones, tablets, or computers, to make a wireless network connection directly to the printer without using a wireless router or access point. Connect to the printer’s Wi-Fi Direct signal the same way Wi-Fi capable devices are connected to a new wireless network or hotspot.
Some devices require downloading the HP Print Service plugin app from the Google Play store.
Older Android Devices (4.3 or older): Download the HP ePrint app from the Google Play store.
Windows Phone: Download the HP AiO Remote app from the Windows Store.
 Learn more about mobile printing
To learn more about other mobile printing options, including additional ePrint solutions, scan the QR code, or see the “Mobile printing” section of the user guide.
Enable Wi-Fi Direct
To set up Wi-Fi Direct from the control panel, complete the following steps:
1.From the Home screen on the printer control panel, touch the Connection Information 


 button, and open the following menus:
•Wi-Fi Direct
•Settings
•On/Off
2.Touch the On menu item. The printer saves the setting and then returns the control panel to the Wi-Fi Direct Settings menu.
 For more information on wireless printing and wireless setup, go to www.hp.com/go/wirelessprinting.
Discover the printer
1.From the mobile device, turn on the Wi-Fi, and search for wireless networks.
2.Select the printer, which will show up as ‘HP-Print-model-name’ as shown on the printer control panel. Example printer name: HP-Print-29-AJ OJP 8620
9. Set up HP ePrint via email (optional)
Use HP ePrint via email to print documents by sending them as an email attachment to the printer’s email address from any email enabled device, even from devices that are not on the same network.
To use HP ePrint via email, the printer must meet these requirements:
•The printer must be connected to a wired or wireless network and have Internet access.
•HP Web Services must be enabled on the printer, and the printer must be registered with HP Connected.
Enable HP Web Services (Touchscreen models only)
1.From the Home screen on the printer control panel, touch the Connection Information 


 button, and open the following menus:
•HP ePrint
•Settings
•Enable Web Services
2.Touch the OK menu item. The printer enables Web Services, and then prints an information page. The information page contains a printer code necessary to register the HP printer at HP Connected.
3.Go to www.hpconnected.com to create an HP ePrint account and complete the setup process.
|
|
|
10. |
Use the scan feature |
|
Use the HP Scan software on your computer to start a scan job at the printer. |
|
|
Windows |
|
OS X |
Open HP Printer Assistant, select Scan, and then select Scan a Document or Photo. |
Click Applications, select HP, and then select HP Easy Scan. |
|
3
English.................. |
1 |
Français................ |
4 |
Deutsch................. |
7 |
Italiano............... |
10 |
Español............... |
13 |
Català................. |
16 |
Dansk.................. |
19 |
Nederlands.......... |
22 |
Eesti.................... |
25 |
Suomi.................. |
28 |
Latviešu.............. |
31 |
Lietuvių............... |
34 |
Norsk.................. |
37 |
Português............ |
40 |
Svenska............... |
43 |
LaserJet Pro MFP M227-M229
LaserJet Ultra MFP M230-M231
Guidededémarrage
www.hp.com/support/ljmfpM227 |
www.register.hp.com |
IMPORTANT:
Suivez les étapes1 à 3 sur le poster de configuration matérielle
de l’imprimante puis passez à l’étape4.
4.Configurationinitialesurlepanneaude commande
Après avoir allumé l’imprimante, attendez son initialisation. Pour naviguer dans le panneau de commande, utilisez les touches fléchées et le bouton OK. Suivez les instructions sur le panneau de commande pour configurer ces paramètres :
•Langue
•Emplacement
•Paramètres par défaut
Dans Paramètrespardéfaut, sélectionnez l’une des options suivantes :
•Autogéré: paramètres par défaut optimisés pour la plupart des utilisateurs qui comprennent des étapes d’installation et de configuration guidées et des mises à jour automatiques.
•Géréparleserviceinformatique: paramètres par défaut optimisés pour la facilité d’administration de la flotte.
Les paramètres sont entièrement personnalisables après l’installation initiale.
REMARQUE : Sélectionnez la page Informations relatives à l’impression pour imprimer une page qui indique comment modifier les paramètres par défaut.
5. Sélectionnerlaméthodedeconnexion
Connexion USB directement entre l’imprimante et l’ordinateur
Utilisez un câble USB de type A-à-B.
Windows
1.Ne connectez pas le câble USB avant d’installer le logiciel. Le processus d’installation vous invite à connecter le câble au moment opportun.
Si le câble est déjà connecté, redémarrez l’imprimante lorsque le processus d’installation vous invite à connecter le câble.
2.Poursuivez avec «6.Localiseroutéléchargerlesfichiers d’installationdulogiciel».
REMARQUE:Lors de l’installation du logiciel, sélectionnez l’option pour
Connecterdirectementcetordinateuràl’aided’uncâbleUSB.
OS X
1.Pour OS X, branchez le câble USB entre l’ordinateur et l’imprimante avant d’installer le logiciel.
2.Poursuivez avec «6.Localiseroutéléchargerlesfichiers d’installationdulogiciel».
Connexionàunréseaufilaire(Ethernet)
(facultatif)
Utilisez un câble réseau standard.
1.Branchez le câble réseau à l’imprimante et au réseau. Attendez quelques minutes que l’imprimante acquière une adresse réseau.
2.Poursuivez avec «6.Localiseroutéléchargerlesfichiers d’installationdulogiciel».
 REMARQUE:Pour Windows, lors de l’installation du logiciel, sélectionnez l’option Seconnecterviaunréseau.
Connexionduréseausansfil (modèlessansfiluniquement)
Panneauxdecommandeàécrantactile
1.Pour connecter l’imprimante à un réseau sans fil (Wi-Fi), sur le panneau de commande de l’imprimante, appuyez sur le bouton Sans fil.
2.Appuyez sur MenuSansfil, puis sur Assistantd’installationsansfil. Sélectionnez le nom du réseau dans la liste SSID, ou entrez le nom du réseau s’il n’y figure pas.
3.Entrez la phrase secrète à l’aide du clavier, puis appuyez sur OK.
4.Patientez pendant que l’imprimante établit une connexion réseau.
5.Sur le panneau de commande de l’imprimante, appuyez sur le bouton Réseau. Si une adresse IP est indiquée, la connexion au réseau
a été établie. Si ce n’est pas le cas, patientez quelques minutes et réessayez. Notez l’adresse IP à utiliser lors de l’installation du logiciel.
Exempled’adresseIP: 192.168.0.1
6.Pour imprimer à partir d’un ordinateur, passez à la section
«6.Localiseroutéléchargerlesfichiersd’installationdulogiciel». Pour imprimer à partir d’un téléphone ou d’une tablette uniquement, continuez avec «8.Impressionmobileetsansfil.(facultatif)».
 Configurermanuellementl’adresseIP
Consultez le manuel de l’utilisateur de l’imprimante pour obtenir des informations sur la configuration manuelle de l’adresse IP. Reportez-vous à la section « Dépannage » de ce manuel.
4
6. Localiseroutéléchargerlesfichiersd’installationdulogiciel
 Méthode1:TéléchargementdeHPEasyStart
(Windows et OS X)
1.Visitez la page 123.hp.com/laserjet et cliquez sur Télécharger.
2.Suivez les instructions et les invites à l’écran pour enregistrer le fichier sur l’ordinateur.
3.Lancez le fichier logiciel à partir du dossier dans lequel il a été enregistré, puis poursuivez avec « 7. Installer le logiciel ».
 Méthode2:TéléchargementdepuislesiteWeb
d’assistance de l’imprimante (Windows et OS X)
1.Accédez à www.hp.com/support/ljmfpM227P.
2.Sélectionnez Pilotes et logiciels.
3.Téléchargez le logiciel adapté à votre modèle d’imprimante et à votre système d’exploitation.
4.Lancez le fichier logiciel à partir du dossier dans lequel il a été enregistré, puis poursuivez avec « 7. Installer le logiciel ».
 Méthode3:InstallationavecleCDdel’imprimante
(Windowsuniquement)
1.Insérez le CD de l’imprimante dans votre ordinateur.
2.Continuez avec « 7. Installer le logiciel ».
 Notes d’installation
Pour plus de détails sur le logiciel de l’imprimante, consultez le fichier des notes d’installation sur le CD de l’imprimante.
7. Installer le logiciel
Solution Windows
1.Insérez le CD de l’imprimante dans l’ordinateur, ou lancez le fichier d’installation du logiciel téléchargé à partir du Web.
2.Le logiciel d’installation détecte la langue du système d’exploitation, puis affiche le menu principal du programme d’installation dans la même langue. Lors de l’installation à partir du CD, si le programme d’installation ne démarre pas après 30 secondes, parcourez le lecteur du CD de l’ordinateur et lancez le fichier nommé setup.exe.
3.L’écran Sélectiondelogicielsindique les logiciels à installer.
•L’installation logicielle recommandée inclut le piloted’impression et les logiciels pour toutes les fonctionnalités de l’imprimante disponibles.
•Pour personnaliser le logiciel installé, cliquez sur le lien
Personnaliserlessélectionsdelogiciel. Lorsque vous avez terminé, cliquez sur le bouton Suivant.
4.Suivez les instructions à l’écran pour installer le logiciel.
5.Lorsque vous êtes invité à sélectionner un type de connexion, sélectionnez l’option appropriée pour le type de connexion :
•Se connecter directement à cet ordinateur à l’aide d’un câble USB
•Seconnecterviaunréseau
•Aidez-moiàétabliruneconnexionsansfilpourlapremièrefois
 REMARQUE:Lors de la connexion à travers un réseau, la meilleure façon de détecter l’imprimante est de sélectionner Trouver automatiquementmonproduitsurleréseau.
REMARQUE:Pour une installation sans fil, sélectionnez l’option
Aidez-moiàétabliruneconnexionsansfilpourlapremièrefois, puis sélectionnez Oui,récupérerlesparamètressansfilsurmon ordinateur.
Solution OS X
1.Ouvrez HP Easy Start.
2.Suivez les instructions fournies pour terminer la configuration de l’appareil et l’installation du logiciel.
ReadirisPro15pourHP
Readiris Pro fournit votre produit HP avec des fonctions de reconnaissance optique de caractères et de numérisation avancées. Convertissez facilement vos documents papier en fichiers PDF modifiables et avec possibilité de recherche, prêts à être stockés et partagés.
Pour télécharger le logiciel sur Internet, rendez-vous sur : www.hp.com/support/ljmfpM227P
Sélectionnez Pilotes, puis le système d’exploitation approprié et cliquez sur
Suivant. Cliquez sur Application - Tierce, puis sur le bouton Télécharger.
5
8.  Imprimeràpartird’unpériphériquemobileousansfil(facultatif)
8.1 Connexionduproduitàunréseausansfil
Pour imprimer depuis un téléphone ou une tablette, connectez le périphérique au même réseau sans fil que l’imprimante.
PériphériquesAppleiOS(AirPrint):ouvrez l’élément à imprimer et sélectionnez l’icône Action. Sélectionnez Imprimer, puis l’imprimante et appuyez sur Imprimer.
PériphériquesAndroidplusrécents(4.4ouplusrécents):ouvrez le document à imprimer, puis sélectionnez le bouton Menu. Sélectionnez Imprimer, puis l’imprimante et appuyez sur Imprimer.
Pour certains périphériques, il est nécessaire de télécharger l’application du module d’extension du service d’impression HP sur Google Play.
PériphériquesAndroidplusanciens(4.3ouplusanciens):téléchargez l’application HP ePrint sur Google Play.
WindowsPhone:téléchargez l’application HP AiO Remote dans le Windows Store.
 En savoir plus sur l’impression mobile
Pour en savoir plus sur les autres options d’impression mobile, notamment les solutions ePrint supplémentaires, numérisez le code QR ou consultez la section « Impression mobile » du manuel de l’utilisateur.
8.2 Wi-Fi Direct
(modèlessansfiluniquement)
Wi-Fi Direct permet aux périphériques Wi-Fi (smartphones, tablettes ou ordinateurs) d’effectuer une connexion réseau sans fil directement vers l’imprimante sans utiliser de routeur sans fil ou de point d’accès. Les utilisateurs se connectent au signal d’impression directe Wi-Fi de
l’imprimante de la même manière qu’ils connectent un périphérique Wi-Fi à un nouveau réseau sans fil ou à une borne d’accès.
Activer Wi-Fi Direct
Pour configurer Wi-Fi Direct depuis le panneau de commande, procédez comme suit :
1.Sur l’écran d’accueil du panneau de commande de l’imprimante,
appuyez sur le bouton Informations de connexion 


 , puis ouvrez les menus suivants :
•Wi-Fi Direct
•Paramètres
•Actif/Inactif
2.Appuyez sur l’élément de menu Activé. L’imprimante enregistre le paramètre, puis renvoie le panneau de commande aux menus
Paramètres Wi-Fi Direct.
 Pour obtenir plus d’informations sur l’impression sans fil et la
configuration sans fil, accédez à www.hp.com/go/wirelessprinting.
Détecterl’imprimante
1.À partir du périphérique portable, activez la Wi-Fi puis recherchez des réseaux sans fil.
2.Sélectionnez l’imprimante, qui apparaîtra comme « HP-Print-nom- modèle » comme indiqué sur le panneau de commande de l’imprimante.
Exemple de nom d’imprimante : HP-Print-29-AJ OJP 8620
9. ConfigurerHPePrintviamessagerieélectronique(facultatif)
Utilisez HP ePrint via messagerie électronique pour imprimer des documents en les envoyant en pièce jointe à l’adresse électronique de l’imprimante depuis n’importe quel périphérique activé, même ceux qui ne sont pas sur le même réseau.
Pour utiliser HP ePrint via messagerie électronique, l’imprimante doit répondre aux exigences suivantes :
•L’imprimante doit être connectée à un réseau câblé ou sans fil et avoir accès à
Internet.
•Les services Web HP doivent être activés sur l’imprimante et celle-ci doit être enregistrée auprès de HP Connected.
ActiverlesServicesWebHP(modèlesàécrantactile uniquement)
1.Sur l’écran d’accueil du panneau de commande de l’imprimante, appuyez sur le bouton Informations de connexion 


 , puis ouvrez les menus suivants :
•HP ePrint
•Paramètres
•Activer les Services Web
2.Appuyez sur l’élément de menu OK. L’imprimante active les services Web, puis imprime une page d’informations. Celle-ci contient le code de l’imprimante nécessaire pour enregistrer le produit HP sur HP Connected.
3.Rendez-vous sur www.hpconnected.com pour créer un compte HP ePrint et terminer le processus de configuration.
10. Utiliserlafonctiondenumérisation
Utilisez le logiciel HP Scan sur votre ordinateur pour lancer un travail de numérisation sur l’imprimante.
Windows |
OS X |
Ouvrez l’Assistant d’imprimante HP, sélectionnez Numériser, puis Numériserun |
Cliquez sur Applications, sélectionnez HP, puis sélectionnez HP Easy Scan. |
document ou une photo. |
|
6
LaserJet Pro MFP M227-M229
LaserJet Ultra MFP M230-M231
Handbuch für die Inbetriebnahme
www.hp.com/support/ljmfpM227 |
www.register.hp.com |
WICHTIG:
Führen Sie die
Schritte1bis3auf
dem Plakat zur Einrichtung der Druckerhardware aus, und fahren Sie dann mit
Schritt4fort.
4.Initialisierungseinrichtung über das Bedienfeld
Warten Sie nach dem Einschalten des Druckers, bis der Drucker initialisiert wurde.
Im Bedienfeld können Sie mithilfe der Pfeiltasten und der Taste OK navigieren. Befolgen Sie die Anweisungen im Bedienfeld, um folgende Einstellungen zu konfigurieren:
•Sprache
•Standort
•Standardeinstellungen
Wählen Sie im Bereich Standardeinstellungen eine der folgenden Optionen aus:
•Selbstverwaltet: Für die meisten Benutzer optimierte Standardeinstellungen, darunter angeleitete Einrichtungsund Konfigurationsschritte und automatische Aktualisierungen.
•IT-verwaltet: Für die Massenverwaltung optimierte Standardeinstellungen.
Nach der Ersteinrichtung können alle Einstellungen im vollen Umfang angepasst werden.
HINWEIS: Wählen Sie Print Information Page (Druckinformationsseite) aus, um eine Seite mit Anweisungen zum Ändern der Standardeinstellungen zu drucken.
English.............. |
1 |
Français............. |
4 |
Deutsch............. |
7 |
Italiano............ |
10 |
Español............ |
13 |
Català.............. |
16 |
Dansk.............. |
19 |
Nederlands...... |
22 |
Eesti................ |
25 |
Suomi.............. |
28 |
Latviešu........... |
31 |
Lietuvių........... |
34 |
Norsk............... |
37 |
Português........ |
40 |
Svenska........... |
43 |
5. Verbindungsmethode auswählen
Direkte USB-Verbindung zwischen dem Drucker und dem Computer
Verwenden Sie ein USB-Kabel des Typs A-auf-B.
Windows
1.Schließen Sie das USB-Kabel erst nach Installation der Software an. Beim Installationsvorgang werden Sie zum passenden Zeitpunkt zum Anschließen des Kabels aufgefordert. Wenn das Kabel bereits angeschlossen ist, starten Sie den Drucker neu, wenn Sie die
Installation zum Anschließen des Kabels auffordert.
2.Fahren Sie mit „6.Software-Installationsdateienauffindenund herunterladen“ fort.
HINWEIS: Wählen Sie während der Softwareinstallation die Option
Directly connect this computer using a USB cable (Direkte Verbindung zu diesem Computer mit einem USB-Kabel) aus.
OS X
1.Schließen Sie OS X das USB-Kabel zwischen dem Computer und dem
Drucker vor der Installation der Software an.
2.Fahren Sie mit „6.Software-Installationsdateienauffindenund herunterladen“ fort.
Kabellose Netzwerkverbindung (nur Wireless-Modelle)
Bedienfelder mit Touchscreen
1.Um den Drucker mit einem Drahtlosnetzwerk (Wi-Fi) zu verbinden, berühren Sie auf dem Bedienfeld des Druckers die Taste „Wireless“.
2.Berühren Sie Drahtlosmenü, und berühren Sie dann Assistent für die drahtlose Installation. Wählen Sie in der Liste „SSID“ den
Netzwerknamen aus, oder geben Sie den Netzwerknamen ein, wenn er in der Liste nicht aufgeführt ist.
3.Geben Sie die Passphrase über die Tastatur ein, und berühren Sie dann die Taste OK.
4.Warten Sie, bis der Drucker eine Netzwerkverbindung hergestellt hat.
5.Berühren Sie auf dem Bedienfeld des Druckers die Taste „Netzwerk“. Wenn eine IP-Adresse aufgeführt wird, wurde die Netzwerkverbindung hergestellt. Falls nicht, warten Sie einige Minuten und versuchen Sie es erneut. Notieren Sie die IP-Adresse zur Software-Installation.
Beispiel-IP-Adresse: 192.168.0.1
6.Um von einem Computer aus zu drucken, fahren Sie mit „6. Software-
Installationsdateienauffindenundherunterladen“fort. Um nur von einem Mobiltelefon oder einem Tablet aus zu drucken, fahren Sie mit
„8. Mobiler Druck und Drahtlosdruck (optional)“ fort.
Kabelgebundene Netzwerkverbindung
(Ethernet) (optional)
Verwenden Sie ein Standardnetzwerkkabel.
1.Schließen Sie das Netzwerkkabel an den Drucker und das Netzwerk an. Warten Sie einige Minuten, während der Drucker eine Netzwerkadresse bezieht.
2.Fahren Sie mit „6.Software-Installationsdateienauffindenund herunterladen“ fort.
HINWEIS: Wählen Sie für Windows während der Softwareinstallation Connect through a network (Verbindung über ein Netzwerk) aus.
 ManuelleKonfigurationderIP-Adresse
Informationen zum manuellen Konfigurieren der IP-Adresse finden Sie im Benutzerhandbuch zum Drucker. Lesen Sie dazu den Abschnitt
„Fehlerbehebung“ in dieser Anleitung.
7
6. Software-Installationsdateienauffindenundherunterladen
 Methode 1: Download von HP Easy Start (Windows und OS X)
1.Gehen Sie zu 123.hp.com/laserjet, und klicken Sie auf Download.
2.Befolgen Sie die Anweisungen auf dem Bildschirm, um die Datei auf dem Computer zu speichern.
3.Starten Sie die Softwaredatei in dem Ordner, in dem die Datei gespeichert wurde, und fahren Sie mit „7. Software installieren“ fort.
 Methode 2: Herunterladen von der DruckerSupportwebsite (Windows und OS X)
1.Besuchen Sie die Website www.hp.com/support/ljmfpM227P.
2.Wählen Sie Software & Treiber aus.
3.Laden Sie die Software für Ihr Druckermodell und Ihr Betriebssystem herunter.
4.Starten Sie die Softwaredatei in dem Ordner, in dem die Datei gespeichert wurde, und fahren Sie mit „7. Software installieren“ fort.
 Methode 3: Installieren über die Drucker-CD
(nurWindows)
1.Legen Sie die Drucker-CD in den Computer ein.
2.Fahren Sie mit „7. Software installieren“ fort.
 Installationshinweise
Weitere Informationen zur Software für den Drucker finden Sie in der Datei mit den Installationshinweisen auf der Drucker-CD.
7. Software installieren
Lösung für Windows
1.Legen Sie die Drucker-CD in den Computer ein, oder starten Sie die aus dem Internet heruntergeladene Softwareinstallationsdatei.
2.Das Softwareinstallationsprogramm erkennt die Sprache des Betriebssystems und zeigt das Hauptmenü des
Installationsprogramms in der erkannten Sprache an. Wenn bei der Installation von der CD das Installationsprogramm nach 30 Sekunden nicht startet, navigieren Sie zum CD-Laufwerk auf dem Computer und starten Sie die Datei SETUP.EXE.
3.Im Bildschirm Software Selection (Softwareauswahl) wird die zu installierende Software angezeigt.
•Die empfohlene Softwareinstallation umfasst den Druckertreiber und die Software für alle verfügbaren Druckerfunktionen.
•Um anzupassen, welche Software installiert werden soll, klicken Sie auf die Verknüpfung Customize software selections
(Softwareauswahl anpassen). Wenn Sie fertig sind, klicken Sie auf die Schaltfläche Next (Weiter).
4.Befolgen Sie zur Installation der Software die am Bildschirm angezeigten Anleitungen.
5.Wenn Sie aufgefordert werden, einen Verbindungstyp auszuwählen, wählen Sie die entsprechende Option für den Verbindungstyp aus:
•Directly connect to this computer using USB cable (Direkte Verbindung zu diesem Computer mit einem USB-Kabel)
•Connect through a network (Verbindung über ein Netzwerk)
•Helpmesetupafirst-timewirelessconnection(Unterstützung beim ersten Einrichten einer drahtlosen Verbindung)
 HINWEIS: Die einfachste Möglichkeit für die Erkennung des Druckers beim Herstellen einer Verbindung über ein Netzwerk besteht in der Auswahl der Option Automaticallyfindmyproductonthenetwork
(Gerät im Netzwerk automatisch ermitteln).
 HINWEIS: Wählen Sie für eine Drahtlosinstallation die Option Help me setupafirst-timewirelessconnection(Assistent zur Ersteinrichtung einer Drahtlosverbindung) und anschließend die Option Yes, retrieve the wireless settings on my computer (Ja, Drahtloseinstellungen auf dem Computer abrufen) aus.
Lösung für OS X
1.Öffnen Sie HP Easy Start.
2.Befolgen Sie die die angegebenen Anleitungen zum Abschließen der Geräteeinrichtung und Softwareinstallation.
Readiris Pro 15 für HP
Readiris Pro stellt Ihr HP Produkt mit erweiterten OCRund Scanfunktionen zur Verfügung. Sie können Ihre Papierdokumente mit ihnen problemlos in bearbeitbare und durchsuchbare PDF-Dateien umwandeln, die gespeichert und gemeinsam genutzt werden können.
Über die folgenden URLs können Sie die Software aus dem Internet herunterladen: www.hp.com/support/ljmfpM227P
Wählen Sie Treiber sowie anschließend das entsprechende Betriebssystem aus, und klicken Sie auf Weiter. Klicken Sie auf Anwendung–
Dritthersteller und anschließend auf Herunterladen.
8
8.  Mobiles und kabelloses Drucken (optional)
8.1 Verbinden des Geräts mit einem Wireless-Netzwerk
Wenn Sie von einem Mobiltelefon oder Tablet aus drucken möchten, müssen
Sie das Gerät mit dem Wireless-Netzwerk verbinden, mit dem auch der Drucker verbunden ist.
Apple iOS-Geräte (AirPrint): Öffnen Sie das zu druckende Dokument, und wählen Sie das Symbol „Action“ (Aktion) aus. Wählen Sie die Option Print (Drucken), dann den Drucker und anschließend Print (Drucken).
Neuere Android-Geräte (Version 4.4 oder neuer): Öffnen Sie das zu druckende Dokument, und wählen Sie die Schaltfläche Menu (Menü). Wählen Sie die Option Print (Drucken), dann den Drucker und anschließend Print (Drucken).
Bei einigen Geräten muss die HP Print Service Plugin-App aus dem Google Play Store heruntergeladen werden.
8.2 Wi-Fi Direct
(nur Wireless-Modelle)
Wi-Fi Direct ermöglicht WLAN-fähigen Geräten wie Smartphones, Tablets oder Computern das Herstellen einer direkten WLAN-Verbindung mit dem
Drucker, ohne dass dafür ein Wireless-Router oder Access Point erforderlich ist. Die Verbindung mit dem Wi-Fi Direct-Signal erfolgt auf dieselbe Weise, wie die Verbindung eines WLAN-fähigen Geräts mit einem neuen Wireless-
Netzwerk oder einem Hotspot.
Aktivieren von Wi-Fi Direct
Gehen Sie wie folgt vor, um Wi-Fi Direct vom Bedienfeld aus einzustellen:
1.Berühren Sie auf dem Bedienfeld des Druckers im Ausgangsmenü
die Taste Verbindungsinformationen 


 , und öffnen Sie die folgenden Menüs:
Ältere Android-Geräte (Version 4.3 oder älter): Laden Sie die HP ePrint
App aus dem Google Play Store herunter.
Windows Phone: Laden Sie die HP AiO Remote App aus dem Windows Store herunter.
 Weitere Informationen zum mobilen Druck
Informationen zu weiteren Mobildruckoptionen wie zu weiteren ePrint-Lösungen oder zum Scannen des QR-Codes finden Sie im Abschnitt zum Mobildruck im
Benutzerhandbuch.
•Wi-Fi Direct
•Einstellungen
•Ein/Aus
2.Berühren Sie den Menübefehl Ein. Der Drucker speichert die
Einstellungen, und das Bedienfeld kehrt in das Menü
Wi-Fi Direct-Einstellungen zurück.
 Weitere Informationen zum Drahtlosdruck sowie zur drahtlosen Installation finden Sie unter www.hp.com/go/wirelessprinting.
Erkennen des Druckers
1.Aktivieren Sie auf dem Mobilgerät den WLAN-Empfänger, und suchen
Sie nach Drahtlosnetzwerken.
2.Wählen Sie den Drucker aus. Er wird mit dem Namen „HP-Drucker-
Modell-Name“ angezeigt (vgl. Bedienfeld). Beispiel für den Druckernamen: HP-Print-29-AJ OJP 8620
9. HP ePrint per E-Mail einrichten (optional)
Nutzen Sie HP ePrint per E-Mail, um Dokumente zu drucken, indem Sie diese über ein Gerät mit E-Mail-Funktion als E-Mail-Anhang an die E-Mail-Adresse des Druckers senden. Dabei kann es sich auch um Geräte handeln, die sich nicht in demselben Netzwerk befinden.
Zur Verwendung von HP ePrint per E-Mail muss der Drucker diese Anforderungen erfüllen:
•Der Drucker muss mit einem kabelgebundenen oder Wireless-Netzwerk verbunden sein und über einen Internetzugang verfügen.
•HP Web Services müssen im Drucker aktiviert sein, und der Drucker muss bei HP Connected registriert sein.
Aktivieren von HP Web Services (nur Touchscreen-Modelle)
1.Berühren Sie auf dem Bedienfeld des Druckers im Ausgangsmenü die Taste
Verbindungsinformationen 


 , und öffnen Sie die folgenden Menüs:
•HP ePrint
•Einstellungen
•Aktivieren von Web Services
2.Berühren Sie den Menübefehl OK. Der Drucker aktiviert Web Services und druckt anschließend eine Informationsseite aus. Die Informationsseite enthält einen Druckercode, der zum Registrieren des HP Druckers bei HP Connected erforderlich ist.
3.Gehen Sie zur Erstellung eines HP ePrint-Kontos zu www.hpconnected.com, und schließen Sie den Einrichtungsprozess ab.
10. Verwenden der Scanfunktion
Über die HP Scan-Software auf dem Computer können Sie einen Scanauftrag auf dem Drucker starten.
Windows |
OSX |
Öffnen Sie den HP Druckerassistenten, und wählen Sie die Option Scannen und |
Klicken Sie auf Anwendungen, und wählen Sie HP, HPEasyScanaus. |
anschließend Dokument oder Foto scannen aus. |
|
9
English.................. |
1 |
Français................ |
4 |
Deutsch................. |
7 |
Italiano............... |
10 |
Español............... |
13 |
Català................. |
16 |
Dansk.................. |
19 |
Nederlands.......... |
22 |
Eesti.................... |
25 |
Suomi.................. |
28 |
Latviešu.............. |
31 |
Lietuvių............... |
34 |
Norsk.................. |
37 |
Português............ |
40 |
Svenska............... |
43 |
Guida introduttiva per
LaserJet Pro MFP M227-M229 LaserJet Ultra MFP M230-M231
IMPORTANTE:
Seguire i passaggi 1 - 3 del poster di
installazione dell’hardware della stampante,quindi continuare con il passaggio4.
www.hp.com/support/ljmfpM227 |
www.register.hp.com |
4.Configurazioneinizialedalpannellodi controllo
Dopo aver acceso la stampante, attendere il termine dell’inizializzazione. Per navigare nel pannello di controllo, utilizzare i pulsanti freccia e il pulsante OK. Seguire i messaggi sul pannello di controllo per configurare le seguenti impostazioni:
•Lingua
•Località
•Impostazioni predefinite
In Impostazionipredefiniteselezionare una delle opzioni seguenti:
•Autogestito: Impostazioni ottimizzate predefinite per la maggior parte degli utenti che comprendono i passaggi di installazione e configurazione e gli aggiornamenti automatici.
•Gestito da IT: Impostazioni predefinite ottimizzate per gestione del parco macchine. Dopo la configurazione iniziale, le impostazioni sono completamente configurabili.
NOTA: Selezionare Stampa pagina informazioni, per stampare una pagina con istruzioni sulla modifica delle impostazioni predefinite.
5. Scelta del metodo di connessione
Collegamento USB diretto tra stampante ecomputer
Utilizzare un cavo USB di tipo A/B.
Windows
1.Non collegare il cavo USB prima di installare il software. Il processo di installazione richiede di collegare il cavo al momento appropriato. Se il cavo è già connesso, riavviare la stampante quando il programma di installazione di collegare il cavo.
2.Continuare con “6.Individuareoscaricareifilediinstallazionedel software”.
NOTA: Durante l’installazione del software, selezionare l’opzione
CollegadirettamenteaquestocomputerutilizzandouncavoUSB.
OS X
1.Per OS X, collegare il cavo USB tra il computer e la stampante prima di installare il software.
2.Continuare con “6.Individuareoscaricareifilediinstallazionedel software”.
Connessione della rete wireless (solo modelli wireless)
Pannellidicontrolloconschermoasfioramento
1.Per collegare la stampante a un rete wireless (Wi-Fi), toccare il pulsante Wireless sul pannello di controllo della stampante.
2.Toccare Menu Wireless, quindi Configurazionewirelessguidata. Selezionare il nome di rete dall’elenco SSID o immettere il nome della rete se non è presente nell’elenco.
3.Utilizzare la tastiera per immettere la frase di accesso, quindi toccare il pulsante OK.
4.Attendere che la stampante stabilisca la connessione di rete.
5.Sul pannello di controllo della stampante, toccare il pulsante Rete.
Se viene elencato un indirizzo IP, la connessione di rete è stata stabilita. In caso contrario, attendere qualche altro minuto e riprovare. Annotare l’indirizzo IP per l’uso durante l’installazione del software.
EsempiodiindirizzoIP: 192.168.0.1
6.Per stampare da un computer, continuare con “6. Individuare
oscaricareifilediinstallazionedelsoftware”. Per stampare solo da telefono o tablet, continuare con “8. Stampa da dispositivi mobili ewireless(facoltativo)”.
Connessione di rete cablata (Ethernet)
(facoltativo)
Utilizzare un cavo di rete standard.
1.Collegare il cavo di rete alla stampante e alla rete. Attendere alcuni minuti in modo che la stampante acquisisca un indirizzo di rete.
2.Continuare con “6.Individuareoscaricareifilediinstallazionedel software”.
NOTA: Per Windows, durante l’installazione del software, selezionare l’opzione Collega tramite una rete.
 Configurazionemanualedell’indirizzoIP
Per informazioni su come configurare manualmente l’indirizzo IP, vedere la Guida utente della stampante. Vedere la sezione “Risoluzione dei problemi” di questa guida.
10
6. Individuareoscaricareifilediinstallazionedelsoftware
 Metodo 1: Download di HP Easy Start (Windows e OS X)
1.Accedere a 123.hp.com/laserjet e fare clic su Download.
2.Seguire le istruzioni e le richieste visualizzate per salvare il file nel computer.
3.Avviare il file del software dalla cartella in cui è stato salvato e continuare con
“7. Installare il software”.
 Metodo 2: Download dal sito Web di supporto della stampante (Windows e OS X)
1.Accedere a www.hp.com/support/ljmfpM227P.
2.Selezionare Software and drivers (Software e driver).
3.Scaricare il software per il modello della stampante e il sistema operativo in uso.
4.Avviare il file del software dalla cartella in cui è stato salvato e continuare con
“7. Installare il software”.
 Metodo 3: Installazione dal CD della stampante
(soloWindows)
1.Inserire il CD della stampante nel computer.
2.Continuare con “7. Installazione del software”.
 Note di installazione
Per maggiori dettagli sul software per la stampante, vedere il file Note di installazione nel CD della stampante.
7. Installare il software
Soluzione per Windows
1.Inserire il CD della stampante nel computer o avviare il file di installazione del software scaricato dal Web.
2.Il programma di installazione del software rileva la lingua del sistema operativo, quindi visualizza il menu principale del programma di installazione nella stessa lingua. Se il programma di installazione non si avvia dopo 30 secondi quando si installa da CD, sfogliare l’unità CD nel computer e avviare il file denominato SETUP.EXE.
3.Nella schermata Selezione software vengono riportati i dettagli relativi al software da installare.
•L’installazione del software consigliata comprende il driver di stampa e il software per tutte le funzioni della stampante disponibili.
•Per personalizzare il software installato, fare clic sul collegamento Personalizza selezioni software. Al termine, fare clic sul pulsante
Avanti.
4.Seguire le istruzioni visualizzate per installare il software.
5.Quando viene richiesto di selezionare un tipo di connessione, selezionare l’opzione appropriata per il tipo di connessione:
•Collegamento diretto al computer mediante cavo USB
•Collega tramite una rete
•Configuraperlaprimavoltalaconnessionewireless
NOTA: Quando si effettua la connessione a una rete, il modo più semplice di rilevare la stampante, è di selezionare l’opzione
Automaticallyfindmyproductonthenetwork(Trova automaticamente il prodotto in rete).
NOTA: Per l’installazione wireless, selezionare l’opzione Configura per la prima volta la connessione wireless, quindi Sì, recupera le impostazioni wireless sul computer.
Soluzione per OS X
1.Aprire HP Easy Start.
2.Seguire le istruzioni fornite per completare la configurazione della periferica e l’installazione del software.
Readiris Pro 15 for HP
Readiris Pro offre al prodotto HP funzionalità avanzate per OCR e scansione. I documenti cartacei possono essere convertiti con facilità in file PDF modificabili e ricercabili da memorizzare e condividere.
Per scaricare il software dal Web, accedere a: www.hp.com/support/ljmfpM227P
Selezionare Drivers (Driver), quindi il sistema operativo appropriato e fare clic su Next (Avanti). Fare clic su Application - 3rd Party (Applicazione - Terze parti), quindi sul pulsante Download.
11
8.  Stampa da dispositivi mobili e wireless (facoltativo)
8.1 Collegamento della periferica a una rete wireless
Per stampare da un telefono o un tablet, connettere il dispositivo alla stessa rete wireless della stampante.
Dispositivi Apple iOS (AirPrint): Aprire il documento da stampare, quindi selezionare l’icona Azione. Selezionare Stampa, selezionare la stampante, quindi selezionare Stampa.
Dispositivi Android più recenti (4.4 o versioni successive): Aprire il documento da stampare, quindi selezionare il pulsante Menu. Selezionare Stampa, selezionare la stampante, quindi selezionare Stampa.
Alcuni dispositivi richiedono il download del plugin Servizio di stampa
HP dallo store di Google Play.
Dispositivi Android meno recenti (4.3 o versioni precedenti): Scaricare l’app HP ePrint app da Google Play.
Windows Phone: Scaricare l’app HP AiO Remote da Windows Store.
 Maggiori informazioni sulla stampa da dispositivi mobili
Per maggiori informazioni su altre opzioni per la stampa da dispositivi mobili, comprese altre soluzioni ePrint, acquisire il codice QR o vedere la sezione “Stampa da dispositivi mobili” della Guida per l’utente.
8.2 Wi-Fi Direct
(solo modelli wireless)
Wi-Fi Direct consente ai dispositivi con Wi-Fi quali smartphone, tablet
o computer, di stabilire una connessione di rete wireless direttamente a una stampante senza dover utilizzare un router wireless o un punto di accesso.
La connessione avviene tramite il segnale Wi-Fi Direct della stampante allo stesso modo con cui si connette un dispositivo Wi-Fi a una nuova rete o un nuovo hotspot wireless.
Abilitare Wi-Fi Direct
Per impostare Wi-Fi Direct dal pannello di controllo, procedere come segue:
1. Nella schermata principale del pannello di controllo della stampante, toccare il pulsante Informazioni di connessione 


 e aprire
i seguenti menu:
•Wi-Fi Direct
•Impostazioni
•On/Off
2.Toccare la voce di menu On. L’impostazione viene salvata, quindi viene nuovamente visualizzato il menu Impostazioni Wi-Fi Direct del pannello di controllo.
 Per ulteriori informazioni sulla stampa e sulla configurazione wireless,
accedere a www.hp.com/go/wirelessprinting.
Rilevamento stampante
1.Dal dispositivo mobile, attivare il Wi-Fi e cercare le reti wireless.
2.Selezionare la stampante, che verrà mostrata come “HP-Print-nome- modello” come mostrato sul pannello di controllo della stampante.
Nome della stampante di esempio: HP-Print-29-AJ OJP 8620
9. ConfigurareHPePrintviae-mail(facoltativo)
Utilizzare HP ePrint via e-mail per stampare i documenti inviandoli come allegati e-mail all’indirizzo e-mail della stampante da qualsiasi dispositivo compatibile,
anche a periferiche che non sono sulla stessa rete.
Per utilizzare HP ePrint via e-mail, è necessario che la stampante soddisfi i seguenti requisiti:
•La stampante deve essere connessa a una rete cablata o wireless e avere accesso a Internet.
•I Servizi Web HP devono essere abilitati sulla stampante e la stampante deve essere registrata con HP Connected.
Abilitare i servizi Web HP (solo modelli con schermo asfioramento)
1.Nella schermata principale del pannello di controllo della stampante, toccare il pulsante Informazioni di connessione 


 e aprire i seguenti menu:
•HP ePrint
•Impostazioni
•Abilita servizi Web
2.Toccare la voce di menu OK. Il prodotto abilita i Servizi Web, quindi stampa una pagina di informazioni. La pagina di informazioni contiene il codice della stampante per la registrazione della stampante HP con HP Connected.
3.Per creare un account HP ePrint e completare il processo di configurazione, accedere all’indirizzo www.hpconnected.com.
10. Utilizzo della funzione di scansione
Utilizzare il software HP Scan nel computer per avviare un processo di scansione dalla stampante.
Windows |
OS X |
Aprire HP Printer Assistant, selezionare Scansione, quindi Scansione di un |
Fare clic su Applicazioni, selezionare HP, quindi selezionare HP Easy Scan. |
documento o di una foto. |
|
12
LaserJet Pro MFP M227-M229
LaserJet Ultra MFP M230-M231
Guía de introducción
www.hp.com/support/ljmfpM227 |
www.register.hp.com |
IMPORTANTE:
Siga los pasos 1-3 del folleto de configuración del hardware de la impresora y, después, continúe con el paso 4.
4. Configuracióninicialenelpaneldecontrol
Después de encender la impresora, espere a que se inicialice. Para navegar por el panel de control, utilice los botones de flecha y el botón OK. Siga las indicaciones del panel de control para configurar estos ajustes:
•Idioma
•Ubicación
•Configuración predeterminada
En Configuraciónpredeterminadaseleccione una de estas opciones:
•Autogestionado: configuración predeterminada optimizada para la mayoría de los usuarios, que incluye pasos de instalación y configuración guiados y actualizaciones automáticas.
•Gestionado por TI: ajustes predeterminados optimizados para una gestionabilidad de la flota.
La configuración puede personalizarse completamente después de la configuración inicial.
NOTA: Seleccione Imprimir página de información para imprimir una página que indica cómo cambiar la configuración predeterminada.
English.............. |
1 |
Français............. |
4 |
Deutsch............. |
7 |
Italiano............ |
10 |
Español............ |
13 |
Català.............. |
16 |
Dansk.............. |
19 |
Nederlands...... |
22 |
Eesti................ |
25 |
Suomi.............. |
28 |
Latviešu........... |
31 |
Lietuvių........... |
34 |
Norsk............... |
37 |
Português........ |
40 |
Svenska........... |
43 |
5. Seleccióndelmétododeconexión
Conexión USB directamente entre la impresorayelequipo
Utilice un cable USB de tipo A a B.
Windows
1.No conecte el cable USB antes de instalar el software. El proceso de instalación del software muestra un aviso para conectar el cable en el momento adecuado. Si el cable ya está conectado, reinicie la impresora cuando el proceso de instalación muestre el aviso para conectar elcable.
2.Continúe con el paso “6. Localización o descarga de los archivos de instalacióndelsoftware”.
NOTA: Durante la instalación del software, seleccione la opción
ConectardirectamenteesteequipomedianteuncableUSB.
OS X
1.Para OS X, conecte el cable USB entre el equipo y la impresora antes de instalar el software.
2.Continúe con el paso “6. Localización o descarga de los archivos de instalacióndelsoftware”.
Conexión de la red inalámbrica (solo modelos inalámbricos)
Paneles de control con pantalla táctil
1.Para conectar la impresora a una red inalámbrica (Wi-Fi), toque el botón Configuración inalámbrica en el panel de control de la impresora.
2.Toque el menú Configuracióninalámbricay, a continuación, Asistente deconfiguracióninalámbrica. Seleccione el nombre de la red en la lista SSID o introduzca el nombre de la red si no lo encuentra en la lista.
3.Escriba la contraseña en el teclado y, a continuación, toque el botón
Aceptar.
4.Espere mientras la impresora establece una conexión de red nueva.
5.En el panel de control de la impresora, toque el botón Red. Si aparece una dirección IP, se habrá establecido la conexión de red. Si no, espere unos minutos más e inténtelo de nuevo. Anote la dirección IP que se usará durante la instalación del software. Dirección IP de ejemplo: 192.168.0.1
6.Para imprimir desde un equipo, continúe con el paso “6. Localización odescargadelosarchivosdeinstalacióndelsoftware”. Para imprimir solamente desde un teléfono o una tableta, continúe con el paso “8.Impresiónmóvileinalámbrica(opcional)”.
Conexión a una red por cable (Ethernet)
(opcional)
Utilice un cable de red estándar.
1.Conecte el cable de red a la impresora y a la red. Espere unos minutos a que la impresora obtenga la dirección de red.
2.Continúe con el paso “6. Localización o descarga de los archivos de instalacióndelsoftware”.
 NOTA: Para Windows, durante la instalación del software, seleccione la opción Conectaratravésdeunared.
 ConfiguraciónmanualdeladirecciónIP
Consulte la guía del usuario de la impresora para obtener información acerca de cómo configurar la dirección IP de manera manual. Consulte la sección “Solución de problemas” de esta guía.
13
6. Localización o descarga de los archivos de instalación del software
 Método1:DescargadesdeHPEasyStart
(Windows y OS X)
1.Vaya a 123.hp.com/laserjet y haga clic en Descargar.
2.Siga las instrucciones e indicaciones en pantalla para guardar el archivo en el equipo.
3.Inicie el archivo de software de la carpeta en la que se guardó el archivo y continúe con “7. Instalación del software”.
 Método2:Descargadesdeelsitiowebdeasistencia
delaimpresora(WindowsyOSX)
1.Vaya a www.hp.com/support/ljmfpM227P.
2.Seleccione Software y controladores.
3.Descargue el software para su modelo de impresora y sistema operativo.
4.Inicie el archivo de software de la carpeta en la que se guardó el archivo y continúe con “7. Instalación del software”.
 Método3:InstalacióndesdeelCDdelaimpresora
(solo Windows)
1.Inserte el CD de la impresora en el equipo.
2.Continúe con “7. Instalación del software”.
 Notas sobre la instalación
Para obtener más información acerca del software de la impresora, consulte el archivo de notas sobre la instalación del CD de la impresora.
7. Instalación del software
Solución de Windows
1.Inserte el CD de la impresora en el equipo o inicie el archivo de instalación del software descargado de la Web.
2.El programa de instalación del software detecta el idioma del sistema operativo y, después, muestra el menú principal del programa de instalación en ese idioma. Cuando se realiza la instalación desde el CD, si el programa de instalación no se inicia después de 30 segundos, vaya a la unidad de CD del equipo e inicie el archivo SETUP.EXE.
3.En la pantalla Selección de software se muestran los detalles del software que se va a instalar.
•La instalación de software recomendada incluye el controlador de impresión y el software para todas las funciones disponibles de la impresora.
•Para personalizar el software instalado, haga clic en el enlace
Personalizar selecciones de software. Cuando termine, haga clic en el botón Siguiente.
4.Siga las instrucciones en pantalla para instalar el software.
5.Cuando se le indique que seleccione un tipo de conexión, seleccione la opción correspondiente al tipo de conexión:
•ConectardirectamenteaesteequipomedianteuncableUSB.
•Conectaratravésdeunared.
•Ayudarmeaconfigurarunaconexióninalámbricaporprimeravez.
NOTA: Al realizar la conexión a través de una red, el modo más sencillo de detectar la impresora es seleccionar Buscar mi producto automáticamente en la red.
NOTA: En el caso de una instalación inalámbrica, seleccione la opción
Ayudarmeaconfigurarunaconexióninalámbricaporprimeravezy, a continuación, Sí,quierorecuperarlaconfiguracióninalámbricaen elequipo.
Solución OS X
1.Abra HP Easy Start.
2.Siga las instrucciones que se indican para completar la configuración del dispositivo y la instalación del software.
Readiris Pro 15 para HP
Readiris Pro le da a su producto HP funciones avanzadas de reconocimiento óptico de caracteres (OCR) y escaneo. Convierta fácilmente los documentos impresos en archivos PDF que puede editar, guardar y compartir, además de poder hacer búsquedas.
Para descargar el software de la Web, vaya a: www.hp.com/support/ljmfpM227P
Seleccione Controladores y el sistema operativo correspondiente; después, haga clic en Siguiente. Haga clic en Aplicación de terceros y, a continuación, en el botón Descargar.
14
8.  Impresión móvil e inalámbrica (opcional)
8.1 Conexión del dispositivo a la red inalámbrica
Para imprimir desde un teléfono o una tableta, conecte el dispositivo a la misma red inalámbrica que la impresora.
Dispositivos iOS de Apple (AirPrint): abra el elemento que desee imprimir y seleccione el icono Acción. Seleccione primero Imprimir, después la impresora y por último, de nuevo Imprimir.
Dispositivos Android recientes (4.4 o más recientes): abra el elemento que desee imprimir y seleccione el botón Menú. Seleccione primero Imprimir, después la impresora y por último, de nuevo, Imprimir.
8.2 Wi-Fi Direct
(solo modelos inalámbricos)
Wi-Fi Direct permite que los dispositivos con capacidad Wi-Fi, como por ejemplo, los teléfonos inteligentes, las tabletas o los equipos, realicen conexiones de red inalámbricas directamente a la impresora sin utilizar un direccionador ni un punto de acceso inalámbricos. Conéctese a la señal directa de Wi-Fi Direct de la impresora del mismo modo que conecta un dispositivo con capacidad Wi-Fi a una red inalámbrica nueva o a un punto de acceso inalámbrico.
Algunos dispositivos requieren que se descargue el complemento HP Print Service de Play Store de Google.
Dispositivos Android antiguos (4.3 o anteriores): descargue la aplicación HP ePrint de Play Store de Google.
Windows Phone: descargue la aplicación HP AiO Remote de Windows Store.
 Obtener más información sobre la impresión móvil
Para obtener más información acerca de otras opciones de impresión móvil, incluidas las soluciones adicionales de ePrint, escanee el código QR o consulte la sección “Impresión móvil” de la guía del usuario.
Activar Wi-Fi Direct
Para configurar Wi-Fi Direct desde el panel de control, realice los pasos siguientes:
1.En la pantalla de inicio del panel de control de la impresora, toque el botón Información de conexión 


 y abra los menús siguientes:
•Wi-Fi directo
•Configuración
•Activada/desactivada
2.Toque el elemento del menú Activada. La impresora guarda la configuración y después se vuelve a mostrar el menú Configuración deWi-FiDirecten el panel de control.
 Para obtener más información sobre la impresión inalámbrica y la configuración inalámbrica, visite www.hp.com/go/wirelessprinting.
Detección de la impresora
1. En el dispositivo móvil, active la conectividad Wi-Fi y busque redes inalámbricas.
2. Seleccione la impresora, que en el panel de control de la impresora se muestra como “HP-Print-modelo-nombre”. Nombre de impresora de ejemplo: HP-Print-29-AJ OJP 8620
9. ConfiguracióndeHPePrintatravésdelcorreoelectrónico(opcional)
Utilice HP ePrint a través del correo electrónico para imprimir documentos enviándolos como adjunto de un mensaje de correo electrónico a la dirección de correo de la impresora desde cualquier dispositivo que tenga acceso al correo electrónico, incluso desde dispositivos que no están en la misma red.
Para utilizar HP ePrint a través del correo electrónico, la impresora debe cumplir los requisitos siguientes:
•La impresora debe estar conectada a una red por cable o inalámbrica y disponer de acceso a Internet.
•Los Servicios Web de HP deben estar activados en la impresora, la cual debe estar registrada en HP Connected.
Activación de los servicios Web de HP (solo para los modelos con pantalla táctil)
1.En la pantalla de inicio del panel de control de la impresora, toque el botón
Información de conexión 


 y abra los menús siguientes:
•HP ePrint
•Configuración
•Activar servicios web
2.Toque el elemento del menú Aceptar. La impresora activa los Servicios Web y luego imprime una página de información. La página de información contiene un código de la impresora que se utiliza para registrar la impresora HP en
HP Connected.
3.Vaya a www.hpconnected.com para crear una cuenta HP ePrint y completar el proceso de instalación.
10. Uso de la función de escaneado
Utilice el software HP Scan en el equipo para iniciar un trabajo de escaneado en la impresora.
Windows |
OS X |
Abra HP Printer Assistant, seleccione Escanear y a continuación, seleccione |
Haga clic en Aplicaciones y seleccione HP y, a continuación, HP Easy Scan. |
Escanear un documento o una fotografía. |
|
15
 Loading...