


 Gas Dryer
DGGX1US
Installation instructions

 WARNING
For your safety the information in this manual must be followed to minimize the risk of death, personal injury, fire, explosion, or property damage.
Do not store or use gasoline or other flammable vapors and liquids near this or any other appliance.
What to do if you smell gas
Do not try to light or start any appliance.
Do not touch any electrical switch; do not use any telephone in your building.
Clear the room, building or area of all occupants.
Immediately call your gas supplier from a neighbor’s telephone. Follow the gas supplier’s instructions.
If you cannot reach your gas supplier, call the fire department.
A qualified installer, service agency or the gas supplier must perform installation and service.
The Governor of California is required to publish a list of substances known to the state of California to cause cancer or reproductive harm and requires business to warn customers of potential exposures to such substances.
Gas appliances contain or produce substances, which can cause death, or serious illness and which are known to the State of California to cause cancer, birth defects, or other reproductive harm. To reduce the risk from substances in fuel or from fuel combustion, make sure this appliance is installed, operated, and maintained according to the manufacturers instructions.
2

Important safety instructions
 WARNING
To reduce the risk of fire, electric shock, or injury to persons when using your appliance, follow basic precautions, including the following:
1.Read all instructions before using the appliance.
2.Installation and service must be performed by a qualified installer, service agency or the gas supplier.
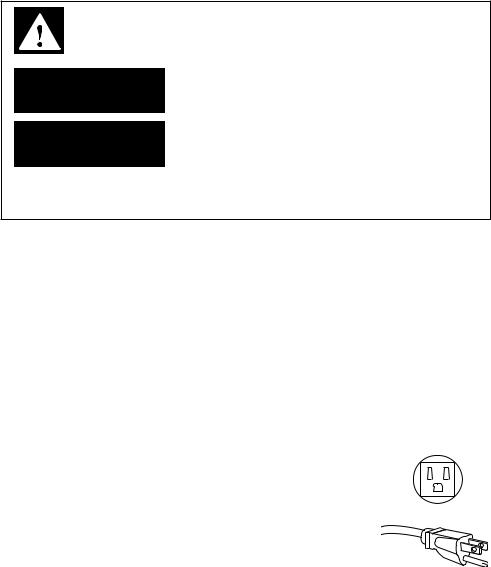
3.Make sure the power cord is located so that it will not be stepped on, tripped over or otherwise subject to stress or damage.
4.Pressing the POWER button to turn the dryer off, does NOT disconnect the dryer from the power supply, even though the dryer lights are out.
5.Do not operate this dryer if it is damaged, malfunctioning, partially disassembled or has missing or broken parts, including a damaged cord or plug.
6.Do not dry articles that have been previously cleaned in, washed in, soaked in, or spotted with, gasoline, dry-cleaning solvents, other flammable or explosive substances as they give off vapors that could ignite or explode.
7.Close supervision is necessary if this dryer is used by or near children. Do not allow children to play inside, around or with this dryer or any other appliance.
8.Before the appliance is removed from service or discarded, remove the lid and drum door to the drying compartment.
9.Do not reach into the appliance if the drum is moving.
10.Do not install or store this appliance where it is exposed to water and or the weather.
11.Do not tamper with the controls or the lid lock.
12.Do not repair or replace any part of the appliance or attempt any servicing unless specifically recommended in the user-maintenance instructions or in published user-repair instructions that you understand and have the skills to carry out.
13.Unless specifically recommended by their manufacturer, do not use fabric softeners or similar products in a tumble dryer.
14.Do not use heat to dry articles containing foam rubber or similar textured rubber-like materials.
15.Check to see if the lint bucket needs emptying. Empty before the lint reaches the top of the transparent section (usually once a week).
16.Keep area around the exhaust opening and adjacent surrounding areas free from the accumulation of lint, dust, and dirt.
17.Have the interior of the appliance and exhaust duct cleaned periodically by qualified service personnel.
18.Do not place items exposed to cooking oils or other vegetable oils in your dryer. Items contaminated with cooking and other vegetable oils may contribute to a chemical reaction that could cause a load to catch fire.
SAVETHESE INSTRUCTIONS |
3 |
|
Read this before you start installing your dryer
This is the safety alert symbol. This symbol alerts you to hazards that can kill or hurt you and others. The safety alert symbol and the word DANGER or WARNING will precede all safety messages. These words mean:
 DANGER
  WARNING
You can be killed or seriously injured if you don’t immediately follow instructions.
You can be killed or seriously injured if you don’t follow instructions.
All safety messages will identify the hazard, tell you how to reduce the chance of injury, and tell you what can happen if the instructions are not followed.
Check to make sure you have all the tools and parts necessary to correctly install this appliance.
Tools required
1⁄4’’nut driver or socket wrench
Phillips screwdriver
Flat-blade screwdriver
Adjustable wrench that opens to 1’’or 1’’hex-head socket wrench (for adjusting the feet)
Adjustable wrench 8”or 10”(20cm or 25cm) for gas connections
Level
Pipe joint compound (pipe dope or tape) for gas pipe connections that is resistant to LP Propane, Butane and Natural Gas
Caulking gun and compound (for installing new exhaust vent)
Gloves
Safety glasses
Knife
Duct tape
Parts supplied
2 feet inserts
A power supply cord is supplied already connected to the gas dryer
Check to make sure all parts have been supplied.
Accessories
Natural Gas to LP Conversion Kit Part No 395489
LP to Natural Gas Conversion Kit Part No 395490
Mobile Home Installation Kit Part No 395488
Drying Rack Part No 395332P
Parts needed
Check with local codes and read electrical, gas and venting requirements before purchasing parts.
4

To the installer
The correct installation of the dryer is your responsibility.
Be sure you read the following instructions carefully before you start to install the dryer. These instructions should be left with the home owner for future reference.
It is your responsibility to:
Observe all governing codes and ordinances.
Check code requirements. Some codes limit or do not permit installation of clothes dryers in garages, closets, mobile homes or sleeping quarters. Contact your local building inspector.
Adhere to these installation instructions.
Allow for spacing requirements with side by side installations (refer page 6).
Make sure you have all items necessary for correct installation.
Properly install the dryer.
Contact a qualified installer to ensure that the electrical and gas installation meets all national and local codes and ordinances.
Location requirements
 WARNING
Explosion Hazard
Keep flammable materials and vapours, such as gasoline, away from the dryer.
Place dryer at least 18 inches (46 cm) above the floor for a garage installation.
Failure to do so can result in death, explosion, fire, or burns.
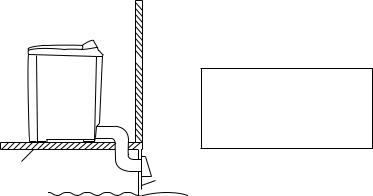
The dryer must be installed or stored in an area which is not exposed to water or weather.
It is extremely important that the dryer is installed in a well ventilated location. This dryer must exhaust air outdoors. Do not install the dryer in any room or closet which does not permit the free flow of replacement air.
Before installing the dryer ensure that there is sufficient height to fully open the lid. Allow sufficient room behind the dryer for the exhaust. The air intake is at the rear of the dryer. Ensure that there is a sufficient air passage on each side of the dryer for intake air.
5

The area in which the dryer is located must be kept clear and free from combustible materials, gasoline and other flammable vapours and liquids. A dryer produces combustible lint so the area around the dryer must be cleaned regularly to keep it free of lint.
This dryer can only be vented from the rear and must be exhausted to the outdoors.
Alcove or closet installation
When installing a dryer in a closet/alcove it must be WARNING exhausted to the outdoors. No other fuel burning
appliance can be installed in the same closet or alcove.
The top opening area in the door must be a minimum of 48 square inches (310cm2) and the bottom opening area must have a minimum of 24 square inches (155cm2). These openings must never be obstructed (a louvred door with the minimum air opening is acceptable). Minimum installation clearances are required but more clearance is recommended.
|
|
|
|
min 56" |
|
|
|
|
(1372 – 1422mm) |
1" (25mm) |
1" (25mm) |
1" (25mm) |
min 2" (50mm) |
min 3" (76mm) |
|
|
|
48 sq" (310cm2) |
|
total ventation area 72 sq" (465cm2)
6 |
24 sq" (155cm2) |
|

Dimensions
Lid clearance
Check that there is enough clearance for the lid to fully open.
|
|
|
|
|
|
|
|
|
|
|
|
|
|
|
|
|
|
|
|
|
|
|
|
|
|||
|
|
|
|
|
|
|
|
|
|
||||
|
|
|
|
|
|
|
|
|
|||||
|
|
|
|
|
|
||||||||
|
|
|
|
|
|
|
|
|
|
||||
|
|
|
|
|
|
|
|
|
|
|
|||
|
|
|
|
|
|
|
|
|
|
||||
|
|
|
|
|
|
|
|
|
|||||
|
|
|
|
|
|
|
|
|
|
||||
|
|
|
|
|
|
|
|
|
|
|
|||
|
|
|
|
|
|
|
|
|
|
||||
|
|
|
|
|
|
|
|
|
|||||
|
|
|
|
|
|
|
|
|
|
|
|
|
|
|
|
|
|
|
|
|
|
|
|
|
|
|
|
|
|
|
|
|
|
|
|
|
|
|
|
|
|
|
|
|
Exhaust outlet location
Exhaust outlet
|
4 |
(111mm) |
|
" |
|
|
8 |
|
|
3/ |
|
13 7/8" (352mm) |
13 1/8" (333mm) |
|
7
Mobile home installation
The installation of the dryer in a mobile home must conform to the Manufactured Home Construction and Safety Standard Title 24 CFR, Part 32-80 {formerly the Federal Standard for Mobile Home Construction and Safety, Title 24 HUD (Part 280), 1975} for the United States.
When installing a dryer in a mobile home, provisions for anchoring the dryer to the floor must be made.
A Mobile Home Installation kit is available with instructions (see Accessories page 4). Locate in an area that has adequate make up air (a minimum of 72 square inches of unobstructed opening is required).
Mobile home installations must be exhausted to the outdoors with the exhaust duct termination securely fastened to the mobile home structure, using materials that will not support combustion.
The exhaust duct must not terminate beneath the mobile home. See the section on exhausting for more information.

|
|
|
|
|
|
8
 Loading...