


Fisher & Paykel DE4060M1, DE5060M1 User Manual

INSTALLATION INSTRUCTIONS
USER GUIDE
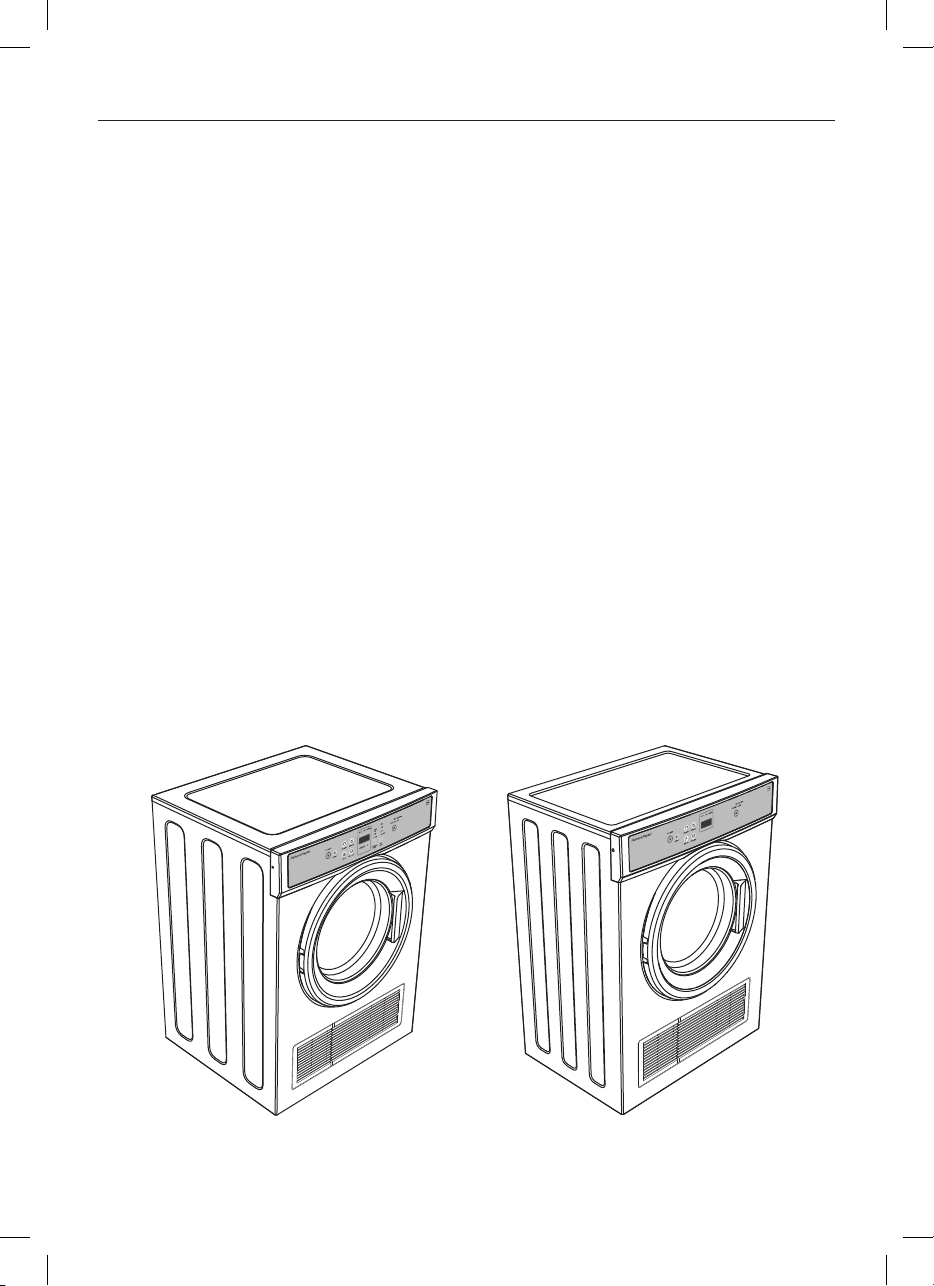
Vented clothes dryer
DE5060M and DE4060M models
NZ AU SG ROW


CONTENTS
Introduction 3
Safety and warnings 4
Installation instructions 7
Getting started quickly 16
Dryer controls 18
Sorting and loading 19
Drying cycles 22
Drying cycle options 24
Cleaning your dryer 27
Before you call for service 28
Troubleshooting 29
Manufacturer’s Warranty 33
Customer Care 35
IMPORTANT!
SAVE THESE INSTRUCTIONS
The models shown in this user guide may
not be available in all markets and are
subject to change at any time. For current
details about model and specification
availability in your country, please go to
our website www.fisherpaykel.com or
contact your local Fisher & Paykel dealer.
Registration
Register your product with us so we can
provide you with the best service possible.
To register your product visit our website:
www.fisherpaykel.com
1

INTRODUCTION
Welcome to your Fisher & Paykel vented dryer.
Thank you for purchasing a Fisher & Paykel clothes dryer. We are proud of this dryer
andtrust it will serve you well for many years.
At Fisher & Paykel we aim to provide innovative products that are simple to use,
ergonomic, energy efficient and kind to the environment. Thousands of tonnes of
laundry and 80 years of laundry experience have been programmed into your dryer
tohelp give you the best possible performance.
Your new dryer gives you the convenience of tumble drying and your clothes the
advantage of not being subjected to the harsh overdrying effects of the sun. Your
clothes will feel softer, retain their shape better and require less ironing. This dryer
has been specifically designed to complement our front loading and top loading
Fisher&Paykel washers.
Your vented dryer has numerous cycles and options so you can perform many drying
tasks with ease, allowing you to spend less time in the laundry. All of our dryers have
the ability to automatically sense when your clothes are dry, meaning your dryer is more
efficient, making it kinder on your wallet and the environment.
Please take the time to read these instructions carefully before you begin using your
dryer. Following the advice in this user guide will ensure you get the performance
you expect from your dryer and that you get the best possible results. Keep these
instructions for future reference and pass them on with your dryer, if it changes hands.
We hope you enjoy your new dryer. We have certainly enjoyed designing it for you.
Vented clothes dryer
3
SAFETY AND WARNINGS
Meaning of symbols on the dryer
Warning: Risk of fire/Flammable materials
Read the instructions
!
WARNING!
Fire Hazard
Only dry fabrics that have been washed with water.
Do not use heat to dry articles containing foam rubber or similarly
textured rubber–like materials, dry on ‘Air Dry’.
Do not stop a tumble clothes dryer before the end of the drying
cycleunless all items are removed and spread out, in order to dissipate
the heat.
A clothes dryer produces combustible lint; the lint filter must be
cleaned before each drying cycle.
Failure to follow the warnings outlined in these user instructions can
cause a fire hazard.
Failure to follow these instructions can result in death or personal injury.
IMPORTANT SAFETY INSTRUCTIONS
WARNING! When using this appliance always exercise basic safety precautions
including the following:
Dryer use
The tumble dryer is intended only for drying textile material washed in water.
Undergarments that contain metal reinforcements should not be placed in the dryer.
Damage to the dryer can result if the metal reinforcements come loose during drying.
If you wish to dry these items use a drying rack or place in a garment bag.
Check and remove all objects from pockets, eg lighters and matches.
Never dry rubber articles, or any plastic items or film, eg plastic lined tablecloths
andbaby bibs.
Clothes should go through the cool down/airing phase in the final part of the cycle.
This ensures items are left at a temperature where they will not be damaged. If for
any reason the dryer is stopped before the cycle has finished, dry clothes should be
removed immediately and not left in the dryer. Clothes should be quickly spread out
flat to cool so heat can dissipate, not left bunched up, eg in a clothes basket.
This dryer has been designed for domestic use only, not for commercial applications,
such as massage/beauty clinics where there may be increased lint accumulation or
flammable materials in the atmosphere or load.
Do not operate this product without the lint filter in place or allow lint to accumulate
in or around the dryer.
This dryer is not intended for use by persons (including children) with reduced
physical, sensory or mental capabilities, or lack of experience and knowledge,
unless given supervision or instruction concerning the use of the dryer by a person
responsible for their safety.
4

SAFETY AND WARNINGS
Children should be supervised to ensure they do not play with the dryer.
Unplug the machine from the power supply when it is not in use.
Do not swing on or put weight on the door.
Your dryer is designed to stop operating in the event of power outage. When power
isresumed, the machine will remain off until the ‘POWER’ button is pressed. To
restart the dryer, press ‘POWER’ , select your drying cycle and press .
Never attempt to repair the dryer yourself.
The only user-removable part of the dryer is the lint filter. No other parts are designed
to be removed by anyone other than aFisher & Paykel Authorised Repairer.
For problems that cannot be solved from information in this User Guide, turn off and
unplug your dryer and contact a Fisher & Paykel Authorised Repairer.
When disposing of the dryer, it is recommended that the door is removed to avoid
children getting trapped inside, and that the electrical cable is cut off close to the dryer.
IMPORTANT!
We do not recommend the use of extension cords or portable electrical outlet devices
for safety reasons.
Lint
Accumulated lint in the dryer can become a fire hazard; it also reduces the efficiency
of the dryer by causing longer drying times and increased power consumption.
Clean the lint filter before every load.
Ensure the area around the dryer is clear of lint.
At regular intervals have the interior of the dryer cleaned of any accumulated lint.
This must be done by a Fisher & Paykel trained and supported service technician. This
must be done when the dryer installation is changed from free standing or inverted, or
vice versa.
The dryer exhaust ducting should be inspected and cleaned periodically to remove
accumulated lint.
Spontaneous combustion
IMPORTANT!
To reduce the risk of fire in a tumble dryer the following should be observed:
Items that have been spotted or soaked with vegetable oil or cooking oil are a fire
hazard and should not be placed in a tumble dryer.
Oil-affected items can ignite spontaneously, especially when exposed to heat sources
such as a tumble dryer. The items become warm causing an oxidation reaction in the
oil. This oxidation creates heat. If the heat cannot escape the items can become hot
enough to catch fire. Piling, stacking or storing oil-affected items can prevent heat
from escaping creating a fire hazard.
If it is unavoidable that fabrics that contain vegetable oil, cooking oil or have been
contaminated by hair care products be placed in a tumble dryer, they should first be
washed in hot water with extra detergent – this will reduce, but not eliminate the fire
hazard. The cool down cycle of the dryer should be used to reduce the temperature
ofthese items. They should not be removed from the tumble dryer and piled or
stacked while hot.
Items that have previously been cleaned in, washed in, soaked in or spotted with
flammable liquids or solids, eg petrol/gasoline, kerosene, dry cleaning solvents,
vegetable or cooking oil, acetone, denatured alcohol, some brands of spot removers,
turpentine, waxes and wax removers or other flammable or explosive substances
should not be placed in a tumble dryer.
Do not dry unwashed items in the tumble dryer.
5

SAFETY AND WARNINGS
The dryer is not to be used if industrial chemicals have been used for cleaning.
Fabric Softeners or similar products should not be used in a tumble dryer to eliminate
the effects of static electricity, unless this practice is specifically recommended by the
manufacturer of the fabric softener product.
Rubber backed articles, foam rubber (latex foam), clothes or pillows fitted with foam
rubber pads, fibreglass, shoes containing rubber, shower caps, babies waterproof
napkin covers and waterproof textiles should not be dried in the dryer. These
materials can when heated produce fire by spontaneous combustion.
The maximum mass of dry textiles depends on your model. DE5060M model is rated
at5 kg. The DE4060M model is rated at 4 kg. Do not overload yourdryer.
6

INSTALLATION INSTRUCTIONS
Please read and follow the ‘Safety and warnings’ and ‘Installation instructions’
sections carefully before using your dryer!
Accessories
Please check you received the following accessories with your Fisher & Paykel dryer.
Youwill find them inside the drum:
1 x Installation instructions and user guide
1 x Wall mounting kit
1 x Duct adapter
1 x Inverted panel
Unpacking
To ensure the best performance from your new dryer please follow the instructions below.
Removing the packaging
Remove the outer packaging (including the polystyrene packer and plastic wrapping).
1
All packaging must be removed prior to use.
IMPORTANT!
Ensure packaging materials are kept out of reach of children.
Please help protect the environment and dispose of the packaging from around the
dryer in an environmentally friendly manner.
Tilt the dryer backwards and ‘walk’ it off the base one foot at a time. Not doing so may
2
cause damage to your floor and dryer.
Remove all packaging and accessories from inside the drum and ensure you remove
3
protective covers from the door and console.
Location
IMPORTANT!
The dryer must be installed in a well-ventilated, dustfree environment.
The dryer must not be installed on any textured floor
coverings (eg carpet, rugs).
Do not install the dryer behind a lockable door, sliding
door, or behind a door where the hinge is on the
opposite side to that of the dryer in such a way that the
full opening of the door is inhibited. Ensure the dryer
door can always be opened fully.
Do not install the dryer outside, in a damp place, where
there is a risk of freezing, where it may be rained on, in
direct sunlight or close to a source of heat.
Do not place your dryer on top of its power cable.
7

TITLE TO GO HERE
INSTALLATION INSTRUCTIONS
Venting
Correct installation is very important for all dryers to ensure maximum efficiency
andsafety.
IMPORTANT!
Never run the dryer unless the airflow system is free from obstruction.
There must be adequate ventilation to avoid the back flow of gases into the room from
appliances burning fuels, including open fires, when operating the dryer.
Exhaust air must not be discharged into a flue which is used for exhausting fumes from
appliances burning gas or other fuels.
External venting
Your dryer has been designed to be vented outside to provide the following advantages:
Ensures optimum efficiency by preventing recirculation of moist air.
Eliminates condensation on walls and ceilings.
Reduces the chance of lint being sucked into the dryer.
Prevents lint and other fine particles being blown into the room.
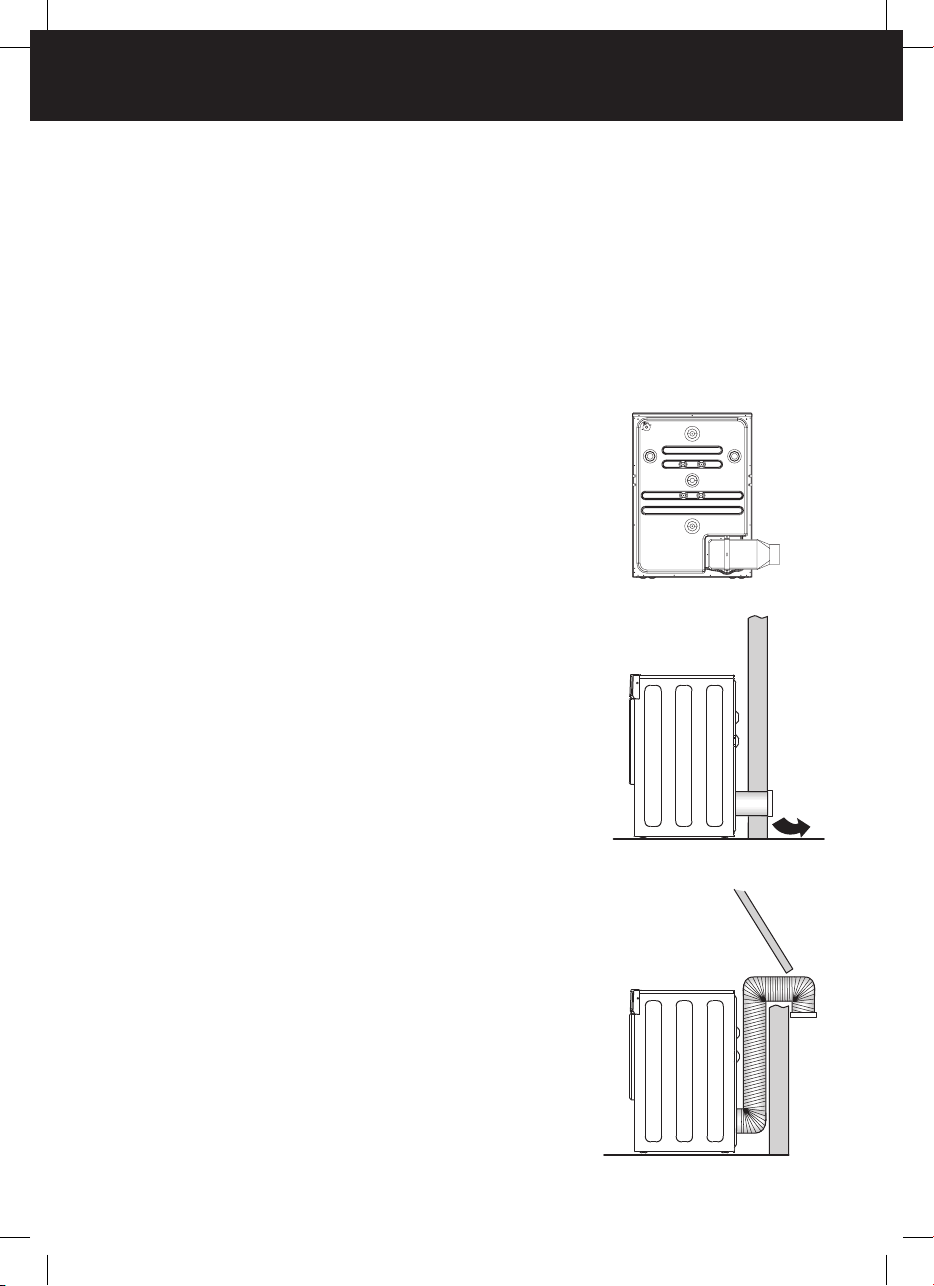
All external venting systems must be:
Made from 100 mm diameter flexible foil sleeved with a galvanised metal pipe where
thevent system goes through the wall, or 100 mm diameter galvanised metal piping.
Exhausted outside and not into another confined space, eg the roof cavity of a house.
Fitted with a vent cap outside to stop rain water entering the dryer exhaust system.
Angled to avoid condensation running back into the dryer.
The vent system should be a maximum of two metres with no more than three 90° bends.
Vent systems over two metres long require special installation. Contact a Fisher & Paykel
Authorised Repairer.
Internal venting
The dryer is set up in the factory for front venting. If front venting is used there must be
adequate ventilation to avoid the build up of moisture in the room, which can affect the
performance of the dryer. Venting must comply with local by-laws and regulations.
8
TITLE TO GO HERE
INSTALLATION INSTRUCTIONS
Installation options
There are two different ways your dryer can be positioned. Freestanding or inverted and
mounted on a wall.
Free standing
The dryer stands on the floor and can easily be moved into position.
Move the dryer into the desired position. Do not lift the dryer by the top panel.
1
Have a minimum clearance on all sides of at least 20 mm.
2
Have a minimum clearance at the rear of 75mm. The spacers from the accessory wall
3
mounting kit can be used to set this distance.
Install the dryer on a stable and level floor.
4
Free standing venting options
Note: the vent system should be a maximum
oftwometres with no more than three 90⁰ bends.
Through-wall venting
The dryer is vented directly through the wall using
Kit part number PD-SVHCW4, in combination with
the duct adaptor supplied with the dryer. The dryer
is vented with a kit that can be positioned to remove
the air to the side. Kit part number PD-DK4W.
Through-wall venting with kit
Movable venting
The dryer is vented through a window using kit
partnumber PD-F0408, in combination with the
duct adaptor supplied with the dryer. This requires
the dryer to be a minimum distance of 140mm from
the wall to ensure the ducting is not restricted with
tight bends or can be crushed.
Before a rear venting option is installed the dryer
must be changed from the front venting factory
setup. Remove the outlet grille from the front
left-hand side and replace with the outlet cover
from the rear left-hand side. These covers should
begently pried at the sides to prevent damage.
Front venting
Front venting is the only recommended option for
venting into the room. The dryer is set up for front
venting when it leaves the factory.
Note: All efforts should be made to vent the dryer
externally if possible, to avoid moisture build up in
thearea around the dryer.
Through-wall venting
Movable venting
9

INSTALLATION INSTRUCTIONS
Inverted wall mounting installation
Your dryer has been designed to be inverted and mounted on the wall above a
washer or tub. A wall mounting kit must be used. Inverting allows access to the
dryer control panel.
Tools and parts required:
Drill and 3mm bit
Phillips head screwdriver
Wall mounting kit includes:
2 x Plastic spacers
2 x Wall hanging brackets
2 x Hanging hook
4 x Wood screws
6 x Screws for hanging hooks and plastic spacers
10
 Loading...