


 Loading...
Epson Ensemble HD 1080, Ensemble HD 720, Ensemble HD 6100, Ensemble HD 6500, Ensemble HD 8500 User's Guide
...User’s Guide

Copyright Notice
All rights reserved. No part of this publication may be reproduced, stored in a retrieval system, or transmitted in any form or by any means, electronic, mechanical, photocopying, recording, or otherwise, without the prior written permission of Seiko Epson Corporation.
The information contained herein is designed only for use with this Epson product. Epson is not responsible for any use of this information as applied to other equipment.
Neither Seiko Epson Corporation nor its affiliates shall be liable to the purchaser of this product or third parties for damages, losses, costs, or expenses incurred by purchaser or third parties as a result of: accident, misuse, or abuse of this product or unauthorized modifications, repairs, or alterations to this product, or (excluding the U.S.) failure to strictly comply with Seiko Epson Corporation’s operating and maintenance instructions.
Legal Notice
This product incorporates copyright protection technology that is protected by U.S. patents and other intellectual property rights. Use of this copyright protection technology must be authorized by Macrovision, and is intended for home and other limited viewing uses only, unless otherwise authorized by Macrovision. Reverse engineering or disassembly is prohibited.
Trademarks
Epson is a registered trademark and Epson Exceed Your Vision is a logomark of Seiko Epson Corporation.
PowerLite and PrivateLine are registered trademarks, Ensemble HD is a trademark, and Epson Connection is a service mark of Epson America, Inc.
The DVD Video logo  is a trademark of DVD Format/Logo Licensing Corporation.
Manufactured under license from Dolby Laboratories. “Dolby”, “Pro Logic”, and the double-D symbol are trademarks of Dolby Laborarories.
“DTS” and “DTS Digital Surround” are registered trademarks of Digital Theater Systems, Inc.
General Notice: Other product names used herein are for identification purposes only and may be trademarks of their respective owners. Epson disclaims any and all rights in those marks.
This information is subject to change without notice.
© 2008 Epson America, Inc. 4/08 |
CPD-24528 |
2
Important Safety Instructions
CAUTION: To reduce the risk of electric shock, do not remove the cover (or back). No user serviceable parts inside. Refer servicing to qualified personnel.
WARNING: To reduce the risk of fire or electric shock, do not expose this apparatus to rain or moisture.
The lightning flash with arrowhead, within an equilateral triangle, is intended to alert the user to the presence of uninsulated “dangerous voltage” within the product’s enclosure that may be of sufficient magnitude to constitute a risk of electrical shock to persons.
The exclamation point within an equilateral triangle is intended to alert the user to the presence of important operating maintenance (servicing) instructions in the literature accompanying the appliance.
1.Read these instructions.
2.Keep these instructions.
3.Heed all warnings.
4.Follow all instructions.
5.Do not use this apparatus near water.
6.Clean only with dry cloth.
7.Do not block any ventilation openings. Install in accordance with the manufacturer’s instructions.
8.Do not install near any heat sources such as radiators, heat registers, stoves, or other apparatus (including amplifiers) that produce heat.
9.Do not defeat the safety purpose of the polarized or grounding-type plug. A polarized plug has two blades with one wider than the other. A grounding type plug has two blades and a third grounding prong. The wide blade or the third prong is provided for your safety. If the provided plug does not fit into your outlet, consult an electrician for replacement of the obsolete outlet.
10.Protect the power cord from being walked on or pinched particularly at plugs, convenience receptacles, and the point where they exit from the apparatus.
11.Only use attachments/accessories specified by the manufacturer.
12.Unplug this apparatus during lightning storms or when unused for long periods of time.
13.Refer all servicing to qualified service personnel. Servicing is required when the apparatus has been damaged in any way, such as when the power-supply cord or plug is damaged, liquid has been spilled or objects have fallen into the apparatus, the apparatus has been exposed to rain or moisture, does not operate normally, or has been dropped.
3

Additional Safety Instructions
•Do not place the components of this system near sources of heat or in direct sunlight.
•Make sure nothing blocks the ventilation openings on any of the components. Allow for sufficient heat dispersion when components are installed on a rack. Do not block or cover the heatsink on the back of the subwoofer.
•Where the mains plug is used as the disconnect device, the disconnect device shall remain readily operable.
•When unplugging the power cord of any system component, handle it carefully. Hold the plug when unplugging the cord.
•This product should be operated only from the type of power source indicated on the marking label. If you are not sure of the type of power supplied in your home, consult your product dealer or local power company.
•Do not overload wall outlets, extension cords, or integral convenience receptacles as this can result in a risk of fire or electric shock.
•Keep the system components free from moisture, water, and dust.
•Do not let insecticides, benzene, or thinner come in contact with any components of the system.
•Never push objects of any kind through openings in the system components as they may touch dangerous voltage points or short-out parts that could result in a fire or electric shock. Never spill liquid of any kind on the product.
•Except as specifically explained in these instructions, do not attempt to service this product yourself. Refer all servicing to qualified service personnel.
•Never disassemble or modify the product in any way. Dangerous electrical voltages inside the components can severely injure you.
•When replacement parts are required, be sure the service technician has used replacement parts specified by the manufacturer or have the same characteristics as the original part. Unauthorized substitutions may result in fire, electric shock, or other hazards.
•When closing the screen, be careful not to pinch your fingers where the screen closes against the case.
•Do not touch the white part of the screen with your hands. Oil from your skin could damage it.
•Never look into the projector lens when the lamp is turned on. The bright light can damage your eyes. Never let children look into the lens when it is on.
•Don’t use the projector outside of the required temperature range of 41 to 95 °F (5 to 35 °C). Doing so may cause an unstable display and could lead to projector damage.
• The lamp(s) in this product contain mercury. Please consult your state and local regulations regarding disposal or recycling. Do not put in the trash.
•Allow the projector lamp to cool for one hour before replacing it.
4

Contents
Introduction
Getting Started
Using the Remote Control . . . . . . . . . . . . . . . . . . . . . . . . . . . . . . . . . . . . . . . . . . . . . . . . . . . . . . . . . . . . . 12 Turning On the System . . . . . . . . . . . . . . . . . . . . . . . . . . . . . . . . . . . . . . . . . . . . . . . . . . . . . . . . . . . . . . . 13 Turning On Selected Components. . . . . . . . . . . . . . . . . . . . . . . . . . . . . . . . . . . . . . . . . . . . . . . . . 14 Controlling the Screen . . . . . . . . . . . . . . . . . . . . . . . . . . . . . . . . . . . . . . . . . . . . . . . . . . . . . . . . . . . . . . . . 15 Controlling the DVD Player and Other Equipment . . . . . . . . . . . . . . . . . . . . . . . . . . . . . . . . . . . . . . . . . 15 Controlling Playback . . . . . . . . . . . . . . . . . . . . . . . . . . . . . . . . . . . . . . . . . . . . . . . . . . . . . . . . . . . 15 Selecting Channels on an HD Tuner, Cable Box, or Satellite Receiver . . . . . . . . . . . . . . . . . . . . . . 16 Using the Buttons on the AV Controller . . . . . . . . . . . . . . . . . . . . . . . . . . . . . . . . . . . . . . . . . . . . 16
Adjusting the Volume . . . . . . . . . . . . . . . . . . . . . . . . . . . . . . . . . . . . . . . . . . . . . . . . . . . . . . . . . . . . . . . . 17
Watching Movies
Inserting a Disc . . . . . . . . . . . . . . . . . . . . . . . . . . . . . . . . . . . . . . . . . . . . . . . . . . . . . . . . . . . . . . . . . . . . . 19
Playing a DVD. . . . . . . . . . . . . . . . . . . . . . . . . . . . . . . . . . . . . . . . . . . . . . . . . . . . . . . . . . . . . . . . . . . . . . 20
Using Basic Playback Functions . . . . . . . . . . . . . . . . . . . . . . . . . . . . . . . . . . . . . . . . . . . . . . . . . . . 20
Using Other Playback Features. . . . . . . . . . . . . . . . . . . . . . . . . . . . . . . . . . . . . . . . . . . . . . . . . . . . 22
Listening to Music
Playing a CD . . . . . . . . . . . . . . . . . . . . . . . . . . . . . . . . . . . . . . . . . . . . . . . . . . . . . . . . . . . . . . . . . . . . . . . 23 Using Basic Playback Functions . . . . . . . . . . . . . . . . . . . . . . . . . . . . . . . . . . . . . . . . . . . . . . . . . . . 24 Using Other Playback Features. . . . . . . . . . . . . . . . . . . . . . . . . . . . . . . . . . . . . . . . . . . . . . . . . . . . 25
Playing Audio Files. . . . . . . . . . . . . . . . . . . . . . . . . . . . . . . . . . . . . . . . . . . . . . . . . . . . . . . . . . . . . . . . . . . 26 Using Basic Playback Functions . . . . . . . . . . . . . . . . . . . . . . . . . . . . . . . . . . . . . . . . . . . . . . . . . . . 27 Listening to an MP3 Player . . . . . . . . . . . . . . . . . . . . . . . . . . . . . . . . . . . . . . . . . . . . . . . . . . . . . . . . . . . . 28 Listening to a Tape Deck . . . . . . . . . . . . . . . . . . . . . . . . . . . . . . . . . . . . . . . . . . . . . . . . . . . . . . . . . . . . . . 29 Listening to AM/FM Radio . . . . . . . . . . . . . . . . . . . . . . . . . . . . . . . . . . . . . . . . . . . . . . . . . . . . . . . . . . . . 29 Tuning to the Desired Station . . . . . . . . . . . . . . . . . . . . . . . . . . . . . . . . . . . . . . . . . . . . . . . . . . . . 29 Using Radio Station Presets . . . . . . . . . . . . . . . . . . . . . . . . . . . . . . . . . . . . . . . . . . . . . . . . . . . . . . 30
Connecting and Using Other Components
Connecting Video Equipment . . . . . . . . . . . . . . . . . . . . . . . . . . . . . . . . . . . . . . . . . . . . . . . . . . . . . . . . . . 32 Connecting the Audio Cable for the Video Source . . . . . . . . . . . . . . . . . . . . . . . . . . . . . . . . . . . . . 33 Linking Audio and Video Sources . . . . . . . . . . . . . . . . . . . . . . . . . . . . . . . . . . . . . . . . . . . . . . . . . 34 Connecting Audio Equipment . . . . . . . . . . . . . . . . . . . . . . . . . . . . . . . . . . . . . . . . . . . . . . . . . . . . . . . . . . 36 Setting Up the Remote Control . . . . . . . . . . . . . . . . . . . . . . . . . . . . . . . . . . . . . . . . . . . . . . . . . . . . . . . . . 36 Entering the Setup Code for Your Component . . . . . . . . . . . . . . . . . . . . . . . . . . . . . . . . . . . . . . . 37 Customizing the Remote Control Menu . . . . . . . . . . . . . . . . . . . . . . . . . . . . . . . . . . . . . . . . . . . . 39 Using the Remote Control to Operate Your Equipment . . . . . . . . . . . . . . . . . . . . . . . . . . . . . . . . . . . . . . 39
Adjusting the Sound, Picture, and Other Settings
Using the On-screen Menu System . . . . . . . . . . . . . . . . . . . . . . . . . . . . . . . . . . . . . . . . . . . . . . . . . . . . . . 41
Adjusting the Picture . . . . . . . . . . . . . . . . . . . . . . . . . . . . . . . . . . . . . . . . . . . . . . . . . . . . . . . . . . . . . . . . . 42
Adjusting the Color Mode . . . . . . . . . . . . . . . . . . . . . . . . . . . . . . . . . . . . . . . . . . . . . . . . . . . . . . . 42
Adjusting the Aspect Ratio . . . . . . . . . . . . . . . . . . . . . . . . . . . . . . . . . . . . . . . . . . . . . . . . . . . . . . . 43
Adjusting the Picture Quality . . . . . . . . . . . . . . . . . . . . . . . . . . . . . . . . . . . . . . . . . . . . . . . . . . . . . 45
5

Adjusting the Sound. . . . . . . . . . . . . . . . . . . . . . . . . . . . . . . . . . . . . . . . . . . . . . . . . . . . . . . . . . . . . . . . . . 46
Using Test Tones to Adjust the Sound . . . . . . . . . . . . . . . . . . . . . . . . . . . . . . . . . . . . . . . . . . . . . . 47
Changing the Surround Sound Format . . . . . . . . . . . . . . . . . . . . . . . . . . . . . . . . . . . . . . . . . . . . . 47
Using Midnight Mode . . . . . . . . . . . . . . . . . . . . . . . . . . . . . . . . . . . . . . . . . . . . . . . . . . . . . . . . . . 48
Using Other Features . . . . . . . . . . . . . . . . . . . . . . . . . . . . . . . . . . . . . . . . . . . . . . . . . . . . . . . . . . . . . . . . . 49
Choosing the Language . . . . . . . . . . . . . . . . . . . . . . . . . . . . . . . . . . . . . . . . . . . . . . . . . . . . . . . . . 49
Using Parental Controls . . . . . . . . . . . . . . . . . . . . . . . . . . . . . . . . . . . . . . . . . . . . . . . . . . . . . . . . . 50
Restoring Factory Defaults . . . . . . . . . . . . . . . . . . . . . . . . . . . . . . . . . . . . . . . . . . . . . . . . . . . . . . . . . . . . . 51
Cleaning and Maintenance
Cleaning. . . . . . . . . . . . . . . . . . . . . . . . . . . . . . . . . . . . . . . . . . . . . . . . . . . . . . . . . . . . . . . . . . . . . . . . . . . 53
Cleaning the Screen . . . . . . . . . . . . . . . . . . . . . . . . . . . . . . . . . . . . . . . . . . . . . . . . . . . . . . . . . . . . 53
Cleaning the Projector Lens . . . . . . . . . . . . . . . . . . . . . . . . . . . . . . . . . . . . . . . . . . . . . . . . . . . . . . 53
Cleaning System Components . . . . . . . . . . . . . . . . . . . . . . . . . . . . . . . . . . . . . . . . . . . . . . . . . . . . 54
Adjusting the Screen Length. . . . . . . . . . . . . . . . . . . . . . . . . . . . . . . . . . . . . . . . . . . . . . . . . . . . . . . . . . . . 54
Manual Screen Adjustment . . . . . . . . . . . . . . . . . . . . . . . . . . . . . . . . . . . . . . . . . . . . . . . . . . . . . . 55
Adjusting the Image Position and Focus. . . . . . . . . . . . . . . . . . . . . . . . . . . . . . . . . . . . . . . . . . . . . . . . . . . 56
Repositioning the Image. . . . . . . . . . . . . . . . . . . . . . . . . . . . . . . . . . . . . . . . . . . . . . . . . . . . . . . . . 56
Focusing and Resizing the Image . . . . . . . . . . . . . . . . . . . . . . . . . . . . . . . . . . . . . . . . . . . . . . . . . . 57
Checking the Projector Lamp. . . . . . . . . . . . . . . . . . . . . . . . . . . . . . . . . . . . . . . . . . . . . . . . . . . . . . . . . . . 58
Checking the Info Menu . . . . . . . . . . . . . . . . . . . . . . . . . . . . . . . . . . . . . . . . . . . . . . . . . . . . . . . . 58
Checking the Warning Light . . . . . . . . . . . . . . . . . . . . . . . . . . . . . . . . . . . . . . . . . . . . . . . . . . . . . 58
Replacing Remote Control Batteries. . . . . . . . . . . . . . . . . . . . . . . . . . . . . . . . . . . . . . . . . . . . . . . . . . . . . . 59
Solving Problems
Basic Operation Problems . . . . . . . . . . . . . . . . . . . . . . . . . . . . . . . . . . . . . . . . . . . . . . . . . . . . . . . . . . . . . 61 Picture Problems . . . . . . . . . . . . . . . . . . . . . . . . . . . . . . . . . . . . . . . . . . . . . . . . . . . . . . . . . . . . . . . . . . . . 62 Sound Problems . . . . . . . . . . . . . . . . . . . . . . . . . . . . . . . . . . . . . . . . . . . . . . . . . . . . . . . . . . . . . . . . . . . . . 64 Problems Using the Screen. . . . . . . . . . . . . . . . . . . . . . . . . . . . . . . . . . . . . . . . . . . . . . . . . . . . . . . . . . . . . 65 Problems Using the Remote Control . . . . . . . . . . . . . . . . . . . . . . . . . . . . . . . . . . . . . . . . . . . . . . . . . . . . . 66 Problems Using the DVD Player . . . . . . . . . . . . . . . . . . . . . . . . . . . . . . . . . . . . . . . . . . . . . . . . . . . . . . . . 67 Problems Using the Radio . . . . . . . . . . . . . . . . . . . . . . . . . . . . . . . . . . . . . . . . . . . . . . . . . . . . . . . . . . . . . 67 Problems Using an External Component . . . . . . . . . . . . . . . . . . . . . . . . . . . . . . . . . . . . . . . . . . . . . . . . . . 68 Where To Get Help . . . . . . . . . . . . . . . . . . . . . . . . . . . . . . . . . . . . . . . . . . . . . . . . . . . . . . . . . . . . . . . . . . 69
Internet Support. . . . . . . . . . . . . . . . . . . . . . . . . . . . . . . . . . . . . . . . . . . . . . . . . . . . . . . . . . . . . . . 69 Speak to a Support Representative . . . . . . . . . . . . . . . . . . . . . . . . . . . . . . . . . . . . . . . . . . . . . . . . . 69 Purchase Supplies and Accessories . . . . . . . . . . . . . . . . . . . . . . . . . . . . . . . . . . . . . . . . . . . . . . . . . 69
Using Advanced Remote Control Features
Adjusting the LCD Screen . . . . . . . . . . . . . . . . . . . . . . . . . . . . . . . . . . . . . . . . . . . . . . . . . . . . . . . . . . . . . 71 Adjusting the Contrast . . . . . . . . . . . . . . . . . . . . . . . . . . . . . . . . . . . . . . . . . . . . . . . . . . . . . . . . . . 72 Learning Commands from Another Remote Control . . . . . . . . . . . . . . . . . . . . . . . . . . . . . . . . . . . . . . . . . 72 Cloning Your Remote Control . . . . . . . . . . . . . . . . . . . . . . . . . . . . . . . . . . . . . . . . . . . . . . . . . . . . 74 Advanced Remote Control Setup . . . . . . . . . . . . . . . . . . . . . . . . . . . . . . . . . . . . . . . . . . . . . . . . . . . . . . . . 75 Editing Device Names and Commands . . . . . . . . . . . . . . . . . . . . . . . . . . . . . . . . . . . . . . . . . . . . . 75 Setting Up Macros . . . . . . . . . . . . . . . . . . . . . . . . . . . . . . . . . . . . . . . . . . . . . . . . . . . . . . . . . . . . . 77 Adding or Hiding Pages . . . . . . . . . . . . . . . . . . . . . . . . . . . . . . . . . . . . . . . . . . . . . . . . . . . . . . . . . 78 Erasing Learned Buttons and Macros . . . . . . . . . . . . . . . . . . . . . . . . . . . . . . . . . . . . . . . . . . . . . . . 79 Using Remote Control Punch-Through . . . . . . . . . . . . . . . . . . . . . . . . . . . . . . . . . . . . . . . . . . . . . 80
6

Using an RF Base Station . . . . . . . . . . . . . . . . . . . . . . . . . . . . . . . . . . . . . . . . . . . . . . . . . . . . . . . . . . . . . . 81 Setting Up an Addressable Base Station . . . . . . . . . . . . . . . . . . . . . . . . . . . . . . . . . . . . . . . . . . . . . 81 Restoring Remote Control Factory Defaults. . . . . . . . . . . . . . . . . . . . . . . . . . . . . . . . . . . . . . . . . . . . . . . . 83
Remote Control Codes
Using the Code Tables . . . . . . . . . . . . . . . . . . . . . . . . . . . . . . . . . . . . . . . . . . . . . . . . . . . . . . . . . . . . . . . . 85
Recalling Programmed Codes. . . . . . . . . . . . . . . . . . . . . . . . . . . . . . . . . . . . . . . . . . . . . . . . . . . . . 86
Code Tables . . . . . . . . . . . . . . . . . . . . . . . . . . . . . . . . . . . . . . . . . . . . . . . . . . . . . . . . . . . . . . . . . . . . . . . . 87
Specifications
Playable Disc Types . . . . . . . . . . . . . . . . . . . . . . . . . . . . . . . . . . . . . . . . . . . . . . . . . . . . . . . . . . . . . . . . . . 119
Screen Specifications . . . . . . . . . . . . . . . . . . . . . . . . . . . . . . . . . . . . . . . . . . . . . . . . . . . . . . . . . . . . . . . . . 120
General. . . . . . . . . . . . . . . . . . . . . . . . . . . . . . . . . . . . . . . . . . . . . . . . . . . . . . . . . . . . . . . . . . . . . . 120
Built-in Speaker System . . . . . . . . . . . . . . . . . . . . . . . . . . . . . . . . . . . . . . . . . . . . . . . . . . . . . . . . . 120
Remote Control Specifications . . . . . . . . . . . . . . . . . . . . . . . . . . . . . . . . . . . . . . . . . . . . . . . . . . . . . . . . . . 120
Powered Subwoofer Specifications . . . . . . . . . . . . . . . . . . . . . . . . . . . . . . . . . . . . . . . . . . . . . . . . . . . . . . . 121
Bass Driver . . . . . . . . . . . . . . . . . . . . . . . . . . . . . . . . . . . . . . . . . . . . . . . . . . . . . . . . . . . . . . . . . . . 121
Amplifier . . . . . . . . . . . . . . . . . . . . . . . . . . . . . . . . . . . . . . . . . . . . . . . . . . . . . . . . . . . . . . . . . . . . 121
Physical . . . . . . . . . . . . . . . . . . . . . . . . . . . . . . . . . . . . . . . . . . . . . . . . . . . . . . . . . . . . . . . . . . . . . 121
Surround Speaker Specifications. . . . . . . . . . . . . . . . . . . . . . . . . . . . . . . . . . . . . . . . . . . . . . . . . . . . . . . . . 121
AV Controller Specifications . . . . . . . . . . . . . . . . . . . . . . . . . . . . . . . . . . . . . . . . . . . . . . . . . . . . . . . . . . . 122
Notices
Responsible Use of Copyrighted Materials . . . . . . . . . . . . . . . . . . . . . . . . . . . . . . . . . . . . . . . . . . . . . . . . . 123
FCC Compliance Statement . . . . . . . . . . . . . . . . . . . . . . . . . . . . . . . . . . . . . . . . . . . . . . . . . . . . . . . . . . . 123
Declaration of Conformity . . . . . . . . . . . . . . . . . . . . . . . . . . . . . . . . . . . . . . . . . . . . . . . . . . . . . . . . . . . . . 124
Epson America, Inc. Limited Warranty . . . . . . . . . . . . . . . . . . . . . . . . . . . . . . . . . . . . . . . . . . . . . . . . . . . 124
Index
7

8

Introduction
The Ensemble HDTM home cinema system by Epson® is designed to transform your living room into a state-of-the-art home cinema. Its wide-format (16:9) projection screen, 5.1-channel surround sound system, and high-definition video projector deliver unrivaled, high-performance picture and sound.
Your home cinema system’s ease-of-use and versatility let you:
•Watch movies using the built-in DVD player (see page 19)
•Listen to music in various formats—by playing CDs, connecting an MP3 player, or using the built-in AM/FM radio (see page 23)
•Connect external components such as a cable box, satellite receiver, gaming console, or high-definition DVD player like Blu-rayTM or HD DVD® (see page 31)
•Use the included universal remote control to operate not just the Ensemble HD system, but any components you connect to it
See “Getting Started” in the next section for basic instructions on using your system.
9

10
Getting Started
The universal remote control included with your Ensemble HD system puts complete control over your home theater in the palm of your hand. With one touch, you can lower the screen, turn on the projector, and get ready to watch a movie. If you’ve connected additional components to your home theater, such as a cable box or satellite receiver, you can use the remote control to operate them too.
See these sections:
•“Using the Remote Control” on page 12
•“Turning On the System” on page 13
•“Controlling the Screen” on page 15
•“Controlling the DVD Player and Other Equipment” on page 15
•“Adjusting the Volume” on page 17
11
Using the Remote Control
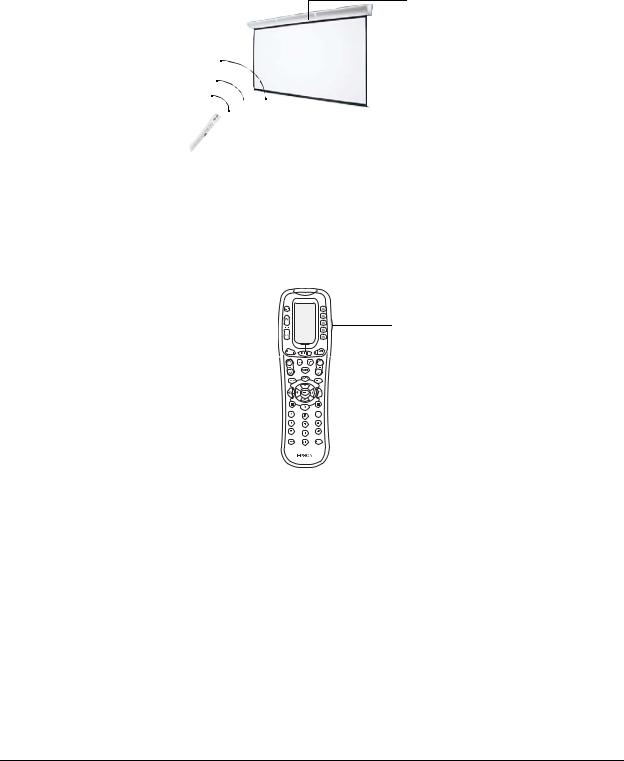
Aim the remote control at the screen and press any button. An  icon appears on the remote control’s LCD screen to indicate that a command is being transmitted. At the same time, the blue light at the top of the projection screen flashes, indicating that the system is receiving a command.
Blue light
Note
The blue light remains on when the screen is raised and turns off when the screen is lowered.
If you’re using the remote control in a darkened room, press the LIGHT button on the side of the remote control. The keys and display screen on the remote control light up so you can make a selection. The light shuts off by itself after 10 seconds, or you can turn it off by pressing the LIGHT button a second time.
LIGHT button
(on side of remote control)
Note
If you need to increase the amount of time the remote control lights up or change the contrast of its screen, see page 71.
12
Turning On the System
When you’re ready to watch a movie, you can lower the screen, turn on the projector, and turn on the AV controller (with its built-in DVD player) with the touch of a button.
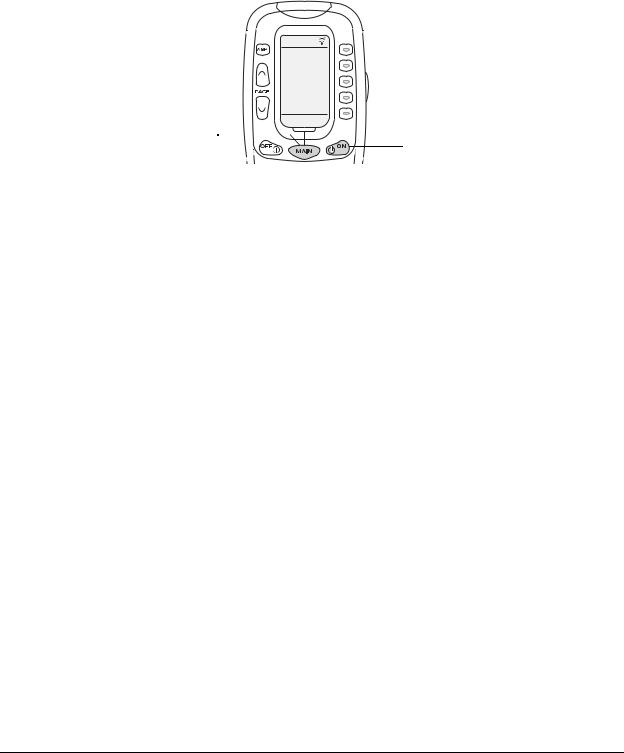
1 Make sure the MAIN menu is displayed on the remote control. If necessary, press the MAIN button.
MAIN
DVD
CABLE
SAT
HD
RADIO
1 OF 2
MAIN button 
ON button
2Point the remote control at the screen and press the ON button to turn on the system. The screen comes down and the projector and AV controller turn on.
Note
Make sure the remote control remains pointed at the screen until the system has turned on. (You see the  icon flash on the remote control screen while it’s turning on the system.) If the system does not turn on, see “Basic Operation Problems” on page 61.
The projector lamp takes up to 30 seconds to achieve full brightness.
3When you’re done using the system, make sure the MAIN menu is displayed on the remote control and press the OFF button. The projector and AV controller turn off, and the screen raises up automatically.
Note
If you install additional components, such as a cable box or satellite receiver, you can set up the remote control to turn them on with one button, too. See “Setting Up Macros” on page 77.
13
Turning On Selected Components
You can turn on and operate any component in the system without using any of the others. For example, if you want to listen to your home theater’s built-in radio, you can turn on the radio by itself without lowering the screen.
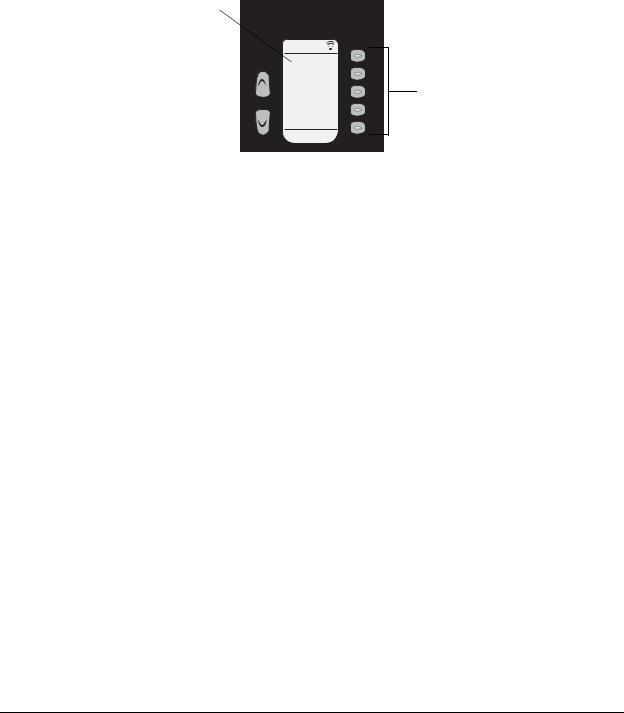
1Make sure the MAIN menu is displayed on the remote control. If necessary, press the MAIN button. You see a list of components displayed on the remote control:
List of components
|
MAIN |
|
|
|
DVD |
|
|
|
CABLE |
Press the button for the |
|
|
SAT |
||
Page up and down buttons |
component you want to use |
||
HD |
|||
|
|
RADIO
1 OF 2
2If you don’t see the component you want to use, it may be listed on the next page. Press the PAGE  or
or  (page up or down) button to access additional components.
3Press the button to the right of the component you want to use, such as DVD or RADIO. The top of the screen changes from MAIN to the name of the component you select, and the menu options change to the ones for that component.
Note
Some of the options in the MAIN menu, such as CABLE or SAT, are for components that don’t come with the Ensemble HD system, such as a cable box or satellite receiver. If you install components like these, you can use the remote control to operate them just like the rest of your system. See “Connecting and Using Other Components” on page 31 for more information.
4Once you’ve opened the menu for the selected component, press the ON button to turn it on or the OFF button to turn it off. (If you select DVD or RADIO, the AV controller turns on automatically.)
5Follow the instructions elsewhere in this guide to operate the selected component:
•If you selected RADIO, you can listen to AM/FM radio through your home theater (see page 23).
•If you selected DVD, you can you can play a DVD (see page 19), listen to a CD (see page 23), or listen to a disc with MP3 audio files (page 26).
•To use other components you may have added to your system, see page 39.
14
Controlling the Screen
The screen is lowered automatically when you turn on the system as described on page 13. If necessary, you can also operate the screen manually as described below.
Note
To change how far the screen comes down when you lower it, see “Adjusting the Screen Length” on page 54.
1Make sure the MAIN menu is displayed on the remote control. If necessary, press the MAIN button.
2Press the PAGE  button to display additional components.
3Press the button to the right of PROJ to select the projector menu.
4Press S-DWN to lower the screen. It comes down and automatically stops at the pre-set position.
5Press S-UP to raise the screen when you’re done using it.
Controlling the DVD Player and Other Equipment
The universal remote control has all the buttons you need to control the Ensemble HD home theater, along with any additional components you may add to it. Here’s an overview of the main buttons you’ll use to control the built-in DVD player and radio, as well as any optional components like a cable box or satellite receiver.
Note
You can also use the buttons on the AV controller for many of the same functions that you would normally access using the remote control. See “Using the Buttons on the AV Controller” on page 16.
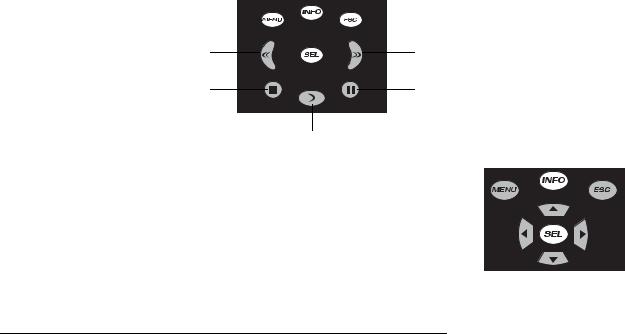
Controlling Playback
Use the buttons shown below to control playback when watching a movie or listening to music:
Fast-rewind/skip backward |
Fast-forward/skip forward |
Stop |
Pause |
|
Play |
Note
The buttons highlighted at right are for accessing the on-screen menu system and selecting menu options, not for controlling playback. See “Using the On-screen Menu System” on page 41.
15

Selecting Channels on an HD Tuner, Cable Box, or Satellite Receiver
You can use the numeric keypad to select pretuned radio stations or the tracks on a CD. If you’ve connected an HD tuner or other equipment to receive programmed content, use the numeric keypad to enter channels. The method of entering the digits varies, depending on the type of equipment you’re using—for example, you might have to press 0 to enter a single-digit number, such as 01. In some case, you may need to press the ENT (Enter) or SEL (Select) button to enter the digits.
You can also use CH  and
and  (channel up and down) to change channels.
To return to the previously selected channel, press the PREV CH button.
Using the Buttons on the AV Controller
You can use the buttons on the AV controller to control most basic functions.
Note
All these functions are accessible via the remote control.
•ON/STANDBY lets you turn on the AV controller. The controller is on when the light surrounding the button is blue, and is off (standby) when the light is orange.
•SOURCE lets you switch between the Ensemble HD system’s DVD player and radio, or select other equipment you’ve connected to the system. Each time you press the button, the AV controller cycles through these functions or sources:
DVD player → FM radio → AM radio → Audio 1 port → Audio 2 port → Composite video (CVBS) → S-video → Component video → HDMI 1 → HDMI 2
ON/STANDBY |
Volume |
|
control |
||
button |
||
knob |
||
|
SOURCE button |
Playback control buttons |
Eject button |
16

•The playback control buttons let you control playback when watching a DVD or listening to a CD. In addition, the  and
and 
 buttons let you select preset radio stations while listening to AM or FM radio.
•The  eject button opens and closes the DVD/CD tray.
•The volume control knob lets you adjust the sound volume.
Adjusting the Volume
The Ensemble HD system gives you various ways to control the volume:
•VOL  and
and  (volume up and down) lets you change the volume from –74 to +10 dB.
•MUTE temporarily turns off the sound. Press the button again to restore audio.
•Midnight Mode adjusts the sound for late-night viewing when you want to avoid disturbing others. Volume is reduced at the bass end with volume highs and lows being compressed to a narrower range. See page 48 for details.
Note
You can also adjust the volume using the volume control knob on the AV controller.
To use headphones with your home theater, plug them into the PHONES jack on the front of the AV controller. The jack accepts 1/4-inch stereo headphones. When you plug in the headphones, the sound is automatically muted from the Ensemble HD speakers.
17

18

Watching Movies
Follow the steps in this chapter when you’re ready to watch a movie on DVD. See these sections:
•“Inserting a Disc” below
•“Playing a DVD” on page 20
Note
If you watch movies under different lighting conditions (for example, in the daytime and at night), you may want to change the Color Mode when you begin watching a movie (see “Adjusting the Color Mode” on page 42).
Depending on the aspect ratio your movie was filmed in, you may also want to select a different Aspect setting (see “Adjusting the Aspect Ratio” on page 43).
Inserting a Disc
The DVD player, built into the Ensemble HD system, accepts both DVD and DVD-R discs. For more information on compatible formats, see “Playable Disc Types” on page 119.
1Make sure the Ensemble HD system is turned on (see “Turning On the System” on page 13).
2Open the DVD/CD tray by pressing the  eject button on the AV controller. (Or select EJECT from the DVD menu on the remote control.)
Note
Make sure you don’t have a USB flash drive inserted, or you won’t be able to operate the DVD player, or insert or eject a DVD. Remove the flash drive prior to inserting the disc.
3 Place the disc in the tray, playable side down.
4Close the DVD/CD tray by pressing the  eject button on the AV controller. (Or select EJECT from the DVD menu on the remote control.)
When you’re done playing the disc, open the DVD/CD tray as described above and remove the disc.
19
Playing a DVD
Once the disc is inserted, follow these steps to begin playing the movie:
1If the DVD player was the last function you used, the DVD begins playing automatically.
If you previously used a different function (such as CABLE or SAT), select the DVD option on the remote control:
MAIN |
Select DVD |
|
DVD |
||
|
CABLE
SAT
HD
RADIO
1 OF 2
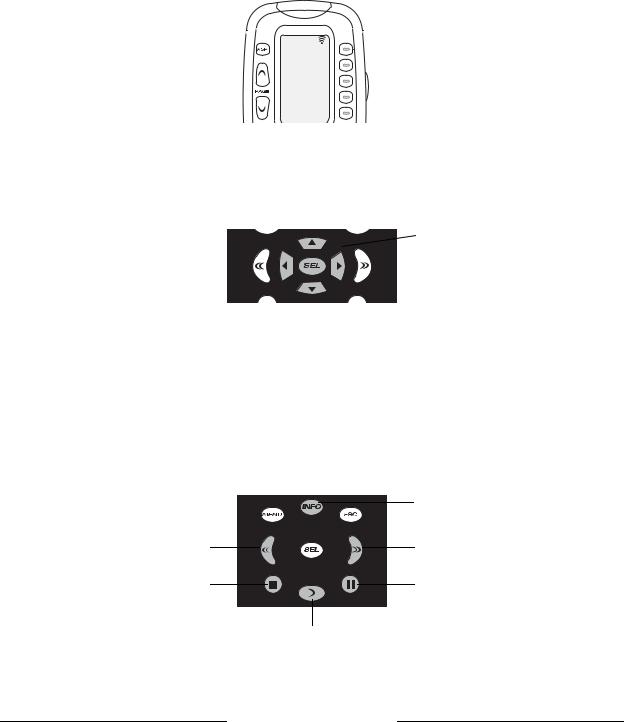
2When the DVD begins playing, you may see a menu screen that lets you select its contents and other options. (This menu varies from disc to disc.) Use the arrow buttons (l r u d) to highlight the option you want, then press the SEL (Select) button. For example, to play a movie, highlight the “Play movie” option, then press SEL.
Use these buttons to select
DVD menu options
3If you need to return to the DVD’s main menu screen while watching the movie, press the MENU or GUIDE button. You can also select MENU from the DVD menu on the remote control.
Note
To avoid losing your place while watching a movie, don’t switch sources. If you select a different source (such as CABLE or SAT), the DVD will stop playing. It will start over from the beginning when you return to the DVD function.
Using Basic Playback Functions
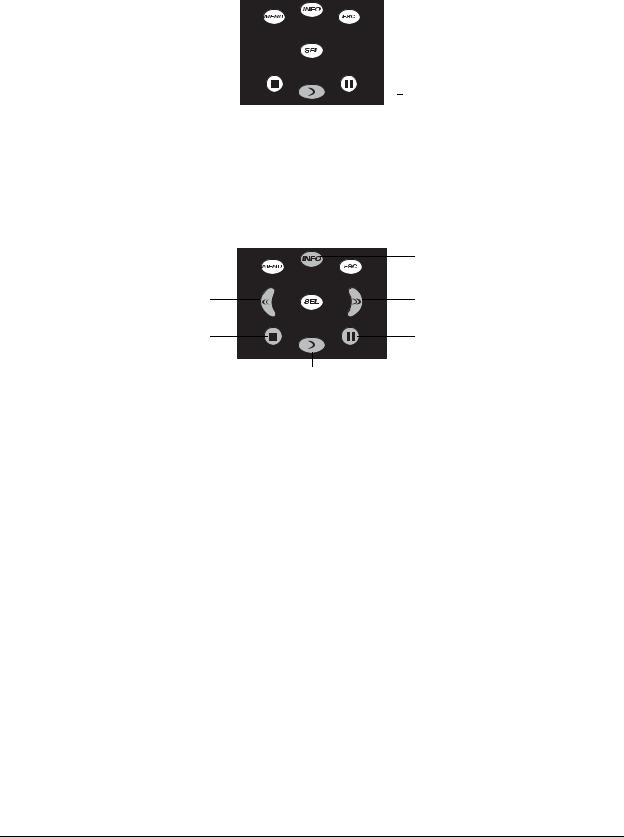
While you’re watching a movie, you can use the following buttons to control playback:
|
Time elapsed/time remaining |
Fast-rewind/skip backward |
Fast-forward/skip forward |
Stop |
Pause/step |
|
Play |
20
•Press the 
 pause button to stop the movie temporarily. The image freezes on the screen. While the movie is paused, pressing the
 pause button again puts the player in step mode. Each time you press the
 pause button, the movie advances one frame at a time. To return to normal playback, press the
  play button.
•Press the  stop button to stop projection of the movie temporarily. The DVD player remembers the point in the movie where you stopped. Press the
  play button to resume playback from that point.
Note
If you press the  stop button twice, playback will start over from the beginning of the movie.
•Press the  play button to resume playback if you’ve paused or stopped the movie.
•Press the  fast-rewind or
  fast-forward button to skip backward or forward to a different chapter in the movie. DVDs are usually structured with each movie or special feature having its own title, and with each title broken into chapters:
As you skip through chapters, the title and chapter information display at the top of the screen.
•Press and hold the  fast-rewind or
 fast-forward button to move quickly through a scene. Each time you press and hold the button, the speed doubles and then finally returns to normal speed:
2× → 4× → 8× → 16× → normal speed
•Press the INFO button to display title and chapter information on the screen. The on-screen display tells you the time elapsed and time remaining at your current location on the disc. Each time you press the INFO button, you see the following information displayed:
Title time elapsed →Title time remaining →Chapter time elapsed →Chapter time remaining →Display off
Note
If you press a button for a function that cannot be performed at a given time (for example, if you press the  play button while the movie is already playing), you see the
  symbol on the screen.
21

Using Other Playback Features
You can use the DVD menu on the remote control to access several other features while watching movies.
Note
Some functions in the remote control’s DVD menu are used only for playing CDs. These include the Shuffle, Memory, and Clear functions.
•If your DVD has separate audio tracks in different languages, you can change the language by selecting AUDIO from the DVD menu. Each time you press AUDIO, the language changes and you see an onscreen display like the following:
Audio 5/5:Dolby D 2CH ENGLISH
Note
If you usually watch DVDs with a language other than English selected, you can set that language to be used automatically whenever you play a DVD. See “Choosing the Language” on page 49.
•Some DVDs include scenes that have been shot from different camera angles. They have a symbol like this to indicate the number of available angles: 
 . When you encounter a scene with multiple angles, a camera icon is displayed on the screen. Select ANGLE in the DVD menu to change angles. To stop displaying the camera icon, press the INFO button repeatedly until it clears the icon from the screen.
•To repeat the current chapter of a movie that you’re watching, select RPEAT from the DVD menu. To repeat the entire title (such as the movie itself or a special feature), press RPEAT again. Press RPEAT a third time to cancel the repeat function.
To repeat just part of a scene that you’re watching, press A<>B at the beginning of the part you want to repeat, then press A<>B a second time to mark the end of the section. Press A<>B a third time to cancel the repeat function.
•To move slowly through a scene, select SLOW from the DVD menu. Each time you press SLOW, the speed is reduced by one-half. You can select from 1/2, 1/4, and 1/8 speed. To return to normal playback, press the  play button.
•If your DVD has subtitles, you can change the subtitle language by selecting SUB-T from the DVD menu. Each time you press SUB-T, the language changes and you see an on-screen display like the following:
Subtitle 03/03:FRENCH
Note
If you usually watch DVDs with subtitles, you can have the subtitle language you prefer turned on automatically whenever you play a DVD. See “Choosing the Language” on page 49.
22

Listening to Music
Follow these steps when you want to listen to music with your Epson Ensemble HD system. See these sections:
•“Playing a CD” below
•“Playing Audio Files” on page 26
•“Listening to an MP3 Player” on page 28
•“Listening to a Tape Deck” on page 29
•“Listening to AM/FM Radio” on page 29
Note
When listening to music, you may wish to change the surround sound format to STEREO. See “Changing the Surround Sound Format” on page 47.
Playing a CD
The DVD player built into the Ensemble HD system can play music CDs as well as movies. The player accepts both commercial CDs and home-recorded CD-R and CD-RW discs. For more information on compatible formats, see “Playable Disc Types” on page 119.
1 Select the DVD option on the remote control to activate the DVD player:
MAIN |
Select DVD |
|
DVD |
||
|
CABLE
SAT
HD
RADIO
1 OF 2
Note
For most CD playing functions, it is not necessary to lower the screen or turn on the projector.
2Insert the CD just as you’d insert a DVD. See “Inserting a Disc” on page 19.
After a moment, you see the number of tracks and total playing time on the AV controller.
23
3 To begin playing the CD, press the  play button.
Play button
Note
To avoid interrupting CD playback, don’t switch sources. If you select a different source (such as CABLE or SAT), the CD will stop playing. It will start over from the beginning when you resume playback.
Using Basic Playback Functions
While you’re listening to a CD, you can use the following buttons and the numeric keypad to control playback:
|
Time elapsed/time remaining |
Fast-rewind/skip backward |
Fast-forward/skip forward |
Stop |
Pause |
Play
•To play a specific track on the CD, use the numeric keypad on the remote control. For example, to select track 3, just press the 3 button. To select track 21, press 2 followed by 1. After pressing the buttons, wait a moment for the selection to be transmitted, or press SEL (Select) to transmit your selection right away.
You can also skip between tracks by using the  fast-rewind or
  fast-forward button. To advance to the next track, momentarily press and release the
  button without holding it. To go to the previous track, press the
  button twice (the first time returns you to the beginning of the current track).
•The current track and elapsed time are indicated on the AV controller screen.
If the projector is on, you can also display the track and time information on the projection screen by pressing the INFO button. Each additional time you press the INFO button, the displayed information changes (both on the AV controller and on the projection screen) as follows:
Track time elapsed → Track time remaining → Total time elapsed → Total time remaining → Display off
•Press and hold the  fast-rewind or
  fast-forward button to move quickly through a track. Each time you press and hold the button, the speed changes as follows:
2× → 4× → 6× → 8× → 2×
To return to normal playback, press the  play button.
•Press the 
 pause button to stop the music temporarily. To resume playback, press
  play or
 pause.
•Press the  stop button when you’re done listening to the CD.
24

Using Other Playback Features
You can use the DVD menu on the remote control to access several other features while listening to a CD.
Note
Most functions in the remote control’s DVD menu are used only for playing DVDs. Only the ones listed below can be used when playing CDs.
•To repeat the current track of a CD that you’re listening to, select RPEAT from the DVD menu. To repeat the entire CD (or a programmed playlist), press RPEAT again. Press RPEAT a third time to cancel the repeat function. Each time you select this option, the display changes as follows:
Repeat one → Repeat all → Repeat off
To repeat just part of a track, press A<>B at the beginning of the part you want to repeat, then press A<>B a second time to mark the end of the section. Press A<>B a third time to cancel the repeat function.
•To play all the tracks on your CD in a random order, press the  stop button if the CD is currently playing. Select SHUFF (Shuffle) from the DVD menu, then press the
  play button. After all the tracks finish playing, the DVD player stops and the shuffle function is cancelled. To cancel shuffle mode while random playback is in progress, press the
  stop button, then press SHUFF.
•You can play up to 21 tracks in any desired order by creating a playlist. To create a playlist, you need to lower the screen and turn on the projector. Also, press the  stop button if the CD is currently playing. Once the projector is turned on, select MEMO (Memory) from the DVD menu on the remote control. You see this screen:
Select desired track number
Total tracks on disc
TRACK |
|
PROGRAM LIST |
|
01 |
ADD |
05 |
Playlist |
|
DELETE |
11 |
|
[15] |
13 |
|
|
|
|
||
|
PLAY |
|
|
|
CLEAR |
|
|
Select the desired track number on the left, using the u or d button on the remote control. Then highlight ADD, using the r button, and press SEL (Select). The track number is added to the list on the right. Repeat for any additional tracks you want to add.
To insert a track at an earlier point in the list, highlight the track in the playlist prior to the point where you want to insert the new track. Then select the desired track number on the left and select INSERT. Use DELETE to erase a track, or CLEAR to erase the whole list.
Once you’ve finished creating your playlist, highlight PLAY and press SEL (Select) to start playback. The playlist is retained until you remove the CD or turn off the player. To resume normal playback without the playlist, press the stop button, then press
  play.
play.
25

Playing Audio Files
You can use the AV controller to play MP3 and WMA audio files stored on a USB flash drive, or on a data CD or DVD.
Note
If you burn your MP3 and WMA files to an audio CD instead of a data CD, play the disc as described in “Playing a CD” on page 23.
You can also display JPG images (stored on a flash drive, data CD, or DVD) by following the instructions below. When you press the  play button, your photos display as a slideshow.
1Make sure the Ensemble HD system is turned on (see “Turning On the System” on page 13). You’ll need the projector turned on in order to select files on the screen.
2Insert your USB flash drive into the USB slot on the front of the AV controller. (If the files are stored on a CD or DVD, insert the disc as described in “Inserting a Disc” on page 19.)
3Select the DVD option on the remote control. (This tells the AV controller to check for an inserted disc or flash drive.)
MAIN |
Select DVD |
|
DVD |
||
|
CABLE
SAT
HD
RADIO
1 OF 2
26

After a moment, you see the contents of the flash drive or CD/DVD displayed on the screen:
Multimedia Player |
|
|
|
ROOT |
PHOTOS |
0 |
Folder containing more files |
|
MP3Song 1 |
1 |
MP3 files |
|
MP3Song 2 |
2 |
|
|
|
||
|
Song 3 |
3 |
Windows media audio (WMA) files |
|
Song 4 |
4 |
|
|
|
||
|
Photo 1 |
5 |
JPG photo image |
Caution
Do not remove the flash drive while its data access light is flashing, or you could lose data on the drive. Always stop playback by pressing the stop button before removing the drive.
4Do one of the following:
•Press the  play button to play all files from the beginning.
•Use the u or d button to highlight the file you’d like to start with. (If a file is already playing, press the
 stop button first.) Then press the
  play button. All files are played from the selected file to the last one on the drive.
•If your flash drive contains folders, use the u or d button to highlight the desired folder, then press SEL (Select) to view its contents. Highlight the file you’d like to start with, then press the  play button. Only files in the folder are played.
When you’re done listening to music on the flash drive, make sure its data access light is not flashing. (If necessary, press the  stop button.) Then pull the drive straight out of the slot.
Using Basic Playback Functions
While you’re listening to audio files, you can use the following buttons and the numeric keypad to control playback:
|
Time elapsed/time remaining |
Fast-rewind/skip backward |
Fast-forward/skip forward |
Stop |
Pause |
Play/resume
•To play a specific file, use the numeric keypad on the remote control. For example, to select file 3, just press the 3 button. To select file 21, press 2 followed by 1. After pressing the buttons, wait a moment for the selection to be transmitted, or press SEL (Select) to transmit your selection right away.
You can also skip between tracks by using the  fast-rewind or
  fast-forward button. To advance to the next track (or go to the previous one), momentarily press and release the button without holding it.
27

•The current file and elapsed time are indicated on the AV controller screen. You can also display the file and time information on the projection screen by pressing the INFO button. Each time you press the INFO button, the displayed information changes (both on the AV controller and on the projection screen) as follows:
Time elapsed → Time remaining → Display off
•Press and hold the  fast-rewind or
  fast-forward button to move quickly through a file. Each time you press and hold the button, the speed increases:
2× → 4× → 6× → 8× → normal speed
To return to normal playback, press the  play button.
•Press the 
 pause button to stop the music temporarily. To resume playback, press the
  play button.
•Press the  stop button when you’re done listening.
Note
You can also use the repeat function to repeat one or more files. Select RPEAT from the DVD menu on the remote control. Each time you press RPEAT, you switch between various repeat options.
Listening to an MP3 Player
You can connect a personal MP3 player, such as an iPod, to the AUDIO 2 port on the front of the
AV controller. You’ll need a 1/8-inch stereo mini audio cable, which you can purchase from an electronics retailer.
1Connect one end of a stereo mini audio cable to the AUDIO 2 port, shown below. Connect the other end to the headphone jack on your MP3 player.
Note
Do not connect your MP3 player to the AV controller with a USB cable.
2Select the AUDIO option on the remote control, then select AUD2. This switches the audio input to your MP3 player.
3Use the controls on your MP3 player to begin playing music.
28
Listening to a Tape Deck
Make sure your tape deck (or other audio source) is connected to the AUDIO 1 port on the back of the AV controller, as described in “Connecting Audio Equipment” on page 36.
1Select the AUDIO option on the remote control, then select AUD1. This switches the audio input to your tape deck.
2Use the controls on your tape deck to begin playing music.
Listening to AM/FM Radio
You can use the AV controller to receive AM or FM radio broadcasts. First make sure an antenna is connected, as described in the Installation Guide.
Tuning to the Desired Station
1 Select the RADIO option on the remote control to activate the radio:
MAIN
DVD |
|
CABLE |
|
SAT |
|
HD |
|
RADIO |
Select RADIO |
|
|
1 OF 2 |
|
Note
To use the radio, it is not necessary to lower the screen or turn on the projector.
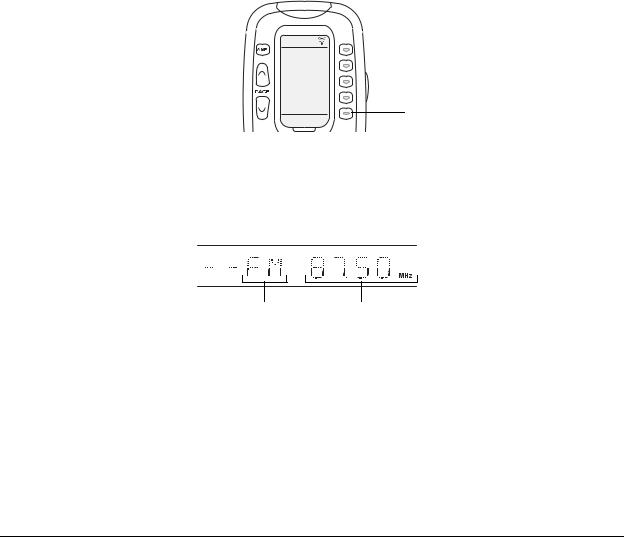
2Select the BAND option on the remote control to switch between AM and FM. The display on the AV controller shows the current station:
Band Frequency
3Select TUNE+ or TUNE– to change the frequency:
•Press the button momentarily and then release it to change the frequency manually.
•Or press and hold the button to find the next available station automatically. The tuner searches until a station of sufficient strength has been found, and the word “TUNED” appears on the display. Weak stations are skipped during the auto-tuning process.
29

Using Radio Station Presets
You can save up to 40 preset stations. Follow these steps to save a station:
1Tune in the desired station, as described in the previous section.
2Select the SAVE option in the RADIO menu on the remote control. The preset number flashes on the display:
Preset number
3Select the desired preset number (1 through 40):
•Use the numeric keypad to enter the number—for example, to select preset 3, press 0 followed by 3. To select preset 21, press 2 followed by 1.
•Or use the  or
or  button to select the desired number, then press SAVE again.
Note
A preset station is erased from the memory when you store another station in its place.
Once your stations are preset, use either the numeric keypad on the remote control, or the  and
and  buttons, to quickly access your favorite stations. You can also use the
  and
and 
 buttons on the AV controller.
30
Loading...