


Sony PJ790VE, PJ780VE, PJ790V, PJ790E, HDR-PJ780E User Manual
...
"Handycam" User Guide
Operation Search
Before use
Getting started
Recording
Playback
Playing images on a TV
Saving images with an external device
Using the Wi-Fi function
Customizing your camcorder
Troubleshooting
Maintenance and precautions
 Contents list
Search Print
Top page
HDR-PJ780E/ PJ780VE/ PJ790/ PJ790E/ PJ790V/ PJ790VE
User Guide
Use this manual if you encounter any problems, or have any questions about the camcorder.
 Back to top
Copyright 2013 Sony Corporation
1

"Handycam" User Guide |
Search |
|
|
|
Top page > Operation Search |
||
Operation Search |
Operation Search |
|
|
Before use |
|
|
|
|
|
|
|
|
Operation Search |
|
|
Getting started |
|
|
|
Search by operation
Recording

 Back to top Playback
Playing images on a TV
Saving images with an external device
Using the Wi-Fi function
Customizing your camcorder
Troubleshooting
Maintenance and precautions
 Contents list
Copyright 2013 Sony Corporation
2

"Handycam" User Guide |
Search |
|
|
|
Top page > Before use |
||
Operation Search |
Before use |
|
|
Before use |
|
|
|
|
|
|
|
Getting started |
How to use this User Guide |
|
|
|
How to use this User Guide |
|
|
Recording |
|
|
|
Model Information |
|
|
|
|
|
|
|
Playback |
Parts and controls/Screen indicators |
|
|
|
|
|
|
Playing images on a TV |
Parts and controls |
|
|
|
Parts and controls (Wireless Remote Commander) |
|
|
Saving images with an external |
|
|
|
Screen indicators |
|
|
|
device |
|
|
|
|
About language setting |
|
|
Using the Wi-Fi function |
|
|
|
|
About language setting |
|
|
Customizing your camcorder |
|
|
|
|
|
|
|

 Back to top
 Troubleshooting
Maintenance and precautions
 Contents list
Copyright 2013 Sony Corporation
3

"Handycam" User Guide |
Search |
|
|
|
Top page > Getting started |
||
Operation Search |
Getting started |
|
|
|
|
|
|
Before use |
|
|
|
|
|
|
|
Getting started |
Checking the supplied items |
|
|
Recording |
Supplied items |
|
|
Attaching the supplied accessories |
|
|
|
|
|
|
|
Playback |
Charging the battery pack |
|
|
|
|
|
|
Playing images on a TV |
Charging the battery pack using the AC Adaptor |
|
|
|
Charging the battery pack using your computer |
|
|
Saving images with an external |
|
|
|
|
|
|
|
device |
Turning the power on, and setting the date and time |
|
|
Using the Wi-Fi function |
Turning the power on, and setting the date and time |
|
|
|
Preparing the recording media |
|
|
Customizing your camcorder |
|
|
|
|
Selecting a recording medium |
|
|
|
|
|
|
Troubleshooting |
Inserting a memory card |
|
|
Maintenance and precautions |
Back to top |
|
|
Contents list |
|
|
Copyright 2013 Sony Corporation |
4

"Handycam" User Guide
Operation Search
Before use
Getting started
Recording
Playback
Playing images on a TV
Saving images with an external device
Using the Wi-Fi function
Customizing your camcorder
Troubleshooting
Maintenance and precautions
 Contents list
Search Print
Top page > Recording
 Recording
Recording
Recording movies Shooting photos
Screen indicators during recording
Useful functions for recording images
Zooming
Capturing photos during movie recording (Dual Capture) Recording in mirror mode
Intelligent Auto
Recording the selected subject clearly (Face Priority) Recording movies in dim places (Video Light) Recording in dark places (NightShot)
Controlling the image settings manually with the MANUAL dial
Recording information on your location (GPS)
Features available using GPS (Models with GPS) Using the GPS function (Models with GPS)
Obtaining a map of the current location (triangulation priority mode) (Models with GPS) Checking the triangulating status (Models with GPS)
Hints for better reception (Models with GPS)
 Back to top
Copyright 2013 Sony Corporation
5

"Handycam" User Guide |
Search |
|
|
|
Top page > Playback |
||
Operation Search |
Playback |
|
|
|
|
|
|
Before use |
|
|
|
|
|
|
|
|
Playback |
|
|
Getting started |
|
|
|
|
Playing movies and photos from the Event View screen |
|
|
Recording |
|
|
|
Playing movies and photos from a map (Models with GPS) |
|
|
|
|
|
|
|
Playback |
Dividing a movie |
|
|
Playing images on a TV |
Capturing a photo from a movie |
|
|
|
Highlight playback |
|
|
Saving images with an external |
|
|
|
Enjoying a digest of your movies (Highlight Playback) |
|
|
|
device |
|
|
|
|
Changing the settings for Highlight Playback |
|
|
Using the Wi-Fi function |
|
|
|
Saving Highlight Playback in high definition image quality (HD) (Scenario Save) |
|
|
|
|
|
|
|
Customizing your camcorder |
|
|
|
Converting Highlight Playback scenes or Highlight Scenarios to standard definition image |
|||
Troubleshooting |
quality (STD) (Highlight Movie) |
|
|
|
|
|
|
|
Using the built-in projector |
|
|
Maintenance and precautions |
|
|
|
Using the built-in projector |
|
|
|
|
|
|
|
Contents list |
Using the projector for your computer or smartphone |
|
|
 Back to top
Copyright 2013 Sony Corporation
6

"Handycam" User Guide |
Search |
|
|
|
Top page > Playing images on a TV |
||
Operation Search |
Playing images on a TV |
|
|
|
|
|
|
Before use |
|
|
|
|
|
|
|
|
Playing images on a high definition TV |
|
|
Getting started |
|
|
|
|
Connecting the camcorder to a high definition TV |
|
|
Recording |
|
|
|
Playing images on a non-high-definition TV |
|
|
|
|
|
|
|
Playback |
|
|
|
Connecting the camcorder to a non-high-definition TV |
|
|
|
|
|
|
|
Playing images on a TV |
Setting the aspect ratio according to the connected TV (16:9/4:3) |
|
|
Saving images with an external |
When your TV is monaural (When your TV has only one audio input jack) |
|
|
Connecting the camcorder to a TV via a VCR |
|
|
|
device |
|
|
|
|
Playing images on a TV supporting 5.1ch surround sound |
|
|
Using the Wi-Fi function |
|
|
|
|
Enjoying 5.1ch surround sound |
|
|
Customizing your camcorder |
|
|
|
|
|
|
|
|
Playing images on a TV supporting “BRAVIA” Sync |
|
Troubleshooting |
||
Using “BRAVIA” Sync |
||
|
||
Maintenance and precautions |
Back to top |
|
|
||
Contents list |
|
|
|
Copyright 2013 Sony Corporation |
7

"Handycam" User Guide |
Search |
|
|
|
Top page > Saving images with an external device |
||
Operation Search |
Saving images with an external device |
|
|
|
|
|
|
Before use |
|
|
|
|
|
|
|
|
Using the “PlayMemories Home” software |
|
|
Getting started |
|
|
|
|
Playing images on a computer |
|
|
Recording |
|
|
|
Checking the computer system |
|
|
|
|
|
|
|
Playback |
Installing the “PlayMemories Home” software in your computer |
|
|
|
Disconnecting your camcorder from the computer |
|
|
Playing images on a TV |
|
|
|
Saving images with an external |
The devices on which the created disc can be played back |
|
|
Starting the “PlayMemories Home” software |
|
|
|
device |
|
|
|
Downloading the dedicated software for the camcorder |
|
|
|
Using the Wi-Fi function |
|
|
|
Saving images on an external media device |
|
|
|
|
|
|
|
Customizing your camcorder |
|
|
|
Saving images on an external media device easily |
|
|
|
Troubleshooting |
Saving the desired images in the camcorder to the external media device |
|
|
|
Playing back images in the external media device on the camcorder |
|
|
Maintenance and precautions |
|
|
|
Devices that cannot be used as an external media device |
|
|
|
|
|
|
|
Contents list |
Creating a disc with a recorder |
|
|
|
Creating a standard definition image quality (STD) disc with a recorder |
|
Back to top |
|
Copyright 2013 Sony Corporation |
8

"Handycam" User Guide |
Search |
|
|
|
|
Top page > Using the Wi-Fi function
Operation Search |
Using the Wi-Fi function |
|
|
||
Before use |
||
|
||
|
Using the Wi-Fi function |
|
Getting started |
||
|
Using the Wi-Fi function |
|
Recording |
||
Attaching the wireless adaptor |
||
|
||
Playback |
What you can do with the Wi-Fi function |
|
|
Playing images on a TV
Saving images with an external device
Using the Wi-Fi function Customizing your camcorder
Troubleshooting
Maintenance and precautions
 Contents list
What you can do with the Wi-Fi function
Available menus with the wireless adaptor attached
Ctrl with Smartphone Send to Smartphone Send to Computer WPS Push
Access point settings Edit Device Name Disp MAC Address SSID/PW Reset Network Info Reset Airplane Mode
Troubleshooting
Troubleshooting
 Back to top
Copyright 2013 Sony Corporation
9

"Handycam" User Guide
Operation Search
Before use
Getting started
Recording
Playback
Playing images on a TV
Saving images with an external device
Using the Wi-Fi function Customizing your camcorder Troubleshooting
Maintenance and precautions
 Contents list
 Customizing your camcorder
Using menu items
Setting up menu items
Shooting Mode
Movie
Photo
Smth Slw REC (Smooth slow rec) Golf Shot
Camera/Mic
White Balance
Spot Meter/Fcs (Spot meter/focus) Spot Meter (Flexible spot meter) Spot Focus
Exposure Focus IRIS
Shutter Speed AGC Limit AE Shift
White Balance Shift Low Lux
Scene Selection Cinematone Fader Self-Timer
Tele Macro SteadyShot (movie) SteadyShot (photo) Digital Zoom Conversion Lens Auto Back Light Dial Setting NIGHTSHOT Light Face Detection Smile Shutter Smile Sensitivity Flash
Flash Level
Red Eye Reduction Closer Voice
Blt-in Zoom Mic
Search Print
Top page > Customizing your camcorder
10
Auto Wind NR
Audio Mode Audio Rec Level My Button Expanded Focus Grid Line Display Setting Zebra
Peaking Light Bright
Audio Level Display
Image Quality/Size
REC Mode
Frame Rate HD/MP4/STD Setting Wide Mode x.v.Color
Image Size
Playback Function
Event View
Map View (HDR-PJ780VE/ PJ790V/ PJ790VE) Highlight Movie
Scenario
Edit/Copy
Delete
Protect
Copy Direct Copy
Setup
Media Select
Media Info Format
Repair Img. DB F. File Number
Data Code Volume
Download Music (HDR-PJ790/ PJ790V) Empty Music (HDR-PJ790/ PJ790V) TV Type
HDMI Resolution
CTRL FOR HDMI (Control for HDMI) USB Connect
USB Connect Setting USB LUN Setting Beep
LCD Brightness
Your Location (HDR-PJ780VE/ PJ790V/ PJ790VE) Airplane Mode (HDR-PJ780VE/ PJ790V/ PJ790VE)
11

GPS Setting (HDR-PJ780VE/ PJ790V/ PJ790VE)
REC Lamp
Remote Ctrl
Language Setting
24p Mode (HDR-PJ780E/ PJ780VE/ PJ790E/ PJ790VE)
Calibration
Battery Info
Power Save
Initialize
Demo Mode
Date & Time Setting
Area Setting
Auto Clock ADJ (HDR-PJ780VE/ PJ790V/ PJ790VE)
Auto Area ADJ (HDR-PJ780VE/ PJ790V/ PJ790VE)
 Back to top
Copyright 2013 Sony Corporation
12

"Handycam" User Guide |
Search |
|
|
|
Top page > Troubleshooting |
||
Operation Search |
Troubleshooting |
|
|
|
|
|
|
Before use |
|
|
|
|
|
|
|
|
If you have problems |
|
|
Getting started |
|
|
|
|
If you have problems |
|
|
Recording |
|
|
|
Troubleshooting |
|
|
|
|
|
|
|
Playback |
|
|
|
Overall operations/Wireless Remote Commander |
|
|
|
|
|
|
|
Playing images on a TV |
Batteries/power sources |
|
|
|
LCD screen/viewfinder |
|
|
Saving images with an external |
|
|
|
Memory card |
|
|
|
device |
|
|
|
|
Recording |
|
|
Using the Wi-Fi function |
|
|
|
Playback |
|
|
|
|
|
|
|
Customizing your camcorder |
|
|
|
Editing movies/photos on your camcorder |
|
|
|
Troubleshooting |
Playback on the TV |
|
|
Maintenance and precautions |
Copying/Connecting to other devices |
|
|
Connecting to a computer |
|
|
|
|
|
|
|
Contents list |
Self-diagnosis display/Warning indicators |
|
|
|
Self-diagnosis display |
|
Warning Indicators |
|
Back to top |
|
Copyright 2013 Sony Corporation |
13

"Handycam" User Guide |
Search |
|
|
|
|
Operation Search
Before use
Getting started
Recording
Playback
Playing images on a TV
Saving images with an external device
Using the Wi-Fi function
Customizing your camcorder
Troubleshooting Maintenance and precautions
 Contents list
Top page > Maintenance and precautions
 Maintenance and precautions
Maintenance and precautions
About the AVCHD format
About GPS (Models with GPS)
About the memory card
About the “InfoLITHIUM” battery pack
About handling of your camcorder
On use and care
On moisture condensation
On charging the pre-installed rechargeable battery
Notes on disposal/transfer the ownership of the camcorder
Recording time of movies/number of recordable photos
Charging time
Expected time of recording and playback with each battery pack
Expected recording time of movies
Expected number of recordable photos
Using your camcorder abroad
Using your camcorder abroad
On trademarks
On trademarks
License
Notes on the License
 Back to top
Copyright 2013 Sony Corporation
14

"Handycam" User Guide
Operation Search
Before use
Getting started
Recording
Playback
Playing images on a TV
Saving images with an external device
Using the Wi-Fi function
Customizing your camcorder
Troubleshooting
Maintenance and precautions
 Contents list
Search Print
Top page > Contents list
Contents list
 Operation Search
Operation Search
Search by operation
 Back to top
 Before use
How to use this User Guide
How to use this User Guide Model Information
Parts and controls/Screen indicators
Parts and controls
Parts and controls (Wireless Remote Commander) Screen indicators
About language setting
About language setting
 Back to top
 Getting started
Checking the supplied items
Supplied items
Attaching the supplied accessories
Charging the battery pack
Charging the battery pack using the AC Adaptor Charging the battery pack using your computer
Turning the power on, and setting the date and time
Turning the power on, and setting the date and time
Preparing the recording media
Selecting a recording medium Inserting a memory card
 Back to top
 Recording
Recording
Recording movies
Shooting photos
Screen indicators during recording
15
Useful functions for recording images
Zooming
Capturing photos during movie recording (Dual Capture) Recording in mirror mode
Intelligent Auto
Recording the selected subject clearly (Face Priority) Recording movies in dim places (Video Light) Recording in dark places (NightShot)
Controlling the image settings manually with the MANUAL dial
Recording information on your location (GPS)
Features available using GPS (Models with GPS) Using the GPS function (Models with GPS)
Obtaining a map of the current location (triangulation priority mode) (Models with GPS) Checking the triangulating status (Models with GPS)
Hints for better reception (Models with GPS)
 Back to top
 Playback
Playback
Playing movies and photos from the Event View screen Playing movies and photos from a map (Models with GPS) Dividing a movie
Capturing a photo from a movie
Highlight playback
Enjoying a digest of your movies (Highlight Playback) Changing the settings for Highlight Playback
Saving Highlight Playback in high definition image quality (HD) (Scenario Save)
Converting Highlight Playback scenes or Highlight Scenarios to standard definition image quality (STD) (Highlight Movie)
Using the built-in projector
Using the built-in projector
Using the projector for your computer or smartphone
 Back to top
 Playing images on a TV
Playing images on a high definition TV
Connecting the camcorder to a high definition TV
Playing images on a non-high-definition TV
Connecting the camcorder to a non-high-definition TV
Setting the aspect ratio according to the connected TV (16:9/4:3)
When your TV is monaural (When your TV has only one audio input jack) Connecting the camcorder to a TV via a VCR
Playing images on a TV supporting 5.1ch surround sound
Enjoying 5.1ch surround sound
Playing images on a TV supporting “BRAVIA” Sync
Using “BRAVIA” Sync
16
 Back to top
 Saving images with an external device
Using the “PlayMemories Home” software
Playing images on a computer Checking the computer system
Installing the “PlayMemories Home” software in your computer Disconnecting your camcorder from the computer
The devices on which the created disc can be played back Starting the “PlayMemories Home” software
Downloading the dedicated software for the camcorder
Saving images on an external media device
Saving images on an external media device easily
Saving the desired images in the camcorder to the external media device Playing back images in the external media device on the camcorder Devices that cannot be used as an external media device
Creating a disc with a recorder
Creating a standard definition image quality (STD) disc with a recorder
 Back to top
 Using the Wi-Fi function
Using the Wi-Fi function
Using the Wi-Fi function Attaching the wireless adaptor
What you can do with the Wi-Fi function
What you can do with the Wi-Fi function
Available menus with the wireless adaptor attached
Ctrl with Smartphone Send to Smartphone Send to Computer WPS Push
Access point settings Edit Device Name Disp MAC Address SSID/PW Reset Network Info Reset Airplane Mode
Troubleshooting
Troubleshooting
 Back to top
 Customizing your camcorder
Using menu items
Setting up menu items
Shooting Mode
17
Movie
Photo
Smth Slw REC (Smooth slow rec) Golf Shot
Camera/Mic
White Balance
Spot Meter/Fcs (Spot meter/focus) Spot Meter (Flexible spot meter) Spot Focus
Exposure Focus IRIS
Shutter Speed AGC Limit AE Shift
White Balance Shift Low Lux
Scene Selection Cinematone Fader Self-Timer
Tele Macro SteadyShot (movie) SteadyShot (photo) Digital Zoom Conversion Lens Auto Back Light Dial Setting NIGHTSHOT Light Face Detection Smile Shutter Smile Sensitivity Flash
Flash Level
Red Eye Reduction Closer Voice
Blt-in Zoom Mic
Auto Wind NR
Audio Mode Audio Rec Level My Button Expanded Focus Grid Line Display Setting Zebra
Peaking Light Bright
Audio Level Display
Image Quality/Size
18
REC Mode
Frame Rate HD/MP4/STD Setting Wide Mode x.v.Color
Image Size
Playback Function
Event View
Map View (HDR-PJ780VE/ PJ790V/ PJ790VE) Highlight Movie
Scenario
Edit/Copy
Delete
Protect
Copy Direct Copy
Setup
Media Select
Media Info Format
Repair Img. DB F. File Number
Data Code Volume
Download Music (HDR-PJ790/ PJ790V) Empty Music (HDR-PJ790/ PJ790V) TV Type
HDMI Resolution
CTRL FOR HDMI (Control for HDMI) USB Connect
USB Connect Setting USB LUN Setting Beep
LCD Brightness
Your Location (HDR-PJ780VE/ PJ790V/ PJ790VE) Airplane Mode (HDR-PJ780VE/ PJ790V/ PJ790VE) GPS Setting (HDR-PJ780VE/ PJ790V/ PJ790VE)
REC Lamp
Remote Ctrl Language Setting
24p Mode (HDR-PJ780E/ PJ780VE/ PJ790E/ PJ790VE) Calibration
Battery Info
Power Save Initialize Demo Mode
Date & Time Setting Area Setting
19

Auto Clock ADJ (HDR-PJ780VE/ PJ790V/ PJ790VE)
Auto Area ADJ (HDR-PJ780VE/ PJ790V/ PJ790VE)
 Back to top
 Troubleshooting
If you have problems
If you have problems
Troubleshooting
Overall operations/Wireless Remote Commander Batteries/power sources
LCD screen/viewfinder Memory card Recording
Playback
Editing movies/photos on your camcorder Playback on the TV
Copying/Connecting to other devices Connecting to a computer
Self-diagnosis display/Warning indicators
Self-diagnosis display Warning Indicators
 Back to top
 Maintenance and precautions
Maintenance and precautions
About the AVCHD format
About GPS (Models with GPS)
About the memory card
About the “InfoLITHIUM” battery pack
About handling of your camcorder
On use and care
On moisture condensation
On charging the pre-installed rechargeable battery
Notes on disposal/transfer the ownership of the camcorder
Recording time of movies/number of recordable photos
Charging time
Expected time of recording and playback with each battery pack
Expected recording time of movies
Expected number of recordable photos
Using your camcorder abroad
Using your camcorder abroad
On trademarks
On trademarks
License
Notes on the License
20
Back to top
Copyright 2013 Sony Corporation
21

"Handycam" User Guide
Operation Search
Before use
Getting started
Recording
Playback
Playing images on a TV
Saving images with an external device
Using the Wi-Fi function
Customizing your camcorder
Troubleshooting
Maintenance and precautions
 Contents list
Search Print
Top page > Operation Search > Operation Search > Search by operation
Search by operation
Setting the date and time
Date & Time Setting
Area Setting
Auto Clock ADJ (HDR-PJ780VE/ PJ790V/ PJ790VE)
Identifying part names
Parts and controls
Displaying the data code
Data Code
Checking your golf swing
Golf Shot
Smth Slw REC (Smooth slow rec)
Selecting the suitable setting automatically for the recording situation
Intelligent Auto
Recording people clearly
Face Detection
Recording the selected subject clearly (Face Priority)
Smile Shutter
Scene Selection (Portrait)
Scene Selection (Spotlight)
Scene Selection (Night Portrait)
Closer Voice
Recording images with the selected image quality
REC Mode
Frame Rate
HD/MP4/STD Setting
Wide Mode
Image Size
Recording images without blurring
SteadyShot (movie)
SteadyShot (photo)
Adjusting the focus
Spot Focus
Tracking focus: Recording the selected subject clearly (Face Priority)
Focus
Using the GPS function
GPS Setting (HDR-PJ780VE/ PJ790V/ PJ790VE)
Your Location (HDR-PJ780VE/ PJ790V/ PJ790VE)
Recording movies in a dim place
Recording in dark places (NightShot)
22

Low Lux
Scene Selection (Night Portrait)
Scene Selection (Night Scene)
Recording movies in dim places (Video Light)
Flash
Recording sound clearly
Closer Voice
Auto Wind NR
Audio Mode
Blt-in Zoom Mic
Audio Rec Level
Capturing photos during movie recording
Recording high quality photos during movie recording (Dual capture): Recording movies Smile Shutter
Recording sunset or fireworks beautifully
Scene Selection (Fireworks)
Scene Selection (Sunrise&Sunset)
Selecting a recording medium
Media Select
Saving battery power
Power Save
Recording images manually to achieve the effect you want
Controlling the image settings manually with the MANUAL dial
Dial Setting
Playing movies and photos from an event
Event View
Playing movies and photos from a map
Map View (HDR-PJ780VE/ PJ790V/ PJ790VE)
Enjoying a digest of your movies
Enjoying a digest of your movies (Highlight Playback)
Using the built-in projector
Using the built-in projector
Playing images on a TV
Connecting the camcorder to a high definition TV
Connecting the camcorder to a non-high-definition TV
Editing movies and photos
Capturing a photo from a movie
Dividing a movie
Delete
Saving images with an external device
Saving images on an external media device easily
Creating a disc
Creating a standard definition image quality (STD) disc with a recorder
 Back to top
Copyright 2013 Sony Corporation
23

"Handycam" User Guide
Operation Search
Before use
Getting started
Recording
Playback
Playing images on a TV
Saving images with an external device
Using the Wi-Fi function
Customizing your camcorder
Troubleshooting
Maintenance and precautions
 Contents list
Search Print
Top page > Before use > How to use this User Guide > How to use this User Guide
How to use this User Guide
 Selecting a topic to display
 Searching a topic by keyword
 Returning to a previous page
 Printing out a page
 Marks and notations used in this User Guide
This User Guide explains how to use each function of the camcorder, how to change settings, and how to troubleshoot a problem.
 Selecting a topic to display
The following illustrations take Internet Explorer 7 as an example.
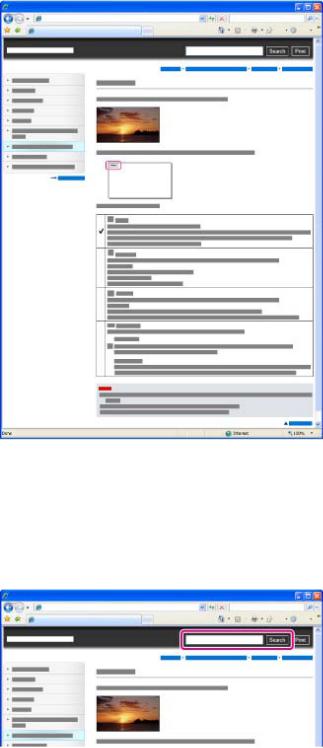
1.Click a title in the side bar on the left of the browser window. A list of topic titles appears in the right pane.
2.Click a topic title in the list.
Descriptions appear in the right pane.
24
Changing the font size
Change the font size by changing the setting of your web browser. For how to change the font size setting, refer to the Help of your web browser.
 Searching a topic by keyword
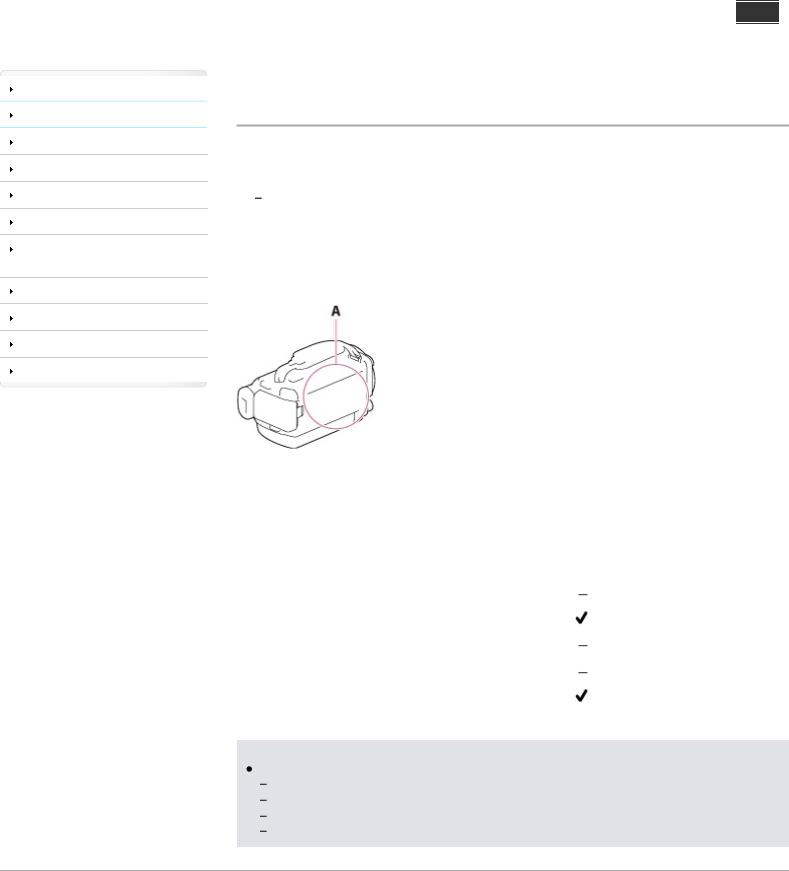
Enter the keyword in the search window, then click the [Search] button.
 Returning to a previous page
Use the back button of your web browser or the breadcrumb trail navigation (A) to return to a page you previously viewed.
25

 Printing out a page
Click the [Print] button to print out a page you are viewing.
 Marks and notations used in this User Guide
In this User Guide, the sequence of operations is shown by arrows ( |
) (A). |
Operate the camcorder in the order indicated.
26

Icons in the operating procedure sentences appear when the camcorder is in its default settings.  The default setting is indicated by
  .
.
 Back to top
Copyright 2013 Sony Corporation
27
"Handycam" User Guide
Operation Search
Before use
Getting started
Recording
Playback
Playing images on a TV
Saving images with an external device
Using the Wi-Fi function
Customizing your camcorder
Troubleshooting
Maintenance and precautions
 Contents list
Search Print
Top page > Before use > How to use this User Guide > Model Information
Model Information
In this User Guide, the differences in the specifications for each model are described together.
If you find the description “Models with ... ” like below, confirm in this chapter whether the description applies to your camcorder.
(Models with GPS)
 (Models with the NTSC color system)
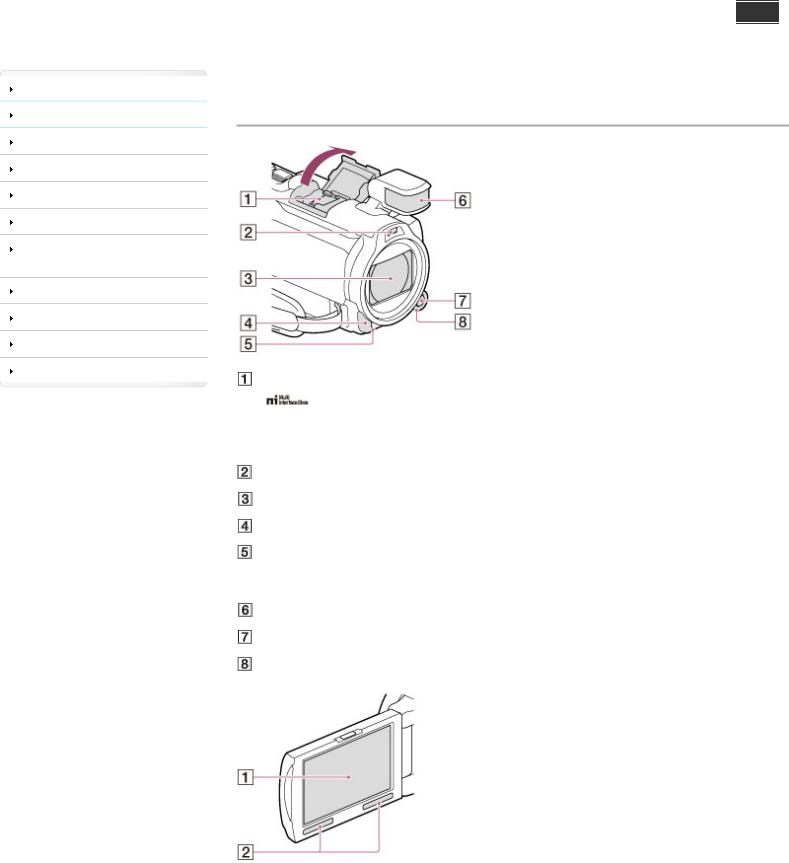
 To confirm the model name of your camcorder
See the bottom of your camcorder.
A: Model name (HDR-xxx)
 Differences in functions
Model name |
Signal format |
USB connection |
GPS |
HDR-PJ780E |
PAL |
Output only |
|
|
|
|
|
HDR-PJ780VE/ PJ790VE |
PAL |
Output only |
|
|
|
|
|
HDR-PJ790 |
NTSC |
Input/Output |
|
|
|
|
|
HDR-PJ790E |
PAL |
Output only |
|
|
|
|
|
HDR-PJ790V |
NTSC |
Input/Output |
|
|
|
|
|
Notes
For the following items, the descriptions are explained with the model name. Parts and controls [Details]
Menu items
Expected recording time of movies [Details] Expected number of recordable photos [Details]
 Back to top
Copyright 2013 Sony Corporation
28
"Handycam" User Guide
Operation Search
Before use
Getting started
Recording
Playback
Playing images on a TV
Saving images with an external device
Using the Wi-Fi function
Customizing your camcorder
Troubleshooting
Maintenance and precautions
 Contents list
Search Print
Top page > Before use > Parts and controls/Screen indicators > Parts and controls
Parts and controls
Multi interface shoe
For details on compatible accessories of the Multi interface shoe, visit the Sony web site in your area, or consult your Sony dealer or localauthorized Sony service facility.
Operations with other manufacture’s accessories are not guaranteed.
Flash/Video light
Lens (Carl Zeiss lens)
Remote sensor/Infrared port
Camera recording lamp
The camera recording lamp lights up in red during recording. The lamp flashes when the remaining recording media capacity or battery power is low.
Built-in microphone
MANUAL button
MANUAL dial
29
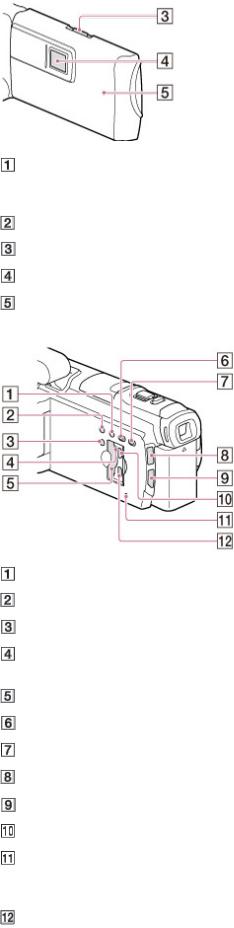
LCD screen/Touch panel
If you rotate the LCD panel 180 degrees, you can close the LCD panel with the LCD screen facing out. This is convenient during playback operations.
Speakers
PROJECTOR FOCUS lever
Projector lens
GPS antenna (HDR-PJ780VE/ PJ790V/ PJ790VE)
A GPS antenna is located in the LCD panel.
LIGHT (Video Light) button
NIGHTSHOT button
POWER button
Memory card access lamp
While the lamp is lit or flashing, the camcorder is reading or writing data.
Memory card slot
 (View Images) button
PROJECTOR button  (Movie)/
  (Photo) lamp
MODE button
PROJECTOR IN jack
RESET button
Press RESET using a pointed object.
Press RESET to initialize all the settings including the clock setting.
HDMI OUT jack
30
 Loading...