


PCV-RX761
Table of contents
 Loading...
Sony PCV-RX761, PCV-RX760, PCV-RX750P, PCV-RX750, PCV-RX730 User Guide
...
VAIO Digital Studio™
Computer User Guide


Contents
Welcome.................................................................5
Locating Controls and Connectors .....................7
Front Panel Overview..................................................................... 7
Back Panel Overview ................................................................... 10
VAIO Action Setup...............................................13
Shortcut Keys.............................................................................. 13
To Change the Sony Software Window Design............................ 15
VAIO AV Applications .........................................17
Overview of Preinstalled Software ............................................... 17
DigitalPrint Software ................................................................... 19
DVgate Software.......................................................................... 27
MovieShaker Software................................................................. 30
PictureGear Software................................................................... 37
Smart Capture Software .............................................................. 40
SonicStage Software ................................................................... 49
VisualFlow Software .................................................................... 56
Configuring Your VAIO Computer .....................59
Hard Disk Drive Partition .............................................................. 59
i.LINK (IEEE1394) Compatibility.................................................. 60
To Enable Ethernet Connectivity .................................................. 61
3

VAIO Digital Studio Computer User Guide
System, Application,
and Driver Recovery CD(s) ................................ 63
To Use the System Recovery CD(s) ............................................. 63
To Use the Application Recovery CD(s) ....................................... 65
To Use the Driver Recovery CD.................................................... 66
Troubleshooting ................................................. 67
Topics .......................................................................................... 67
Notes on Use ............................................................................... 79
For Answers to Your Software Questions .................................... 84
Resources.................................................................................... 87
Index .................................................................... 89
4

VAIO Digital Studio Computer User Guide
Welcome
Thank you for purchasing your Sony VAIO® computer! Your new
computer is a superb blend of high technology and easy-to-use
functionality. The information provided here is designed to help you to
become familiar with the hardware and software applications included
with your system.
5

VAIO Digital Studio Computer User Guide
6

Locating Controls and Connectors
Front Panel Overview
The front panel of your VAIO Computer allows access to the optical and floppy
disk drives. It also includes Universal Serial Bus (USB) and i.LINK® ports to
connect compatible peripheral devices.
i.LINK is a trademark of Sony used only to designate that a product contains an
✍
IEEE1394 connection. The i.LINK connection may vary, depending on the software
applications, operating system, and compatible i.LINK devices. All products with an
i.LINK connection may not communicate with each other.
Please refer to the documentation that came with your compatible i.LINK device for
information on operating conditions and proper connection. Before connecting
compatible i.LINK PC peripherals to your system, such as an optical or hard disk drive,
confirm their operating system compatibility and required operating conditions.
7

VAIO Digital Studio Computer User Guide
Front panel
Your computer may not be supplied with all of the features listed, depending on the
✍
system configuration you purchased.
8
1 Optical drive 1
See Specifications sheet for optical drive information.
2 Optical drive 2
See Specifications sheet for optical drive information.
3 Floppy disk drive
Reads and writes data from and to a 3.5-inch floppy disk.
4 Floppy disk drive access indicator light
Lights in green while reading and writing data from and to a floppy disk.
5 Optical drive access indicator light
Lights in amber while reading and writing data from and to the optical drives.
6 Hard disk drive access indicator light
Lights in amber while reading and writing data from and to the hard disk.
7 Power switch and indicator light
Turns the computer on/off . The indicator light is blue while the power is on and
amber when the computer is in Stand by mode.
8 i.LINK 4-pin port (IEEE1394)
Connection for a compatible digital device.
9 Optical drive 1 eject button
Ejects a disc from Optical drive 1.
10 Optical drive 2 eject button
Ejects a disc from Optical drive 2.
11 Memory Stick slot (Not available on all models)
Reads and writes data from and to a Memory Stick media.
12 Floppy disk eject button
Ejects a floppy disk.
13 Universal Serial Bus (USB) ports (2)
Connections for compatible USB devices.
Front Panel Overview
For your convenience, your computer includes USB and i.LINK ports on both the front
✍
and back panels. The 4-pin i.LINK port is located on the front panel and the 6-pin
i.LINK port is located on the back.
9
VAIO Digital Studio Computer User Guide
Back Panel Overview
The back panel of your computer contains the ports for supplied and optional
accessories. The icons on the back panel locate and identify the ports and jacks
on your computer.
Your computer may not be supplied with all of the features listed, depending on the
✍
system configuration you purchased.
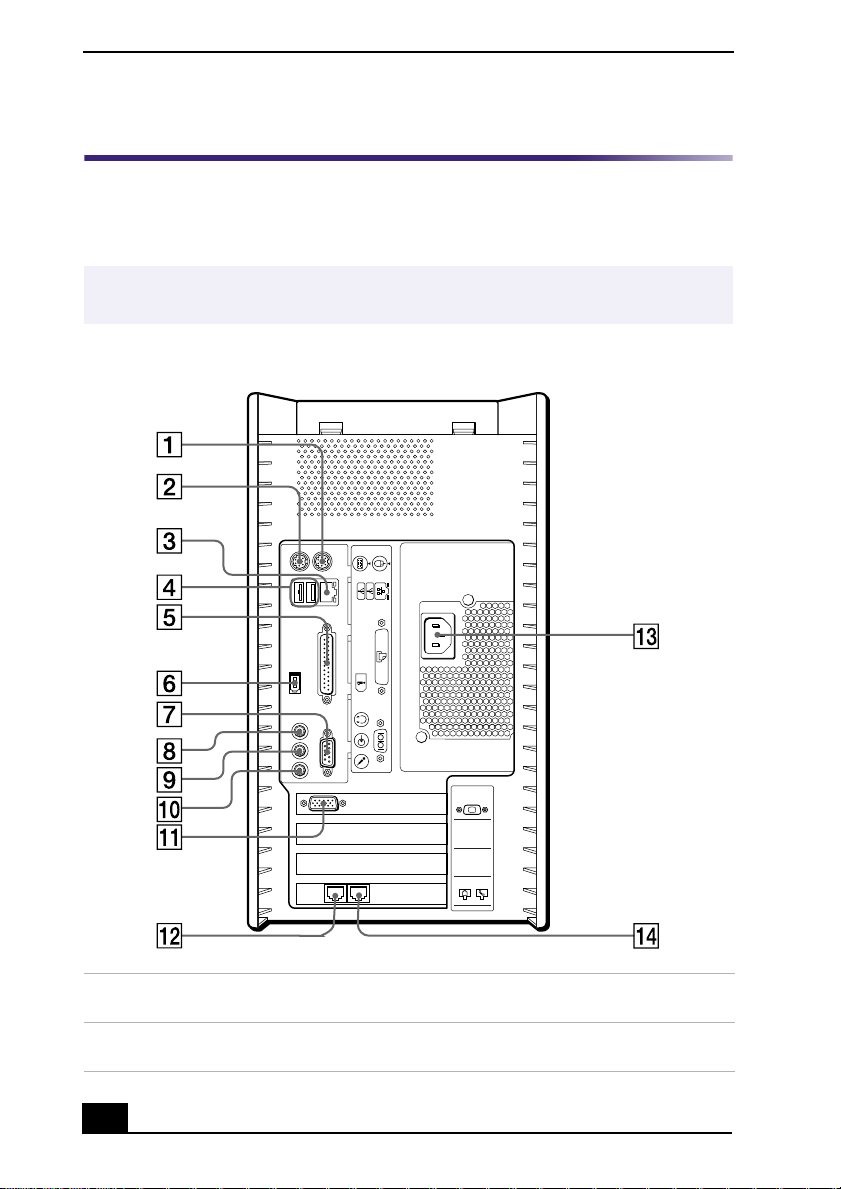
Back panel
KEYBOARD
MOUSE
USB NETWORK
ACT
LINK
PRINTER
1 Mouse port
Connection for a PS/2® mouse.
2 Keyboard port
Connection for a PS/2 Keyboard.
10
i.LINK
S400
HEADPHONES
LINE IN
MIC
SERIAL
4
MONITOR
3
2
1
LINE
TELEPHONE
3 Ethernet port
10Base-T/100Base-TX Fast Ethernet interface.
(The port marked with (Network) is for LAN connections only.)
4 Universal Serial Bus (USB) ports (2)
Connection for compatible USB devices.
5 Printer port
Connection for a parallel device, such as a printer or scanner.
6 i.LINK 6-pin port (IEEE1394)
Connection for a compatible digital device.
7 Serial port
Connection for a compatible serial device.
8 Headphones jack
Connection for the supplied speakers or optional headphones.
9 Line In jack
Connection for an audio device.
10 Microphone jack
Connection for a microphone (optional).
11 Monitor port
Connection for a standard CRT display.
12 Modem line jack
Connection for the supplied modem cable to the wall jack.
13 AC Input port
Connection for the supplied power cord.
14 Telephone jack
Connection for a phone cable (optional) to the computer.
Back Panel Overview
i.LINK is a trademark of Sony used only to designate that a product contains an
✍
IEEE1394 connection. The i.LINK connection may vary, depending on the software
applications, operating system, and compatible i.LINK devices. All products with an
i.LINK connection may not communicate with each other.
Please refer to the documentation that came with your compatible i.LINK device for
information on operating conditions and proper connection. Before connecting
compatible i.LINK PC peripherals to your system, such as an optical or hard disk drive,
confirm their operating system compatibility and required operating conditions.
11

VAIO Digital Studio Computer User Guide
12

VAIO Action Setup
VAIO Action Setup manages the settings for your computer’s Shortcut
keys (S Keys).
Shortcut Keys
The programmable S Keys are linked with the following applications as their
default settings:
❑ S1 — Outlook® Express
❑ S2 — Internet Explorer
❑ S3 — SonicStage
❑ S4 — PictureGear™
❑ S5 — MovieShaker™
❑ S6 — Help/Demo
You can reprogram the S keys to launch other applications.
i.LINK is a trademark of Sony used only to designate that a product contains an
✍
IEEE1394 connection. The i.LINK connection may vary, depending on the software
applications, operating system, and compatible i.LINK devices. All products with an
i.LINK connection may not communicate with each other.
Please refer to the documentation that came with your compatible i.LINK device for
information on operating conditions and proper connection. Before connecting
compatible i.LINK PC peripherals to your system, such as an optical or hard disk
drive, confirm their operating system compatibility and required operating conditions.
13

VAIO Digital Studio Computer User Guide
Changing the settings of the S Keys
1 Click Start in the Windows Taskbar and select All Programs.
2 Select VAIO Action Setup, then click VAIO Action Setup.
You can also double-click the VAIO Action Setup icon, located in the Windows
✍
taskbar, to launch VAIO Action Setup.
3 Click the S Key you want to change.
4 From the Select Application dialog box, click the option for the desired type
of function. The corresponding applications appear in the list box on the
right.
You can drag an application to place it into the list box.
✍
5 The Confirmation Application Name window appears. Click Next.
6 You can type a new name and description, if desired. Click Finish.
14

To Change the Sony Software Window Design
To Change the Sony Software Window Design
You can select from different window designs for your Sony software and create
your own personal computing environment.
Changing the window design
1 Click Start in the Windows taskbar and select the Control Panel.
2 Click Other Control Panel Options.
3 Click UI Design Selector.
4 Click << or >> and select the desired design.
5 Click Apply.
6 The “UI Design Selector” window design changes. The window design for
your Sony software will match the “UI Design Selector” window.
7 To try another selection, click << or >>, then click Apply.
8 When you have made your selection, click OK. The UI Design Selector
closes and the Sony software window design displays.
You may only use this feature with compatible UI Design Selector software.
✍
15

VAIO Digital Studio Computer User Guide
16

VAIO AV Applications
Your VAIO® computer is preconfigured with a collection of audio and
video (AV) applications that make it easy to use advanced multimedia
technology. This section describes the VAIO® AV applications.
Your computer may not be supplied with all of the software applications listed,
✍
depending on the system configuration you purchased.
Your computer’s visual presentation of the VAIO AV applications may not appear
exactly as shown in this section, depending on the specific computer model you
purchased.
Overview of Preinstalled Software
DigitalPrint
Sony Electronics Inc.
This image management software makes it fun and easy to edit, import, and organize your
digital pictures in a photo album for rich digital printing to any standard color laser or
inkjet printer. Digital Print can also be used to make custom CD labels for your audio CDs.
DVgate
Sony Electronics Inc.
Connect a digital video camera recorder to the i.LINK® port and capture your own video
clips and still images. You can edit clips from your video, add new clips, and combine
clips into new movie segments. You can also save your images in a variety of popular file
formats.
™
Media Bar® DVD Player
Sony Electronics Inc.
Media Bar DVD Player is created especially for high-quality DVD playback. You can
enjoy the superior digital video quality and the effects features. You can rewind or fastforward scenes from the DVD Player monitor as you would with any ordinary DVD
player, to easily find the scene you want to view. Typical DVD playback features are
available, such as multiple angles, audio language tracks, and subtitles. Media Bar DVD
Player seamlessly integrates a premium audio/visual experience with an easy-to-use
software interface.
17

VAIO Digital Studio Computer User Guide
MovieShaker™
Sony Electronics Inc.
Sony’s original MovieShaker software creates personal movies that have transitions,
background music, and text. Just import your video clips and “shake” with a click of the
mouse. Your personal movies are easy to create and fun to share with family and friends.
PictureGear™
Sony Electronics Inc.
This image management software displays images from your hard drive, a Sony digital
still camera, or a Sony Mavica®
format, so that you can easily view the contents of an entire folder.
camera. The images appear in a convenient light-table
Smart Capture
Sony Electronics Inc.
Smart Capture is a fun new way to send multimedia messages via e-mail. Smart Capture
manages the i.LINK® connection between your notebook and a Sony Digital Handycam®
Camcorder that supports the i.LINK interface. It allows you to capture compressed video
or still images and save them to your hard disk drive or share via e-mail. A smart solution
for computer, digital audio/video and network convergence.
SonicStage
Sony Electronics Inc.
This new jukebox application adds a host of new features to its predecessor, OpenMG™
Jukebox. Continuing to take advantage of Sony’s copyright-protected ATRAC3™ format
for high-quality digital audio storage, SonicStage sports a new Music Visualizer, a sleek
new player skin design, audio CD burning capability, and a parametric equalizer for finetuning audio playback.
VisualFlow™
Sony Electronics Inc.
VisualFlow software is a state-of-the-art Sony multimedia browser designed specifically
for Memory Stick® media. It displays any still picture, movie or sound file stored in a
Memory Stick media in a visually pleasing, artistic manner. VisualFlow software not only
plays a selected movie or sound file, but also enables playback of files by other
applications like PictureGear™ software or Memory Stick Slideshow.
18
DigitalPrint Software
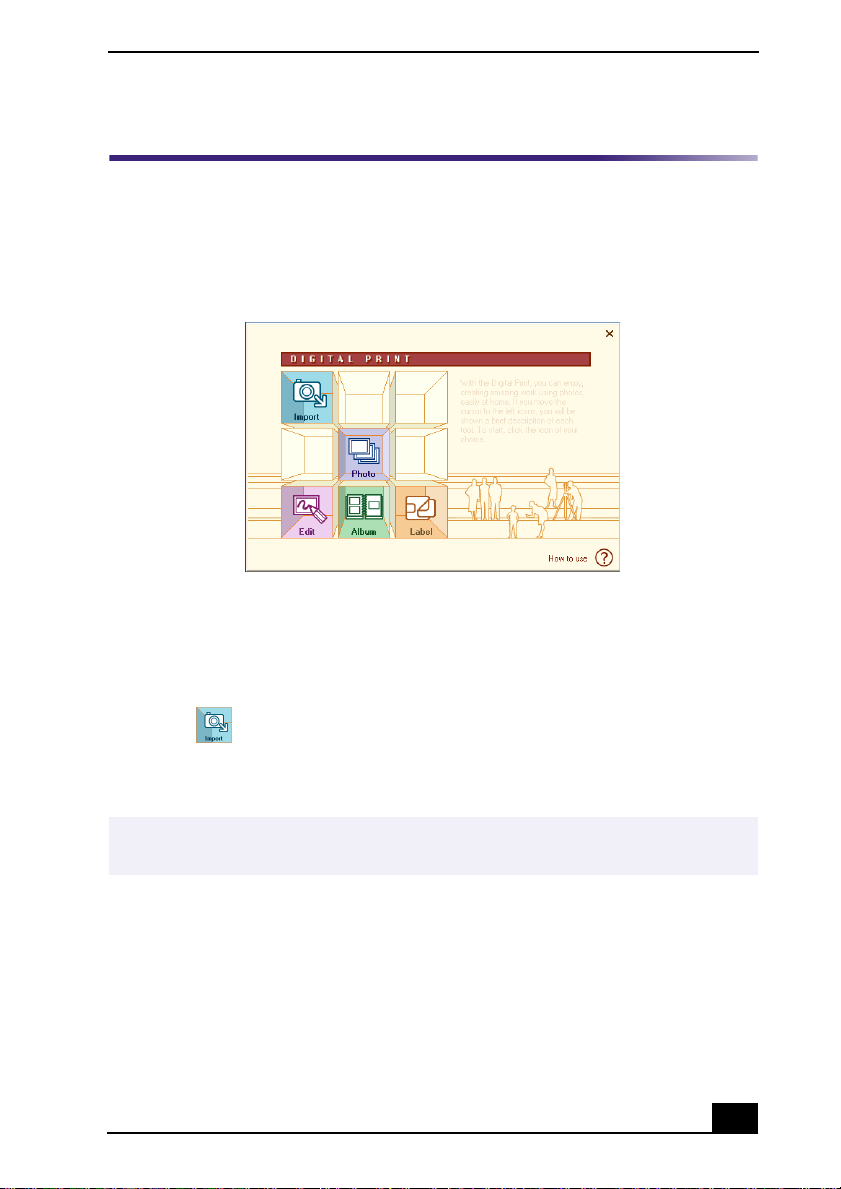
DigitalPrint Software
DigitalPrint is designed to creatively manage your digital pictures. With its easyto-use features, you can quickly load images from your digital camera or
camcorder, print high-quality photos, and make personalized photo albums and
labels to share with friends and family.
DigitalPrint main browser window
Using PhotoCapture
Capture and import your digital pictures from your digital camera or camcorder,
to your computer. You can select your favorite pictures and place them in handy
folders for future use.
1 Click (Import) to open the PhotoCapture window. Your connected
digital camera, camcorder, or Memory Stick® media is indicated in the
window.
Properly connect your digital camera, camcorder, or insert your Memory Stick media
✍
in your computer.
19
VAIO Digital Studio Computer User Guide
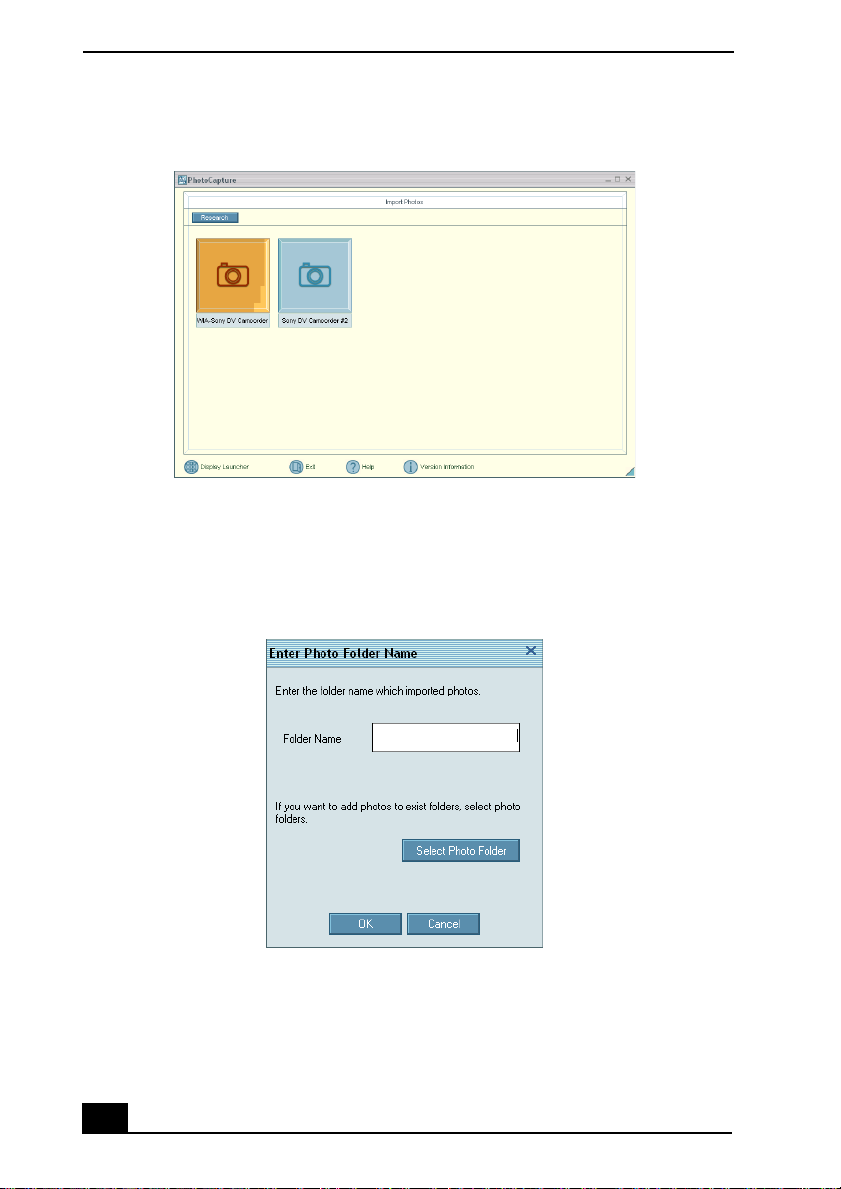
PhotoCapture window
2 Click the camera icon to open the Enter Photo Folder Name dialog box. You
can enter a name for a new folder or click Select Photo Folder, to import
your pictures to an existing folder. Click OK.
Enter Photo Folder Name dialog box
20
DigitalPrint Software
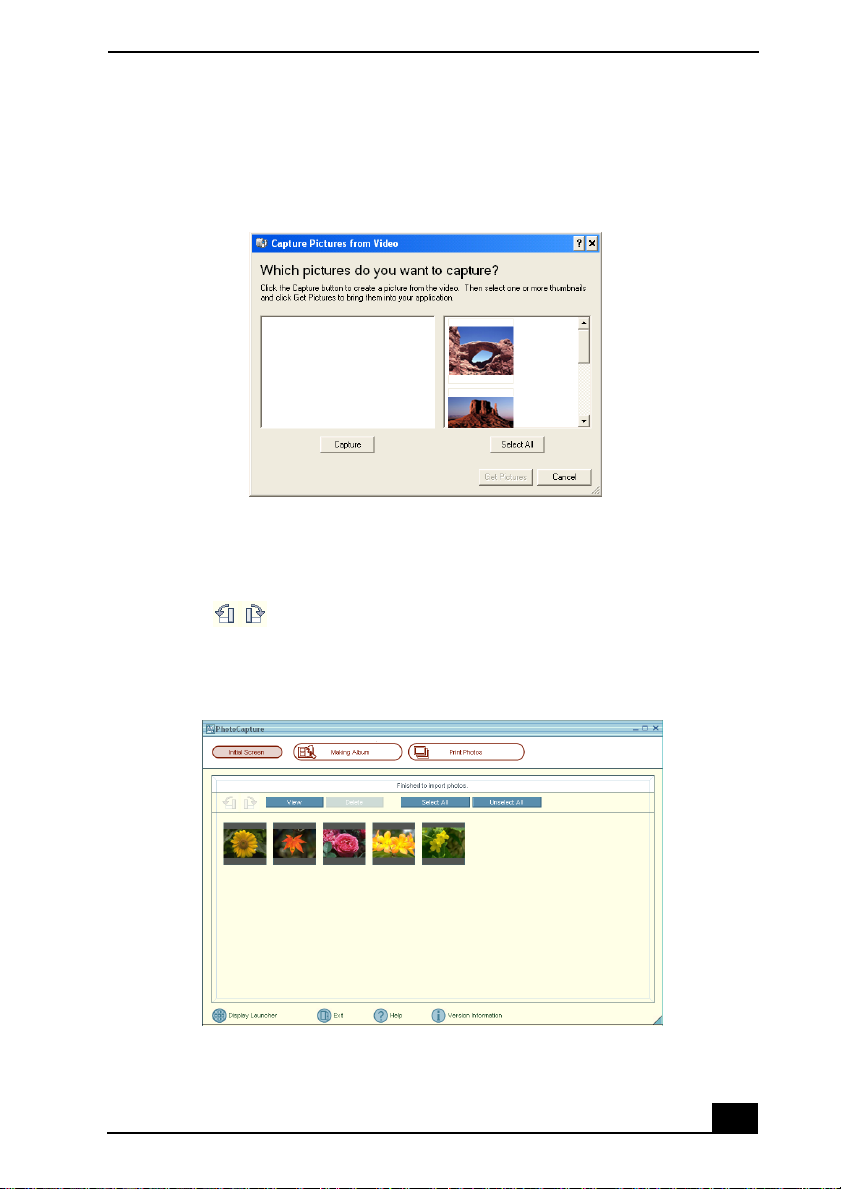
3 Click the Capture button to capture still images. You can preview a
thumbnail version of your pictures in the selection view window.
Capture Pictures from Video window
4 Select the desired pictures and click the Get Pictures button. The
PhotoCapture picture editor window appears.
5 Click the View button to see an enlarged version of a selected picture. You
can use (Rotate) to change the position of a selected picture. Use the
Delete button to eliminate any unwanted pictures.
PhotoCapture editing window
21
VAIO Digital Studio Computer User Guide
Using PhotoCollection
You can select and print your favorite digital pictures, using your computer and
home printer.
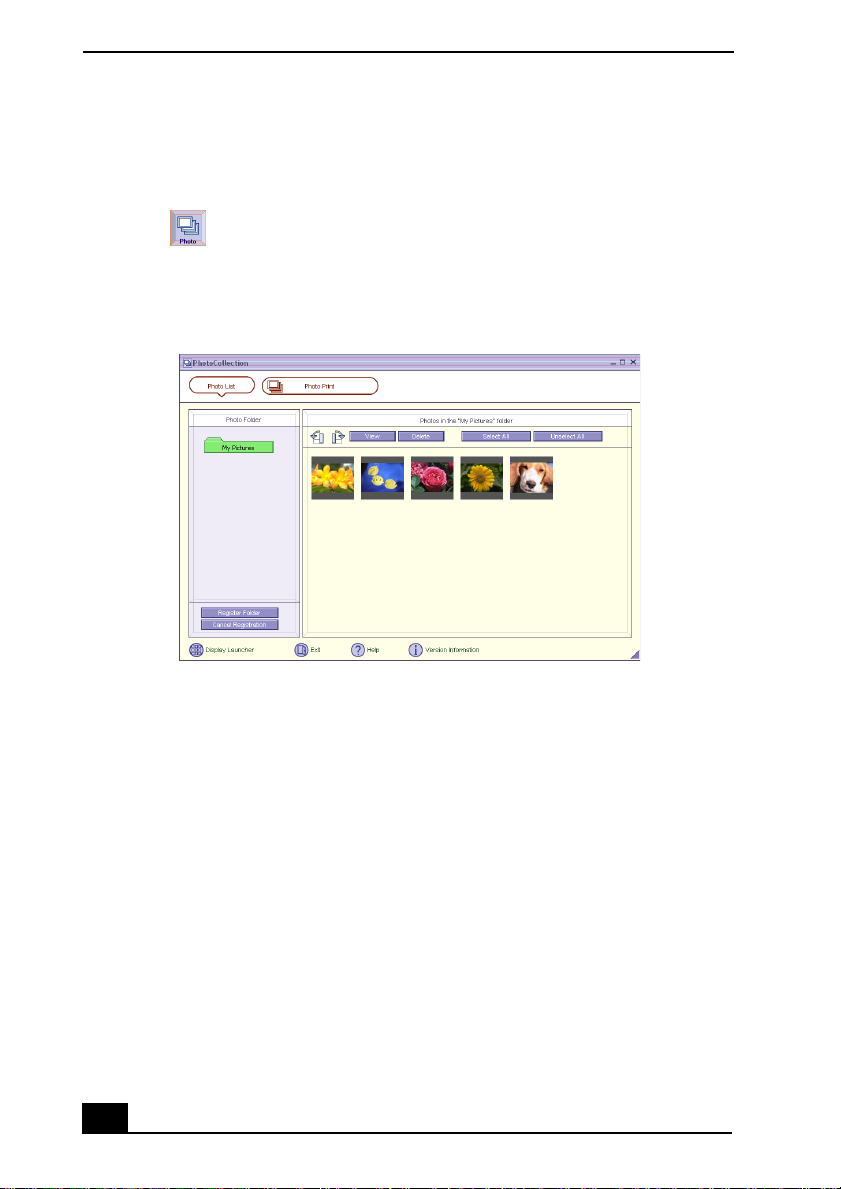
1 Click (Photo) to open the PhotoCollection window. A list of available
Folders is displayed on the left side of the window, with the folder contents
displayed as thumbnail pictures on the right.
PhotoCollection window
2 Select the desired folder. From the thumbnail view, click to select the
pictures you want to print.
3 Click the Photo Print button at the top of the window. Select the number of
prints you want to make, using the scroll arrows. Click OK.
4 Select the paper, based on the picture positioning desired. A layout preview
is displayed on the left side of the window.
5 Use the configuration buttons and drop-down lists to select the printer and to
set margins.
22
DigitalPrint Software
Printer and Paper selection window
6 Click Print All to begin printing all pages, or click “Print the selected page
only” to print a specific page of photos.
Using PhotoDecor
You can decorate your favorite photos with clip art, stamps, or your own drawing
talent. Add, remove, and change your designs to create your own unique photo
art.
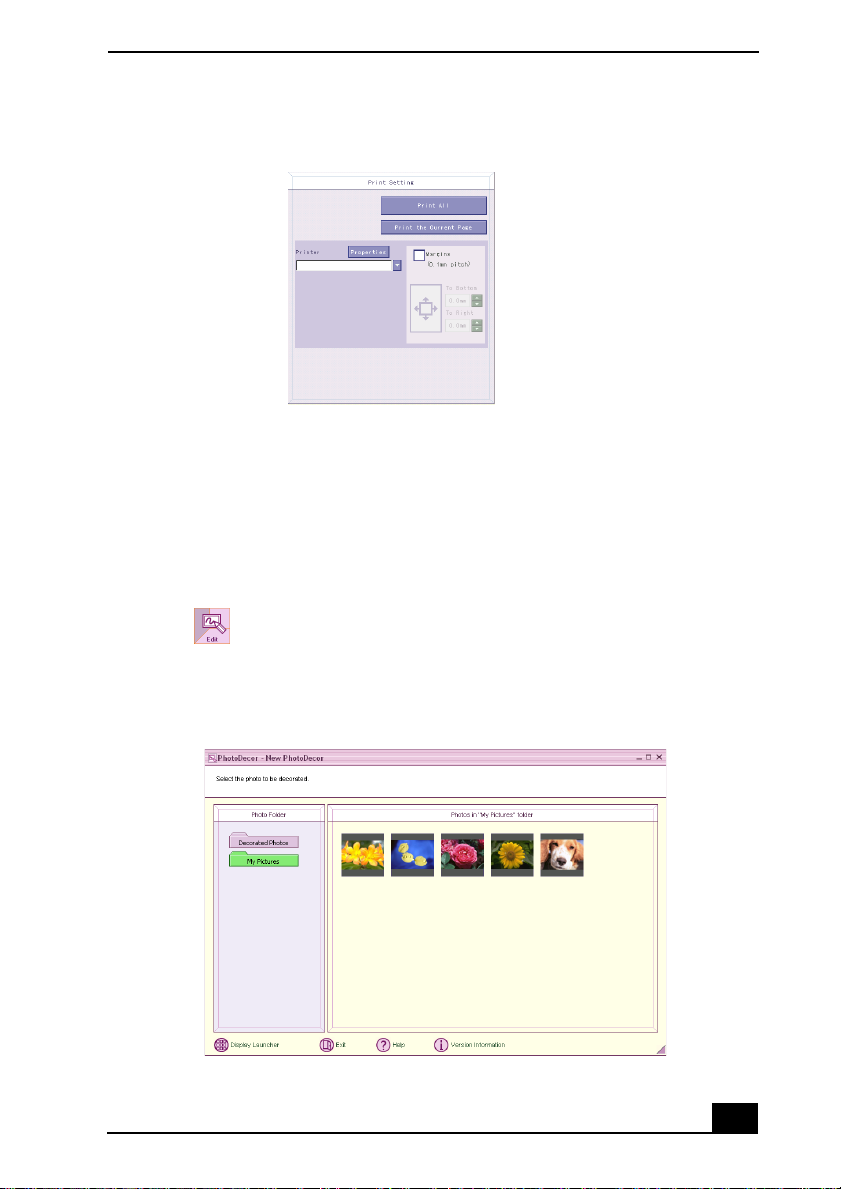
1 Click (Edit) to open the PhotoDecor - New PhotoDecor window. A list
of your available Folders is displayed on the left side of the window, with the
folder contents displayed as thumbnail pictures on the right.
PhotoDecor-New PhotoDecor window
23
VAIO Digital Studio Computer User Guide
2 Select the desired folder. From the thumbnail view, click to select the
pictures you want to decorate. The PhotoDecor editing window appears.
3 Use the decoration features on the right side of the window by clicking on
the desired decoration icon and then dragging the decoration onto your
photo.
4 Click the Print button when your photo is ready to be printed. You can save
your decorated pictures before printing. Name the new picture and click
Save.
The default location for your saved decorated pictures is in the Decorated Photos
✍
folder, which can be viewed from the PhotoDecor - New PhotoDecor window.
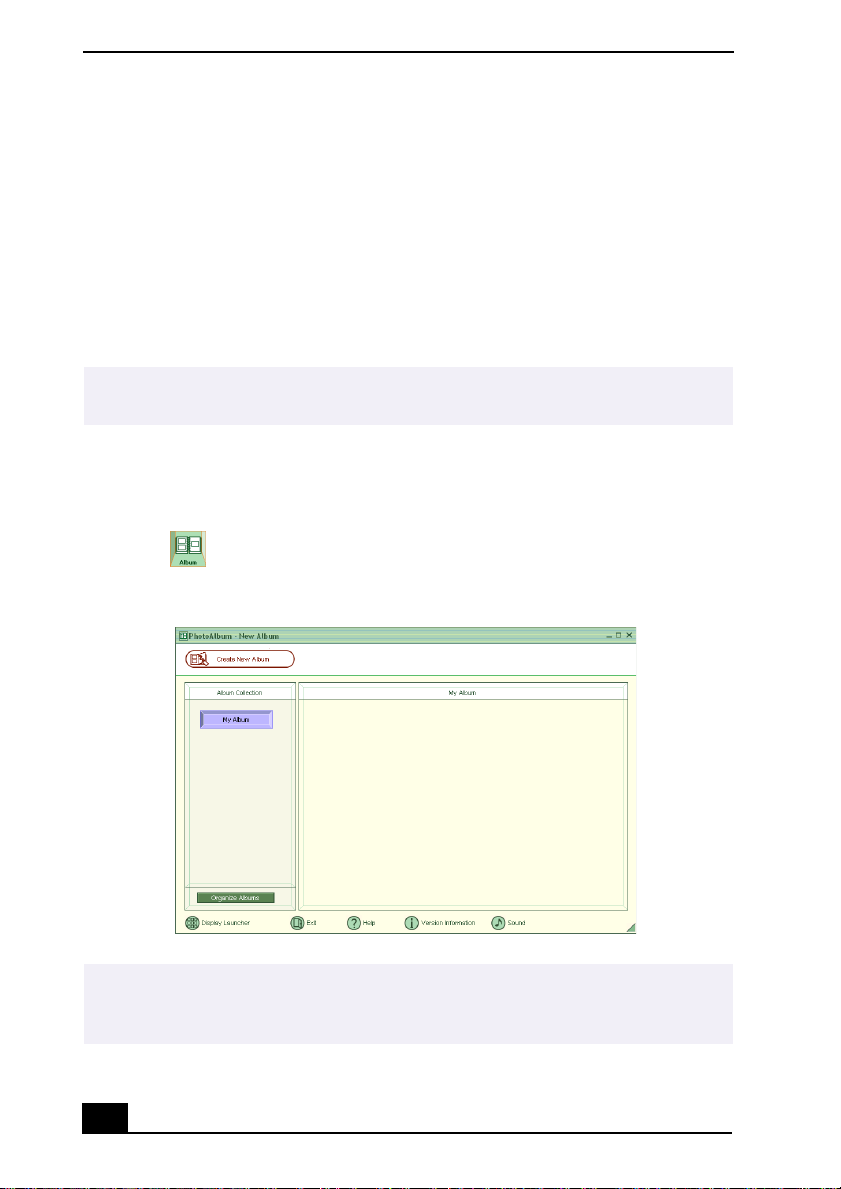
Using PhotoAlbum
Capture your special photos in an organized photo album. You can share your
custom-made photo albums with friends and family.
1 Click (Album) to open the PhotoAlbum - New Album window.
PhotoAlbum - New Album window
If you wish to work on a previously created album, do not click Create New Album.
✍
Instead, select the desired album from the Album Collection view on the right side of
the window.
24
DigitalPrint Software
2 Click Create New Album. The Select Photo window appears.
3 Select the photos you want to include in your album from the available
folders displayed. Click List to select individual pictures from each folder.
The Select Design window appears.
4 Select a design template for your album. Use the scroll bar to see all
available designs. When you have selected the design, the Select Layout
window appears.
5 Select a page layout for your album. A preview of your selected design and
page layout is displayed. Scroll through the album, using the book icons at
the bottom of the window.
6 Click the Page List button to edit your album. Customize your album by
adding more pictures, decorations, comments, or deleting pages. Click Print.
7 Select the album type and click Print.
For information on stitching your album, click Stitch Album. See the online Help file
✍
for more details.
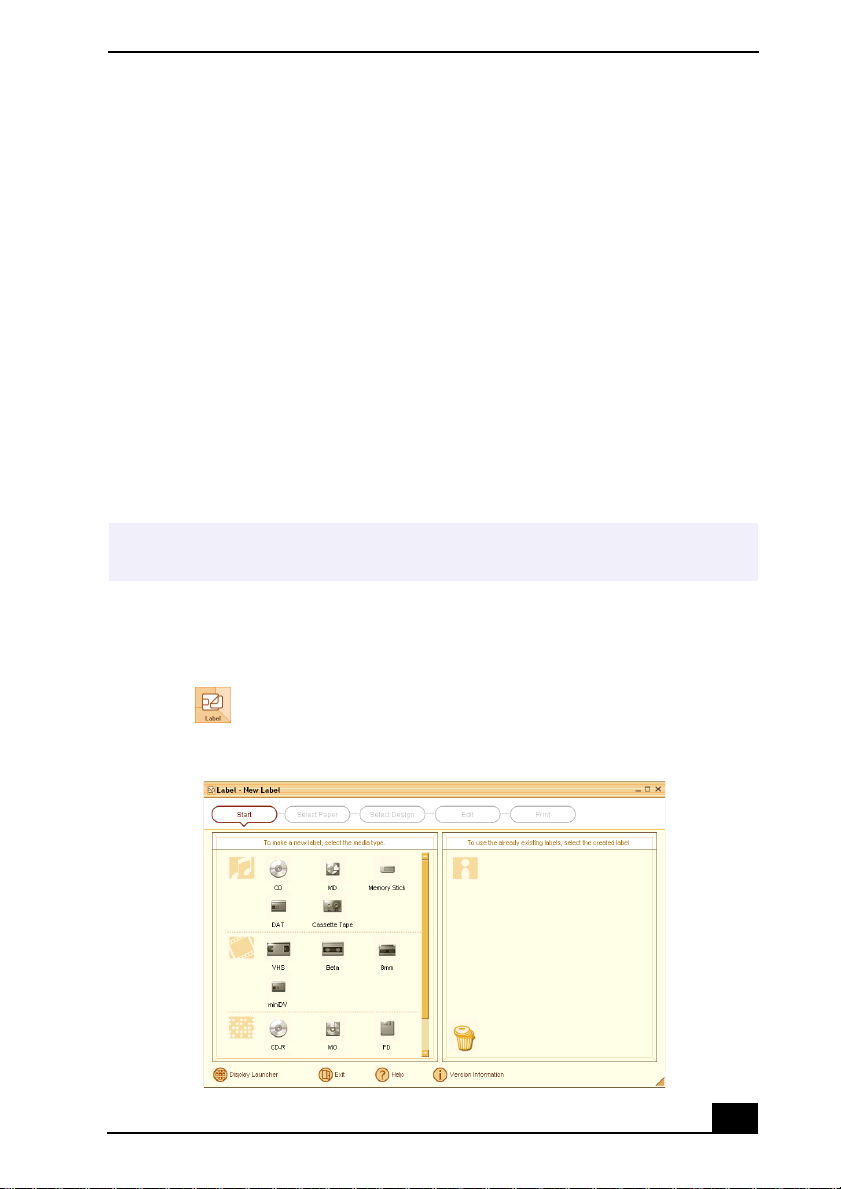
Using LabelMaker
Use LabelMaker to design original labels to personalize your media, such as
Memory Stick® media, CDs, or video cassettes.
1 Click (Label) to open the Label - New Label window.
Label - New Label window
25
VAIO Digital Studio Computer User Guide
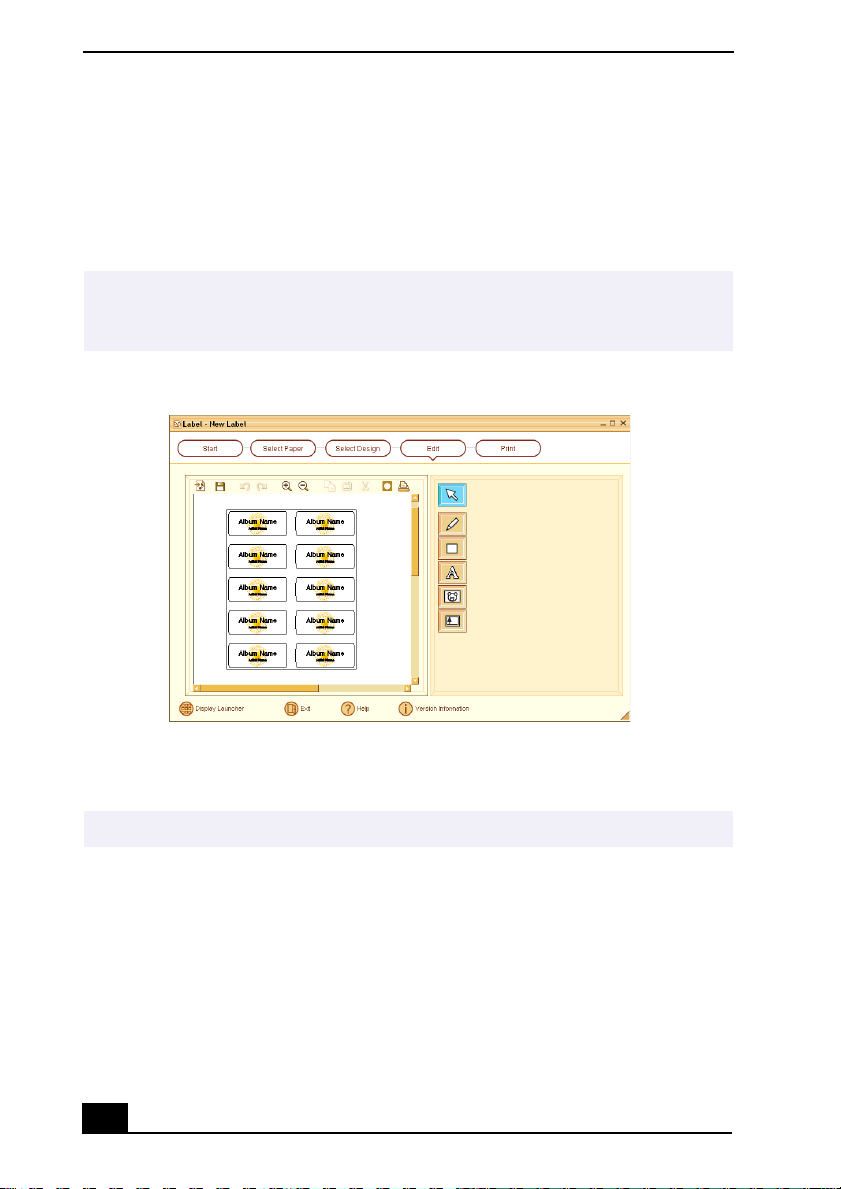
2 Click to select a media type. The Select Paper window appears.
3 Select the media’s paper layout. The Select Design window appears.
4 Select a design template. Add your decorations or customize the design
template, as desired.
A new window appears, enabling you to list the contents of your audio or video media.
✍
You can create a song or video list, depending on the type of media label being
created.
Design Edit window
5 Click Print to complete the label making process. Use the configuration
buttons and drop-down lists to select the printer and to set margins.
See the online Help for detailed information on using DigitalPrint software.
✍
26

DVgate Software
DVgate Software
Connecting a digital video camcorder
Turn off the power to your digital video camcorder before connecting it to your
computer. After connecting the device, turn its power back on. You do not need to
turn off the computer when connecting the camcorder.
To use DVgate™ software with a digital video camcorder
❑ Do not use DVgate™ software when the connected digital video device is in
Timer Recording mode, as this may produce a malfunction in the device.
❑ Video captures larger than 2 GB (9 minutes and 30 seconds) are
automatically continued in a second file.
❑ You can record stereo audio (stereo 1) while capturing video, or you can add
audio on the stereo 2 track after capturing the video data.
❑ You cannot use different audio modes on the same tape. Perform a separate
capture for each audio mode you wish to use.
❑ DVgate software does not support hard disk compression. Do not use disk
compression if you are planning to work with DVgate software.
❑ Title data is saved in the flash memory of a digital video camera and is not
transferred to tape by DVgate software.
❑ Disable your screen saver program to avoid interruption during your capture
sessions.
❑ The drop frame compensation feature does not provide accurate
compensation adjustments for tapes recorded in LP mode.
❑ The information displayed by the capture progress indicator may not be
accurate for tapes that are recorded using a mixture of both SP and LP
modes.
❑ Keep the video head of your digital video device properly cleaned.
Anomalies that you see in captured data may be due to dust or other particles
on the video head.
❑ The last frame captured is one frame before your selected [OUT] point. The
frame you see immediately after clicking the [OUT] button is not captured.
27

VAIO Digital Studio Computer User Guide
To use DVgate software to record AVI files to tape
❑ Do not use DVgate™ software when the connected digital video device is in
Timer Recording mode, as this could produce a malfunction in the device.
You can record only AVI files. MPEG files cannot be recorded.
✍
❑ Avoid recording problems, such as a single frame appearing in multiple
frames, by closing other applications on your system while recording.
❑ You cannot use different audio modes on the same tape. If you have AVI files
that use different audio modes, they cannot be recorded at the same time, but
must be recorded separately.
❑ DVgate software features do not support working with AVI files that are
smaller than 4 MB.
❑ DVgate software does not support hard disk compression.
❑ Video and audio data are not available while you are recording, in order to
maximize recording capabilities.
❑ If DVgate software indicates that frames are dropped, try closing all open
applications, or defragmenting your hard drive.
Installing the DVgate plug-in for Adobe Premiere software
Your VAIO® computer may not have Adobe® Premiere® software preinstalled.
If you subsequently purchase and install this software on your computer, you
must install a plug-in to ensure compatibility with the DVgate software.
To install the DVgate plug-in
Install the plug-in for Adobe Premiere 6.0 by following these steps:
1 Click Start in the Windows® taskbar and then click Run. The Run window
appears.
2 Click Browse and navigate to your C: drive, using the Look in: drop-down
list.
3 Double-click Program Files, double-click Sony, and then double-click
DVgate.
28
Loading...