


SPIDEM MY COFFEE

Type Sup 035 - Type Sup 035R
ItalianoEnglishDeutschFrançaisEspañolPortugalNederlandsPolski
ISTRUZIONI PER L'USO
OPERATING INSTRUCTIONS
MODE D’EMPLOI
BEDIENUNGSANLEITUNG
INSTRUÇÕES PARA O USO
INSTRUCCIONES PARA EL USO
GEBRUIKSAANWIJZING
INSTRUKCJE OBSŁUGI
LEGGERE ATTENTAMENTE QUESTE ISTRUZIONI D'USO PRIMA DI UTILIZZARE LA MACCHINA.
READ THESE OPERATING INSTRUCTIONS CAREFULLY BEFORE USING THE MACHINE.
LIRE ATTENTIVEMENT CES INSTRUCTIONS AVANT D’UTILISER LA MACHINE.
DIESE BEDIENUNGSANLEITUNG IST VOR DEM ERSTEN GEBRAUCH DER MASCHINE AUFMERKSAM ZU LESEN.
LER ATENTAMENTE ESTAS INSTRUÇÕES PARA O USO ANTES DE USAR A MÁQUINA.
LÉANSE ATENTAMENTE LAS SIGUIENTES INSTRUCCIONES DE USO ANTES DE UTILIZAR LA MÁQUINA.
LEES DEZE INSTRUCTIES AANDACHTIG DOOR VOORDAT U HET APPARAAT IN GEBRUIK NEEMT.
PRZECZYTAĆ UWAŻNIE NINIEJSZE INSTRUKCJE OBSŁUGI PRZED UŻYTKOWANIEM URZĄDZENIA.
Spidem My Coffee
Spidem My Coffee Rapid Steam
FOR HOUSEHOLD USE ONLY
USAGE DOMESTIQUE SEULEMENT

Congratulazioni!
Ci congratuliamo con voi per l’acquisto di questa macchina per caffè espresso, di qualità superiore, e vi ringraziamo per
la fi ducia accordataci. Prima di mettere in funzione la macchina, vi consigliamo di leggere attentamente le istruzioni per
l’uso che vi spiegano come utilizzarla, pulirla e mantenerla in perfetta effi cienza. Se avete altre domande, rivolgetevi al
rivenditore o direttamente alla casa produttrice. Saremo lieti di darVi tutti i chiarimenti desiderati.
Congratulations!
Thank you for purchasing this highest quality espresso coffee machine and for your confi dence in our company. Before
operating the machine, we recommend carefully reading the operating instructions that explain how to use, clean and
maintain it in perfect working order. Please refer an authorized dealer, or to Saeco, if you have any questions. We will
be happy to provide any clarifi cations.
Herzlichen Glückwunsch!
Wir gratulieren Ihnen zum Kauf dieses hochwertigen Kaffeevollautomaten und wir danken Ihnen für das Vertrauen, das
Sie uns entgegenbringen. Bevor Sie die Maschine in Betrieb nehmen, empfehlen wir Ihnen, die Gebrauchsanweisung
aufmerksam zu lesen, in der der Gebrauch, die Reinigung und die Pfl ege beschrieben werden. Sollten Sie darüber
hinaus weitere Fragen haben, so wenden Sie sich bitte an den Händler oder direkt an den Hersteller. Wir liefern Ihnen
gerne alle gewünschten Informationen.
Félicitations !
Nous vous félicitons pour l’achat de cette machine à café expresso de qualité supérieure et vous remercions de votre
confi ance. Avant de mettre la machine en marche, nous vous recommandons de lire attentivement ce mode d’emploi
qui vous explique comment utiliser, nettoyer et conserver la machine en parfait état de fonctionnement. Si vous avez
des questions à poser, nous vous prions de contacter le revendeur ou directement notre service consommateurs. Nous
vous donnerons avec plaisir toutes les informations nécessaires.
¡Enhorabuena!
Enhorabuena por haber comprado esta máquina de café exprés de alta calidad y gracias por la confi anza depositada
en nosotros. Antes de poner en funcionamiento la máquina se aconseja leer atentamente las instrucciones de uso que
explican cómo utilizarla, limpiarla y mantenerla en perfectas condiciones. En caso de dudas, dirigirse a un revendedor
o directamente al fabricante. Será un placer responderle.
Parabéns!
Obrigado por ter adquirido esta máquina de café expresso, de qualidade superior, e pela confi ança demonstrada. Antes
de pôr a funcionar a máquina, aconselhamos a ler atentamente as instruções de uso nas quais é explicado como utilizá-
la, limpá-la e mantê-la em perfeita efi ciência. Para outros esclarecimentos, dirija-se ao revendedor ou directamente ao
fabricante. Teremos o prazer em esclarecer quaisquer outras dúvidas.
Gefeliciteerd!
Wij feliciteren u met het feit dat u deze espressomachine van topkwaliteit gekocht heeft en danken u voor het in ons
gestelde vertrouwen. Wij adviseren u om, voordat u het apparaat in gebruik neemt, deze instructies aandachtig te
lezen. In deze gebruiksaanwijzing wordt namelijk uitgelegd hoe u het apparaat het beste kunt gebruiken, schoonmaken
en onderhouden. Als u nog vragen heeft kunt u zich wenden tot de verkoper of rechtstreeks contact opnemen met de
fabrikant. Wij zullen u met plezier de gewenste informatie verschaffen.
Gratulacje!
Gratulujemy Państwu zakupu tego wysokiej jakości ekspresu do kawy espresso i dziękujemy za powierzone nam
zaufanie. Przed uruchomieniem urządzenia radzimy Państwu uważnie przeczytać instrukcje użytkowania, które objaśnią,
w jaki sposób należy go używać, myć i utrzymywać w doskonałym stanie. Jeżeli mają Państwo jakieś pytanie, należy
zwrócić się do sprzedawcy bądź bezpośrednio do producenta. B
ędziemy zaszczyceni mogąc udzielić Państwu wszelkich
informacji.

3
23
7
22
3
1
2
4
6
1110
5
12
9
8
1419 18
15 2120
16
17
13

4
Fig.1 - Abb.1 - Afb.1 - Rys.1 Fig.2 - Abb.2 - Afb.2 - Rys.2 Fig.3 - Abb.3 - Afb.3 - Rys.3
Fig.4 - Abb.4 - Afb.4 - Rys.4 Fig.5 - Abb.5 - Afb.5 - Rys.5 Fig.6 - Abb.6 - Afb.6 - Rys.6
Fig.7 - Abb.7 - Afb.7 - Rys.7 Fig.8 - Abb.8 - Afb.8 - Rys.8 Fig.9 - Abb.9 - Afb.9 - Rys.9
Fig.10 - Abb.10 - Afb.10 - Rys.10 Fig.11 - Abb.11 - Afb.11 - Rys.11 Fig.12 - Abb.12 - Afb.12 - Rys.12

5
Fig.13 - Abb.13 - Afb.13 - Rys.13 Fig.14 - Abb.14 - Afb.14 - Rys.14 Fig.15 - Abb.15 - Afb.15 - Rys.15
Fig.16 - Abb.16 - Afb.16 - Rys.16 Fig.17 - Abb.17 - Afb.17 - Rys.17 Fig.18 - Abb.18 - Afb.18 - Rys.18
Fig.19 - Abb.19 - Afb.19 - Rys.19 Fig.20 - Abb.20 - Afb.20 - Rys.20 Fig.21 - Abb.21 - Afb.21 - Rys.21
Fig.22 - Abb.22 - Afb.22 - Rys.22
Fig.23 - Abb.23 - Afb.23 - Rys.23 Fig.24 - Abb.24 - Afb.24 - Rys.24

6
Fig.25 - Abb.25 - Afb.25 - Rys.25 Fig.26 - Abb.26 - Afb.26 - Rys.26
Fig.29 - Abb.29 - Afb.29 - Rys.29
Fig.27 - Abb.27 - Afb.27 - Rys.27
Fig.28 - Abb.28 - Afb.28 - Rys.28
1 2 3
Fig.30 - Abb.30 - Afb.30 - Rys.30

7
Italiano
GENERALITÀ - DATI TECNICI
1 GENERALITÀ
La macchina da caffè è indicata per la preparazione di
caffè espresso impiegando caffè in grani ed è dotata di
un dispositivo per l’erogazione del vapore e dell’acqua
calda. Il corpo della macchina dall’elegante design è
stato progettato per uso domestico e non è indicato per
un funzionamento continuo di tipo professionale.
Attenzione. Non si assumono responsabilità
per eventuali danni in caso di:
• impiego errato e non conforme agli scopi previ-
sti;
• riparazioni non eseguite presso i centri d’assi-
stenza autorizzati;
• manomissione del cavo di alimentazione;
• manomissione di qualsiasi componente della
macchina;
• stoccaggio od uso della macchina ad una tempe-
ratura inferiore ai 0°C;
• impiego di pezzi di ricambio ed accessori non
originali.
In questi casi viene a decadere la garanzia.
1.1 Per facilitare la lettura
Il triangolo d’avvertimento indica
tutte le istruzioni importanti per
la sicurezza del l’uten te. Attenersi
scrupolosamente a tali indicazioni per evitare feri-
menti gra vi!
Il riferimento ad illustrazioni, parti dell’apparecchio o ele-
menti di co man do, ecc. è in di ca to da numeri o lettere; in
questo caso si rimanda all’illustrazione.
Questo simbolo evidenzia le in for ma zio ni da
tenere in maggiore con si de ra zio ne, per un
migliore uti liz zo della mac chi na.
Le illustrazioni corrispondenti al te sto si trovano nelle
prime pagine del manuale. Consultare queste pagine
du ran te la lettura delle istru zio ni per l’uso.
1.2 Impiego di queste istruzioni per l’uso
Conservare queste istruzioni per l’uso in un luogo
sicuro ed allegarle alla macchina per caffè qualora
un’altra persona dovesse utilizzarla.
Per ulteriori informazioni o nel caso di problemi, non trat-
tati del tutto o soltanto insuffi cientemente nelle presenti
istruzioni, rivolgetevi ai Centri di Assistenza Autorizzati.
2 DATI TECNICI
Il costruttore si riserva il diritto di modifi care le caratteri-
stiche tecniche del prodotto.
Tensione nominale - Potenza nominale - Alimentazione
Vedi targhetta posta sull’apparecchio
Materiale corpo
Termoplastico
Dimensioni (l x a x p) (mm)
370 x 370 x 480
Peso
9 Kg
Lunghezza cavo
1,2 m
Pannello di comando
Sulla parte frontale
Pannarello
Speciale per cappuccini
Serbatoio acqua
1,7 litri - Estraibile
Capacità contenitore caffè (gr)
230
Capacità contenitore fondi
14
Pressione pompa
15 bar
Caldaia
Inox
Dispositivi di sicurezza
Termofusibile
3 NORME DI SICUREZZA
Mai mettere a contatto dell’acqua le parti sotto cor-
rente: pericolo di cortocircuito! Il vapore e l’acqua
calda possono provocare scottature! Mai dirigere
il getto di vapore o dell’acqua calda verso parti del
corpo, toccare con precauzione il beccuccio vapore
/ acqua calda: pericolo di scottature!
Destinazione d’uso
La macchina per caffè è prevista esclu si va men te per
l’impiego do me sti co. È vietato apportare modifi che tec-
ni che e ogni impiego illecito, a causa dei rischi che essi
com por ta no! L’apparecchio non è destinato ad essere
utilizzato da persone (compresi i bambini) con ridotte
capacità fi siche, mentali o sensoriali o con esperienza
e/o competenze insufficienti, a meno che non siano
sotto la supervisione di una persona responsabile della

8
NORME DI SICUREZZA
loro sicurezza o non vengano da essa istruite sull’uso
dell’apparecchio.
Alimentazione di corrente
Allacciare la macchina per caffè soltanto ad una presa
di corrente adeguata.
La tensione deve corrispondere a quella indicata sulla
targhetta dell’apparecchio.
Cavo d’alimentazione
Mai usare la macchina per caffè se il cavo d’alimenta-
zione è difettoso.
Se il cavo d’alimentazione è danneggiato, deve essere
cambiato dal produttore o dal suo servizio assistenza
clienti. Non far passare il cavo d’alimentazione per an-
goli e su spigoli vivi, sopra oggetti molto caldi e proteg-
gerlo dall’olio.
Non portare o tirare la macchina per caffè tenendola per
il cavo.
Non estrarre la spina tirandola per il cavo oppure toccar-
la con le mani bagnate.
Evitare che il cavo d’alimentazione cada liberamente da
tavoli o scaffali.
Protezione d’altre persone
Tenere i bambini sotto supervisione, per evitare che gio-
chino con l’apparecchio.
I bambini non si rendono conto del pericolo connesso
agli elettrodomestici. Non lasciare alla portata dei bam-
bi ni i ma te ria li utilizzati per im bal la re la mac chi na.
Pericolo d’ustioni
Evitare di dirigere contro se stessi e/o altri il getto di
vapore e/o d’acqua calda: pericolo di scottature!
Usare sempre le apposite maniglie o manopole.
Ubicazione
Sistemare la macchina per caffè in un po sto sicuro,
dove nessuno può rovesciarla o venirne ferito.
Acqua calda o vapore sur ri scal da to po treb be ro fuoriu-
scire: pericolo di scottature!
Non tenere la macchina a temperatura inferiore a 0°C;
c'è il pericolo che il gelo possa danneggiare la macchi-
na. Non usare la macchina per caffè al l’aper to.
Non posare la macchina su su per fi ci mol to calde e nelle
vicinanze di fi amme libere per evitare che la carcassa
fonda o co mun que si danneggi.
Pulizia
Prima di pulire la macchina, è in di spensa bi le disinserire
la macchina con il tasto ON/OFF tasti e poi staccare la
spina dalla presa di corrente. Inoltre, aspettare che la
macchina si raf fred di.
Mai immergere la mac chi na nel l’ac qua!
È severamente vietato cercare d’in ter ve ni re all’interno
della macchina.
Non utilizzare, per scopi alimentari, l’acqua rimasta nel
serbatoio per alcuni giorni, lavare il serbatoio e riempirlo
con acqua fresca potabile.
Spazio per l’uso e la ma nu ten zio ne
Per il corretto e buon funzionamento della macchina per
caffè si consiglia quanto segue:
• Scegliere un piano d’appoggio ben livellato;
• Scegliere un ambiente suffi cientemente illuminato,
igienico e con presa di corrente facilmente accessibi-
le;
• Prevedere una distanza minima dalle pareti della
macchina come indicato in fi gura
(Fig.A).
Custodia della macchina
Quando la macchina rimane inutilizzata per un periodo
prolungato, spegnerla e staccare la spina dalla presa.
Custodirla in luogo asciutto e non accessibile ai bambi-
ni. Proteggerla dalla polvere e dallo sporco.
Riparazioni / Manutenzione
Nel caso di guasti, difetti o sospetto di difetto dopo una
caduta, staccare subito la spina dalla presa. Mai mettere
in funzione una macchina difettosa.
Soltanto i Centri di Assistenza Autorizzati possono effet-
tuare interventi e riparazioni.
Le riparazioni vanno eseguite unicamente da un centro
di assistenza autorizzato.
Nel caso di interventi non eseguiti a regola d’arte, si de-
clina ogni responsabilità per eventuali danni.
Antincendio
In caso di incendio utilizzare estintori ad anidride carbo-
nica (CO
2
). Non utilizzare acqua o estintori a polvere.

9
Italiano
COMPONENTI MACCHINA - INSTALLAZIONE
Legenda componenti macchina
Contenitore caffè in grani con coperchio
Sportello di servizio
Cassetto raccogli fondi
Erogatore (regolabile in altezza)
Vasca raccogli gocce + griglia
Pannello comandi
Tubo erogazione acqua calda / vapore con
pannarello
Serbatoio acqua
Cavo alimentazione
Pomello rubinetto acqua calda / vapore
Piastra appoggia tazze
Vasca recupero liquidi
Gruppo caffè
Pannello comandi
Tasto erogazione caffè corto
Tasto erogazione caffè lungo
Tasto selezione vapore
Tasto ON/OFF
Led Allarmi
Led Temperatura
Led Vapore / Doppio caffè
Led Decalcifi cazione
Accessori
Chiave per regolazione macinatura
Grasso per Gruppo Caffè
4 INSTALLAZIONE
Per la propria sicurezza e quella di terzi attenersi
scrupolosamente alle “Norme di sicurezza” riportate
nel cap.3.
4.1 Imballaggio
L’imballo originale è stato progettato e realizzato per
proteggere la macchina durante la spedizione.
Si consiglia di conservarlo per un eventuale trasporto
futuro.
4.2 Operazioni preliminari
• Prelevare dall’imballo la vasca raccogli gocce (5) con
griglia.
• Prelevare dall’imballo la macchina da caffè e posi-
zionarla in un luogo idoneo rispondente ai requisiti
richiesti e descritti nelle norme di sicurezza (cap.3).
• (Fig.15) - Inserire la vasca raccogligocce (5) nell’ap-
posita sede sulla macchina.
• Prima di inserire la spina nella presa di corrente,
assicurarsi d'aver eseguito tutte le operazioni riportate
nel par.4.3.
Nota importante: É importante leggere quanto
riportato nel Capitolo 12, ove viene spiegato
in dettaglio il signifi cato di tutte le segnalazioni che
la macchina fornisce all’utilizzatore, mediante i led
posizionati sul pannello comandi.
4.3 Prima accensione
• (Fig.3) - Sollevare leggermente il serbatoio acqua (8)
ed estrarlo dalla sua sede.
• (Fig.4) - Sciacquarlo e riempirlo con acqua fresca; si
consiglia di non riempire il serbatoio in modo ecces-
sivo. Reinserire il serbatoio nella sede apposita.
Immettere nel serbatoio (8) sempre e soltanto
acqua fresca non gassata. Acqua calda non-
ché altri liquidi possono danneggiare il serbatoio e/o
la macchina. Non mettere in funzione la macchina
senza acqua: accertarsi che ve ne sia a suffi cienza
all’interno del serbatoio.
• (Fig.1) - Togliere il coperchio dal contenitore caffè (1).
• (Fig.2) - Versare il caffè in grani.
Nota: La griglia posta nel contenitore caffè
non può e non deve essere rimossa.
10
INSTALLAZIONE - REGOLAZIONI
Immettere nel contenitore (1) sempre e sol-
tanto caffè in grani. Caffè macinato, solubile,
nonché altri oggetti danneggiano la macchina.
• Riposizionare il coperchio sul contenitore caf-
fè (1).
• (Fig.5A) - Inserire la spina nella presa di corrente sul
retro della macchina.
• (Fig.5B) - Inserire la spina dell'altro capo del cavo in
una presa di corrente a parete di tensione adegua-
ta.
• Per accendere la macchina è suffi ciente premere il
tasto (17); il led (18) comincia a lampeggiare velo-
cemente indicando che è necessario procedere al
caricamento del circuito.
• (Fig.7) - Per caricare il circuito, inserire un contenitore
sotto al tubo vapore (pannarello) (7);
• (Fig.8) - Ruotare il pomello (10) in senso orario ed
attendere. Dal pannarello uscirà una quantità im-
postata d'acqua, dopo di che il led (18) lampeggerà
lentamente, richiedendo la chiusura del rubinetto
(10).
A questo punto il led (19) inizierà a lampeggiare len-
tamente, indicando la fase di riscaldamento.
Nota: Prima di procedere alla prima messa in
funzione, in caso di prolungata inattività o se
il serbatoio acqua è stato vuotato completamente, è
consigliabile caricare il circuito.
Terminato il riscaldamento, la macchina
esegue un ciclo di risciacquo dei circuiti
interni. Viene erogata una piccola quantità d’acqua;
in questa fase i led lampeggiano ciclicamente in
senso antiorario. Attendere che questo ciclo venga
portato a termine automaticamente.
• Terminate le operazioni di cui sopra, la macchina è
predisposta per l’uso.
• Per erogare caffè, acqua calda o vapore, ed utilizzare
correttamente la macchina, seguire attentamente le
istruzioni che seguono.
5 REGOLAZIONI
La macchina che avete acquistato consente di effettua-
re alcune regolazioni che vi permetteranno di utilizzarla
al meglio.
5.1 Regolazione macinacaffè
Il caffè è un prodotto naturale e le sue ca-
ratteristiche possono cambiare in funzione
dell’origine e della miscela. La macchina da caffè
Spidem è dotata di un sistema di auto-regolazione
che consente d'utilizzare tutti i tipi di caffè in grani
esistenti in commercio (non caramellati).
Per questo motivo si consiglia di procedere
all'erogazione di qualche caffè prima di regolare il
macinacaffè.
Attenzione! La manopola di regolazione della
macinatura, posta all’interno del contenitore
caffè, deve essere ruotata solo quando il macinacaffè
è in funzione. Non inserire caffè macinato e/o solubile
nel contenitore caffè in grani.
È vietato introdurre qualsiasi materiale che
non sia caffè in grani. Il macinacaffè contie-
ne componenti in movimento che possono essere
pericolosi; vietato introdurre le dita e/o altri oggetti.
Prima di intervenire, per qualsiasi motivo, all’inter-
no del contenitore caffè, disinserire l’interruttore
generale e staccare la spina dalla presa di corrente.
Non immettere caffè in grani quando il macinacaffè
è in funzione.
La macchina permette di effettuare una leggera regola-
zione del grado di macinatura del caffè per adattarlo al
tipo di caffè utilizzato.
La regolazione deve essere effettuata agendo sul perno
presente all’interno del contenitore caffè; questo deve
essere premuto e ruotato solo con la chiave fornita in
dotazione.
(Fig.28-29) - Premere e ruotare il perno di un solo scat-
to alla volta ed erogare 2-3 caffè; solo in questo modo si
può notare la variazione del grado di macinatura.
I riferimenti posti all’interno del contenitore indicano il
grado di macinatura impostato.
1 - Macinatura Grossa
2 - Macinatura Media
3 - Macinatura Fine

11
Italiano
REGOLAZIONI - EROGAZIONE CAFFE'
5.2 Regolazione caffè in tazza
La macchina permette di regolare la quantità di caffè
erogato secondo i vostri gusti e/o alle dimensioni delle
vostre tazze/tazzine.
Ad ogni pressione e rilascio del tasto (14) o (15) la mac-
china eroga una quantità, programmata e differente, di
caffè. Questa quantità può essere ri-programmata a
piacimento. Ad ogni tasto può essere associata un'ero-
gazione di caffè; questa avviene in modo indipendente.
Come esempio, si descrive la programmazione del tasto
(14) a cui, di norma, è associato il caffè espresso.
• (Fig.10) - Porre una tazzina sotto all'erogatore.
• (Fig.12) - Premere e mantenere premuto il tasto (14);
durante questa fase i led (19) e (20) lampeggiano in
modo alternato.
• (Fig.12) - Quando, nella tazzina, è stato raggiunto
il quantitativo di caffè desiderato, rilasciare il tasto
(14).
A questo punto il tasto (14) è programmato; ad ogni
pressione e rilascio, la macchina, provvede ad erogare
la medesima quantità appena programmata.
5.3 Regolazione erogatore caffè
(Fig.9) - L'erogatore può essere regolato in altezza per
meglio adattarsi alle dimensioni delle tazzine che volete
utilizzare.
Per effettuare la regolazione, alzare o abbassare ma-
nualmente l'erogatore.
Le posizioni consigliate sono:
(Fig.10) - per l'utilizzo di tazzine piccole;
(Fig.11) - per l'utilizzo di tazze grandi.
5.4 Stand-by
La macchina è predisposta per il risparmio energetico.
Dopo 60 minuti dall'ultimo utilizzo, la macchina si spe-
gne automaticamente.
Per riavviare la macchina è suffi ciente premere il tasto
(17); in questo caso la macchina eseguirà il risciacquo
solo se la caldaia si è raffreddata.
6 EROGAZIONE CAFFÉ
Nota: Nel caso in cui la macchina non eroghi
caffè, verifi care che il serbatoio acqua con-
tenga acqua.
Prima di erogare caffè verifi care che il led
verde di pronto temperatura (19) sia acceso
fi sso, che il serbatoio acqua e il contenitore caffè
siano pieni.
• (Fig.10 - Fig.11) - Posizionare 1 o 2 tazze/tazzine
sotto ai beccucci dell’erogatore (4); potete regolare
l’altezza dell’erogatore in modo che si adatti alle vostre
tazzine.
• (Fig.12) - Per erogare il caffè occorre premere e
rilasciare il tasto (14), per ottenere un caffè espresso,
o (15) per un caffè lungo.
• Successivamente si avvia il ciclo di erogazione: per
erogare 1 caffè premere una sola volta il tasto; per
erogare 2 caffè premere 2 volte di seguito il tasto.
In questa modalità di funzionamento, la mac-
china provvede automaticamente a macinare
e dosare la giusta quantità di caffè. La preparazione
di due caffè richiedere due cicli di macinatura e due
cicli di erogazione gestiti automaticamente dalla
macchina; questa opzione viene segnalata dal led
20 lampeggiante.
• Dopo aver compiuto il ciclo di preinfusione, il caffè
comincia a fuoriuscire dall'erogatore (4).
• L’erogazione del caffè si ferma automaticamente
quando viene raggiunto il livello impostato; è comun-
que possibile interrompere l’erogazione del caffè
premendo il tasto azionato in precedenza.
La macchina è regolata per preparare un vero
espresso all'italiana. Questa caratteristica
potrebbe allungare leggermente i tempi d'erogazione
a tutto vantaggio del gusto intenso del caffè.
12
EROGAZIONE ACQUA CALDA - EROGAZIONE VAPORE
7 EROGAZIONE ACQUA CALDA
Attenzione: all’inizio possono verificarsi
brevi spruzzi di acqua calda: pericolo di
scottature. Il tubo di erogazione dell’acqua calda può
raggiungere temperature elevate: evitare di toccarlo
direttamente con le mani.
• Prima d'erogare acqua calda verifi care che il led ver-
de di pronto temperatura (19) sia acceso.
Con la macchina pronta per l’erogazione del caffè, pro-
cedere nel seguente modo:
• (Fig.7) - Mettere una tazza e/o un recipiente sotto al
tubo acqua calda/vapore (7).
• (Fig.8) - Aprire in senso orario il pomello (10).
• Prelevare la quantità desiderata di acqua calda; per
fermare l’erogazione dell’acqua calda ruotare in sen-
so antiorario il pomello (10). La macchina si riporta
nel funzionamento normale.
In qualche caso può succedere che all'aper-
tura del rubinetto (10), non esca l'acqua calda
e il led (19) lampeggi lentamente. Sarà suffi ciente
attendere che il led (19) diventi fi sso, per ottenere
un fl usso di acqua calda dal pannarello.
8 EROGAZIONE VAPORE / PREPARAZIONE
DEL CAPPUCCINO
Il vapore può essere utilizzato per montare il latte per
il cappuccino ma anche per il riscaldamento delle be-
vande.
Pericolo di scottature! All’inizio dell’ero-
gazione possono verifi carsi brevi spruzzi di
acqua calda. Il tubo di erogazione può raggiungere
temperature elevate: evitare di toccarlo direttamente
con le mani.
• (Fig.13) - Con la macchina pronta per erogare caffè,
premere il tasto (16); si accende il led (20). La mac-
china necessita di un tempo di preriscaldamento, in
questa fase il led (19) lampeggia.
• Prima di erogare vapore attendere che il led verde
(19) si sia acceso in modo fi sso.
• (Fig.7 - Fig.8) - Inserire un contenitore sotto al tubo
vapore (pannarello) (7); aprire il pomello (10) “Acqua
calda/vapore” per qualche istante, in modo da far
uscire l’acqua residua dal tubo vapore (pannarello);
in breve tempo comincerà ad uscire solo vapore.
• Chiudere il pomello (10).
• Riempire con latte freddo 1/3 del contenitore che si
desidera utilizzare per preparare il cappuccino.
Per garantire un miglior risultato nella pre-
parazione del cappuccino, il latte utilizzato
deve essere freddo.
• (Fig.14) - Immergere nel tubo vapore (pannarello) il
latte da riscaldare ed aprire il pomello (10); far ruotare
il recipiente con lenti movimenti dal basso verso l’alto
per rendere uniforme la formazione di schiuma.
• Dopo aver utilizzato il vapore per il tempo desiderato
chiudere il pomello (10).
• Lo stesso sistema può essere utilizzato per il riscal-
damento di altre bevande.
Dopo aver utilizzato il tubo vapore (pannarello), lavarlo
come descritto nel capitolo "Pulizia e Manutenzione".
Dopo aver preparato il latte schiumato ero-
gare il caffè. Premere il tasto (16):
Mod. Mycoffe: eseguire le procedure descritte nel pa-
ragrafo 8.1 per riportare la macchina alla temperatura di
erogazione del caffè.
Mod. Mycofee Rapid Steam: la macchina esegue au-
tomaticamente le procedure per riportare la macchina
alla temperatura di erogazione del caffè.
In caso di inutilizzo, la macchina si riporta
automaticamente alla temperatura per
l'erogazione del caffè per evitare inutili sprechi di
energia.
8.1 Passaggio da vapore a caffè
(solo modello Mycoffe)
• Nel passaggio da erogazione vapore ad erogazione
caffè, il led (19) lampeggia velocemente indicando che
la macchina è in sovratemperatura e non può erogare
caffè.
• Per potere erogare caffè, è necessario scaricare
dell’acqua.
(Fig.7 - Fig.8) - Inserire un contenitore sotto al tubo
vapore (pannarello) (7) e ruotare il pomello Vapore (10)
in senso orario; attendere fi no a quando non rimane
acceso in modo fi sso solo il led di pronto temperatura
(19). Successivamente chiudere il pomello ruotandolo
in senso antiorario.

13
Italiano
PULIZIA E MANUTENZIONE
9 PULIZIA E MANUTENZIONE
Pulizia generica
• La manutenzione e la pulizia possono essere effettua-
te soltanto quando la macchina è fredda e scollegata
dalla rete elettrica.
• Non immergere la macchina nell’acqua e non inserire
i componenti nella lavastoviglie.
• Non utilizzare oggetti acuminati o prodotti chimici
aggressivi (solventi) per la pulizia.
• Per la pulizia dell’apparecchio utilizzare un panno
morbido inumidito con acqua.
• Non asciugare la macchina e/o i suoi componenti
utilizzando un forno a microonde e/o un forno con-
venzionale.
• (Fig.16) - Giornalmente, dopo aver riscaldato il lat te,
smontare la parte esterna del pannarello e lavarla con
acqua potabile fresca.
• (Fig.17) - Settimanalmente si deve pulire il tubo va-
pore. Per eseguire questa operazione, si deve:
- rimuovere la parte esterna del pannarello (per la
regolare pulizia);
- sfi lare la parte superiore del pannarello dal tubo vapo-
re;
- lavare la parte superiore del pannarello con acqua
fresca potabile;
- lavare il tubo vapore con un panno umido e rimuo-
vere eventuali residui di latte;
- riposizionare la parte superiore nel tubo vapore
(assicurarsi che sia completamente inserita).
Rimontare la parte esterna del pannarello.
• (Fig.4) - Si consiglia di pulire quotidianamente il ser-
batoio dell’acqua:
- Estrarre il fi ltro posto all’interno del serbatoio e pulirlo
con acqua corrente potabile.
- Riposizionare il fi ltro nel suo alloggiamento eser-
citando una leggera pressione combinata ad una
leggera rotazione.
- Riempire il serbatoio con acqua fresca potabile.
• (Fig.15) - Giornalmente vuotare e lavare la vasca
raccogli gocce.
• (Fig.9) - Ogni settimana sfi lare l'erogatore, tirandolo
verso il basso, e lavarlo con acqua tiepida. Dopo averlo
lavato, riposizionarlo nella sua sede.
• (Fig.19-20) - Pulire il vano di servizio; raccoman-
diamo, ogni giorno, di vuotare e pulire:
- il cassetto raccoglifondi (3)
- la vasca recupero liquidi (12).
9.1 Gruppo caffè
• Il Gruppo Caffè (13) deve essere pulito ogni volta che
si riempie il contenitore di caffè in grani o, in ogni caso,
almeno una volta alla settimana.
• Spegnere la macchina premendo l’interruttore (17) ed
estrarre la spina dalla presa di corrente.
• (Fig.18 - Fig.19) - Aprire lo sportello di servizio (2).
Togliere il cassetto raccoglifondi (3) e la vasca recu-
pero liquidi (12).
• (Fig.21) - Estrarre il Gruppo Caffè (13) tenendolo per
l’apposita maniglia e premendo sul tasto «PUSH». Il
Gruppo Caffè può essere lavato solo con acqua tiepida
senza detergente.
• (Fig.22) - Lavare il Gruppo Caffè con acqua tiepida;
lavare con cura il fi ltro superiore.
• Lavare ed asciugare accuratamente tutte le parti del
Gruppo Caffè.
• Pulire accuratamente il vano interno della macchina
• (Fig.23) - Verifi care che i due riferimenti coincidano.
• (Fig.24) - Verifi care che la leva sia a contatto con
la base del Gruppo Caffè. Premere il tasto "PUSH"
per assicurarsi che il Gruppo Caffè sia in posizione
idonea.
Lubrifi care il Gruppo Caffè dopo circa 500
erogazioni. Il grasso per la lubrifi cazione
del Gruppo Caffè è acquistabile presso i centri
d'assistenza autorizzati.
• (Fig.25) - Solo con il grasso fornito in dotazione,
lubrifi care le guide del gruppo.
• (Fig.26-27) - Distribuire il grasso uniformemente sulle
due guide laterali.
• Introdurre di nuovo il Gruppo Caffè nell’apposito vano
fi no ad ottenerne l’aggancio SENZA premere sul tasto
"PUSH" .
• Inserire il cassetto raccoglifondi e la vasca recupero
liquidi. Chiudere lo sportello di servizio.
14
DECALCIFICAZIONE - SMALTIMENTO
10 DECALCIFICAZIONE
La formazione del calcare è naturale conseguenza
dell'uso dell’apparecchio; la decalcifi cazione è neces-
saria ogni 1-2 mesi o quando si osserva una riduzione
della portata dell’acqua.
La necessità d'eseguire la decalcifi cazione viene evi-
denziata dal led 21 che inizia a lampeggiare.
Usare il prodotto decalcifcante Saeco (Fig.30).
E' stato formulato specifi catamente per man-
tenere al meglio la performance e la funzionalità della
macchina per tutta la sua vita, nonchè per evitare, se
correttamente usato, ogni alterazione del prodotto
erogato.
Attenzione! Non utilizzare in nessun caso
l’aceto come decalcifi cante.
(Fig.17) - Prima d'eseguire la decalcifi cazione rimuo-
vere il pannarello dal tubo vapore come descritto nel
capitolo "Pulizia e Manutenzione".
• Accendere la macchina con il tasto ON/OFF (17).
Attendere che la macchina termini il processo di
risciacquo e riscaldamento.
• Miscelare il decalcifi cante con acqua come specifi cato
sulla confezione del prodotto decalcifi cante e riempire
il serbatoio dell’acqua.
• (Fig.7) - Posizionare un contenitore sotto al tubo
vapore (7).
• (Fig.8) - Prelevare ad intervalli (una tazza per volta)
l’intero contenuto del serbatoio dell’acqua ruotando il
pomello vapore (10) in senso orario; per fermare l’ero-
gazione ruotare il pomello (10) in senso antiorario.
• Durante i singoli intervalli si deve lasciare agire,
la soluzione decalcifi cante, per circa 10-15 minuti,
scollegando la macchina con il tasto ON/OFF (17).
Vuotare il contenitore.
• Ripetere le operazioni fi no a terminare la soluzione
decalcifi cante all'interno del serbatoio.
• Terminata la soluzione decalcifi cante, sciacquare il
serbatoio dell’acqua e riempirlo con acqua fresca.
• Accendere la macchina con il tasto ON/OFF (17).
• (Fig.8) - Vuotare il contenuto del serbatoio dell’acqua
ruotando il pomello vapore (10) in senso orario; per
fermare l’erogazione ruotare il pomello (10) in senso
antiorario.
Terminata la decalcifi cazione inserire il pannarello nel
tubo vapore come descritto nel capitolo "Pulizia e Ma-
nutenzione".
Premere il pulsante (16) per 7 secondi per disattivare
l’allarme della decalcifi cazione.
La soluzione decalcifi cante deve essere smal-
tita secondo quanto previsto dal costruttore
e/o dalle norme vigenti nel Paese d’utilizzo.
11 SMALTIMENTO
Ai sensi dell’art. 13 del Decreto Legislativo 25 luglio
2005, n. 151”Attuazione delle Direttive 2002/95/CE,
2002/96/CE e 2003/108/CE, relative alla riduzione
dell’uso di sostanze pericolose nelle apparecchiature
elettriche ed elettroniche, nonché allo smaltimento
dei rifi uti”
Il simbolo del cassonetto barrato riportato
sull’apparecchiatura o sulla sua confezione indica
che il prodotto alla fi ne della propria vita utile deve
essere raccolto separatamente dagli altri rifi uti.
L’utente dovrà, pertanto, conferire l’apparecchiatura
giunta a fi ne vita agli idonei centri di raccolta diffe-
renziata dei rifi uti elettronici ed elettrotecnici, oppure
riconsegnarla al rivenditore al momento dell’acquisto
di una nuova apparecchiatura di tipo equivalente, in
ragione di uno a uno.
L’adeguata raccolta differenziata per l’avvio succes-
sivo dell’apparecchiatura dismessa al riciclaggio, al
trattamento e allo smaltimento ambientalmente com-
patibile contribuisce ad evitare possibili effetti negati-
vi sull’ambiente e sulla salute e favorisce il reimpiego
e/o riciclo dei materiali di cui è composta l’apparec-
chiatura.Lo smaltimento abusivo del prodotto da par-
te dell’utente comporta l’applicazione delle sanzioni
amministrative previste dalla normativa vigente.
15
Italiano
SPIE PANNELLO COMANDI
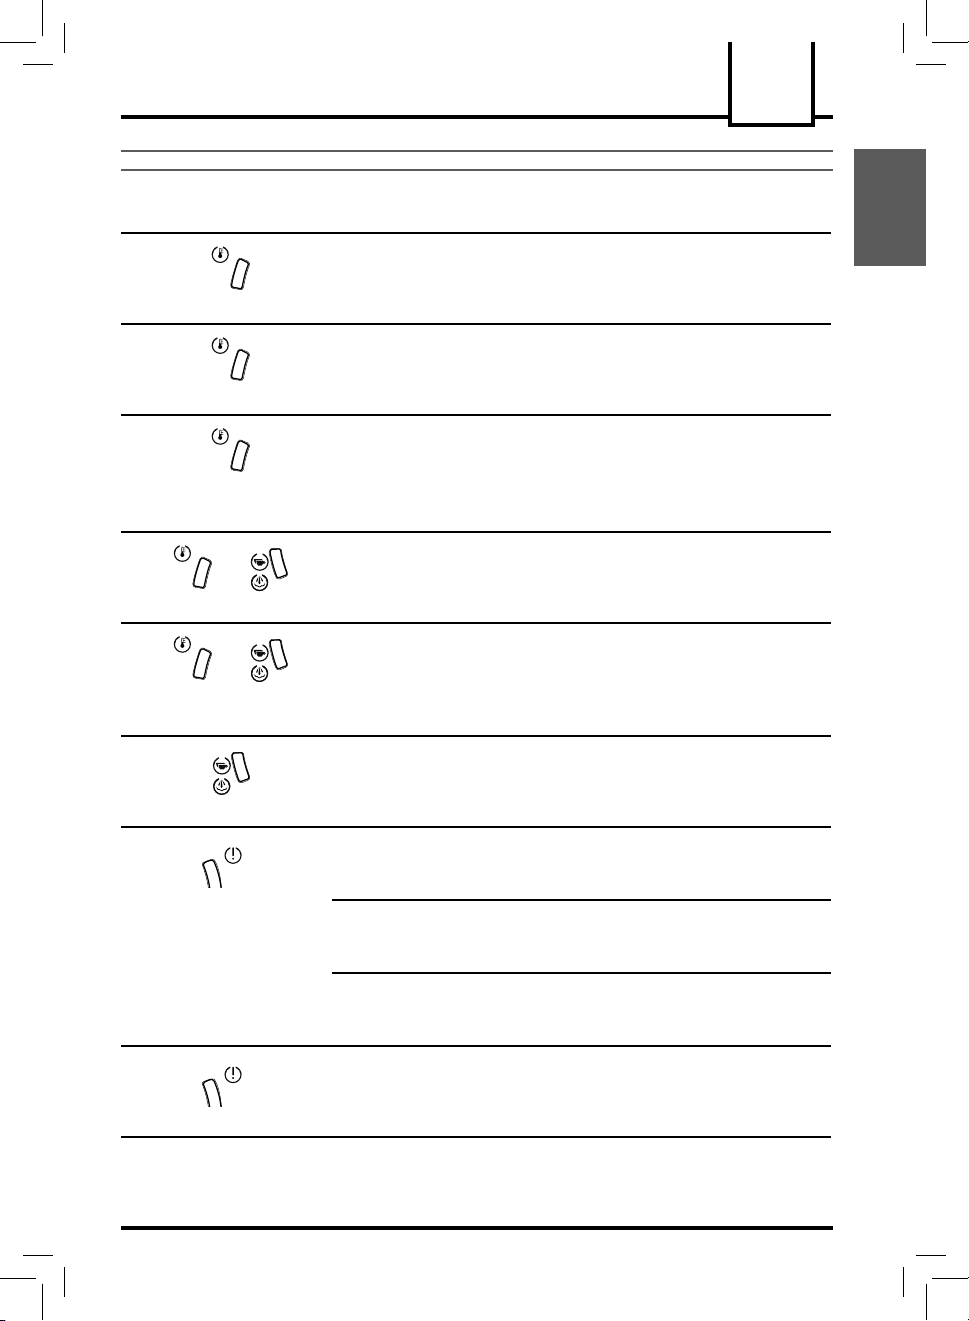
12 SPIE PANNELLO COMANDI
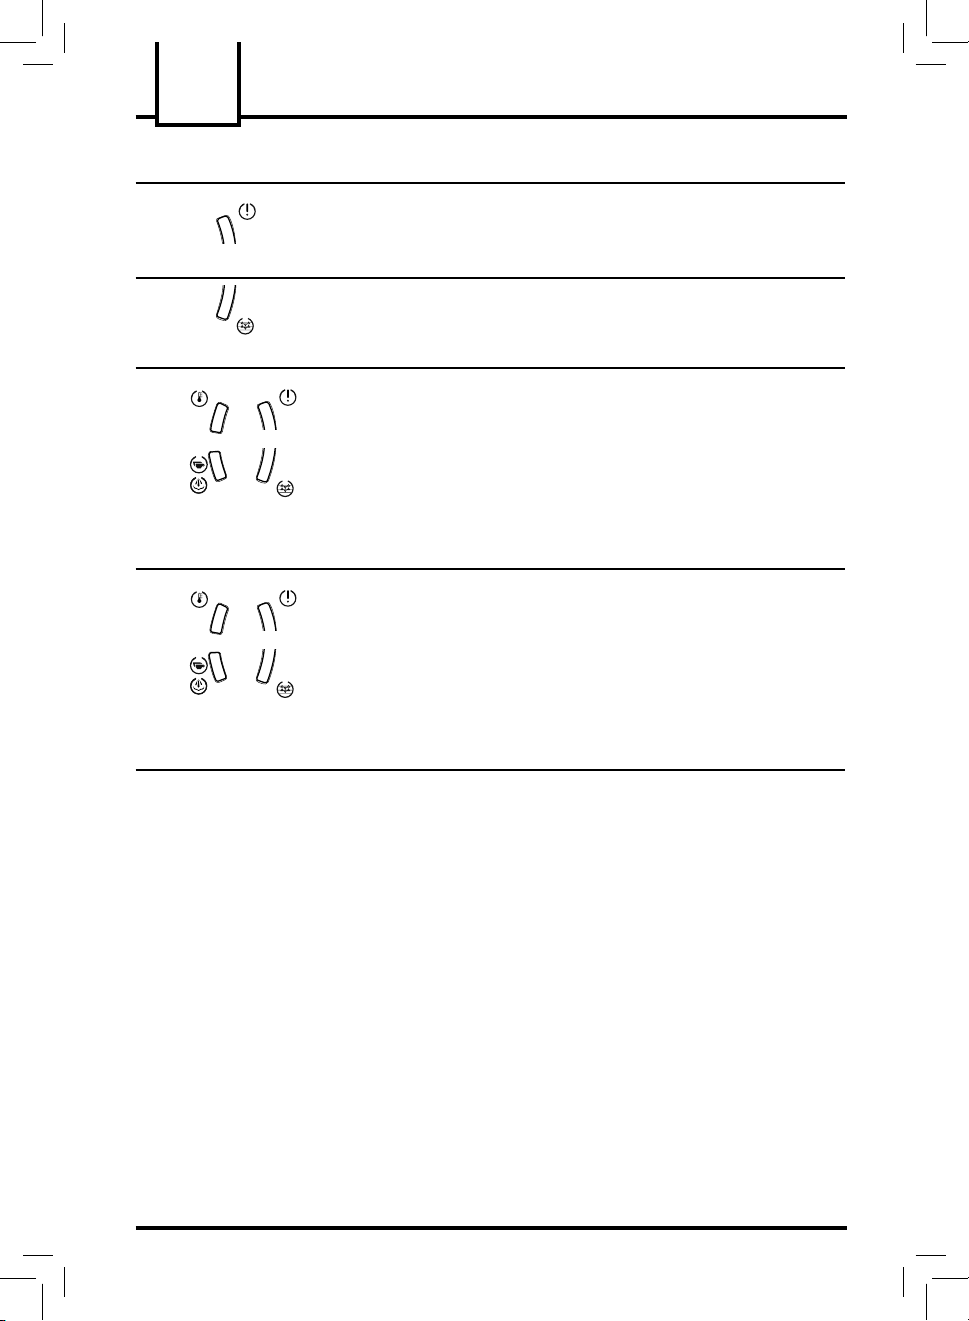
Segnalazioni Cause Rimedi
Fissa
Macchina in temperatura pronta:
- per l’erogazione del caffè;
- per l’erogazione dell’acqua calda.
Lampeggiante lento
Macchina in fase di riscaldamento
per l’erogazione caffè, acqua calda
e vapore.
Lampeggiante veloce
Macchina in sovratemperatura; in
questa modalità la macchina non può
erogare caffè.
È necessario scaricare dell’acqua in
un contenitore ruotando il pomello
Vapore (10) fino a quando il led
verde di pronto temperatura (19) non
rimane acceso in modo fi sso.
+
Fissi contemporaneamente
Macchina in temperatura pronta per
l’erogazione del vapore
+
Lampeggianti in rotazione
(alternato)
Indica macchina in fase di
programmazione della quantità di
caffè in tazza (vedi par.5.2)
Lampeggiante lento
Macchina in fase d'erogazione di un
doppio caffè.
Fissa
Quantità d’acqua insufficiente nel
serbatoio.
Riempire il serbatoio con acqua
fresca potabile, caricare il circuito ed
iniziare nuovamente la procedura.
Serbatoio caffè vuoto. Riempire il serbatoio con caffè in
grani ed iniziare nuovamente la
procedura.
Cassetto raccogli fondi pieno
Vasca recupero liquidi piena
Con la macchina accesa svuotare
il cassetto raccogli fondi e la vasca
recupero liquidi.
Lampeggiante veloce
Circuito acqua scarico. Caricare il circuito acqua della
macchina come descritto nel
paragrafo 4.3.
16
Segnalazioni Cause Rimedi
Lampeggiante lento
Gruppo erogatore, cassetto fondi,
sportello di servizio o rubinetto
in posizione NON corretta per il
funzionamento della macchina.
Per spegnere la luce rossa
lampeggiante, verifi care che tutti i
componenti siano inseriti o chiusi in
modo corretto.
Lampeggiante lento
La macchina necessita di un ciclo di
decalcifi cazione.
Eseguire la decalcifi cazione come
descritto nel capitolo 10
+
+
Lampeggianti in senso
antiorario (ciclicamente)
La macchina sta eseguendo il ciclo
di risciacquo.
+
+
Lampeggianti
contemporaneamente
La macchina è in una condizione
anomala e non permette l'erogazione
del caffè, dell'acqua o del vapore.
Spegnere e dopo 30 secondi
riaccendere la macchina.
Provare 2 o 3 volte.
Se la macchina NON si avvia,
contattare il centro assistenza.
SPIE PANNELLO COMANDI

17
Italiano
Problemi Cause Rimedi
La macchina non si accende La macchina non è collegata alla rete
elettrica
Collegare la macchina alla rete elettrica
Il caffè non è abbastanza caldo Le tazzine sono fredde Scaldare le tazzine con acqua calda.
Non fuoriesce acqua calda o vapore Il foro del tubo vapore è otturato Pulire il foro del tubo vapore con uno
spillo.
Prima d'effettuare questa operazione
assicurarsi che la macchina sia
spenta e fredda.
Pannarello sporco. Pulire il pannarello.
Il caffè ha poca crema La miscela non è adatta o il caffè
non è fresco di torrefazione oppure è
macinato troppo grosso
Cambiare miscela di caffè o regolare la
macinatura come al par.5.1.
La macchina impiega troppo tempo
per scaldarsi o la quantità di acqua
che fuoriesce dal tubo è limitata
Il circuito della macchina è intasata dal
calcare
Decalcifi care la macchina
Il Gruppo Caffè non può essere
estratto
Gruppo Caffè fuori posizione Accendere la macchina. Chiudere lo
sportello di servizio. Il gruppo erogatore
ritorna automaticamente nella posizione
iniziale
Cassetto raccoglifondi inserito Estrarre il cassetto raccogli fondi prima
di estrarre il gruppo di erogazione
Macchina macina ma il caffè non
fuoriesce.
(Vedere nota)
Manca acqua Riempire il serbatoio dell’acqua e
ricaricare il circuito (Par.4.3)
Gruppo Caffè sporco Pulire il Gruppo Caffè (Par.9.1)
Circuito non carico Ricaricare il circuito (Par.4.3)
Evento estremo che avviene quando
la macchina sta regolando automatica-
mente la dose.
Erogare alcuni caffè come descritto nel
par.5.1.
Erogatore sporco. Pulire l'erogatore.
Caffè troppo acquoso.
(Vedere nota)
Evento estremo che avviene quando
la macchina sta regolando automatica-
mente la dose.
Erogare alcuni caffè come descritto nel
par.5.1.
Caffè fuoriesce lentamente
(Vedere nota)
Caffè troppo fi ne Cambiare miscela di caffè o regolare la
macinatura come al par.5.1.
Circuito non carico Ricaricare il circuito (Par.4.3)
Gruppo Caffè sporco Pulire il Gruppo Caffè (Par.9.1)
Caffè fuoriesce all’esterno dell’ero-
gatore
Erogatore otturato Pulire l’erogatore ed i suoi fori d’uscita
Nota: questi problemi possono essere normali se è stata modifi cata la miscela del caffè o nel caso in cui si
stia effettuando la prima installazione; in questo caso attendere che la macchina proceda ad una autorego-
lazione come descritto nel par.5.1.
Per i guasti non contemplati dalla suddetta tabella o in caso che i rimedi suggeriti non li risolvano,
rivolgersi ad un centro assistenza.
PROBLEMI - CAUSE - RIMEDI

18
R & D Manager
Mr. Andrea Castellani
DICHIARAZIONE DI CONFORMITA’ CE
EC 2006/95, EC 2004/118,
EC 1992/31, EC 1993/68
SAECO INTERNATIONAL GROUP S.P.A
- Via Torretta, 240 - 40041 Gaggio Montano (Bo) - Italy
dichiariamo sotto la nostra responsabilità che il prodotto:
MACCHINA PER CAFFE’ AUTOMATICA
SUP 035 - SUP 035R
al quale si riferisce questa dichiarazione è conforme alle seguenti norme:
• Sicurezza di elettrodomestici e apparecchi elettrici - Requisiti generali
EN 60335-1 (2002) + A1(2004) + A2(2006) + A11(2004) + A12 (2006)
• Sicurezza di elettrodomestici e apparecchi elettrici - Parte 2-15
Requisiti specifi ci per apparecchi per riscaldare liquidi
EN 60335-2-15 (2002) + A1(2005)
• Sicurezza apparecchi per uso domestico e similare. Campi elettromagnetici
Metodi per la valutazione e le misure EN 50366 (2003) + A1 (2006).
• Sicurezza di elettrodomestici e apparecchi eletricci - Parte 2-14
Requisiti specifi ci per polverizzatori e macinacaffè EN 60335-2-14 (2006).
• Limiti e metodi di misurazione dei disturbi radio caratteristici di apparecchi con motore
elettrico e termici per uso domestico e simili scopi, strumenti elettrici e simili
apparecchiature elettriche - EN 55014-1 (2006)
• Compatibilità elettromagnetica (EMC)
Parte 3^ Limiti - Sezione 2 : Limiti per le emissioni di corrente armonica (corrente in
ingresso dell’apparecchiatura ≤ 16A per fase) - EN 61000-3-2 (2006)
• Compatibilità elettromagnetica (EMC)
Parte 3^ Limiti - Sezione 3 : Limitazione delle fl uttuazioni e dei picchi di tensione nei
sistemi di alimentazione a bassa tensione per apparecchiature con corrente nominale ≤ 16A.
EN 61000-3-3 (1995) + A1(2001) + A2 (2005)
• Requisiti di immunità per elettrodomestici, strumenti e apparecchi similari.
Norma per famiglia di prodotti EN 55014-2 (1997) + A1 (2001)
secondo le disposizioni delle direttive CE 73/23, CE 89/336, CE 92/31, CE 93/68.
Gaggio Montano - li, 23/06/2008
19
Italiano

20
IMPORTANT SAFEGUARDS
When using electrical appliances, basic safety precautions should always
be followed, including the following:
1. Read all instructions.
2. Do not touch hot surfaces. Use handles or knobs.
3. To protect against fire, electric shock and injury to persons do not
immerse cord, plugs, or appliance in water or other liquid.
4. Close supervision is necessary when the appliance is used by or near
children.
5. Unplug from outlet when not in use and before cleaning. Allow to
cool before putting on or taking off parts, and before cleaning the
appliance.
6. Do not operate any appliance with a damaged cord or plug or after the
appliance malfunctions, or has been damaged in any manner. Return
appliance to the nearest authorized service facility for examination,
repair or adjustment.
7. The use of accessory attachments not recommended by the appliance
manufacturer may result in fire, electric shock or injury to persons.
8. Do not use outdoors.
9. Do not let cord hang over edge of table or counter, or touch hot
surfaces.
10. Do not place on or near a hot gas or electric burner, or in a heated
oven.
11. Always attach plug to appliance first, then plug cord into wall outlet.
To disconnect, turn any control to “off”, then remove plug from wall
outlet.
12. Do not use appliance for other than intended use.
13. Save these instructions.
SAVE THESE INSTRUCTIONS

21
English
CAUTION
This appliance is for household use only. Any servicing, other than
cleaning and user maintenance, should be performed by an authorized
service centre. Do not immerse machine in water. To reduce the risk of
fire or electric shock, do not disassemble the machine. There are no
parts inside the machine serviceable by the user. Repair should be done
by authorized service personnel only.
1 Check voltage to be sure that the voltage indicated on the nameplate
corresponds with your voltage.
2 Never use warm or hot water to fill the water tank. Use cold water only.
3 Keep your hands and the cord away from hot parts of the appliance
during operation.
4 Never clean with scrubbing powders or harsh cleaners. Simply use a
soft cloth dampened with water.
5 For optimal taste of your coffee, use purified or bottled water. Periodic
descaling is still recommended every 2-3 months.
6 Do not use caramelized or flavored coffee beans.
INSTRUCTIONS FOR THE POWER
SUPPLY CORD
A. A short power-supply cord (or detachable power-supply cord) is to
be provided to reduce risks resulting from becoming entangled in or
tripping over a longer cord.
B. Longer detachable power-supply cords or extension cords are available
and may used if care is exercised in their use.
C. If a long detachable power-supply cord or extension cord is used,
1. The marker electrical rating of the detachable power-supply cord or
extension cord should be at least as great as the electrical rating of the
appliance
2. If the appliance is of the grounded type, the extension cord should be a
grounding-type 3-wire cord, and
3. The longer cord should be arranged so that it will not drape over the
counter top or table top where it can be pulled on by children or tripped
over.
22
GENERAL INFORMATION - TECHNICAL SPECIFICATIONS
1 GENERAL INFORMATION
This coffee machine is made for brewing espresso
coffee using whole coffee beans and is equipped with
a device to dispense steam and hot water. The elegant
machine housing has been designed for domestic use
only and is not suitable for continuous, professional
use.
Warning. No liability is held for damage
caused by:
• Incorrect use not in accordance with the intended
purposes;
• Repairs not carried out by authorized service
centres;
• Tampering with the power cord;
• Tampering with any parts of the machine;
• Storage or use of the machine at temperatures
below 0ºC (32ºF);
• The use of non-original spare parts and acces-
sories.
In these cases, the warranty will be voided.
1.1 To Simplify Manual Reading
The warning triangle indicates the
instructions that are important for
user's safety. Please carefully
follow these instructions to avoid serious injury!
References to illustrations, parts of the appliance
or controls, etc. are indicated by numbers or letters.
Whenever possible, refer to the illustration.
This symbol is used to highlight information
that is particularly important to ensure opti-
mal use of the machine.
The illustrations corresponding to the text can
be found on the fi rst pages of the manual. Please
refer to these pages while reading the operating
instructions.
1.2 How to use these Operating Instructions
Keep these operating instructions in a safe place
and make them available to anyone who may use
the coffee machine.
For further information or in case of problems that
are not included or not completely explained in these
instructions, please contact Saeco Customer Service.
2 TECHNICAL SPECIFICATIONS
The manufacturer reserves the right to make changes to
the technical specifi cations of the product.
Nominal Voltage - Power rating - Power supply
See label on the appliance
Housing
Thermoplastic material
Size (w x h x d)
370 x 370 x 480 mm / 14.6 x 14.6 x 18.9 in
Weight
9 kg / 19.8 lbs
Power cord length
1.2 m / 47.2 in
Control panel
Front
Pannarello
frothing attachment for making cappuccino
Water tank (removable)
1.7 litres / 57.5 oz
Coffee bean hopper capacity
230 g / 8 oz
Coffee grounds drawer capacity
14 portions
Pump pressure
15 bar
Boiler
Stainless steel
Safety devices
Thermal fuse
3 SAFETY REGULATIONS
Never allow water to come into contact with any of
the electrical parts of the machine: Danger of short
circuit! Steam and hot water may cause scalding! Do
not direct the steam or hot water jet towards body
parts. Handle the steam/hot water spout with care:
Danger of scalding!
Intended Use of the Machine
The coffee machine is intended for domestic use only.
Do not make any technical changes or use the machine
for unlawful purposes since this would create serious
hazards! The appliance is not to be used by persons
(including children) with reduced physical, mental or
sensory abilities or with scarce experience and/or
competences, unless they are supervised by a person
responsible for their safety, or they are instructed by

23
English
SAFETY REGULATIONS
him/her on how to properly use the machine.
Power Supply
Only connect the coffee machine to a suitable socket.
The voltage must correspond to the indication on the
machine's label.
Power Cord
Never use the coffee machine if the power cord is
defective or damaged.
If damaged, the power cord must be replaced by the
manufacturer or the manufacturer's customer service
centre. Do not pass the power cord around corners,
over sharp edges or over hot objects and keep it away
from oil.
Do not use the power cord to carry or pull the coffee
machine.
Do not pull out the plug by the power cord or touch it
with wet hands.
Do not let the power cord hang freely from tables or
shelves.
For the safety of others
Prevent children from playing with the machine.
Children are not aware of the risks linked with electric
household appliances. Do not leave the coffee machine
packaging within the reach of children.
Danger of Burns
Never direct the jet of hot steam and/or hot water
towards yourself or others: Danger of scalding!
Always use the handles or knobs provided.
Machine Location
Place the coffee machine in a safe place, where there
will be no danger of overturning or injury.
Hot water or overheated steam may spill out of the
machine: Danger of scalding!
Do not keep the machine at a temperature below 0ºC
(32ºF). Frost may damage the machine. Do not use the
coffee machine outdoors.
Do not place the machine on very hot surfaces and
close to open fl ames in order to prevent its housing from
melting or being damaged.
Cleaning
Before cleaning the machine, turn it off by pressing the
power button, then pull out the plug from the socket.
Wait for the machine to cool down.
Never immerse the machine in water!
It is strictly forbidden to tamper with the internal parts
of the machine.
Water left in the tank for several days should not be
consumed. Wash the tank and fi ll it with fresh drinking
water.
Suitable Location for Operation and Maintenance
To ensure correct and effi cient performance of the coffee
machine, we recommend following the instructions
below:
• Choose a level surface;
• Choose a location that is sufficiently well-lit, clean
and near an easily reachable socket;
• Allow for a minimum distance from the sides of the
machine as shown (Fig. A).
Storing the Machine
If the machine is to remain inactive for a long time, turn
it off and unplug it. Store it in a dry place and out of the
reach of children. Keep it protected from dust and dirt.
Servicing / Maintenance
In case of failure, problems or a suspected fault resulting
from a fall, you should immediately remove the plug from
the socket. Never attempt to operate a faulty machine.
Servicing and repairs may only be carried out by
authorized service centres.
All liability for damages resulting from work not carried
out by professionals is declined.
Fire Safety Precautions
In case of fi re, use carbon dioxide (CO
2
) extinguishers.
Never use water or powder extinguishers.

24
KEY TO MACHINE COMPONENTS - INSTALLATION
Key to Machine Components
Coffee bean hopper with cover
Service door
Coffee grounds drawer
Dispensing spout (height-adjustable)
Drip tray + grill
Control panel
Hot water / steam wand with Pannarello frother
Water Tank
Power cord
Hot water / steam knob
Cup stacking surface
Drip tray
Brew group
Control panel
Small coffee brew button
Long coffee brew button
Steam button
Power button
Warning light
Temperature light
Steam / double coffee light
Descaling light
Accessories
Grinder adjustment key
Brew group lubricant
4 INSTALLATION
For your own safety and that of others, carefully fol-
low the "Safety Regulations" in section 3.
4.1 Machine Packaging
The original packaging has been designed and
constructed to protect the machine during transport.
We recommend keeping the packaging carton for
possible future transportation.
4.2 Preliminary Operations
• Remove the drip tray (5) with grill from the
packaging.
• Remove the coffee machine from the packaging
and position it in a proper place in compliance with
the requirements described in the safety regulations
(section 3).
• (Fig.15) - Place the drip tray (5) into the machine.
• Before plugging the machine into the socket, be
sure that all steps outlined in section 4.3 have been
completed.
Important Note: Carefully read the explanation
of all the warnings displayed by the machine
by means of the lights on the control panel (section
12).
4.3 Using the Machine for the First Time
• (Fig.3) - Lift the water tank (8) slightly and remove it
from its seat.
• (Fig.4) - Rinse and fi ll it with fresh water taking care
not to overfi ll it. Replace the water tank.
Always use only fresh, non-sparkling water to
fi ll the tank (8). Hot water or any other liquid
may damage the tank and/or the machine. Do not turn
on the machine with empty tank: make sure there is
enough water in the tank.
• (Fig.1) - Remove the cover from the coffee bean
hopper (1).
• (Fig.2) - Pour in coffee beans.
Note: The grill on top of the coffee bean
hopper can not and need not be removed.
25
English
INSTALLATION - ADJUSTMENTS
Always add only coffee beans in the coffee
bean hopper (1). Pre-ground coffee, instant
coffee or any other object may damage the ma-
chine.
• Replace the cover on the coffee bean hopper (1).
• (Fig.5A) - Insert the plug into the socket on the back
of the machine.
• (Fig.5B) - Insert the plug of the other end of the power
cord into a wall socket with suitable power voltage.
• To turn on the machine simply press the power button
(17); the warning light (18) will begin to blink rapidly
indicating that the water circuit must be primed.
• (Fig.7) - To prime the water circuit, place a container
beneath the steam wand (Pannarello frother) (7);
• (Fig.8) - Turn the hot water knob (10) clockwise and
wait. A small set amount of water will come out of
the Pannarello, after which light (18) will blink slowly,
indicating that you can turn off the knob (10).
At this point, the temperature light (19) will begin to
blink slowly, indicating that the machine is in warm-up
mode.
Note: Before starting the machine after long
periods of inactivity or if the water tank has
been completely emptied, it is advisable to prime
the circuit.
When warm-up is complete, the machine
carries out a rinse cycle of the internal
circuits. A small amount of water will be dispensed;
in this phase the lights blink cyclically in a counter
clockwise direction. Wait for this cycle to be
completed automatically.
• When the above steps are complete, the machine is
ready for use.
• To brew coffee, dispense hot water or steam, and
for proper use of the machine, carefully follow the
instructions provided.
5 ADJUSTMENTS
The machine allows for certain adjustments that will
permit you to use it to its full potential.
5.1 Coffee Grinder Adjustment
Coffee is a natural product and its features
may change according to its origin and
blend. The Spidem coffee machine is equipped with
a self-adjusting system that allows using all types
of coffee beans available on the market (except
caramelized ones).
For this reason we recommend brewing several cups
of coffee before adjusting the coffee grinder.
Warning! The grinder adjustment knob, inside
the coffee bean hopper, must be turned only
when the grinder is running. Do not pour ground and/
or instant coffee into the coffee bean hopper.
Do not insert any material other than coffee
beans into the hopper. The grinder contains
moving parts that may be dangerous. Therefore, do
not insert fi ngers and/or other objects. Switch the
power button to off and remove the plug from the
socket before carrying out any type of operation
inside the bean hopper. Do not pour coffee beans
when the grinder is working.
The machine lets you make slight adjustments to the
coffee grinder to adapt it to the kind of coffee used.
This adjustment is carried out by adjusting the knob
found on the inside of the coffee bean hopper; this
knob must be pressed and turned only with the grinder
adjustment key (22) provided with the coffee machine.
(Fig.28-29) - While the grinder is running, press and turn
the knob (with the supplied key) one notch at a time and
brew 2-3 cups of coffee; the grinder adjustment may only
be noticed in this way. The references located inside the
coffee bean hopper indicate the grind setting.
1 - Coarse Grind
2 - Medium Grind
3 - Fine Grind

26
ADJUSTMENTS - COFFEE BREWING
5.2 Adjusting the Brewed Coffee
The machine allows you to adjust the amount of brewed
coffee according to your tastes and/or the size of your
coffee cup(s).
Each time you press and release the brew button (14)
or (15) the machine brews a pre-programmed amount
of coffee, which is different for each button. This amount
may be re-programmed to your taste. Each button may
be individually programmed for a specifi c brew setting.
As an example, the following procedure describes
the programming of button (14), which is normally
associated with espresso coffee.
• (Fig.10) - Place a cup beneath the dispensing
spout.
• (Fig.12) - Press and hold button (14); in this phase
the lights (19) and (20) blink alternately.
• (Fig.12) - When the amount of coffee in the cup
reaches the desired level, release button (14).
Button (14) is now programmed; each time it is pressed
and released, the machine will brew the same amount
of coffee just programmed.
5.3 Dispensing Spout Adjustment
(Fig.9) - The height of the dispensing spout (4) may be
adjusted to better fi t the dimensions of the cups that you
wish to use.
Manually move the dispensing spout up or down to
adjust its height.
The recommended positions are:
(Fig.10) - for use with small cups;
(Fig.11) - for use with large cups.
5.4 Stand-by
The machine is designed for energy saving.
After 60 minutes of inactivity, the machine turns off
automatically.
To turn the machine on again simply press the power
button (17); in this case the machine will go through the
rinse cycle only if the boiler is cold.
6 COFFEE BREWING
Note: Should the machine not brew coffee,
make sure that the water tank contains
water.
Before brewing coffee, make sure that the
green temperature ready light (19) is solid
(not blinking) and that the water tank and the coffee
bean hopper are full.
• (Fig.10 - Fig.11) - Place 1 or 2 cups beneath the
dispensing spout (4). You may adjust the height of
the dispensing spout to your cups.
• (Fig.12) - To brew the coffee simply press and release
button (14) for an espresso coffee, or (15) for a long
coffee.
• The brewing cycle is started: To brew 1 coffee press
the button just once; to brew 2 coffees press the
button twice in a row.
In this mode of operation, the machine
automatically grinds and doses the correct
amount of coffee. Brewing two coffees requires two
grinding cycles and two brewing cycles, carried out
automatically by the machine; this option is indicated
by the blinking double coffee light (20).
• After the prebrewing cycle, coffee begins to come out
of the dispensing spout (4).
• Coffee brewing stops automatically when the pre-
programmed level is reached; in any case it is
possible to interrupt coffee brewing by pressing the
button initially pressed.
The machine is adjusted to brew a real Italian
espresso. This feature may slightly lengthen
the brewing time, allowing the intense fl avour of the
coffee to develop fully.

27
English
DISPENSING HOT WATER - PREPARING A CAPPUCCINO
7 DISPENSING HOT WATER
Warning: at the beginning, short spurts of hot
water may come out: Danger of scalding. The
steam / hot water wand may reach high temperatures:
never touch it with bare hands.
• Before dispensing hot water, make sure that the
green temperature ready light (19) is on.
When the machine is ready to brew coffee, proceed as
follows:
• (Fig.7) - Place a cup and/or a container beneath the
hot water/steam wand (7).
• (Fig.8) - Open knob (10) by turning it clockwise.
• Fill the cup with hot water to the level desired; to stop
the hot water dispensing, turn knob (10) counter-
clockwise. The machine returns to normal operation.
Occasionally, upon opening knob (10), hot
water may not be dispensed and light (19)
may blink slowly. Should this happen, simply wait
until light (19) stops blinking and remains solid, at
which point hot water will be dispensed from the
hot water wand.
8 DISPENSING STEAM / PREPARING A CAP-
PUCCINO
Steam may be used to froth milk for a cappuccino, as
well as to reheat other beverages.
Danger of scalding! At the beginning, short
spurts of hot water may come out. The steam
wand may reach high temperatures: Never touch it
with bare hands.
• (Fig.13) - When the machine is ready to brew coffee,
press the steam button (16); light (20) will switch on.
The machine needs time to preheat; in this phase,
light (19) will blink.
• Before dispensing steam, wait until the green
temperature light (19) is solid (not blinking).
• (Fig.7 - Fig.8) - Place a container beneath the steam
wand (Pannarello frother) (7) and open the hot
water/steam knob (10) for a few seconds so as to
let the residual water come out of the steam wand
(Pannarello frother). After a brief moment, a steady
jet of steam will come out of the wand.
• Close the steam knob (10).
• Fill 1/3 of the container in which you wish to prepare
the cappuccino with cold milk.
Use cold milk for better results when
preparing a cappuccino.
• (Fig.14) - Immerse the steam wand (Pannarello
frother) in the milk to be heated and open the knob
(10). Move the container gently up and down to evenly
distribute the steam in the milk and level the foam
formation.
• After using the steam for the desired time, close the
steam knob (10).
• The same procedure can be used to heat other
beverages.
After using the steam wand (Pannarello frother), wash
it as described in the "Cleaning and Maintenance"
section.
After preparing the frothed milk, brew the
coffee. Press button (16).
My Coffee model: follow the procedure described in
section 8.1 to bring the machine back to the coffee
brewing temperature.
My Coffee Rapid Steam model: the machine
automatically brings itself back to the coffee brewing
temperature.
When not in use, the machine automatically
reaches the temperature needed to brew cof-
fee to save energy.
8.1 Switching from steam to coffee
(My Coffee model only)
• When switching from steaming to coffee brewing, light
(19) blinks quickly showing that the machine is over
temperature. Coffee may not be brewed.
• In order to brew coffee, a small amount of water must
fi rst be dispensed.
(Fig.7 - Fig.8) - Place a container beneath the steam
wand (Pannarello) (7). Turn the steam knob (10)
clockwise and wait until only the green temperature
ready light (19) is solid (not blinking). Then close the
knob by turning it counter-clockwise.

28
CLEANING AND MAINTENANCE - DESCALING THE MACHINE
9 CLEANING AND MAINTENANCE
General cleaning
• Maintenance and cleaning can only be carried out
when the machine is cold and disconnected from the
power supply.
• Do not immerse the machine in water or place any of
its parts in a dishwasher.
• Do not use sharp objects or harsh chemical products
(solvents) for cleaning.
• Use a soft, dampened cloth to clean the machine.
• Do not dry the machine and/or its components using
a microwave and/or conventional oven.
• (Fig.16) - Every day, after steaming milk, remove the
external part of the Pannarello frother and wash it with
fresh drinking water.
• (Fig.17) - Clean the steam wand weekly. In order to
do this, please:
- Remove the external part of the Pannarello (for
standard cleaning);
- Remove the upper part of the Pannarello from the
steam wand;
- Wash the upper part of the Pannarello with fresh
drinking water;
- Wash the steam wand with a wet cloth and remove
any milk residue;
- Replace the upper part of the steam wand (make
sure it is completely inserted).
Re-assemble the external part of the Pannarello.
• (Fig.4) - Clean the water tank on a daily basis.
- Remove the fi lter in the water tank and wash it under
running drinking water.
- Re-insert the fi lter into its seat by gently pressing
and turning it.
- Fill the water tank with fresh drinking water.
• (Fig.15) - Empty and clean the drip tray daily.
• (Fig.9) - Each week remove the dispensing spout,
pulling it downwards, and wash it with lukewarm water.
After washing it, place it back in position.
• (Fig.19-20) - Clean the service compartment. We
recommend emptying and cleaning (on a daily
basis):
- The coffee grounds drawer (3)
- The drip tray (12).
9.1 Brew Group
• The brew group (13) must be cleaned every time the
coffee bean hopper is fi lled or at least once a week.
• Turn off the machine by pressing button (17) and
remove the plug from the socket.
• (Fig.18 - Fig.19) - Open the service door (2). Remove
the coffee grounds drawer (3) and drip tray (12).
• (Fig.21) - Remove the brew group (13) pulling it by
the handle and press the "PUSH" button. The brew
group must be rinsed only with lukewarm water with
NO detergent/soap.
• (Fig.22) - Thoroughly rinse the brew group with
lukewarm water and carefully clean the upper fi lter.
• Thoroughly rinse and dry all the parts of the brew
group.
• Thoroughly clean the inside of the machine.
• (Fig.23) - Make sure that the two reference signs
match up.
• (Fig.24) - Make sure that the lever is in contact with
the brew group. Press the "PUSH" button to make
sure that the brew group is in the correct position.
Lubricate the brew group after approximately
500 brewing cycles. The brew group lubricant
may be purchased in authorized service centers.
• (Fig.25) - Lubricate the brew group guides using the
supplied lubricant only.
• (Fig.26-27) - Apply the lubricant evenly to the guides
on both sides of the brew group.
• Insert the brew group in its seat clicking it into place
WITHOUT pressing the "PUSH" button.
• Insert the coffee grounds drawer and the drip tray.
Close the service door.

29
English
DESCALING THE MACHINE - MACHINE DISPOSAL
10 DESCALING THE MACHINE
Limescale normally forms with the use of the appliance.
Descaling is necessary every 1-2 months or if you notice
a reduction in water fl ow.
When the machine needs descaling, the descaling light
(21) begins to blink.
Please use Saeco descaling solution in your
machine (Fig.30). It has been specifically
developed to preserve performance and functionality
throughout the lifetime of the machine and to ensure,
with regular use, a high quality delivered product.
Warning! Never use vinegar as a descaling
solution.
(Fig.17) - Before descaling, remove the Pannarello
from the steam wand as described in the "Cleaning and
Maintenance" section.
• Turn the machine on by pressing the power button
(17). Wait for the machine to complete the warm
up and rinse cycles.
• Mix the descaling solution with water as specifi ed on
the package of the descaling product and fi ll the water
tank.
• (Fig.7) - Place a container beneath the steam wand
(7).
• (Fig.8) - By turning knob (10) clockwise, dispense
water in intervals, one cup at a time; to stop
dispensing, turn knob (10) counter-clockwise.
• Between each cup, you must allow the descaling
solution to take effect for about 10-15 minutes, turning
the machine off by pressing the power button (17).
Empty the container.
• Continue until the descaling solution runs out and the
water tank is empty.
• When the descaling solution is fi nished, rinse the water
tank and fi ll it with fresh water.
• Turn the machine on by pressing the power button
(17).
• (Fig.8) - Turning the knob (10) clockwise, empty the
entire contents of the water tank; to stop dispensing,
turn knob (10) counter-clockwise.
When descaling is complete, insert the Pannarello onto
the steam spout as described in the “Cleaning and
Maintenance" section.
Press the steam button (16) for 7 seconds to deactivate
the descaling light.
Saeco descaling solution should be disposed
of according to the manufacturer instructions
and/or the regulations in the country of use.
11 MACHINE DISPOSAL
- The packing materials can be recycled.
- Appliance: unplug the appliance and cut the power
cord.
- Deliver the appliance and power cord to a service
center or public waste disposal facility
This product complies with eu directive 2002/96/ec.
The symbol
on the product or on its
packaging indicates that this product may not be
treated as household waste. Instead it shall be handed
over to the applicable collection point for the recycling
of electrical and electronic equipment.
By ensuring this product is disposed of correctly, you
will help prevent potential negative consequences
for the environment and human health, which could
otherwise be caused by inappropriate waste handling
of this product. For more detailed information about
recycling of this product, please contact your local city
offi ce, your household waste disposal service or the
shop where you purchased the product.

30
CONTROL PANEL LIGHTS
12 CONTROL PANEL LIGHTS
Warning Possible Causes Resolutions
Fixed
The machine is up to temperature for:
- brewing coffee;
- dispensing hot water.
Slowly blinking
The machine is warming up to brew
coffee, and dispense hot water and
steam.
Quickly blinking
The machine is overheated; in this
state the machine cannot brew
coffee.
Some of the hot water must be
dispensed into a container by turning
the steam knob (10) until the green
temperature ready light (19) stops
blinking and remains lit.
+
Simultaneously fi xed
The machine is at the correct
temperature to dispense steam.
+
Blinking in rotation
(alternate directions)
The machine is programming the
amount of coffee to be brewed (see
section 5.2).
Slowly blinking
The machine is brewing a double
coffee.
Fixed
There is not enough water in the
water tank.
Refill the water tank with fresh
drinking water, prime the circuit and
restart brewing.
The coffee bean hopper is empty. Refi ll the coffee bean hopper with
coffee beans and restart brewing.
The coffee grounds drawer is full.
The drip tray is full.
With the machine turned on, empty
the coffee grounds drawer and the
drip tray.
Quickly blinking
The water circuit is empty. Prime the water circuit of the machine
as described in section 4.3.
 Loading...