


QT
Video Loss
This guide was written for use with DVRs using firmware version 3.1.9 or later.
To check your firmware version, click on Information in the Main Menu and then
click on System. If you have an earlier version, you will need to get your Gateway IP
address from the Network Information window (also located in the Information
menu) before continuing past Step 1.
Remote Monitoring Quick Start Guide
QT Series Network DVRs
Before You Get Started
This poster is intended to help you get your Q-See security system connected to your network and
accessible for remote monitoring. You must have already set up your system and have a basic idea of
its operation. There are many additional features which can be customized to your specific needs. More
information and instructions are available in the Remote Monitoring Guide incuded on the CD that came
with your system or available for download from our website at www.Q-See.com/Support.
For information on how to set up your DVR and cameras, please refer to the Quick Start Guide poster
included with your DVR along with the User Manual also included on the accompanying CD.
Network Information
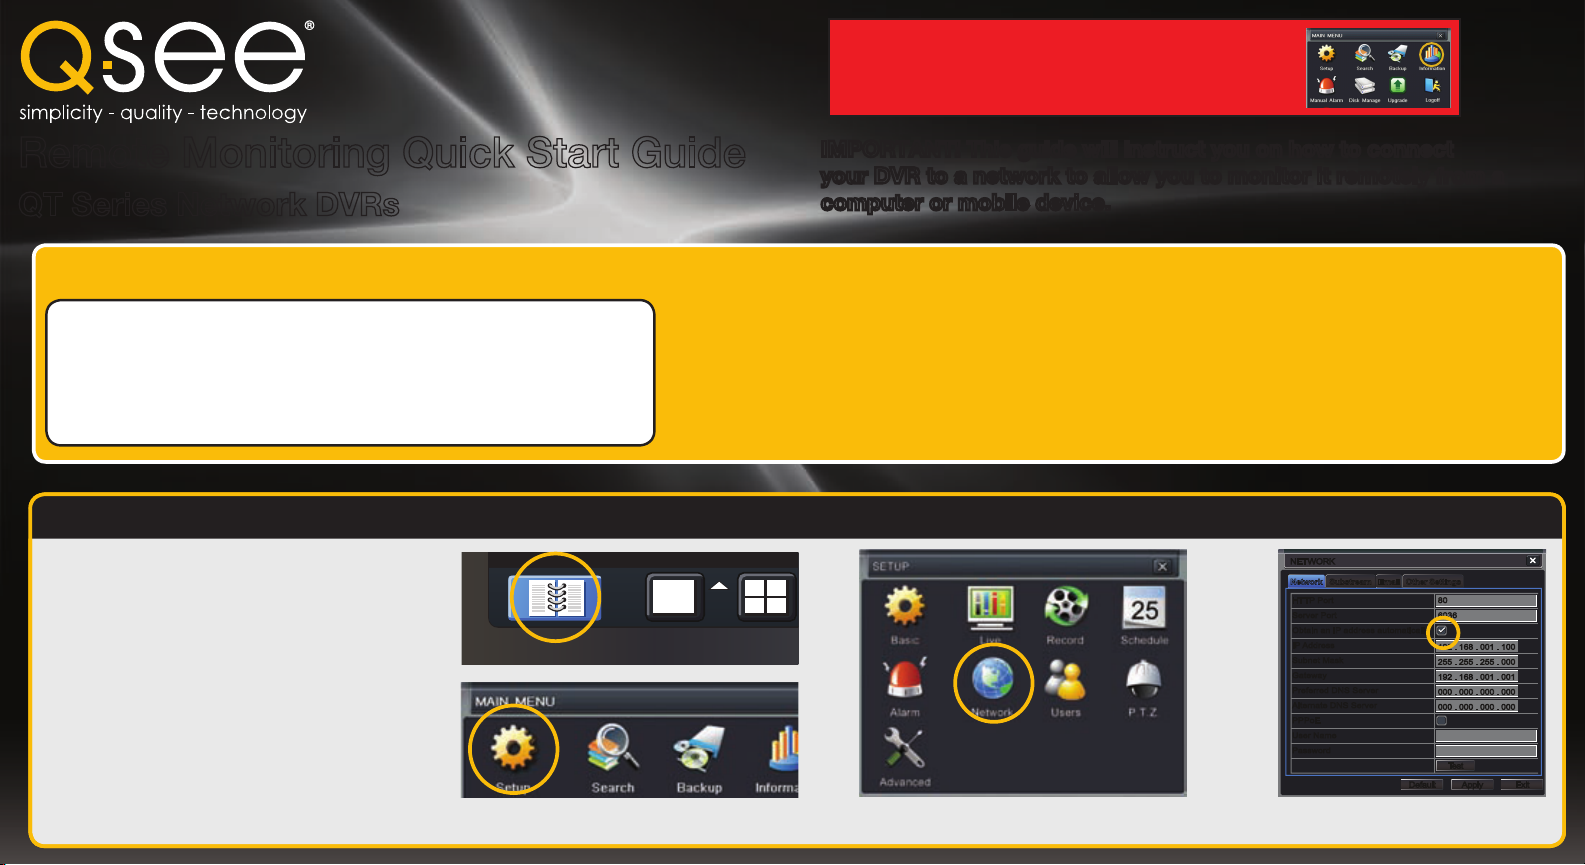
STEP 1 Establish an IP Address
A. Click on the Menu icon in the tool bar on the DVR’s screen.
B. Click on the Setup icon in the Main Menu
C. Click on the Network icon in the Setup Menu
D. Ensure that the box labeled “Obtain IP Address Automatically” is checked.
If it is not, please put a checkmark in the box, click on Apply and then Exit
the window. Reopen the window to see the updated IP address.
E. Write down the:
1. DVR’s IP Address
2. Subnet Mask, and
3. Gateway (your Router’s address)
F. Exit Menu
A C
B
You will need:
• Ensure that your DVR is connected directly to your network router using
a Cat5 or “Ethernet” cable plugged into your DVR’s network port (labelled
“NET” or “LAN”). Having a network switch between your DVR and router
can cause connectivity problems. Please note that your DVR must be
connected to your router with a cable as it will not work with a wireless
connection.
• Have a computer connected to the same router as your DVR.
IMPORTANT! This guide will instruct you on how to connect
your DVR to a network to allow you to monitor it remotely from a
computer or mobile device.
• You will need your router’s brand, model number and manual. The manual
is also usually available on your router’s manufacturer’s website.
• The “Manuals and Software” CD that came with your DVR. It contains
necessary software and links to other important programs which are
mentioned in this guide.
NETWORKNETWORK
D, E
NetworkNetwork SubstreamSubstream Other SettingsOther SettingsEmailEmail
HTTP Port
HTTP Port
Server Port
Server Port
Obtain an IP addres s automatically
Obtain an IP addres s automatically
IP Address
IP Address
Subnet Mask
Subnet Mask
Gateway
Gateway
Preferred DNS Ser ver
Preferred DNS Ser ver
Alternate DNS Ser ver
Alternate DNS Ser ver
PPPoE
PPPoE
User Name
User Name
Password
Password
80
80
6036
6036
192 . 168 . 001 . 100
192 . 168 . 001 . 100
255 . 255 . 255 . 000
255 . 255 . 255 . 000
192 . 168 . 001 . 001
192 . 168 . 001 . 001
000 . 000 . 000 . 000
000 . 000 . 000 . 000
000 . 000 . 000 . 000
000 . 000 . 000 . 000
DefaultDefault
TestTest
ApplyApply ExitExit
1
2
3
UPnP or Port Forwarding
Page Safety Tools
NetworkNetwork SubstreamSubstream
NETWORKNETWORK
DefaultDefault
ApplyApply ExitExit
TestTest
DDNS
DDNS Server
User Name
Password
Host Domain
DDNS Update [Hours]
UPnP
DDNS
DDNS Server
User Name
Password
Host Domain
DDNS Update [Hours]
UPnP
EmailEmail Other SettingsOther Settings
MyQ-See.com
myname@myemailaddress.com
myqseeaccountpassword
myaccount.myq-see.com
3
MyQ-See.com
myname@myemailaddress.com
myqseeaccountpassword
myaccount.myq-see.com
3
STEP 2 Opening Ports
To make your DVR accessible from outside of your local network, you have to “forward” ports 80 and 6036 through your router to your DVR’s IP address.
There are several ways to do this and we present two options which cover the majority of users. If you are unable to connect your DVR to the Internet using
either of these procedures, we describe two other methods in the Remote Monitoring Guide which can be found on the CD that came with your system.
Please note that if you are able to use UPnP, you should NOT forward your ports as this will cause connection issues.
OPTION A: UPnP OPTION B: Opening Ports Using DMZ
The QT series of DVRs come configured to take
advantage of the latest networking technology, UPnP
or Universal Plug ‘n Play right out of the box. If you
have an UPnP-enabled router, you will only need to
plug the DVR into your network and you will then be
able to proceed to the end of this section.
Consult your router’s manual to determine whether it
has UPnP or not. Please note that, as of this writing,
2Wire brand routers do not have the UPnP feature. If
you do not have a UPnP-enabled Router, you will have
to utilize another method to forward your ports.
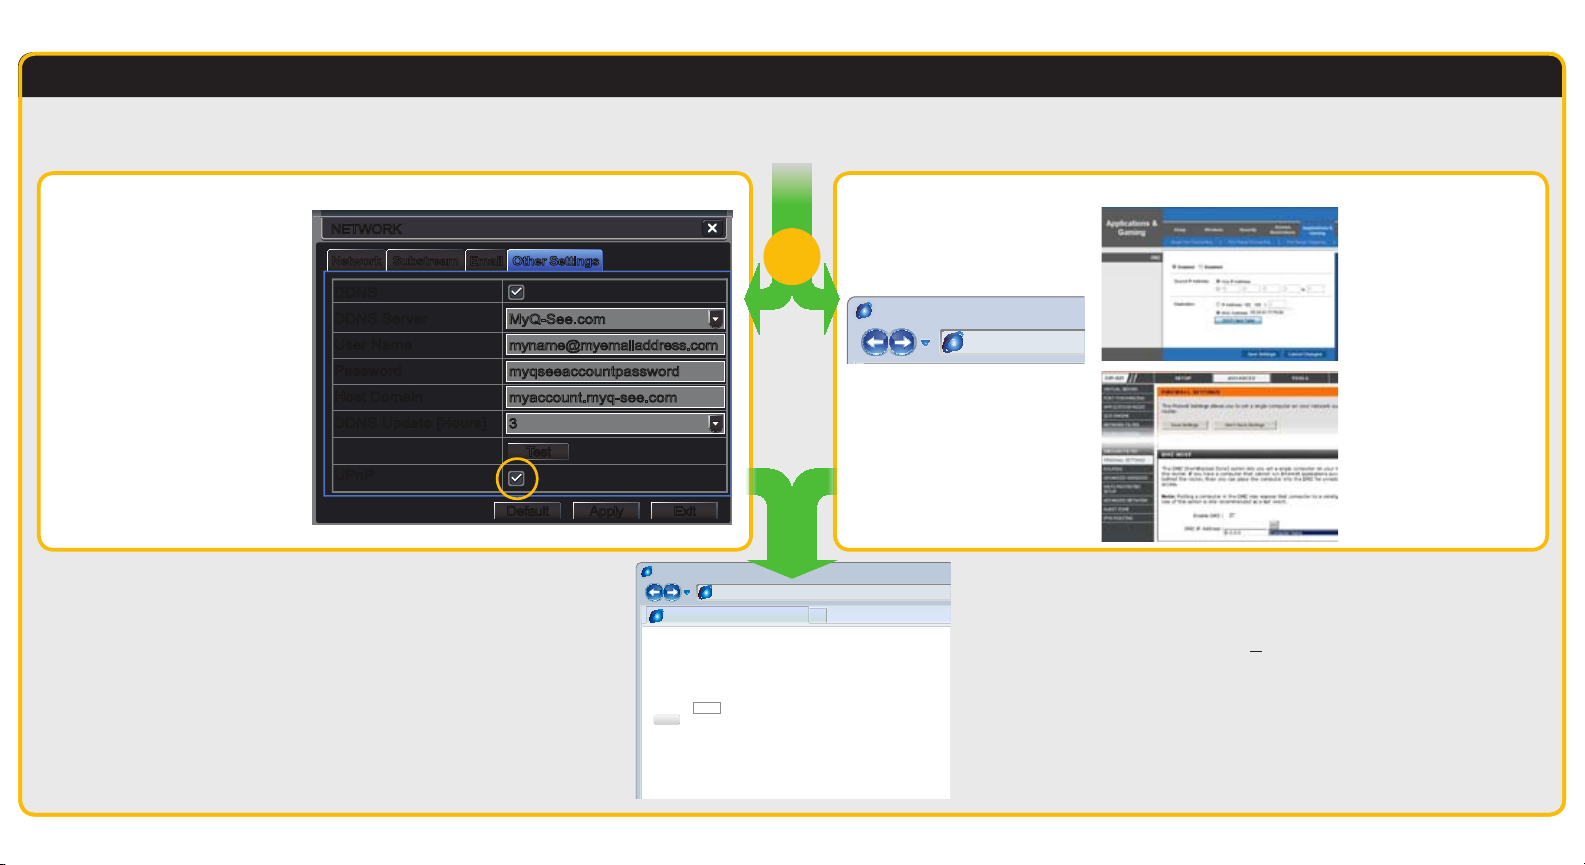
If you wish to ensure that UPnP is turned on in your
DVR, go to the Network window as described in
Step 1, above, and click on the Other Settings tab.
The UPnP box should have a check mark in it. If it
does not, click on the box to add the check, then click
on Apply before hitting Exit. When you reopen the
window, the box should be checked.
To confirm that your ports have been forwarded successfully, go to www.canyouseeme.org using a computer
connected to the same router as the DVR.
A. Enter “80” into the box labeled “What Port?”
B. Click on the Check button
C. You should see a green “Success” message. If not, return to the DVR’s Network window and, in the Network
D. Repeat for port 6036
tab, change port 80 to 81, 83 or 85 and click Apply to save your changes before checking using that new
number on CanYouSeeMe.
OR
Browser - Windows Internet Explorer
hp://canyouseeme.org/
Open Port Check Tool
CanYouSeeMe.org - Open Port Check Tool
This page will serve as a free utility for remotely verifying a port is open or closed. It will
be useful for users who wish to check to see if a server or ISP is blocking certain ports.
Your IP: 81.919.622.24
What Port?
Check
Success: I can see your service on
81.919.622.24 on port (80)
Your ISP is not blocking port 80
A. On a computer connected to the same router
as the DVR, open a web browser and enter the
Gateway (Router’s IP address) you obtained in
Part 1 into the browser window’s address bar to
access your router.
Browser - Windows Internet Explorer
hp://10.6.196.6
B. Locate the DMZ settings in your router. Each
manufacturer is different so please consult
your router’s manual for the location of this
setting. Two examples are shown at right.
This website will also display your Public IP address near the top of the page above the box where you entered
your port number. This is the number which you will use to access the DVR using a web browser or your
mobile device from outside of your local network (away from the building in which your DVR is located). Please
note that if you had to use a different port number than 80, you will have to add a colon (:) and that port number to
the end of the address shown. Example 81.919.622.24:81.
C. Enable DMZ.
D. Enter the DVR’s IP address (Obtained
in Step 1 Obtain an IP Address,
above).
E. Click on Apply or Save to preserve
your settings.
 Loading...