


Q-See QTN8022D, QT848, QT8216, QTN8021B, QT8316 Technical Manual
...
QT SERIES
IP CAMERAS
QUICK START

Thank You for Choosing a Q-See Product!
We are proud to back up our products with conditional service warranty covering all hardware
for 24 months from the date of purchase. But, we are also here to help you get the most
out of your system even if there aren’t any issues. Our self-help Knowledge Base, located
at www.Q-See.com/Support has the answers to the most common questions. If you can’t
find the solution to your problem, please feel free to contact our live support during the hours
shown below.
PRODUCT SUPPORT, DOWNLOADS,
FIRMWARE UPDATES & MANUALS
24/7 Technical Resource Data Base
Live Chat (M-F, 6am - 7pm Sat & Sun 9am - 5pm PST)
www.Q-See.com/Support
ABOUT THIS MANUAL
This Quick Start manual will help you get your IP camera online - whether
you’ll be connecting it to an NVR, or using it in stand-alone (remote) mode.
Detailed instructions on operating your camera using an NVR, computer or
mobile device are contained in the User Manual or Remote Monitoring
Guide on the CD included with your product. You will also find any needed
computer software on this CD as well. Additional information can be
downloaded from our support website at www.Q-See.com/Support.
This manual was accurate at the time it was completed. However, because
of our ongoing effort to constantly improve our products, along with
smartphone and router manufacturers adding and changing features on
their products, it is possible that some functions may change from how
they are described. We encourage you to visit our website at www.Qsee.com to check for the latest firmware and sofware updates as well as
product announcements.
© 2014 Q-See. Reproduction in whole or in part without written permission is prohibited. All
rights reserved. This manual and software and hardware described herein, in whole or in part,
may not be reproduced, translated, or reduced to any machine-readable form without prior
written approval.
Trademarks: All brand names and products are trademarks or registered trademarks of their
respective owners.
Q-See is a registered trademark of DPS, Inc.
Disclaimer: The information in this document is subject to change without notice. The
manufacturer makes no representations or warranties, either express or implied, of any kind
with respect to completeness of its contents.
Manufacturer shall not be liable for any damages whatsoever from misuse of this product.
NVR
POE
Block
POE
Block
Network
Network
Port
POE
Router
NVR
POE
Block
POE
Block
NetworkNetwork
Port
DC 48V
DC 12V
RS232
AUDIO
IN
VIDEO
OUT
CONNECTING AND MOUNTING CAMERAS
What makes Internet Protocol (IP) or Network cameras different is that they each have a
little computer processor inside them that allows them to talk to the NVR over a network including the Internet.
There are three ways you can connect your cameras to your NVR:
1. Directly through the PoE Ports
2. Through your local network
3. Remotely over the Internet
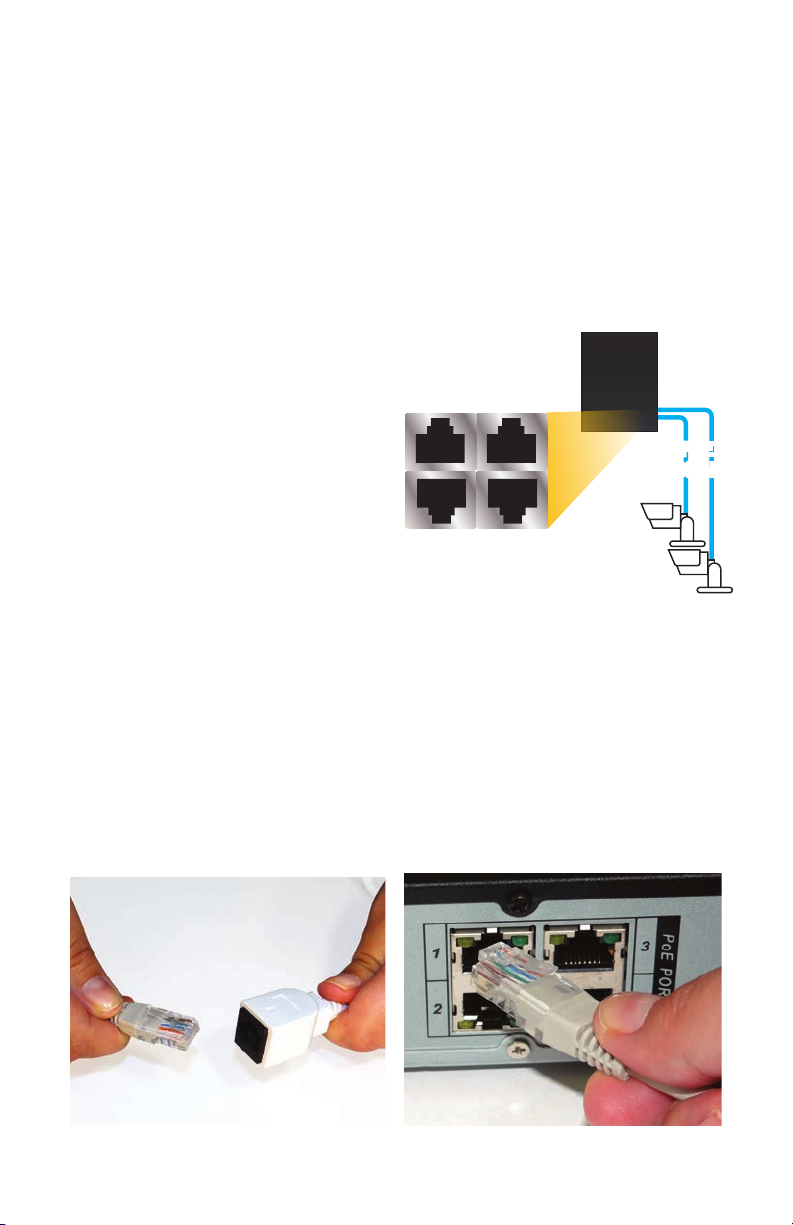
USING THE POE PORTS
This is the simplest method. These ports
provide power to the camera while receiving
their video signal.
• Connect the camera and NVR using the
RJ-45 Ethernet cable.
• The PoE port can power a camera up to
200 feet away.
• The camera’s video will appear after a few
seconds. (Non QT-series NVRs will need to
search for the camera)
• Cameras will be assigned to a channel
based on the order they were connected.
STEP 1. Connect one of the long Ethernet cables to the socket on the wire leading from
the camera.
STEP 2. Plug the other end of the Ethernet cable into any of the Power over Ethernet
(PoE) ports on the back of the NVR.
PICTURE 1
NVR
POE
POE
Block
Block
STEP 3. Repeat for additional cameras.
1
PICTURE 2
2
PICTURE 3
3
NVR
POE
Block
POE
Block
POE
Router/
Modem
POE
Router/
Modem
NetworkNetwork
Port
Internet
Internet
ON YOUR LOCAL NETWORK
Instead of running the cable directly between
your camera and NVR, you can connect the
camera to the same network used by your
NVR.
• The camera will require its own power
supply, called a “POE Injector” or a power
supply at the camera’s location
• Both the camera and NVR must be on the
same network (ie; connected to the same
router)
• The camera’s video will be received by
the NVR through the latter’s network
connection.
• To view video from networked cameras, you will need to have the NVR search for the camera
on the network.
The steps below are for use with Q-See’s QT-Series NVRs. To connect using another brand or
series, please consult that NVR’s manual.
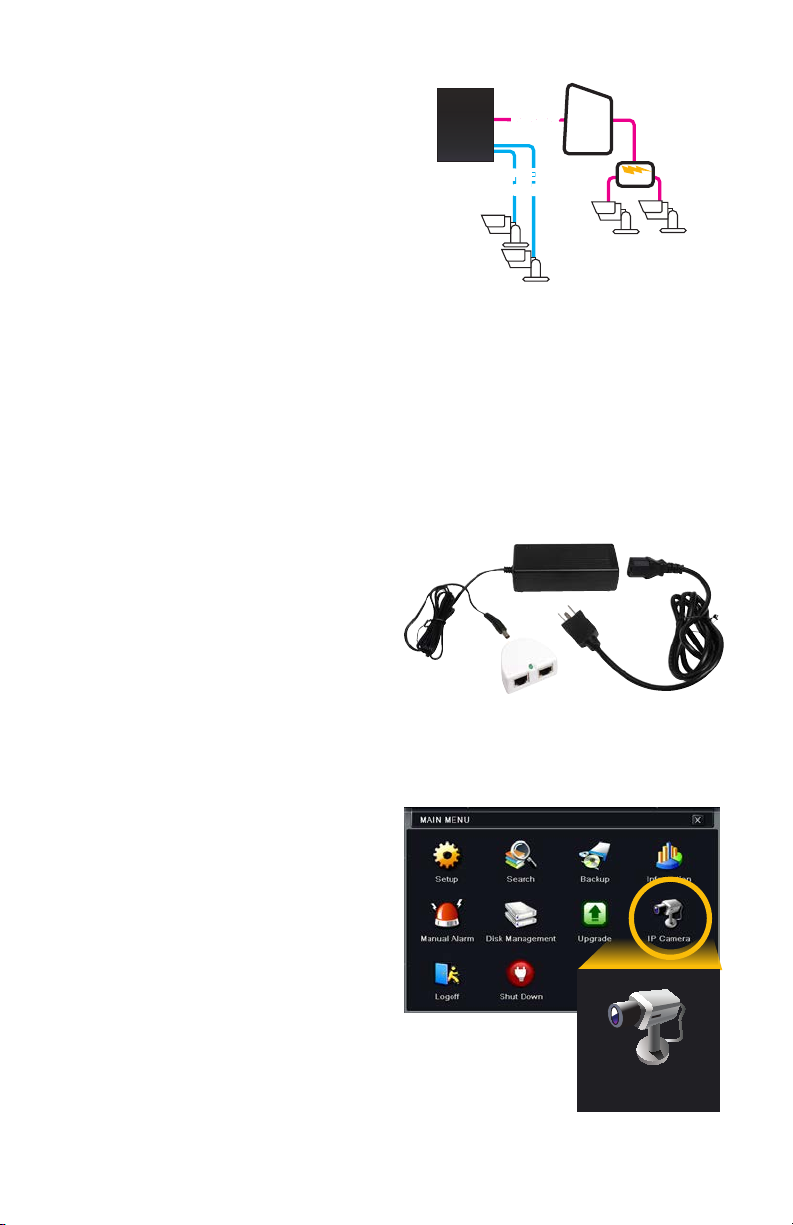
STEP 1. Connect the camera to a POE
Injector, such as Q-See’s QAPE
model (right).
NVR
Network
Network
Port
POE
POE
Block
Block
PICTURE 4
Router
POE
STEP 2. Plug the injector into a power
outlet.
STEP 3. Use a network cable to connect
the injector to a network port.
STEP 4. Select IP Camera from the
Main Menu.
4
PICTURE 5
IP Camera
PICTURE 6
 Loading...