


 Limited warranty
Terms & Conditions
1.Philips warrants to the original retail purchaser ("Consumer" or "You") that this Philips consumer communication product and all accessories originally provided by Philips in the sales package ("Product") are free from material defects in material, design and workmanship under normal use in accordance with operation instructions and pursuant to the following terms and conditions. This limited warranty extends only to the Consumer for Products purchased and used in the original country of purchase. The limited warranty is valid only in Philips' intended country of sales of the Product.
2.The limited warranty period for the Product extends for ONE (1) YEAR from the date of purchase of the Product as documented by valid proof of purchase (6 months for Accessories). IMPORTANT - You are required to return the Product together with a valid proof of purchase, which must identify the point of purchase, date of purchase, Product model and Product serial number clearly.
3.During the limited warranty period, Philips or its authorized service representative will repair without charge for parts or labor, a materially defective Product with new or refurbished parts or Product, and return such repaired Product to the Consumer in working condition. Philips will retain defective parts, modules or equipment. Repaired Product will be covered by this limited warranty for the balance of the original limited warranty period.
IMPORTANT:
Should you need to take the Product back to the after sales service, please make sure that you return both the handset(s) and the base as well as the accessories.
4. This limited warranty does not cover:
a)Product that has been subjected to misuse, accident, shipping or other physical damage, improper installation, abnormal operation or handling, neglect, inundation, fire, water or other liquid intrusion; or
b)Product that has been damaged due to repair, alteration, or modification by anyone not authorized by Philips; or
c)Product that has reception or operations problems caused by signal conditions, network reliability or cable or antenna systems; or
d)Product which defect or problem is caused by its use with non-Philips products or accessories; or
e)Product which warranty/quality stickers, product serial number or electronic serial number has been removed, altered or rendered illegible; or
f)Product purchased, used, serviced, or shipped for repair from outside the original country of purchase, or used for commercial or institutional purposes (including but not limited to Products used for rental purposes); or
g)Product returned without valid proof of purchase or which proof of purchase has been altered or is illegible; h)Normal wears and tears of Force Majeure.
5.Except for the express warranties set forth above and those implied by law and which cannot be excluded or modified by agreement, Philips provides no other warranty whether express or implied (whether by statute, under the operation of law or otherwise) and specifically disclaims any warranty of satisfactory quality merchantability or fitness for a particular purpose.
Philip's total liability for damages relating to or arising out of the purchase or use of the product, regardless of the type or cause of such damage or the form or characterization of the claim asserted (e.g.contract or tort), shall not exceed the original purchase price paid for the product.
However in no event shall Philips be liable for any punitive, special, incidental, indirect or consequential damages resulting from purchase or use of the product, to the fullest extent allowed by law, whether or not Philips has been advised of the possibility of such damages. These limitations shall apply notwithstanding the failure of the essential purpose of any limited remedy. This limited warranty does not affect the Consumer's statutory rights under applicable national laws in force.
No carrier, retailer, agent, dealer, employee, thereof, or employee of Philips is authorized to make modifications to this limited warranty and you should not rely on any such representation.
English
Additional Onis 200 handset |
1 |

English
 Introduction
Soft keys
Correction and “R”
Obtaining a line 

Loudspeaker
Microphone
SCREEN ICONS:
Battery charge status
Answerphone activated
Indicates message on answerphone or Operator mail box
Internal call in progress
Menu navigation keys
Intercom
Operator services
Earpiece Volume
Handset ringer deactivated Loudspeaker activated Withheld identity activated Base/Handset link correct
2

Recommendations and safety information
This additional HANDSET, compliant with both Onis 200 and Onis Vox 200 models, gives you permanent access to a cordless telephone in rooms which do not have a telephone socket.
You may use up to 8 HANDSETS with each Onis 200 and Onis Vox 200 base station. In order to get the most out of your HANDSET, we recommend you read the instructions supplied with your main BASE STATION and HANDSET.
This HANDSET meets GAP standard requirements and may be used with any GAP base station, irrespective of the make.
In this case, we recommend you carefully read the following information, compiled using comments and suggestions provided by other users.
Safety information:
•Avoid contact with liquid.
•To avoid any risk of electric shock, please do not attempt to open the handset or base station. Repairs should be carried out by our after-sales service.
•The charging contacts should be kept away from conductive objects (metal objects, keys, jewellery, etc.).
English
The CE mark on your telephone means that it is compliant with European directive 99/05/EC on technical regulations for user safety, electromagnetic interference and radio tests.
Electric connection: 230V mains supply, single phase AC, with the exception of IT-type equipment described in standard EN 60-950. (NB: Excessive mains voltage limits are defined according to criteria laid out in the same standard.)
Operating temperature is between 5° C and 45° C.The mains power pack has a 230V supply sectioning feature to protect the user. As a preventive measure, this should be close to the equipment and easily accessible.
Telephone connection: network voltage is classed as telephone network voltage in compliance with EN 60-950.
NB:You are about to use an approved DECT-type telephone that allows private intercommunication between cordless phones and a cordless PABX or domestic terminal. Use of this equipment is subject to conditions specified by the decree of January 13, 1995, published in the “Journal Officiel” on January 26, 1995, defining general licensing conditions in compliance with Article L.89 of the “Code des Postes et Télécommunications”. In addition to the approval of the equipment, the following conditions of use must be respected, particularly in view of the use of radio frequencies:
1.DECT equipment is not guaranteed against jamming by other authorised use of radio frequencies;
2.DECT equipment may be used to connect fixed points only if these connections are not permanent and the equivalent isotropic radiated power at the antenna is less than 50 mW;
3.DECT equipment (cordless PABX type with more than two network access lines) must be installed by an agent approved by the telecommunications ministry. Such installations are complex, as defined in Article R. 20-22 of the “Code des P. et T.” ;
4.Telepoint network access conditions for DECT equipment must be subject to an agreement signed with the authorised telepoint network operator concerned.
Environmental Protection:
Your HANDSET has been designed in compliance with the Philips EcoDesign program, which takes environmental factors into consideration throughout the product’s life cycle.
Additional Onis 200 handset |
3 |

English
 Setting up the handset
Installing the handset
Proceed as follows:
•Plug the mains adapter into an easily-accessible socket.
•Place the HANDSET on the CHARGER.
Before initial use or following a long period without charging, the HANDSET should be fully charged for at least 12 hours.
L WARNING:
Once the handset is fully charged, you should follow the procedure described on page 4 (registering the handset with a base station).
Inserting and replacing batteries
R03/AAA NiMh rechargeable batteries should be used as replacements.
•Slide open the HANDSET battery cover in the direction indicated by the arrow.
•Remove batteries.
•Insert new batteries as indicated and replace the cover.
•Place the HANDSET on the CHARGER. Charge for at least 12 hours.
L WARNING:
Never use non-rechargeable batteries. Use only the recommended types (R03/AAA NiMh).
NOTE. Used batteries should not be disposed of with household waste.
Return used batteries to your distributor or take to a suitable collection centre.
4

 Registering the handset with a base station
In order to use the HANDSET with the BASE STATION, you must first follow the procedure described below. Each HANDSET may be used with two different
BASE STATIONS.
L WARNING:
Before commencing the following, the handset must be fully charged for at least 12 hours.
ONIS 200 or ONIS Vox 200 base stations
1Unplug and plug back in the power supply of the Onis 200 BASE STATION.
2Scroll to “Register hdset” under “Handset settings” in the “Settings” menu and select OK|.
3Enter the base station registration code (4 figures) and select OK|.
4The screen will display “Recording” for a short while, followed by “Set!” once
the procedure is complete.
In the event of failure, begin again from step 1 .
Another base station
First, follow the procedure described by the manufacturer (see base station manufacturer’s instructions).
Once this is done, follow steps 2 to 4 of the procedure shown above for the
HANDSET.
 Cleaning your handset
Use a damp, lightly soaped cloth to clean your HANDSET.Wipe with a dry cloth.
•Never use a solvent or household product. Clean your telephone regularly to keep it looking brand new.
Important:
Do not place your telephone in a place where it may fall.
The code is shown on the label beneath the base station bottom (RC).
English
Additional Onis 200 handset |
5 |

English
 Changing the handset language
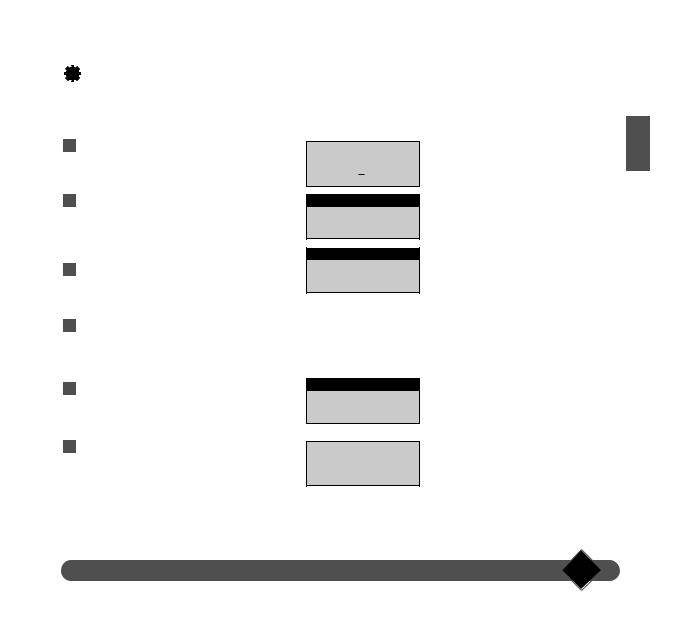
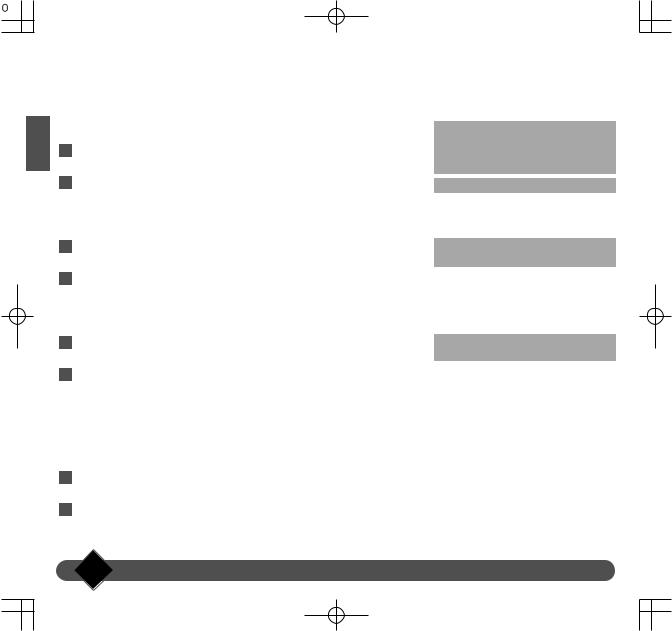
1On the idle screen, scroll through the list of menus and select |SETTINGS.
2Scroll to “Handset settings”.
3Select OK|.
17 FEB |
11:48 |
||
Philips 1 |
|||
SETTINGS |
|
|
|
|
▼ |
||
|
|
|
|
SETTINGS |
|
|
|
Handset |
settings |
||
BACK |
|
|
OK |
|
|||
Handset settings |
|||
Language |
|
|
|
BACK |
|
|
OK |
|
|
|
|
4Choose OK| to select the “Language” option.
5Scroll to the language you want and select OK|.
6Press and hold the  key to return to the idle screen.
Language
√ English
BACK |
OK |
Set !
6
 Using the handset with an ONIS 200 base station
The additional HANDSET functions in the same manner as the handset which comes with your Onis 200 or Onis Vox 200 BASE STATION.
With this multi-handset setup you can now:
-make conference calls,
-transfer calls,
-make an external call with two other HANDSETS in an intercom mode (if you have 3 or more HANDSETS). See instructions for more information.
-use the “babysit” function.
 Using the handset with another GAP standard base station
The GAP standard guarantees minimum operating performance for all handsets and base stations, irrespective of their make.
Your HANDSET conforms with this standard.
In order to get the most out of your HANDSET, we recommend you read both these and the manufacturer’s instructions.
When your HANDSET is used with a different make of base station, line connection, call reception and dialling functions are guaranteed.
 Charger wall-mounting
1Make two holes in the wall, 65mm apart vertically and insert screws.
2Mount the base using the plastic attachment and pull down.
 Battery performance
The telephone will work for approximately one week when the HANDSET is away from the BASE STATION in idle mode and around 8 hours when in use.
•During a call, beeps will provide a warning when only a few seconds of battery life remain.
Communication will be cut off automatically when after this time.
The  icon indicates a charge level below 5% (no bar).You should now charge the HANDSET
English
Additional Onis 200 handset |
7 |

English
Recharging
It takes at least 12 hours to fully recharge an empty battery.
Range
The HANDSET has a range of around 300m in an open area with good radio reception.
•During a call, reception will begin to break up as you near the range limit. Should this happen, you should quickly move closer to the base station to prevent communication being cut off.
Please follow the installation recommendations on page 3.
Onis 200 handset keys
•The  key allows you to transfer and receive calls.
•The  key allows you to activate or deactivate the HANDSET loudspeaker.
•The  key allows you to select intercom with another handset.
•The  key allows you to adjust the receiver or loudspeaker volume level during a call.
•The  key allows you to delete a character already entered.The same key also enables you to use the “R” function during a call. Pressing and holding this key allows you to return to the idle screen at any time.
•The  key allows you to access the list of operator services.
The outline of the  icon flashes to show that the handset is correctly placed on the charger.
This information is approximate and applies to a fully charged battery.
8

 Understanding the menu system
Menus are displayed on the fourth line, with headings and sub-headings shown on the second and third lines of your screen.
Menus:
You can access the menus using the 

 keys:
keys:
•Use these keys to select menus shown at the bottom of the screen.
Eg: On the idle screen, the available menus are |REDIAL and SHARED|.
•Use the 
 keys to scroll through menus not shown on screen. Use the


 keys to select, as above.
•Press and hold the  key to interrupt any activated function and return to the idle screen.
Headings and sub-headings:
•Headings are shown on the second line on a black background.
•Sub-headings are shown on the third line. Use the 
 keys to scroll
through the sub-headings. Use the 

 keys to select OK| or retrace a step |BACK.
•Some headings enable you to modify options.When accessing the heading, the active option appears first, preceded by “√ ”.
To choose another option, use the 
 keys to scroll through the list and validate your option using.
The u icon indicates that other menus are available.
The u icon does not appear on screen for headings and sub-headings.
English
Additional Onis 200 handset |
9 |
English
 Customising your handset
Ringer settings
The HANDSET has 9 ringer melodies.
1Scroll to “Ext. ringer type” or “Int. ringer type” under the “Handset sounds” heading in the “Settings” menu and select OK|.
2Scroll to one of the nine melodies and select OK|.
External melody: for all incoming calls. Internal melody: for all intercom calls.
You will hear the selected ringer.
Ringer volume
1Scroll to “Ringer Volume” under the “Handset sounds” heading in the “Settings” menu and select OK|.
2Scroll to the chosen volume and select OK|.
To deactivate the ringer, select the Silence option.The  icon will be displayed.
Screen contrast
1Scroll to “Contrast” under the “Handset Settings” heading in the “Settings” menu and select OK|.
2Scroll to the chosen contrast and select OK|.
The screen contrast will immediately be adjusted.
Activating/deactivating the key tones
HANDSET keys can be set to sound when pressed.You can program this sound:
1Scroll to “Key tones” under the “Handset sounds” heading in the “Settings” menu, and select OK|.
2Choose whether to activate or deactivate the tones and select OK|.
10
 Using the telephone
Making a call
When you lift the HANDSET from the CHARGER, the  icon should
be highlighted.
If this is not the case, please refer to the section entitled “Telephone troubleshooting”.
1Press  .
.
2Check for a tone and dial the number you wish to call.
3To end the conversation, press  again or replace the handset on its charger.
English
You can also obtain a line by pressing the  key.This activates the handset loudspeaker.
Preparing the number before calling (predial)
To check the number and, where necessary, correct before calling:
1Enter the number on the keypad.
•If you make a mistake, you can delete the last character using |CORRECT or by pressing  .
.
2Press  or
or  to make the call.
Answering a call
Your ONIS 200 rings, unless you have deactivated the ringer:
1Press  to talk.
•You can deactivate the handset ringer by pressing |SILENCE.
2Press  again to hang up, or replace the handset on the base station or charger.
The number will be displayed on screen. The RECORD| function allows you to store the number in one of the phonebooks.
Additional Onis 200 handset |
11 |
English
 Using the Intercom
Your base station may be used with 8 handsets. Intercom allows you to communicate internally between two handsets.
In addition, if you have three or more handsets, external calls may be made while the intercom function is in use (e.g.one handset is used to communicate externally while two others are used for an internal call).
Internal calls
1Press  .
.
2Use 
 to scroll through the list and select the extensions you wish to call.
3Select CALL| or  to make the call.
4Select |STOP INTER. or press  to end intercom from the handset.
•On the HANDSET called, press  to answer.
L NOTE:
If you receive an external call while in intercom mode, beeps will alert the handsets in use. You must hang up the internal call before taking the external call. However, a third HANDSET, not being used on an internal call, may also be used to take the external call.
You may also enter the number of the handset you wish to call  or to make all handsets ring.
In this case, steps 2 and 3 become redundant.
Intercom during external call and call forward
During the external call, tell the person on the other end of the line that you will be unable to hear them for a moment, then:
1Press  .
.
2Use 
 to scroll through the list and choose the handset you wish to call. Select CALL|.
The person on the other end of the line will hear hold music.
12
|
|
|
|
|
|
|
|
|
|
|
|
Select |SWITCH to place the internal call on hold and speak to the person |
|
|
|
|
|
|
|
|
|
||
|
|
|
|
|
|
||
|
|
|
|
You can also hang up by pressing |
. |
||
|
|
|
3 |
||||
|
|
|
|
on the external line. Using this function, it is possible to switch between |
|
|
|
|
|
|
|
|
|
||
internal and external lines.
•Select TRANSF.| to forward the external call to your chosen handset.
•Scroll to and select CONF. CALL| to set up a conference call between the external caller and two internal handsets.
On the handset(s) called:
Press  to answer.
 Using the babysit function
English
Acts as a silent intercom, while another handset is used as an intercom monitoring handset to listen to noise in the room where the former monitoring handset has been placed. If you receive a call, the intercom will remain silent and will not take the call.
Activating babysit mode
1Scroll to “Babysit mode” under the “Handset settings” heading in the “Settings” menu and select OK|.
2Scroll to activate the function and select OK|.
The “Babysit mode” indicator then appears on the idle screen.
Deactivating the babysit mode
On the idle screen shown, select CANCEL|.
Using the intercom
In order to listen to noises picked up by the monitoring handset, you will need to set up the intercom (see page 10) between the handsets.
L NOTE:
Handsets in “Babysit” mode can still be used to make calls, but will not ring when a call is received.
You can deactivate the babysit mode using the “Babysit mode” menu, following the same procedure as that used to activate the mode.
Additional Onis 200 handset |
13 |
English
 Telephone troubleshooting...
PROBLEMS |
REASONS |
SOLUTIONS |
|
|
|
|
|
The HANDSET |
icon does not flash |
- Poor contact. |
- Move the HANDSET slightly. |
when the handset is placed on the charger. |
- Dirty contacts. |
- Clean the contacts with a cloth moistened |
|
|
|
|
with alcohol. |
|
|
|
|
No dial tone. |
|
- No power. |
- Check connections. |
|
|
- The HANDSET is not sufficiently charged. |
- Charge the HANDSET. |
|
|
- You are too far away from the BASE STATION. |
- Move closer to the BASE STATION. |
|
|
|
|
No ringer. |
|
The ringer is deactivated. |
See “Ringer settings”. |
|
|
|
|
The icon is not displayed. |
- The handset has not been registered. |
- Begin the handset registration procedure |
|
|
|
- No mains power. |
again (page 4). |
|
|
- The HANDSET is too far from the BASE |
- Check connections. |
|
|
STATION. |
- Move closer to the BASE STATION. |
|
|
|
|
When adding a HANDSET to the BASE |
The procedure used to add a HANDSET to |
Disconnect and connect the BASE |
|
STATION, a “Failure” message is displayed on |
the BASE STATION has failed. |
STATION mains power supply. Begin the |
|
the HANDSET. |
|
The maximum number of handsets (8) has been |
handset registration procedure again (p. 4). |
|
|
reached. |
|
|
|
|
|
Interference during the call. |
-You are too far away from the BASE STATION. |
- Move closer to the BASE STATION. |
|
|
|
- The BASE STATION is too close to |
Check the range. |
|
|
electrical appliances, reinforced concrete walls |
- Move the BASE STATION to find a better |
|
|
or metal door frames. |
position (the higher the better). |
|
|
|
|
14

Garantibestemmelser
Kære kunde,
Tak fordi du har valgt dette materiel fra PHILIPS. Det er fremstillet med den størst omhu, for at du skal blive helt tilfreds med brugen af det. Hvis du på trods af vore anstrengelser alligevel skulle få problemer med materiellet, kan du henvende dig til den forhandler, som du har købt materiellet hos, og som vil sørge for varetagelse af problemet. Hvis du skulle få brug for at kontakte en serviceafdeling i udlandet, supplerer PHILIPS' Internationale Garanti de garantiforpligtelser, som forhandleren har underskrevet vedrørende materiellet, i 12 måneder fra købsdatoen, dvs. at du gratis kan få repareret materiellet med hensyn til reservedele og arbejdsløn.
For at PHILIPS' Internationale Garanti dækker, forudsættes det, at materiellet har været anvendt i overensstemmelse med betjeningsvejledningen, og til det formål, materiellet er beregnet til. Du skal fremvise kassebon eller faktura med angivelse af købsdato, forhandlerens navn, model og produktets serienummer.
Garantien dækker ikke i følgende tilfælde:
●Ved ændring i eller forandring af ovennævnte dokumenter;
●Hvis produktets model og/eller serienummer ikke kan læses;
●I tilfælde af udført arbejde på produktet, der er udført af en person, som ikke er autoriseret;
●Skader, som skyldes en for apparatet uvedkommende årsag, f.eks. lynnedslag, brand, vandskade eller forsømmelse.
Der mindes om, at en ændring eller forandring af produktet, for at det opfylder normerne for udsendelse/modtagelse eller tilslutning til andre lokalnet end de for landet gældende, som det er fremstillet til og/eller godkendt til, ikke vedrører garantien. Som følge heraf anbefales det at kontrollere materiellets geografiske destination, når det købes.
Denne garanti har ingen indflydelse på de rettigheder, som du i givet fald har som forbruger, i henhold til den i landet gældende lovgivning.
I tilfælde af fejl ved dit PHILIPS-produkt skal du henvende dig til forhandleren.
Hvis det skulle blive nødvendigt at henvende sig til en serviceafdeling i udlandet, i et land hvor der ikke er nogen forhandler eller repræsentation for PHILIPS, kan du kontakte PHILIPS forbrugerservice, som vil anvise et servicested.
I tilfælde af problemer med det købte PHILIPS materiel anbefales det at læse brugsanvisningen nøje, før du kontakter forhandleren. Hvis forhandleren ikke kan besvare dit spørgsmål, er du velkommen til at skrive eller ringe til:
PHILIPS CONSUMER COMMUNICATIONS
Frederikskaj 6
DK 1780 KØBENHAVN K
Tel : 80880940
nordic@sitel.co.uk
Dansk
Ekstra Onis 200 håndsæt |
1 |

Introduktion
|
Taster til valg af |
Dansk |
funktion |
|
|
|
Korrigering og "R" |
|
Klartone |
Højttaler
Mikrofon
SKÆRMIKONER:
Batteriets ladestatus
Telefonsvarer aktiveret
Angivelse af besked på telefonsvareren eller på Top Message Intern samtale i gang
Tast til navigation i menuen
Intern kommunikation
Teleoperatørernes
præfikser
Lydstyrke
Ringetone for håndsæt afbrudt
Højttaler aktiveret
Secret d'Appel aktiveret
Korrekt forbindelse base/håndsæt
2
Henstillinger og sikkerhedsoplysninger
Dette ekstra HÅNDSÆT, der er kompatibelt med modellerne Onis 200 og Onis Vox 200, giver konstant adgang til en trådløs telefon i lokaler, hvor der ikke er noget telefonstik.
Du kan bruge op til 8 HÅNDSÆT med basen Onis 200 eller Onis Vox 200. Det anbefales, at du læser brugsanvisningen, der følger med BASEN og HÅNDSÆTTET, for at få mest muligt ud af HÅNDSÆTTET og dets funktioner.
Dette HÅNDSÆT opfylder kravene i standarden GAP og kan anvendes med alle baser af typen GAP uanset fabrikatet.
I dette tilfælde anbefales det, at du nøje læser følgende oplysninger, der er udarbejdet på baggrund af kommentarer og forslag fra andre brugere.
Sikkerhedsoplysninger:
•Undgå al kontakt med væsker.
•Forsøg aldrig at åbne håndsættet eller basen, da det kan medføre risiko for elektrisk stød. Reparationer skal udføres af vores serviceafdeling.
•Ladekontakterne må ikke komme i nærheden af ledende genstande såsom metalgenstande, nøgler, smykker mv.
CE-mærket bevidner, at produkterne er i overensstemmelse med gældende tekniske bestemmelser i henhold til EU-direktivet 99/05/EØF om brugersikkerhed angående elektromagnetiske forstyrrelser og radioforsøg.
Elektrisk tilslutning: Strømforsyning på ledningsnettet 230 V, enfaset vekselstrøm med undtagelse af anlæg med IT-diagram i henhold til normen EN 60-950.Vær opmærksom på, at netspændingen er klasseret som værende farlig i henhold til kriterierne i den samme norm. Anvendelsestemperatur mellem 5° C og 45° C. I tilfælde af fare fungerer nettilslutningsblokken som ledningsadskiller for strømforsyningen på 230 V. Den skal af sikkerhedsmæssige grunde være installeret i nærheden af materiellet og altid være let tilgængelig.
Tilslutning til telefonlinjen: De spændinger, der findes på nettet, er klasseret i gruppe TRT-3 (telefonnetspænding) i henhold til normen EN 60-950. Oplysning: Dette udstyr af typen DECT er godkendt og giver mulighed for intern kommunikation til privat brug mellem trådløse telefoner og en privat, trådløs og automatisk omskifter (PABX). Under anvendelse af udstyret skal de forhold overholdes, der er angivet i fransk bekendtgørelse af 13. januar 1995 og offentliggjort i fransk Statstidende den 26. januar 1995, og som fastlægger betingelserne for en generel licens på grundlag af §L.89 i loven om post og telekommunikation. Foruden godkendelse af udstyret skal følgende anvendelsesforhold overholdes, specielt med hensyn til brug af radioelektriske frekvenser:
1. Brugen af DECT-udstyr er ikke sikret mod forstyrrelser, der frembringes af anden tilladt brug af radioelektriske frekvenser.
2. DECT-udstyret må kun anvendes til oprettelse af forbindelse mellem faste punkter i det omfang, hvor disse forbindelser ikke er permanente, og at den isotrope stråleeffekt svarende til antennen er mindre end 50 mW.
3.Installationen af DECT-udstyret (trådløs type PABX med mere end to adgangslinjer til nettet) skal foretages af en officielt godkendt installatør, idet disse installationer er komplekse i henhold til §R. 20-22 i loven om post og telekommunikation.
4.Adgang til et telefonnet med DECT-udstyret skal ske i henhold til en underskrevet aftale med ejerne af det relevante godkendte telefonnet.
Dansk
MILJØBESKYTTELSE:
Telefonens HÅNDSÆT er fremstillet i henhold til Philips' økologiske program vedrørende produktdesign, EcoDesign, som tager højde for apparatets forhold til omgivelserne i hele dets levetid.
t
Ekstra Onis 200 håndsæt |
3 |

Konfiguration af håndsættet
Dansk
Installation af håndsættet
Benyt følgende fremgangsmåde:
•Sæt netstrømsadapteren i et let tilgængeligt vægstik.
•Anbring HÅNDSÆTTET på OPLADEREN.
Før brug af håndsættet første gang eller efter en længere periode uden opladning, skal HÅNDSÆTTET oplades i mindst 12 timer.
L ADVARSEL:
Når håndsættet er fuldt opladet, skal du følge fremgangsmåden, der er beskrevet på side 5, om registrering af håndsættet på en base.
Installere og udskifte batterier
Når batterierne skal udskiftes, skal der bruges batterier af typen R03/AAA NiMh.
•Åbn klappen til batterirummet på HÅNDSÆTTET ved at trække klappen i pilens retning.
•Tag batterierne ud.
• Sæt de nye batterier i, vend dem i den viste retning, og luk klappen.
•Anbring HÅNDSÆTTET på OPLADEREN igen. Lad batterierne lade op i mindst
12 timer.
L OBS!
Brug aldrig engangsbatterier. Brug kun de batterimodeller, der anbefales (R03/AAA NiMh).
Obs! De brugte batterier må ikke smides ud sammen med husholdningsaffald.
Aflever i stedet for de brugte batterier hos forhandleren eller til et genbrugscenter.
4
Ændring af håndsættets sprog
1Gå ind i standbysærmen, og nuf for at vælge |SETTINGS i menverne.
2Rul gennem indstillingerne, indtil “Handset Settings” vises.
3Tryk på OK|.
4Tryk på OK| for at vælge menupuktet “Language”.
5Rul til det sprog du vil bruge,og tryk på OK|.
6Tryk længe på tasten  for at vende tillbage til standbyskæmen.
17 FEB |
11:48 |
Philips 1 |
|
SETTINGS |
▼ |
SETTINGS
Handset settings
BACK OK
Handset |
settings |
Language |
|
BACK |
OK |
Language
√ English
BACK OK
Language
√ Dansk
BACK OK
OK !
Dansk
Ekstra Onis 200 håndsæt |
5 |

Dansk
Registrering af håndsættet på en base
Før HÅNDSÆTTET kan bruges med BASEN, skal du følge fremgangsmåden, der er beskrevet herunder. Hvert HÅNDSÆT kan bruges med to forskellige BASER.
L ADVARSEL:
Før du begynder nedenstående fremgangsmåde, skal håndsættet være fuldt opladet, dvs. i mindst 12 timer.
Baserne ONIS 200 eller ONIS Vox 200
1Afbryd strømforsyningen til BASEN Onis 200, og tilslut den igen.
2Rul til Register hdset under Handset settings i menuen Settings, og tryk på
OK|.
3Indtast basens registreringskode (4 cifre), og tryk på OK|.
4På skærmen vises “I gang” i et øjeblik efterfulgt af “Ok!”, når proceduren er gennemført.
Hvis registreringen mislykkes, skal fremgangsmåden gentages fra trin 1 .
En anden base
Følg først den fremgangsmåde, der er beskrevet af fabrikanten, se basefabrikantens anvisninger.
Udfør derefter trin 2 til 4 i den fremgangsmåde, der er anført herover, for
HÅNDSÆTTET.
Rengøring af håndsættet
Koden er anført på etiketten, der sidder på undersiden af basen (RC).
Brug en fugtig klud, der er vædet i lidt sæbevand, til at rengøre HÅNDSÆTTET. Tør efter med en tør klud.
•Brug hverken opløsningsmidler eller rengøringsmidler.Vedligehold apparatet med jævne mellemrum, så det altid ser ud som nyt.
VIGTIGT!
Undgå at placere apparatet på et sted, hvor det kan risikere at falde ned.
6
 Brug af håndsættet med basen ONIS 200
Det ekstra HÅNDSÆT fungerer på samme måde som det håndsæt, der leveres med
BASEN Onis 200 eller Onis Vox 200.
Med konfigurationen af dette multihåndsæt kan du nu:
-foretage konferenceopkald,
-viderestille opkald,
-foretage et eksternt opkald med to andre HÅNDSÆT i intern kommunikation, hvis du har 3 eller flere HÅNDSÆT. Se anvisningerne for yderligere oplysninger.
-bruge funktionen Babysit.
Brug af håndsættet med en anden GAP-
standardbase
Standarden GAP sikrer visse funktioners ydeevne for alle håndsæt og baser, uanset deres fabrikat.
Dette HÅNDSÆT er fremstillet i overensstemmelse med denne standard.
Det anbefales, at du læser disse og fabrikantens anvisninger for at få mest ud af HÅNDSÆTTET og dets funktioner.
 Vægmonteret oplader
1Lav to huller i væggen med 65 mm afstand i højden, og sæt skruerne i.
2Monter basen ved hjælp af plastanordningen, og træk nedad.
Når HÅNDSÆTTET bruges med en base af et andet fabrikat, er der sikkerhed for, at indgående opkald og opkaldsfunktionerne virker.
Batteriets ydeevne
Telefonen virker i ca. en uge, når HÅNDSÆTTET ikke er anbragt på BASEN i standby og ca. 8 timer under samtale.
•Under samtale udsendes en biplyd som advarsel, når der kun er et par sekunders taletid tilbage, før batteriet er helt afladet.
Når batteriet er helt afladet, afbrydes samtalen automatisk.
Ikonet  angiver, at ladestanden er under 5 % (ingen streger vises). Oplad HÅNDSÆTTET med det samme
Dansk
Ekstra Onis 200 håndsæt |
7 |

Dansk
Opladning
Den samlede varighed for opladning, når batteriet er helt afladet, er mindst 12 timer. Konturen omkring ikonet  blinker for at angive, at håndsættet ligger rigtigt på basen.
Rækkevidde
Under samtale bliver forbindelsen dårlig, når grænsen for håndsættets rækkevidde er nået.
•Gå i så fald tættere på basen, da samtalen ellers vil blive afbrudt.
Overhold anvisningerne for installation, der er angivet på side 4.
Taster på håndsættet Onis 200
•Tasten  bruges til at foretage og modtage opkald.
•Tasten  bruges til at aktivere eller deaktivere højttaleren på HÅNDSÆTTET.
•Tasten  bruges til at vælge intern kommunikation med et andet ekstra håndsæt (ekstraudstyr).
•Tasten  bruges til at indstille lydstyrken på højttaleren under en samtale.
•Tasten  bruges til at slette et tegn under indtastning. Den bruges også til anvendelse af funktionen "R" under samtale. Med et langt tryk på denne tast kan du når som helst vende tilbage til standbyskærmen.
•Tasten  giver adgang til listen over teleoperatørernes præfikser.
Disse oplysninger er vejledende og gælder for et fuldt opladet batteri.
8

Menuernes opbygning
På fjerde linje vises forskellige menuer, og på anden og tredje linje af skærmen vises menupunkter og undermenupunkter.
Menuer:
Med tasterne 

 du adgang til menuerne:
•Brug disse taster til at vælge de menuer, som vises på skærmens nederste linje. Eksempel: I standbyskærmen er disse menuer |GENKALD og FÆLLES LISTE|.
•Hvis du vil have adgang til en menu, som ikke vises på nederste linje, skal du
bruge tasterne 
 til at rulle i menuerne.Tryk derefter på tasterne

 som beskrevet herover.
•Med et langt tryk på  kan du når som helst afbryde den aktuelle handling og vende tilbage til standbyskærmen.
MENUPUNKTER OG UNDERMENUPUNKTER:
• Titlen på menupunktet er angivet på 2. linje med sort baggrund.
•Undermenupunkter vises på 3. linje. Brug tasterne 
 til at rulle i
undermenupunkter. Brug derefter tasterne 

 for at vælge OK| eller flytte et niveau |TILBAGE.
Ikonet u angiver, at flere menuer er tilgængelige.
Ikonet u vises ikke på skærmen for menupunkter og undermenupunkter.
Dansk
Ekstra Onis 200 håndsæt |
9 |
Dansk
 Tilpasning af håndsættet
Indstilling af ringetoner
Du kan vælge mellem 9 forskellige melodier som ringetone til håndsættet.
1Gå ind i menuen Indstilling, vælg menupunktet Lyd håndsæt, rul indtil Udendørs melodi eller Indendørs melodi vises, og tryk derefter på OK|.
2Rul i menuen for at vælge en af de ni melodier, og tryk derefter på OK|.
Melodi til eksterne opkald: udendørs melodi: Bruges til alle indgående opkald.
Indendørs melodi: Bruges til alle opkald til intern kommunikation.
Du hører derefter den valgte ringetone.
Ringetonens lydstyrke
1Gå ind i menuen Indstilling, vælg menupunktet Lyd håndsæt, og rul indtil Lydstyrke melodi vises.Tryk derefter på OK|.
2Rul gennem menuen for at vælge den ønskede lydstyrke, og tryk på OK|.
Vælg indstillingen Tavs for at afbryde ringetonen. Ikonet  vises.
Skærmens kontrast
1Gå ind i menuen Indstilling, vælg menupunktet Indstil håndsæt, rul indtil Kontrast vises, og tryk derefter på OK|.
2Rul gennem menuen for at vælge den ønskede kontrast, og tryk derefter på
OK|.
Aktivere/deaktivere tastetoner
Hver gang du trykker på en tast på HÅNDSÆTTET, kan det angives med en biplyd. Du kan programmere denne biplyd:
1Gå ind i menuen Indstilling, vælg menupunktet Lyd håndsæt, og rul indtil Tastetoner vises.Tryk derefter på OK|.
2Rul gennem indstillingerne for at aktivere eller deaktivere biplydene, og tryk derefter på OK|.
Skærmens kontrast justeres med det samme.
10
Brug af telefonen
Foretage opkald
Kontroller før opkaldet, at ikonet  vises på skærmen. Se kapitlet Fejlfinding, hvis ikonet ikke vises.
1Tryk på tasten  .
.
2Kontroller, at du hører klartonen, og indtast derefter det nummer, du vil ringe til.
3Tryk på tasten igen  eller anbring håndsættet på opladeren for at afslutte samtalen.
Dansk
Du kan også få klartone ved at trykke på tasten  . Håndsættets højttaler aktiveres automatisk.
Indtaste nummeret før et opkald (foropkald)
Benyt denne fremgangsmåde, hvis du vil kunne kontrollere nummeret og eventuelt rette det, før du aktiverer opkaldet:
1 Indtast telefonnummeret på tastaturet.
Nummeret vises på skærmen, efterhånden som det indtastes. Med funktionen OPTAG.| kan du gemme nummeret på en af telefonlisterne.
Ekstra Onis 200 håndsæt |
11 |

Dansk
Brug af funktionen intern kommunikation
Basen kan bruges sammen med op til 8 HÅNDSÆT. Funktionen Intern kommunikation kan bruges til at tale sammen internt mellem to håndsæt.
Hvis du har mindst tre håndsæt, kan der endvidere foretages eller modtages opkald udefra samtidig med den interne kommunikation, f.eks. kan et håndsæt bruges til samtale med en ekstern person, mens to andre håndsæt er i intern kommunikation.
Intern kommunikation uden for samtale
1Tryk på  .
.
2Rul gennem indstillingerne med 
 for at vælge den eller de håndsæt, du vil ringe til.
3Vælg OPKALD| eller tryk på  for at aktivere opkaldet.
4Vælg |STOP AFSP., eller tryk på tasten  for at afslutte en intern kommunikation fra håndsættet.
•Tryk på  på det HÅNDSÆT, der ringes til, for at besvare opkaldet.
L BEMÆRK!
Hvis der kommer et opkald udefra under en intern kommunikation, angiver biplyde, at håndsættene er optaget. Afslut først den interne kommunikation, før du besvarer opkaldet udefra. Et tredje HÅNDSÆT, der ikke deltager i den interne kommunikation, kan besvare det eksterne opkald.
Du kan også indtaste nummeret på det håndsæt, du vil ringe til, eller trykke på  for at ringe til alle håndsæt. I så fald kan du springe trin 2 og 3 over.
Intern kommunikation under et eksternt opkald og viderestilling
Under den eksterne samtale skal du sige til den person, du taler med, at du ikke vil kunne høre vedkommende et øjeblik. Gør derefter følgende:
1Tryk på  .
.
2Brug tasterne  og
og  til at rulle gennem listen, og vælg det håndsæt du vil ringe til.Vælg OPKALD|.
Personen i den anden ende af linjen hører nu ventemusik.
12

3Vælg |SKIFT for at sætte det interne opkald i venteposition og tale med personen på den eksterne linje.Ved hjælp af denne funktion er det muligt at
skifte mellem en intern og en ekstern linje.
•Vælg VIDEREST.| for at viderestille det eksterne opkald til det ønskede håndsæt.
•Rul til indstillingen, og vælg KONF.OPKALD| for at aktivere et konferenceopkald mellem det eksterne opkald og to interne håndsæt.
På de håndsæt, der ringes til:
Tryk på  for at besvare opkaldet.
Brug af funktionen Babysitning
Du kan også afslutte opkaldet med et tryk på  .
.
Funktionen bruges til overvågning af et rum. Et "overvågningshåndsæt" fungerer som en helt dæmpet mikrofon. Et andet håndsæt opretter en intern kommunikation med overvågningshåndsættet, for at du kan lytte efter støj i det rum, hvor overvågningshåndsættet er anbragt. Hvis der samtidigt kommer et indgående opkald, forbliver overvågningshåndsættet stille og kan ikke bruges til at besvare opkaldet.
Aktivere funktionen Babysitning
Betegnelsen Babysitmodus vises på skærmen i standby.
Dansk
Ekstra Onis 200 håndsæt |
13 |
 Loading...