


TAM2805-10
Register your product and get support at
www.philips.com/support
User manual
Internet Radio
M2805

1
EN
Contents
1 Important 2
Safety 2
Hearing safety 2
2
Your Internet radio 3
Introduction 3
What's in the box 3
Overview of the main unit 3
Overview of the remote control 4
3 Get started 5
Connect the radio antenna 5
Connect power 5
Place your product 5
Prepare the remote control 6
Power on 6
Perform initial setup 6
4
Listen to the Internet radio 8
Use menu in Internet radio mode
station list 8
Store Internet radio stations 9
Select a preset Internet radio station 9
Show Internet radio station information 9
5 Listen to Spotify 9
6 Listen to DAB radio 10
Tune to DAB radio stations 10
To tune to a station from the available
station list 10
Store DAB radio stations 10
Select a preset DAB radio station 10
DAB menu selection and information
display 10
Display DAB+ information 11
7 Listen to FM radio 11
Tune to FM radio stations 11
Store FM radio stations 11
Select a preset FM radio station 12
Use menu in FM mode 12
Display RDS information 12
8 Play from Bluetooth enabled devices 13
9 Use system settings menu 13
Set system language 13
Adjust network settings 14
Set time/date 14
Reset all the settings 14
Check software information and
upgrade the rmware (if available) 14
Check the software version 15
Adjust backlight settings 15
10 Use system main menu 15
Set clock and alarm 15
Set sleep timer 16
11 Product information 17
12 Troubleshooting 17
13 Notice 18
Declaration of conformity 18
Care of the environment 18
2
EN
1 Important
Safety
Read and understand all instructions before you
use this product. If damage is caused by failure
to follow the instructions, the warranty does
not apply.
This ‘bolt of lightning’ indicates uninsulated
material within the device may cause an electrical
shock. For the safety of everyone in your
household, please do not remove the covering.
The ‘exclamation mark’ calls attention to
features for which you should read the enclosed
literature closely to prevent operating and
maintenance problems.
WARNING: To reduce the risk of re or
electric shock, the device should not be
exposed to rain or moisture and objects lled
with liquids, such as vases, should not be placed
on the device.
CAUTION: To prevent electric shock, fully
insert the plug. (For regions with polarized
plugs: To prevent electric shock, match a wide
blade to a wide slot.)
Warning
• Never remove the casing of this apparatus.
• Never lubricate any part of this apparatus.
• Never place this apparatus on other
electrical equipment.
• Keep this apparatus away from direct
sunlight, naked ames or heat.
• Make sure that you always have easy
access to the power cord, plug or adaptor
to disconnect the apparatus from the
power.
• The device should not be exposed to
dripping and splashing.
• Do not place any source of danger on the
device (e.g. liquid lled objects. lit candles).
• Where the MAINS plug or an appliance
coupler is used as the disconnect device,
the disconnect device shall remain readily
operable.
• Make sure that there is enough free space
around the product for ventilation.
• Battery usage CAUTION - To prevent battery
leakage which may result in bodily injury,
property damage, or damage to the unit.
• Install the batteries with correct polarities as
indicated.
• Batteries (packed or installed) shall not be
exposed to excessive heat such as sunshine,
re or the like.
• Remove batteries when the unit is not to be
used for a long time.
• Only use attachments / accessories specied
by the manufacturer.
Caution
• To avoid hearing damage, limit the time you
use the headphones at high volume and set
the volume to safe level.
• The louder the volume, the shorter is the
safe listening time.
Hearing safety
Be sure to observe the following guidelines when
using your headphones.
• Listen at reasonable volumes for reasonable
periods of time.
• Be careful not to adjust the volume as your
hearing adapts.
• Do not turn up the volume so high that you
can’t hear what’s around you.
• You should use caution or temporarily
discontinue use in potentially hazardous
situations.
• Excessive sound pressure from earphones and
headphones can cause hearing loss.
3
EN
2
Your Internet radio
Congratulations on your purchase, and
welcome to Philips! To fully benet from the
support that Philips offers, register your product
at www.philips.com/support.
Introduction
With this unit, you can:
• Listen to Internet radio through network
connection.
• Listen to FM and Digital Audio Broadcasting
(DAB) radio.
• Play audio from Bluetooth devices.
• Use your phone, tablet or computer as a
remote control for Spotify.
• Know the time and set an alarm.
What's in the box
Check and identify the contents of your package:
• Main unit
• Table stand
• 1 x AC power adapter
• 1 x radio antenna
• Remote control (with 2 x AAA batteries)
• Printed materials
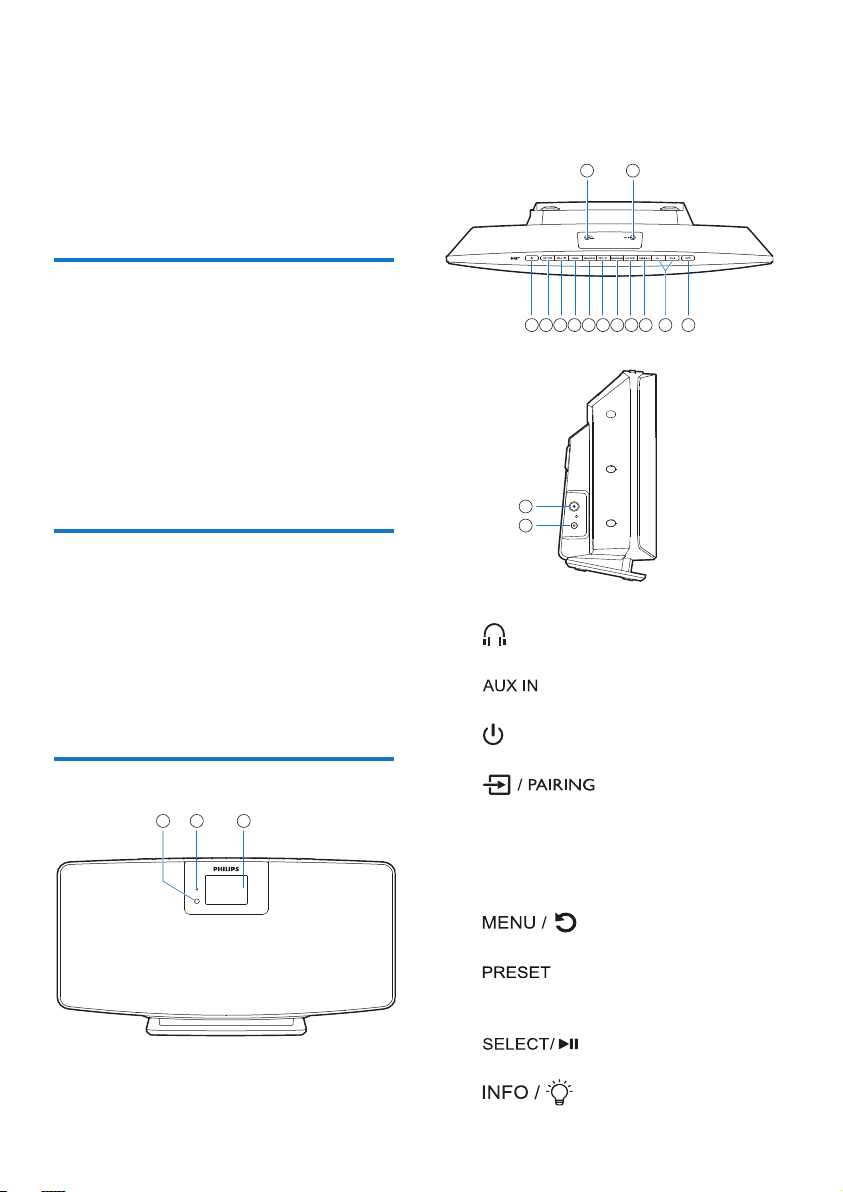
Overview of the main unit
1
2
3
a.IR sensor
b.LED indicator
• Standby indicator: turns red when this
product is switched to standby.
c.Display panel
• Show current status.
4
6
7
8
9
10
11
12
13
14
15
16
17
18
5
d.
• Headphone socket.
e.
• Connect to an external audio device.
f.
• Switch on or to standby.
g.
• Press to select a source: FM, DAB+,
AUDIO IN, BT.
• In Bluetooth mode, press and hold for
more than 2 seconds to enter pairing
mode.
h.
• Go to the main menu.
i.
• Select a preset Internet radio station, FM
radio station or DAB+ station.
j.
• Conrm selection.
k.

4
EN
• Show information.
• Adjust backlight brightness.
l.
• Set alarm and sleep options.
m.
• Skip to previous track;
• Tune to the previous radio station.
n.
• Skip to next track;
• Tune to the next radio station.
o.
• Adjust volume.
p.
• Mute volume.
q.
• Connect to the supplied radio antenna.
r.
• Connect to the supplied power adaptor.
Overview of the remote control
1
2
11
10
8
9
7
4
5
6
3
a.
• Switch on or to standby.
b.
• Press to go to Graphical Main Menu;
• Internet Radio, Spotify, DAB radio, FM
radio, BT mode, AUX IN mode.
• Press and hold to switch to BT mode.
c.
• Display playback information or radio
service information.
d.
• Select an FM station.
• Select a DAB+ station.
• Program radio stations.
• Auto store radio stations.
• Adjust volume.
• Select AUDIO IN source.
e.
• Select a preset radio station.
f.
• Back to the previous menu.
g.
• Select a preset sound effect.
• Turn DBB on or off.
h.
• Set an alarm timer.
i.
• Set a sleep timer.
j.
• Adjust backlight brightness.
k.
• Mute or restore volume.

5
EN
3 Get started
Caution
• Use of controls or adjustments or performance of
procedures other than herein may result in hazardous
radiation exposure or other unsafe operation.
Always follow the instructions in this chapter in
sequence.
If you contact Philips, you will be asked for the
model and serial number of this product.
Model No. ____________________
Serial No. ____________________
Connect the radio antenna
Connect the supplied radio antenna to this
product before listening to the radio.
Connect power
Connect the power cord to the wall socket.
Caution
• Risk of product damage! Make sure that the power
supply voltage corresponds to the voltage printed on
the back or the underside of the unit.
• Risk of electrical shock! Before you plug the AC power
adaptor, make sure that the adaptor plug converter is
xed securely. When you unplug the AC power adaptor,
always pull the plug, never the cord.
• Before you connect the AC power adaptor, make sure
that you have completed all the other connections.
Place your product
Before you place this product on the table,
attach the supplied table stand to the main unit,
as illustrated below.
Tip
• See the attached wall mounting sheet for how to
mount this product onto the wall.
6
EN
Prepare the remote control
Caution
• Risk of product damage! When the remote control is
not used for long periods, remove the batteries.
• Batteries contain chemical substances and should be
disposed of properly.
To insert the remote control batteries:
1 Open the battery
compartment.
2 Insert the supplied 2
AAA batteries with
correct polarity (+/-)
as indicated.
3 Close the battery
compartment.
Power on
Press .
» When the unit is turned on, it is tuned
to the last selected source.
To switch to standby mode, press again.
» The display panel is dimmed.
» The time and date (if set) are displayed.
Note
• If the system is idle for 15 minutes, the radio will switch
to standby mode automatically.
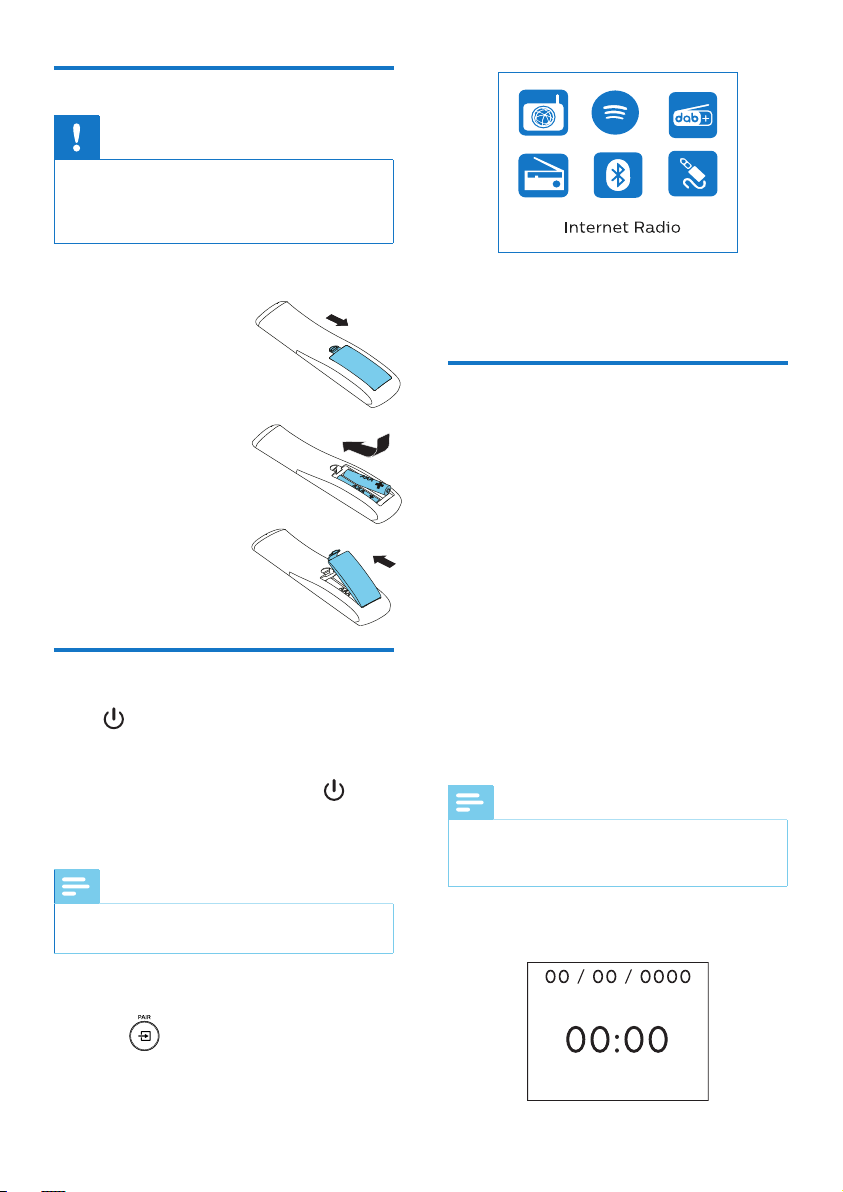
To switch to the main display:
1 Press .
» The display panel will show as below:
2 Press the navigation buttons to choose the
menu options.
Perform initial setup
Follow the instructions below to congure
some basic settings.
To listen to the internet radio, you need to set
up a Wi-Fi connection rst. Wi-Fi Protected
Setup (WPS) is a standard created by Wi-
Fi Alliance for easy establishment of secure
wireless home networks. If your wireless router
supports WPS, you can quickly and securely
connect the radio to the router through
one of the two setup methods: Push Button
Conguration (PBC), or Personal Identication
Number (PIN).
For those that do not support WPS, you have
another option to connect the radio to the
wireless router.
Note
• Before you connect to a network, familiarize yourself
with the network router.
• Make sure that your home Wi-Fi network is enabled.
1 When the product is powered on for the
rst time, the display will show up.
 Loading...