


SZ51-60

Modules described
in this manual
SZ2-ST
WHSZ Series Eyepieces
Auxiliary Objectives
SZX-STAD1
SZH-STAD1
SZ2-FO
SZH-SG
SZH-SC
INSTRUCTIONS
SZ61/SZ61-60
SZ61TR
SZ51/SZ51-60
ZOOM STEREO MICROSCOPES
This instruction manual is for the Olympus Zoom Stereo Microscopes. To ensure the safety, obtain
optimum performance and to familiarize yourself fully with the use of this microscope, we recommend that you study this manual thoroughly before operating the microscope.
Retain this instruction manual in an easily accessible place near the work desk for future reference.
This publication is printed on 100% recycled paper
AX6611

This device complies with the requirements of directive 98/79/EC concerning in vitro diagnostic medical
devices. CE marking means the conformity to the directive.

CONTENTS
SZ2 series
IMPORTANT – Be sure to read this section for safe use of the equipment. –
1 MODULES AND NOMENCLATURE
2 SUMMARY OF OBSERVATION PROCEDURE
3 OPERATION
3-1 Base........................................................................................................................................................................................................................... 6
1 Using the Stage Plate ............................................................................................................................................................................................................. 6
2 Adjusting the Focus Adjustment Knob Tension .............................................................................................................................. 6
3-2 Microscope Body ......................................................................................................................................................................... 6-10
1 Adjusting the Interpupillary Distance ............................................................................................................................................................... 6
2 Adjusting the Diopter (Zoom Confocality Adjustment) ......................................................................................................... 6
3 Using the High/Low Zoom Magnification Stopper..................................................................................................................... 7
4 Using the Eye Shades............................................................................................................................................................................................................ 8
1-2
3-4
5
6-10
5 Using an Eyepiece Micrometer Disk................................................................................................................................................................ 8
6 Using the Auxiliary Objectives ................................................................................................................................................................................... 9
7 Selecting the Light Path (SZ61TR) ....................................................................................................................................................................... 9
8 Adjusting the Confocality of TV Camera (SZ61TR) ................................................................................................................. 10
4 TROUBLESHOOTING GUIDE
5 SPECIFICATIONS
6 OPTICAL PERFORMANCE
7 ASSEMBLY
8OPTIONAL MODULES
8-1 BX Stage Adapter Type 1 SZX-STAD1 ..................................................................................................... 17 - 18
11
12
13
14-16
17-23
8-2 Stage Adapter Type 1 SZH-STAD1 ........................................................................................................................ 19
8-3 Up/Down Moving Stage SZ2-FO................................................................................................................... 19-21
8-4 Gliding Stage SZH-SG ................................................................................................................................................... 21-22
8-5 Cup Stage SZH-SC............................................................................................................................................................ 22-23
IMPORTANT
The SZ2 series of stereo microscopes are provided with ESD (Electro-Static Discharge) protection specifications. They are
provided with electroconductive coating in their external finish to reduce the surface resistance and grounding lead wires in
their standard base or frame to eliminate static electricity from them.
CAUTION To maintain the ESD protection performance, always use the microscope in combination with the
modules described in this manual or options having the ESD protection specifications. Otherwise,
the grounding will not work properly.
· The eye shades of the eyepieces are not provided with the ESD protection performance. Be sure to
remove them.
· The SZ2-SPBW stage plate is provided with the ESD protection performance only in the black surface.
SAFETY PRECAUTIONS
1. After the equipment has been used in an observation of a specimen that
is accompanied with a potential of infection, clean the parts coming in
²
contact with the specimen to prevent infection.
· Moving this microscope is accompanied with the risk of dropping
the specimen. Be sure to remove the specimen before moving
this product.
@
Fig. 1
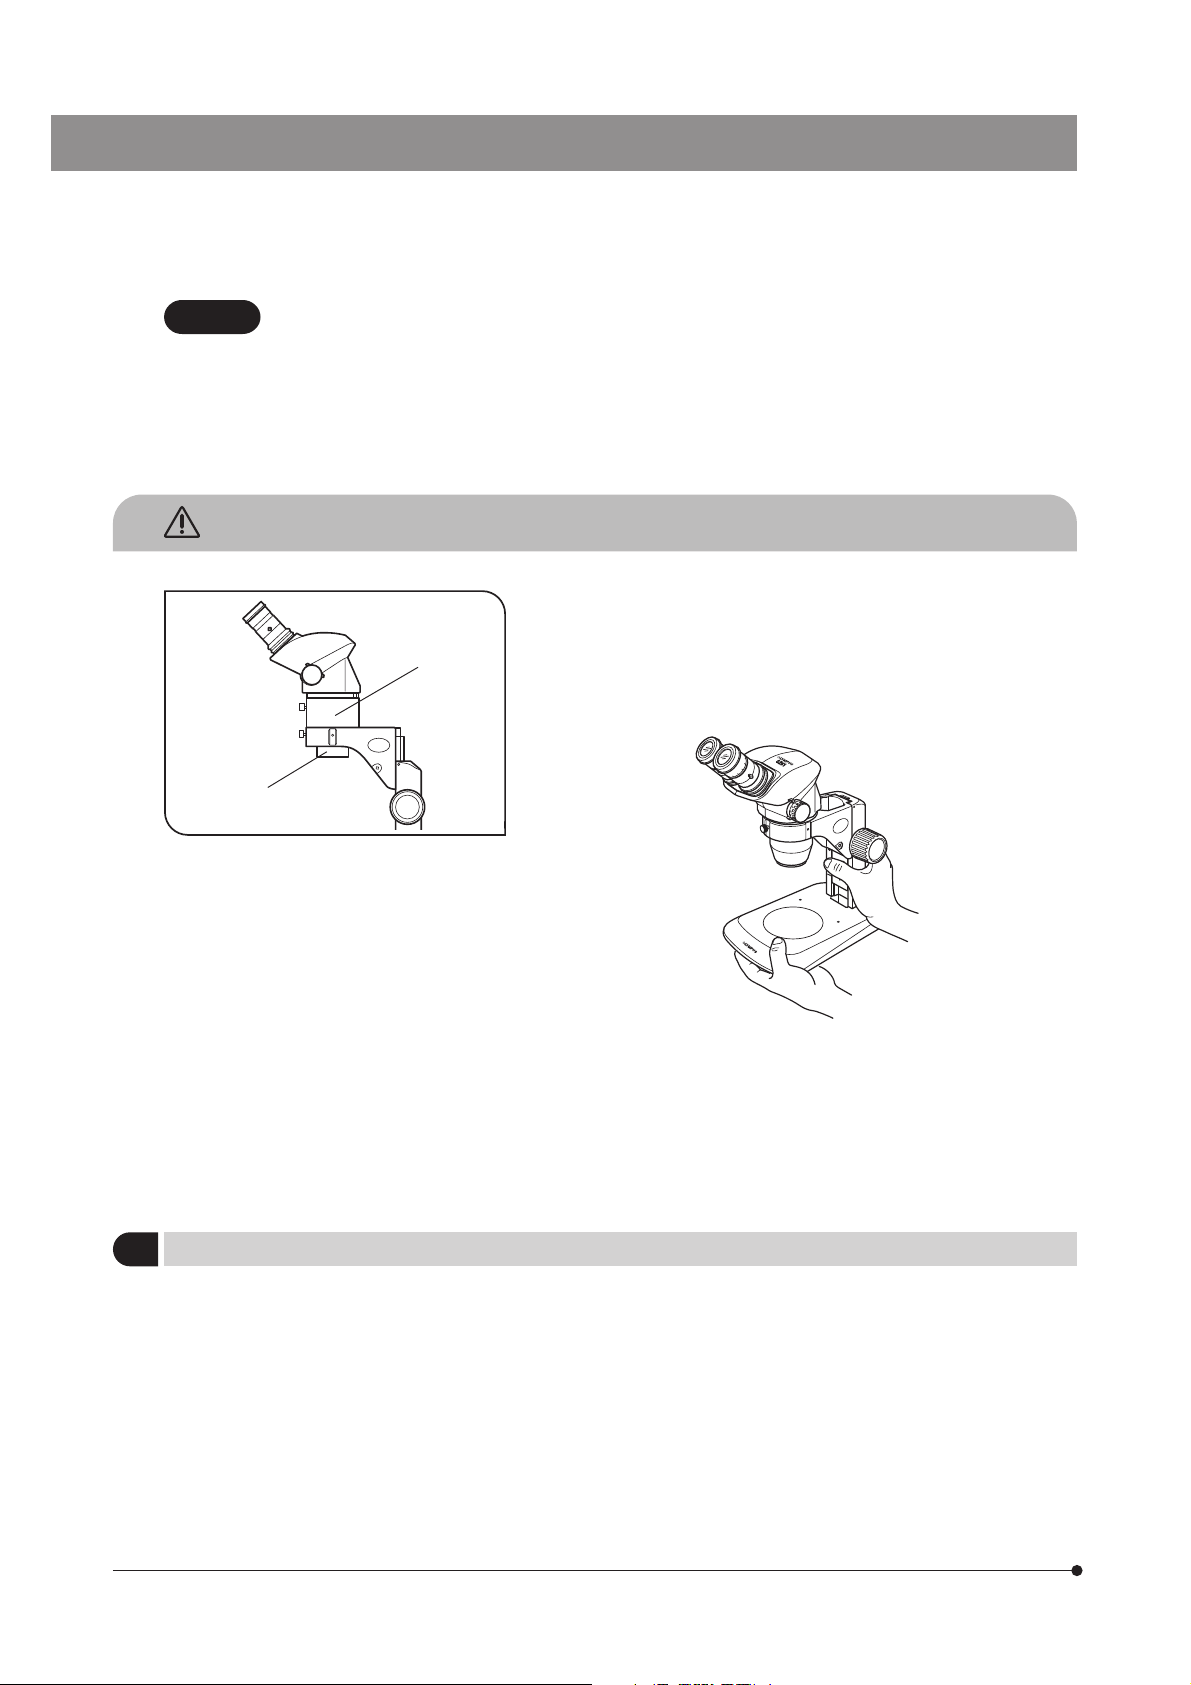
· Hold the bottom of the stand with one hand while holding base column with the other hand to avoid tilting the
microscope.
· In case the specimen is damaged by erroneous operation, promptly take the infection prevention measures.
2. When the optional 0.5X auxiliary objective @ is used, the microscope become unstable due to the use of the SZ2-ET
auxiliary sleeve ². Be careful not to topple down the microscope. (Fig. 1)
In addition, when a TV camera is mounted on the SZ61TR, special care is required because the microscope becomes
more unstable.
Getting Ready
1
1. A microscope is a precision instrument. Handle it with care and avoid subjecting it to sudden or severe impact.
2. Do not use the microscope where it is subjected to direct sunlight, high temperature and humidity, dust or vibrations.
(For the operating conditions, see “SPECIFICATIONS” on page 12.)
3. Be careful not to leave stains and fingerprints on the lens surfaces.
Contamination of the lens and mirror deteriorates the view of images.
4. Do not turn the left and right zoom adjustment knobs in the opposite directions, as this will result in a failure.
5. The rubber parts of the eyepiece sleeves are fragile and should be handled carefully. If they are damaged, dirt will
penetrate inside the microscope.
1

SZ2 series
Maintenance and Storage
2
1. Clean all glass components by wiping gently with gauze. To remove fingerprints or oil smudges, wipe with gauze slightly
moistened with a mixture of ether (70%) and alcohol (30%).
Since solvents such as ether and alcohol are highly flammable, they must be handled carefully. Be sure to keep
these chemicals away from open flames or potential sources of electrical sparks –– for example, electrical
equipment that is being switched on or off. Also remember to always use these chemicals only in a well-ventilated room.
2. Do not attempt to use organic solvents to clean the microscope components other than the glass components. To clean
them, use a lint-free, soft cloth slightly moistened with a diluted neutral detergent.
3. Do not disassemble any part of the microscope as this could result in malfunction or reduced performance.
Caution
3
If the microscope is used in a manner not specified by this manual, the safety of the user may be imperiled. In addition,
the equipment may also be damaged. Always use the equipment as outlined in this instruction manual.
The following symbols are used to set off text in this instruction manual.
: Indicates that failure to follow the instructions in the warning could result in bodily harm to the
user and/or damage to equipment (including objects in the vicinity of the equipment).
# : Indicates that failure to follow the instructions could result in damage to equipment.
} : Indicates commentary (for ease of operation and maintenance).
2
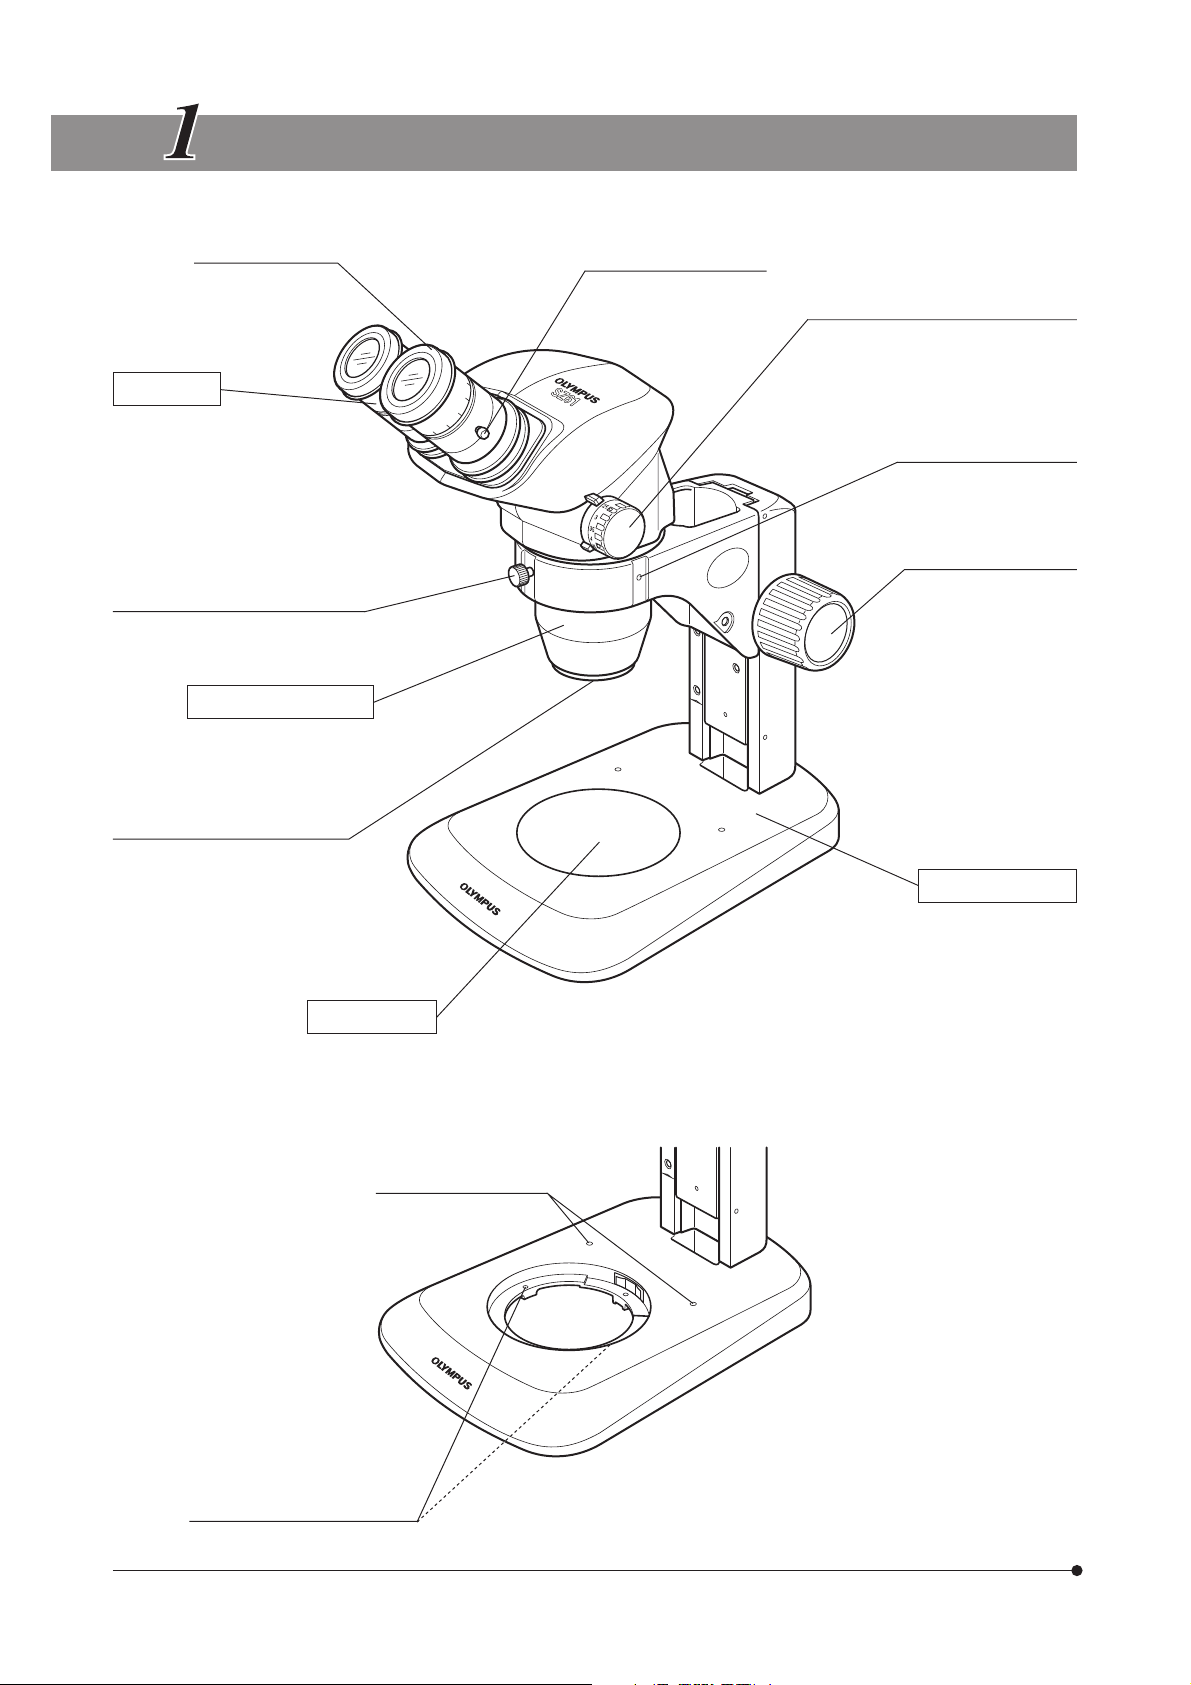
MODULES AND NOMENCLA TURE
Eye shade (Page 8)
Eyepiece
· WHSZ10X
· WHSZ10X-H
· WHSZ15X-H
· WHSZ20X
· WHSZ20X-H
· WHSZ30X-H
Body clamping knob
(Threaded for accessory mounting)
Microscope Body
· SZ61 · SZ51
· SZ61-60 · SZ51-60
· SZ61TR
Auxiliary objective mount thread
Optional auxiliary objectives
· 110AL0.25X · 110AL0.62X
· 110ALK0.3X · 110AL0.75X
· 110ALK0.4X · 110AL1.5X
· 110AL0.5X · 110AL2X
Eyepiece clamping knob
(x 2)
Zoom adjustment knob (Page 6 & 7)
· SZ61/61-60/TR: 0.67X to 4.5X
· SZ51/51-60: 0.8X to 4X
Accessory mount thread
(x 5)
Focus adjustment knob
(Page 6)
Stroke: 120 mm
Standard Base
SZ2-ST
3
Stage Plate
· SZ2-SPBW
(ESD protection on black surface)
· SP-C
Accessory mount holes
Optional stage mounting holes
M4 screw (x 2)

Observation Tube of SZ61TR
SZ2 series
C-mount (Page 10)
C-mount clamping screw
Confocality adjustment clamping
screw (Page 10)
(x 2)
Light path selector lever (Page 9)
Pulled out: TV path 100%
Pushed in: Right eyepiece sleeve
(Right eyepiece sleeve
light path 0%)
light path 100%
4
SUMMARY OF OBSER V ATION PR OCEDURE
2-1 Preparation
(Page)
1. Confirm the mounting, particularly that of the microscope body. (P. 14 - 16)
2. Confirm that the eyepieces are positioned correctly with respect to the standard base. (P. 15)
3. Adjust the rotation tension of the focus adjustment knob. (P. 6)
4. Prepare the light source as required.
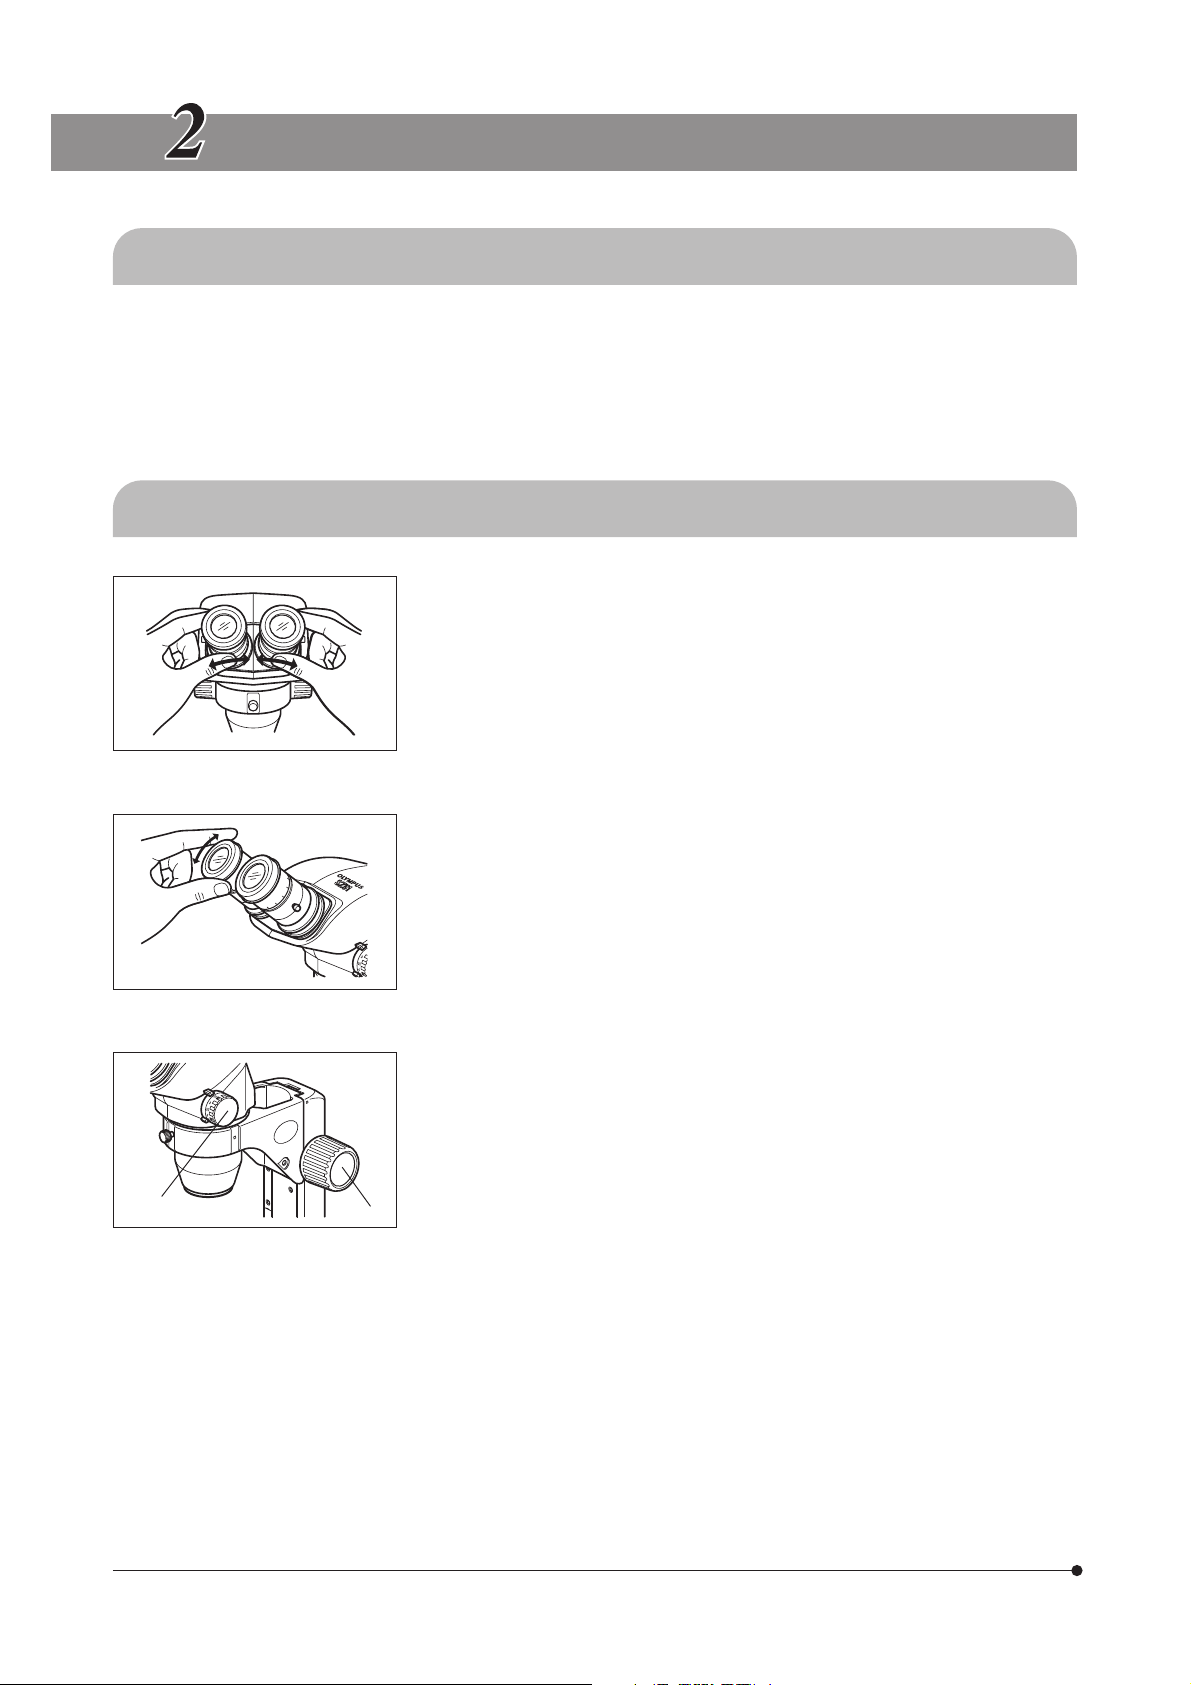
2-2 Observation Procedure
1. Place the specimen on the stage plate. (Page 6)
2. Adjust the interpupillary distance. (Page 6)
3. Adjust the eyepiece diopter. (Pages 6 & 7)
(Note) This operation is not possible with the eyepieces without
The operation is slightly difference when a micrometer is mounted in
one of the eyepieces with helicoids.
......................................................................................................................................
..................................................................................
....................................................................................................................................................................
helicoids (WHSZ10X/20X).
5
@
²
4. Set the zoom adjustment knob @ for the lowest magnification and rotate
the focus adjustment knob ² to bring the specimen into approximate
focus.
5. Rotate the zoom adjustment knob @ to the target magnification and
rotate the focus adjustment knob ² to bring the specimen into accurate
focus.
OPERA TION
3-1 Base
SZ2 series
Using the Stage Plate
1
When reflected light illumination is used, the stage plate can be placed
either the white or black surface facing up depending on which side
makes the specimen easier to view.
#To maintain the ESD performance, use the black surface of the SZ2-
SPBW stage plate.
#When transmitted light illumination is used, use the optional SP-C
transparent glass stage plate.
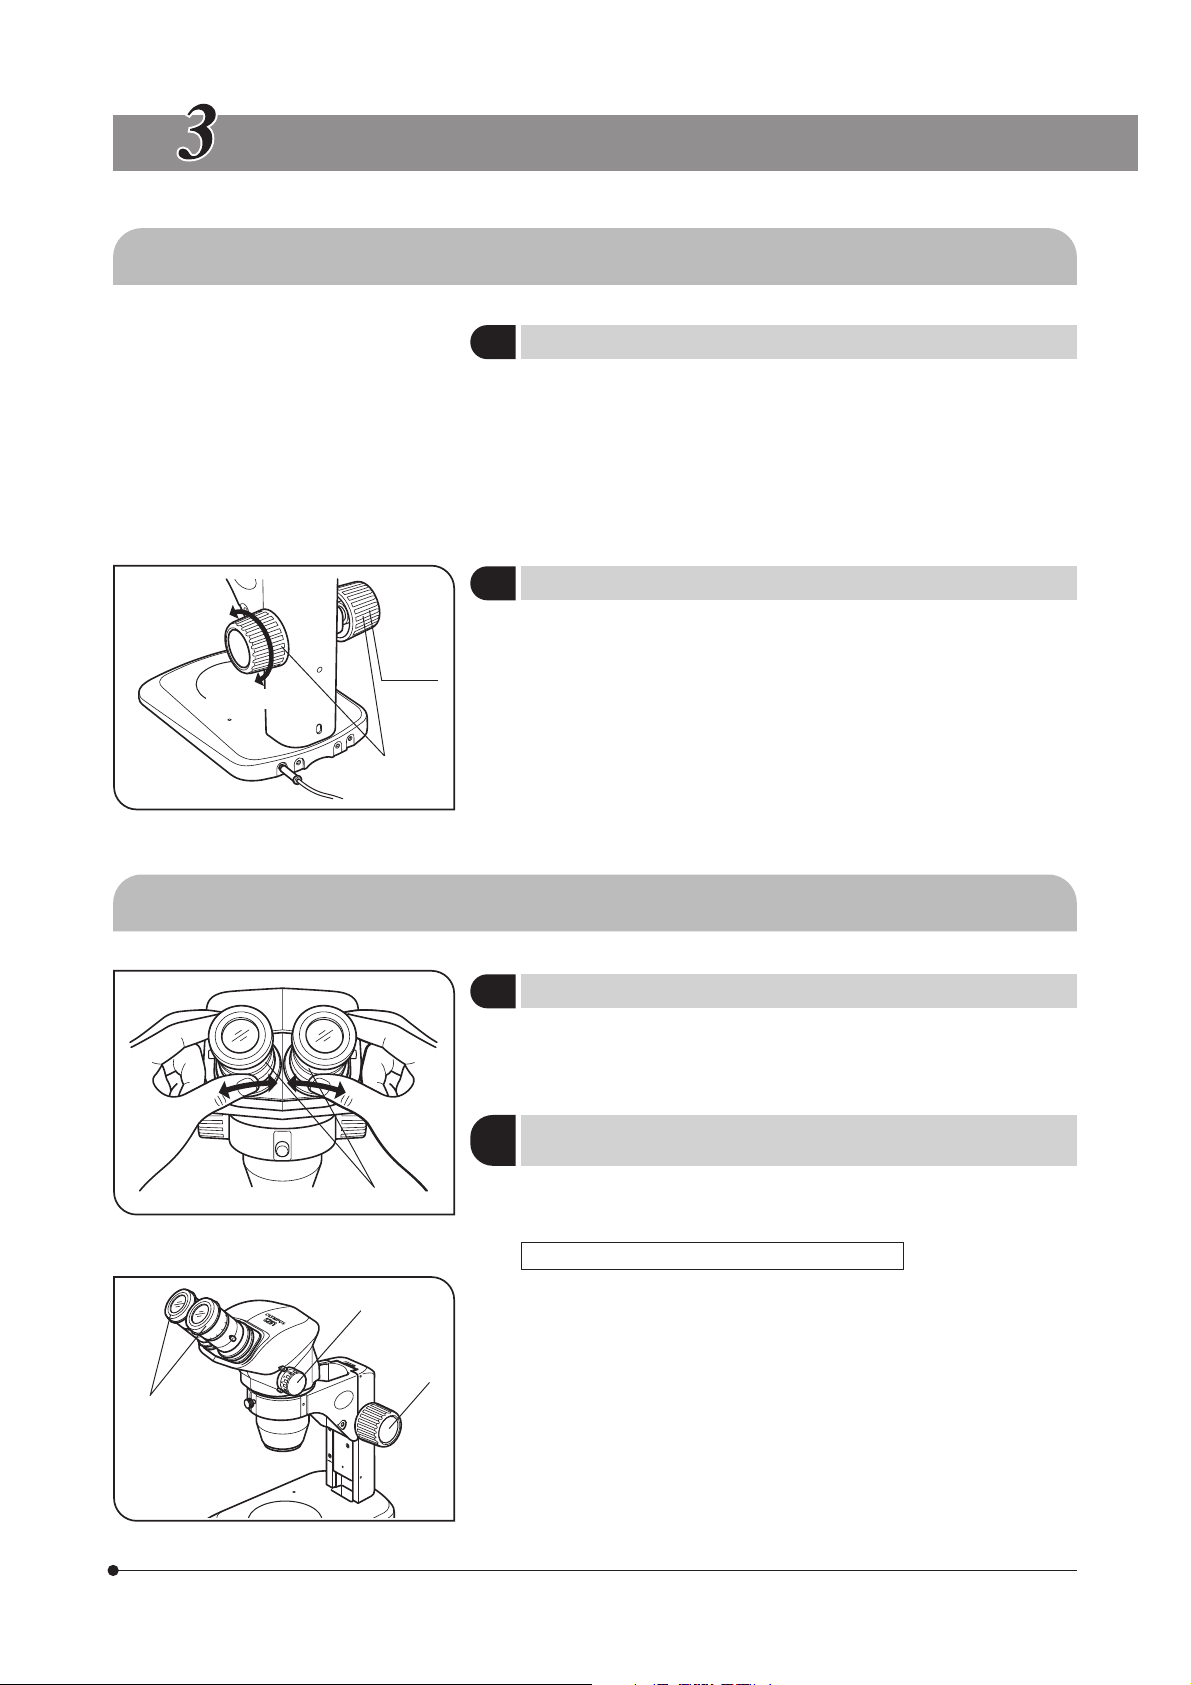
To decrease
Clamp.
To increase
@
Fig. 2
3-2 Microscope Body
Adjusting the Focus Adjustment Knob Tension
2
}This operation is intended to facilitate the rotation of the knobs while
preventing spontaneous drop of the microscope body. It is recommended
to set the knob tension to a slightly higher level than the point where
spontaneous drop occurs.
· Hold the left and right focus adjustment knobs @ with both hands, fix the
left knob and rotate the right knob. The rotation tension of the knobs
increases or decreases according to the direction in which the right knob
is rotated.
Adjusting the Interpupillary Distance
1
While holding the left and right eyepiece sleeves @ with both hands,
look through the eyepieces and adjust for binocular vision until the left
and right fields of view coincide completely.
Adjusting the Diopter
2
(Zoom Confocality Adjustment)
(Figs 4 & 5)
(Fig. 2)
(Fig. 3)
²
Fig. 3
Fig. 4
³
@
|
}The adjustment operation is variable whether the eyepieces use an eye-
piece micrometer disks or not.
Eyepieces without eyepiece micrometer disk
1. Turn the diopter adjustment rings ² of the left and right eyepieces to
positions “0”.
2. Place an easy-to-observe specimen on the stage plate.
3. Set the zoom adjustment knob ³ for the lowest magnification and rotate
the focus adjustment knob | to bring the specimen into focus.
4. Set the zoom adjustment knob ³ for the highest magnification and rotate the focus adjustment knob | to bring the specimen into focus.
5. Set the zoom adjustment knob ³ for the lowest magnification and rotate
the diopter adjustment rings ² of the left and right eyepieces, instead of
the focus adjustment knob, to bring the specimen into focus.
6
 Loading...