


MVME6100 Single-Board Computer
Installation and Use
V6100A/IH2
April 2006 Edition
© Copyright 2004, 2006 Motorola Inc.
All rights reserved.
Printed in the United States of America.
Trademarks
Motorola and the stylized M logo are trademarks registered in the U.S. Patent and Trademark Office.
All other product or service names mentioned in this document are the property of their respective holders.

Safety Summary
The following general safety precautions must be observed during all phases of operation, service, and repair of this equipment. Failure to comply with these precautions or with specific warnings elsewhere in this manual could result in personal injury or damage to the equipment.
The safety precautions listed below represent warnings of certain dangers of which Motorola is aware. You, as the user of the product, should follow these warnings and all other safety precautions necessary for the safe operation of the equipment in your operating environment.
Ground the Instrument.
To minimize shock hazard, the equipment chassis and enclosure must be connected to an electrical ground. If the equipment is supplied with a three-conductor AC power cable, the power cable must be plugged into an approved three-contact electrical outlet, with the grounding wire (green/yellow) reliably connected to an electrical ground (safety ground) at the power outlet. The power jack and mating plug of the power cable meet International Electrotechnical Commission (IEC) safety standards and local electrical regulatory codes.
Do Not Operate in an Explosive Atmosphere.
Do not operate the equipment in any explosive atmosphere such as in the presence of flammable gases or fumes. Operation of any electrical equipment in such an environment could result in an explosion and cause injury or damage.
Keep Away From Live Circuits Inside the Equipment.
Operating personnel must not remove equipment covers. Only Factory Authorized Service Personnel or other qualified service personnel may remove equipment covers for internal subassembly or component replacement or any internal adjustment. Service personnel should not replace components with power cable connected. Under certain conditions, dangerous voltages may exist even with the power cable removed. To avoid injuries, such personnel should always disconnect power and discharge circuits before touching components.
Use Caution When Exposing or Handling a CRT.
Breakage of a Cathode-Ray Tube (CRT) causes a high-velocity scattering of glass fragments (implosion). To prevent CRT implosion, do not handle the CRT and avoid rough handling or jarring of the equipment. Handling of a CRT should be done only by qualified service personnel using approved safety mask and gloves.
Do Not Substitute Parts or Modify Equipment.
Do not install substitute parts or perform any unauthorized modification of the equipment. Contact your local Motorola representative for service and repair to ensure that all safety features are maintained.
Observe Warnings in Manual.
Warnings, such as the example below, precede potentially dangerous procedures throughout this manual. Instructions contained in the warnings must be followed. You should also employ all other safety precautions which you deem necessary for the operation of the equipment in your operating environment.
To prevent serious injury or death from dangerous voltages, use extreme caution when handling, testing, and adjusting this
equipment and its components.
Warning

Flammability
All Motorola PWBs (printed wiring boards) are manufactured with a flammability rating of 94V-0 by ULrecognized manufacturers.
EMI Caution
This equipment generates, uses and can radiate electromagnetic energy. It may cause
!or be susceptible to electromagnetic interference (EMI) if not installed and used with
Caution |
adequate EMI protection. |
|
Lithium Battery Caution
This product contains a lithium battery to power the clock and calendar circuitry.
Danger of explosion if battery is replaced incorrectly. Replace battery only with the
!same or equivalent type recommended by the equipment manufacturer. Dispose of
Caution |
used batteries according to the manufacturer’s instructions. |
|
Il y a danger d’explosion s’il y a remplacement incorrect de la batterie. Remplacer
!uniquement avec une batterie du même type ou d’un type équivalent recommandé par
Attention |
le constructeur. Mettre au rebut les batteries usagées conformément aux instructions |
|
du fabricant. |
||
|
Explosionsgefahr bei unsachgemäßem Austausch der Batterie. Ersatz nur durch
!denselben oder einen vom Hersteller empfohlenen Typ. Entsorgung gebrauchter
Vorsicht |
Batterien nach Angaben des Herstellers. |
|
CE Notice (European Community)
This is a Class A product. In a domestic environment, this product may cause radio
! |
interference, in which case the user may be required to take adequate measures. |
|
|
Warning |
|
Motorola products with the CE marking comply with the EMC Directive (89/336/EEC). Compliance with this directive implies conformity to the following European Norms:
EN55022 “Limits and Methods of Measurement of Radio Interference Characteristics of Information Technology Equipment”; this product tested to Equipment Class A
EN50082-1:1997 “Electromagnetic Compatibility—Generic Immunity Standard, Part 1. Residential, Commercial and Light Industry”
System products also fulfill EN60950 (product safety) which is essentially the requirement for the Low Voltage Directive (73/23/EEC).
Board products are tested in a representative system to show compliance with the above mentioned requirements. A proper installation in a CE-marked system will maintain the required EMC/safety performance.
In accordance with European Community directives, a “Declaration of Conformity” has been made and is on file within the European Union. The “Declaration of Conformity” is available on request. Please contact your sales representative.
Notice
While reasonable efforts have been made to assure the accuracy of this document, Motorola, Inc., assumes no liability resulting from any omissions in this document, or from the use of the information obtained therein. Motorola reserves the right to revise this document and to make changes from time to time in the content hereof without obligation of Motorola to notify any person of such revision or changes.
Electronic versions of this material may be read online, downloaded for personal use, or referenced in another document as a URL to a Motorola website. The text itself may not be published commercially in print or electronic form, edited, translated, or otherwise altered without the permission of Motorola, Inc.
It is possible that this publication may contain reference to or information about Motorola products (machines and programs), programming, or services that are not available in your country. Such references or information must not be construed to mean that Motorola intends to announce such Motorola products, programming, or services in your country.
Limited and Restricted Rights Legend
If the documentation contained herein is supplied, directly or indirectly, to the U.S. Government, the following notice shall apply unless otherwise agreed to in writing by Motorola, Inc.
Use, duplication, or disclosure by the Government is subject to restrictions as set forth in subparagraph (b)(3) of the Rights in Technical Data clause at DFARS 252.227-7013 (Nov. 1995) and of the Rights in Noncommercial Computer Software and Documentation clause at DFARS 252.227-7014 (Jun. 1995).
Motorola, Inc.
Embedded Communications Computing
2900 South Diablo Way
Tempe, Arizona 85282

Contents
About This Manual . . . . . . . . . . . . . . . . . . . . . . . . . . . . . . . . . . . . . . . . . . . . . . . . . . . . . . . . . . . . . . . . . xv
Overview of Contents . . . . . . . . . . . . . . . . . . . . . . . . . . . . . . . . . . . . . . . . . . . . . . . . . . . . . . . . . . . . . xv Comments and Suggestions . . . . . . . . . . . . . . . . . . . . . . . . . . . . . . . . . . . . . . . . . . . . . . . . . . . . . . . xv Conventions Used in This Manual . . . . . . . . . . . . . . . . . . . . . . . . . . . . . . . . . . . . . . . . . . . . . . . . . . . xvi
1 Hardware Preparation and Installation . . . . . . . . . . . . . . . . . . . . . . . . . . . . . . . . . . . . . . . . . . . . . . . 1
Introduction . . . . . . . . . . . . . . . . . . . . . . . . . . . . . . . . . . . . . . . . . . . . . . . . . . . . . . . . . . . . . . . . . . . . . 1 Description . . . . . . . . . . . . . . . . . . . . . . . . . . . . . . . . . . . . . . . . . . . . . . . . . . . . . . . . . . . . . . . . . . . . . . 1 Getting Started . . . . . . . . . . . . . . . . . . . . . . . . . . . . . . . . . . . . . . . . . . . . . . . . . . . . . . . . . . . . . . . . . . . 2 Overview of Startup Procedures . . . . . . . . . . . . . . . . . . . . . . . . . . . . . . . . . . . . . . . . . . . . . . . . . . 3 Unpacking Guidelines . . . . . . . . . . . . . . . . . . . . . . . . . . . . . . . . . . . . . . . . . . . . . . . . . . . . . . . . . . 3 Hardware Configuration . . . . . . . . . . . . . . . . . . . . . . . . . . . . . . . . . . . . . . . . . . . . . . . . . . . . . . . . . . . . 4 MVME6100 Preparation . . . . . . . . . . . . . . . . . . . . . . . . . . . . . . . . . . . . . . . . . . . . . . . . . . . . . . . . 4 SCON Header (J7) . . . . . . . . . . . . . . . . . . . . . . . . . . . . . . . . . . . . . . . . . . . . . . . . . . . . . . . . . . . . 7 PMC/IPMC Selection Headers (J10, J15 – J18, J25 – J28) . . . . . . . . . . . . . . . . . . . . . . . . . . . . . 7 Front/Rear Ethernet and Transition Module Options Header (J30) . . . . . . . . . . . . . . . . . . . . . . . . 8 SROM Configuration Switch (S3) . . . . . . . . . . . . . . . . . . . . . . . . . . . . . . . . . . . . . . . . . . . . . . . . . 8 Flash Boot Bank Select Configuration Switch (S4) . . . . . . . . . . . . . . . . . . . . . . . . . . . . . . . . . . . . 9 Hardware Installation . . . . . . . . . . . . . . . . . . . . . . . . . . . . . . . . . . . . . . . . . . . . . . . . . . . . . . . . . . . . . 10 Installing the MVME6100 into a Chassis . . . . . . . . . . . . . . . . . . . . . . . . . . . . . . . . . . . . . . . . . . . 10 Connection to Peripherals . . . . . . . . . . . . . . . . . . . . . . . . . . . . . . . . . . . . . . . . . . . . . . . . . . . . . . . . . 11 Completing the Installation . . . . . . . . . . . . . . . . . . . . . . . . . . . . . . . . . . . . . . . . . . . . . . . . . . . . . . . . . 11
2 Startup and Operation . . . . . . . . . . . . . . . . . . . . . . . . . . . . . . . . . . . . . . . . . . . . . . . . . . . . . . . . . . . 13
Introduction . . . . . . . . . . . . . . . . . . . . . . . . . . . . . . . . . . . . . . . . . . . . . . . . . . . . . . . . . . . . . . . . . . . . 13
Applying Power . . . . . . . . . . . . . . . . . . . . . . . . . . . . . . . . . . . . . . . . . . . . . . . . . . . . . . . . . . . . . . . . . 13
Switches and Indicators . . . . . . . . . . . . . . . . . . . . . . . . . . . . . . . . . . . . . . . . . . . . . . . . . . . . . . . . . . . 13
3 MOTLoad Firmware . . . . . . . . . . . . . . . . . . . . . . . . . . . . . . . . . . . . . . . . . . . . . . . . . . . . . . . . . . . . . 15
Introduction . . . . . . . . . . . . . . . . . . . . . . . . . . . . . . . . . . . . . . . . . . . . . . . . . . . . . . . . . . . . . . . . . . . . 15
Overview . . . . . . . . . . . . . . . . . . . . . . . . . . . . . . . . . . . . . . . . . . . . . . . . . . . . . . . . . . . . . . . . . . . 15
MOTLoad Implementation and Memory Requirements . . . . . . . . . . . . . . . . . . . . . . . . . . . . . . . . 15
MOTLoad Commands . . . . . . . . . . . . . . . . . . . . . . . . . . . . . . . . . . . . . . . . . . . . . . . . . . . . . . . . . 15
MOTLoad Utility Applications . . . . . . . . . . . . . . . . . . . . . . . . . . . . . . . . . . . . . . . . . . . . . . . . . . . 16
MOTLoad Tests . . . . . . . . . . . . . . . . . . . . . . . . . . . . . . . . . . . . . . . . . . . . . . . . . . . . . . . . . . . . . . 16
Using MOTLoad . . . . . . . . . . . . . . . . . . . . . . . . . . . . . . . . . . . . . . . . . . . . . . . . . . . . . . . . . . . . . 17
Command Line Interface . . . . . . . . . . . . . . . . . . . . . . . . . . . . . . . . . . . . . . . . . . . . . . . . . . . . . . . 17
MVME6100 Installation and Use (V6100A/IH2) |
vii |

Contents
Command Line Help . . . . . . . . . . . . . . . . . . . . . . . . . . . . . . . . . . . . . . . . . . . . . . . . . . . . . . . . . . 18 Command Line Rules . . . . . . . . . . . . . . . . . . . . . . . . . . . . . . . . . . . . . . . . . . . . . . . . . . . . . . . . . 18 MOTLoad Command List . . . . . . . . . . . . . . . . . . . . . . . . . . . . . . . . . . . . . . . . . . . . . . . . . . . . . . . . . . 19 Default VME Settings . . . . . . . . . . . . . . . . . . . . . . . . . . . . . . . . . . . . . . . . . . . . . . . . . . . . . . . . . . . . . 23 Firmware Settings . . . . . . . . . . . . . . . . . . . . . . . . . . . . . . . . . . . . . . . . . . . . . . . . . . . . . . . . . . . . . . . 25 CR/CSR Settings . . . . . . . . . . . . . . . . . . . . . . . . . . . . . . . . . . . . . . . . . . . . . . . . . . . . . . . . . . . . . 25 Displaying VME Settings . . . . . . . . . . . . . . . . . . . . . . . . . . . . . . . . . . . . . . . . . . . . . . . . . . . . . . . 25 Editing VME Settings . . . . . . . . . . . . . . . . . . . . . . . . . . . . . . . . . . . . . . . . . . . . . . . . . . . . . . . . . . 26 Deleting VME Settings . . . . . . . . . . . . . . . . . . . . . . . . . . . . . . . . . . . . . . . . . . . . . . . . . . . . . . . . . 27 Restoring Default VME Settings . . . . . . . . . . . . . . . . . . . . . . . . . . . . . . . . . . . . . . . . . . . . . . . . . 27 Remote Start . . . . . . . . . . . . . . . . . . . . . . . . . . . . . . . . . . . . . . . . . . . . . . . . . . . . . . . . . . . . . . . . . . . 27 Alternate Boot Images and Safe Start . . . . . . . . . . . . . . . . . . . . . . . . . . . . . . . . . . . . . . . . . . . . . . . . 29 Firmware Startup Sequence Following Reset . . . . . . . . . . . . . . . . . . . . . . . . . . . . . . . . . . . . . . . . . . 29 Firmware Scan for Boot Image . . . . . . . . . . . . . . . . . . . . . . . . . . . . . . . . . . . . . . . . . . . . . . . . . . . . . 29 Valid Boot Images . . . . . . . . . . . . . . . . . . . . . . . . . . . . . . . . . . . . . . . . . . . . . . . . . . . . . . . . . . . . . . . 31 Checksum Algorithm . . . . . . . . . . . . . . . . . . . . . . . . . . . . . . . . . . . . . . . . . . . . . . . . . . . . . . . . . . 31 MOTLoad Image Flags . . . . . . . . . . . . . . . . . . . . . . . . . . . . . . . . . . . . . . . . . . . . . . . . . . . . . . . . 32 USER Images . . . . . . . . . . . . . . . . . . . . . . . . . . . . . . . . . . . . . . . . . . . . . . . . . . . . . . . . . . . . . . . 32 Alternate Boot Data Structure . . . . . . . . . . . . . . . . . . . . . . . . . . . . . . . . . . . . . . . . . . . . . . . . . . . 33
4 Functional Description . . . . . . . . . . . . . . . . . . . . . . . . . . . . . . . . . . . . . . . . . . . . . . . . . . . . . . . . . . . 35
Features . . . . . . . . . . . . . . . . . . . . . . . . . . . . . . . . . . . . . . . . . . . . . . . . . . . . . . . . . . . . . . . . . . . . . . . 35
Block Diagram . . . . . . . . . . . . . . . . . . . . . . . . . . . . . . . . . . . . . . . . . . . . . . . . . . . . . . . . . . . . . . . . . . 36
Processor . . . . . . . . . . . . . . . . . . . . . . . . . . . . . . . . . . . . . . . . . . . . . . . . . . . . . . . . . . . . . . . . . . . . . . 37
L3 Cache . . . . . . . . . . . . . . . . . . . . . . . . . . . . . . . . . . . . . . . . . . . . . . . . . . . . . . . . . . . . . . . . . . . . . . 37
System Controller . . . . . . . . . . . . . . . . . . . . . . . . . . . . . . . . . . . . . . . . . . . . . . . . . . . . . . . . . . . . . . . . 37
CPU Bus Interface . . . . . . . . . . . . . . . . . . . . . . . . . . . . . . . . . . . . . . . . . . . . . . . . . . . . . . . . . . . . 38
Memory Controller Interface . . . . . . . . . . . . . . . . . . . . . . . . . . . . . . . . . . . . . . . . . . . . . . . . . . . . 38
Device Controller Interface . . . . . . . . . . . . . . . . . . . . . . . . . . . . . . . . . . . . . . . . . . . . . . . . . . . . . 39
PCI/PCI-X Interfaces . . . . . . . . . . . . . . . . . . . . . . . . . . . . . . . . . . . . . . . . . . . . . . . . . . . . . . . . . . 39
Gigabit Ethernet MACs . . . . . . . . . . . . . . . . . . . . . . . . . . . . . . . . . . . . . . . . . . . . . . . . . . . . . . . . 39
SRAM . . . . . . . . . . . . . . . . . . . . . . . . . . . . . . . . . . . . . . . . . . . . . . . . . . . . . . . . . . . . . . . . . . . . . 40
General-Purpose Timers/Counters . . . . . . . . . . . . . . . . . . . . . . . . . . . . . . . . . . . . . . . . . . . . . . . 40
Watchdog Timer . . . . . . . . . . . . . . . . . . . . . . . . . . . . . . . . . . . . . . . . . . . . . . . . . . . . . . . . . . . . . 40
I2O Message Unit . . . . . . . . . . . . . . . . . . . . . . . . . . . . . . . . . . . . . . . . . . . . . . . . . . . . . . . . . . . . 40
Four Channel Independent DMA Controller . . . . . . . . . . . . . . . . . . . . . . . . . . . . . . . . . . . . . . . . 40
I2C Serial Interface and Devices . . . . . . . . . . . . . . . . . . . . . . . . . . . . . . . . . . . . . . . . . . . . . . . . . 40
Interrupt Controller . . . . . . . . . . . . . . . . . . . . . . . . . . . . . . . . . . . . . . . . . . . . . . . . . . . . . . . . . . . . 41
PCI Bus Arbitration . . . . . . . . . . . . . . . . . . . . . . . . . . . . . . . . . . . . . . . . . . . . . . . . . . . . . . . . . . . 42
VMEbus Interface . . . . . . . . . . . . . . . . . . . . . . . . . . . . . . . . . . . . . . . . . . . . . . . . . . . . . . . . . . . . . . . . 42
PMCspan Interface . . . . . . . . . . . . . . . . . . . . . . . . . . . . . . . . . . . . . . . . . . . . . . . . . . . . . . . . . . . . . . 42
Flash Memory . . . . . . . . . . . . . . . . . . . . . . . . . . . . . . . . . . . . . . . . . . . . . . . . . . . . . . . . . . . . . . . . . . 42
System Memory . . . . . . . . . . . . . . . . . . . . . . . . . . . . . . . . . . . . . . . . . . . . . . . . . . . . . . . . . . . . . . . . . 42
Asynchronous Serial Ports . . . . . . . . . . . . . . . . . . . . . . . . . . . . . . . . . . . . . . . . . . . . . . . . . . . . . . . . . 42
PCI Mezzanine Card Slots . . . . . . . . . . . . . . . . . . . . . . . . . . . . . . . . . . . . . . . . . . . . . . . . . . . . . . . . . 43
viii MVME6100 Installation and Use (V6100A/IH2)

Contents
Real-Time Clock/NVRAM/Watchdog Timer . . . . . . . . . . . . . . . . . . . . . . . . . . . . . . . . . . . . . . . . . . . . 44
IDSEL Routing . . . . . . . . . . . . . . . . . . . . . . . . . . . . . . . . . . . . . . . . . . . . . . . . . . . . . . . . . . . . . . . . . . 44
Reset Control Logic . . . . . . . . . . . . . . . . . . . . . . . . . . . . . . . . . . . . . . . . . . . . . . . . . . . . . . . . . . . . . . 44
Debug Support . . . . . . . . . . . . . . . . . . . . . . . . . . . . . . . . . . . . . . . . . . . . . . . . . . . . . . . . . . . . . . . . . . 44
Processor JTAG/COP Headers . . . . . . . . . . . . . . . . . . . . . . . . . . . . . . . . . . . . . . . . . . . . . . . . . . . . . 44
5 Pin Assignments. . . . . . . . . . . . . . . . . . . . . . . . . . . . . . . . . . . . . . . . . . . . . . . . . . . . . . . . . . . . . . . . 45
Introduction . . . . . . . . . . . . . . . . . . . . . . . . . . . . . . . . . . . . . . . . . . . . . . . . . . . . . . . . . . . . . . . . . . . . 45 Connectors . . . . . . . . . . . . . . . . . . . . . . . . . . . . . . . . . . . . . . . . . . . . . . . . . . . . . . . . . . . . . . . . . . . . . 46 PMC Expansion Connector (J4) . . . . . . . . . . . . . . . . . . . . . . . . . . . . . . . . . . . . . . . . . . . . . . . . . 46 Gigabit Ethernet Connectors (J9, J93) . . . . . . . . . . . . . . . . . . . . . . . . . . . . . . . . . . . . . . . . . . . . 48 PCI Mezzanine Card (PMC) Connectors (J11 – J14, J21 – J24) . . . . . . . . . . . . . . . . . . . . . . . . 49 COM1 Connector (J19) . . . . . . . . . . . . . . . . . . . . . . . . . . . . . . . . . . . . . . . . . . . . . . . . . . . . . . . . 57 VMEbus P1 Connector . . . . . . . . . . . . . . . . . . . . . . . . . . . . . . . . . . . . . . . . . . . . . . . . . . . . . . . . 58 VMEBus P2 Connector (PMC Mode) . . . . . . . . . . . . . . . . . . . . . . . . . . . . . . . . . . . . . . . . . . . . . 59 VMEbus P2 Connector (IPMC Mode) . . . . . . . . . . . . . . . . . . . . . . . . . . . . . . . . . . . . . . . . . . . . . 61 Headers . . . . . . . . . . . . . . . . . . . . . . . . . . . . . . . . . . . . . . . . . . . . . . . . . . . . . . . . . . . . . . . . . . . . . . . 63 SCON Header (J7) . . . . . . . . . . . . . . . . . . . . . . . . . . . . . . . . . . . . . . . . . . . . . . . . . . . . . . . . . . . 63 Boundary Scan Header (J8) . . . . . . . . . . . . . . . . . . . . . . . . . . . . . . . . . . . . . . . . . . . . . . . . . . . . 64 PMC/IPMC Selection Headers (J10, J15 – J18, J25 – J28) . . . . . . . . . . . . . . . . . . . . . . . . . . . . 64 COM2 Header (J29) . . . . . . . . . . . . . . . . . . . . . . . . . . . . . . . . . . . . . . . . . . . . . . . . . . . . . . . . . . 65 Front/Rear Ethernet and Transition Module Options Header (J30) . . . . . . . . . . . . . . . . . . . . . . . 65 Processor JTAG/COP Header (J42) . . . . . . . . . . . . . . . . . . . . . . . . . . . . . . . . . . . . . . . . . . . . . . 66
A Specifications . . . . . . . . . . . . . . . . . . . . . . . . . . . . . . . . . . . . . . . . . . . . . . . . . . . . . . . . . . . . . . . . . . 67
Power Requirements . . . . . . . . . . . . . . . . . . . . . . . . . . . . . . . . . . . . . . . . . . . . . . . . . . . . . . . . . . . . . 67
Supply Current Requirements . . . . . . . . . . . . . . . . . . . . . . . . . . . . . . . . . . . . . . . . . . . . . . . . . . . 67
Environmental Specifications . . . . . . . . . . . . . . . . . . . . . . . . . . . . . . . . . . . . . . . . . . . . . . . . . . . . . . . 67
B Thermal Validation . . . . . . . . . . . . . . . . . . . . . . . . . . . . . . . . . . . . . . . . . . . . . . . . . . . . . . . . . . . . . . 69
Thermally Significant Components . . . . . . . . . . . . . . . . . . . . . . . . . . . . . . . . . . . . . . . . . . . . . . . . . . |
69 |
Component Temperature Measurement . . . . . . . . . . . . . . . . . . . . . . . . . . . . . . . . . . . . . . . . . . . . . . |
73 |
Preparation . . . . . . . . . . . . . . . . . . . . . . . . . . . . . . . . . . . . . . . . . . . . . . . . . . . . . . . . . . . . . . . . . |
73 |
Measuring Junction Temperature . . . . . . . . . . . . . . . . . . . . . . . . . . . . . . . . . . . . . . . . . . . . . . . . |
73 |
Measuring Case Temperature . . . . . . . . . . . . . . . . . . . . . . . . . . . . . . . . . . . . . . . . . . . . . . . . . . . |
73 |
Measuring Local Air Temperature . . . . . . . . . . . . . . . . . . . . . . . . . . . . . . . . . . . . . . . . . . . . . . . . |
75 |
C Related Documentation . . . . . . . . . . . . . . . . . . . . . . . . . . . . . . . . . . . . . . . . . . . . . . . . . . . . . . . . . . 77
Motorola Embedded Communications Computing Documents . . . . . . . . . . . . . . . . . . . . . . . . . . . . . 77
Manufacturers’ Documents . . . . . . . . . . . . . . . . . . . . . . . . . . . . . . . . . . . . . . . . . . . . . . . . . . . . . . . . 78
Related Specifications . . . . . . . . . . . . . . . . . . . . . . . . . . . . . . . . . . . . . . . . . . . . . . . . . . . . . . . . . . . . 79
MVME6100 Installation and Use (V6100A/IH2) |
ix |

List of Figures
Figure 1-1. MVME6100 Layout . . . . . . . . . . . . . . . . . . . . . . . . . . . . . . . . . . . . . . . . . . . . . . . . . . . . . . 6 Figure 4-1. MVME6100 Block Diagram . . . . . . . . . . . . . . . . . . . . . . . . . . . . . . . . . . . . . . . . . . . . . . . 36 Figure B-1. Thermally Significant Components—Primary Side . . . . . . . . . . . . . . . . . . . . . . . . . . . . 71 Figure B-2. Thermally Significant Components—Secondary Side . . . . . . . . . . . . . . . . . . . . . . . . . . 72 Figure B-3. Mounting a Thermocouple Under a Heatsink . . . . . . . . . . . . . . . . . . . . . . . . . . . . . . . . . 74 Figure B-4. Measuring Local Air Temperature . . . . . . . . . . . . . . . . . . . . . . . . . . . . . . . . . . . . . . . . . . 75
MVME6100 Installation and Use (V6100A/IH2) |
xi |

List of Tables
Table 1-1. Startup Overview . . . . . . . . . . . . . . . . . . . . . . . . . . . . . . . . . . . . . . . . . . . . . . . . . . . . |
. . . . 3 |
Table 1-2. MVME6100 Jumper and Switch Settings . . . . . . . . . . . . . . . . . . . . . . . . . . . . . . . . . . |
. . . . 5 |
Table 1-3. SROM Configuration Switch (S3) . . . . . . . . . . . . . . . . . . . . . . . . . . . . . . . . . . . . . . . . . |
. . . 8 |
Table 1-4. Configuration Switch (S4) . . . . . . . . . . . . . . . . . . . . . . . . . . . . . . . . . . . . . . . . . . . . . . . |
. . 10 |
Table 1-5. MVME6100 Connectors . . . . . . . . . . . . . . . . . . . . . . . . . . . . . . . . . . . . . . . . . . . . . . . . |
. . 11 |
Table 2-1. Front-Panel LED Status Indicators . . . . . . . . . . . . . . . . . . . . . . . . . . . . . . . . . . . . . . . . |
. . 13 |
Table 3-1. MOTLoad Commands . . . . . . . . . . . . . . . . . . . . . . . . . . . . . . . . . . . . . . . . . . . . . . . . . |
. . 19 |
Table 3-2. MOTLoad Image Flags . . . . . . . . . . . . . . . . . . . . . . . . . . . . . . . . . . . . . . . . . . . . . . . . . |
. . 32 |
Table 4-1. MVME6100 Features Summary . . . . . . . . . . . . . . . . . . . . . . . . . . . . . . . . . . . . . . . . . . |
. . 35 |
Table 4-2. Device Bus Parameters . . . . . . . . . . . . . . . . . . . . . . . . . . . . . . . . . . . . . . . . . . . . . . . . |
. . 39 |
Table 5-1. PMC Expansion Connector (J4) Pin Assignments . . . . . . . . . . . . . . . . . . . . . . . . . . . . |
. . 46 |
Table 5-2. Gigabit Ethernet Connectors (J9, J93) Pin Assignment . . . . . . . . . . . . . . . . . . . . . . . . |
. . 48 |
Table 5-3. PMC Slot 1 Connector (J11) Pin Assignments . . . . . . . . . . . . . . . . . . . . . . . . . . . . . . . |
. . 49 |
Table 5-4. PMC Slot 1 Connector (J12) Pin Assignments . . . . . . . . . . . . . . . . . . . . . . . . . . . . . . . |
. . 50 |
Table 5-5. PMC Slot 1 Connector (J13) Pin Assignments . . . . . . . . . . . . . . . . . . . . . . . . . . . . . . . |
. . 51 |
Table 5-6. PMC Slot 1 Connector (J14) Pin Assignments . . . . . . . . . . . . . . . . . . . . . . . . . . . . . . . |
. . 52 |
Table 5-7. PMC Slot 2 Connector (J21) Pin Assignments . . . . . . . . . . . . . . . . . . . . . . . . . . . . . . . |
. . 53 |
Table 5-8. PMC Slot 2 Connector (J22) Pin Assignments . . . . . . . . . . . . . . . . . . . . . . . . . . . . . . . |
. . 54 |
Table 5-9. PMC Slot 2 Connector (J23) Pin Assignments . . . . . . . . . . . . . . . . . . . . . . . . . . . . . . . |
. . 55 |
Table 5-10. PMC Slot 2 Connector (J24) Pin Assignments . . . . . . . . . . . . . . . . . . . . . . . . . . . . . . |
. . 56 |
Table 5-11. COM1 Connector (J19) Pin Assignments . . . . . . . . . . . . . . . . . . . . . . . . . . . . . . . . . . |
. . 57 |
Table 5-12. VMEbus P1 Connector Pin Assignments . . . . . . . . . . . . . . . . . . . . . . . . . . . . . . . . . . |
. . 58 |
Table 5-13. VMEbus P2 Connector Pin Assignments (PMC Mode) . . . . . . . . . . . . . . . . . . . . . . . |
. . 59 |
Table 5-14. VME P2 Connector Pinouts with IPMC712 . . . . . . . . . . . . . . . . . . . . . . . . . . . . . . . . |
. . 61 |
Table 5-15. VME P2 Connector Pinouts with IPMC761 . . . . . . . . . . . . . . . . . . . . . . . . . . . . . . . . |
. . 62 |
Table 5-16. SCON Header (J7) Pin Assignments . . . . . . . . . . . . . . . . . . . . . . . . . . . . . . . . . . . . . |
. . 63 |
Table 5-17. Boundary Scan Header (J8) Pin Assignments . . . . . . . . . . . . . . . . . . . . . . . . . . . . . . |
. . 64 |
Table 5-18. PMC/IPMC Configuration Jumper Block . . . . . . . . . . . . . . . . . . . . . . . . . . . . . . . . . . . |
. . 64 |
Table 5-19. COM2 Planar Serial Port Header (J29) Pin Assignments . . . . . . . . . . . . . . . . . . . . . |
. . 65 |
Table 5-20. Front/Rear Ethernet and Transition Module Options Header (J30) Pin Assignment |
. . . 65 |
Table 5-21. Processor JTAG/COP (RISCWatch) Header (J42) Pin Assignments . . . . . . . . . . . . . |
. . 66 |
Table A-1. Power Requirements . . . . . . . . . . . . . . . . . . . . . . . . . . . . . . . . . . . . . . . . . . . . . . . . . . |
. . 67 |
Table A-2. MVME6100 Specifications . . . . . . . . . . . . . . . . . . . . . . . . . . . . . . . . . . . . . . . . . . . . . . |
. . 67 |
Table B-1. Thermally Significant Components . . . . . . . . . . . . . . . . . . . . . . . . . . . . . . . . . . . . . . . |
. . 70 |
Table C-1. Motorola Embedded Communications Computing Documents . . . . . . . . . . . . . . . . . . |
. . 77 |
Table C-2. Manufacturers’ Documents . . . . . . . . . . . . . . . . . . . . . . . . . . . . . . . . . . . . . . . . . . . . . |
. . 78 |
Table C-3. Related Specifications . . . . . . . . . . . . . . . . . . . . . . . . . . . . . . . . . . . . . . . . . . . . . . . . . |
. . 79 |
MVME6100 Installation and Use (V6100A/IH2) |
xiii |
About This Manual
About This Manual
The MVME6100 Single-Board Computer Installation and Use manual provides the information you will need to install and configure your MVME6100 single-board computer. It provides specific preparation and installation information, and data applicable to the board.
As of the printing date of this manual, the MVME6100 supports the models listed below.
Model Number |
Description |
MVME6100-0161 |
1.267 GHz MPC7457 processor, 512MB DDR |
|
memory, 128MB Flash, Scanbe handles |
|
|
MVME6100-0163 |
1.267 GHz MPC7457 processor, 512MB DDR |
|
memory,128MB Flash, IEEE handles |
|
|
MVME6100-0171 |
1.267 GHz MPC7457 processor, 1GB DDR |
|
memory, 128MB Flash, Scanbe handles |
|
|
MVME6100-0173 |
1.267 GHz MPC7457 processor, 1GB DDR |
|
memory, 128MB Flash, IEEE handles |
|
|
Overview of Contents
This manual is divided into the following chapters and appendices:
Chapter 1, Hardware Preparation and Installation, provides MVME6100 board preparation and installation instructions, as well as ESD precautionary notes.
Chapter 2, Startup and Operation, provides the power-up procedure and identifies the switches and indicators on the MVMEM6100.
Chapter 3, MOTLoad Firmware, describes the basic features of the MOTLoad firmware product.
Chapter 4, Functional Description, describes the MVME6100 on a block diagram level.
Chapter 5, Pin Assignments, provides pin assignments for various headers and connectors on the MMVE6100 single-board computer.
Appendix A, Specifications, provides power requirements and environmental specifications.
Appendix B, Thermal Validation, provides information to conduct thermal evaluations and identifies thermally significant components along with their maximum allowable operating temperatures.
Appendix C, Related Documentation, provides a listing of related Motorola manuals, vendor documentation, and industry specifications.
Comments and Suggestions
Motorola welcomes and appreciates your comments on its documentation. We want to know what you think about our manuals and how we can make them better. Mail comments to:
MVME6100 Installation and Use (V6100A/IH2) |
xv |

About This Manual
Motorola Embedded Communications Computing
Reader Comments DW164
2900 S. Diablo Way
Tempe, Arizona 85282
You can also submit comments to the following e-mail address: reader-comments@mcg.mot.com
In all your correspondence, please list your name, position, and company. Be sure to include the title and part number of the manual and tell how you used it. Then tell us your feelings about its strengths and weaknesses and any recommendations for improvements.
Conventions Used in This Manual
The following typographical conventions are used in this document:
bold
is used for user input that you type just as it appears; it is also used for commands, options and arguments to commands, and names of programs, directories and files.
italic
is used for names of variables to which you assign values, for function parameters, and for structure names and fields. Italic is also used for comments in screen displays and examples, and to introduce new terms.
courier
is used for system output (for example, screen displays, reports), examples, and system prompts.
<Enter>, <Return> or <CR>
represents the carriage return or Enter key.
Ctrl
represents the Control key. Execute control characters by pressing the Ctrl key and the letter simultaneously, for example, Ctrl-d.
xvi MVME6100 Installation and Use (V6100A/IH2)

Hardware Preparation and Installation |
1 |
|
|
|
|
|
|
|
Introduction
This chapter contains the following information:
■Board preparation and installation instructions
■ESD precautionary notes
Description
The MVME6100 is a single-slot, single-board computer based on the MPC7457 processor, the MV64360 system controller, the Tsi148 VME Bridge ASIC, up to 1 GB of ECC-protected DDR DRAM, up to 128MB of flash memory, and a dual Gigabit Ethernet interface.
Front panel connectors on the MVME6100 board include: two RJ-45 connectors for the Gigabit Ethernet, one RJ-45 connector for the asynchronous serial port with integrated LEDs for BRDFAIL and CPU run indication, and a combined reset and abort switch.
The MVME6100 is shipped with one additional asynchronous serial port routed to an on-board header.
The MVME6100 contains two IEEE1386.1 PCI, PCI-X capable mezzanine card slots. The PMC slots are 64-bit capable and support both front and rear I/O. All I/O pins of PMC slot 1 and 46 I/O pins of PMC slot 2 are routed to the 5-row DIN, P2 connector. I/O pins 1 through 64 from J14 of PMC slot 1 are routed to row C and row A of P2. I/O pins 1 through 46 from J24 of PMC slot 2 are routed to row D and row Z of P2.
The MVME6100 has two planar PCI buses (PCI0 and PCI1). In order to support a more generic PCI bus hierarchy nomenclature, the MV64360 PCI buses will be referred to in this document as PCI bus 0 (root bridge instance 0, bus 0) and PCI bus 1 (root bridge instance 1, bus 0). PCI bus 1 connects to PMC slots 1 and 2 of the board. PCI bus 0 connects to the Tsi148 VME Bridge ASIC and PMCspan bridge (PCI6520). This interface operates at PCI-X (133 MHz) speed. Both PCI planar buses are controlled by the MV64360 system controller.
Voltage Input/Output (VIO) for PCI bus 1 is set by the location of the PMC keying pins; both pins should be set to designate the same VIO, either +3.3V or +5V.
The MVME6100 board interfaces to the VMEbus via the P1 and P2 connectors, which use 5- row 160-pin connectors as specified in the VME64 Extension Standard. It also draws +12V and +5V power from the VMEbus backplane through these two connectors. The +3.3V, +2.5V, +1.8V, and processor core supplies are regulated on-board from the +5V power.
MVME6100 Installation and Use (V6100A/IH2) |
1 |

Chapter 1 Hardware Preparation and Installation
Note For maximum VMEbus performance, the MVME6100 should be mounted in a VME64x compatible backplane (5-row). 2eSST transfers are not supported when a 3-row backplane is used.
The MVME6100 supports multiple modes of I/O operation. By default, the board is configured for Ethernet port 2 to the front panel (non-specific transition module), and PMC slot 1 in IPMC mode. The board can be configured to route Ethernet port 2 to P2 and support MVME712M or MVME761 transition modules. The front/rear Ethernet and transition module options are configured by jumper block J30.
Selection of PMC slot 1 in PMC or IPMC mode is done by the jumper blocks J10, J15-J18, and J25-J28 (see Table 1-2 on page 5). IPMC mode is selected when an IPMC712 or IPMC761 module is used. If an IPMC is used, J30 should be configured for the appropriate transition module (see J30 configuration options as illustrated in Front/Rear Ethernet and Transition Module Options Header (J30) on page 8).
The IPMC712 and IPMC761 use AD11 as the IDSEL line for the Winbond PCI-ISA bridge device. This device supplies the four serial and one parallel port of the IPMC7xx module. The Discovery II PHB (MV64360) does not recognize address lines below AD16. For this reason, although an IPMC7xx module may be used on an MVME6100, the serial and parallel ports are not available, nor addressable. This issue will be resolved by MCG at a later date.
Note Other functions, such as Ethernet and SCSI interfaces, are function independent of the Winbond IDSEL line. The wide SCSI interface can only be supported through IPMC connector J3.
PMC mode is backwards compatible with the MVME5100 and MVME5500 and is accomplished by configuring the on-board jumpers.
Getting Started
This section provides an overview of the steps necessary to install and power up the MVME6100 and a brief section on unpacking and ESD precautions.
2 MVME6100 Installation and Use (V6100A/IH2)

Chapter 1 Hardware Preparation and Installation
Overview of Startup Procedures
The following table lists the things you will need to do before you can use this board and tells where to find the information you need to perform each step. Be sure to read this entire chapter, including all Caution and Warning notes, before you begin.
Table 1-1. Startup Overview
What you need to do... |
Refer to... |
Unpack the hardware. |
Unpacking Guidelines on page 3 |
|
|
Configure the hardware by |
MVME6100 Preparation on page 4 |
setting jumpers on the board. |
|
|
|
Install the MVME6100 board in |
Installing the MVME6100 into a Chassis on |
a chassis. |
page 10 |
|
|
Connect any other equipment |
Connection to Peripherals on page 11 |
you will be using |
|
|
|
Verify the hardware is installed. |
Completing the Installation on page 11 |
|
|
Unpacking Guidelines
Unpack the equipment from the shipping carton. Refer to the packing list and verify that all items are present. Save the packing material for storing and reshipping of equipment.
Note If the shipping carton is damaged upon receipt, request that the carrier’s agent be present during the unpacking and inspection of the equipment.
Avoid touching areas of integrated circuitry; static discharge can damage circuits.
!
Caution
Use ESD
Wrist Strap
Motorola strongly recommends that you use an antistatic wrist strap and a conductive foam pad when installing or upgrading a system. Electronic components, such as disk drives, computer boards, and memory modules can be extremely sensitive to electrostatic discharge (ESD). After removing the component from its protective wrapper or from the system, place the component flat on a grounded, static-free surface (and, in the case of a board, component side up). Do not slide the component over any surface.
If an ESD station is not available, you can avoid damage resulting from ESD by wearing an antistatic wrist strap (available at electronics stores) that is attached to an active electrical ground. Note that a system chassis may not be grounded if it is unplugged.
MVME6100 Installation and Use (V6100A/IH2) |
3 |

Chapter 1 Hardware Preparation and Installation
Inserting or removing modules with power applied may result in damage to module ! components.
Caution
Dangerous voltages, capable of causing death, are present in this equipment. Use extreme caution when handling, testing, and adjusting.
Warning
Hardware Configuration
This section discusses certain hardware and software tasks that may need to be performed prior to installing the board in a chassis.
To produce the desired configuration and ensure proper operation of the MVME6100, you may need to carry out certain hardware modifications before installing the module.
Most options on the MVME6100 are software configurable. Configuration changes are made by setting bits in control registers after the board is installed in a system.
Jumpers/switches are used to control those options that are not software configurable. These jumper settings are described further on in this section. If you are resetting the board jumpers from their default settings, it is important to verify that all settings are reset properly.
MVME6100 Preparation
Figure 1-1 illustrates the placement of the jumpers, headers, connectors, switches, and various other components on the MVME6100. There are several manually configurable headers on the MVME6100 and their settings are shown in Table 1-2. Each header’s default setting is enclosed in brackets. For pin assignments on the MVME6100, refer to Chapter 5, Pin Assignments.
4 MVME6100 Installation and Use (V6100A/IH2)

Chapter 1 Hardware Preparation and Installation
Table 1-2. MVME6100 Jumper and Switch Settings
Jumper/ |
|
|
|
Switch |
Function |
Settings |
|
J7 |
SCON Header |
[No jumper installed] |
Auto-SCON |
|
|
1-2 |
Always SCON |
|
|
2-3 |
No SCON |
|
|
|
|
J10, |
PMC/IPMC Selection Headers |
[Jumper installed] |
|
J15–J18, |
|
1-2 |
PMC I/O |
J25–J28 |
|
[2-3] |
IPMC I/O for IPMC7xx |
|
|
|
support (default) |
|
|
|
|
J30 |
Front/Rear Ethernet and |
Refer to Front/Rear Ethernet and Transition Module |
|
|
Transition Module Options |
Options Header (J30) on page 8 for details. |
|
|
Header |
|
|
|
|
|
|
S3 |
SROM Configuration Switch, |
Refer to SROM Configuration Switch (S3) on page |
|
|
sets board Geographical |
8 for details. |
|
|
Address |
|
|
|
|
|
|
S4 |
Flash Boot Bank Select |
Refer to Flash Boot Bank Select Configuration |
|
|
Configuration Switch, sets |
Switch (S4) on page 9 for details. |
|
|
Write Protect A, Write Protect |
|
|
|
B, Boot Bank Select, and Safe |
|
|
|
Start |
|
|
|
|
|
|
Note Items in brackets are factory default settings.
MVME6100 Installation and Use (V6100A/IH2) |
5 |

Chapter 1 Hardware Preparation and Installation
The MVME6100 is factory tested and shipped with the configuration described in the following sections.
Figure 1-1. MVME6100 Layout
|
|
J42 |
J7 |
J8 |
|
|
|
|
|
J29 |
|
|
|
|
|
|
|
|
|
|
|
|
|
|
|
|
|
|
|
|
|
|
J21 |
J22 |
|
|
|
|
|
|
S4 |
|
|
|
|||
MEZZANINEPCI |
|
|
|
|
4 |
3 |
2 |
1 |
|
|
|
|
|
|
1 2 3 4 5 6 7 8 |
S3 |
1 2 3 4 5 6 7 8 |
J23 |
J24 |
|
|||
CARD |
|
|
|
S1 |
|
|
|
P1 |
|||
|
|
|
|
|
|
|
|
|
|
||
|
|
|
|
|
|
|
|
|
J11 |
J12 |
|
PCI |
|
|
|
|
|
|
|
|
|
|
J3 |
MEZZANINE |
|
|
|
|
|
|
|
|
|
|
|
|
|
|
|
|
|
|
|
|
PMC |
|
|
|
|
|
|
|
|
|
|
|
|
IPMC |
|
CARD |
|
|
|
|
|
|
|
|
|
|
J30 |
|
|
|
|
|
|
|
|
|
|
|
|
10/100/1000 |
|
|
|
|
|
|
|
|
J13 |
J14 |
|
2 LAN |
J9 |
|
|
|
|
|
|
|
|
|
|
10/100/1000 |
1LAN |
J93 |
|
U12 |
|
|
|
|
U32 |
P2 |
|
|
|
|
|
|
|
|
|||||
|
|
|
|
|
|
|
|
||||
|
|
|
|
|
|
|
|
|
|
||
DEBUG |
|
J19 |
|
|
|
|
|
|
|
|
|
|
|
|
|
|
|
|
|
|
|
|
|
ABT/RST |
|
S2 |
|
|
|
|
|
|
|
|
|
|
|
|
|
|
|
|
|
|
J4 |
|
|
|
|
|
|
|
|
|
|
|
|
|
4296 0604 |
6 MVME6100 Installation and Use (V6100A/IH2)

Chapter 1 Hardware Preparation and Installation
SCON Header (J7)
A 3-pin planar header allows the choice for auto/enable/disable SCON VME configuration. A jumper installed across pins 1 and 2 configures for SCON always enabled. A jumper installed across pins 2 and 3 configures for SCON disabled. No jumper installed configures for auto SCON.
|
J7 |
|
J7 |
|
J7 |
|||||||
1 |
|
|
1 |
|
|
|
|
1 |
|
|
|
|
|
|
|
|
|
|
|
|
|
|
|||
|
|
|
|
|||||||||
2 |
|
|
2 |
|
|
|
|
2 |
|
|
|
|
|
|
|
|
|
|
|
|
|
|
|||
3 |
|
|
3 |
|
|
|
|
3 |
|
|
|
|
|
|
|
|
|
|
|
|
|
|
|
|
|
Auto-SCON |
Always SCON |
No SCON |
||||||||||
(factory configuration)
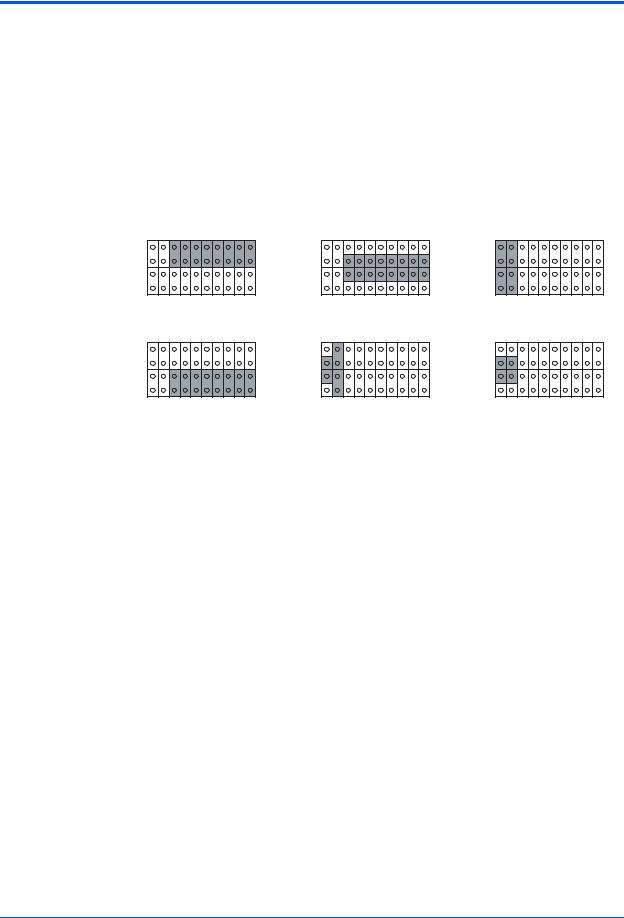
PMC/IPMC Selection Headers (J10, J15 – J18, J25 – J28)
Nine 3-pin planar headers are for PMC/IPMC mode I/O selection for PMC slot 1. These nine headers can also be combined into one single header block where a block shunt can be used as a jumper.
A jumper installed across pins 1 and 2 on all nine headers selects PMC1 for PMC I/O mode. A jumper across pins 2 and 3 on all nine headers selects IPMC I/O mode.
IPMC P2 I/O for IPMC Mode
|
|
|
|
|
|
|
|
|
|
|
|
|
|
|
(factory configuration) |
|
|
|
|
|
|
|
|
|
|
|
|
|
|
||||||||||||||
|
J10 |
|
J15 |
|
J16 |
|
J17 |
|
J18 |
|
J25 |
|
J26 |
|
J27 |
|
J28 |
||||||||||||||||||||||||||
1 |
|
|
|
|
1 |
|
|
|
|
1 |
|
|
|
|
1 |
|
|
|
|
1 |
|
|
|
|
1 |
|
|
|
|
1 |
|
|
|
|
1 |
|
|
|
|
1 |
|
|
|
|
|
|
|
|
|
|
|
|
|
|
|
|
|
|
|
|
|
|
|
|
|
|
|
|
|
|
|
|
|
|
|
|
|
|
|||||||||
2 |
|
|
|
|
2 |
|
|
|
|
2 |
|
|
|
|
2 |
|
|
|
|
2 |
|
|
|
|
2 |
|
|
|
|
2 |
|
|
|
|
2 |
|
|
|
|
2 |
|
|
|
|
|
|
|
|
|
|
|
|
|
|
|
|
|
|
|
|
|||||||||||||||||||||||||||
|
|
|
|
|
|
|
|
|
|
||||||||||||||||||||||||||||||||||
3 |
|
|
|
|
3 |
|
|
|
|
3 |
|
|
|
|
3 |
|
|
|
|
3 |
|
|
|
|
3 |
|
|
|
|
3 |
|
|
|
|
3 |
|
|
|
|
3 |
|
|
|
|
|
|
|
|
|
|
|
|
|
|
|
|
|
|
|
|
|
|
|
|
|
|
|
|
|
|
|
|
|
|
|
|
|
|
|
|
|
|
|
|
|
|
|
|
|
|
|
|
|
|
|
|
|
|
|
|
|
PMC1 P2 I/O for PMC Mode |
|
|
|
|
|
|
|
|
|
|
|
|
|
|
||||||||||||||
|
J10 |
|
J15 |
|
J16 |
|
J17 |
|
J18 |
|
J25 |
|
J26 |
|
J27 |
|
J28 |
|||||||||||||||||||||||||
1 |
|
|
|
|
1 |
|
|
|
|
1 |
|
|
|
1 |
|
|
|
|
1 |
|
|
|
|
1 |
|
|
|
|
1 |
|
|
|
|
1 |
|
|
|
|
1 |
|
|
|
|
|
|
|
|
|
|
|
|
|
|
|
|
|
|
|
|
|
|
|
|
|
|
|
|
|
|
|
|
|
|
|
|
|
|||||||||
|
|
|
|
|
|
|
|
|
|
|
|
|
|
|
|
|
|
|
|
|
|
|
|
|
|
|
|
|
|
|
|
|
|
|||||||||
|
|
|
|
|
|
|
|
|
|
|||||||||||||||||||||||||||||||||
2 |
|
|
|
|
2 |
|
|
|
|
2 |
|
|
|
2 |
|
|
|
|
2 |
|
|
|
|
2 |
|
|
|
|
2 |
|
|
|
|
2 |
|
|
|
|
2 |
|
|
|
3 |
|
|
|
|
3 |
|
|
|
|
3 |
|
|
|
3 |
|
|
|
|
3 |
|
|
|
|
3 |
|
|
|
|
3 |
|
|
|
|
3 |
|
|
|
|
3 |
|
|
|
|
|
|
|
|
|
|
|
|
|
|
|
|
|
|
|
|
|
|
|
|
|
|
|
|
|
|
|
|
|
|
|
|
|
|
|
|
|
|
|
|
|
|
MVME6100 Installation and Use (V6100A/IH2) |
7 |
Chapter 1 Hardware Preparation and Installation
Front/Rear Ethernet and Transition Module Options Header (J30)
A 40-pin planar header allows for selecting P2 options. Jumpers installed across Row A pins 3- 10 and Row B pins 3-10 enable front Ethernet access. Jumpers installed across Row B pins 3- 10 and Row C pins 3-10 enable P2 (rear) Gigabit Ethernet. Only when front Ethernet is enabled can the jumpers be installed across Row C and Row D on pins 1-10 to enable P2 (rear) PMC I/O. Note that all jumpers must be installed across the same two rows (all between Row A and Row B and/or Row C and Row D, or all between Row B and Row C).
The following illustration shows jumper setting options for J30. The factory default is shown where applicable:
J30 Options
1 |
10 |
1 |
10 |
1 |
10 |
11 |
20 |
11 |
20 |
11 |
20 |
21 |
30 |
21 |
30 |
21 |
30 |
31 |
40 |
31 |
40 |
31 |
40 |
Front Ethernet |
|
Rear Ethernet |
|
|
Non-Specific Transition Module |
(Default) |
|
|
|
|
(Default) |
1 |
10 |
1 |
10 |
1 |
10 |
11 |
20 |
11 |
20 |
11 |
20 |
21 |
30 |
21 |
30 |
21 |
30 |
31 |
40 |
31 |
40 |
31 |
40 |
PMC I/O TO P2 |
|
MVME 712M |
|
|
MVME 761 |
(Default) |
|
Transition Module |
|
|
Transition Module |
|
|
|
|
|
4294 0604 |
Refer to Front/Rear Ethernet and Transition Module Options Header (J30) on page 65 for connector pin assignments.
SROM Configuration Switch (S3)
A part of the 8-position SMT switch, S3 enables/disables the MV64360 SROM initialization and all I2C EEPROM write protection.
The SROM Init switch is OFF to disable the MV64360 device initialization via the I2C SROM. The switch is ON to enable this sequence.
The SROM WP switch is OFF to enable write protection on all I2C. The switch is ON to disable the I2C EEPROM write protection.
Table 1-3. SROM Configuration Switch (S3)
POSITION |
2 |
1 |
|
|
|
FUNCTION |
SROM WP |
SROM_INIT |
|
|
|
DEFAULT (OFF) |
WP |
No SROM_INIT |
|
|
|
8 MVME6100 Installation and Use (V6100A/IH2)
Chapter 1 Hardware Preparation and Installation
S3 position 3-8 defines the VME Geographical Address if the MVME6100 is installed in a 3-row backplane. The following is the pinout:
Positio |
|
n |
Function |
3 |
VMEGAP_L |
|
|
4 |
VMEGA4_L |
|
|
5 |
VMEGA3_L |
|
|
6 |
VMEGA2_L |
|
|
7 |
VMEGA1_L |
|
|
8 |
VMEGA0_L |
|
|
Setting the individual position to ON forces the corresponding signal to zero. If the board is installed in a 5-row backplane, the geographical address is defined by the backplane and positions 3-8 of S3 should be set to OFF. The default setting is OFF.
Flash Boot Bank Select Configuration Switch (S4)
A 4-position SMT configuration switch is located on the board to control Flash Bank B Boot block write-protect and Flash Bank A write-protect. Select the Flash Boot bank and the programmed/safe start ENV settings.
Note It is recommended that Bank B Write Protect always be enabled.
The Bank B Boot WP switch is OFF to indicate that the Flash Bank B Boot block is writeprotected. The switch is ON to indicate no write-protection of Bank B Boot block.
The Bank A WP switch is OFF to indicate that the entire Flash Bank A is write-protected. The switch is ON to indicate no write-protection of Bank A Boot block.
When the Boot Bank Sel Switch is ON, the board boots from Bank B, when OFF, the board boots from Bank A. Default is ON (boot from Bank B).
MVME6100 Installation and Use (V6100A/IH2) |
9 |

Chapter 1 Hardware Preparation and Installation
When the Safe Start switch is set OFF, normal boot sequence should be followed by MOTLoad. When ON, MOTLoad executes Safe Start, during which the user can select the Alternate Boot Image.
Table 1-4. Configuration Switch (S4)
POSITION |
4 |
3 |
2 |
1 |
|
|
|
|
|
FUNCTION |
B BOOT WP |
|
BANK SEL |
|
|
A WP |
START |
||
|
BANK |
BANK |
BOOT |
SAFE |
|
|
|
|
|
FACTORY |
OFF |
ON |
ON |
OFF |
DEFAULT |
WP |
No WP |
Bank B |
Norm ENV |
|
|
|
|
|
Hardware Installation
Installing the MVME6100 into a Chassis
Use the following steps to install the MVME6100 into your computer chassis.
1.Attach an ESD strap to your wrist. Attach the other end of the ESD strap to an electrical ground (refer to Unpacking Guidelines). The ESD strap must be secured to your wrist and to ground throughout the procedure.
2.Remove any filler panel that might fill that slot.
3.Install the top and bottom edge of the MVME6100 into the guides of the chassis.
Only use injector handles for board insertion to avoid damage/deformation to the front
!panel and/or PCB. Deformation of the front panel can cause an electrical short or other
Warning |
board malfunction. |
|
4.Ensure that the levers of the two injector/ejectors are in the outward position.
5.Slide the MVME6100 into the chassis until resistance is felt.
6.Simultaneously move the injector/ejector levers in an inward direction.
7.Verify that the MVME6100 is properly seated and secure it to the chassis using the two screws located adjacent to the injector/ejector levers.
8.Connect the appropriate cables to the MVME6100.
To remove the board from the chassis, press the red locking tabs (IEEE handles only) and reverse the procedure.
10 MVME6100 Installation and Use (V6100A/IH2)

Chapter 1 Hardware Preparation and Installation
Connection to Peripherals
When the MVME6100 is installed in a chassis, you are ready to connect peripherals and apply power to the board.
Figure 1-1 on page 6 shows the locations of the various connectors while Table 1-5 lists them for you. Refer to Chapter 5, Pin Assignments for the pin assignments of the connectors listed below.
Table 1-5. MVME6100 Connectors
Connector |
Function |
J3 |
IPMC761/712 connector |
|
|
J4 |
PMC expansion connector |
|
|
J9, J93 |
Gigabit Ethernet connectors |
|
|
J11, J12, J13, J14 |
PCI mezzanine card (PMC) slot 1 connector |
|
|
J19 |
COM1 connector |
|
|
J21, J22, J23, J24 |
PCI mezzanine card (PMC) slot 2 connector |
|
|
J29 |
COM2 planar connector |
|
|
P1, P2 |
VME rear panel connectors |
|
|
Completing the Installation
Verify that hardware is installed and the power/peripheral cables connected are appropriate for your system configuration.
Replace the chassis or system cover, reconnect the system to the AC or DC power source, and turn the equipment power on.
MVME6100 Installation and Use (V6100A/IH2) |
11 |

Startup and Operation
2
Introduction
This chapter gives you information about the:
■Power-up procedure
■Switches and indicators
Applying Power
After you verify that all necessary hardware preparation is complete and all connections are made correctly, you can apply power to the system.
When you are ready to apply power to the MVME6100:
■Verify that the chassis power supply voltage setting matches the voltage present in the country of use (if the power supply in your system is not auto-sensing)
■On powering up, the MVME6100 brings up the MOTLoad prompt, MVME6100>
Switches and Indicators
The MVME6100 board provides a single pushbutton switch that provides both abort and reset (ABT/RST) functions. When the switch is depressed for less than three seconds, an abort interrupt is generated to the processor. If the switch is held for more than three seconds, a board hard reset is generated. The board hard reset will reset the MPC7457, MV64360, Tsi148 VME Bridge ASIC, PCI6520, PMC1/2 slots, both Ethernet PHYs, serial ports, PMCspan slot, both flash banks, and the device bus control PLD. If the MVME6100 is enabled for VME system controller, the VME bus will be reset and local reset input is sent to the Tsi148 VME controller.
The MVME6100 has two front-panel indicators:
■BDFAIL, software controlled and asserted by firmware (or other software) to indicate a configuration problem (or other failure)
■CPU, connected to a CPU bus control signal to indicate bus transfer activity
The following table describes these indicators:
Table 2-1. Front-Panel LED Status Indicators
Function |
Label |
Color |
Description |
CPU Bus Activity |
CPU |
Green |
CPU bus is busy |
|
|
|
|
Board Fail |
BDFAIL |
Yellow |
Board has a failure |
|
|
|
|
MVME6100 Installation and Use (V6100A/IH2) |
13 |

MOTLoad Firmware
3
Introduction
This chapter describes the basic features of the MOTLoad firmware product, designed by Motorola as the next generation initialization, debugger, and diagnostic tool for highperformance embedded board products using state-of-the-art system memory controllers and bridge chips, such as the MV64360.
In addition to an overview of the product, this chapter includes a list of standard MOTLoad commands, the default VME and firmware settings that are changeable by the user, remote start, and the alternate boot procedure.
Overview
The MOTLoad firmware package serves as a board power-up and initialization package, as well as a vehicle from which user applications can be booted. A secondary function of the MOTLoad firmware is to serve in some respects as a test suite providing individual tests for certain devices.
MOTLoad is controlled through an easy-to-use, UNIX-like, command line interface. The MOTLoad software package is similar to many end-user applications designed for the embedded market, such as the real time operating systems currently available.
Refer to the MOTLoad Firmware Package User’s Manual, listed in Appendix C, Related Documentation, for more details.
MOTLoad Implementation and Memory Requirements
The implementation of MOTLoad and its memory requirements are product specific. The MVME6100 single-board computer (SBC) is offered with a wide range of memory (for example, DRAM, external cache, flash). Typically, the smallest amount of on-board DRAM that a Motorola SBC has is 32MB. Each supported Motorola product line has its own unique MOTLoad binary image(s). Currently the largest MOTLoad compressed image is less than 1MB in size.
MOTLoad Commands
MOTLoad supports two types of commands (applications): utilities and tests. Both types of commands are invoked from the MOTLoad command line in a similar fashion. Beyond that, MOTLoad utilities and MOTLoad tests are distinctly different.
MVME6100 Installation and Use (V6100A/IH2) |
15 |

Chapter 3 MOTLoad Firmware
MOTLoad Utility Applications
The definition of a MOTLoad utility application is very broad. Simply stated, it is considered a MOTLoad command, if it is not a MOTLoad test. Typically, MOTLoad utility applications are applications that aid the user in some way (that is, they do something useful). From the perspective of MOTLoad, examples of utility applications are: configuration, data/status displays, data manipulation, help routines, data/status monitors, etc.
Operationally, MOTLoad utility applications differ from MOTLoad test applications in several ways:
■Only one utility application operates at any given time (that is, multiple utility applications cannot be executing concurrently)
■Utility applications may interact with the user. Most test applications do not.
MOTLoad Tests
A MOTLoad test application determines whether or not the hardware meets a given standard. Test applications are validation tests. Validation is conformance to a specification. Most MOTLoad tests are designed to directly validate the functionality of a specific SBC subsystem or component. These tests validate the operation of such SBC modules as: dynamic memory, external cache, NVRAM, real time clock, etc.
All MOTLoad tests are designed to validate functionality with minimum user interaction. Once launched, most MOTLoad tests operate automatically without any user interaction. There are a few tests where the functionality being validated requires user interaction (that is, switch tests, interactive plug-in hardware modules, etc.). Most MOTLoad test results (error-data/status-data) are logged, not printed. All MOTLoad tests/commands have complete and separate descriptions (refer to the MOTLoad Firmware Package User’s Manual for this information).
All devices that are available to MOTLoad for validation/verification testing are represented by a unique device path string. Most MOTLoad tests require the operator to specify a test device at the MOTLoad command line when invoking the test.
A listing of all device path strings can be displayed through the devShow command. If an SBC device does not have a device path string, it is not supported by MOTLoad and can not be directly tested. There are a few exceptions to the device path string requirement, like testing RAM, which is not considered a true device and can be directly tested without a device path string. Refer to the devShow command description page in the MOTLoad Firmware Package User’s Manual.
Most MOTLoad tests can be organized to execute as a group of related tests (a testSuite) through the use of the testSuite command. The expert operator can customize their testing by defining and creating a custom testSuite(s). The list of built-in and user-defined MOTLoad testSuites, and their test contents, can be obtained by entering testSuite -d at the MOTLoad prompt. All testSuites that are included as part of a product specific MOTLoad firmware package are product specific. For more information, refer to the testSuite command description page in the MOTLoad Firmware Package User’s Manual.
16 MVME6100 Installation and Use (V6100A/IH2)

Chapter 3 MOTLoad Firmware
Test results and test status are obtained through the testStatus, errorDisplay, and taskActive commands. Refer to the appropriate command description page in the MOTLoad Firmware Package User’s Manual for more information.
Using MOTLoad
Interaction with MOTLoad is performed via a command line interface through a serial port on the SBC, which is connected to a terminal or terminal emulator (for example, Window’s Hypercomm). The default MOTLoad serial port settings are: 9600 baud, 8 bits, no parity.
Command Line Interface
The MOTLoad command line interface is similar to a UNIX command line shell interface. Commands are initiated by entering a valid MOTLoad command (a text string) at the MOTLoad command line prompt and pressing the carriage-return key to signify the end of input. MOTLoad then performs the specified action. An example of a MOTLoad command line prompt is shown below. The MOTLoad prompt changes according to what product it is used on (for example, MVME5500, MVME6100).
Example:
MVME6100>
If an invalid MOTLoad command is entered at the MOTLoad command line prompt, MOTLoad displays a message that the command was not found.
Example:
MVME6100> mytest
"mytest" not found
MVME6100>
If the user enters a partial MOTLoad command string that can be resolved to a unique valid MOTLoad command and presses the carriage-return key, the command will be executed as if the entire command string had been entered. This feature is a user-input shortcut that minimizes the required amount of command line input. MOTLoad is an ever changing firmware package, so user-input shortcuts may change as command additions are made.
Example:
MVME6100> version
Copyright: Motorola Inc.1999-2002, All Rights Reserved
MOTLoad RTOS Version 2.0
PAL Version 0.1 (Motorola MVME6100)
Example:
MVME6100> ver
MVME6100 Installation and Use (V6100A/IH2) |
17 |
 Loading...