


 Loading...
MOTOROLA QUENCHTM XT3
User Guide

Table of contents |
|
|
Chapter 1: Getting started.................................................................... |
1 |
|
1.1 |
Your phone .................................................................................................. |
1 |
|
Front ........................................................................................................................ |
1 |
|
Back......................................................................................................................... |
1 |
|
Top........................................................................................................................... |
2 |
|
Side.......................................................................................................................... |
2 |
1.2 |
Installing the SIM card, battery and memory card ................................... |
3 |
|
SIM card .................................................................................................................. |
3 |
|
Battery ..................................................................................................................... |
4 |
|
Memory card ........................................................................................................... |
5 |
1.3 |
Charging the battery ................................................................................... |
5 |
1.4 |
Using a headset........................................................................................... |
5 |
1.5 |
Turning the phone on or off ....................................................................... |
6 |
|
Touch calibration..................................................................................................... |
6 |
Chapter 2: The basics........................................................................... |
7 |
|
2.1 The Home screen ........................................................................................ |
7 |
|
|
Status bar icons........................................................................................................ |
7 |
|
Shortcut menu.......................................................................................................... |
9 |
|
Application drawer ................................................................................................ |
11 |
|
Using widgets ........................................................................................................ |
11 |
|
Setting the wallpaper ............................................................................................. |
12 |
2.2 |
LED indicators ........................................................................................... |
12 |
2.3 |
Adjusting the volume................................................................................ |
12 |
2.4 |
Contacts ..................................................................................................... |
14 |
|
Adding a contact.................................................................................................... |
14 |
|
Searching for contacts ........................................................................................... |
14 |
|
Importing contacts................................................................................................. |
15 |
|
Backing up contacts............................................................................................... |
16 |
|
Favourite contacts.................................................................................................. |
16 |
Chapter 3: Making and answering calls............................................ |
17 |
|
3.1 |
Voice calls.................................................................................................. |
17 |
|
Making a call ......................................................................................................... |
17 |
|
Answering a call .................................................................................................... |
18 |
|
Ending a call.......................................................................................................... |
19 |
Chapter 4: Entering information ........................................................ |
20 |
|
4.1 |
On-screen keyboard.................................................................................. |
20 |
|
Using the on-screen keyboard ............................................................................... |
20 |
|
Setting the input method........................................................................................ |
21 |
|
Changing the input method ................................................................................... |
21 |
4.2 |
Configuring phone keyboard settings .................................................... |
21 |
Chapter 5: Email & Messaging........................................................... |
23 |
|
|
To open messaging ................................................................................................ |
23 |
5.1 |
Text messages........................................................................................... |
23 |
|
Creating and sending a text message..................................................................... |
23 |
i

|
|
Table of contents |
|
Receiving and managing messages ....................................................................... |
24 |
5.2 |
Multimedia messages ............................................................................... |
27 |
|
Creating and sending an MMS message ............................................................... |
27 |
5.3 |
Voice messages ........................................................................................ |
28 |
|
Recording voice..................................................................................................... |
29 |
|
Managing recorded voice ...................................................................................... |
29 |
5.4 |
Email accounts .......................................................................................... |
30 |
|
Setting up an Internet email account ..................................................................... |
30 |
|
To open email ........................................................................................................ |
30 |
5.5 |
Using email ................................................................................................ |
31 |
|
Composing and sending an email.......................................................................... |
31 |
|
Receiving emails ................................................................................................... |
32 |
|
Reading and replying to emails ............................................................................. |
32 |
|
Managing email folders......................................................................................... |
33 |
|
Customising email settings.................................................................................... |
33 |
5.6 |
Google Mail ................................................................................................ |
34 |
Chapter 6: Using the Internet............................................................. |
35 |
|
6.1 |
Connecting to the Internet........................................................................ |
35 |
|
Wi-Fi...................................................................................................................... |
35 |
|
Mobile data network.............................................................................................. |
36 |
|
Starting a data connection ..................................................................................... |
37 |
6.2 Browsing a web page................................................................................ |
38 |
|
|
Managing a web page............................................................................................ |
38 |
6.3 |
Market......................................................................................................... |
40 |
6.4 Java ME apps............................................................................................. |
40 |
|
|
Online .................................................................................................................... |
40 |
|
My code................................................................................................................. |
40 |
Chapter 7: Using Bluetooth® ............................................................. |
41 |
|
7.1 |
Connecting to Bluetooth devices ............................................................ |
41 |
Chapter 8: Media applications ........................................................... |
42 |
|
8.1 |
Photos and videos .................................................................................... |
42 |
|
Taking a photo....................................................................................................... |
42 |
|
Recording video..................................................................................................... |
43 |
|
Reviewing a photo................................................................................................. |
43 |
|
Reviewing a video ................................................................................................. |
44 |
|
Configuring camera settings.................................................................................. |
44 |
8.2 |
Viewing photos & videos.......................................................................... |
46 |
|
To view photos in the album ................................................................................. |
46 |
|
To configure camera & video playback settings ................................................... |
48 |
|
To play back videos in the album.......................................................................... |
48 |
8.3 |
Using the music player ............................................................................. |
48 |
|
Controlling the music player ................................................................................. |
48 |
|
Displaying folder categories.................................................................................. |
49 |
|
Playing music ........................................................................................................ |
49 |
|
Changing playback options ................................................................................... |
49 |
ii

Table of contents |
|
|
|
Creating a playlist.................................................................................................. |
50 |
8.4 Google Talk................................................................................................ |
51 |
|
8.5 Voice note .................................................................................................. |
51 |
|
8.6 YouTube™ ................................................................................................. |
52 |
|
Chapter 9: Navigation ......................................................................... |
53 |
|
9.1 Using GPS tracker..................................................................................... |
53 |
|
|
Turning on GPS..................................................................................................... |
53 |
|
Hiding the GPS window........................................................................................ |
53 |
|
Managing tracking data ......................................................................................... |
54 |
9.2 Google Maps.............................................................................................. |
54 |
|
Chapter 10: Tools................................................................................ |
55 |
|
10.1 |
Calculator................................................................................................. |
55 |
10.2 |
Calendar ................................................................................................... |
55 |
10.3 |
Clock......................................................................................................... |
56 |
10.4 |
Note pad ................................................................................................... |
57 |
Chapter 11: Management.................................................................... |
58 |
|
11.1 Documents To Go ................................................................................... |
58 |
|
|
Word To Go® Viewer........................................................................................... |
58 |
|
Sheet To Go® Viewer ........................................................................................... |
58 |
|
Slideshow To Go® Viewer ................................................................................... |
59 |
|
PDF To Go® Lite.................................................................................................. |
59 |
11.2 |
File browser ............................................................................................. |
59 |
|
Managing files and folders .................................................................................... |
59 |
11.3 RoadSync................................................................................................. |
60 |
|
|
Set up RoadSync for the first time ........................................................................ |
60 |
|
Customise RoadSync............................................................................................. |
60 |
|
Start synchronisation ............................................................................................. |
62 |
|
Update RoadSync .................................................................................................. |
62 |
11.4 |
RoadSync calendar ................................................................................. |
62 |
11.5 |
RoadSync mail......................................................................................... |
62 |
11.6 |
Rss reader................................................................................................ |
63 |
Chapter 12: Managing your phone .................................................... |
64 |
|
12.1 |
Phone settings......................................................................................... |
64 |
|
Wireless controls ................................................................................................... |
64 |
|
Call settings ........................................................................................................... |
64 |
|
Sound & display .................................................................................................... |
64 |
|
Security & location................................................................................................ |
65 |
|
Applications..................................................... |
66 |
|
SD card USB Mass Storage & phone storage ........................... |
66 |
|
Date & time ..................................................... |
66 |
|
Locale & text .................................................... |
66 |
|
About phone .......................................................................................................... |
66 |
12.2 |
Changing basic settings......................................................................... |
67 |
|
Date and time......................................................................................................... |
67 |
iii

|
|
Table of contents |
|
Setting alarms ........................................................................................................ |
67 |
|
Display settings ..................................................................................................... |
68 |
|
Ring settings .......................................................................................................... |
68 |
12.3 |
Using wireless control ............................................................................ |
68 |
12.4 |
Protecting your phone ............................................................................ |
69 |
|
Enable or disable SIM card PIN............................................................................ |
69 |
|
Enabling password protection ............................................................................... |
69 |
12.5 |
Resetting the phone................................................................................ |
69 |
12.6 |
Transferring files to your computer ...................................................... |
70 |
Safety, regulatory & legal ...................................................................................... |
71 |
|
Specifications ......................................................................................................... |
85 |
|
iv
Chapter 1: Getting started
Chapter 1: Getting started
1.1 Your phone
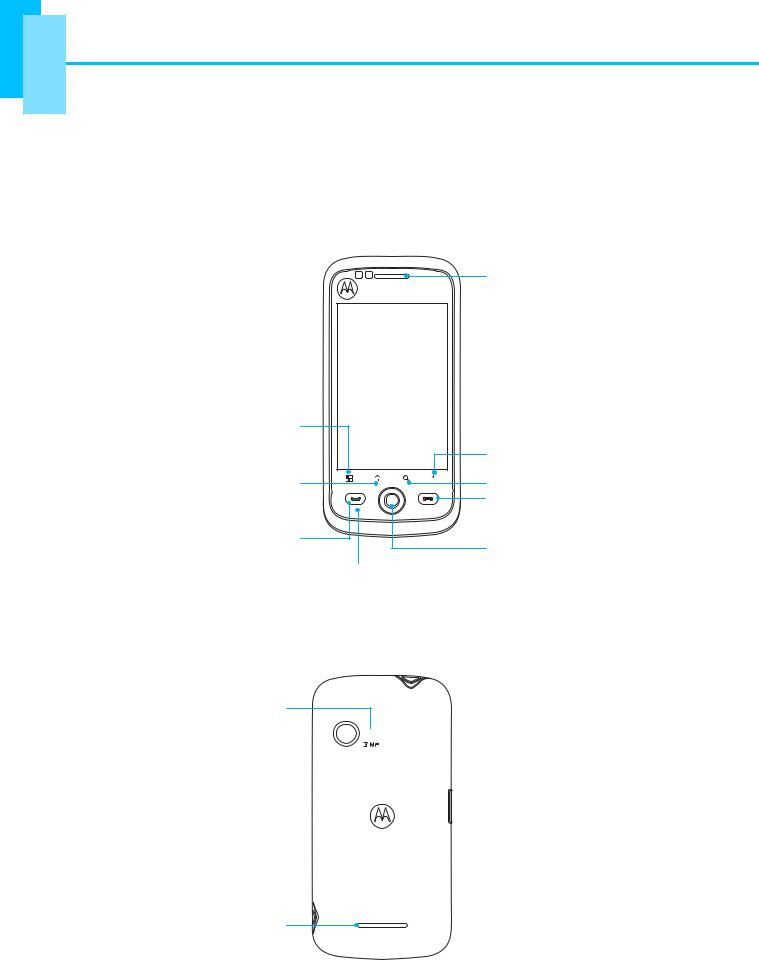
Front
Earpiece
Touch screen 
Menu:
•Press to unlock the phone.
•Press to view menu options.
Home: |
|
Back |
|
• Go back to the Home |
|
||
|
|
||
screen. |
|
Browser |
|
• Press & hold to see |
|
End: End or reject a call. |
|
recent activities. |
|
||
|
|
||
Call: |
|
Trackball: Move to select |
|
• Activate the dialler. |
Microphone |
an option. |
|
• Make or answer a call. |
|||
|
Back
Flash 3 Megapixel camera 

Back cover: 
Push and slide down to open.
Speaker
1
Chapter 1: Getting started
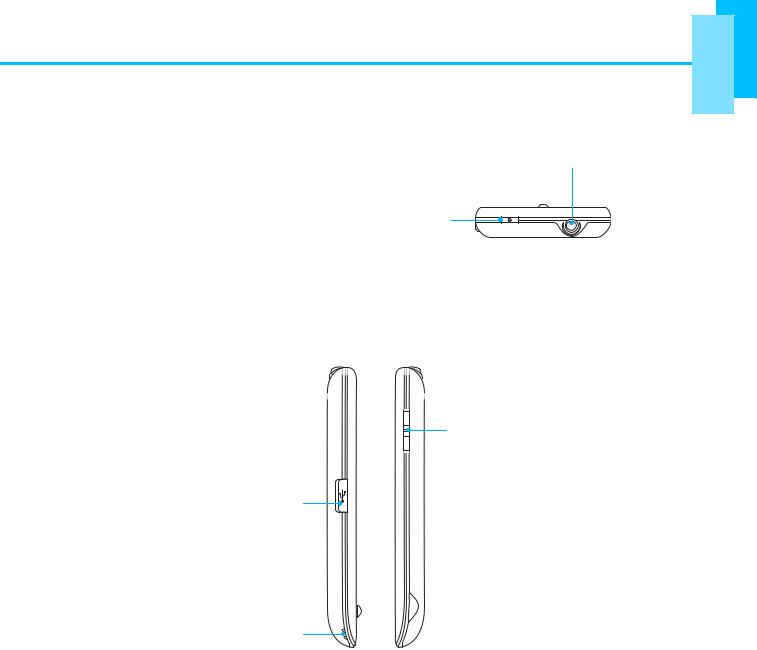
Top
Earphone jack: Use a headset for hands-free conversation or listening to music.
Power:
• Press and hold to turn the phone on or off.
•To save battery, quick press to turn the screen on or off temporarily.
Side
Micro USB connector:
•Connect USB cable to PC as a modem/USB mass storage.
•Connect USB cable and the AC adapter to charge the battery.
Strap hole
Volume: Press up or down to increase or decrease the volume.
Shutter:
• Press to activate the camera.

 • In Camera mode, press to take a photo or video.
Note: The battery can also be charged while connected to a computer.
2
Chapter 1: Getting started
1.2 Installing the SIM card, battery and memory card
Caution: before assembling, charging or using your phone for the first time, please read the important legal and safety information at the back of this guide.
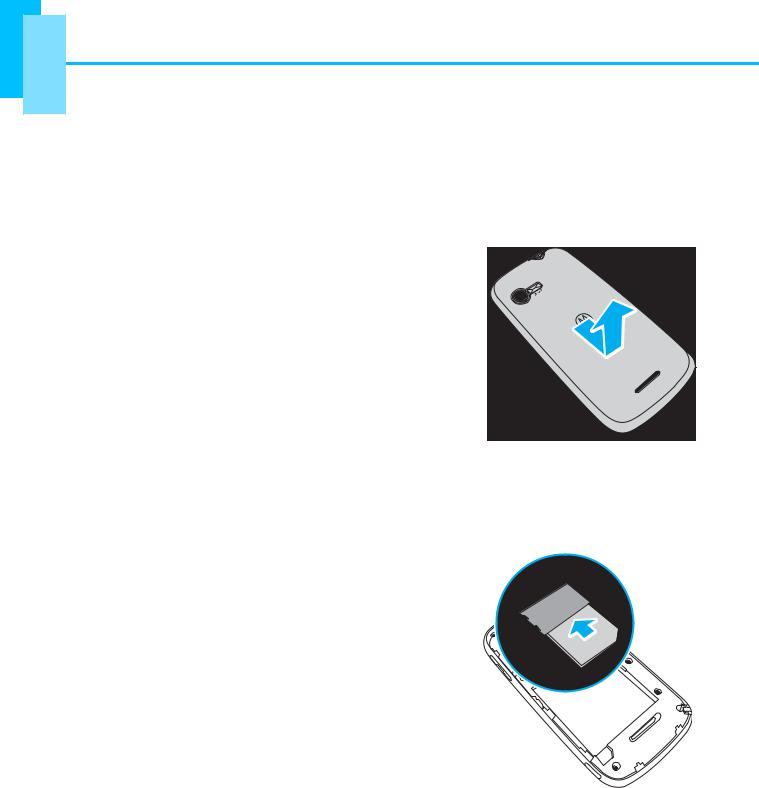
To remove the back cover
1. Turn the phone off.
2. Push and slide down to open the back cover.
SIM card
The SIM card contains your phone number, memory storage and network service details.
To install the SIM card
Insert the SIM card as shown. Make sure the gold contacts are facing down and the cut-off corner facing towards the battery slot.
To remove the SIM card
1. Remove the battery.
2. Slide the SIM card from the card slot.
3
Chapter 1: Getting started
Battery
Your phone comes with a rechargeable Li-Ion battery. Battery life varies depending on the network and applications used and the type of connections attached to your phone.
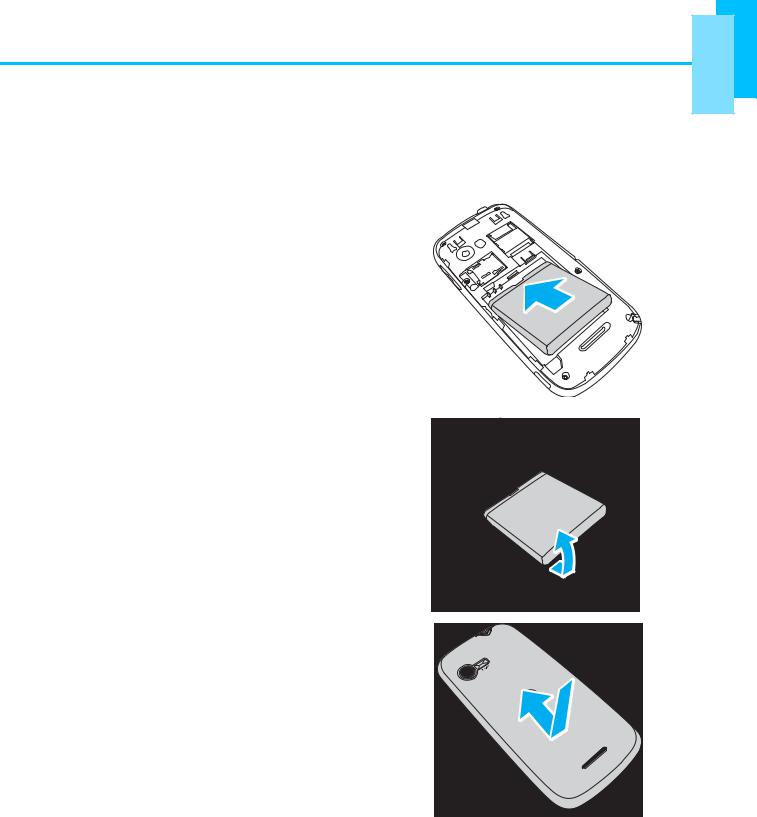
To install the battery
Insert the battery. Make sure the contacts of the battery are aligned with the connectors on the battery slot.
To remove the battery
Lift the battery tab and remove the battery.
To replace the back cover
Secure the hooks on the back cover with the designated holes on the phone and close the back cover.
Caution: Please read “Battery use & safety” on page 71.
4

Chapter 1: Getting started
Memory card
You will need a microSD memory card to store photos, music, videos and other data.
To install the memory card
1. Insert the memory card with the gold contacts facing down.
2. Push the memory card until it clicks into place.
To remove the memory card
1. For safe removal, go to Settings > SD card, USB mass storage & phone storage > Unmount SD card.
2. Push the memory card down to eject it from the slot.
Note: Please note that the microSD memory card is already inserted in the phone.
1.3 Charging the battery
The battery out of the box is only partially charged. To fully charge the battery, charge it for 2 hours.
1.Open the Micro USB connector cover.
2.Plug in the battery charger as shown in the diagram.
3.Plug the AC adapter to the wall outlet to start charging.
When the battery is charging, the red LED is activated;
the  icon is also displayed in the status bar. When the battery is fully charged, the red LED disappears and the
green LED is activated; if the phone is turned on, the  icon is also displayed in the status bar.
Note:
•The battery can also be charged when you connect your phone to the computer.
•To ensure safety, do not remove the battery from the phone while the AC adapter is connected or while it is being charged.
1.4Using a headset
For hands-free conversation or to listen to music, plug a headset into the headset jack.
Note: using a mobile device or accessory while driving may cause distraction and may be illegal. Always obey the laws and drive safely.
5
Chapter 1: Getting started
1.5 Turning the phone on or off
After installing the SIM card and charging the battery, you are now ready to turn on your phone.
To turn on your phone
Press and hold the Power key until the phone vibrates.
To turn off your phone
1.Press and hold the Power key.
2.A pop-up window appears, tap Power off.
3.Select OK to confirm.
To set your phone to sleep mode
To set your phone to sleep mode, press the Power key briefly. This will turn the display off.
To turn the display on, press the Power key briefly.
Touch calibration
The touch calibration appears when the phone is turned on for the first time.
The touch calibration helps you to calibrate the screen to ensure touch accuracy and change the screen orientation and text size before you start using the phone. Follow the on-screen instructions for screen calibration.
6

Chapter 2: The basics
Chapter 2: The basics
2.1 The Home screen
From the Home screen, you can quickly access common features and view notifications of missed calls, received messages, battery and connection status.
Status bar
• Displays status and notification icons and the clock.
• Message, appointment, task and connection
notifications are also displayed here.
Tap to open the
Contacts screen.
Application drawer
Tap to view the applications and settings of the phone.
window, press  .
.
Tap to display the system information. |
Tap to display the notifications. |
||||
|
|
|
|
|
|
|
|
|
|
|
|
7

Chapter 2: The basics
The status bar icons indicate the following information:
Notification icon
Battery icon
Phone network icon
Wi-Fi™ icon
Bluetooth® icon
Volume icon |
Battery icon |
The following icons may appear in the volume icon area.
The following icons may appear in the battery icon area:
Icon Description
Volume is muted.
Vibrate mode is activated.
Speakerphone is on.
To adjust the volume, see “Adjusting the volume” on page 12.
Icon Description
Battery is full.
Battery is low.
Battery is charging.
To charge the battery, see “Charging the battery” on page 5.
Phone network icon
The following icons may appear in the phone network icon area.
Icon Description
No network signal
Maximum signal strength. Fewer bars indicate lower signal strength.
GPRS network is in use.
Icon Description
HSDPA network is in use.
Call is in progress.
Call is on hold.
No SIM card inserted.
8
Chapter 2: The basics
Connection icon
The following icons may appear in the connection icon area.
Notification icon
The following icons may appear in the notification icon area.
Icon Description
WiFi is connected.
Bluetooth connection is active.
GPRS data connection is active.
HSDPA data connection is active.
Phone is connected to PC via
USB connector.
Icon Description
New text message notification
New email notification
Alarm
Task notification
Missed call notification
Tap the status bar and scroll down to view the details.
Shortcut menu
The Shortcut menu displays notifications or other information related to each menu item, tap the item on the Home screen. By default, the following applications are displayed:
Icon |
Menu Item |
Description |
Messaging
Dialler
Contacts
Displays message notification. Tap to access messaging menu. See page 23.
Displays phone keypad. Tap to enter the phone number and make calls. See page 17.
Displays contacts saved on the phone.
Tap to select the contact to make a phone call or send a text message. See page 14.
Application |
Tap to access the Application drawer. |
drawer |
See page 7. |
|
|
9
Chapter 2: The basics
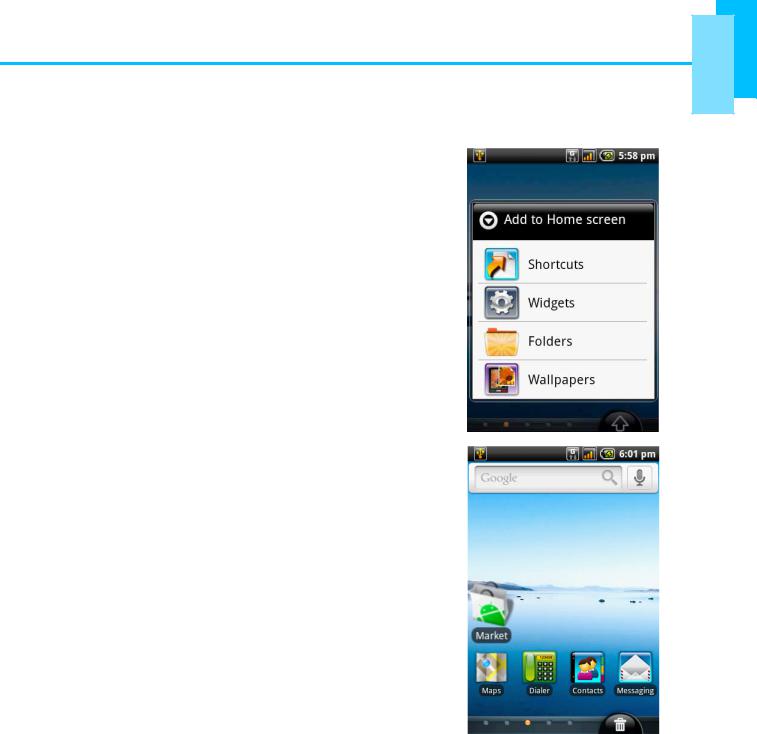
Customising the shortcut menu
To add a shortcut:
1.Tap Menu > Add > Shortcuts.
2.Tap Applications to display the list of applications.
3.Tap to add the items that you want to appear on the
Home screen.
To remove a shortcut:
1.Tap and hold the desired shortcut icon. The icon expands.
2. appears at the bottom of the Home screen.
3.Drag the icon to  to delete. The shortcut icon is then removed.
10
Chapter 2: The basics
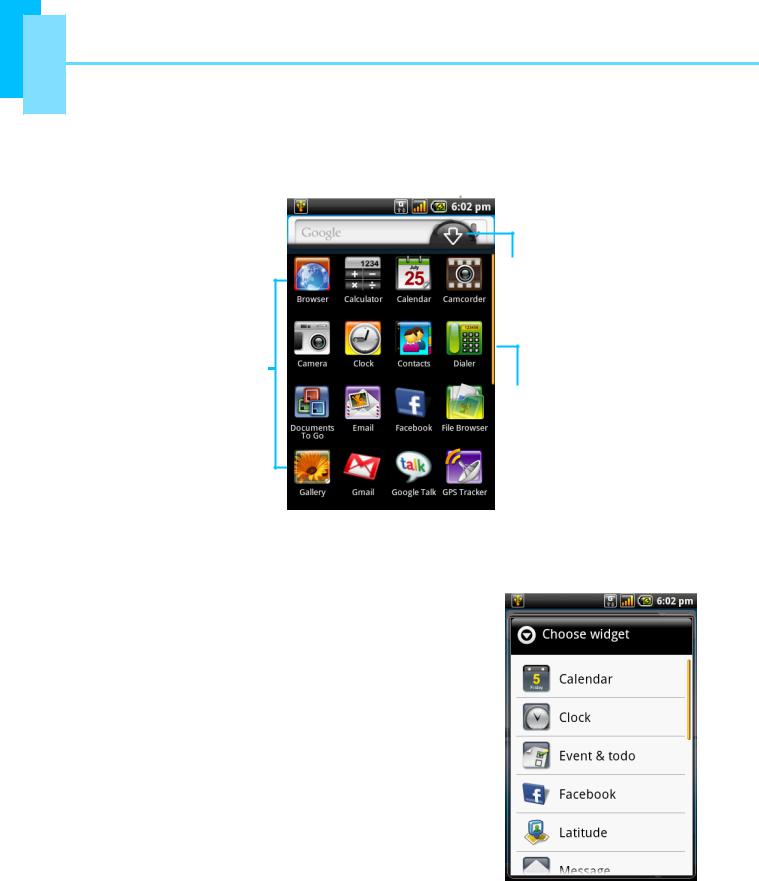
Application drawer
The Application drawer contains all applications and settings. Tap  to display the menu.
Tap to open/close the
Application drawer.
Tap an icon to open the application.
Drag or flick the menu up/down to access more applications on your phone.
Using widgets
Save time with live updates right on your Home screen and get all of your personalised updates in one place.
You may add and customise the Widgets on your Home screen as you like.
1.From the Home screen, tap Menu > Add >
Widgets.
2.A list of all available widgets is displayed. Tap to select the widget you want to appear on your Home screen.
To remove widgets:
1.From the Home screen, tap and hold the desired widget.
2. appears at the bottom of the Home screen.
3.Drag the widget to  to delete.
11
Chapter 2: The basics
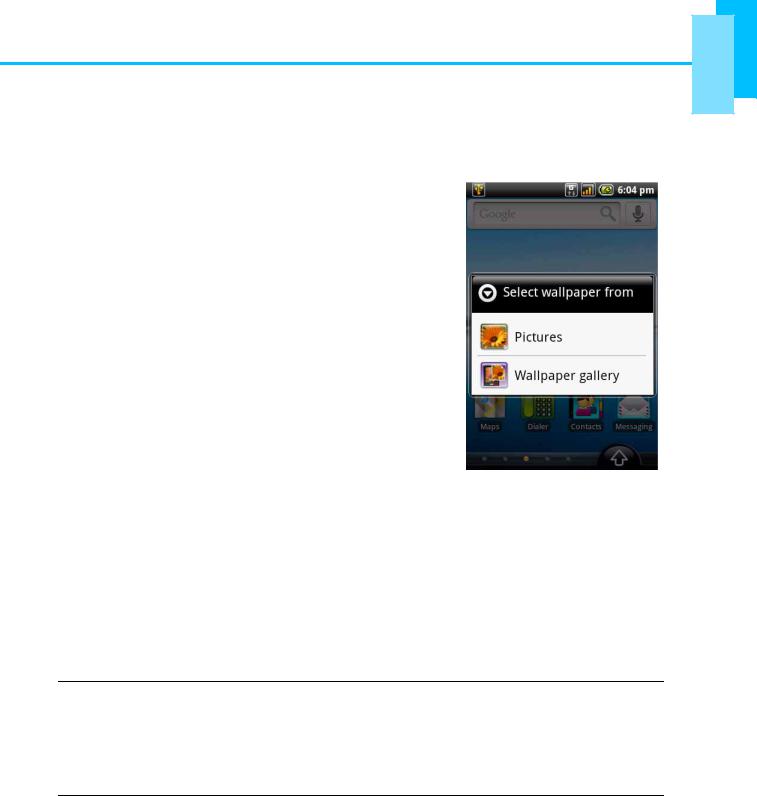
Setting the wallpaper
You can customise the wallpaper on your Home screen using default wallpaper or using pictures taken with your phone.
Set wallpaper from pictures
1.From the Home screen, tap Menu > Wallpaper.
2.Select wallpaper from is displayed on screen.
3.Tap Pictures.
4.You will see thumbnail images of all pictures. Tap to select the picture you want to use as wallpaper.
5.Drag your finger to select the crop area and tap inside the box to crop the image.
6.Tap Save and the cropped image appears as wallpaper on your Home screen.
Set wallpaper from Wallpaper gallery
1.From the Home Screen, tap Menu > Wallpaper.
2.Select wallpaper from is displayed on screen.
3.Tap Wallpaper gallery.
4.All system wallpapers are displayed. Tap to preview the wallpaper.
5.Tap Set wallpaper to apply your selection.
2.2 LED indicators
Your phone has two LED indicators: green and red. Whether your phone is turned on or off, the LED indicators provide useful information.
LED |
Location |
Indication |
|
|
|
Green |
Call key |
Battery is fully charged. |
(solid) |
|
|
|
|
|
Red |
End key |
Battery is charging. |
(solid) |
|
|
Note: When the phone is on, pressing the Call or End key will light all the LED indicators.
2.3 Adjusting the volume
Your phone features three types of volume which can be adjusted separately:
•Media volume: set the volume for music and videos.
•Ringer volume: set the volume for incoming calls and notifications.
•In-call volume: set the volume during a call.
12

Chapter 2: The basics
To adjust ringer volume
1.Tap Application drawer > Settings> Sound & display.
2.Tap Ringer volume or press the Volume key on the right side of your phone to activate the volume window.
3.Tap the slider for the volume you want to adjust.
4.Do either of the following:
a. Drag the slider right to increase or drag the |
Ringer volume slider |
|
slider left to decrease volume. |
||
|
b.Tap Silent mode to set the phone to silent mode
or drag down the slider until it clicks in place to switch to silent mode.
Note: when the phone is set to silent mode, all sounds are turned off except media and alarm.
3.Tap OK to save your settings.
4.Tap  to exit the menu.
To adjust in-call volume
1.During a phone call, press the Volume key on the right side of your phone.
2.Increase or decrease the volume by:
•Pressing the Volume key up or down.
•Using your finger to drag the slider left or right.
In-call volume slider
To adjust media volume
1.Tap Application drawer > Settings> Sound & display.
2.Tap Media volume to activate the volume window.
3.Tap the slider for the volume you want to adjust.
4.Increase or decrease the volume by:
•Pressing the Volume key up or down.
•Using your finger to drag the slider left or right.
5. Tap OK to confirm. |
Media volume |
|
slider |
13

Chapter 2: The basics
2.4 Contacts
Contacts lets you store names, phone numbers, email addresses and other information. Contacts are stored in the phone memory. You can save information such as names, pictures, phone numbers, email addresses, etc. You can also add the frequently used contacts to the favourites list. See “Favourite contacts” on page 16.
Adding a contact
1.On the Home screen, tap Contacts.
2.Tap Menu > New > Create contact.
3.Tap each field to enter the contact information using the on-screen keyboard.
Tips:
•To add a picture, tap Menu > Add icon, then select a picture file or take a photo of the
contact immediately. To take a photo of the contact, select Menu > Capture picture.
•To assign a ring tone, tap Ringtone then select a tone from the list.
4.Tap Done to save.
Searching for contacts
On the Contacts screen, do any of the following to easily search for contacts:
•Tap Menu > Search.
•Type the first few letters of the contact to search.
The list is filtered as you type.
•For example, to view names that start with “k”, tap “k” to see all contacts that start with “k”.
•To filter the contacts list by categories, tap Menu >
By group, then select one of the following options:
All contacts, Contacts with phone numbers or My contacts.
14
Chapter 2: The basics
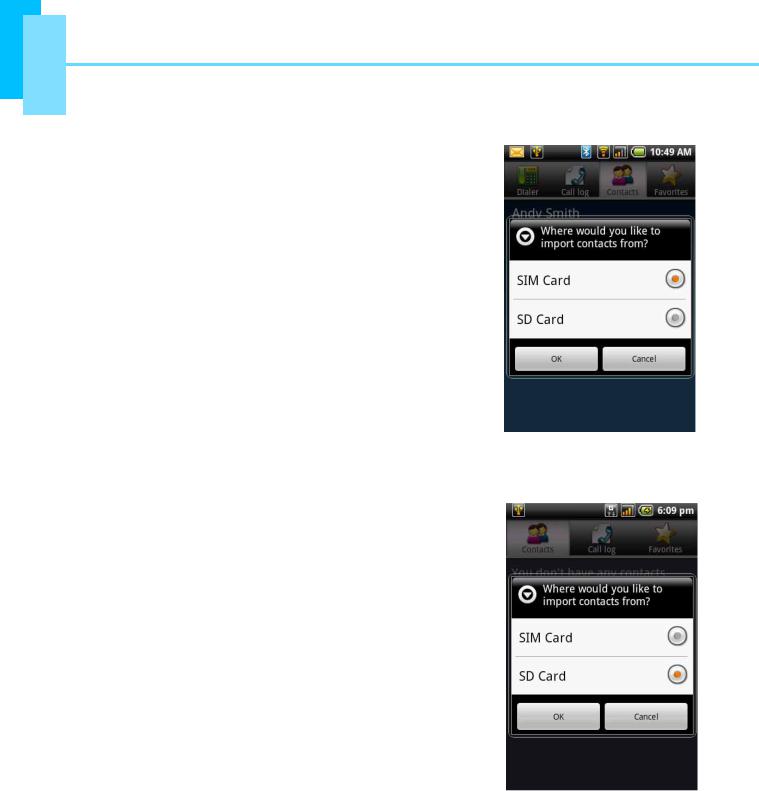
Importing contacts
Copy SIM contacts to the phone
1.From the Home screen, tap Contacts.
2.Tap Menu > Import > SIM card.
3.Tap OK.
Note:
•To copy a single contact, simply tap the contact, then edit contact information as in
“Adding a contact“.
•To copy all contacts, tap Menu > Import all. All contacts on the SIM card are imported.
Copy microSD contacts to the phone
1.From the Home screen, tap Contacts.
2.Tap Menu > Import > SD Card.
Note:
•To copy a single contact, simply tap the contact, tap Import one VCard file and tap to select the contact you want to copy. Then edit contact information as in “Adding a contact“.
•To copy all contacts, tap Import all VCard files. All contacts on the SD card are imported.
3.Tap OK.
15
Chapter 2: The basics
Backing up contacts
You can copy the contacts to the microSD memory card to back up the contact information or import contacts from the memory card to your phone.
Export contacts to the microSD memory card
1.From the Home screen, tap Contacts.
2.Tap Menu > Export contacts.
Note:
•Copying contacts to the microSD memory card will overwrite the old backup file.
3.A warning message pops up, tap OK to proceed. All contacts are copied to the memory card.
Import contacts from the microSD memory card
1.On the Home screen, tap Contacts.
2.Tap Menu > Import > SD card.
3.Tap OK.
4.The backup contacts are copied to the phone.
Favourite contacts
You can add the most frequently called contacts to the favourite contact list which helps you to access the contacts quickly and easily.
Add to favourites
1.From the Home screen, tap Contacts.
2.From the contact list, tap and hold the desired contact.
3.Tap Add to favourites.
A gold star will appear next to the contact name.
4.The contact is now in the favourites list.
Remove from favourites
1.From the Home screen, tap Contacts.
2.Tap the Favourites tab.
3.Tap and hold the desired contact.
4.Tap Remove from favourites.
16
Chapter 3: Making and answering calls
Chapter 3: Making and answering calls
To open the call features:
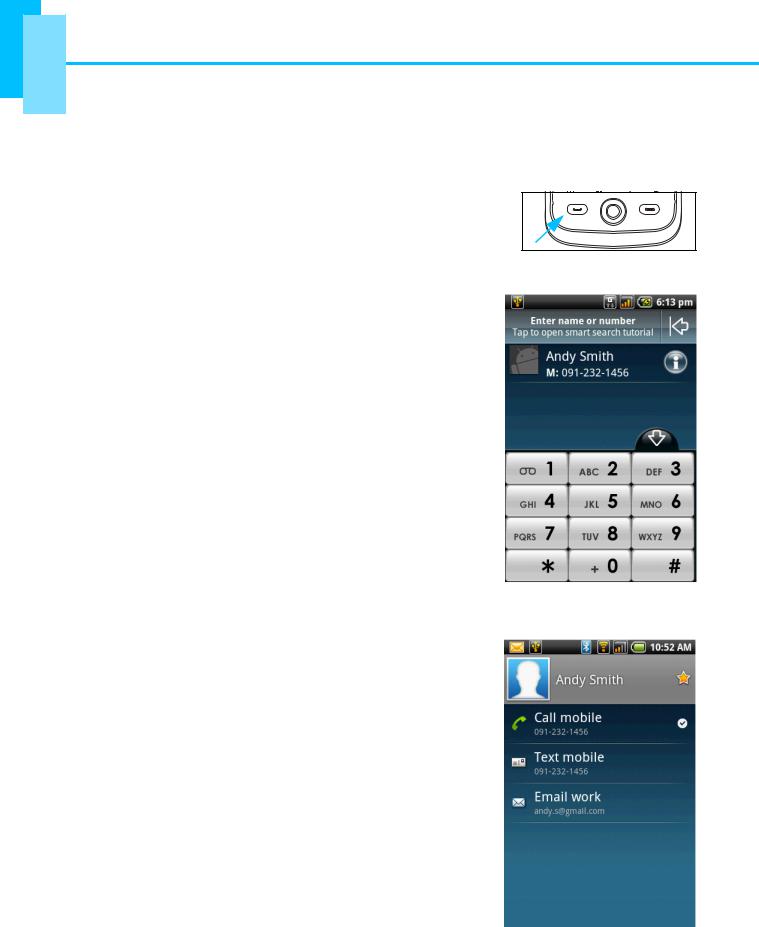
• On the Home screen, tap Dialler.
•From any application screen, press the Call key.
3.1 Voice calls
Making a call
To make a call from the phone screen
1.From the Home screen, tap Dialler.
2.Enter the phone number using the keypad.
Note: tap  to erase a wrong number. Tap and
hold  to erase the entire number.
3.Tap the phone number or press the Call key to dial.
4.To end the call, press the End key.
To make a call from contacts
1.From the Home screen, tap Contacts.
2.Tap the desired contact.
3.Tap Call mobile, Call work or Call home.
Alternatively press the Call key to dial the default number.
17
Chapter 3: Making and answering calls
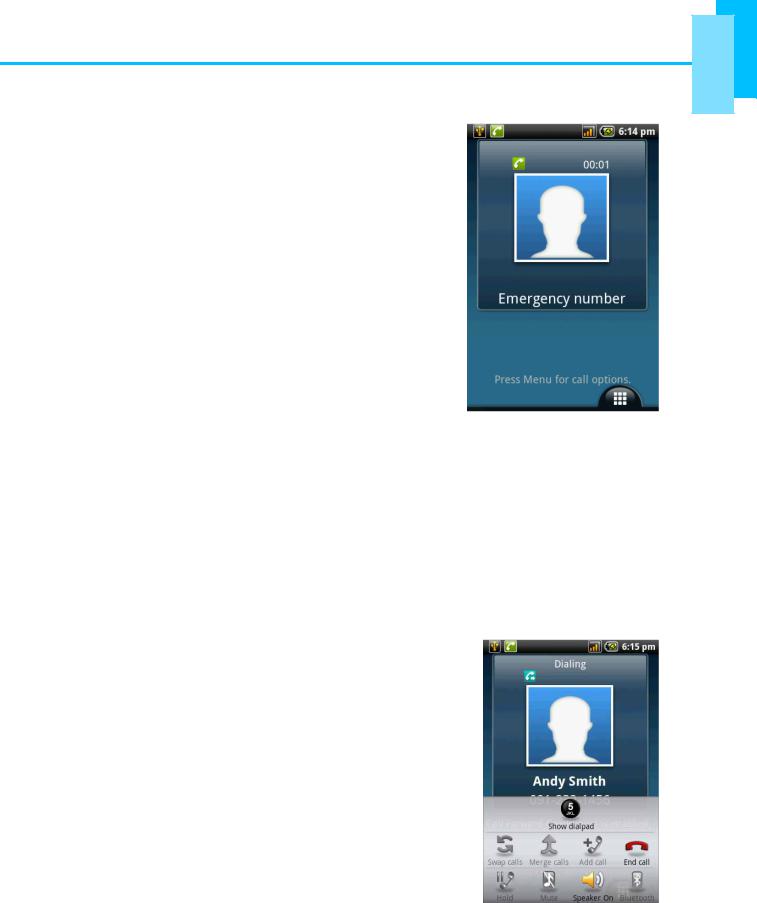
To make emergency calls
Emergency calls without a SIM card:
1.Open the phone screen.
2.Enter the emergency number using the keypad.
3.Tap the phone number or press the Call key.
To make international calls
1.Open the phone screen.
2.Tap and hold  until the international prefix code “+” is displayed.
3.Enter the country code, area code and the phone number.
4.Tap the phone number or press the Call key.
Answering a call
When you receive an incoming call:
•The phone rings (if the ring volume is turned on).
•A notification message appears on the screen.
To accept or reject an incoming call
•To accept the call, press the Call key.
•To reject the call, press the End key.
To put a call on hold
If a call comes in while you are already on another call, tap Hold to put the first call on hold.
To unhold a call, tap Hold again.
To switch between calls
If a call comes in while you are already on another call, tap Hold to put the first call on hold. Tap Swap calls
 to switch between calls.
To make a conference call
1.If you are already on a call, tap Hold to put the call on hold.
2.Tap Add  to display the dialpad and then enter the second number you wish to call.
3.Tap Merge calls  to set up the conference call.
18
Chapter 3: Making and answering calls
Note: conference call is a network service. Check with your network provider for the availability of this function.
To use other voice call features
•Tap Speaker to activate or deactivate the speakerphone.
•Tap Mute to mute or unmute the microphone.
•To view the call history, tap Menu > Dialler > Call log.
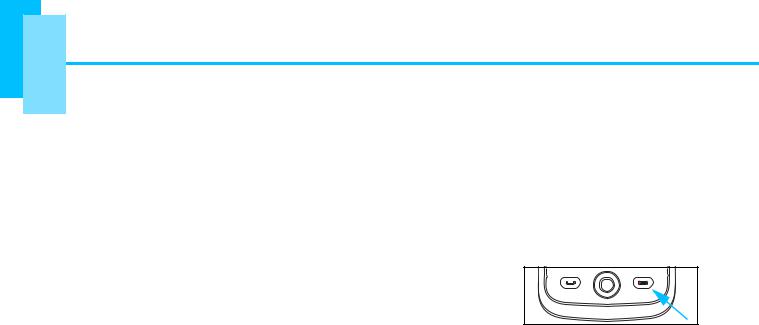
Ending a call
To end a call, tap End call  or press the End key.
19

Chapter 4: Entering information
Chapter 4: Entering information
4.1 On-screen keyboard
The keyboard appears when an application requires text input, such as messaging and writing emails. The keyboard input method is activated by default.
CAPs Lock
Tap to toggle between upper case or lower case. Dictionary: tap to enable
dictionary.
Input method selector: tap to choose your preferred input method.
Using the on-screen keyboard
Tap the screen to display the on-screen keyboard.
Lowercase keyboard |
Uppercase keyboard |
Numbers and symbols |
(default) |
|
|
|
|
|
•Use the keys on the on-screen keyboard as you would a computer keyboard.
•Tap the keys to enter the characters.
•To toggle between upper and lower case letter display, tap  .
.
•To display the numeric and symbols keyboard, tap  . Tap
. Tap  to toggle back.
20
Chapter 4: Entering information
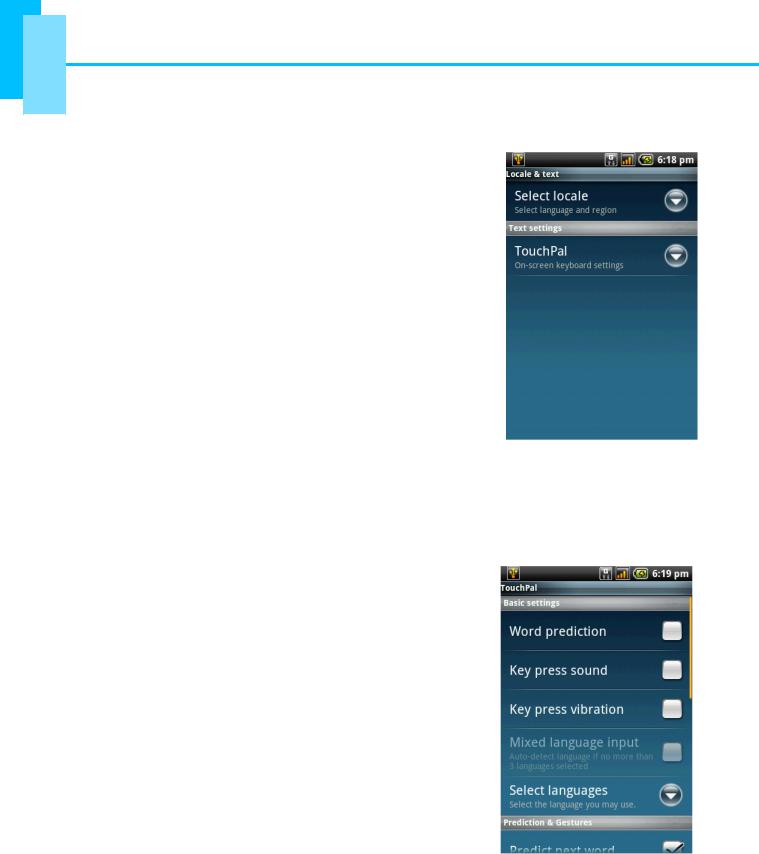
Setting the input method
Your phone supports several text input methods, select your preferred method.
1.Tap Application drawer > Settings > Locale & text.
2.In Text settings, you will see a list of the input methods. Select and check the options you prefer.
Changing the input method
1.Tap and hold any text field in an application. For instance, in Messaging, tap and hold the field “To:”.
The input method screen pops up.
2.You may select one of the available input methods to use.
4.2 Configuring phone keyboard settings
You can use the keyboard to help you enter text.
1.Tap Application drawer > Settings > Locale & text.
2.Tap TouchPal.
3.You can check all applicable options.
Keyboard setting options:
Setting option |
Description |
|
|
Word prediction |
Enables word prediction function. |
|
|
Key press sound |
Phone sounds when user presses any key on the on- |
|
screen keyboard. |
|
|
21
|
|
Chapter 4: Entering information |
|
|
|
|
|
|
|
|
|
||
|
|
|
|
|
|
|
|
Key press vibration |
Phone vibrates when user presses any key on the on- |
|
|
|
|
|
|
screen keyboard. |
|
|
|
|
|
|
|
|
|
|
|
|
Layout in portrait mode |
Select to change the keyboard layout in portrait mode. |
|
|
|
|
|
|
|
|
|
|
|
|
Layout in landscape |
Select to change the keyboard layout in landscape |
|
|
|
|
|
mode |
mode. |
|
|
|
|
|
|
|
|
|
|
|
|
Swipe to switch layout |
Enables swipe to change layout orientation function. |
|
|
|
|
|
|
|
|
|
|
|
|
Enable mixed |
Check to enable text input in different languages. |
|
|
|
|
|
language input |
|
|
|
|
|
|
|
|
|
|
|
|
|
Select languages |
Select the languages you want to use and switch |
|
|
|
|
|
|
between them on the main keyboard. |
|
|
|
|
|
|
|
|
|
|
|
|
Predict next word |
Automatically predicts the next word when entering text. |
|
|
|
|
|
|
|
|
|
|
|
|
Enable prediction |
Automatically predicts the word when entering text. |
|
|
|
|
|
|
|
|
|
|
|
|
Correct mistyping |
Automatically corrects spelling mistakes. |
|
|
|
|
|
|
|
|
|
|
|
|
Slide-down symbols |
Slide down on keys to input symbols. |
|
|
|
|
|
|
|
|
|
|
|
|
Relevant words |
Slide on candidates for relevant words |
|
|
|
|
|
|
(for example: run --> running, ran, runs). |
|
|
|
|
|
|
|
|
|
|
|
22
Chapter 5: Email & Messaging
Chapter 5: Email & Messaging
Use Messaging  to access text and MMS messages. Use Email
  to send and receive email messages via your internet email accounts.
To open messaging
•On the Home screen, tap  .
.
•From the Application Drawer, tap Messaging.
5.1 Text messages
A text message can only contain letters, numbers and symbols.
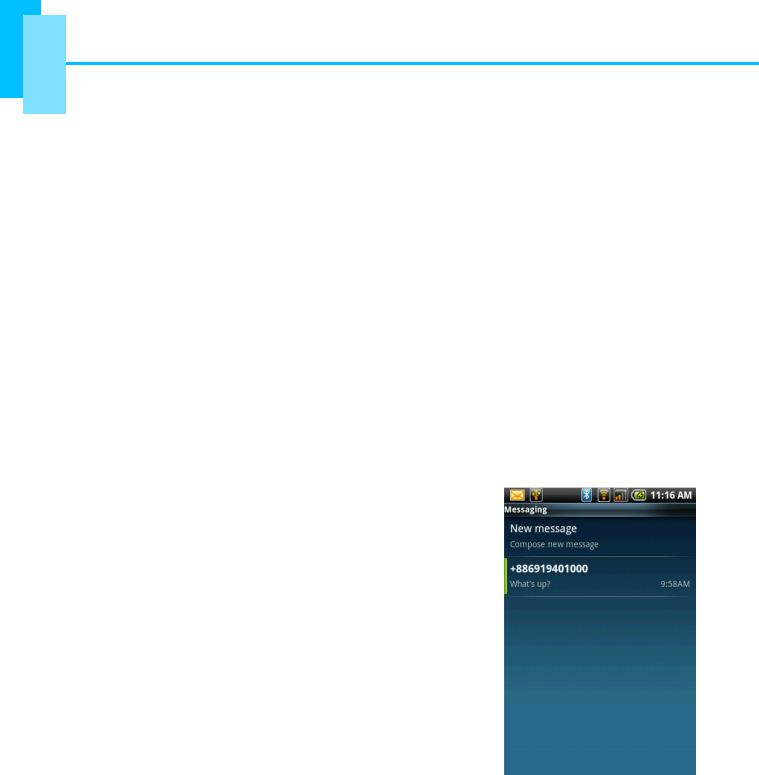
Creating and sending a text message
Your phone offers several ways to create and send a new text message.
From the Messaging screen
1.Tap New message.
The Compose screen is displayed.
2.In the To field, enter the recipient’s phone number.
Tip: To add recipients from Contacts, tap To and enter at least two numbers of a contact number or two characters of a contact name. Then the corresponding contact will be listed for you to select from.
3.Type your message in the Type to compose field.
4.Tap Send or press the Call key to send your message.
23
Loading...