


IPS Investment Ring System 300g
Table of contents
 Loading...
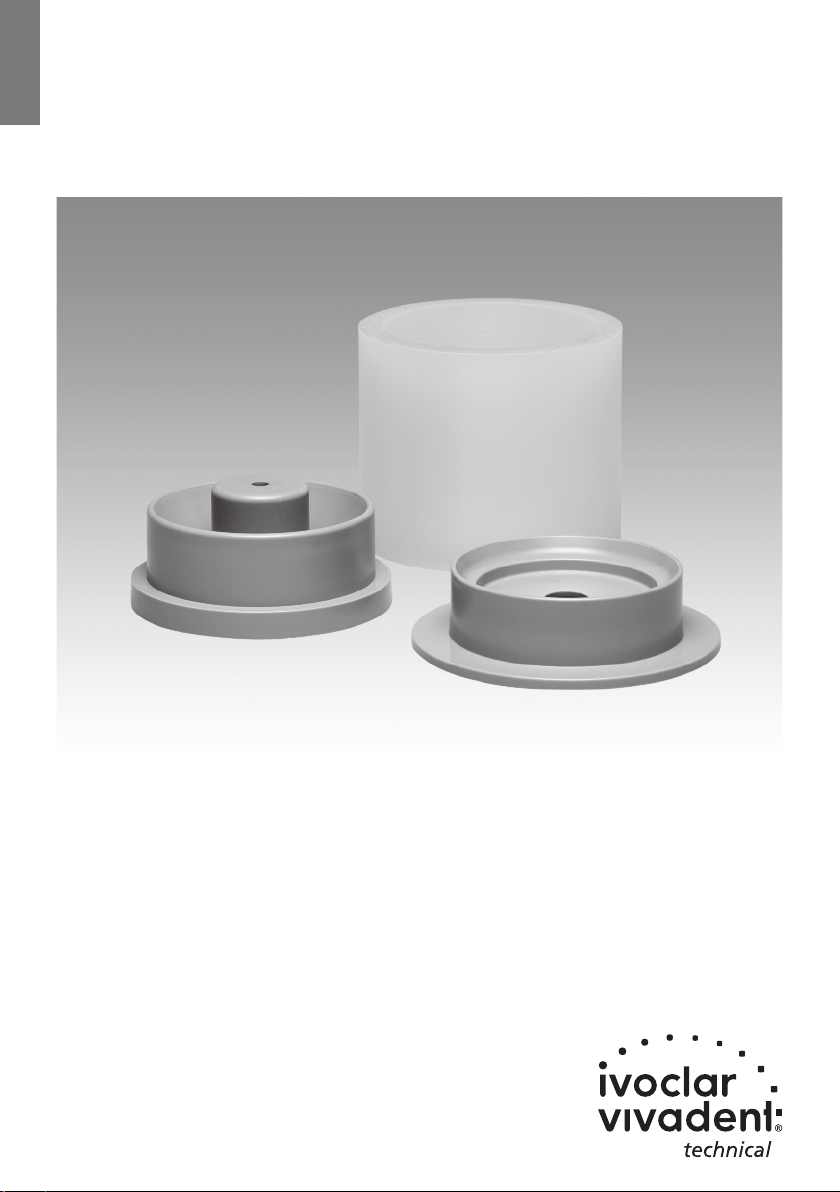
Investment Ring System
300 g
Instructions for Use
Verarbeitungsanleitung
Mode d’emploi
Istruzioni d’uso
Instrucciones de uso
Instruções de Uso
IPS
®
2
English
Instructions for Use
Product description
T
he IPS Investment Ring System 300g represents the latest
investment ring generation for the PRESS technology. It can be
u
sed for pressing on long-span frameworks, as well as for the
pressing on several smaller restorations in one working step.
The Investment Ring System is ideally compatible with existing
Ivoclar Vivadent press ingots and press furnaces.
Indications
– IPS e.max ZirPress
• Pressing on zirconium oxide frameworks up to a bridge
span width of 10 units (depending on the dimensions of
the dental arch)
• Pressing on several smaller zirconium oxide frameworks
– IPS Inline PoM
• Pressing on frameworks fabricated of a ceramic alloy up
to a bridge span width of 10 units (depending on the
dimensions of the dental arch)
• Pressing on several smaller frameworks fabricated of a
ceramic alloy
Limitations of use
– Casting of alloys
– All applications not explicitly approved as an indication
Delivery form
– IPS Investment Ring System 300 g – Starter Kit
1x Ring Base 300 g
1x Ring Gauge 300 g
1x IPS Silicone Ring 300 g
1x IPS Ingot Tongs
1x IPS Sprue Guide 300 g
10x IPS One-Way Plunger 300 g
The components are also individually available.
General note
– Only ingots of the same shade may be processed in one
press cycle.
– Failure to observe the stipulated contraindications and pro-
cessing instructions may lead to compromised press results.
Instructions for Use
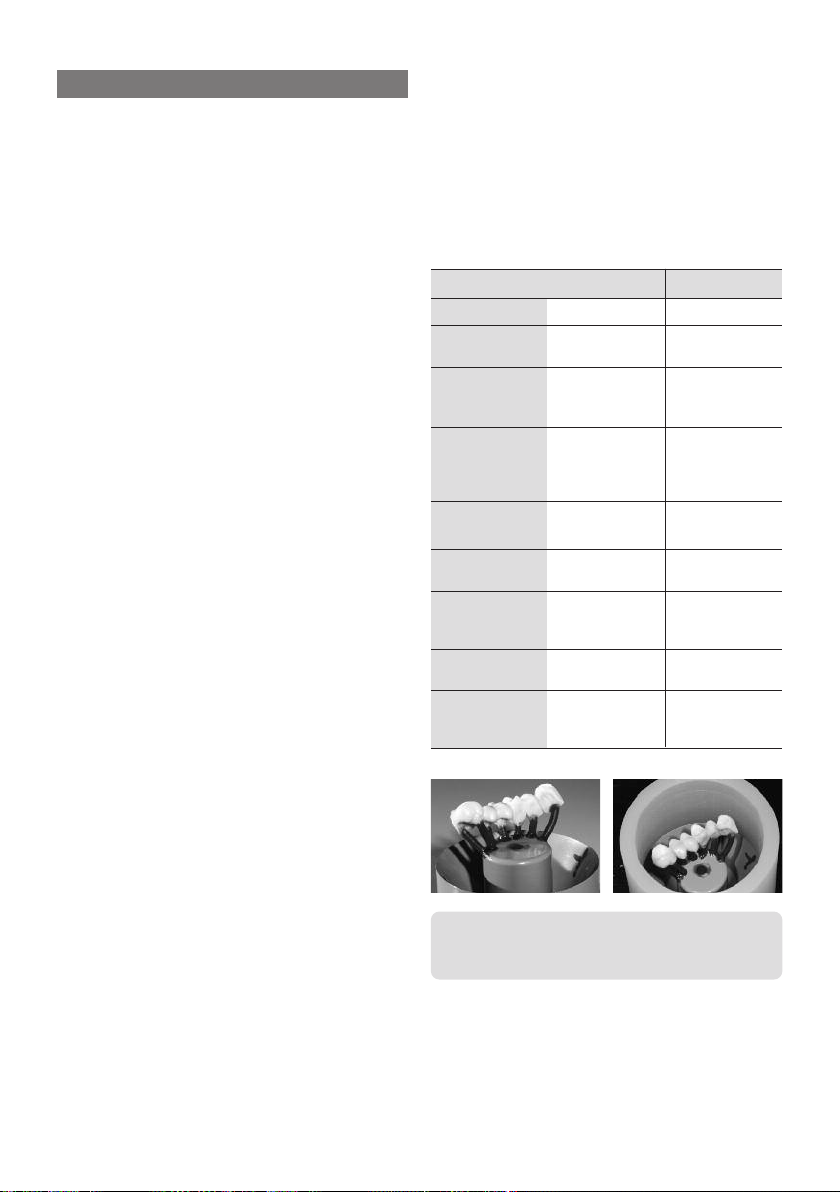
Sprueing
Always attach the sprues in the direction of flow of the ceramic
and at the thickest part of the wax-up so that smooth flowing
of the viscous ceramic during pressing is enabled.
We recommend the following procedure to determine the
accurate wax weight:
–
Weigh the framework (with the fired liner/opaquer).
– Weigh the IPS ring base 300 g (seal the opening of the
r
ing base with wax).
– Position the contoured restoration on the ring base and
a
ttach it with wax. Weigh again.
– The wax weight of the contoured restoration is calculated
by deducting the weight of the ring base and the weight
o
f the framework from the total wax weight.
The following sprueing guidelines must be observed:
Wax wire ø
Length of the wax
wire
Length of the wax
wire incl. waxed-up
objects
Sprue attachment
point at the waxed-
up object
Sprue angle to the
waxed-up object
Sprue angle to the
ring base
Design of the
attachment points
Distance between
the objects
Distance to the
IPS Silicone Ring
Single crowns
3 mm
min. 3 mm,
max. 12 mm
max. 16 mm
thickest part of
the wax-up
axial
45–60°
round and slightly
flared, no angles or
sharp edges
min. 3 mm
min. 10 mm
(Check with the
IPS Sprue Guide)
Bridges
3–4 mm
min. 3 mm,
max. 12 mm
max. 16 mm
thickest part of the
wax-up; bridge
pontics and each
bridge unit
axial
45–60°
round and slightly
flared, no angles or
sharp edges
min. 3 mm
min. 10 mm
(Check with the
IPS Sprue Guide)
Note:
By marking the position of the restoration on the rings,
subsequent divestment may be facilitated.
3
I
nvesting
I
nvesting is carried out using either IPS PressVEST (e.g. over-
night) or with IPS PressVEST Speed. Please refer to the
I
nstructions for Use of the corresponding investment material
for the detailed processing parameters. Please observe the
f
ollowing basic guidelines:
–
Do not use a debubblizer on the wax objects.
–
Mix the investment material. (Caution: The investment
material contains quartz powder. Therefore, avoid the
inhalation of dust)
– Use a suitable instrument for the fine investment of the
cavity. Make sure that the delicate wax margins are not
damaged.
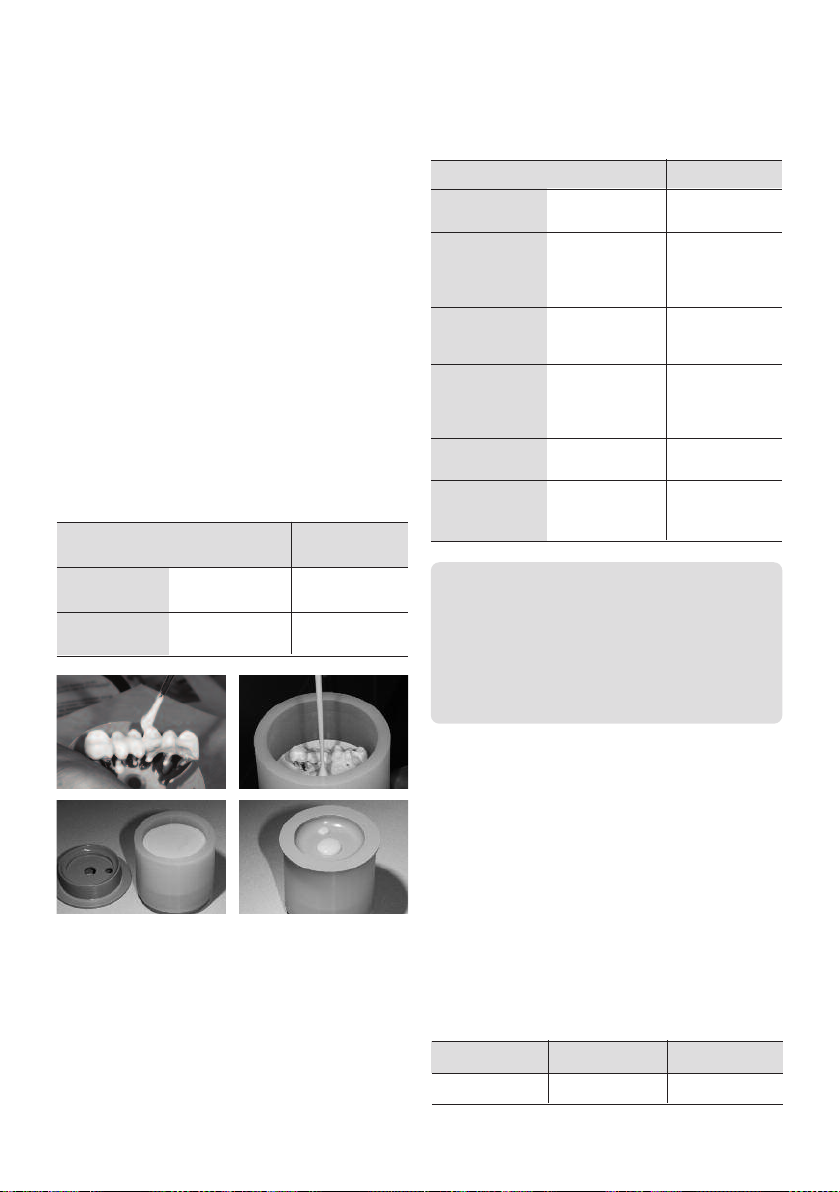
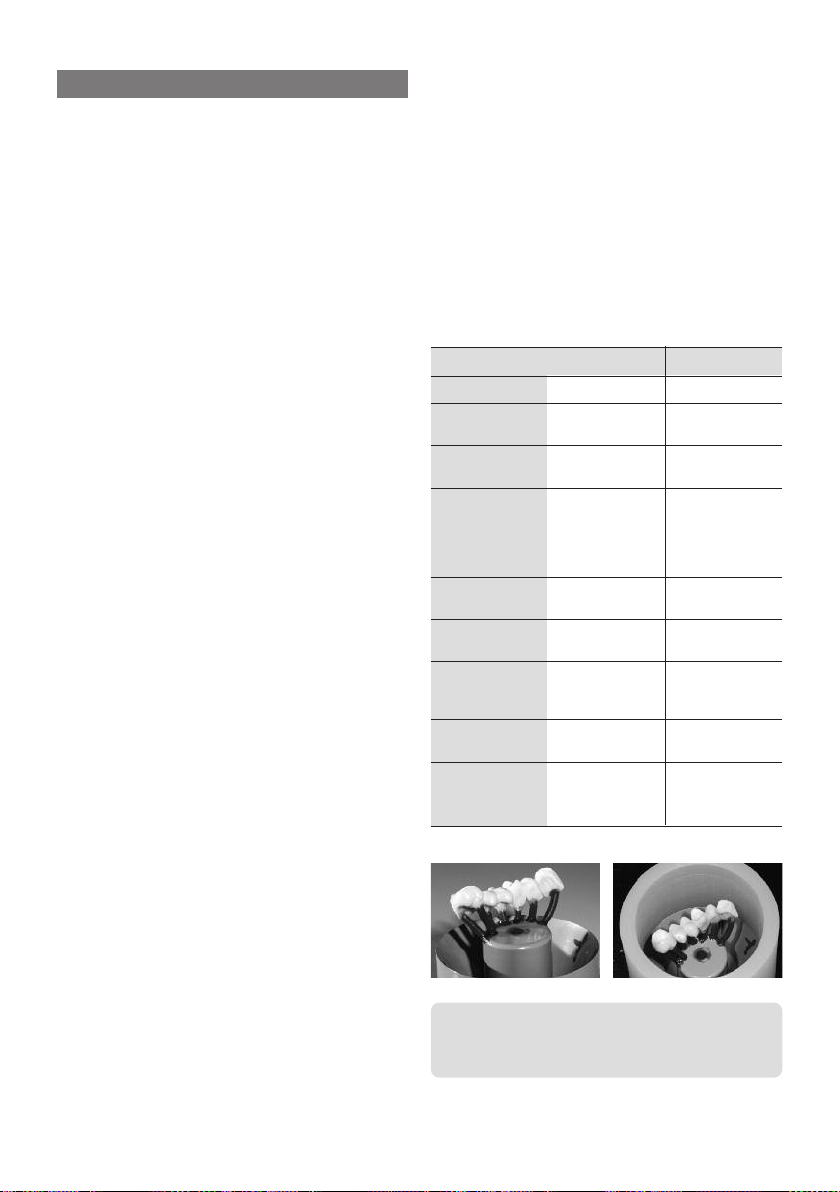
– Carefully place the IPS Silicone Ring 300 g on the IPS Ring
Base 300 g without damaging the wax objects. The silicone
ring must sit flush on the ring base.
– Carefully fill the investment ring with investment material
up to the marking on the silicone ring. Position the ring
gauge with a hinged movement to allow entrapped air to
escape through the eccentric hole.
– Allow the investment ring to set without manipulating it.
Investment material mixing ratio
Setting time
Preheating furnace
t
emperature upon
placing the
investment ring
Position of the in-
vestment ring in the
preheating furnace
IPS e.max ZirPress
ingots or
IPS Inline PoM
ingots
IPS One-Way
Plunger 300 g
Holding time at
final temperature
of 850 °C
IPS PressVEST
at least 60 min.
(max. 24 hours)
Room temperature
(
max. heating rate
5 °C/min)
at the rear wall,
with the opening
facing down
no preheating
no preheating
at least 90 min
IPS PressVEST Speed
at least 30 min. /
max. 45 min.
850 °C
at the rear wall,
with the opening
facing down
no preheating
no preheating
at least 90 min
IPS PressVEST
(300 g)
IPS PressVEST
Speed (300 g)
Single tooth and
bridge frameworks
Single tooth and
bridge frameworks
Liquid :
Distilled Water
39 ml : 27 ml
48 ml : 33 ml
Number of ingots
Wax weight
3 ingots
max. 2.2 g
6 ingots
max. 5.1 g
Note:
If several Speed investments are to be conducted, they
should be invested consecutively and placed into the pre-
heating furnace at an interval of approximately 20 minutes.
Make sure that the furnace temperature does not drop too
much when placing the investment rings into the preheating
furnace.The stipulated holding time counts from the point
when the preheating temperature has been reached again.
Preheating
After the stipulated setting time of the respective investment
material (IPS PressVEST or IPS PressVEST Speed), the
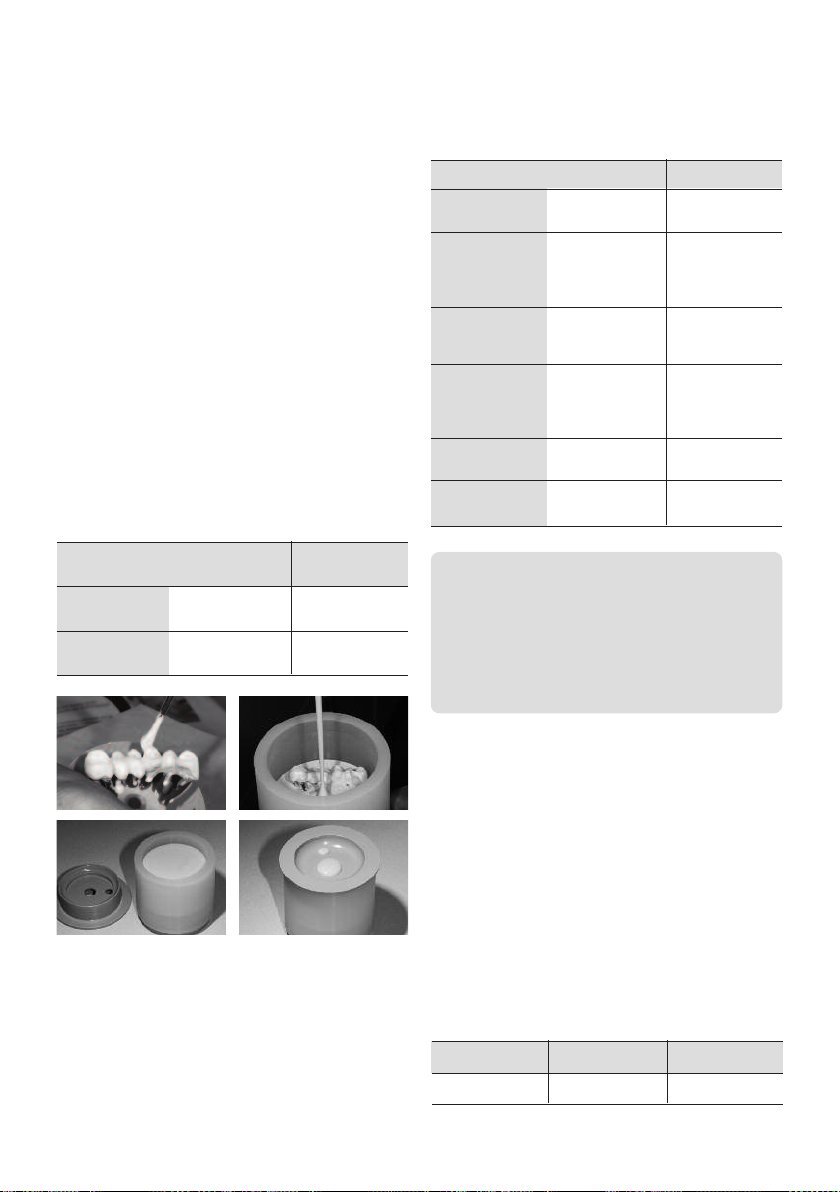
investment ring is prepared for preheating as follows:
– Remove the ring gauge and ring base with a turning
movement.
– Carefully push the investment ring out of the IPS Silicone
Ring.
–
Remove rough spots on the bottom surface of the
i
nvestment ring with a plaster knife. Check the 90° angle.
Investment material residue must not enter the sprues.
B
low into the sprues if necessary.
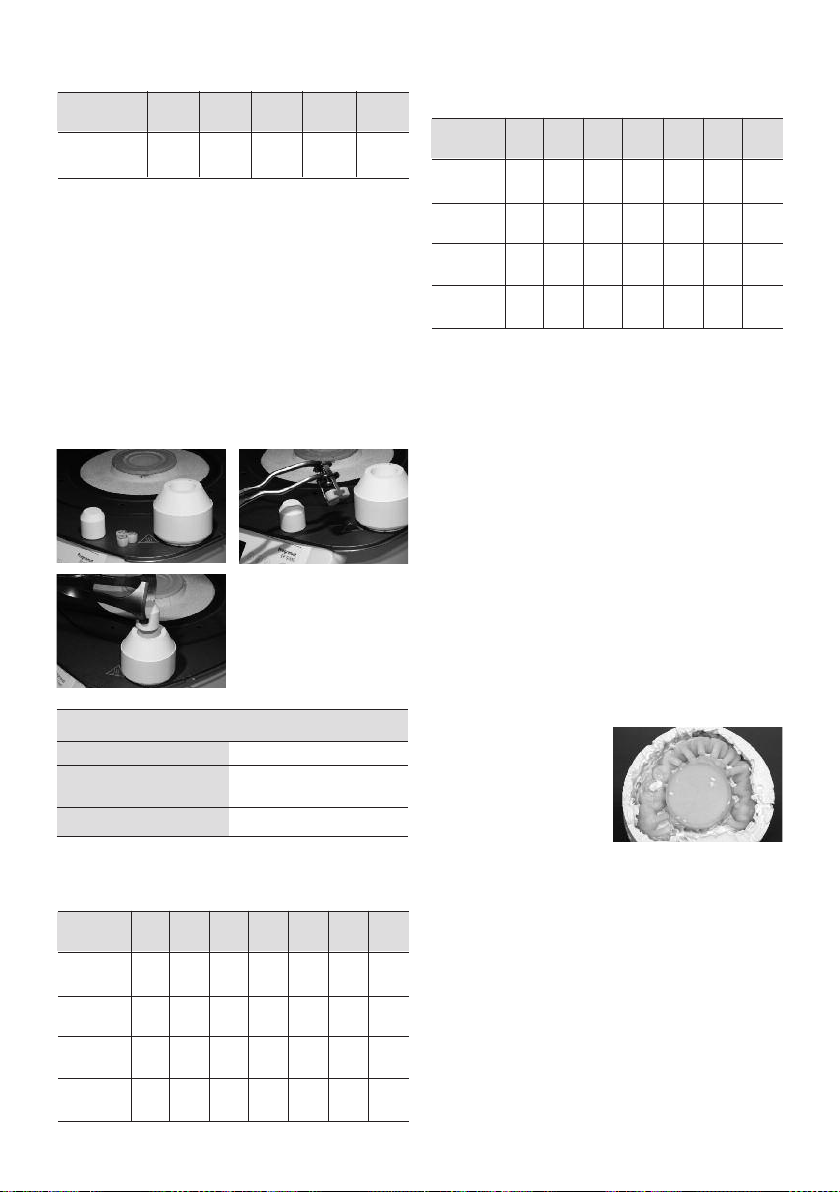
Pressing
Carry out the following preparatory steps for pressing before
the preheating cycle for the investment ring has been
completed:
– Switch on and preheat the press furnace in time. Observe
the special press parameters for the IPS Investment Ring
System 300 g.
– Provide a cold IPS One-Way plunger
– Provide cold ingots in the required shade and pick them up
with the IPS Ingot Tongs.
Ingot selection
–3–6 ingots should always be used per press cycle
– with IPS InLine PoM either only small or only large ingots
must be used per layer.
IPS e.max ZirPress
4
Remove the investment ring from the preheating furnace
i
mmediately after completion of the preheating cycle.This step
may take max. 1 minute to prevent the investment ring from
cooling down too much.
– Place the cold ingots in the hot investment ring using the
IPS Ingot Tongs.
– Place the IPS One-Way plunger in the hot investment ring.
– Place the completed investment ring in the center of the
hot press furnace using the investment tongs.
– The selected press program is started by pressing "START"
– After the press cycle has ended, immediately remove the
investment ring and place it on a cooling grid.
Number 3x 6x 3x 6x 3x XS +
o
f Ingots XS XS SS3x S
W
ax weight max. max. max. max. max.
1.4 g 3.0 g 2.1 g 5.1 g 4.1 g
I
PS InLine PoM
Press B tÀ T HV
1
V
2
A
Furnaces °C °C/min °C min °C °C
EP500 (V2.9) 700 60 940 40 500 940
Progr.
31-51
EP600 /
700 60 930 40 500 930
250
EP600 Combi
µm/min
EP 3000 700 60 930 40 500 930
250
µm/min
EP 5000 700 60 930 40 500 930
250
µm/min
Press parameters for IPS e.max ZirPress
(Please observe the parameters for your press furnace!)
P
ress
B
tÀ T HV
1
V
2
A
Furnace
°C °C/min °C min °C °C
E
P500 (V2.9) 700 60 960 40 500 960
Progr.
3
1-51
E
P600 /
700 60 950 40 500 950
5
0
EP600 Combi
µm/min.
E
P 3000 700 60 950 40 500 950
50
µm/min.
EP 5000 700 60 950 40 500 950
50
µm/min.
P
ress parameters for IPS Inline PoM
(Please observe the parameters for your press furnace!)
Divesting
Once the investment ring has cooled to room temperature
(approx. 60 minutes), divest as follows:
– Mark the length of the plunger on the cooled investment
ring.
– Separate the investment ring using a separating disk. This
predetermined breaking point enables reliable separation
of the investment material and the ceramic.
– Break the investment ring at the predetermined breaking
point using a plaster knife.
– Always use polishing beads to divest the pressed objects.
Do not use Al
2
O
3
for rough and fine divestment.
– Rough divestment is carried out at 4 bar (60 psi) pressure,
while fine divestment is done at 2 bar (30 psi) pressure.
– Observe the blasting direction and distance to prevent
damage to the object margins during divestment.
Note
For long-span restorations,…
– it is recommended to cut the sprues while the restoration
is still in the investment
ring in order to relieve
tensions before final
divestment.
– make sure not to damage
the restoration when
cutting the various sprues.
Date information prepared:
09/2008
Manufacturer:
Ivoclar Vivadent AG, FL-9494 Schaan / Liechtenstein
The material has been developed solely for usein dentistry. Processing should be carried out
strictly according to the Instructions for Use. Liability cannot be accepted for damages resulting
from failure to observe the Instructions or the stipulated area of application. The user is
responsible for testing the material for its suitability and use for any purpose not explicitly sta-
ted in the Instructions. Descriptions and data constitute no warranty of attributes and are not
binding.
maximum number of ingots
IPS e.max ZirPress ingots or
IPS Inline PoM ingots
IPS One-Way-Plunger 300 g
6 ingots
cold ingots
cold plunger
IPS Investment Ring System 300 g
5
Deutsch
Verarbeitungsanleitung
Produktbeschreibung
D
as IPS Muffelsystem 300 g ist die neueste Muffelgeneration
für die PRESS-Technologie. Es kann sowohl für das Überpressen
v
on weitspannigen Gerüsten als auch für die Überpressung
mehrerer kleinerer Restaurationen in einem Arbeitsvorgang ver-
wendet werden. Das Muffelsystem ist auf die bestehenden
Ivoclar Vivadent Pressrohlinge und Pressöfen abgestimmt und
bietet so eine ideale Kompatibilität.
Indikationen
– IPS e.max ZirPress
• Überpressen von Gerüsten aus Zirkoniumoxid bis zu einer
Brückenspannweite von 10 Gliedern (je nach Dimension
des Zahnbogens)
• Überpressen mehrerer kleiner Gerüste aus Zirkoniumoxid
– IPS Inline PoM
• Überpressen von Gerüsten aus einer Aufbrennlegierung
bis zu einer Brückenspannweite von 10 Gliedern (je nach
Dimension des Zahnbogens)
• Überpressen mehrerer kleiner Gerüste aus einer
Aufbrennlegierung
Anwendungseinschränkung
– Giessen von Legierungen
– Alle Anwendungen, die nicht als Indikation freigegeben
sind
Lieferform
– IPS Muffelsystem 300 g – Starter Kit
1x Muffelbasis 300 g
1x Muffellehre 300 g
1x IPS Silikon Ring 300 g
1x IPS Rohlingzange
1x IPS Sprue Guide 300 g
10x IPS Einwegkolben 300 g
Komponenten auch einzeln erhältlich
Grundsätzlicher Hinweis
– In einem Pressvorgang können nur gleichfarbige Rohlinge
verwendet werden.
– Das Nichtbeachten der aufgeführten Anwendungs-
einschränkungen sowie Gebrauchsvorschriften kann zu
Misserfolg führen.
Gebrauchsvorschriften
Anstiften
Die Anstiftung immer in Fliessrichtung und an der dicksten
Stelle der Modellation anbringen, so dass ein störungsfreies
Fliessen der viskosen Keramik beim Pressvorgang möglich ist.
Z
ur Bestimmung des Wachsgewichtes empfiehlt sich folgende
Vorgehensweise:
–
Abwiegen des Gerüstes (mit aufgebranntem Liner, bzw.
Opaquer)
–
Abwiegen der IPS Muffelbasis 300 g (Öffnung der
Muffelbasis zuvor mit Wachs verschliessen)
– Die modellierte Restauration auf der Muffelbasis aufwach-
s
en und nochmals abwiegen
– Das Wachsgewicht der Modellation errechnet sich dann
aus Gesamtgewicht abzüglich Gewicht Muffelbasis abzüg-
lich Gewicht Gerüst.
Folgende Richtlinien sind beim Anstiften unbedingt zu
beachten:
Wachsdraht ø
Länge Wachsdraht
Länge Wachsdraht
inkl. -objekt
Anstiftpunkt am
Wachsobjekt
Anstiftwinkel zum
Wachsobjekt
Anstiftwinkel auf
der Muffelbasis
Gestaltung der
Anstiftstellen
Abstand zwischen
den Objekten
Abstand zum
IPS Silikon Ring
Einzelkronen
3 mm
min. 3 mm,
max. 12 mm
max. 16 mm
dickste Stelle der
Modellation
axial
45–60°
rund und leicht
auslaufend, keine
Ecken und Kanten
min. 3 mm
min. 10 mm
(Kontrolle durch
IPS Sprue Guide)
Brücken
3–4 mm
min. 3 mm,
max. 12 mm
max. 16 mm
dickste Stelle der
Modellation, an den
Brückenpfeilern und
an jedem
Brückenglied
axial
45–60°
rund und leicht
auslaufend, keine
Ecken und Kanten
min. 3 mm
min. 10 mm
(Kontrolle durch
IPS Sprue Guide)
Hinweis: Durch Markierung der Lage der Restauration auf
der Muffelbasis kann das spätere Ausbetten erleichtert
werden.
6
E
inbetten
D
as Einbetten kann je nach Belieben mit IPS PressVEST
(z. B. über Nacht) oder mit IPS PressVEST Speed erfolgen. Die
d
etaillierten Verarbeitungsparameter sind der jeweiligen
Einbettmassen-Verarbeitungsanleitung zu entnehmen. Bitte
f
olgende grundsätzliche Vorgehensweise beachten:
–
Wachsobjekte nicht mit Wachsentspannungsmittel
e
insprühen
– Einbettmasse anrühren (Achtung: Einbettmasse enthält
Quarzmehl – daher die Inhalation von Staub vermeiden)
– Feineinbettung der Kavität mit einem geeigneten
Instrument vornehmen. Darauf achten, dass die feinen
Wachsränder nicht beschädigt werden
– IPS Silikon Ring 300 g vorsichtig auf die IPS Muffelbasis
300 g aufstecken, ohne die Wachsobjekte zu beschädigen.
Der Silikonring muss ganz auf der Muffelbasis aufsitzen
– Anschliessend die Muffel vorsichtig bis zur Markierung am
Silikonring mit Einbettmasse auffüllen und die
IPS Muffellehre 300 g mit einer Kippbewegung aufstecken,
so dass die eingeschlossene Luft durch die exzentrische
Bohrung entweichen kann
– Eingebettete Muffel erschütterungsfrei abbinden lassen
Mischungsverhältnis Einbettmasse
Abbindezeit
TemperaturVor-
w
ärmofen beim
Einbringen der
Muffel
Position der Muffel
im Vorwärmofen
IPS e.max ZirPress
Rohlinge oder
IPS Inline PoM
Rohlinge
IPS Einwegkolben
300 g
Haltezeit auf End-
temperatur 850°C
IPS PressVEST
mind. 60 Min.
(max. 24 Stunden)
Raumtemperatur
(
max. Aufheizrate
5°C/min)
rückwändig,
mit der Öffnung
nach unten
nicht vorwärmen
nicht vorwärmen
mind. 90 Min.
IPS PressVEST Speed
mind. 30 Min. /
max. 45 Min.
850 °C
rückwändig,
mit der Öffnung
nach unten
nicht vorwärmen
nicht vorwärmen
mind. 90 Min.
IPS PressVEST
(300 g)
IPS PressVEST
Speed (300 g)
Einzelzahn- und
Brückengerüste
Einzelzahn- und
Brückengerüste
Liquid :
destilliertes Wasser
39 ml : 27 ml
48 ml : 33 ml
Anzahl Rohlinge
Wachsgewicht
3 Rohlinge
max. 2,2 g
6 Rohlinge
max. 5,1 g
Hinweis:
Werden mehrere Speed Einbettungen vorgenommen, sollten
diese zeitversetzt eingebettet werden und deren Einbringung
in den Vorwärmofen zeitversetzt im Intervall von ca. 20 Min.
erfolgen. Beim Bestücken des Vorwärmofens mit Muffeln
darauf achten, dass die Ofentemperatur nicht zu stark
abfällt. Die angegebene Haltezeit gilt ab Wiedererreichen
der Vorwärmtemperatur.
Vorwärmen
Nach vorgegebener Abbindezeit der jeweiligen Einbettmasse
(IPS PressVEST oder IPS PressVEST Speed) wird die Muffel zum
Vorwärmen wie folgt vorbereitet:
– Muffellehre und Muffelbasis mit einer Drehbewegung ent-
fernen
– Muffel vorsichtig aus dem IPS Silikon Ring drücken
–
Störstellen auf der Standfläche der Muffel mit einem
G
ipsmesser entfernen und den 90° Winkel kontrollieren.
Dabei dürfen keine Einbettmassenreste in den Presskanal
g
elangen, gegebenenfalls ausblasen.
Pressvorgang
Bevor der Vorwärmzyklus der Muffel beendet ist, sind folgende
Vorbereitungen zum Pressen vorzunehmen:
– Pressofen rechtzeitig einschalten und vorwärmen. Spezielle
Pressparameter für das IPS Muffelsystem 300 g beachten.
– Kalten IPS Einwegkolben 300 g bereitstellen
– Kalte Pressrohlinge in der benötigten Farbe bereitstellen
und mit der IPS Rohlingszange aufnehmen.
Auswahl der Rohlinge
– Bei der Pressung müssen immer 3 bzw. 6 Rohlinge ver-
wendet werden
– Bei IPS InLine PoM dürfen entweder nur kleine oder nur
grosse Rohlinge pro Lage verwenden
IPS e.max ZirPress
Loading...