


IPS e.max Ceram
Ceram
all ceramic
all you need
I N S T R U C T I O N S F O R U S E
Table of contents
3 IPS e.max System – one system fo every indication
Ceram
PR OD UC T
IN FO RM ATI ON
4 Product Information
Material
Usage
Composition
Firing behaviour and firing process
Scientific data
9 Practical Use
Shade determination
Layering diagram
Framework design
Tips and tricks on layering
19 Processing on ZrO2Frameworks
Preparing the framework
ZirLiner firing
1stMargin firing (optional)
2ndMargin firing (optional)
Wash firing
1stDentin / incisal firing
2ndDentin / incisal firing
Finishing and preparing for the Stains and Glaze firing
Stain and Glaze firing
Add-On firing
35 Abutment Technique – Pressing on the Straumann®Anatomic IPS e.max®Abutment
Preparing the Straumann® Anatomic IPS e.max® Abutment
Adaptation of the emergence profile
Direct firing of IPS e.max Ceram
PR AC TI CA L USE
49 Gingiva Technique
Framework Design Criteria
Framework Preparation and Application of IPS e.max Ceram ZirLiner
Contouring
Sprueing, Investing
Veneering with IPS e.max Ceram
52 Veneers
54 One for 4
59 Seating and Follow-Up Care
Possibilities for Cementation
Preparing for Cementation
Care notes
-
TI ON
IN FO RM A
Ceram
62 General Information
Questions and Answers
Combination tables
Firing parameters
2

®
e.max
IPS
System –
A L L Y O U N E E D
IPS e.max – one system for every indication
IPS e.max is an innovative all-ceramic system which covers the entire all-ceramic indication range – from
Thin Veneers to 12-unit bridges.
IPS e.max delivers high-strength and highly esthetic materials for the Press and the CAD/CAM
technologies. The system consists of innovative lithium disilicate glass-ceramics used mainly for singletooth restorations and high-strength zirconium oxide for large-span bridges.
Every patient situation presents its own requirements and objectives. IPS e.max meets these requirements,
because due to the system components you obtain exactly what you need.
– The components for the Press technology include the highly esthetic IPS e.max Press lithium disilicate
glass-ceramic ingots and the IPS e.max ZirPress fluorapatite glass-ceramic ingots for the fast and
efficient press-on-zirconium oxide technique.
– Depending on the case requirements, two types of materials are available for the CAD/CAM
technique: the innovative IPS e.max CAD lithium disilicate glass-ceramic blocks and the IPS e.max
ZirCAD high-strength zirconium oxide.
– The nano-fluorapatite layering ceramic IPS e.max Ceram, which is used to characterize/veneer all
IPS e.max components – glass or oxide ceramics –, completes the IPS e.max System.
IPS e.max Ceram
The versatile layering ceramic is optimally coordinated with the materials of the IPS e.max System.
Matching the shade when using different framework materials is clearly facilitated by the universal
layering diagram and the precise shade coordination. After all, the veneering ceramic is the key to highly
esthetic results within the IPS e.max System – both on lithium disilicate (LS2) and zirconium oxide (ZrO2).
The unique combination of translucency, brightness and opalescence leads to natural light scattering and
a balanced relationship between brightness and chroma.
In addition to the traditional dentin and incisal materials in A–D, Chromascop and Bleach shades, there is
a sophisticated range of additional materials (Impulse, Essence, Stains, etc.) for individual esthetics during
internal and external characterization. With the Gingiva ceramic materials, true-to-nature gingival areas
are designed, which are particularly important for implant-retained restorations.
3
®
e.max
IPS
Ceram
Product Information
Material
IPS e.max Ceram is a low-fusing
nano-fluorapatite glass-ceramic
which permits the veneering and
characterization of restorations
fabricated using either the press
technology and/or the CAD/CAM
technology. This glass-ceramic,
which contains nano-fluorapatite
crystals, demonstrates a crystal structure similar to that of vital
teeth. The optical properties are controlled by the nanofluorapatite crystals in the size range of 100–300 nm and microfluorapatite crystals with a length of 1–2 µm. The individual
IPS e.max Ceram materials contain different concentrations of the
apatite crystals, which then enable a unique and adjustable
combination of translucency, brightness and opalescence,
depending on the type of layering material. The IPS e.max ZirLiners
are yet another innovation of this new material concept. They
enable an exceptionally good bond with the zirconium oxide framework and demonstrate high light transmitting capability coupled
with high fluorescence. They thus make the white and not very
translucent zirconium oxide frameworks look as if they have been
shaded and permit the adjustment of the basic zirconium oxide
shade of the framework to the shade of the IPS e.max Press and
IPS e.max CAD glass-ceramics. In this way, the achieved layering
concept permits the fabrication of highly esthetic restorations that
demonstrate optimum stability of shape both on shaded/translucent
glass-ceramic frameworks and on less translucent zirconium oxide
frameworks. The uniform material composition and, consequently,
homogeneous clinical properties, irrespective of the framework
material used, underlines the comprehensive IPS e.max restorative
concept.
IPS e.max Ceram is based on the tried-and-tested shade concept of
other Ivoclar Vivadent veneering materials. In this way, a continuous
concept covering composites, metal-ceramics and all-ceramics has
been achieved. The easy application makes the time-consuming
re-familiarization with the individual veneering materials a thing of
the past.
CTE (100–400°C) [10-6/K] 9.5
Flexural resistance (biaxial) [MPa]* 90
Vickers hardness [MPa] 5400
Chemical solubility [µg/cm2]* 15
Firing temperature [°C/°F] 750/1382
*according to ISO 6872
Ivoclar Vivadent Shade Concept
®
SR
Adoro
d.SIGN®/ InLine
IPS
IPS
®
e.max
IPS
Ceram
®
4

Usage
Composition
Indications
– Characterization and veneering of IPS e.max Press restorations
– Characterization and veneering of IPS e.max ZirPress restorations
– Characterization and veneering of IPS e.max CAD restorations
– Characterization and veneering of IPS e.max ZirCAD frameworks
– Characterizing and veneering Straumann®Anatomic IPS e.max
®
Abutments
– Characterization and veneering of frameworks, implant
abutments and implant superstructures made of
– sintered zirconium oxide and/or HIP zirconium oxide, as well as
– presintered zirconium oxide
and demonstrating a CTE range of 10.5-11.0 x 10⁻⁶K
-1
[100-500 °C].
– Layered veneers on fire-resistant investment materials
– Creation of gingival portions on restorations made of IPS e.max
ZirCAD or IPS e.max ZirPress
Contraindications
– Patients with severely reduced residual dentitions
– Patients suffering from bruxism
– Any other use not listed in the indications
Important processing restrictions
If the following notes are not observed, successful work with
IPS e.max Ceram cannot be ensured:
– The necessary veneering layer thickness must be observed.
– The required layer thickness relation between the framework and
the layering ceramic must be observed.
– IPS e.max Ceram materials must not be mixed with other dental
ceramics
– Zirconium oxide frameworks with a CTE different from the one
stipulated must not be veneered.
– Veneering of zirconium oxide frameworks which were not con-
ditioned according to the stipulations for IPS e.max ZirCAD, e.g.
blasting with Al2O3.
– Metal-frameworks must not be veneered.
– Other pressed ceramics (e.g. IPS Empress®Esthetic) must not be
veneered.
– Aluminium oxide frameworks (e.g. Procera Alumina,
Vita In-Ceram 200 Al Cubes) must not be veneered.
– Slipped and CAD/CAM-fabricated Vita InCeram frameworks (e.g.
In-Ceram Classic Spinell, Alumina, Zirconia) must not be
veneered.
– Cast and CAD/CAM-fabricated titanium oxide must not be
veneered.
– IPS e.max Ceram ZirLiner and Margin materials should not be
used on IPS e.max Press and IPS e.max CAD.
– Inlays, onlays without framework (CAD / ZrO2/ Press)
IPS e.max Ceram and the processing accessories consist of the
following main components:
– IPS e.max Ceram
Components: SiO
2
Additional contents: Al2O3, ZnO2, Na2O, K2O, ZrO, CaO, P2O5,
fluoride and pigments
– IPS e.max Ceram Shades and Glaze Pastes
Components: oxides, glycerine, butandiol, poly(vinyl pyrrolidone)
– IPS e.max Ceram Glaze Spray
Components: Glazing powder, propellant, isobutane
– IPS e.max Ceram ZirLiner Build-Up Liquid (allround)
Components: Water, butandiol and chloride
– IPS e.max Ceram Margin Build-Up Liquids
(allround and carving)
Components: Water, zinc chloride and hydroxyl ethyl cellulose
– IPS e.max Ceram Build-Up Liquids (allround and soft)
Components: Water, propylene glyco, butandiol and chloride
– IPS e.max Ceram Stain and Glaze Liquids
(allround and longlife)
Components: Butandiol, pentandiol
– IPS Model Sealer
Components: Ethyl acetate, softener and nitrocellulose
– IPS Ceramic Separating Liquid
Components: Paraffin oil
– IPS Margin Sealer
Components: Wax dissolved in hexane
Warnings:
– Ethyl acetate is highly inflammable – keep it away from sources
of ignition. Do not inhale the vapours.
– Hexane is highly inflammable and detrimental to health. Avoid
contact with the skin and eyes. Do not inhale the vapours and
keep the material away from sources of ignition.
– Do not inhale ceramic dust during finishing – use suction
equipment and a face-mask.
Side effects
If a patient is known to be allergic to any of the components of
IPS e.max Ceram, the material should not be used.
5
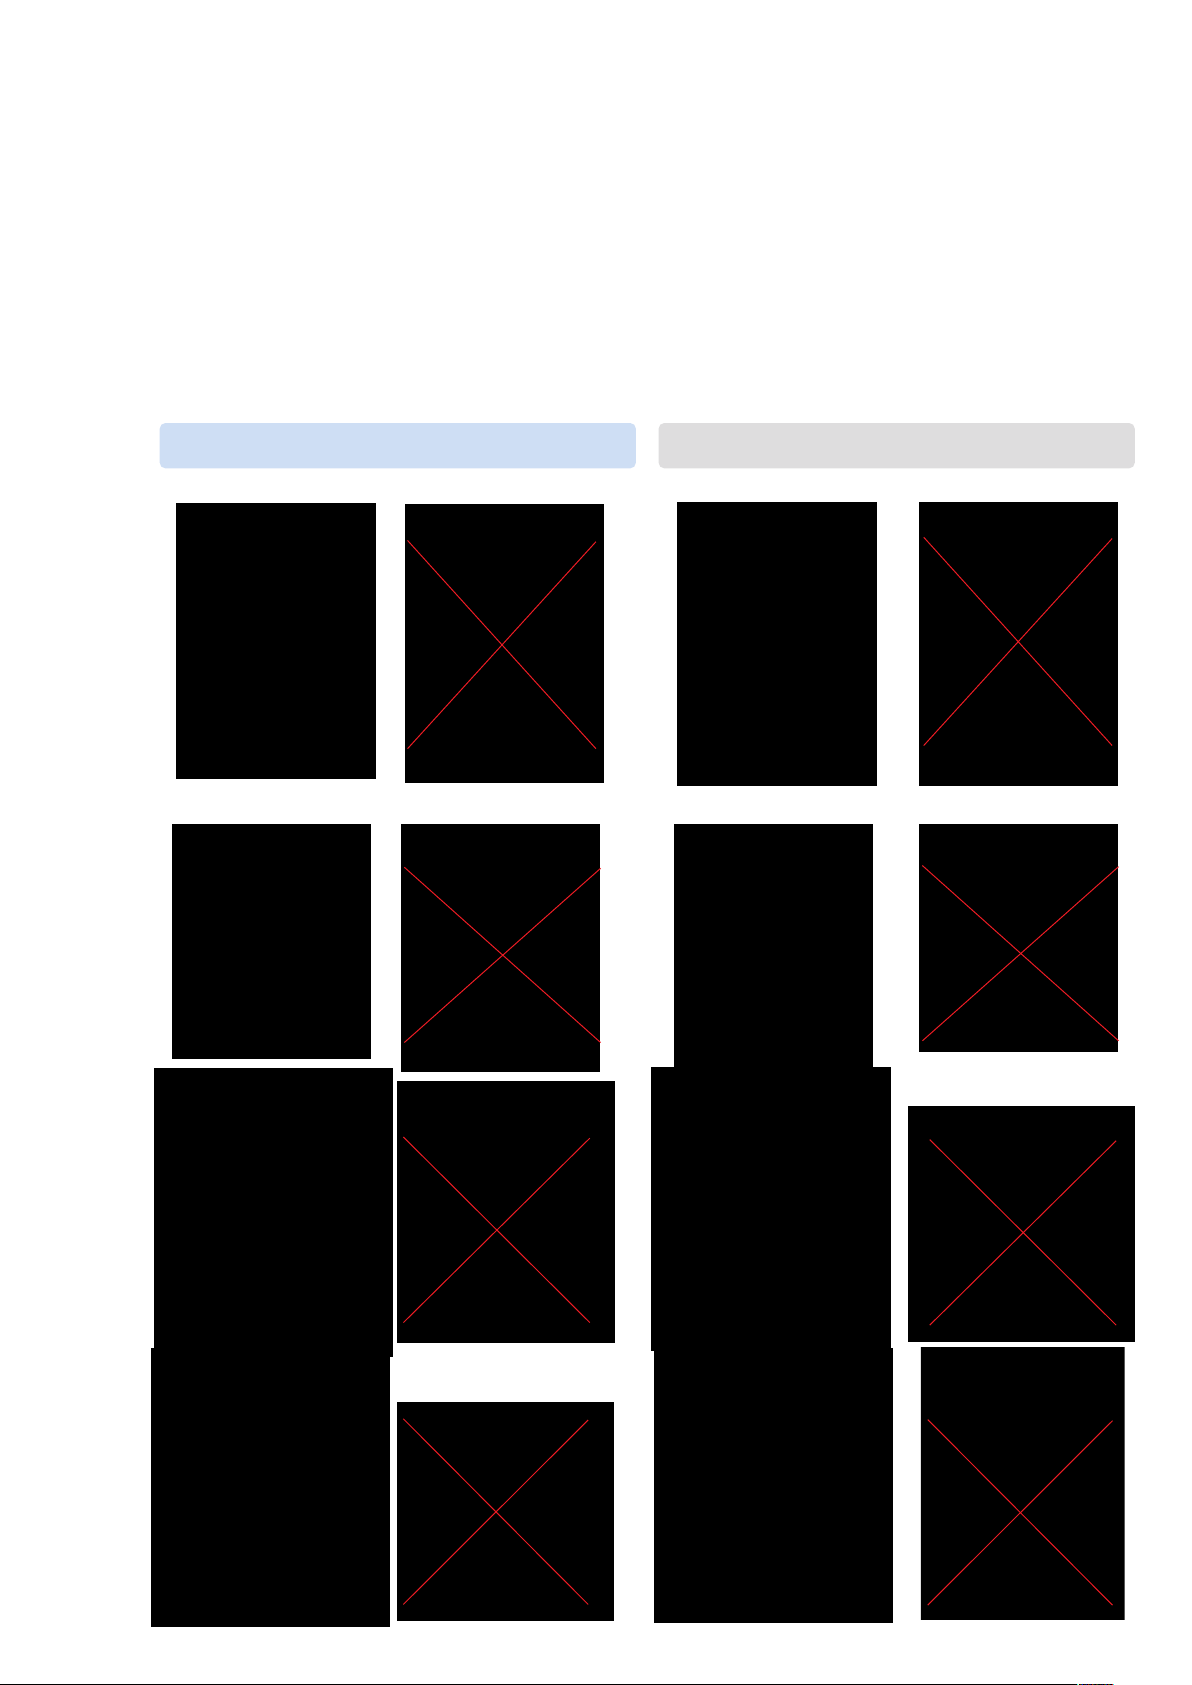
Firing behaviour and firing process
Shade stability
IPS e.max Ceram is a low-fusing nano-fluorapatite glass-ceramic. The new material generation contains nano-fluorapatite
crystals and demonstrates a crystal structure similar to that of vital teeth. Depending on the type of layering material, this
permits a unique and adjustable combination of translucency, brightness and opalescence which is characterized by a high
stability of shape and shade, even after several firing procedures. The following images of fired tabs show the shade
stability of IPS e.max Ceram Dentin A3 after several firing procedures. Even after ten firings, no obvious shade difference
to the original tab is visible. After three firings, the shade of the tab already corresponds with that of the fired restoration
(2 Dentin/Incisal firings and 1 Glaze firing).
1x 3x 5x 7x 10x 1x 3x 5x 7x 10x
Transmitted lightIncident light
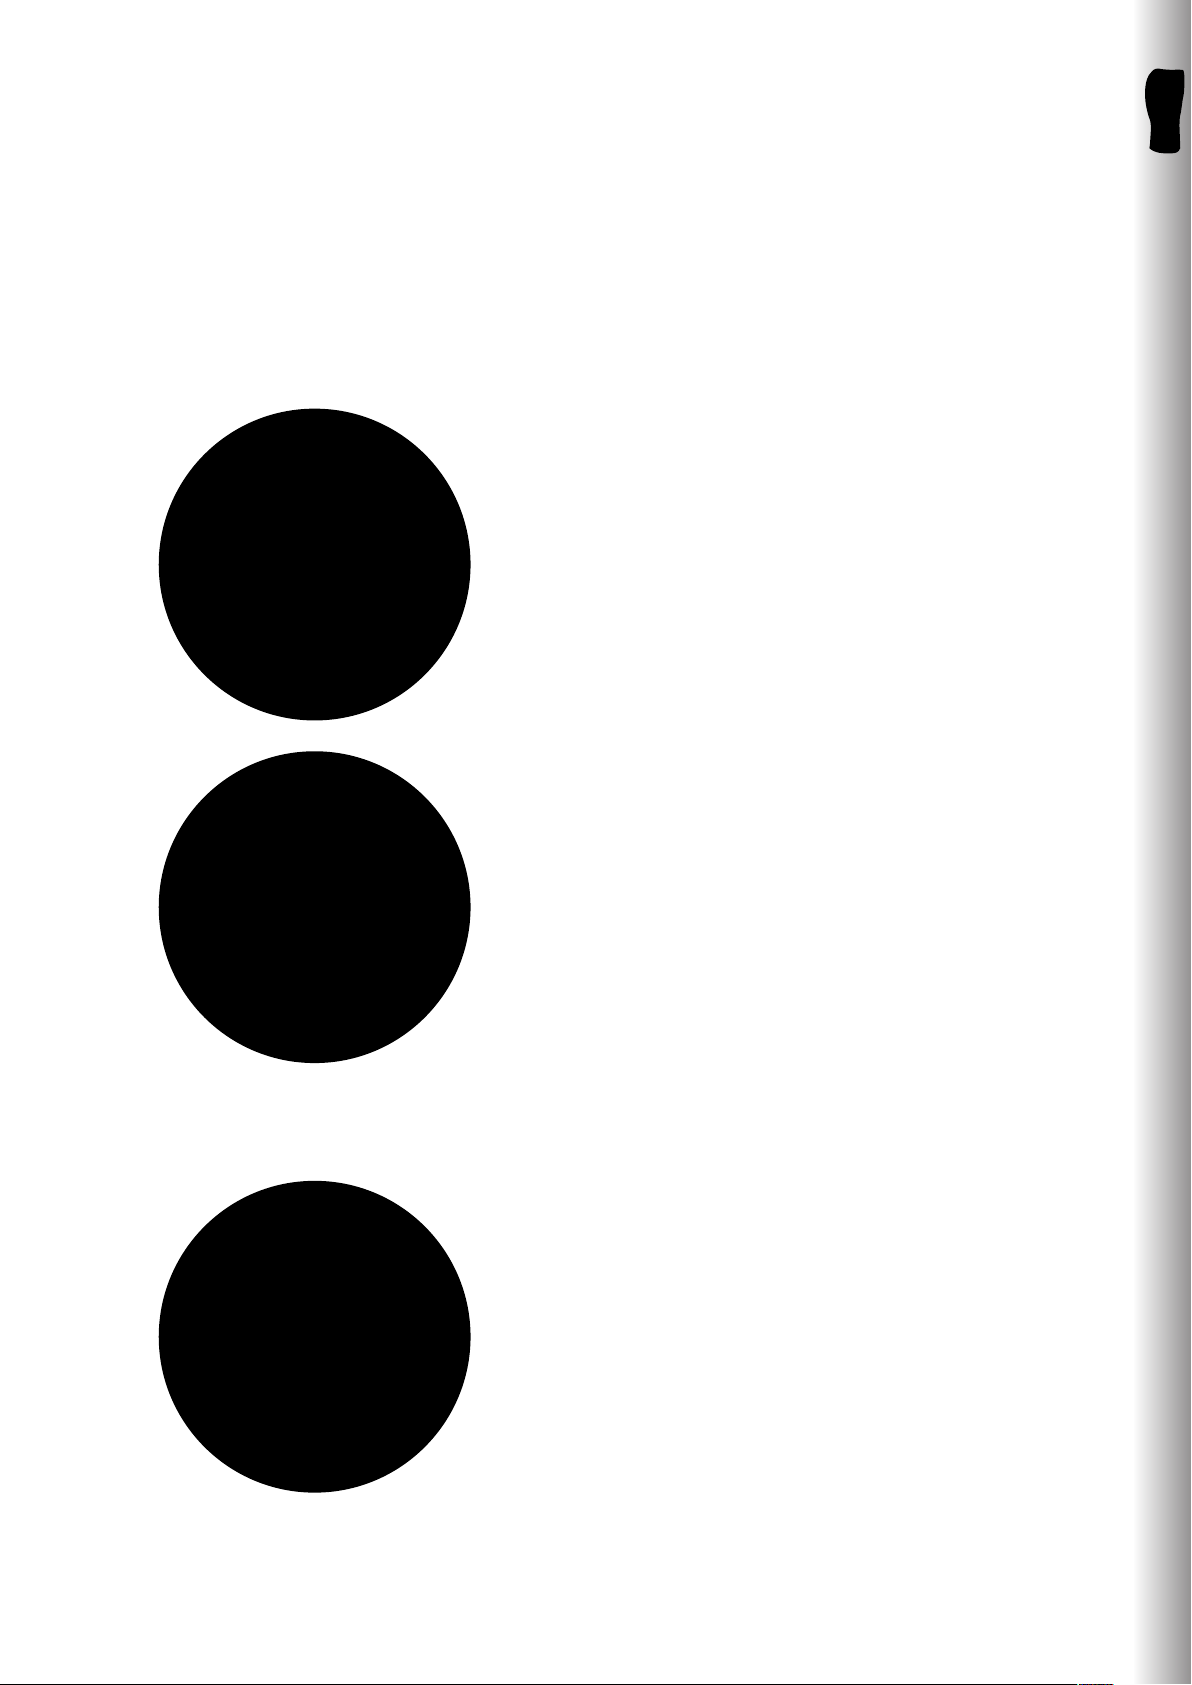
The high shade stability is particularly important for the Opal materials (Opal Effect 1), which are predominantly used in
the incisal area, in order not to obtain a lifeless, greyish incisal third, even after several firing procedures. The following
images show an Opal Effect 1 tab after 10 firings. There are no visible differences as regards the opalescence and
brightness.
1x 3x 5x 7x 10x 1x 3x 5x 7x 10x
Transmitted lightIncident light
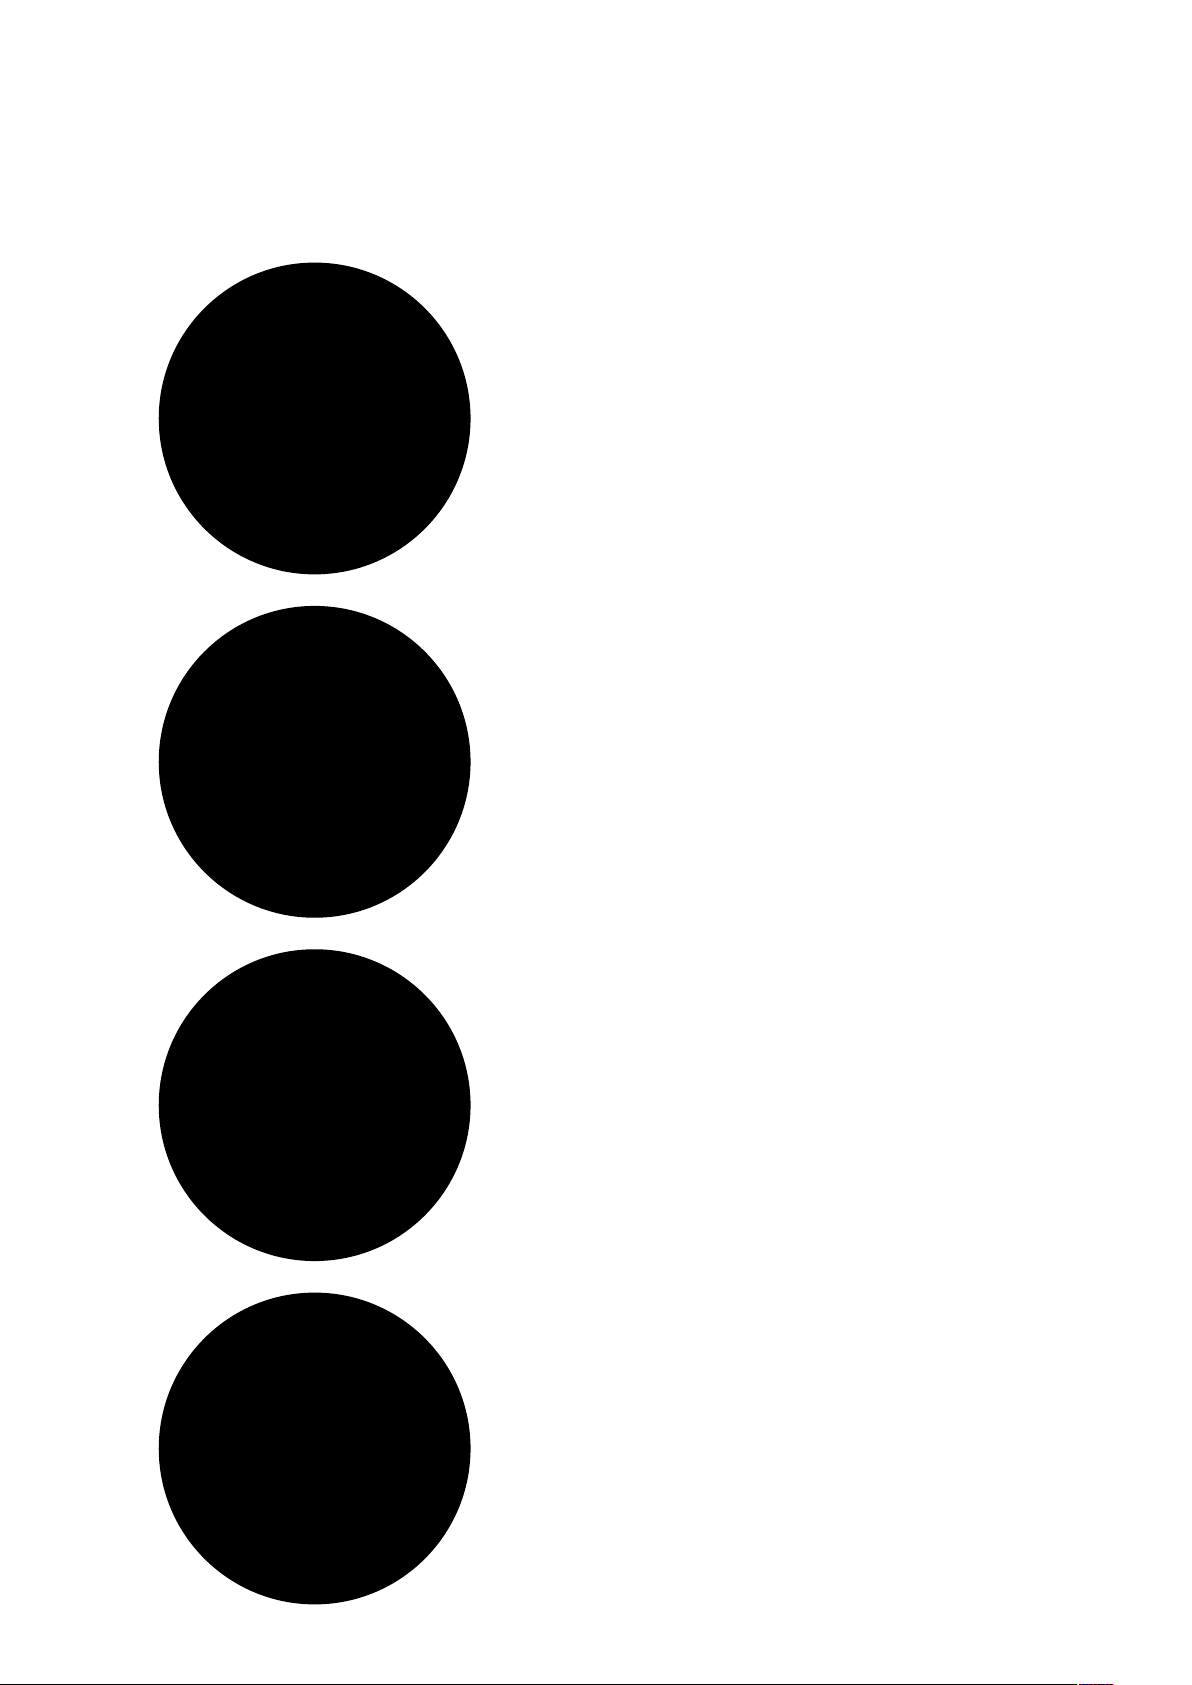
Burn-out behaviour
Given the low transformation point of low-fusing ceramic materials, the burn-out of the organic components in the buildup liquids occurs in a shorter time frame than that of high- and medium-fusing ceramics. If build-up liquids other than the
IPS e.max Ceram Liquids are used, therefore, there is a risk of incomplete burn-out and thus discolouration of the restoration (e.g. cloudiness, greying). The following images show fired IPS e.max Ceram clear tabs for which different build-up
liquids were used. With certain liquids, the discolouration is clearly visible. Therefore, Ivoclar Vivadent recommends using
only the liquids contained in the IPS e.max Ceram Kits. If silver dust is used to design the surface, make sure that it is
completely removed during cleaning. If this is not done, discolouration (e.g. yellowish) may occur after glaze firing.
IPS e.max Ceram
Build-Up Liquid
allround or soft
Competitive Liquid A
Grey residue
Competitive Liquid B
Grey residue
Competitive Liquid C
Cloudiness
Competitive Liquid D
Cloudiness
6

Firing of lithium disilicate-supported restorations
– Use the honey-combed firing tray and the corresponding support pins to fire the restorations.
– Do not use ceramic pins, since they may stick to the restoration.
– The processing temperatures must be observed. Increasing the firing temperature will result in severe vitrification
between the framework and the veneering ceramic, which may lead to crack formation later on. Reducing the firing
temperature results in the ceramic being underfired, rendering it very brittle, which may ultimately lead to delamination.
– The parameters listed in the Instructions for Use apply to Ivoclar Vivadent furnaces (temperature tolerance ± 10 ºC/18 °F).
– If furnaces other than those from Ivoclar Vivadent are used, temperature adjustments may be necessary.
Firing of zirconium oxide-supported restorations
In order to obtain optimum firing results for IPS e.max Ceram, the following points have to be observed:
– In order to ensure an even thickness of the veneer, the zirconium oxide framework must be designed in such a way that
it supports the cusps. Depending on the clinical situation, the results are different wall thicknesses and dimensions of
the framework.
– Since ZrO2is a poor heat conductor compared to other framework materials, a low temperature increase rate tÀ is
required. This ensures even heat distribution in the bonding area between the framework and the veneer as well as the
outer surfaces of the restoration even with different framework thicknesses. In this way, an optimum bond as well as
even sintering of the layering materials is achieved.
– During cooling of the restorations after firing, stress occurs as a result of the different cooling speeds at the outside and
within the material. With long-term cooling L for the "final firing cycle" this stress can be reduced and the risk of
delamination minimized, particularly in ZrO2-supported restorations.
Notes on cooling after completion of the firing program
In order to ensure "smooth" cooling of the restoration after firing, please observe the following notes:
– Wait for the acoustic signal or optical indication of the furnace at the end of the firing cycle before the firing tray with
the fired objects is removed.
– Do not touch the hot objects with metal tongs.
– Allow the objects to cool to room temperature in a place protected from draft.
– Do not blast or quench the objects.
7
Scientific Data
Further scientific data (i.e. strength, wear, biocompatibility) are contained in the “Scientific
Documentation IPS e.max Ceram”. The Documentation also provides a set of studies that describe the
clinical performance of IPS e.max Ceram.
This Scientific Documentation can be obtained from Ivoclar Vivadent.
For further information about all-ceramics and IPS e.max, please refer to the Ivoclar Vivadent Report
No. 16 and 17.
Scientific Documentation
8
®
e.max
IPS
Ceram
Practical Use
Shade Determination – Tooth Shade, Shade of the Prepared
Tooth
Optimum integration in the oral cavity of the patient is the prerequisite for a true-to-nature all-ceramic
restoration. To achieve this, the following guidelines and notes must be observed by both the dentist
and the laboratory.
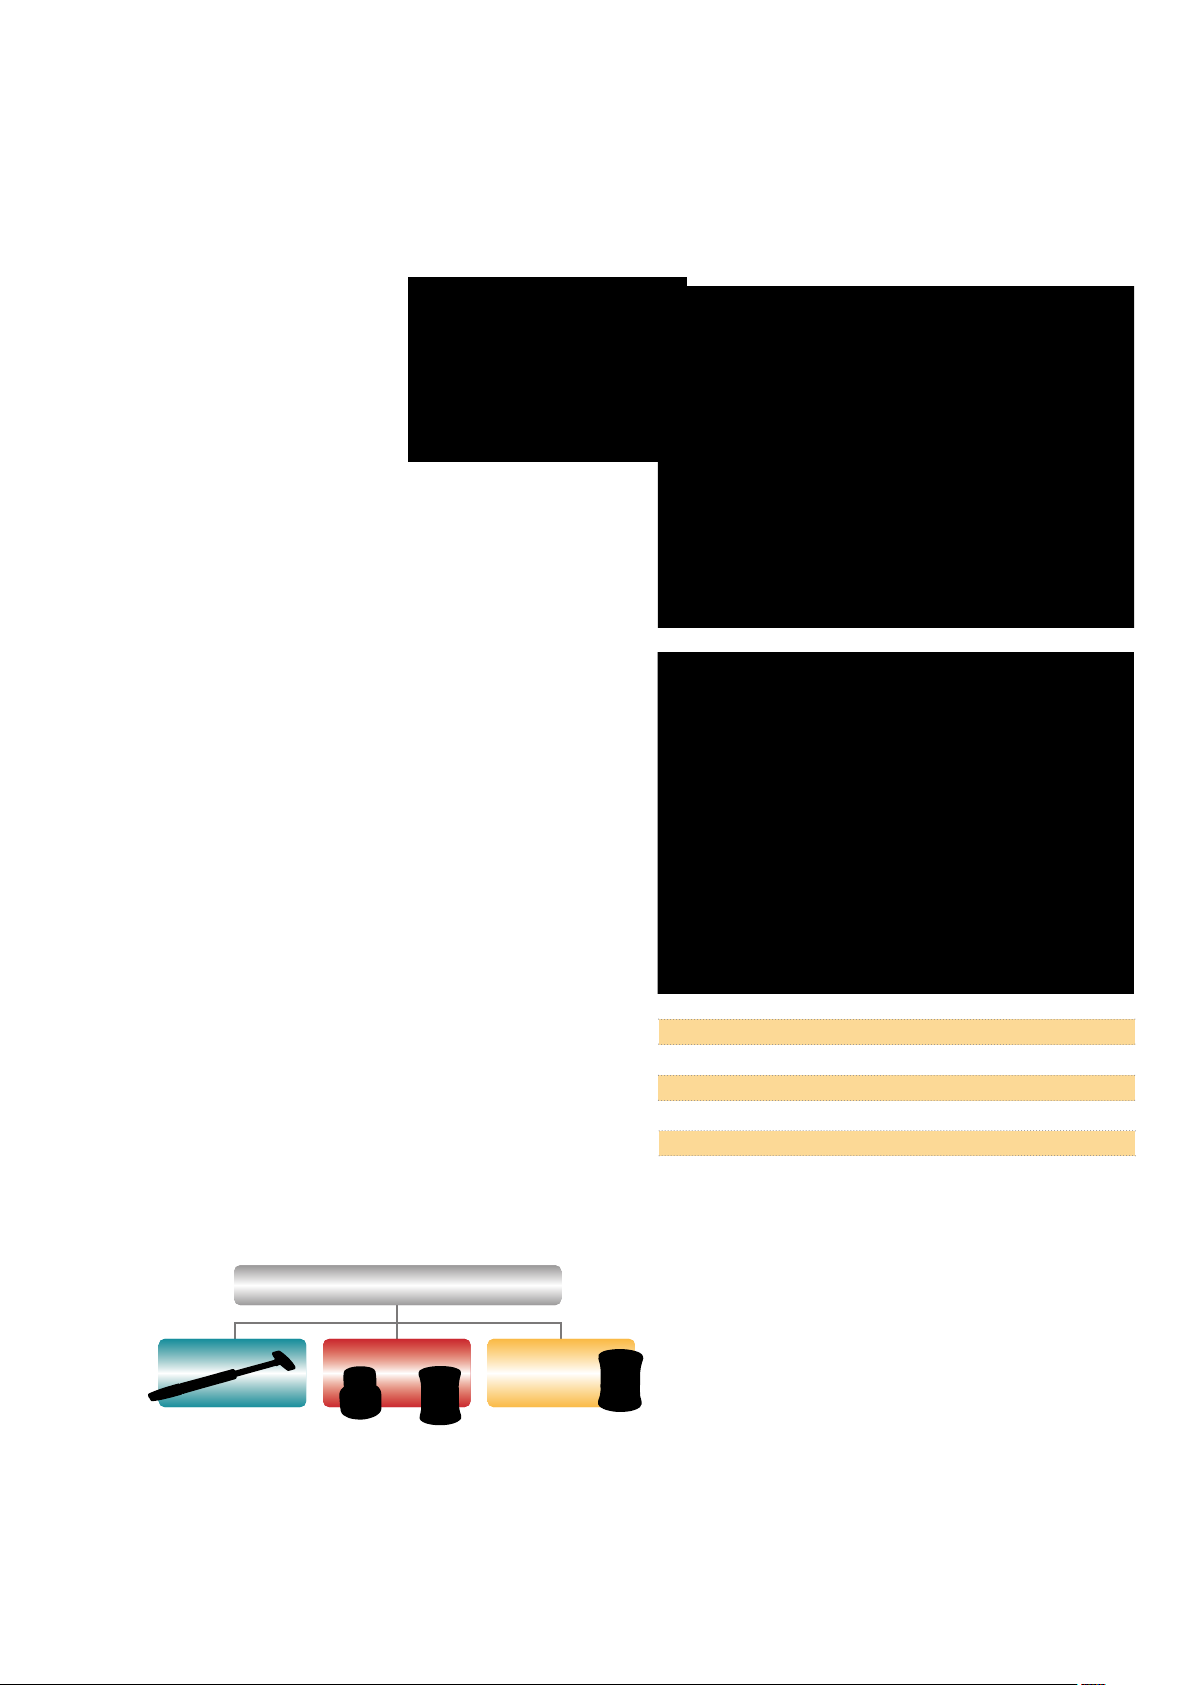
The overall esthetic result of an all-ceramic restoration is influenced by the following factors:
• Shade of the preparation (natural preparation, core build-up, abutment, implant)
• Shade of the restoration (framework shade, veneer, characterization)
• Shade of the cementation material
The optical effect of the preparation shade must not be underestimated during the fabrication of highly
esthetic restorations. For that reason, the shade of the preparation should be determined together with
the desired tooth shade in order to select the suitable block. Especially with severely discoloured
preparations or non-tooth-shaded build-ups, this is of utmost importance. Only if the dentist determines
the shade of the preparation and its subsequent transmission to the laboratory may the desired esthetics
be achieved in a targeted fashion.
Preparation Shade
– Prepared natural tooth
– Core build-up
– Implant, abutment
Restoration Shade
Framework
–
– Veneer
– Characterization
Practical Use
Desired Tooth Shade
Cementation Material
Responsibility of the Dental Office Responsibility of the Laboratory
9
Shade determination of the natural tooth
After tooth cleaning, the tooth shade of the non-prepared tooth and/or the adjacent teeth is
determined with the help of a shade guide. Individual characteristics have to be considered when
determining the tooth shade. If a crown preparation is planned, for example, the cervical shade should
also be determined. In order to achieve the best possible true-to-nature results, shade determination
should be carried out at daylight. Furthermore, the patient should not wear clothes of intensive colours
and/or lipstick.
Die shade selection
In order to facilitate the reproduction of the desired tooth shade, the shade of the preparation is
determined with the help of the IPS Natural Die Material shade guide. This enables the technician to
fabricate a model die similar to the preparation of the patient, on the basis of
which the correct shade and brightness values of the all-ceramic restorations
may be selected.
IPS e.max Ceram Material Shade Guides
For IPS e.max Ceram, the material shade guides are an integral part of
the product concept. For reasons of light refraction, the dentin shade
tabs have been given an anatomical shape and surface structure. All
the other shade tabs demonstrate a slight wedge shape, in order to
better illustrate the translucency of the individual materials. The shade
tabs are fired from the original ceramic materials. To facilitate the
distinction from the existing material shade guides (e.g. IPS d.SIGN,
IPS InLine, SR Adoro), the rods and holders of the IPS e.max Ceram
material shade guides are light-grey.
10
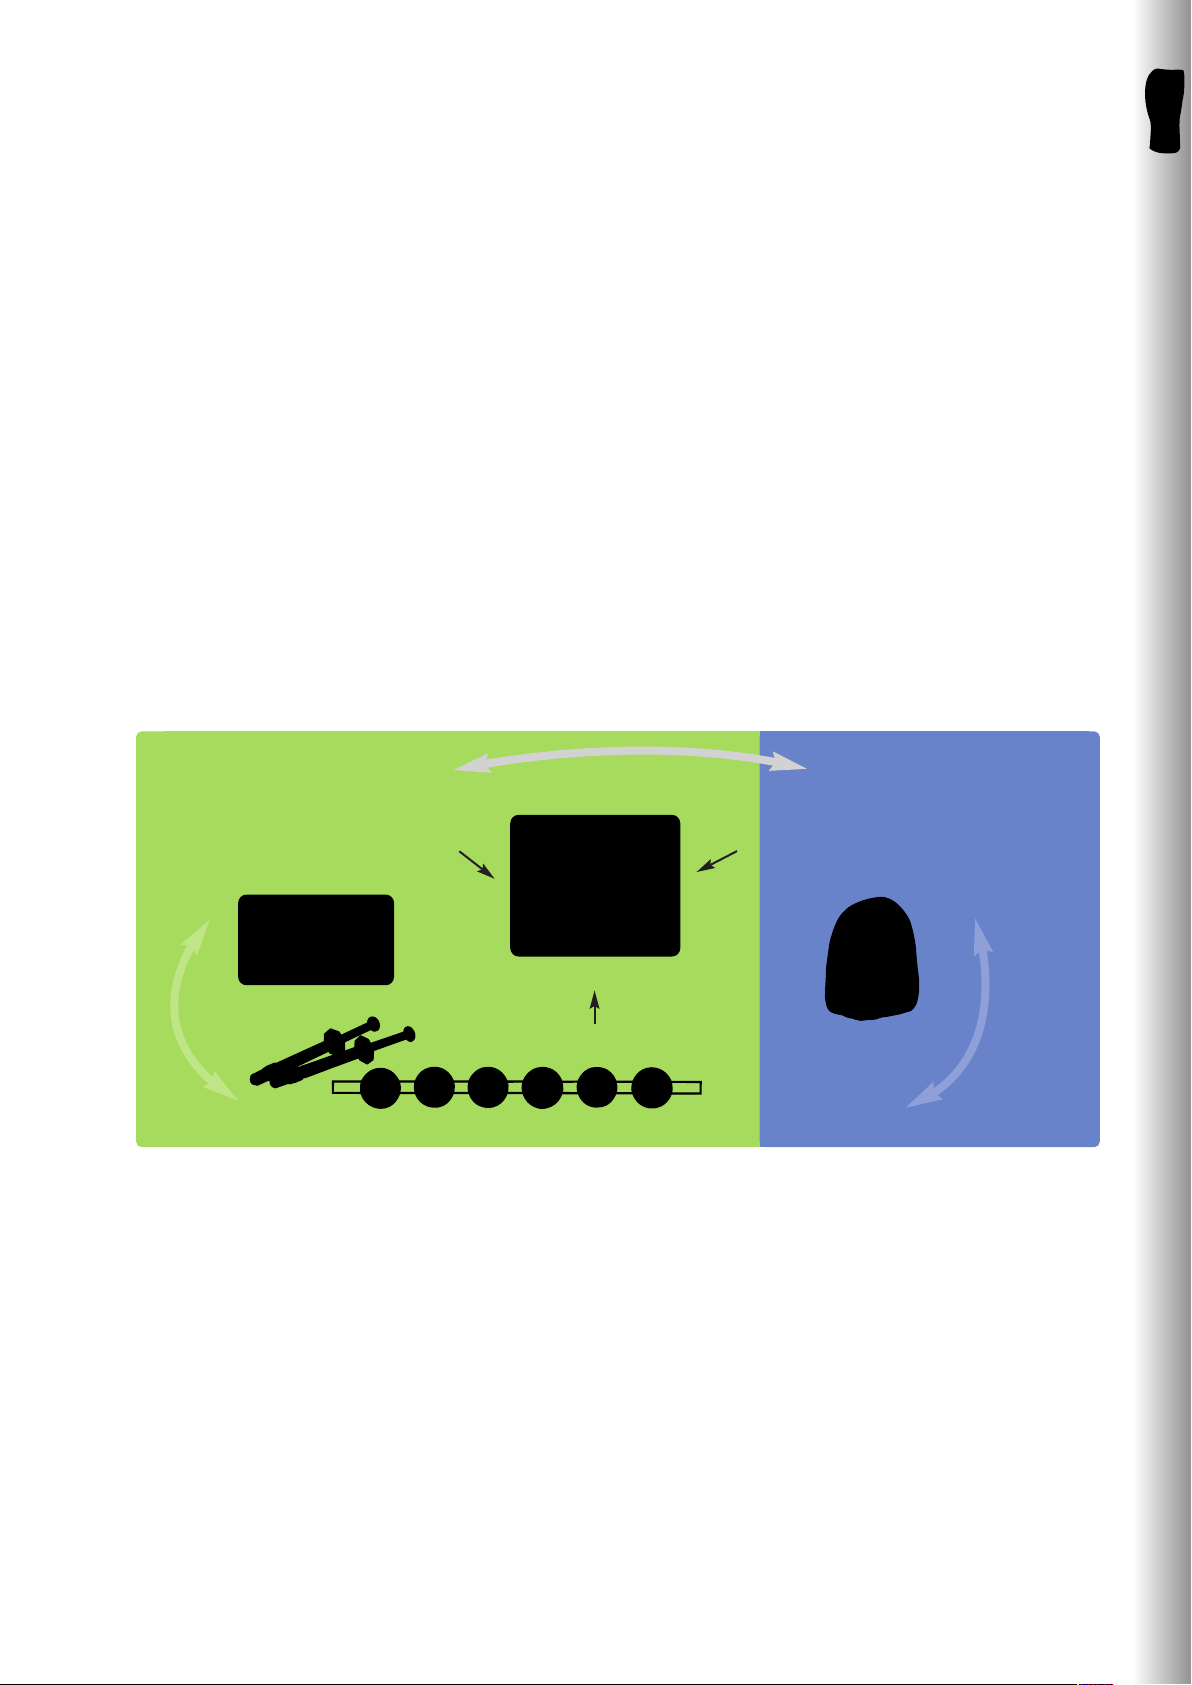
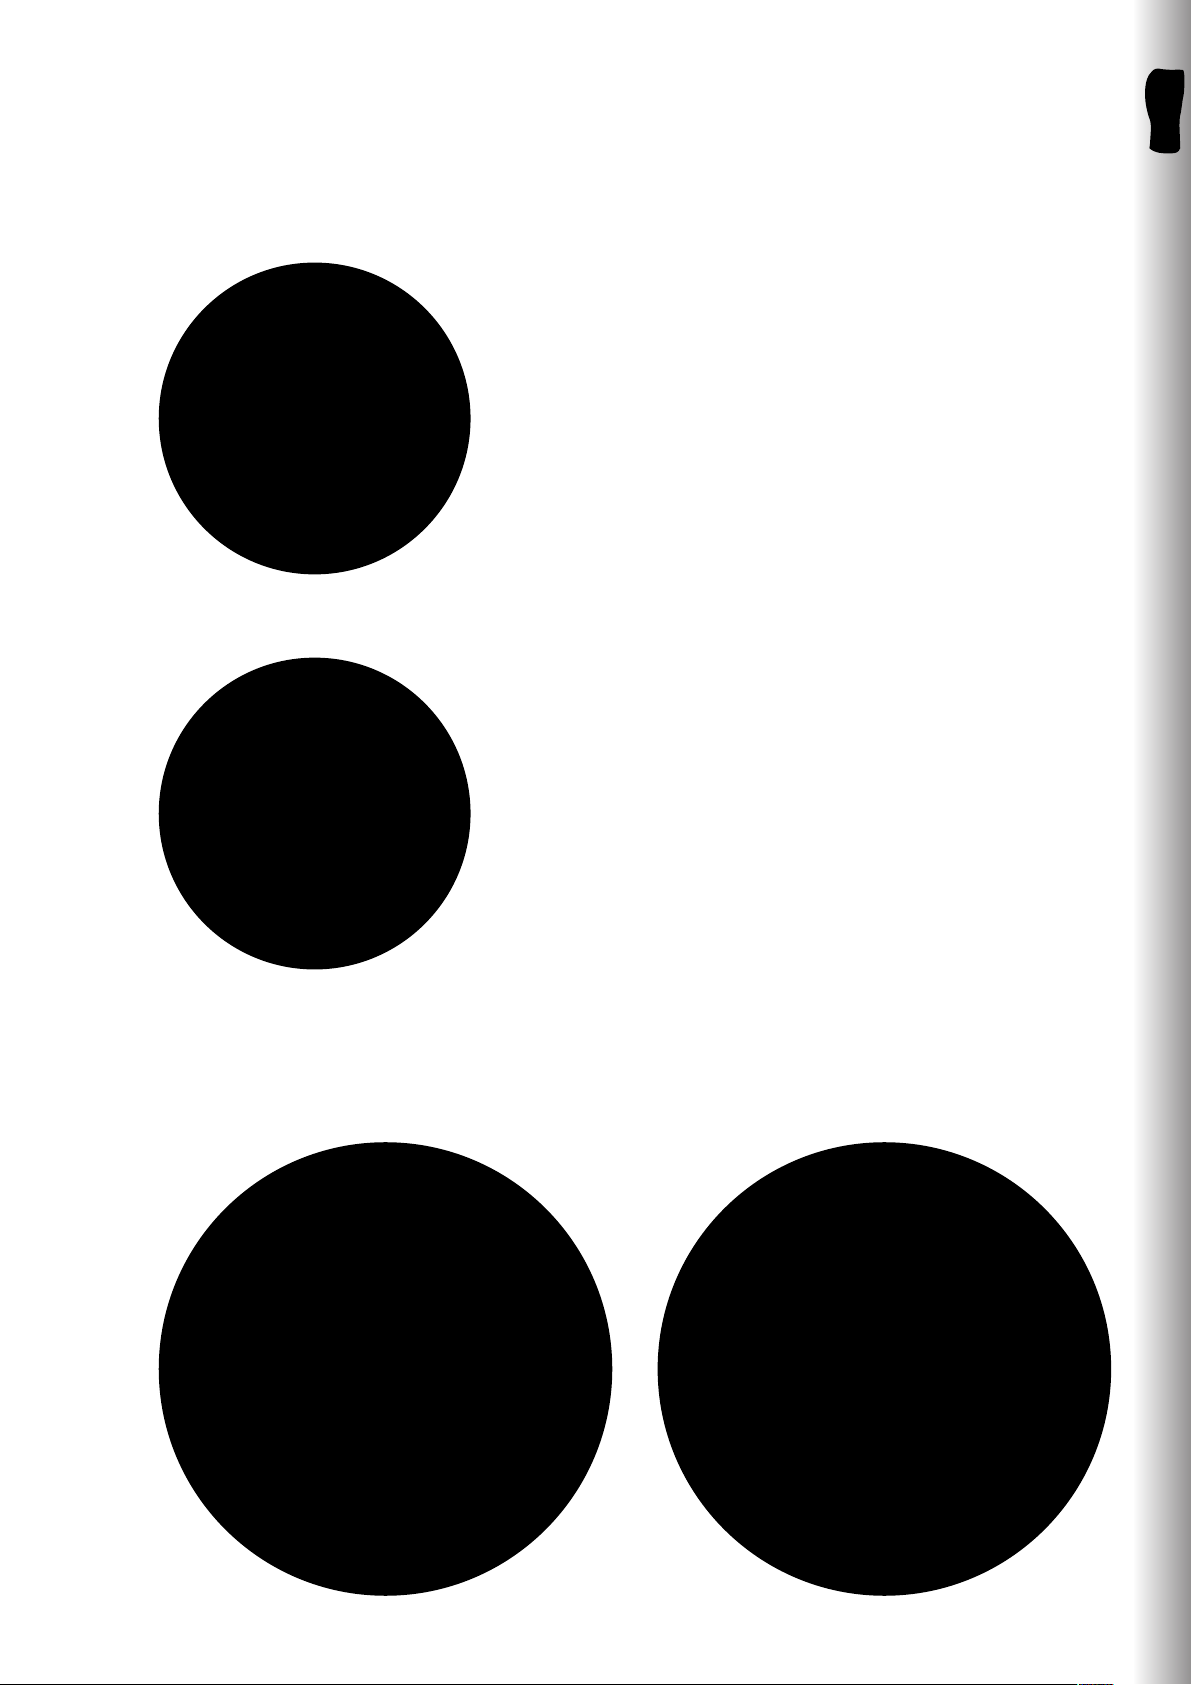
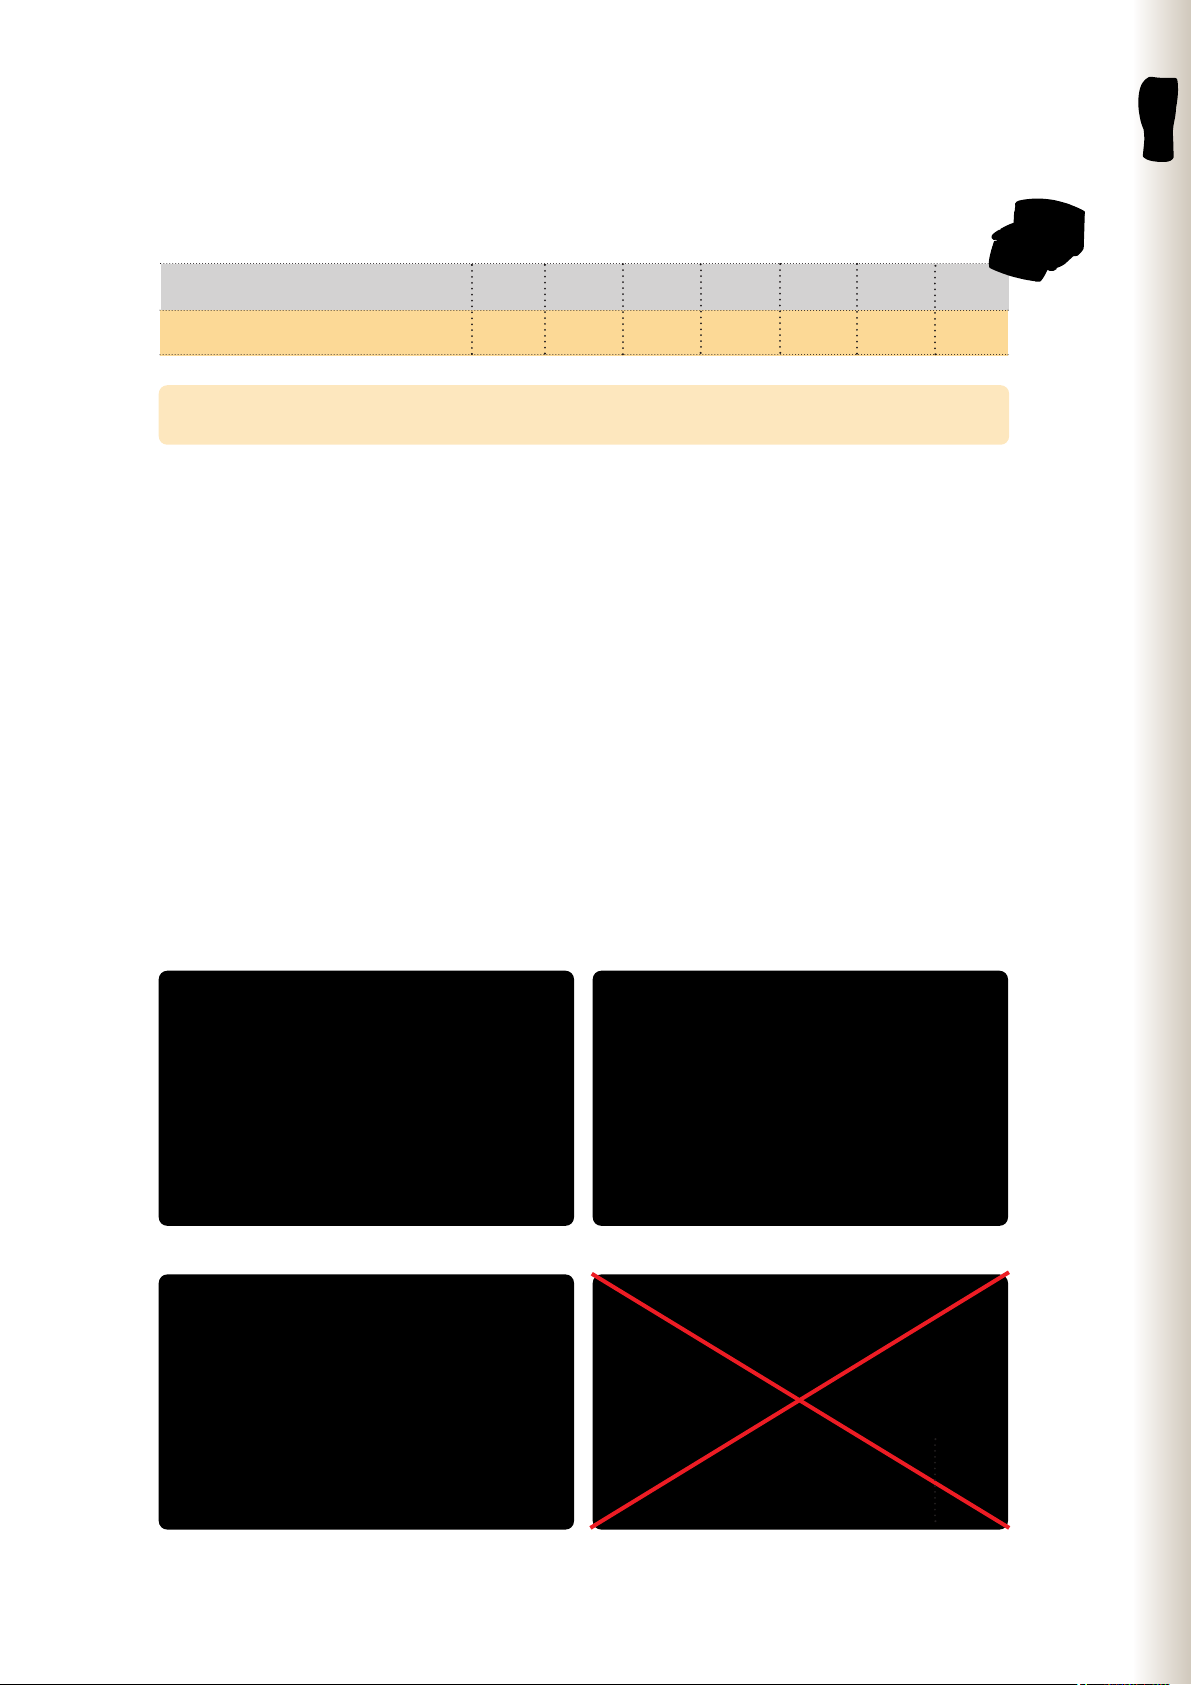
Layering Diagram
The layering diagram of IPS e.max Ceram has been designed in such a way that easy and reliable shade reproduction is possible, irrespective
of the framework material or framework shade. A proportional framework design that supports both shape and cusps represents the ideal
basis.
Practical Use
Layering Diagram for Lithium Disilicate (LS2)
(IPS e.max Press and IPS e.max CAD)
Highly esthetic glass-ceramic framework
Wash (foundation) application
Layering Diagram for Zirconium Oxide (ZrO2)
(IPS e.max ZirCAD)
High-strength zirconium oxide framework
ZirLiner application
Dentin application
Completing the layering with Incisal material
Dentin application
Completing the layering with Incisal material
11
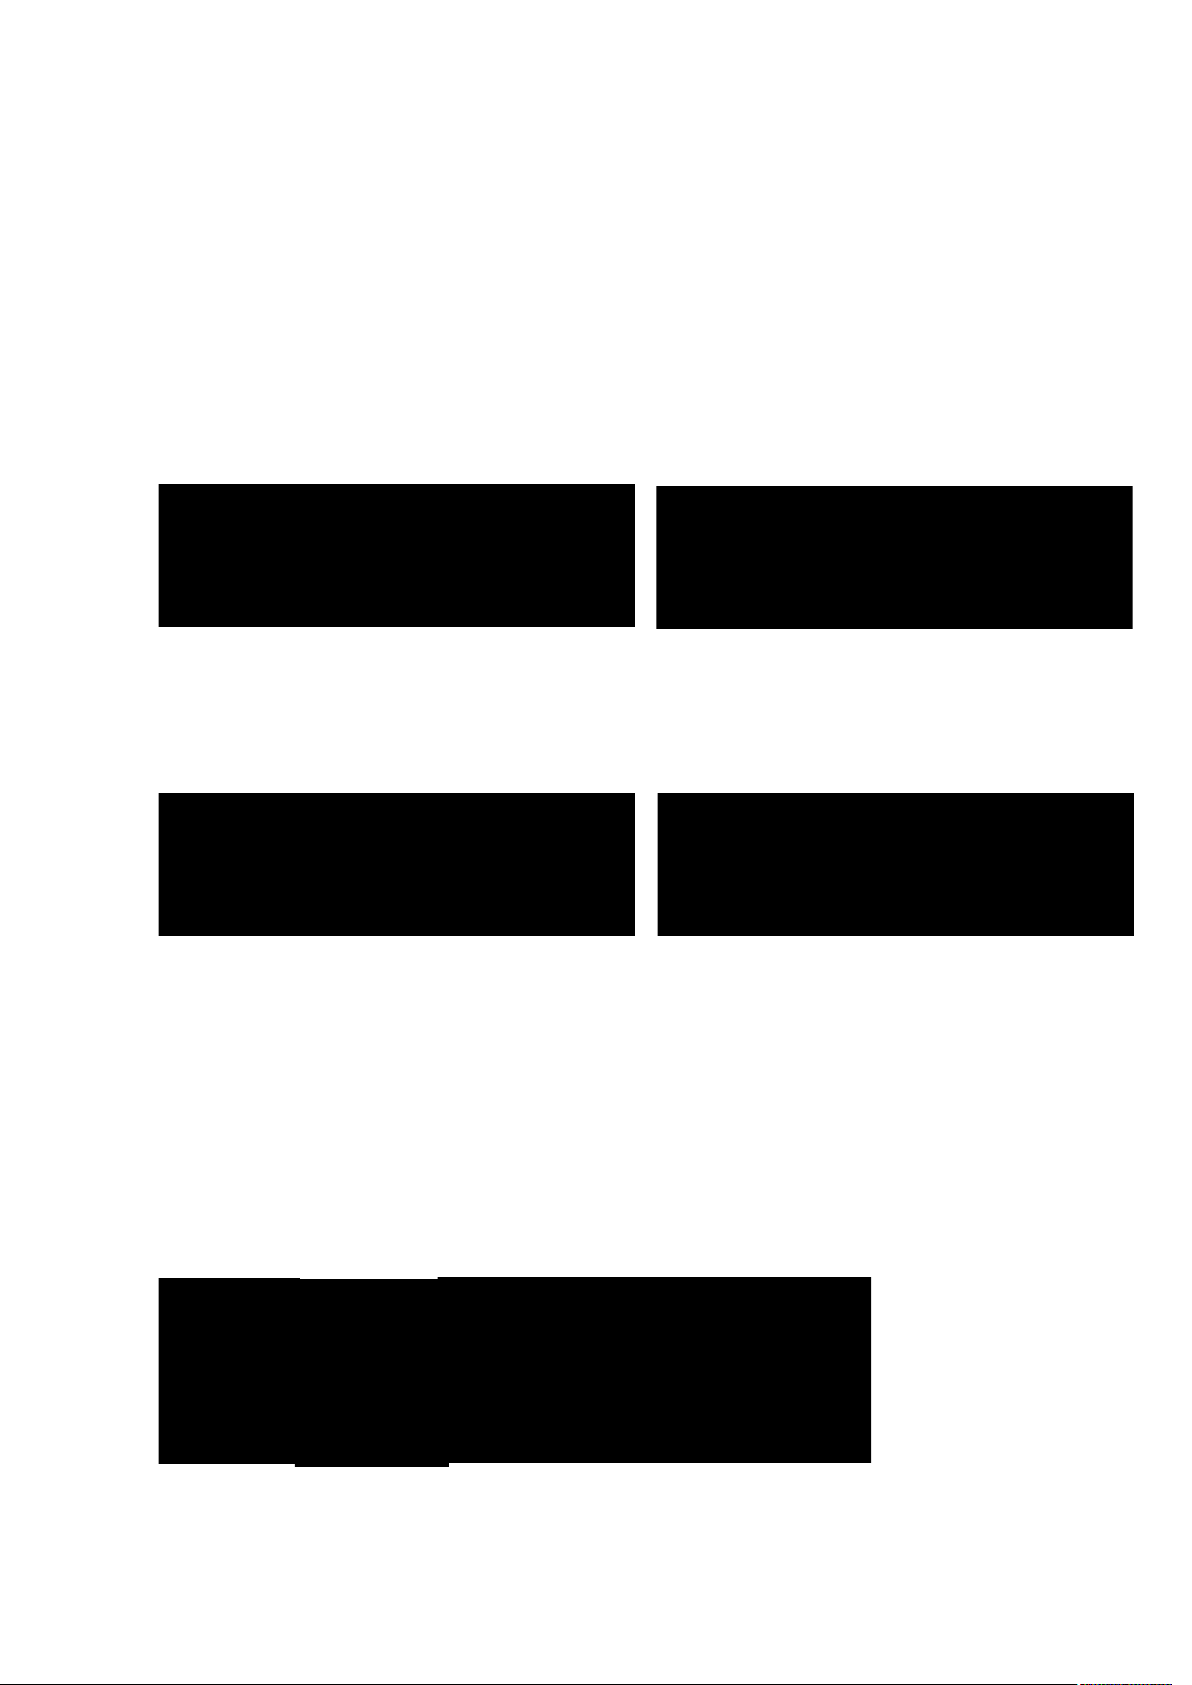
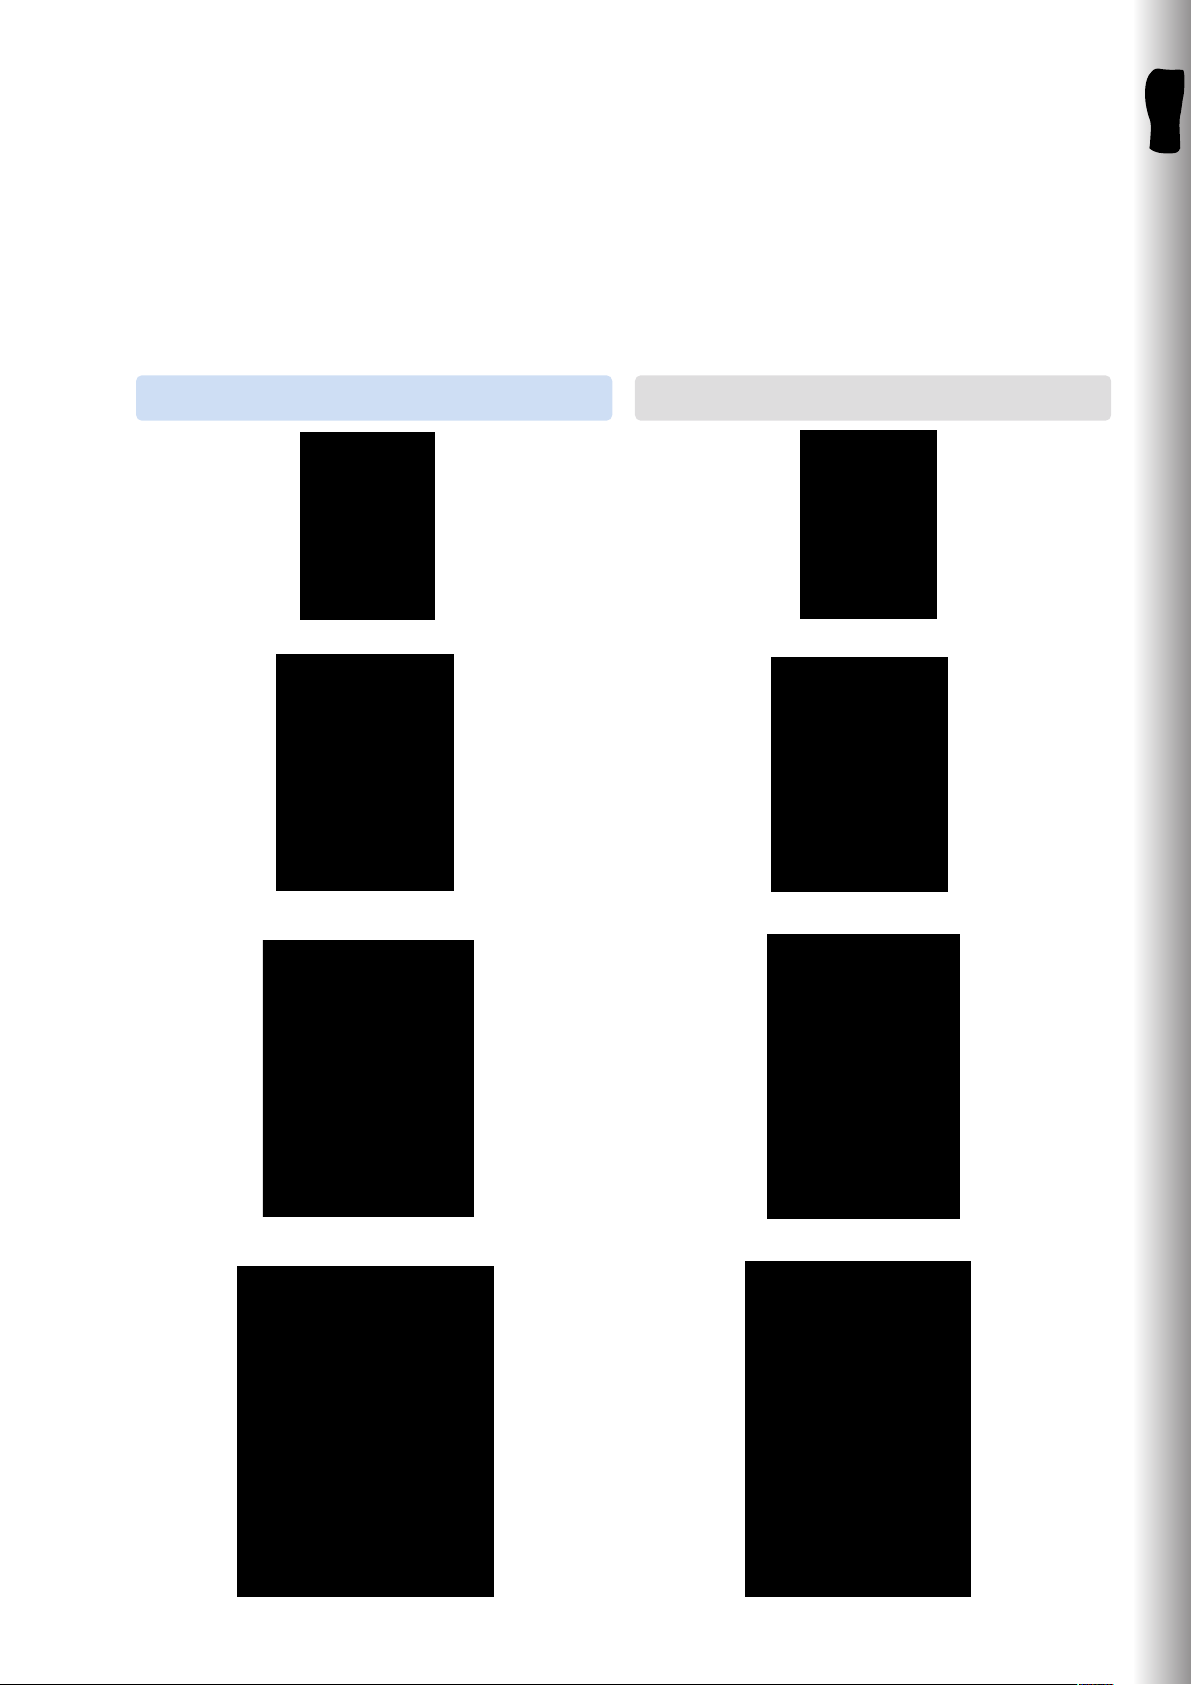
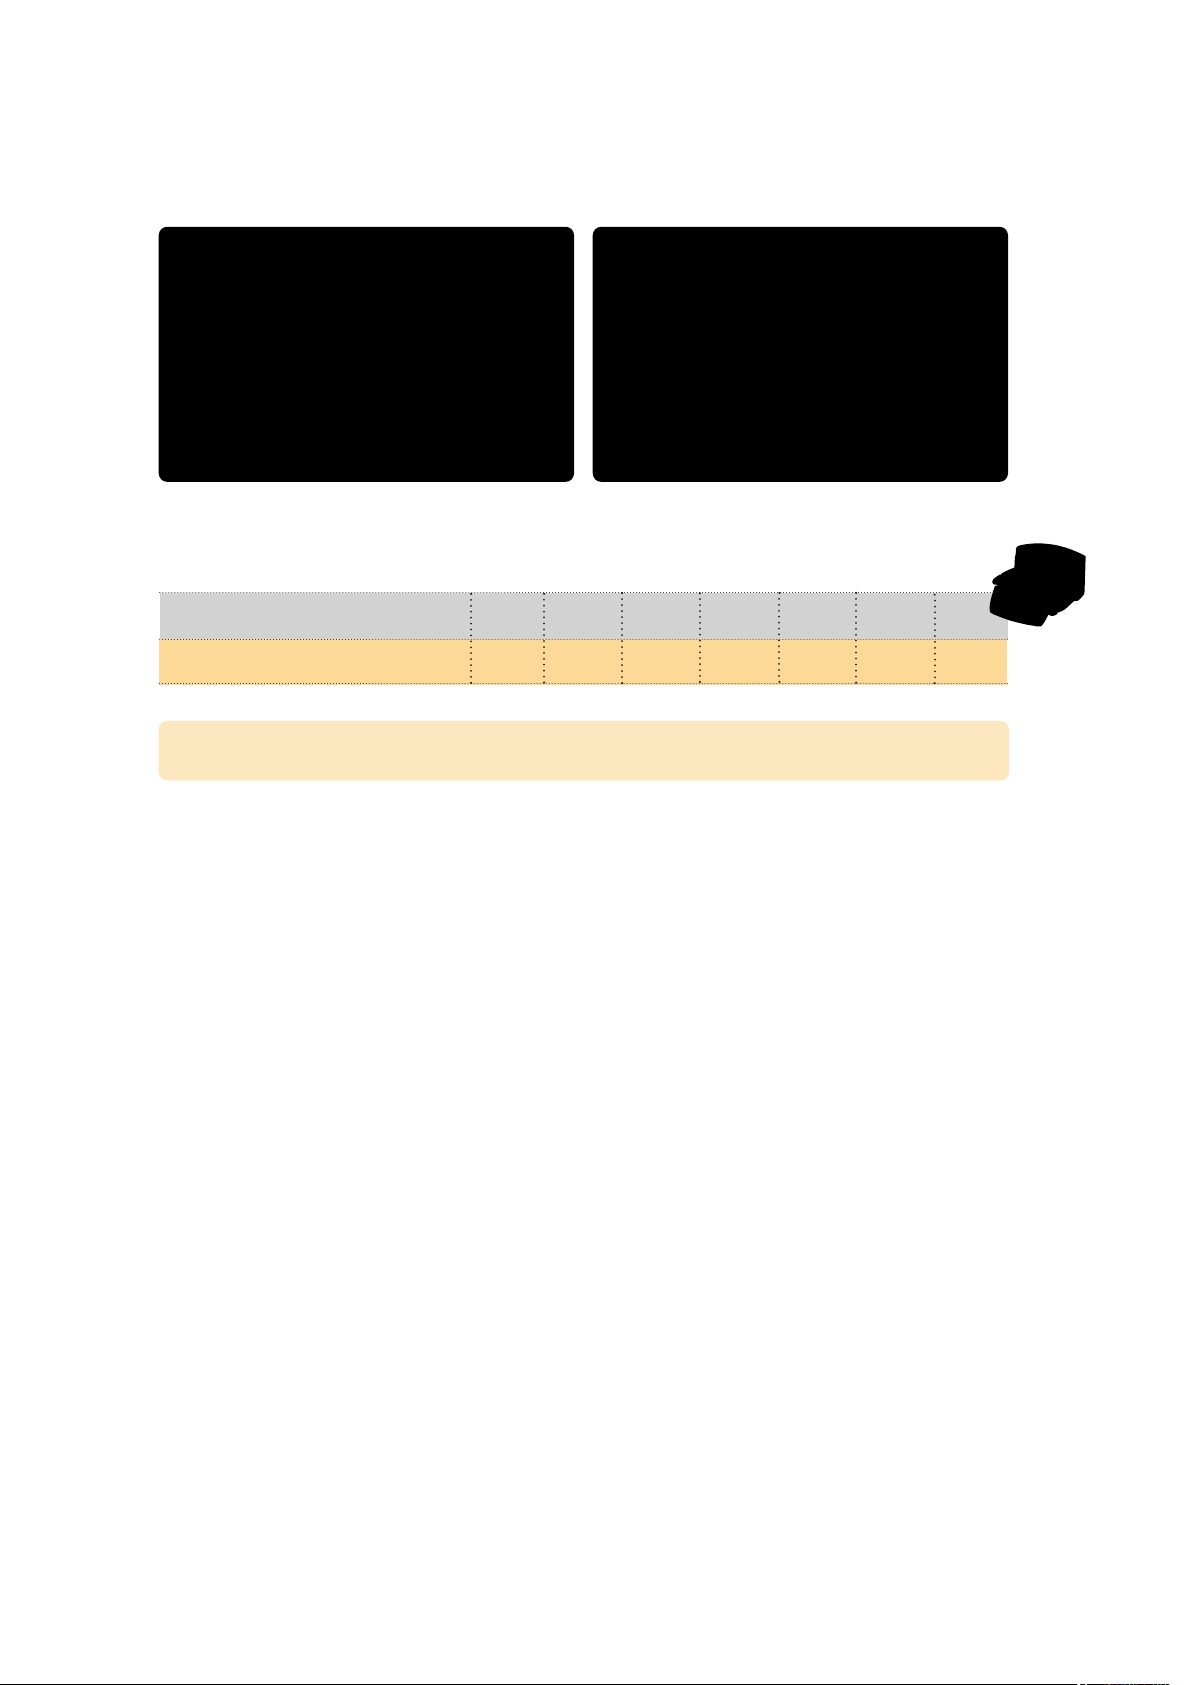
Framework Design
Failure to observe the stipulated framework design criteria and minimum thicknesses may result in clinical failure, such as cracks,
delamination and ultimately to fracture of the restoration.
The framework design must always support the shape of the restoration and the cusps in order to obtain an even layer thickness of the
veneer with IPS e.max Ceram.
Framework Design Lithium Disilicate (LS2) Framework Design for Zirconium Oxide (ZrO
correct
correct
incorrect
incorrect
correct incorrect
correct
incorrect
)
2
correct
correct
incorrect
incorrect
correct
correct incorrect
12
incorrect
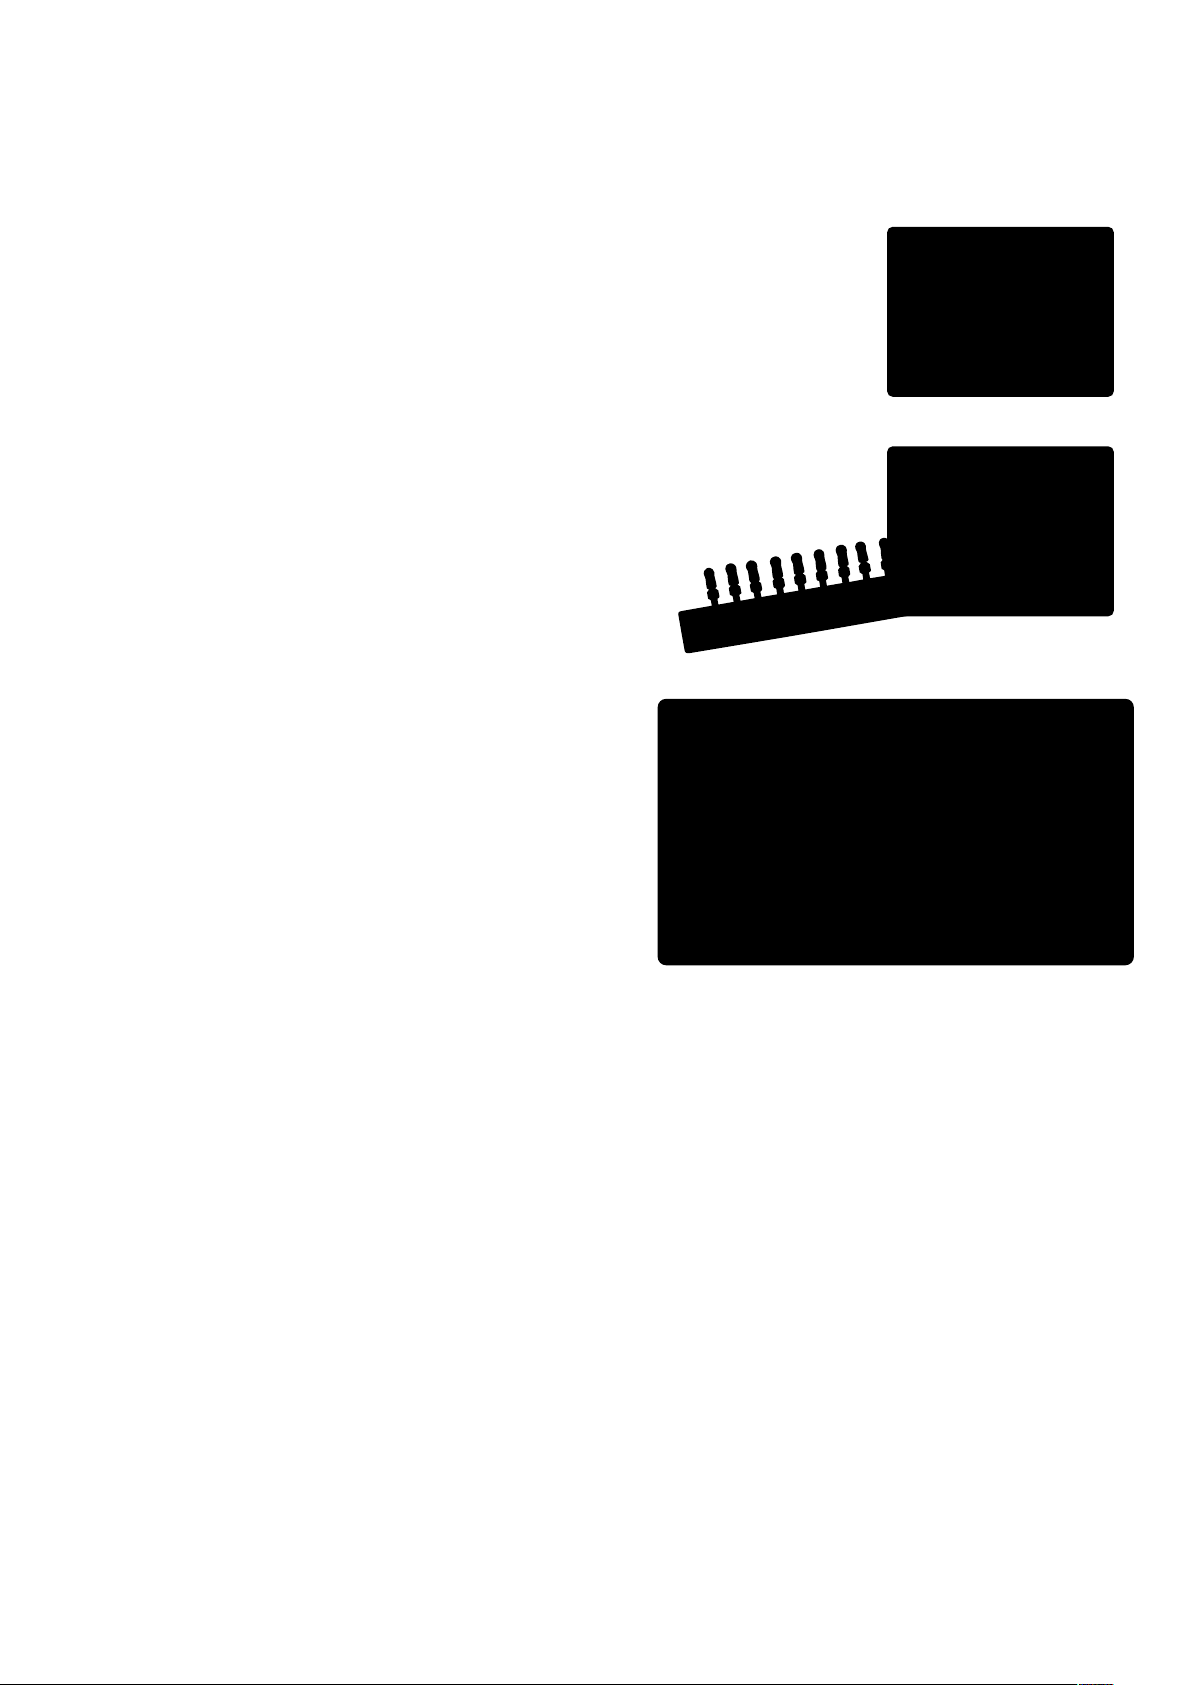
Tips and tricks on layering
Application of the Impulse materials
Increasing the brightness value
Practical Use
By applying Opal Effect 4 or Deep Dentin directly on the wash
layer or ZirLiner, the in-depth brightness value in the dentin area can
be enhanced. The corresponding areas are subsequently covered
with Dentin materials.
Enhancing the in-depth effect – internal
To increase the brightness value in the incisal third, e.g. if space is
limited, Inter Incisal white-blue can be used.
To enhance the in-depth effect in the incisal third, e.g. if space is
limited, Special Incisal, e.g. SI grey, can be used.
13
Designing a true-to-nature incisal third
The Mamelon materials permit a true-to-nature interplay of shades
in the incisal third. They are applied on the completed incisal area,
e.g. MM light, MM salmon.
To complete and enhance the vitality in the incisal area, the shaded
Transparent materials can be used, e.g. T brown-grey.
With the Opal Effect materials, a lifelike opalescent effect in the
incisal third can be achieved. OE 2 can be applied on the
individualized cut-back.
Opal Effect 1 is layered in the mesial and distal areas. Opal Effect 5
is excellently suitable to imitate secondary dentin.
14
Enhancing the in-depth effect – external
Halo effect
Practical Use
The Cervical Transparent materials with their slightly higher fluorescence are used to complete the layering of the cervical third, e.g.
CT orange-pink.
To achieve what is known as the halo effect, Incisal Edge is used
and applied to prolong the incisal edge.
Result of an individual IPS e.max Ceram Impulse layering procedure
15
Applications for the Essence powders
Essence powders are intensively shaded and should, therefore, only be used in very small quantities.
Essence – mixing
Increasing the chroma or the
shade saturation of layering
materials, such as Deep Dentin
and Dentin.
Dentin before
Transpa Incisal before
Dentin after
Enhancing the shade effect of
Incisal materials, e.g. adjusting
of warm and chromatic Incisal
materials.
Transpa Incisal after
Shading of Transparent clear to
create new individual Transpa
materials.
Transpa neutral before
16
Transpa neutral after
Essence – internal
Internal characterizations should only be applied on thoroughly moist areas.
Practical Use
To design Mamelons, e.g. E 02
cream or E 10 terracotta are
used.
To enhance the in-depth
effect, E 15 profundo can be
flushed in.
The increase the brightness
value and to imitate incisal
discolouration, E 01 white and
e.g. E 04 sunset can be flushed
in.
To design enamel cracks, E 02
cream or any mixture can be
applied.
17
Essence – external
Superficial deposits, such as the ones caused by coffee or tea, can be imitated using, e.g. E 13 espresso.
Staining
Completed crown
Natural tooth
Fissures and occlusal surfaces can be reproduced in a lifelike fashion using, e.g. E 05 copper, E 11 mahogany or E 14 terra.
Staining
Completed crown
Natural tooth
Enamel stains are imitated with e.g. E 01 white or E 02 cream.
Staining
Completed crown
18
Natural tooth
®
e.max
IPS
Ceram –
Processing on ZrO2Frameworks
Framework preparation
The stipulations of the manufacturer of the zirconium oxide regarding framework fabrication and preparation
for veneering must be observed. When using IPS e.max ZirCAD, please observe the notes on finishing and
regeneration firing in the respective Instructions for Use.
Place the sintered zirconium oxide framework on the model. Reduce the margins of the premolar for a fused-on
ceramic shoulder down to the inner edge of the chamfer or shoulder preparation. Observe the following
procedure:
– Make sure that the minimum thicknesses are maintained even after minor adjustments.
– Check marginal area and carry out slight adjustments, if necessary.
– Do not 'post-separate' the bridge framework after sintering using separating disks, since this may result in undesired pre-
determined breaking points, which will subsequently compromise the stability of the all-ceramic restoration.
– Before veneering, clean framework under running water or with the steam jet and dry.
– The framework must not be blasted with Al2O3or polishing jet medium, since this would damage the
surfaces.
– Before ZirLiner is applied, the framework must be free of dirt and grease. Prevent any contamination after cleaning.
Frameworks
2
Processing on ZrO
Reduce the margins of the premolar down to the inner edge of the chamfer or shoulder preparation for the fused-on ceramic shoulder.
Before veneering, clean framework under running water or with the steam jet and dry.The framework must not be blasted with Al2O3.
Finished and cleaned zirconium oxide framework
19

ZirLiner firing
Before ZirLiner is applied, the framework must be free of dirt and grease. Avoid any contamination after
cleaning. Observe the following procedure.
– The IPS e.max ZirLiners are only suitable for the application on IPS e.max ZirCAD and other zirconium oxide frameworks.
– IPS e.max Ceram ZirLiner must always be applied prior to veneering in order to achieve a sound bond as well as an in-
depth shade effect and fluorescence.
– Direct layering on ZirCAD framework without using IPS e.max Ceram ZirLiner results in a poor bond and may lead to
delamination.
– For unshaded frameworks, use the IPS e.max Ceram ZirLiners 1-4. If the frameworks are shaded, the
IPS e.max Ceram ZirLiner clear is applied.
– Mix the IPS e.max Ceram ZirLiner in the corresponding shade with the respective liquid to a creamy consistency.
– If a different consistency is desired, the IPS e.max Ceram Build-Up Liquids (allround or soft) and the Glaze and Stain
Liquids (allround or longlife) may be used. The liquids may also be mixed with each other at any mixing ratio.
– Apply ZirLiner on the entire framework, pay special attention to the margins. If required, the restoration may be vibrated
until an even, greenish colour effect is achieved. If the colour appears too pale, the layer is too thin.
– For more intensively shaded areas, 4 IPS e.max Ceram Intensive ZirLiners (yellow, orange, brown and incisal) are available.
– After that, the applied ZirLiner is briefly dried and fired.
– The IPS e.max Ceram ZirLiner should have a layer thickness of approximately 0.1 mm after firing
– If ZirLiner is to be individually characterized after the Margin firing, IPS e.max Ceram Essence is suitable for this purpose.
Given the lower firing temperature of Essence, characterization prior to Margin firing is not possible.
Mix the corresponding IPS e.max Ceram ZirLiner with ZirLiner Liquid to a creamy consistency. Cover the entire framework with the mixed ZirLiner. Make sure that an even, greenish
Conduct the ZirLiner firing on a honey-combed firing tray using the stipulated firing parameters.
20
colour effect is achieved.
Firing parameters for the ZirLiner firing (note the temperature control)
IPS e.max Ceram on ZrO
ZirLiner firing
2
B StÀ T H V1 V2
°C/°F min °C/°F/min °C /°F min °C/°F °C/°F
403/
757 72 1760 842 1758
4:00
40/ 960/
1:00
450/ 959/
Frameworks
2
Do not apply any layering materials on unfired ZirLiner, since this will lead to delamination of the layering
ceramic. Before the actual layering is commenced, the ZirLiner must be fired.
1stMargin firing (optional)
A ceramic shoulder is applied to the reduced premolar bridge abutment after the ZirLiner firing. Observe the following
procedure:
– Before the ceramic shoulder is applied, cover the model die with IPS Margin Sealer and allow it to dry. After that, isolate
the shoulder areas using IPS Ceramic Separating Liquid.
– Place the framework on the die and make sure it is correctly positioned.
– Subsequently, mix IPS e.max Ceram Margin in the desired shade with the corresponding Margin Build-Up Liquid
(allround or carving) and apply in drop-shaped increments.
– For more intensively shaded areas, 4 Intensive Margin materials (yellow, yellow-orange and orange-pink) are available.
– Contour the Margin material as desired and dry.
– Carefully remove the framework with the applied and dried shoulder material from the die, place it on a honey-combed
tray and fire.
Processing on ZrO
Isolate the die and apply the Margin material on the entire shoulder preparation.
Do not apply the Margin material too thinly or with a concave shape.Apply the Margin material in drop-shaped increments.
21
Before firing, carefully remove the framework with the applied and dried shoulder material
from the die and fire.
Ceramic shoulder after firing. Compensate for the sinter shrinkage with the
Firing parameters for the 1stMargin firing (note the temperature control)
nd
Margin firing.
2
IPS e.max Ceram on ZrO2 B StÀ T H V1 V2
°C/°F min °C/°F/min °C /°F min °C/°F °C/°F
1stMargin firing
403/
757 72 1472 842 1470
4:00
40/ 800/
1:00
450/ 799/
Important: IPS e.max Ceram Margin materials are only suitable for the application on IPS e.max ZirCAD and other
zirconium oxide frameworks and must not be used in conjunction with glass-ceramic materials.
22
 Loading...