


C&BComposites
SR Adoro®
Adoro |
|
SR |
® |
|
|
Instructions for Use

Table of Contents
Information
Product
Practical Procedure
4
5
12
24
31
57
SR Adoro – The Composite Veneering System
Product Information
Material
Uses
Composition
Working Times
Curing Depths
The Product System
SR Accessories
Shade Determination
Practical Procedure for Framework-Free Restorations (Inlays/Onlays)
Preparation Guidelines and Minimum Layer Thicknesses Layering Diagram for Inlays / Onlays
SR Adoro Step by Step Sealing the Die Starting Situation Applying the Liner
Removing the Inhibition Layer Layering
Polymerization / Tempering Finishing / Polishing Preparing for Cementation
Practical Procedure for Framework-Free Restorations (Anterior Crowns)
Preparation Guidelines and Minimum Layer Thicknesses SR Adoro Step by Step
Starting Situation
Sealing the Die and Adjoining Parts of the Model Applying the Liner
Removing the Inhibition Layer Anterior Tooth Layering
Final Polymerization / Tempering Finishing / Polishing
Preparing for Cementation
Practical Procedure for Fixed Metal-Supported Restorations
Framework Design
SR Adoro Step by Step
Starting Situation / Framework Fabrication Casting and Finishing
Conditioning of the Framework Layering Diagram
Opaquer Layer
Cervical, Dentin and Incisal Layering Final Polymerization / Tempering Finishing / Polishing
Practical Procedure for Framework-Supported Combination Dentures
Procedure for Combination Dentures
Shade Matching of SR Adoro to Denture Teeth
Masking of Model Cast Retentions with Gingiva Opaquer
2

Practical Procedure
63
71
Practical Procedure for Fixed ZrO2-Supported Restorations
Framework Design
SR Adoro Step by Step
Starting Situation / Layer Thickness / Framework Design Framework Preparation / Conditioning
Applying the Liner
Layering Diagram for A–D and Chromascop Shades Dentin / Incisal Layering
Final Polymerization / Tempering Finishing / Polishing
Practical Procedure for Restorations with Gingiva Components
Framework Design
SR Adoro Step by Step
Example of a Possible Individual Layering Diagram Final Polymerization / Tempering
Finishing / Polishing
Information
General
76 General Information
Cementation
Polymerization / Tempering Parameters
Subsequent Adjustments
Materials Combination Table
Questions and Answers
3
SR
Adoro®
The Composite Veneering System
In view of the versatile application possibilities of veneering composites, we have made it our objective to develop a universally applicable material system that not only offers a wide variety of design options for experienced specialists but also constitutes an optimum and economic alternative for first-time users and all-rounders.
The main thrust of development work on SR Adoro was towards designing a material that offers optimal physical properties, excellent esthetics, convenient handling properties and ample flexibility. Particular emphasis was also placed on coordinating the individual components of the SR Adoro system with each other, as well as with other Ivoclar Vivadent systems (IPS d.SIGN® or IPS InLine®).
Ivoclar Vivadent, who fostered the idea of integrated systems many years ago, has complemented its product range by introducing SR Adoro. A coordinated range of products encompassing alloys, ceramics, denture teeth, equipment, cements and composite veneering materials enables dental technicians to fabricate fixed, removable and combination dentures.
At the same time, the range of possible framework materials was extended with SR Adoro. Zirconium oxide frameworks are an attractive alternative to conventional metal frameworks that may be optimally veneered with SR Adoro. Furthermore, SR Adoro is ideally suitable if "pink esthetics" is an issue. With the use of SR Adoro Gingiva materials, it is possible to complete the soft tissue components easily and efficiently with composite.
The well-balanced assortment – coordinated with the Chromascop and A–D shade guides – and the various additional assortments, enable users the highly esthetic reconstruction of lost tooth structure with SR Adoro.
Your possibilities with the SR Adoro system:
Framework-free |
Metal-supported |
ZrO2-supported |
SR Adoro Materials
4

SR
Adoro®
Product Information
Material
This composite is a tried-and-tested veneering system that offers several advantages over hybrid composite materials with regard to wear, handling, plaque resistance and surface gloss. This can be attributed to the high proportion of inorganic fillers in the nano scale range. Furthermore, the matrix is based on a urethane dimeth acrylate (UDMA), which is distinguished for its toughness, which is higher than that of its predecessors or the frequently used BisGMA.
In order to achieve a non-sticky, homogeneous consistency and a low-shrinkage system, a special prepolymer was developed, which, in turn, is based on nanofillers and the new UDMA. The result is a virtually homogeneous material, which may well be called a microfilled composite.
500 µm
Physical properties of SR Adoro
The inorganic microfillers together with an innovative matrix impart homogeneous structure to the material. The coordinated ratio between these two components provides the best physical properties and promotes a high resistance against discolouration, plaque accumulation and wear.
|
|
|
|
200 µm |
||
|
|
|
|
|
|
|
|
|
SR Adoro |
SR Adoro |
|||
|
|
Dentin |
Incisal |
|||
|
|
|
|
|
|
|
|
Flexural strength [MPa]* |
130 |
± 10 |
120 |
± 10 |
|
|
Vickers hardness [MPa] |
490 ± 10 |
480 ± 10 |
|||
|
|
|
|
|
|
|
|
Water absorption [µg/mm3]* |
17 |
± 1 |
17 |
± 1 |
|
|
Wear (Willitec chewing simulator) – |
|
<0.1 mm3 |
|
|
|
|
Volume abrasion |
|
|
|
|
|
|
|
|
|
|
|
|
|
Modulus of elasticity [MPa] |
7000 |
± 500 |
7000 |
± 500 |
|
|
|
|
|
|
|
|
*according to ISO 10477
Esthetic properties of SR Adoro
Highly esthetic results can be achieved even if a straightforward, basic layering procedure is used. Even the basic SR Adoro material exhibits an opalescent effect, which equals that of the natural tooth. Aspects such as brightness and chroma and/or opacity and translucency were taken into consideration for the colouration of SR Adoro. These characteristics are apparent in the individual components and endow the material with its highly esthetic properties.
5
Uses
Indications
Fixed Denture Prosthetics
Metal-supported
–Veneering of metal-supported restorations with the application of SR Adoro Thermo Guard
–Veneering of combination dentures (e.g. telescope veneers) with the application of SR Adoro Thermo Guard
–Veneering of partially removable implant superstructures with the application of SR Adoro Thermo Guard
–Veneering of Gingiva components in partially removable implant superstructures with the application of SR Adoro Thermo Guard
–Fabrication of long-term temporaries with the application of SR Adoro Thermo Guard
–Masking of model cast frameworks with SR Adoro Opaquer pink
Zirconium oxide-supported
–Veneering of ZrO2-supported restorations
–Characterization and veneering of frameworks and implant superstructures made of yttrium oxide, partially stabilized, sintered or HIP zirconium oxide in a CTE range of 10.5–11.0 x 10⁻⁶ K-1 (100–500 °C).
Metal-free
–Inlays / onlays / veneers
–Anterior crowns
–Long-term temporaries with Everest C-Temp Blanks (KaVo) with a maximum wear period of 12 months
Removable Denture Prosthetics
–Surface characterizations with SR Adoro Stains of Ivoclar Vivadent resin teeth (PMMA) with subsequent veneering with SR Adoro layering materials
–Shape and shade adjustments of Ivoclar Vivadent resin teeth (PMMA) with SR Adoro layering materials in combination with SR Composiv
Contraindications
–Veneering of metal-supported restorations without the application of SR Adoro Thermo Guard
–Posterior crowns without framework support (ZrO2 or alloys)
–Quadrant restorations without sufficient support by the residual dentition
–Veneering of long-span, multi-unit, metal-supported bridges (horseshoe) without sufficient support by the residual dentition
–Conventional cementation of fixed, metal-free restorations
–Framework-free long-term temporaries with a wear period of more than 12 months
–Patients with occlusal dysfunctions and/or parafunctions, such as bruxism, etc.
–Patients with inadequate oral hygiene
–Any clinical applications that are not described as an indication by the manufacturer
–Removal of SR Adoro veneers and reuse of the zirconium oxide framework
–Veneering of zirconium oxide frameworks without the application of SR Adoro Liners
General notes
As is generally known, composites have to meet different demands due to country-specific uses.
Composite veneering materials show specific characteristics and properties and their performance and durability can therefore not be compared with that of other C&B materials.
The composite restorations may require clinical repair over time, depending on the situation and the individual case. The restorations can be repaired by means of microfilled composites, as described in the section on "Subsequent Adjustments" on page 79.
6

Composition
–SR Adoro layering materials
(Cervical, Dentin, Deep Dentin, Incisal, Transpa, Impulse and Gingiva materials)
Dimethacrylate (17–19 wt.%); copolymer and silicon dioxide (82–83 wt.%). Additional contents are catalysts, stabilizers and pigments (<1 wt%).
The total content of inorganic fillers is 64–65 wt.%/46–47 vol.%. Particle size 10-100 nm.
–SR Adoro Liner
Dimethacrylate (48 wt.%); barium glass filler and silicon dioxide (51 wt.%). Additional contents are catalysts, stabilizers and pigments (<1 wt%).
–SR Adoro Opaquer
Dimethacrylate (> 55 wt.%); inorganic fillers (43 wt.%). Additional contents are catalysts, stabilizers and pigments (< 2.5 wt%).
–SR Adoro Stains
Dimethacrylate (47–48 wt.%); copolymer and silicon dioxide (49–50 wt.%).
Additional contents are catalysts, stabilizers and pigments (2–3 wt%).
–SR Adoro Add-On
Dimethacrylate (16–17 wt.%); copolymer and silicon dioxide (82–83 wt.%). Additional contents are catalysts, stabilizers and pigments (<1 wt%).
–SR Model Separator
Polyglycol, polyethylene glycol in a water/alcohol solution.
–SR Link
Dimethacrylate, phosphate ester, solvent and benzoyl peroxide.
–SR Gel
Glycerine, silicon dioxide and aluminium oxide.
–SR Adoro Thermo Guard
Diethylene glycol, water, inorganic fillers, synthetic fibres.
–SR Retention Adhesive
Copolymer, resin and softener (30 wt.%) dissolved in acetone (70 wt.%).
–SR Micro Retention Beads 200–300 microns
–SR Macro Retention Beads 400–600 microns
Copolymer (99.5 wt.%) and titanium dioxide (0.5 wt.%).
–SR Composiv
Dimethacrylate; silicon dioxide (16–17 wt.%) Additional contents are catalysts, stabilizers and pigments (<2.5 wt.%).
–Universal Polishing Paste
Emulsion of aluminium oxide, ammonium oleate, petroleum distillate and water.
Warning
SR Adoro is intended for dental-lab use only. Contact of unpoly merized material (pastes) with the skin or eyes must be prevented. Skin contact of unpolymerized material may have a slight irritating effect and may lead to a sensitization against methacrylates. Many commercial medical gloves do not provide protection against the sensitizing effect of methacrylates. Do not inhale grinding dust. The safety notes on the individual primary packages and labels have to be observed.
General note
Failure to observe the stipulated contraindications and processing instructions may lead to clinical failure.
Side effects
There are no known side effects to date. In individual cases allergic reactions may occur. If a patient is known to be allergic to any of the ingredients, SR Adoro must not be used.
Storage instructions
–Store SR Link in the refrigerator (2–8 °C/36–46 °F).
–Store SR Adoro layering materials and SR Adoro Thermo Guard at 12–28°C/54–82 °F.
–Close syringes immediately after usage (exposure to light causes premature polymerization).
–Reseal SR Adoro Thermo Guard immediately after use (exposure to light causes premature polymerization).
–Protect the materials from direct sunlight.
–Do not use the products after the indicated expiration date.
–Keep material out of children’s reach.
How to clean SR Adoro restorations
Incorrect use of the ultrasound cleaning liquid may dissolve the composite surface due to the high aggressiveness of the liquids. Therefore, alkaline cleaners with a pH value higher than 8 should not be used.
7
Working Times
SR Adoro materials are sensitive to light. The working time depends on the layer thickness, shading and the prevailing light conditions. Light shades react more quickly than do dark ones. The times listed below represent mean values at a light intensity of 3000 lux, which corresponds to the light encountered in a well-lit working space. Bear the maximum time limit in minds, when extruding the material from the syringe.
|
SR Adoro |
Time |
|
|
|
|
|
viscosity |
SR Adoro Liner |
|
|
SR Adoro Opaquer |
2–25 min |
||
|
|||
|
SR Adoro Intensive Opaquer |
||
low |
|
||
SR Adoro Stains |
|
||
|
SR Adoro Cervical |
|
|
|
|
||
viscosity |
SR Adoro Deep Dentin |
4–25 min |
|
SR Adoro Incisal / Transpa |
|||
|
SR Adoro Dentin |
|
|
high |
SR Adoro Add-On |
|
|
|
|
||
|
SR Adoro Impulse |
|
|
|
SR Adoro Gingiva |
|
|
|
|
|
Curing Depths
Given the material's sensitivity to light, the curing depth of
SR Adoro (i.e. precuring with Quick initial light unit) depends on the shade and, above all, the layer thickness applied. Light and translucent shades cure more readily, as light can penetrate them more easily than it does darker and more opaque shades. The curing depths listed below represent values achieved with the Lumamat 100/Targis Power Upgrade with a precuring step of 20 seconds using the Quick initial light unit. It is paramount to bear these values in mind when layering the individual materials.
SR Adoro |
|
Curing depth in mm |
|
(final polymerization with prior precuring for 20 seconds with the Quick) |
|||
|
|||
SR Adoro Opaquer |
max. 0.05 |
||
SR Adoro Stains |
|
0.2 – 0.8 |
|
SR Adoro Pastes (depending on the shade) |
1.0 – 2.0 |
||
|
|
|
|
The Product System
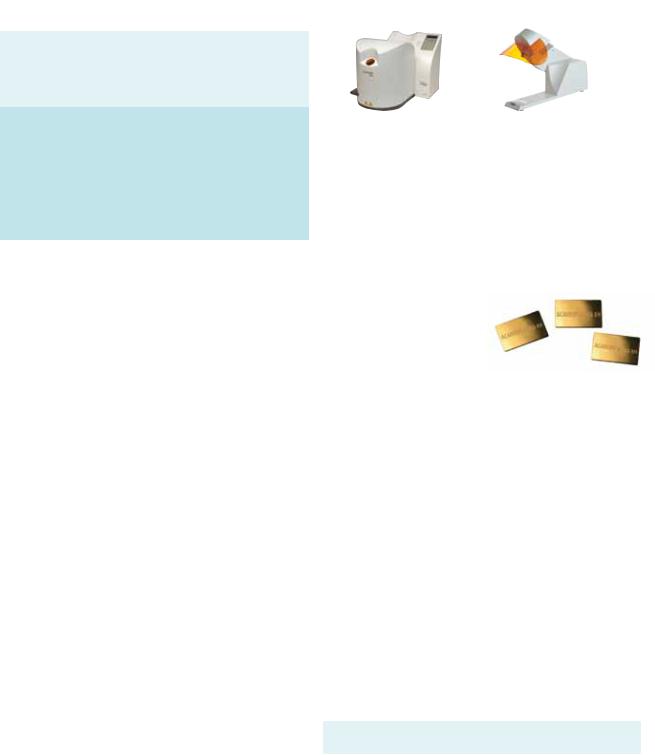
Compatibility with Ivoclar Vivadent equipment
The high-performance Lumamat® 100 light furnace was especially developed for the fabrication of high-quality composite restorations. The object holder of the furnace ensures that the SR Adoro restorations are appropriately positioned for optimum polymerization/ tempering so that they can develop their physical properties to the full. The sensor-controlled Quick can be used for fast precuring processes. It can also be used for the intermediate polymerization of other light-curing veneering materials.
Compatibility with Ivoclar Vivadent alloys
All metal-supported restorations involve the veneering of a pre viously fabricated metal framework. Ivoclar Vivadent offers customers a wide range of different high-quality alloys, which are purposedesigned for their specific field of application. The selection includes high gold, reduced-gold and base metal alloys. The SR Link bonding system provides a sound bond between the metal and composite.
If you use other alloys, please contact the corresponding manufacturer to make sure that the alloy used is compatible with SR Link and its components.
Alloys |
|
Au |
Pt |
Pd |
Ag |
High Gold Content |
|
|
|
|
|
Academy Gold |
77.2 |
< 1.0 |
– |
12.7 |
|
Harmony® PF |
72.0 |
3.6 |
– |
13.7 |
|
Academy Gold XH |
70.7 |
3.6 |
– |
13.7 |
|
Reduced Gold |
|
|
|
|
|
Harmony® X-Hard |
68.3 |
2.9 |
3.6 |
13.8 |
|
XL-X® |
62.8 |
– |
3.9 |
16.1 |
|
Maxigold® |
59.5 |
– |
2.7 |
26.3 |
|
Midigold® 50 |
50.0 |
– |
3.5 |
35.0 |
|
Magenta |
50.0 |
– |
6.5 |
21.0 |
|
Minigold® |
40.0 |
– |
4.0 |
47.0 |
|
Harmony® 3 |
3.5 |
– |
25.9 |
50.8 |
|
Universal Alloys |
|
|
|
|
|
BioUniversal PdF |
71.1 |
9.2 |
– |
11.7 |
|
|
|
Co |
Ni |
Cr |
Mon |
Base Metal |
|
|
|
|
|
IPS d.SIGN® 30 |
60.2 |
– |
30.1 |
< 1.0 |
|
Colado® CC |
59.0 |
– |
25.5 |
5.5 |
|
Colado® NC |
|
– |
65.1 |
20.2 |
1.8 |
4all |
|
– |
61.4 |
25.7 |
11.0 |
Values in percent (%)
*The range of available alloys may vary from country to country
8
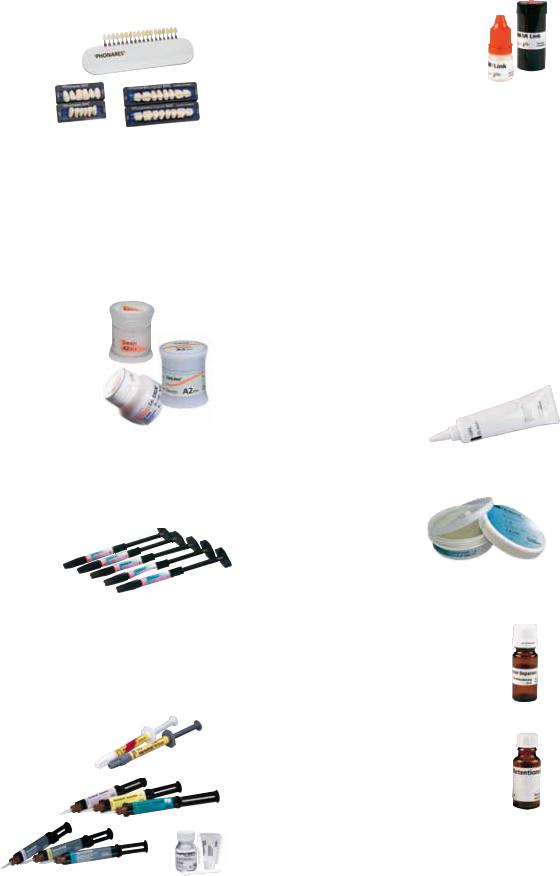
Compatibility with Ivoclar Vivadent tooth lines
Especially in partial and removable denture prosthetics, the com patibility between denture teeth and composite veneering material plays a particularly essential role. For this reason, we paid particular attention to developing a material that
is capable of reproducing the shade of the Ivoclar Vivadent denture teeth.
Compatibility with IPS d.SIGN® and IPS InLine®
The shade concept of SR Adoro, the IPS InLine System, as well as IPS e.max Ceram follows that of IPS d.SIGN. This means that there is an Opaquer, Dentin, Deep Dentin and matching Incisal materials for each tooth shade. The shading of the Impulse, Gingiva, and Stains materials follows that of the IPS d.SIGN, IPS InLine and IPS e.max Ceram materials so that the additional materials that are independent of any shade system permit a similarly esthetic appearance.
This allows users to work more efficiently. Consequently, the processing of combined restorations is easier and faster and shade adaptation to existing ceramic restorations is more efficient.
SR Adoro Gingiva concept
The shades of SR Adoro Gingiva are coordinated with those of the Ivoclar Vivadent Gingiva concept of the IPS InLine, IPS d.SIGN and IPS e.max systems. In this way, the shade design of true-to-nature gingiva components, particularly in conjunction with implant superstructures, is possible according to the same method with all veneering systems.
Compatibility with Ivoclar Vivadent cementation systems
Choose an adequate cementation option from the Ivoclar Vivadent range. Suitable luting composites or cements are available for both the adhesive cementation of framework-free restorations and the conventional cementation framework-supported restorations.
Framework-free restorations:
–Variolink® Veneer
–Variolink® II
–Multilink® Automix
Metal- / zirconium oxide-supported restorations:
–Multilink® Automix
–SpeedCEM®
–Vivaglass® CEM
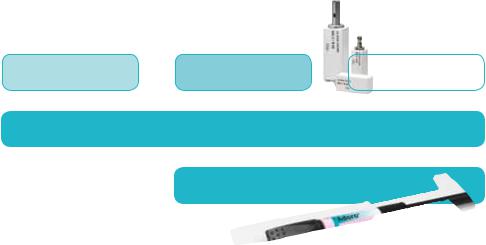
SR® Accessories
SR Link, 5 ml
SR Link is a metal/ZrO2 /composite bonding agent that provides a covalent bond between the metal and ZrO2 frameworks and SR Adoro. SR Link is an easy- to-use and, above all, tried-and-tested bonding system that can be used in conjunction with a wide selection of alloys and ZrO2 frameworks. The bonding system is suitable for use on frameworks made of
–alloys that contain less than 90% gold, palladium and platinum
–alloys that contain less than 50% copper and/or silver
–base metal alloys
–titanium alloys
–ZrO2
SR Link must not be used on electroformed (Galvano) frameworks, as the reactivity of the components partaking in the chemical reaction decreases with increasing contents of precious metal (Galvano, 99.9% fine gold). Consequently, not enough metal-phosphate bonds are formed.
SR Gel, 30 ml
SR Gel is a glycerine-based masking gel that is impervious to oxygen . The gel is applied to the restoration before polymerization/ tempering to minimize the formation of an inhibition layer on the surface of the veneering composite. Consequently, the gel
ensures complete curing of the restoration
SR Adoro Thermo Guard, 175 g
SR Adoro Thermo Guard is a diethylene glycoland water-based paste. The paste, which is applied to all exposed metal parts, provides a thermally absorbing
(cooling) effect, thereby minimizing the internal tension at the interface between metal and SR Adoro. As a result, SR Adoro Thermo Guard helps reduce the risk of hairline cracks.
SR Model Separator, 10 ml
The SR Model Separator is suitable for separating working dies during the fabrication of metal-free restorations and adjoining stone surfaces during composite veneering.
SR Retention Adhesive, 20 ml
This adhesive varnish is utilized to affix microand macroretention beads to the restoration surfaces after contouring.
9
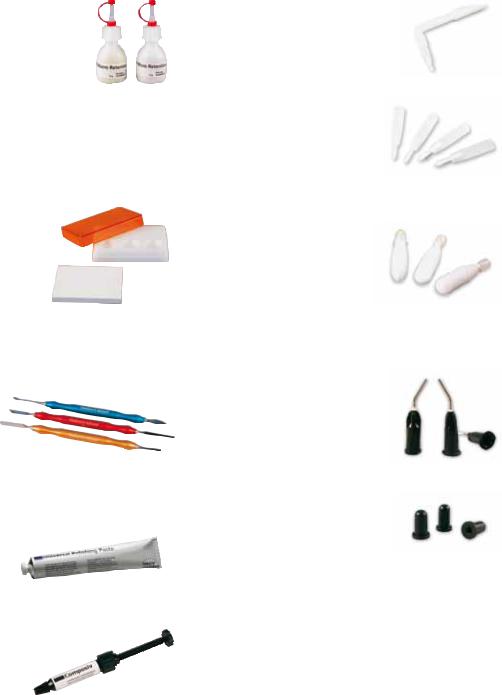
SR Micro Retention Beads, 15 ml SR Macro Retention Beads, 15 ml
Two different sizes of retention beads are available, depending on space conditions.
–Micro retention beads: 200–300 microns
–Macro retention beads: 400–600 microns
SR Mixing Pad, small SR Mixing Plate, small
The SR mixing pad and SR mixing plate are used for different materials . The pad is mainly used to process liquid materials so that time-consuming cleaning of the plate can be avoided.
By contrast, the plate is used to mix the composite components. The light-protective cover of the plate extends the working time of the materials.
SR Modelling Instruments
A (yellow), B (red), C (blue)
The classic Ivoclar Vivadent modelling instruments for composite materials, which are provided in a new, user-friendly design, facilitate the adaptation and contouring of composite materials. They are available with 6 different tips and
can be used for a variety of applications.
Universal Polishing Paste, 100 ml
The SR Universal polishing paste enables quick and efficient polishing of composite and metal restorations to a high gloss. The paste is particularly suitable for prepolishing and principal polishing of SR Adoro veneers.
SR Composiv, 2.5 g
This ivory-coloured bonding paste is the ideal light-curing microfilled composite to optimize the bond of various resins and composite materials. The paste is mainly applied
to promote the bond between Ivoclar Vivadent denture teeth and the
SR Adoro veneering material.
Universal Holder
Used to handle disposable brushes and sponges and thereby help to facilitate the working procedures in the dental laboratory.
Disposable Brushes, 50x
The disposable brushes are particularly suitable for the application of liquid materials, such as SR Model Separator, SR Link, and SR Adoro Opaquer.
Disposable Sponges, 50x
The disposable sponges have been modified to fit into the universal holder. They are used to remove the inhibition layer after polymerization of the Opaquer and Liner.
Cannulas, 10x
These applications can be attached to Liner, Opaquer and Stains syringes. They help achieve more accurate dosing and cleaner application procedures as the extrusion pressure can be controlled.
Cannula Caps, 20x
The cannula caps prevent the material from drying out or polymerizing prematurely while it is is in the cannula and provide protection against contamination.
10
Shade Determination
After tooth cleaning, the tooth shade of the non-prepared tooth and/or the adjacent teeth is determined with the help of a shade guide. Individual characteristics have to be considered when determining the tooth shade. If a crown preparation is
planned, for example, the cervical shade should also be determined. In order to achieve the best possible true-to- nature results, shade determination should be carried out at daylight. Furthermore, the patient should not wear clothes of intensive colours and/or lipstick.
SR Adoro – Individualized shade determination
It goes without saying that the materials shade guides are an integral part of the SR Adoro product concept. The dentin shade tabs feature a textured surface and anatomical shape for light refraction purposes. The other shade tabs are slightly wedge-shaped to take account of the translucency of the individual materials. All shade tabs feature a smooth, i.e. untextured, reverse side to assist users in comparing the shades against the prepared tooth and coloured cements and adhesives. The smooth side of the shade tabs may be individually ground to determine the layering. The individual shade tabs are made of ceramic for reasons of shade stability. They are fired of specially coloured ceramic materials to ensure that they comply with the individual SR Adoro materials. As the materials shade guides have been modelled on the IPS d.SIGN and IPS InLine system shade guides, the sample holders of the SR Adoro shade guides are coloured light grey to distinguish them from the shade guides of other materials.
11

SR |
Adoro – Practical Procedure |
|
® |
for Framework-Free Restorations (Inlays/Onlays)
Preparation Guidelines and Minimum Layer Thicknesses
As framework-free SR Adoro restorations are placed using an adhesive cementation method, a toothconserving and defect-oriented preparation technique can be used.
Inlays
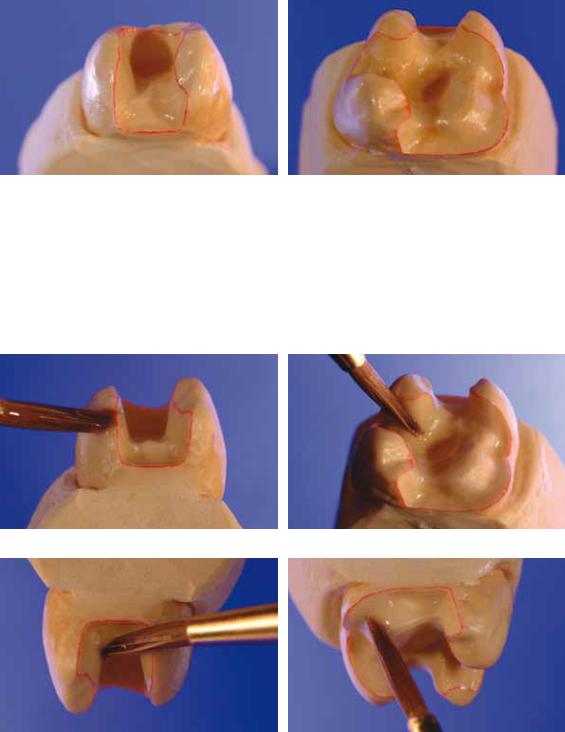
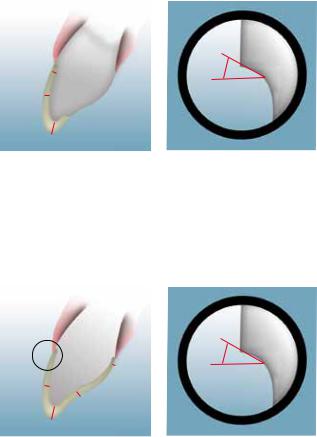
Provide a preparation depth of at least 1.5 mm in the fissure area (central fissure). The isthmus width should be at least 1.5 mm. The walls of the box should be slightly flared. Round out internal line angles to enable accurate fit of the inlay. Avoid preparation margins in functional or abrasion surfaces. Avoid proximal contacts areas. Do not prepare slice-cuts or feather edges.
>90°
1.5
1.5 |
60°–80° |
Onlays
Allow for a preparation of at least 1.5 mm in the area of the fissures, an isthmus width of at least 1.5 mm and provide 1.5 mm space in the area of the cusps. The shoulder may be prepared with a
chamfer (10°–30°) to improve the esthetic appearance of the transition between the composite and the tooth. Onlays are indicated if the preparation margin is less than approximately 0.5 mm away from the cusp tip, or if the enamel is severely undermined.
1.5
1.5 |
1.5 |
10°-30° |
|
|
|
|
|
|
12

Layering Diagram for Inlays/Onlays
Inlay layering
Onlay layering
|
|
Liner |
|
|
Dentin |
|
|
|
Apply the liner up to the margin |
|
Incisal |
|
||
13 |
|
|
Practical Procedure for Framework-Free Restorations (Inlays/Onlays)
SR Adoro Step by Step
Starting Situation
Fabricate a master model or a model with detachable segments according to the impression in the usual manner. Expose and mark the preparation margin. Block out undercuts with blocking out wax or block out resin to ensure that the restoration can be removed after the polymerization process without damaging the die. Basically, the application of a sealer is recommended to harden the surface and to protect the stone die. However, the sealer layer must not result in any changes of the dimensions of the stone die. It is not mandatory to utilize a spacer, as two coats of SR Model Separator will be applied. If you use a spacer, check as to whether it is compatible with SR Model Separator.
Fabrication of a working model with removable segments. The die is coated with sealer.
Sealing the Dies and Adjoining Parts of the Model
SR Model Separator is applied in two thin coats. Apply the first coat generously and make sure that all areas of the cavity are well covered. Watch out for sharp edges in particular. Allow the layer to react for 3 minutes. After the reaction time, apply a second layer in a thin coat, invert the model, and allow to dry for 3 minutes. Additionally, apply SR Model Separator to adjoining model surfaces that may come into contact with SR Adoro (including counterbite), allow to react for a short time, and then disperse excess material with oil-free compressed air.
Apply first coat of SR Model Separator generously, watch out for sharp edges, and allow to react for 3 minutes.
Apply second layer of SR Model Separator in a thin coating and allow to dry for 3 minutes in an upside down position.
14

Liner Application
Procedure for non-discoloured cavities
–Apply Liner clear to the cavity walls and the cavity floor (dentin area) for an optimum chameleon effect.
–Apply Liner incisal in the marginal areas (course of natural enamel) to achieve a harmonious transition between the shade of the restoration and natural tooth structure without grey lines.
Procedure for
slightly discoloured cavities
–Mask dark areas using a liner in an appropriate shade (050-500).
–Coat the remaining portions of the cavity, except the marginal areas, with Liner clear.
–Apply Liner incisal in the marginal areas (course of natural enamel) to achieve a harmonious transition between the shade of the restoration and natural tooth structure without grey lines.
Procedure for
severely discoloured cavities
–Mask the entire cavity, except the marginal areas, using a liner in a corresponding shade (050–500).
–Apply Liner incisal in the marginal areas (course of natural enamel) to achieve a harmonious transition between the shade of the restoration and natural tooth structure without grey lines.
Practical Procedure for Framework-Free Restorations (Inlays/Onlays)
|
Liner clear |
|
Liner incisal |
|
Liner 050–500 |
1st Liner layer– 050–500, clear
Extrude the desired amount of the ready-to-use Liner paste from the syringe and spread it out slightly on the mixing pad using a disposable brush.
First, apply the Liner to the cavity walls and cavity floor in a thin coat and precure each segment for 20 seconds using a Quick curing light. Make sure to fully cover all areas, as the Liner provides an essential bonding surface to the luting composite. Do not cover marginal areas at this stage (course of natural enamel).
Fully cover the cavity walls and cavity floor with the first Liner coat.
15
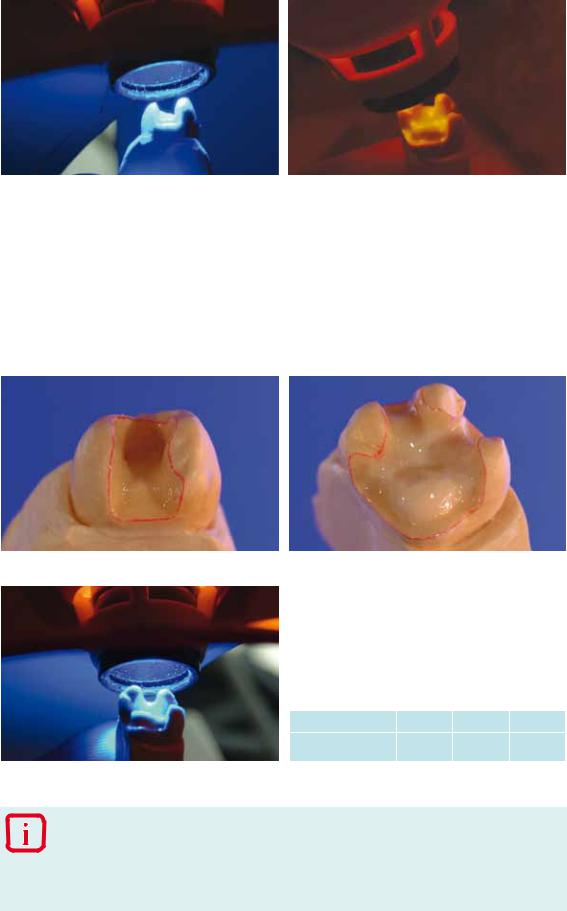
Precure each segment for 20 seconds using a Quick curing light.
2nd Liner layer– incisal
After the application of the first Liner layer, apply Liner incisal in the marginal areas so that all cavity surfaces are coated with Liner. Apply Liner incisal up to the preparation margin in order to ensure a reliable bond between the preparation margins and the luting composite. This measure helps to reduce premature discolouration between the restoration margins and tooth structure.
Apply Liner incisal in the marginal areas, i.e. along the course of the natural enamel ...
Polymerizing the Liner |
Apparatus |
Time |
Program |
|
Precuring time per |
Quick |
20 s |
– |
|
segment |
||||
|
|
|
... and precure each segment for 20 seconds.
–The entire inner surface of the restoration has to be covered with SR Adoro Liner. The layer thickness should be at least 150 microns. Thin out the Liner towards the preparation margin.
–Do not detach hardened SR Adoro Liner from the die, as the layer may become deformed or break in the process.
–If desired, the translucency of the Liners 050-500 may be increased by using Liner clear or Liner incisal.
16

Removing the Inhibition Layer
Thoroughly remove the resulting inhibition layer using a disposable sponge (do not use a solvent); make sure that the Liner surfaces are free of residue and exhibit a mat finish.
Thoroughly remove the inhibition layer with clean disposable sponges.
17
Practical Procedure for Framework-Free Restorations (Inlays/Onlays)

Inlay / Onlay Layering
Adapt the first layer firmly (press into place) to ensure an effective bond between the Liner and composite and precure each segment for 20 seconds using a Quick curing light. The shade effect in the interdental area and cavity may be increased by means of Occlusal Dentin orange. Slightly emphasize the marginal ridges and cusps with Deep Dentin. Subsequently, begin the process of building up the cavity with Dentin materials. Make sure to provide adequate space for the subsequent application of Incisal and Transpa materials. The translucency of the restoration may be increased by means of coloured Transpa materials, such as Transpa orange-grey and Transpa brown-grey. Layer SR Adoro layering materials step by step and precure each individual layer. After building up and precuring the dental plateau, apply characterizations with SR Adoro Stains and precure for 20 seconds. Next, complete the restoration using Incisal and Transpa materials. The cusp tips and triangular ridges may be supplemented with a fine layer of Opal Effect 3 and 4. Adapt firmly and create smooth, rounded transitions between the layers using SR modelling instruments and synthetic brushes.
Increase the shade effect in the interdental and cavity area with Occlusal Dentin ...
... and slightly emphasize the marginal ridges and cusps with Deep Dentin.
Build up a plateau using various Dentin materials ....
18

... and apply characterizations using SR Adoro Stains.
Precure with the Quick curing light and apply Incisal and ...
... Transpa materials to cover the characterizations and create a true-to-nature occlusal morphology.
Complete the procedure by precuring each segment for 20 seconds using the Quick curing light.
–It is essential to observe the stipulated curing depth and maximum layer thickness of the individual materials during the layering procedure.
–If the maximum layer thickness is exceeded, break up large portions into several increments and precure each increment for 20 seconds.
–SR Adoro Stains have to be coated with layering material (e.g. Incisal, Transpa).
19
Practical Procedure for Framework-Free Restorations (Inlays/Onlays)
Polymerization / Tempering
Preparing for polymerization / tempering
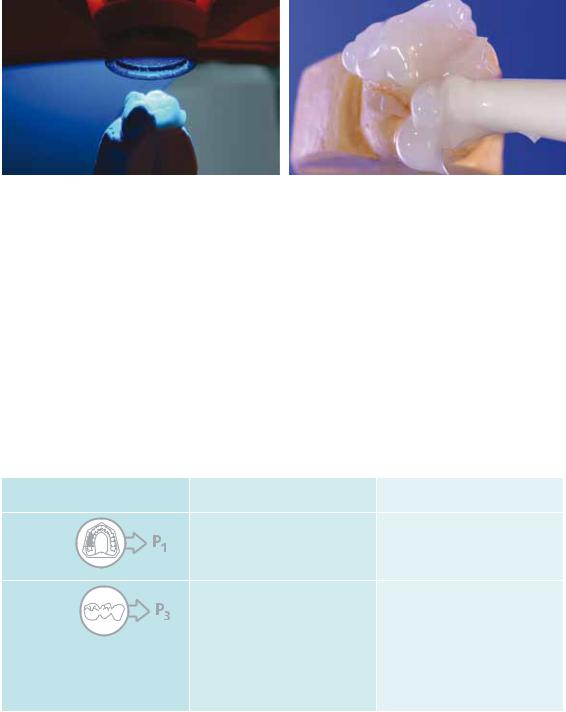
After the layering procedure has been completed, all layers must be precured. To make sure that this is the case precure each segment for 20 seconds using a Quick curing light. Next, apply SR Gel on the entire veneering surface ensuring that all areas are fully covered and the layer is not too thick.
If necessary, precure one more time and apply a fully covering but not inappropriately thick coat of SR Gel.
General notes on polymerization / tempering
After the application of SR Gel, mount the restoration on the object holder and place it in the Lumamat 100 or Targis Power Upgrade furnace in the correct position. The following points must be observed for polymerization / tempering:
–2 programs (P1 and P3) are available for polymerizing / tempering SR Adoro restorations with and without model.
–Framework-supported SR Adoro restorations are permanently polymerized / tempered without model dies and without model using Program P3.
–Framework-free SR Adoro restorations are permanently polymerized / tempered on the model dies without model base. If up to 3 restorations are permanently polymerized /tempered together, Program P3 has to be used. For the permanent polymerization / tempering of more than 3 framework-free SR Adoro restorations, Program P1 is used.
–If SR Adoro restorations are to be permanently polymerized on the model using Program P1 (e.g. bridges), all removable model components (pontic rests, neighbouring teeth) have to be removed from the working model. The remaining weight of the working model must not exceed 400 g.
Lumamat 100 / |
Framework-supported |
Framework-free |
|
Targis Power Upgrade |
|
|
|
|
|
– |
4 or more inlays, onlays and/or |
Program 1 |
|
|
crowns on dies |
|
|
|
|
|
Metal |
– |
up to 3 inlays, onlays and/or |
Program 3 |
– Crowns and multi-unit bridges |
|
crowns on dies |
with applied SR Adoro Thermo |
|
|
|
|
|
|
|
Guard
Zirconium oxide
–Crowns and multi-unit bridges without applied SR Adoro Thermo Guard
20

Mount the dies on the object holder and position correctly.
Make sure that the restorations are not located outside the marked polymerization/tempering zone ...
Inlays/onlays |
Apparatus |
Time |
Program |
|
Precuring time per |
Quick |
20 s |
– |
|
segment |
|
|||
|
|
|
||
|
Lumamat |
|
|
|
Final polymerization / |
100/Targis |
25 min |
3 |
|
tempering |
Power |
|||
|
|
|||
|
Upgrade |
|
|
... select Program 3 and start.
–Calibrate the furnace on a regular basis by means of the L 100 test set. Observe the corresponding manufacturer's instructions.
21
Practical Procedure for Framework-Free Restorations (Inlays/Onlays)
Finishing / Polishing
Finishing
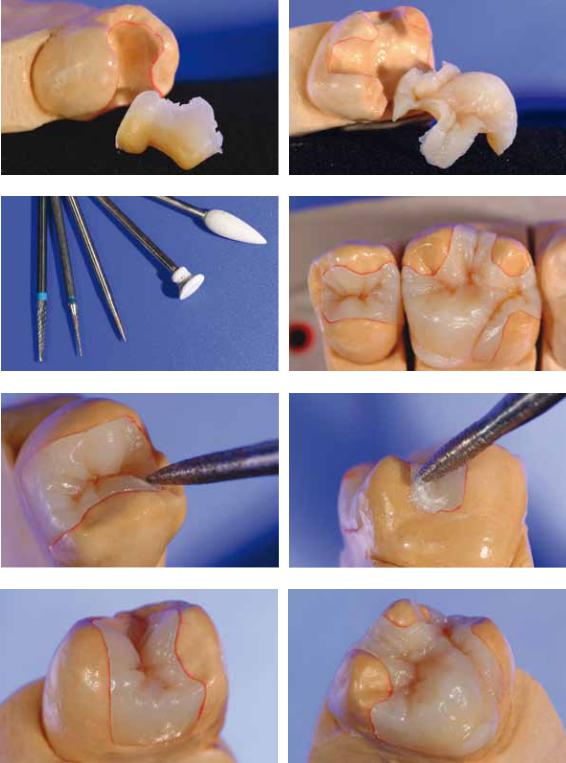
After completion of the polymerization / tempering procedure, completely remove SR Gel from the restoration using running water and/or a steamer. Carefully remove the restoration from the die while it is still warm. If the restoration is removed at a later stage, it is advisable to warm up the stone die by means of water vapour. Finish the restoration with cross-cut tungsten carbide burs and fine diamonds. It is advisable to use low speed and light pressure. Make sure to rework the entire restoration to remove the inhibition layer of approximately 30 microns from all surfaces. Carefully taper the margins of the restoration, lightly grind the margins, and adjust proximal and occlusal contact points. Subsequently, recreate a lifelike tooth shape and surface structure.
Remove SR Gel and carefully lift the restorations off the die.
Finish the surface with cross-cut burs and remove the inhibition layer.
Lightly grind the margins using fine diamonds and tungsten carbide burs ...
... and re-create a true-to-nature surface structure.
22
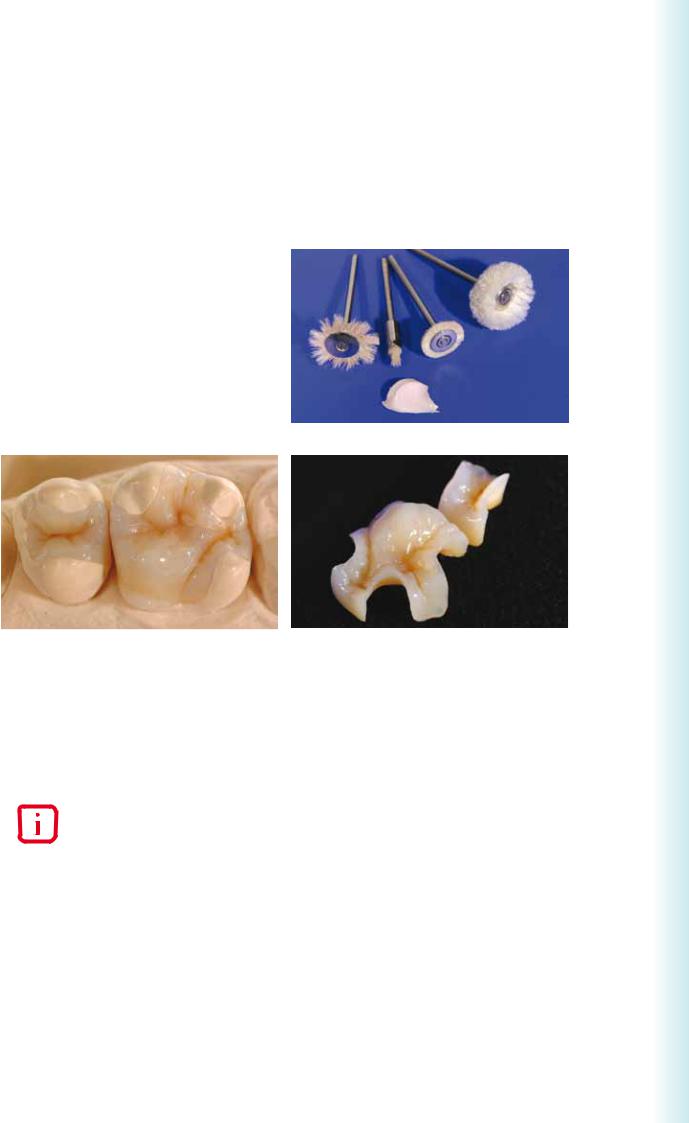
Polishing Prepolishing
Carefully smooth out the ridges on the occlusal surface and proximal surfaces with rubber polishers and silicone polishing wheels. Pay particular attention to the margins in order to avoid rendering them too short.
High-gloss polishing
The restorations are polished to a high gloss using cotton or leather buffing wheels, as well as the Universal Polishing Paste. Use low speed and slight pressure for high-gloss polishing . Adjust the pressure at the handpiece, not with the polishing motor.
In order to optimally polish the occlusal surfaces, we recommend modifying the goat hair brushes to become starshaped so that only the desired areas can be polished due to the smaller size of the brush.
Depending on the type of high gloss desired, leather buffing wheels can be used to achieve a high shine, while cotton buffers are used to achieve a lesser degree of lustre.
Practical Procedure for Metal-Free Restorations (Inlays/Onlays)
SR Adoro inlay and onlay polished to a high gloss
Preparing for Cementation
 |
It is essential to cement SR Adoro restorations using an adhesive cementation technique. |
|
|
In order to achieve a chemical bond with the luting composite, the cavity side of the restoration has to be carefully blasted with Al2O3 at 1 bar (15 psi) pressure in the laboratory. Following the try-in in the dental office and subsequent cleaning, the contact surfaces are again roughened with a 25 micron finishing diamond. Finally, the surfaces are silanized (e.g. with Monobond® Plus) to enable a chemical bond.
23
SR |
Adoro – Practical Procedure |
|
® |
for Framework-Free Restorations (Anterior Crowns)
Preparation Guidelines and Minimum
Layer Thicknesses
Veneer
If possible, the preparation should be entirely located in the enamel. Either design a classical preparation with oro-incisal, chamfer-type embrasure of the incisal edge, or a simple incisal reduction without embrasure of the incisal edge. Avoid incisal preparation margins in functional or abrasion surfaces. The minimum preparation thickness is approx. 0.6–1.0 mm depending on the preparation technique selected. Dissolution of the proximal contacts is not required. Discoloured teeth may require more preparation. The extent of the incisal reduction depends on the desired translucency. The more translucent the incisal edge of the intended veneer is to appear, the more pronounced the reduction should be.
Anterior crown
Evenly reduce the anatomical shape and observe the stipulated minimum thickness. Prepare a circular shoulder with rounded inner edges or a pronounced chamfer of at least 0.8 mm. In the anterior region, reduce the labial and/or palatal / lingual surfaces by at least 1.0 mm. Reduce the incisal crown third by at least 1.5 mm. Design transitions in such a way that no angles or edges are present.
0.6
0.7
1.0
0.8 
0.8
≥1
≥ 1
1.5
10°-30°
10°-30°
24
SR Adoro Step by Step
Starting Situation
Fabricate a master model or a model with detachable segments according to the impression in the usual manner. Expose and mark the preparation margin. Block out undercuts with blocking out wax or block out resin to ensure that the restoration can be removed after the polymerization / tempering process without damaging the die. Basically, the application of a sealer is recommended to harden the surface and to protect the stone die. However, the sealer layer must not result in any changes of the dimensions of the stone die. It is not mandatory to utilize a spacer, as two coats of SR Model Separator will be applied. If you use a spacer, check as to whether it is compatible with SR Model Separator.
A master model is used as the working model. |
Fabrication of a working model with removable segments. The die is coated with sealer. |
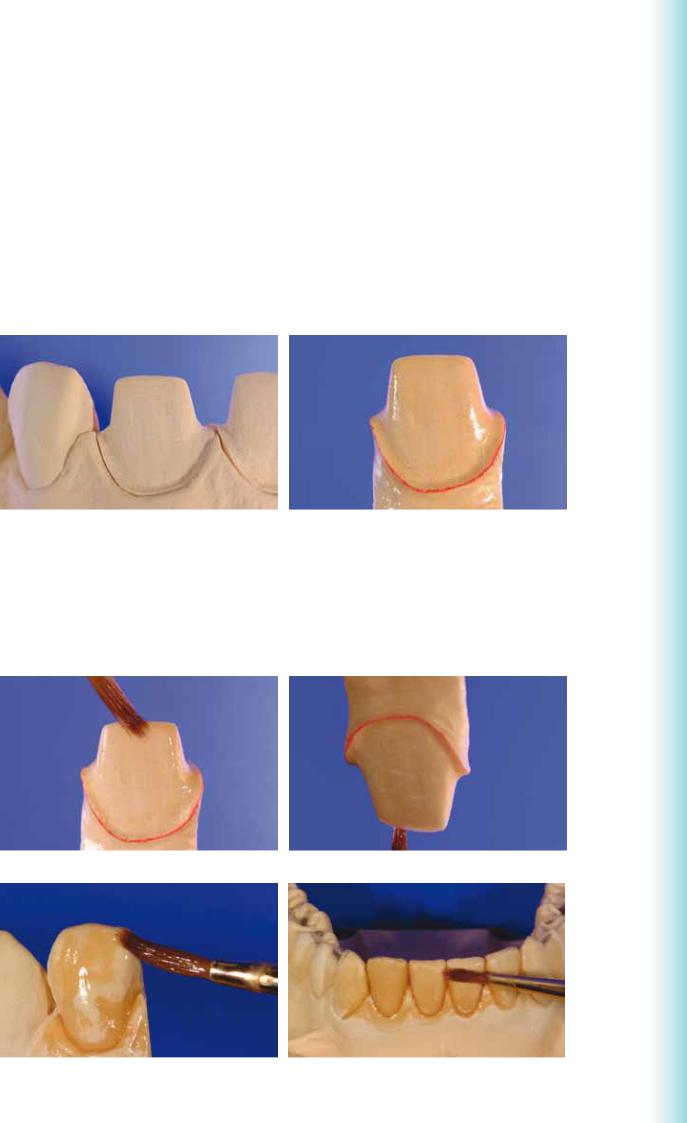
Sealing the Die and Adjoining Parts of the Model
SR Model Separator is applied in two coats. Apply the first coat generously and make sure that all areas of the die are well covered. Watch out for sharp edges (incisal edges) in particular. Allow the layer to react for 3 minutes. After the reaction time, apply a second layer in a thin coat, invert the model, and allow to dry for 3 minutes. Additionally, apply SR Model Separator to adjoining model surfaces (including counterbite), allow to react for a short time, and then disperse excess material with oil-free compressed air.
Practical Procedure for Framework-Free Restorations (Anterior Crowns)
Apply first coat of SR Model Separator generously, pay special attention to the incisal edges, and allow to react for 3 minutes.
Apply second layer of SR Model Separator in a thin coating and allow to dry for 3 minutes in an upside down position.
Isolate adjoining model parts, as well as neighbouring teeth and counterbite.
25
Liner Application
Extrude the desired amount of the ready-to-use Liner paste from the syringe and spread it out slightly on the mixing pad using a disposable brush.
First, apply the Liner thinly on the die surfaces. Make sure to fully cover all areas, as the Liner provides an essential bonding surface to the luting composite. The Liner layer must be at least 150 microns thick and has to be precured for 20 seconds per segment using the Quick.
Apply the Liner on the entire die surface; observe a minimum layer thickness of 150 microns.
TIP
–Liner incisal may be applied to the marginal area to facilitate the transmission of light in the cervical area. This measure provides a harmonious transition between the gingiva and the restoration.
Procedure for non-vital dies
–Mask the entire die with Liner 050 to block out the dark colour of the underlying tooth stratum and, at the same time, to attain an adequate degree of brightness.
–Additionally, Stains white or Stains crackliner may be applied locally to the Liner surface to further increase the degree of brightness.
Liner |
Apparatus |
Time |
Program |
|
Precuring time per |
Quick |
20 s |
– |
|
segment |
||||
|
|
|
Precure each segment for 20 seconds using a Quick curing light.
–The entire die surface has to be covered with an SR Adoro Liner layer of at least 150 microns. Thin out the Liner towards the preparation margin.
–Do not detach hardened SR Adoro Liner from the die, as the Liner coping may become deformed or break in the process.
–If desired, the translucency of the Liners 050-500 may be increased by using Liner clear or Liner incisal.
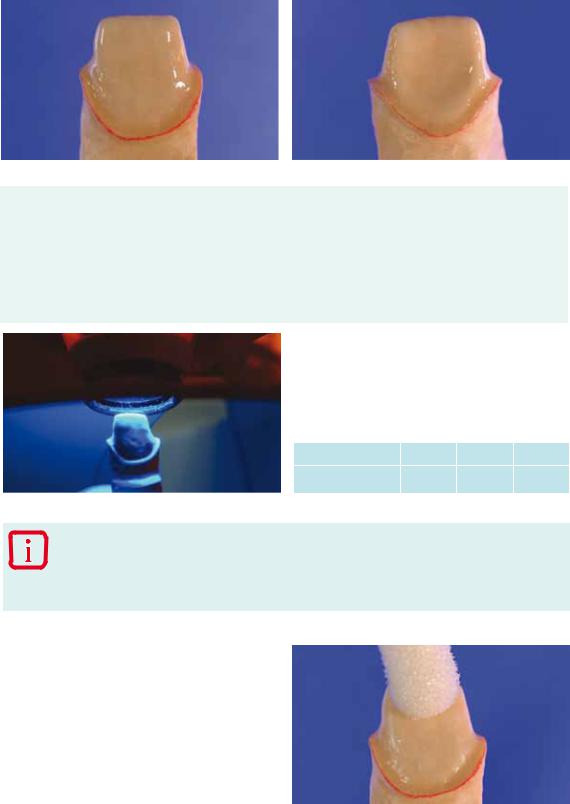
Removing the Inhibition Layer
Thoroughly remove the resulting inhibition layer using a disposable sponge (do not use a solvent); make sure that the Liner surfaces are free of residue. Make sure that the Liner shows a mat surface.
26

Anterior Tooth Layering
Adapt the first layer firmly (press into place) to ensure an effective bond between the Liner and composite and precure each segment for 20 seconds using a Quick curing light. The shade effect in the interdental area and palatal fossa may be increased by means of Stains orange or Occlusal Dentin orange. Build up the labial surface using various Dentin materials. Reproduce areas of higher brightness with Opal Effect 3 (cervical) and Inter Incisal white-blue (incisal). Apply the appropriate Transpa materials to the dentin core. Build up and precure the incisal extension using Opal Effect materials (OE 1 and OE 2). Mimic mamelons using Mamelon materials and Stains and precure. Next, complete the restoration step by step using Incisal and Transpa materials. Build up the palatal ridges using Dentin materials. The triangular ridges may be coated with a fine layer of Opal Effect 3 and 4. Adapt firmly and create smooth, rounded transitions between the layers using SR Modelling Instruments and synthetic brushes.
Complete marginal areas with Deep Dentin and Dentin; enhance the shade effect in the palatal region by means of Stains and Occlusal Dentin ...
... and precure for 20 seconds using the Quick curing light. Complete the dentin core with Transpa materials ...
and build up the incisal area using Opal Effect 1.
27
Practical Procedure for Framework-Free Restorations (Anterior Crowns)
 Loading...