


HP Pavilion
MX50, MX70, and MX90
Multimedia Monitors
English

The information in this document is subject to change without notice.
Hewlett-Packard® Company makes no warranty of any kind with regard to this material, including, but not limited to, the implied warranties of merchantability and fitness for a particular purpose.
HP shall not be liable for errors contained herein or for incidental or consequential damages in conntion with the furnishing, performance, or use of this material.
HP assumes no responsibility for the use or reliability of its software on equipment that is not furnished by HP.
This document contains proprietary information that is protected by copyright. All rights are reserved. No part of this document may be photocopied, reproduced, or translated to another language without the prior written consent of HP.
Hewlett-Packard Company
Home Products Division
P.O. Box 4010
Cupertino, CA 95015-4010
USA
© Copyright Hewlett-Packard Company, 2000. All rights reserved.
Hewlett-Packard is a registered trademark of Hewlett-Packard Company in the United States of America and other countries.
Other brand or product names are trademarks of their respective holders.

Contents
Introduction ......................................... |
1 |
For Your Safety ................................................. |
1 |
Additional Safety Information ............................. |
3 |
AC Power Safety Warning................................. |
3 |
Installation........................................... |
3 |
Locating the Monitor ......................................... |
3 |
Connecting the Power and Video Cables............. |
4 |
Connecting the Speakers ................................... |
5 |
Using the Monitor ................................ |
6 |
Turning the Monitor On and Off ......................... |
6 |
Degaussing the Display ..................................... |
7 |
Setting the Screen Resolution.............................. |
7 |
Selecting Refresh Rate ....................................... |
8 |
English
Minimizing Energy Use ..................................... |
8 |
Cleaning the Screen ......................................... |
8 |
Adjusting the Viewing Angle.............................. |
9 |
Changing Display Settings.................... |
9 |
Using the Front Panel ........................................ |
9 |
Pre-Set Contrast Modes ................................... |
10 |
Setting a Pre-Set Contrast Mode ....................... |
10 |
Changing Mode Settings ................................. |
11 |
Adjusting Brightness and Contrast Directly......... |
12 |
Using the OSD Main Window ......................... |
12 |
Using the Size & Position Window ................... |
15 |
Using the Advanced Geometry Window ........... |
16 |
Using the OSD Advanced Menu Window ......... |
17 |
Choosing the Color Temperature ...................... |
19 |
HP Pavilion MX50, MX70, and MX90 Multimedia Monitors |
iii |

Setting Red, Green, and Blue Values |
................. 20 |
Regulatory Information ...................... |
31 |
|
Choosing a Language..................................... |
21 |
Declaration of Conformity ................................ |
31 |
|
Choosing the OSD Position.............................. |
22 |
FCC Statement ................................................ |
32 |
|
Adjusting the Moiré Filters ............................... |
23 |
X-Ray Radiation Notice .................................... |
33 |
|
Using the Status Window ................................ |
24 |
General Notice ............................................... |
33 |
|
Restoring Factory Adjustments.......................... |
24 |
DOC Statement (Canada Only) ........................ |
33 |
|
Technical Information |
25 |
EMI Statement (European Union Only) ............... |
33 |
|
Declaration of VCCI Class B Compliance |
33 |
|||
Monitor Information |
25 |
|||
|
|
|||
Pre-Set Video Modes....................................... |
27 |
Index ................................................. |
34 |
|
Pin Assignments ............................................. |
28 |
|
|
|
DPMS Power Management Features ................. |
29 |
|
|
iv |
HP Pavilion MX50, MX70, and MX90 Multimedia Monitors |
Introduction
The HP Pavilion MX50, MX70, and MX90 Multimedia Monitors (Models P1282A, P1283A, and P1284A) are high-resolution color monitors designed for use with HP Pavilion and other PCs. Each monitor includes a built-in microphone and mounts for speakers supplied by HP Pavilion. The monitors comply with Environmental Protection Agency (EPA) ENERGY STAR® standards and include automatic power management features.
Other features include:
3On-screen adjustment of display settings
3Support for high refresh rates to reduce screen flicker and eyestrain
3Built-in tilt and swivel base
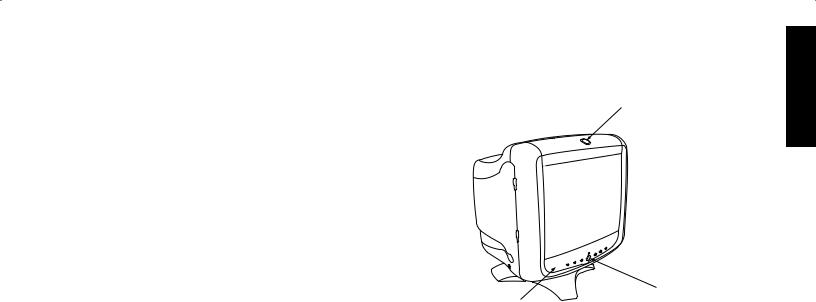
The following illustrates a front view of your HP Pavilion monitor.
Microphone
Panel Button
Control Panel
For Your Safety
For your safety and the protection of your monitor, follow these procedures:
3Always connect the monitor to a grounded, three-prong power outlet. Use only the factorysupplied power cord.
English
HP Pavilion MX50, MX70, and MX90 Multimedia Monitors |
1 |

Warning: To completely disconnect power from the monitor you must remove the power cable from the power socket.
3To prevent electrical shock, do not remove the back cover of the monitor. Only qualified service personnel should remove the cover.
3Do not place objects on top of the monitor that could fall into the vents or block airflow.
3To avoid the risk of damage to the monitor and electrical shock to yourself, do not expose the monitor to rain or moisture.
3Adjust only those controls with operations that are covered in this manual. Improperly adjusting other controls can result in damage and could require repair by a service technician.
If any of the following conditions occur, unplug the monitor and contact a qualified service technician:
3The power cord or plug is frayed or damaged.
3You have spilled liquid into the monitor.
3The monitor has been exposed to rain or water.
3The monitor does not operate correctly when the operating instructions are followed.
3The monitor has been dropped or the cabinet has been damaged.
3The performance of the monitor changes abruptly.
2 |
HP Pavilion MX50, MX70, and MX90 Multimedia Monitors |

Additional Safety Information
These products have been evaluated for connection to an “IT” power system (an AC distribution system with no direct connection to earth, according to IEC950).
AC Power Safety Warning
Warning: Locate the monitor near an AC outlet. The AC power cord is your HP monitor’s main AC disconnecting device and must be easily accessible at all times. For your safety, the power cord provided with your system has a grounded plug. Always use the power cord with a properly grounded wall outlet to avoid the risk of electrical shock.
Installation
Follow the instructions in this chapter to install your HP Pavilion MX50, MX70, or MX90 Multimedia Monitor.
Warning: The MX monitors are heavy objects. Exercise caution, or get help when lifting, to prevent back injury.
Note: Before installing the monitor, refer to your PC and video adapter documentation. You may need to make changes to accommodate the monitor.
Locating the Monitor
Place the monitor on a flat, sturdy surface. Choose an area that is free from excessive heat, moisture, and sunlight. Locate the monitor as far as possible from sources of electromagnetic interference, such as transformers, motors, fluorescent lighting, and other PC monitors.
English
HP Pavilion MX50, MX70, and MX90 Multimedia Monitors |
3 |
 MX90, MX50, MX70 User Manual")
Connecting the Power and Video
Cables
Before connecting any cables, be sure to read the safety instructions at the beginning of this manual. The PC and monitor must be turned off.
To connect the power and video cables:
1Connect the power cord to the back of the monitor.
2Plug the power cord into a power outlet.
3Connect the blue plug on the video cable to the video port of your PC. If you have an HP Pavilion PC, this port is marked in blue.
However, on some Pavilion PCs, the port could be marked in orange. (The illustration below is for reference only. Check your PC user’s guide for the video port location.)
4 |
|
|
|
|
|
|
|
|
|
|
|
|
|
|
|
|
|
|
|
|
|
|
|
|
|
|
|
|
|
|
|
|
|
|
|
|
|
|
|
|
|
|
|
|
HP Pavilion MX50, MX70, and MX90 Multimedia Monitors |
|
|
|
|
|
|||
4Insert the pink microphone cable plug into the sound input connector on the back of your PC. If you have an HP Pavilion PC, the connector is marked in pink. However, on some
Pavilion PCs, the connection could be marked in yellow.
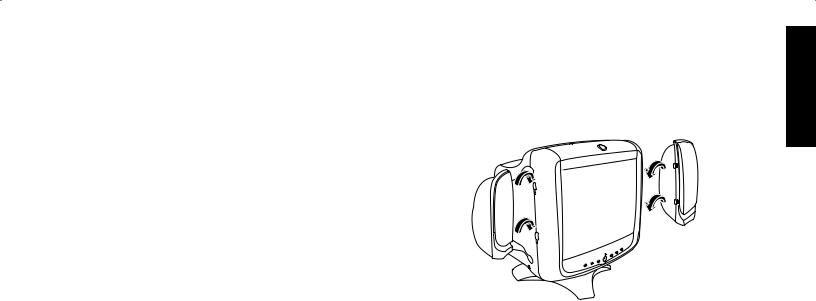
Connecting the Speakers
The monitor is designed for use with the Polk Audio speakers supplied by HP.
1Extend the cables attached to the two speakers.
2Identify the left and right speakers. You can tell which side of the monitor a speaker fits onto by observing its curvature and mounting pegs. Not all speakers have mounting pegs. If you don't have mounting pegs, skip to step 5. The side of the speaker with mounting pegs fits flush against the side of the monitor.
3Insert the pegs of the right speaker into the corresponding slots on the right side of the monitor. Push down, sliding the speaker pegs completely into the slots.
4Insert the pegs of the left speaker into the corresponding slots on the left side of the monitor. Push down, sliding the speaker pegs completely into the slots.
5Refer to your PC user’s guide for instructions on how to connect your speakers to the PC.
English
HP Pavilion MX50, MX70, and MX90 Multimedia Monitors |
5 |

Using the Monitor
This chapter contains information about using the HP Pavilion MX50, MX70, or MX90 Multimedia Monitors.
Turning the Monitor On and Off
Use the Power button on the front panel to turn the monitor on and off. When the monitor is on, the light near the Power button is illuminated. The light is green when the monitor and PC are active and yellow/amber when the monitor is in one of its reduced power modes.
The monitor’s power management features reduce power consumption to low levels when your PC has been inactive for a specified period of time. See “Minimizing Energy Use” on page 8 for more information.
Because of the monitor’s power management features, you don’t normally need to turn off the monitor when it’s not in use. When turned off, the monitor uses the same amount of power that it uses in Sleep mode (less than 5 watts).
If your PC doesn’t support DPMS power management, you can reduce power consumption by turning off the monitor when it won’t be used for an extended period. You can turn the monitor off even if you leave the PC running.
Warning: To completely disconnect power from the monitor, you must remove the power cord from the AC power outlet or surge protector.
6 |
HP Pavilion MX50, MX70, and MX90 Multimedia Monitors |
Degaussing the Display
Degaussing removes magnetism that causes unwanted color variations. Degauss the display any time you notice unusual color variations.
Note: Do not degauss more frequently than once every 30 minutes, or the degauss will be incomplete. It is not necessary to degauss unless you have moved the monitor.
There are two degaussing methods. Each time you turn on the monitor, it is automatically degaussed. You can also use the Degauss option in the on-screen display (OSD) main window to degauss the display.
See “Using the OSD Main Window” on page 12 for instructions.
Setting the Screen Resolution
The screen resolution determines the amount of information shown in the display. Screen resolution refers to the number of dots or pixels used to make up an image. A low screen resolution means that the display uses a relatively small number of relatively large dots. A higher resolution means that more dots of a smaller size make up the image. With higher screen resolutions, icons, windows, and text are smaller on the screen, but more information can be displayed.
Use the Window’s Control Panel to set the screen resolution. The monitor supports many common screen resolutions, as shown in the “Pre-Set Video Modes.”
English
HP Pavilion MX50, MX70, and MX90 Multimedia Monitors |
7 |

Selecting Refresh Rate
To minimize eyestrain and maximize the performance of your display, use the highest possible image refresh rate or vertical frequency for which you don’t perceive flicker (generally at or above 75 Hz for most users). The image refresh rate is the number of times per second that the image is refreshed. The “Pre-Set Video Modes” table shows the image refresh rates supported by the monitors at different screen resolutions.
Minimizing Energy Use
HP Pavilion PCs support VESA Display Power Management Signaling (DPMS). Power Management features reduce the monitor’s power consumption after a period of keyboard inactivity.
The monitor supports three different power-saving modes — Standby, Suspend, and Sleep. See “DPMS Power Management Features” for a description of the characteristics of each mode.
When the monitor is in one of its power-saving modes, the screen is blanked out and the front panel power indicator is yellow/amber. Consult your PC user’s guide for information about setting the power-saving modes.
Cleaning the Screen
To clean the screen:
1Turn off and unplug the monitor.
2Spray a soft cotton cloth with regular household glass cleaner, and then gently wipe the screen.
8 |
HP Pavilion MX50, MX70, and MX90 Multimedia Monitors |

Warning: Don’t use cleaning solutions containing fluoride, acids, or alkalis. Never use hard or abrasive cleaning products to clean the screen.
3Dry the screen with a soft cotton cloth.
4Plug in the monitor and turn it on.
Adjusting the Viewing Angle
The monitor’s pedestal mounting enables you to adjust the viewing angle. You can tilt and swivel the monitor to find the most comfortable viewing position.
Changing Display Settings
Use the on-screen display (OSD) features of the monitor to change settings. The buttons on the front panel control on-screen icons and windows.
Using the Front Panel
Use the six buttons on the front of the monitor to control OSD functions.
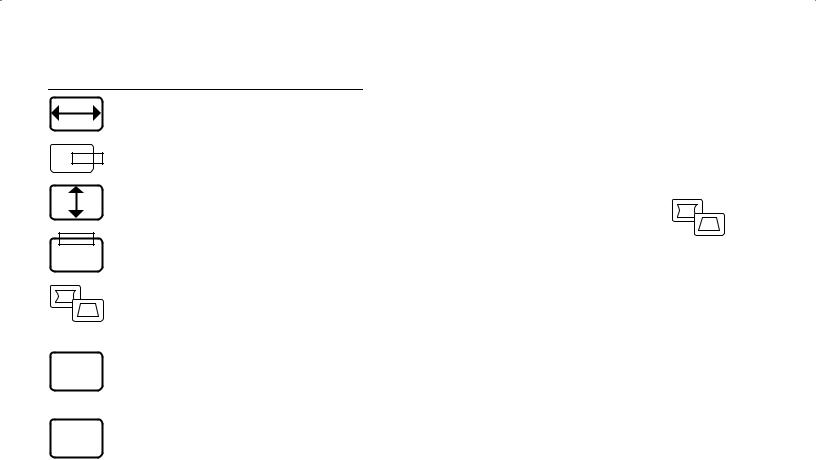
MODE |
The Mode button opens the Contrast Mode |
|
window and allows you to choose from the |
|
monitor’s pre-set modes. See “Pre-Set |
|
Contrast Modes” on page 10, for |
|
instructions. |
The Brightness button opens and closes the
Brightness Adjustment window.
The Contrast button opens and closes the
Contrast Adjustment window.
English
HP Pavilion MX50, MX70, and MX90 Multimedia Monitors |
9 |
SELECT |
The Select button opens the OSD Main |
|||
|
|
|
|
window if no other OSD windows are |
|
|
|
|
displayed. In the OSD Main window, the |
|
|
|
|
Select button opens the adjustment bar for |
|
|
|
|
the selected icon, or the corresponding |
|
|
|
|
window. When the Brightness or Contrast |
|
|
|
|
Adjustment bar is on the screen, the Select |
|
|
|
|
button closes the bar and saves the value. |
|
|
|
|
The Minus button decreases a setting if an |
|
|
|
|
|
|
|
|
|
adjustment window is open. In a window, |
|
|
|
|
the button moves the pointer upward |
|
|
|
|
through the icon menu. |
|
|
|
|
The Plus button increases a setting if an |
|
|
|
|
|
|
|
|
|
|
|
|
|
|
adjustment window is open. In a window, |
|
|
|
|
the button moves the pointer downward |
|
|
|
|
through the icon menu. |
Pre-Set Contrast Modes
Pre-set contrast modes enable you to quickly change contrast settings to match those commonly used for various activities and viewing conditions.
Two pre-set contrast modes are provided:
Text mode is designed for best results in lower ambient lighting environments and with applications like word processors and spreadsheets. This is
a lower contrast setting.
Benefit: Eye comfort, less fatigue, and improved focus.
Video/Games mode offers higher contrast appropriate for viewing fullmotion video, and for photographic and pre-press applications.
Benefit: Higher contrast for vibrant, vivid images, and maximum visual impact with games and video.
Setting a Pre-Set Contrast Mode
1Press the Mode button on the front of the monitor. The Contrast Mode window opens.
10 HP Pavilion MX50, MX70, and MX90 Multimedia Monitors

CONTRAST MODE
TEXT
VIDEO/GAMES
2To select a mode, press the Mode button again, or press the Plus (+) or Minus (–) button.
3When the icon for the monitor mode you want is highlighted, press the Select button. The Contrast Mode window closes.
Changing Mode Settings
The pre-set contrast modes are the overall, master settings for brightness, contrast, and other image settings. You may make further adjustments to the image settings by using the OSD.
If you turn off the monitor, the last used mode is active when you turn it back on.
Changes to color temperature are independent of the contrast mode setting — the two modes will function the same way with any color setting.
English
HP Pavilion MX50, MX70, and MX90 Multimedia Monitors 11

Adjusting Brightness and Contrast
Directly
You can change the display’s brightness or contrast quickly by pressing the Brightness or Contrast button. Brightness adjusts the black level, while contrast adjusts the difference between the dark and light parts of the image.
Adjust the brightness level so that black items on the screen appear black. Then adjust the contrast for the most comfortable viewing.
To adjust the brightness or contrast:
1Press the Brightness or Contrast button on the front panel to open the Brightness Adjustment window, or the Contrast Adjustment window.
BRIGHTNESS
- |
|
|
+ 50 |
2Press the Plus (+) or Minus (–) button to increase or decrease the setting from its current position.
3When the brightness or contrast is at the desired level, press the Brightness or Contrast button again to close the adjustment window.
Using the OSD Main Window
The OSD Main window enables you to make changes to a variety of display settings. You open the window by pressing the Select button when no other OSD windows are displayed on the screen.
12 HP Pavilion MX50, MX70, and MX90 Multimedia Monitors

800 X 600 / 85 Hz
BRIGHTNESS
CONTRAST
ZOOM
SIZE & POSITION
ADVANCED GEOMETRY
ADVANCED MENU
DEGAUSS
EXIT EXIT
-
|
|
In the OSD Main window, the following functions |
||||||||||
|
||||||||||||
|
|
are available: |
||||||||||
|
|
|
|
|
|
|
|
|
|
|
|
|
|
|
|
|
|
|
|
|
|
|
|
|
Brightness Adjusts the luminance |
|
|
|
|
|
|
|
|
|
|
|
|
level in the image. |
|
|
|
|
|
|
|
|
|
|
|
|
Contrast Adjusts the difference in |
|
|
|
|
|
|
|
|
|
|
|
|
luminance between light and dark areas |
|
|
|
|
|
|
|
|
|
|
|
|
of the image. |
|
|
|
|
|
|
|
|
|
|
|
|
Zoom Increases or decreases the size |
|
|
|
|
|
|
|
|
|
|
|
|
of an image in both directions. |
|
|
|
|
|
|
|
|
|
|
|
|
Size and Position Opens the Size & |
|
|
|
|
|
|
|
|
|
|
|
|
|
|
|
|
|
|
|
|
|
|
|
|
|
Position window. |
|
|
|
|
|
|
|
|
|
|
|
||
|
|
|
|
|
|
|
|
|
|
|
|
Advanced Geometry Opens the |
|
|
|
|
|
|
|
|
|
|
|
|
|
|
|
|
|
|
|
|
|
|
|
|
|
Advanced Geometry window. |
|
|
|
|
|
|
|
|
|
|
|
|
Advanced Menu Opens the |
|
|
|
|
|
|
|
|
|
|
|
|
|
|
|
|
|
|
|
|
|
|
|
|
|
|
|
|
|
|
|
|
|
|
|
|
|
|
Advanced Menu window. |
|
|
|
|
|
|
|
|
|
|
|
|
|
|
|
|
|
|
|
|
|
|
|
|
|
Degauss Degausses the display and |
+ 50 |
|
|
|
|
|
|
|
|
|
|
|
restores image quality. |
|
|
|
EXIT |
|
Exit Closes the OSD Main window |
|||||||
|
|
|
|
and saves any changes you have made. |
||||||||
English
HP Pavilion MX50, MX70, and MX90 Multimedia Monitors 13

If you select the icons for Brightness, Contrast, or Zoom, an adjustment bar appears below the OSD window. You shorten or lengthen the adjustment bar with the Plus (+) or Minus (–) button. A number next to the control bar shows the percentage of the current setting relative to its maximum value.
To use the OSD Main window:
1Press the Select button on the front of the monitor to open the OSD Main window.
2Press the Plus (+) or Minus (–) button to move among the icons in the window.
3When the icon for the function you want is highlighted, press the Select button.
3If you select the Degauss or Exit option, the option takes effect immediately.
3If you select the icons for Brightness, Contrast, or Zoom, an adjustment bar appears.
3If you select any other option, another window appears.
4If an adjustment bar appears, press the Plus (+) or Minus (–) button to change the current setting, and then press the Select button to save your changes and close the
adjustment bar.
82 |
|
5 To close the OSD Main window, |
EXIT |
select the Exit icon. |
Note: Only a highlighted icon, and the Reset
and Exit icons, will display a descriptive text.
14 HP Pavilion MX50, MX70, and MX90 Multimedia Monitors
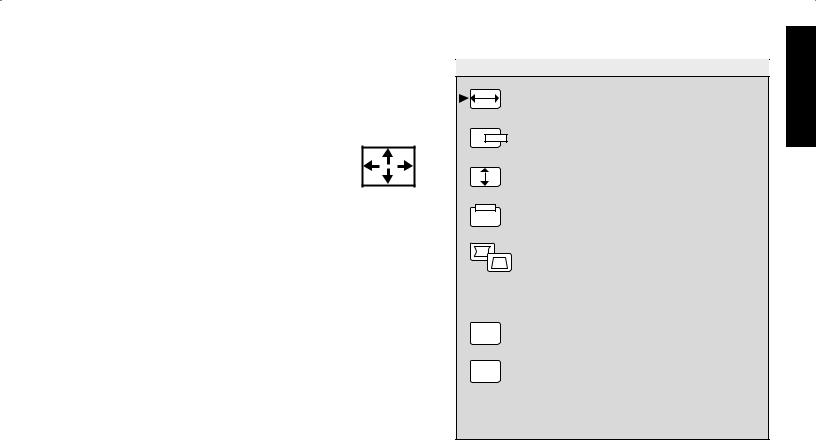
Using the Size & Position Window
The Size & Position window allows you to adjust the horizontal and vertical size and position of an image.
To open the Size & Position window, select the Size & Position icon in the OSD Main window.
SIZE & POSITION
H-SIZE
H-POSITION
V-SIZE
V-POSITION
ADVANCED GEOMETRY
RESET RESET
EXIT EXIT
- |
|
|
+ 50 |
English
HP Pavilion MX50, MX70, and MX90 Multimedia Monitors 15
In the Size & Position window, the following functions are available:
H-Size Adjusts the horizontal size of the image.
H-Position Adjusts the horizontal position of the image.
V-Size Adjusts the vertical size of the image.
V-Position Adjusts the vertical position of the image.
Advanced Geometry Opens the Advanced Geometry window. See “Using the OSD Advanced Geometry Window” on page 16.
Reset Resets the values for the Size & RESET Position window and the Advanced
Geometry window (except rotation) to factory settings.
Exit Closes the Size & Position EXIT window, saves any changes you have
made, and opens the Main window.
Using the Advanced Geometry
Window
The Advanced Geometry window allows you to correct the shape and position of an image beyond the basic vertical and horizontal sizing and positioning that you can do in the Size & Position window.
To open the Advanced Geometry window, select the Advanced Geometry icon in the OSD Main window.
16 HP Pavilion MX50, MX70, and MX90 Multimedia Monitors
ADVANCED GEOMETRY
SIDE PIN
PIN BALANCE
TRAPEZOID
PARALLELOGRAM
ROTATION
RESET RESET
EXIT EXIT
- |
|
|
+ 50 |
In the Advanced Geometry window, the following functions are available:
Side-Pin Adjusts any tapering or bowing of both sides of the image.
Pin Balance Straightens the left or right side of the image when only one side of the image is bowed.
Trapezoid Makes the vertical sides parallel to each other.
Parallelogram Squares the image.
Rotation Adjusts the angle of the image (MX70 and MX90 only).
Reset Returns all advanced geometry RESET settings, except rotation, to their original
factory values.
Exit Closes the Advanced Geometry EXIT window, saves any changes you have
made, and opens the previous window.
Using the OSD Advanced
Menu Window
The OSD Advanced Menu window allows you to make changes to a variety of advanced display settings. Except in special circumstances, you will not need to adjust these settings, but they are available to you as added options.
English
HP Pavilion MX50, MX70, and MX90 Multimedia Monitors 17
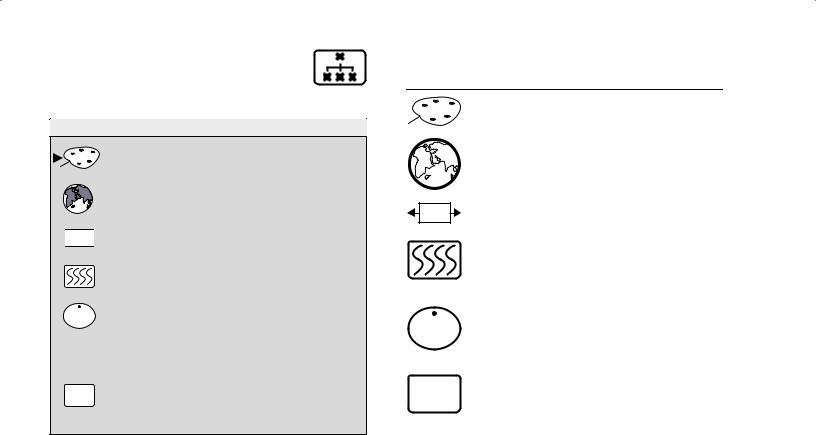
To open the Advanced Menu window, select the Advanced Menu icon in the OSD Main window.
ADVANCED MENU
COLOR
LANGUAGE

 OSD
OSD  OSD POSITION
MOIRE
I STATUS
EXIT EXIT
In the OSD Advanced Menu window, the following functions are available:
|
Color Adjusts the color temperature of |
|
the image. |
|
Language Sets the language of the |
|
OSD window. |
OSD |
OSD Position Adjusts the position of |
|
the OSD window. |
|
Moiré Control Reduces wavy colored |
|
lines or patterns in the background of |
|
your image. Horizontal and vertical |
|
controls are available. |
I |
Status Provides information about the |
horizontal and vertical scan frequencies, |
|
the resolution (for pre-set modes only), |
|
|
and the serial number of the monitor. |
EXIT |
Exit Closes the OSD Advanced Menu |
window. |
18 HP Pavilion MX50, MX70, and MX90 Multimedia Monitors
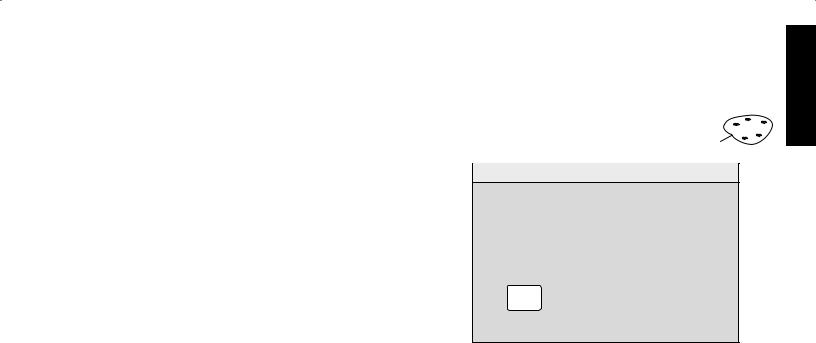
Choosing the Color Temperature
The default color settings in the Text and Video/Games modes are optimized for best results in those environments, but you can change the color temperature temporarily when necessary. (If you need to save color settings for a particular application, use the USER COLOR setting.)
You can choose between two settings: 9300K and 6500K.
The 9300K setting is often used for office environments or fluorescent lighting. The 6500K setting is often used in environments with incandescent lighting.
You can also choose to individually adjust the red, green, and blue (RGB) values that make up the screen image. See the section, “Setting Red, Green, and Blue Values” on page 20 for instructions. To choose the color temperature:
1In the OSD Advanced window, press the Plus
(+) or Minus (–) button to move to the Color icon.
2 Press the Select button to open the Color Adjustment window.
COLOR
9300K
6500K USER color
EXIT EXIT
Press the Plus (+) or Minus (–) button to move to the color temperature option you want.
English
HP Pavilion MX50, MX70, and MX90 Multimedia Monitors 19

3Press the Select button to select the color temperature.
4Select the Exit icon to close the Color window.
Setting Red, Green, and Blue
Values
You may want to make very precise adjustments to the screen color. For example, under unique ambient lighting conditions, you may need to adjust the screen color so that it more closely matches the ambient lighting conditions. You can make these adjustments by individually setting red, green, and blue (RGB) values.
Make sure to let the monitor warm up fully before trying to match colors precisely. It takes the monitor up to 30 minutes to warm up completely after being turned on or recovering from a power-saving state.
To set RGB values:
1In the OSD Advanced Menu window, press the Plus (+) or Minus (–) button to move to the Color icon.
2Press the Select button to open the Color Adjustment window.
3In the Color Adjustment window, press the Plus
(+) or Minus (–) button to move to the USER COLOR setting.
4Press the Select button to open the RGB Adjustment window.
5Press the Plus (+) or Minus (–) button to move among the options, and then press Select to choose an option.
20 HP Pavilion MX50, MX70, and MX90 Multimedia Monitors
USER COLOR
R |
- |
|
|
+ |
50 |
G - |
|
50 |
|||
|
|
+ |
|||
B |
- |
|
50 |
||
|
|
+ |
|||
RESET RESET
EXIT EXIT
6When a color is selected, press the Plus (+) or Minus (–) button to increase or decrease the video gain for that color, and then press Select.
7Press Exit to close the USER COLOR window.
Note: If you select the Reset icon, you reset the value of the color to the previously set user value.
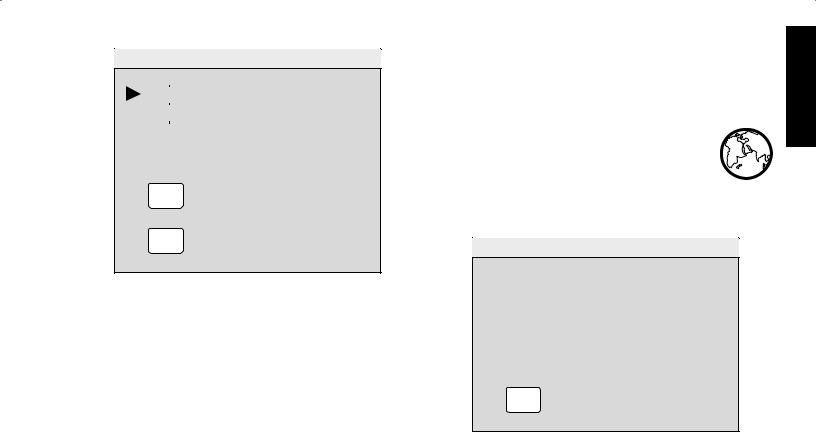
Choosing a Language
To choose a language for the text in the OSD window:
1In the OSD Advanced Menu window, press the Plus (+) or Minus (–) button
to move to the Language icon.
2Press the Select button to open the Language Selection window.
LANGUAGE
ENGLISH ESPAÑOL FRANÇAIS DEUTSCH ITALIANO
EXIT EXIT
English
HP Pavilion MX50, MX70, and MX90 Multimedia Monitors 21

3Press the Plus (+) or Minus (–) button to move to the language you want.
4Press the Select button to select the language.
5Press Exit to close the Language window.
Choosing the OSD Position
The default OSD window position for the windows is the center of the screen, but you can change the window position.
To adjust the OSD window position:
1 In the OSD Advanced Menu window, |
|
|
|
OSD |
|
||
press the Plus (+) or Minus (–) button |
|
||
|
|
||
to move to the OSD Position icon. |
|
|
|
2Press the Select button to open the OSD Position window.
OSD POSITION
EXIT EXIT
- |
|
|
+ 50 |
3Press the Plus (+) or Minus (–) button to move between options.
4Press Select to choose a function. The pointers change to arrows for the selected function.
5With the vertical pointers selected, press the Plus (+) or Minus (–) button to move the OSD
window up or down.
22 HP Pavilion MX50, MX70, and MX90 Multimedia Monitors

6With the horizontal pointers selected, press the Plus (+) or Minus (–) button to move the OSD window right or left.
7When you complete the adjustment, press Select.
8Press Exit to close the OSD Position window.
Adjusting the Moiré Filters
Select the Moiré Control icon to reduce wavy colored lines or patterns in the background of your image. Separate adjustment of horizontal and vertical moiré is available.
To adjust the moiré filter:
1In the OSD Advanced Menu window, press the Plus (+) or Minus (–) button to move to the Moiré icon.
2Press the Select button to open the Moiré window.
3Press the Plus (+) or Minus (–) button to move among the options.
MOIRÉ
H-MOIRÉ: ON H-MOIRÉ: OFF
V-MOIRÉ: ON V-MOIRÉ: OFF
EXIT EXIT
-
 + 50
+ 50
4Press the Select button to select an option. An adjustment bar will appear underneath the Moiré window if you select H-Moiré : On or
V-Moiré : On.
Note: The “H” in H-Moiré means horizontal; the “V” in V-Moiré means vertical.
English
HP Pavilion MX50, MX70, and MX90 Multimedia Monitors 23

5Press the Select button to save your changes and close the adjustment bar.
6Press Exit to close the Moiré window.
Using the Status Window
The Status window is an information window that displays the horizontal and vertical scan frequencies, the resolution (for pre-set modes only), and the serial number of the monitor.
To display the Status window:
1 In the OSD Advanced Menu window,
press the Plus (+) or Minus (–) button |
I |
|
|
to move to the Status icon. |
|
2Press the Select button to open the Status window.
3Press Select to close the Status window.
STATUS
SERIAL NUMBER
AASDD12345
FV :70Hz
FH :31KHz
RESOLUTION: 640 X 480
EXIT EXIT
Restoring Factory Adjustments
To restore all parameters to the original factory values:
1Turn the power off.
2While pressing the Plus (+) button, turn the power back on.
24 HP Pavilion MX50, MX70, and MX90 Multimedia Monitors

Technical Information
This chapter contains technical information about the HP Pavilion MX50, MX70, and MX90 Multimedia Monitors.
These monitors are compatible with IBM PC, PC-compatible, and PS/2 PCs. They are also compatible with VESA power management standards. (See “DPMS Power Management Features” on page 29.)
Monitor Information
|
MX50 |
MX70 |
MX90 |
|
|
|
|
Picture tube |
15 in (38.1 cm), |
17 in (43.1 cm), |
19 in (48.2 cm), |
|
90° deflection, |
90° deflection, |
100° deflection, |
|
black matrix, |
black matrix, |
44% light transmission, |
|
phosphor P22 medium short, |
phosphor P22 medium short, |
0.26mm dot pitch, |
|
0.28 mm dot pitch |
0.27 mm dot pitch |
semi-tint, anti-reflective/ |
|
|
|
anti-static coating (Arasc) |
Maximum |
280 mm (H) x 210 mm (V) |
320 mm (H) x 240 mm (V) |
365 mm (H) x 274 mm (V |
viewable area |
11 in (H) x 8.25 in (V) |
12.6 in (H) x 9.5 in (V) |
14.4 in (H) x 10.8 in (V) |
|
13.8 in (350 mm) diagonal |
15.8 in (400 mm) diagonal |
18 in (457 mm) diagonal |
Line (horizontal) |
30–54 kHz |
30–70 kHz |
30–95 kHz |
frequency |
|
|
|
English
HP Pavilion MX50, MX70, and MX90 Multimedia Monitors 25

|
MX50 |
MX70 |
MX90 |
|
|
|
|
Raster (vertical) |
47–100 Hz |
50–120 Hz |
50–150 Hz |
frequency |
|
|
|
Power source |
100–240 VAC, 50–60 Hz |
100–240 VAC, 50–60 Hz |
100–240 VAC, 50–60 Hz |
|
(auto switching) |
(auto switching) |
(auto switching) |
Power |
70 W maximum |
90 W maximum |
130 W maximum |
consumption |
|
|
|
Dot rate |
65 MHz |
110 MHz |
160 MHz |
Pedestal |
Tilt: 5° forward, |
Tilt: 5° forward, |
Tilt: 5° forward, |
|
15° backward |
15° backward |
15° backward |
|
Swivel: –45° left or right |
Swivel: –60° left or right |
Swivel: –60° left or right |
Dimensions |
366 x 396 x 412 mm |
414 x 440 x 442 mm |
465 x 487 x 422 mm |
(W x H x D) |
14.4 x 15.6 x 16.2 in |
16.3 x 17.3 x 17.4 in |
18.3 x 19.2 x 16.1 in |
Net weight |
12.0 kg (26.4 lb.) |
19.0 kg (41.9 lb.) |
25.0 kg (55.0 lb.) |
Operating |
|
|
|
Conditions |
|
|
|
Temperature |
5° to 35°C (41° to 95°F) |
5° to 35°C (41° to 95°F) |
5° to 35°C (41° to 95°F) |
Humidity |
15% to 80%, non-condensing |
15% to 80%, non-condensing |
15% to 80%, non-condensing |
Altitude |
|
|
0 to 10,000 feet |
Storage |
|
|
|
Conditions |
|
|
|
Temperature |
–25° to 60°C (–13° to 140°F) |
–25° to 60°C (–13° to 140°F) |
–25° to 60°C (–13° to 140°F) |
Humidity |
20% to 80%, non-condensing |
20% to 80%, non-condensing |
20% to 80%, non-condensing |
26 HP Pavilion MX50, MX70, and MX90 Multimedia Monitors
 Loading...