


Color LaserJet Pro M253-M254
Getting Started Guide
IMPORTANT:
Follow Steps 1 - 2 on the printer hardware setup poster, then continue
with Step 3.
www.hp.com/support/ljM253 |
www.register.hp.com |
3. Initial setup on the control panel
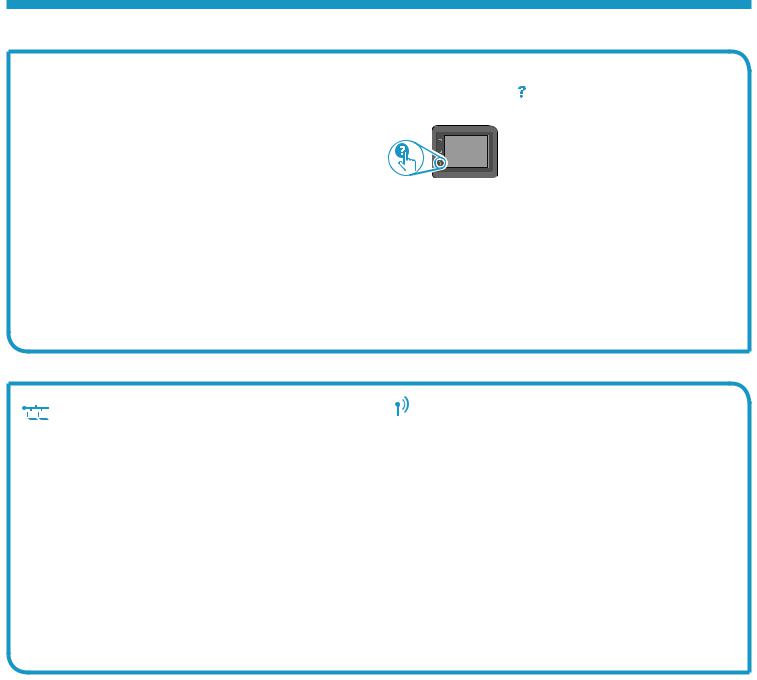
After turning on the printer, wait for it to initialize. To navigate the 2-line control panel, use the arrow buttons and the OK button. To navigate the touchscreen control panel, use touch, swipe, andscrollgestures.Followthepromptsonthecontrolpaneltoconfigurethesesettings:
•Language
•Location
•Default Settings
Under Default Settings selectoneoftheseoptions:
•Self-managed: Optimized default settings for most users that include guided setup and configurationstepsandautomaticupdates.
•IT-managed: Optimizeddefaultsettingsforfleetmanageability.
Settings are fully customizable after initial setup.
NOTE: Select Print Information Page to print a page that instructs how to change the default settings.
English......................... |
1 |
Bahasa Indonesia........ |
4 |
.......................... |
7 |
............................. |
10 |
.................. |
13 |
TiếngViệt.................. |
16 |
4. Select the connection method
USB connection directly between the printer and the computer
Use an A-to-B type USB cable.
Windows
1.Do not connect the USB cable before installing the software. The installation process prompts to connect the cable at the appropriate time. If the cable is already connected, restart the printer when installation prompts to connect the cable.
2.Continue to “5. Download and install the software.”
OS X
1.For OS X, connect the USB cable between the computer and the printer before installing the software.
2.Continue to “5. Download and install the software.”
Wired Ethernet network connection (Optional)
Use a standard network cable.
1.Connect the network cable to the printer and to the network. Wait a few minutes for the printer to acquire a network address.
2.Continue to “5. Download and install the software.”
Wireless network connection (wireless models only)
Touchscreen control panels
1.To connect the printer to a wireless (Wi-Fi) network, on the printer control panel, touch the Wireless button.
2.Touch Wireless Menu, and then touch Wireless Setup Wizard. Select the network name from the SSID list, or enter the network name if it is not listed.
3.Use the keyboard to enter the passphrase, and then touch the OK button.
4.Wait while the printer establishes a network connection.
5.On the printer control panel, touch the Network button. If an IP address is listed, the network connection has been established. If not, wait a few more minutes and try again. Note the IP address for use during software installation. Example IP address: 192.168.0.1
2-line/LED control panels
1.To connect the printer to a wireless (Wi-Fi) network, make sure that the printer, access point, and computer are turned on and that the computer is connected to the wireless network.
2.A USB cable might be required during SW installation.
3.To print from a computer, continue with “5. Download and install the software.” To print from a phone or tablet only, continue with “6. Mobile printing (optional).”
 ManuallyconfiguretheIPaddress
See the printer user guide for information on how to manually configure the IP address www.hp.com/support/ljM253.
1
5. Download and install the software
 Method 1: Download HP Easy Start (Windows and OS X)
1.Go to 123.hp.com/laserjet, and click Download.
2.Followtheon-screeninstructionsandpromptstosavethefiletothecomputer.
3.Launchthesoftwarefilefromthefolderwherethefilewassaved.
 Method 3: Install from the printer CD (Windows only)
1.Insert the printer CD into the computer.
2.Follow the on-screen instructions to install the software.
 Method 2: Download from printer support website (Windows and OS X)
1.Go to www.hp.com/support/ljM253.
2.Select Software and drivers.
3.Download the software for your printer model and operating system.
4.Launchthesoftwarefilefromthefolderwherethefilewassaved.
 Install Notes
For more details about the software for the printer, see the install notes file on the printer CD.
6 Mobile printing (optional)
6.1 Connect the device to the wireless network
To print from a phone or tablet, connect the device to the same wireless network as the printer.
Apple iOS devices (AirPrint): Open the item to print, and select the Action icon. Select Print, select the printer, and then select Print.
Android devices (4.4 or newer): Open the item to print, and select the Menu button. Select Print, select the printer, and select Print.
Some devices require downloading the HP Print Service plugin app from the Google Play store.
Windows Phone: Download the HP AiO Remote app from the Windows Store.
Learn more about mobile printing
For further information on these and other operating systems (Chrome/Google Cloud Print) go to
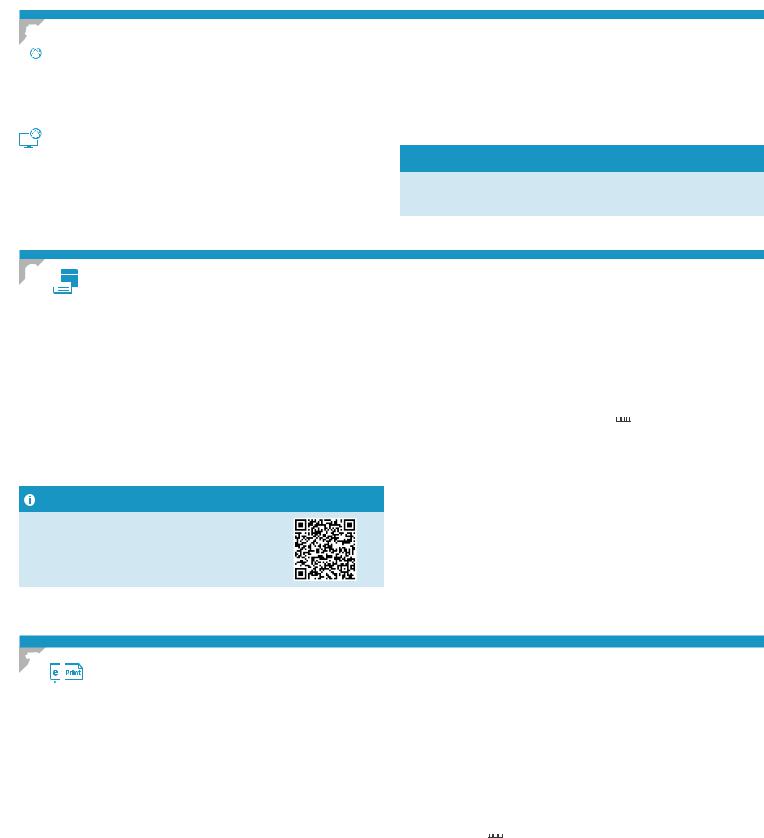
www.hp.com/go/LaserJetMobilePrinting or scan the QR code.
6.2 Wi-Fi Direct (wireless models only)
Wi-Fi Direct allows Wi-Fi capable devices, such as smart phones, tablets, or computers, to make a wireless network connection directly to the printer without using a wireless router or access point. Connect to the printer’s Wi-Fi Direct signal the same way Wi-Fi capable devices are connected to a new wireless network
or hotspot.
Enable Wi-Fi Direct
1.2-line control panels: On the printer control panel, press the OK button, and then open the Network Setup menu.
Touchscreen control panels: From the Home screen on the printer control panel, select the Connection Information 


 button.
2.Openthefollowingmenus:
•Wi-Fi Direct
•Settings (touchscreen control panels only)
•On/Off
3.Touch the On menu item. Touching the Offbutton disables Wi-Fi Direct printing.
 For more information on wireless printing and wireless setup, go to www.hp.com/go/wirelessprinting.
Discover the printer
1.From the mobile device, turn on the Wi-Fi, and search for wireless networks.
2.Select the printer as shown on the printer control panel. Example printer name: Direct-bb-HP M277 Laserjet
7.  Set up HP ePrint via email (optional)
Use HP ePrint via email to print documents by sending them as an email attachment to the printer’s email address from any email enabled device, even from devices that are not on the same network.
TouseHPePrintviaemail,theprinter must meet these requirements:
•The printer must be connected to a wired or wireless network and have Internet access.
•HP Web Services must be enabled on the printer, and the printer must be registered with HP Connected.
Enable HP Web Services
2-line/LED control panels
1.After the printer is connected to the network, print a configuration page and identify the printer IP address.
2.At the computer, open a web browser and enter the printer IP address into the address line. The HP Embedded Web Server (EWS) opens.
3.Select the HP Web Services tab, and click the Enable button. The printer configures the connection to the Internet, and then a message appears indicating an information sheet will print.
4.Click the OK button. An ePrint page prints out. On the ePrint page, look for the e-mail address that is automatically assigned to the printer.
Touchscreen control panels
1.From the Home screen on the printer control panel, touch the Connection Information 


 button, and open the following menus:
•HP ePrint
•Settings
•Enable Web Services
2.Touch the OK menu item. The printer enables Web Services, and
then prints an information page. The information page contains a printer code necessary to register the HP printer at HP Connected.
3.Go to www.hp.connected.com to create an HP ePrint account and complete the setup process.
2

Troubleshooting
User guide |
Control panel help (touchscreen models only) |
The user guide includes printer usage and troubleshooting information. It is available |
Touch the Help button on the printer control panel to access help topics. |
ontheprinterCDandontheWeb: |
|
1. Go to www.hp.com/support/ljM253
2.Select the printer if prompted to, and then click User Guides.
Checkforfirmwareupdates
1.Go to www.hp.com/support/ljM253
2.Select the printer if prompted to, and then click Software and Drivers.
3.Select the operating system, and click the Next button.
4.Select Firmware, and click the Download button.
Additional support resources
ForHP’sall-inclusivehelpfortheprinter,goto:www.hp.com/support/ljM253
•Solve problems
•Findadvancedconfigurationinstructions
•Download software updates
•Join support forums
•Find warranty and regulatory information
•Access mobile printing resources
 Wired (Ethernet) network connection (optional)
•Verify that the printer is attached to the correct network port using a cable of the correct length.
•Verify the lights next to the network port are lit.
•Verify the print driver is installed on the computer.
•Testthenetworkconnectionbypingingthenetwork:
Windows
Click Start > Run. Type cmd, and press Enter. Type ping,
type a space, type the printer IP address, and then press Enter.
Example IP address:192.168.0.1.TofindtheprinterIP,see“Findtheprinter IPaddress.”
OS X
Open the Network Utility, and type the IP address in the ping pane. Press Enter.
Example IP address:192.168.0.1.TofindtheprinterIP,see“Findtheprinter IPaddress.”
•If the window displays round-trip times, the network is working.
•If the ping does not work, try restarting the printer and recheck all of the connection steps.
Wireless network connection (wireless models)
•Verify that the network cable is not connected. The printer cannot connect toawirelessnetworkwhenanetworkcableisconnected.
•Verify that the printer and wireless router are turned on and have power.
Alsomakesurethewirelessswitchisturnedon.
•Verify that the printer is within the range of the wireless network. For most networks, the printer must be within 30 m (100 ft) of the wireless access point (wireless router).
•Verify the print driver is installed on the computer.
•Verify that the computer and printer connect to the same wireless network.
•For OS X verify that the wireless router supports Bonjour.
•Restart the wireless router.
3
English...................... |
1 |
Bahasa Indonesia..... |
4 |
....................... |
7 |
........................... |
10 |
................ |
13 |
TiếngViệt................ |
16 |
Color LaserJet Pro M253-M254
Panduan Persiapan
www.hp.com/support/ljM253 |
www.register.hp.com |
3. Konfigurasiawalpadapanelkontrol
PENTING:
Ikuti Langkah 1-2 pada
posterkonfigurasiperangkat keras printer, lalu lanjutkan dengan Langkah 3.
Setelah menghidupkan printer, tunggu proses inisialisasi. Untuk menavigasikan panel kontrol 2baris,gunakantombolpanahdantombolOK. Untuk menavigasikan panel kontrol layar sentuh,gunakangerakansentuh,geser,dangulir.Ikutiperintahpadapanelkontroluntuk mengkonfigurasipengaturanberikut:
•Bahasa
•Lokasi
•Pengaturan Default
Dalam Default Settings (Pengaturan Default) pilih salah satu dari pilihan berikut:
•Dikelola sendiri: Pengaturan default yang dioptimalkan untuk sebagian besar pengguna yang mencakup panduan langkah-langkah pengaturan dan konfigurasi serta pembaruan otomatis.
•Dikelola TI: Pengaturan default yang dioptimalkan untuk kemampuan pengelolaan cepat.
Pengaturan dapat disesuaikan sepenuhnya setelah konfigurasi awal.
CATATAN: Pilih Print Information Page (Cetak Halaman Informasi) untuk mencetak halaman yang menunjukkan cara mengubah pengaturan default.
4. Memilih metode sambungan
Sambungan USB secara langsung antara printer dan komputer
Gunakan kabel USB jenis A-ke-B.
Windows
1.Jangan sambungkan kabel USB sebelum menginstal perangkat lunak. Proses penginstalan meminta untuk menyambungkan kabel pada waktu yang tepat. Jika kabel telah tersambung, hidupkan ulang printer saat penginstalan meminta untuk menyambungkan kabel.
2.Lanjutkan ke “5. Men-download dan menginstal perangkat lunak”.
OS X
1.Untuk OS X, sambungkan kabel USB antara komputer dan printer sebelum menginstal perangkat lunak.
2.Lanjutkan ke “5. Men-download dan menginstal perangkat lunak”.
Sambungan jaringan Ethernet berkabel (Opsional)
Gunakan kabel jaringan standar.
1.Sambungkan kabel jaringan ke printer dan jaringan. Tunggu beberapa menit agar printer mendapatkan alamat jaringan.
2.Lanjutkan ke “5. Men-download dan menginstal perangkat lunak”.
Sambungan jaringan nirkabel (hanya model nirkabel)
Panel kontrol layar sentuh
1.Untuk menyambungkan printer ke jaringan nirkabel (Wi-Fi), pada panel kontrol printer, sentuh tombol Wireless (Nirkabel).
2.Sentuh Wireless Menu (Menu Nirkabel), lalu sentuh Wireless Setup Wizard (Wizard Pengaturan Nirkabel). Pilih nama jaringan dari daftar SSID, atau masukkan nama jaringan jika tidak tercantum dalam daftar.
3.Gunakan keyboard untuk memasukkan frasa akses, lalu sentuh tombol OK.
4.Tunggu sementara printer menetapkan sambungan jaringan.
5.Pada panel kontrol printer, sentuh tombol Network (Jaringan). Jika alamat IP tercantum dalam daftar, berarti koneksi jaringan telah ditetapkan. Jika tidak, tunggu beberapa menit, lalu coba lagi. Catat alamat IP untuk digunakan saat penginstalan perangkat lunak berlangsung. Contoh alamat IP: 192.168.0.1
Panel kontrol 2 baris/LED
1.Untuk menyambungkan printer ke jaringan nirkabel (Wi-Fi), pastikan printer, jalur akses, dan komputer telah dihidupkan dan komputer tersambung ke jaringan nirkabel.
2.Kabel USB mungkin diperlukan saat penginstalan SW berlangsung.
3.Untuk mencetak dari komputer, lanjutkan dengan “5. Download dan instal perangkat lunak.” Untuk mencetak hanya dari telepon atau tablet, lanjutkan dengan "6. Pencetakan seluler (opsional)."
 MengkonfigurasialamatIPsecaramanual
Lihat panduan pengguna printer untuk mendapatkan informasi tentang cara mengkonfigurasi alamat IP secara manual www.hp.com/support/ljM253.
4

5. Men-download dan menginstal perangkat lunak
 Metode 1: Download HP Easy Start (Windows dan OS X)
1.Kunjungi 123.hp.com/laserjet, lalu klik Download.
2.Ikuti petunjuk pada layar dan konfirmasi untuk menyimpan file di komputer.
3.Jalankan file perangkat lunak dari folder tempat menyimpan file.
 Metode 3: Instal dari CD printer (hanya Windows)
1.Masukkan CD printer ke komputer.
2.Ikuti petunjuk pada layar untuk menginstal perangkat lunak.
 Metode 2: Download dari situs web dukungan printer (Windows dan OS X)
1.Kunjungi www.hp.com/support/ljM253.
2.Pilih Software and drivers (Perangkat lunak dan driver).
3.Download perangkat lunak untuk model printer dan sistem operasi Anda.
4.Jalankan file perangkat lunak dari folder tempat menyimpan file.
 Catatan Penginstalan
Untuk informasi lebih rinci tentang perangkat lunak printer, lihat file catatan penginstalan pada CD printer.
6 Pencetakan seluler (opsional)
6.1 Menyambungkan perangkat ke jaringan nirkabel
Untuk mencetak dari telepon atau tablet, sambungkan perangkat ke jaringan nirkabel yang sama dengan printer.
Perangkat Apple iOS (AirPrint): Buka item untuk dicetak, lalu pilih ikon Action (Tindakan). Pilih Print (Cetak), pilih printer, lalu pilih Print (Cetak).
Perangkat Android (4.4 atau versi lebih baru): Buka item yang akan dicetak, lalu pilih tombol Menu. Pilih Print (Cetak), pilih printer, lalu pilih Print (Cetak).
Perangkat tertentu mengharuskan Anda men-download aplikasi plugin Layanan HP Print dari Google Play store.
Windows Phone: Download aplikasi HP AiO Remote dari Windows Store.
Selengkapnya tentang pencetakan seluler
Untuk informasi lebih lanjut tentang hal ini dan sistem operasi lainnya (Chrome/Google Cloud Print), kunjungi www.hp.com/go/LaserJetMobilePrinting atau pindai kode QR.
6.2 Wi-Fi Direct (hanya model nirkabel)
Wi-Fi Direct memungkinkan perangkat yang mendukung Wi-Fi, misalnya smartphone, tablet, atau komputer, membuat sambungan jaringan nirkabel langsung ke printer tanpa menggunakan router atau jalur akses nirkabel. Sambungkan ke sinyal Wi-Fi Direct printer menggunakan cara yang sama seperti menyambungkan perangkat yang mendukung Wi-Fi ke jaringan nirkabel atau hotspot baru.
Mengaktifkan Wi-Fi Direct
1.Panel kontrol 2-baris: Di panel kontrol printer, tekan tombol OK, lalu buka menu Network Setup (Pengaturan Jaringan).
Panel kontrol layar sentuh: Dari layar Home (Beranda) di panel kontrol printer, pilih tombol Connection Information (Informasi Sambungan) 


 .
.
2.Buka menu berikut:
•Wi-Fi Direct
•Settings (Pengaturan) (hanya panel kontrol layar sentuh)
•On/Off(Aktif/TidakAktif)
3.Sentuh item menu On (Aktif). Menyentuh tombol Off (Tidak Aktif) akan menonaktifkan pencetakan Wi-Fi Direct.
 Untuk informasi selengkapnya tentang pencetakan dan pengaturan nirkabel, kunjungi www.hp.com/go/wirelessprinting.
Menemukan printer
1.Dari perangkat bergerak, aktifkan Wi-Fi, lalu cari jaringan nirkabel.
2.Pilih printer yang ditunjukkan pada panel kontrol printer. Contohnamaprinter:Direct-bb-HP M277 Laserjet
7.  MengkonfigurasiHPePrintmelaluiemail(opsional)
Gunakan HP ePrint via email untuk mencetak dokumen dengan mengirimnya sebagai lampiran email ke alamat email printer dari perangkat apa pun yang mendukung email, bahkan dari perangkat di jaringan yang berbeda.
Untuk menggunakan HP ePrint via email, printer harus memenuhi persyaratan berikut ini:
•Printer harus disambungkan ke jaringan berkabel atau nirkabel dan memiliki akses Internet.
•Layanan Web HP harus diaktifkan di printer, dan printer harus terdaftar di HP Connected.
Mengaktifkan Layanan Web HP
Panel kontrol 2 baris/LED
1.Setelah printer terhubung ke jaringan, cetak halaman konfigurasi dan temukan alamat IP printer.
2.Di komputer, buka browser web, lalu masukkan alamat IP printer di baris alamat. HP Embedded Web Server (EWS) akan terbuka.
3.Pilih tab HP Web Services (Layanan Web HP), lalu klik tombol
Enable (Aktifkan). Printer mengkonfigurasi sambungan ke Internet, lalu pesan ditampilkan untuk menunjukkan bahwa lembar informasi akan dicetak.
4.Klik tombol OK. Halaman ePrint dicetak. Pada halaman ePrint, cari alamat email yang ditentukan secara otomatis ke printer.
Panel kontrol layar sentuh
1. Dari layar Home (Beranda) pada panel kontrol printer, sentuh tombol Connection
Information (Informasi Sambungan) |
,lalubukamenuberikut: |
•HP ePrint
•Settings (Pengaturan)
•Enable Web Services (Aktifkan Layanan Web)
2.Sentuh item menu OK. Printer mengaktifkan Web Services (Layanan Web), lalu mencetak halaman informasi. Halaman informasi berisi kode printer yang diperlukan untuk mendaftarkan printer HP di HP Connected.
3.Kunjungi www.hp.connected.com untuk membuat akun HP ePrint dan menyelesaikan proses konfigurasi.
5
Mengatasi masalah
Panduan pengguna
Panduan pengguna mencakup informasi tentang penggunaan printer dan mengatasi masalah. Panduan pengguna tersedia pada CD printer dan web:
1.Kunjungi www.hp.com/support/ljM253
2.Pilih printer jika diminta, lalu klik User Guides (Panduan Pengguna).
Memeriksapembaruanfirmware
1.Kunjungi www.hp.com/support/ljM253
2.Pilih printer jika diminta, lalu klik Software and Drivers
(Perangkat Lunak dan Driver).
3.Pilih sistem operasi, lalu klik tombol Next (Berikutnya).
4.Pilih Firmware, lalu klik tombol Download.
Bantuan panel kontrol (hanya model layar sentuh)
Sentuh tombol Help (Bantuan) pada panel kontrol printer untuk mengakses topik bantuan.
Sumber dukungan tambahan
Untuk bantuan secara menyeluruh dari HP terkait printer, kunjungi: www.hp.com/support/ljM253
•Mengatasi masalah
•Menemukan petunjuk konfigurasi tingkat lanjut
•Men-download pembaruan perangkat lunak
•Bergabung dengan forum dukungan
•Mencari informasi jaminan dan peraturan
•Mengakses sumber pencetakan seluler
 Sambungan jaringan berkabel (Ethernet) (opsional)
•Pastikan printer telah tersambung ke port jaringan yang benar menggunakan kabel dengan panjang yang benar.
•Pastikan lampu di sebelah port jaringan telah menyala.
•Pastikan driver cetak telah terinstal di komputer.
•Uji sambungan jaringan dengan melakukan ping jaringan:
Windows
Klik Start (Mulai) > Run (Jalankan). Ketik cmd, lalu tekan Enter. Ketik ping, ketik spasi, ketik alamat IP printer, lalu tekan Enter. Contoh alamat IP: 192.168.0.1. Untuk menemukan IP printer, lihat "Menemukan alamat IP printer".
OS X
Buka Network Utility (Utilitas Jaringan), lalu ketik alamat IP di jendela ping. Tekan Enter. Contoh alamat IP: 192.168.0.1. Untuk menemukan IP printer, lihat "Menemukan alamat IP printer".
•Jika jendela menampilkan waktu respons (round-trip time), berarti jaringan berfungsi.
•Jika ping tidak berjalan, coba hidupkan ulang printer, lalu periksa kembali semua langkah sambungan.
 Sambungan jaringan nirkabel (model nirkabel)
•Pastikan kabel jaringan tidak tersambung. Printer tidak dapat tersambung ke jaringan nirkabel jika kabel jaringan tersambung.
•Pastikan printer dan router nirkabel telah diaktifkan dan memiliki daya. Pastikan juga sakelar nirkabel telah diaktifkan.
•Pastikan printer telah berada dalam jangkauan jaringan nirkabel. Untuk sebagian besar jaringan, printer harus berada dalam jarak 30 m (100 kaki) dari jalur akses nirkabel (router nirkabel).
•Pastikan driver cetak telah terinstal di komputer.
•Pastikan komputer dan printer telah tersambung ke jaringan nirkabel yang sama.
•Untuk OS X, pastikan router nirkabel mendukung Bonjour.
•Hidupkan ulang router nirkabel.
6
 Loading...