


 W i r e l e s s
HP Deskjet F4500 All-in-One series
Start Here
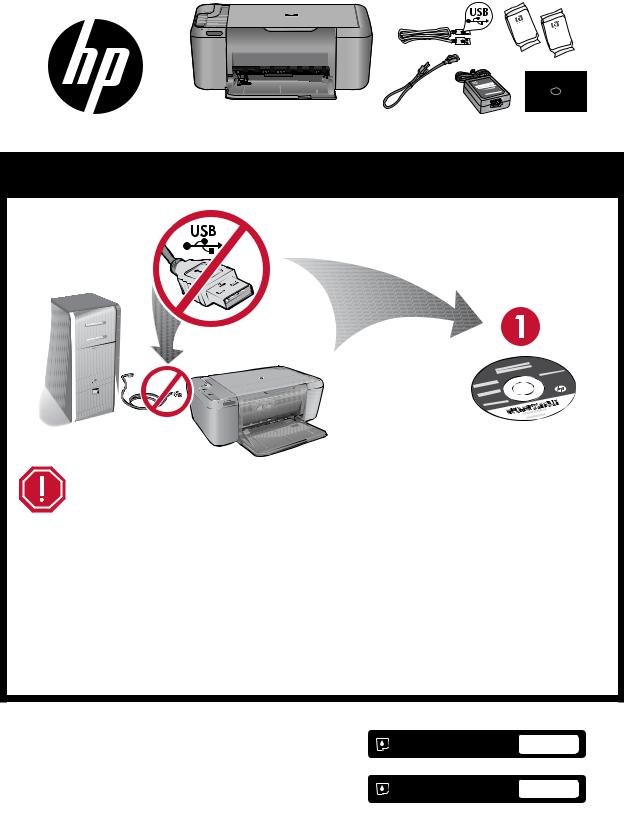
Important!
Do NOT connect the USB cable until prompted onscreen by the software!
•Insert the software CD to start. For computers without a CD/DVD drive, please go to www.hp.com/support to download and install the printer software.
•Follow the animated setup guide, while the software installs.
•The animated setup guide contains important information on setting up the printer, including Push Button Method.
•To increase your product usage experience, please take the time to register at: http://www.register.hp.com
*CB755-90014* |
Black Cartridge |
121/121XL |
|||
|
|
||||
*CB755-90014* |
Tri-color Cartridge |
121/121XL |
|||
|
|
|
|
||
|
CB755-90014 |
|
|
|
|
|
|
|
|
Printed in [English] |
|
EN |
FR |
PT |
AR |
© 2009 Hewlett-Packard Development Company, L.P. |
|

Control panel
English
1 On: 
Turns the HP All-in-One on or off. When the HP All-in- One is off, a minimal amount of power is still used. To completely remove power, turn off the HP All-in-One, then unplug the power cord.
2 Cancel: 
Stops the current operation.
3 Scan (USB only): 
To use the Scan (USB only) button, the computer must be turned on and connected to the HP All-in-One with a USB cable. To scan wirelessly in Windows, click the HP Solution Center icon on the computer’s desktop, and then click Scan. To scan wirelessly on the Mac, open HP Scan, and then click Scan.
4Paper Selection: 
Changes the paper type setting for copying to either plain or photo paper. The Paper Selection lights indicate the currently selected paper size and type. The default paper type setting is Plain.
5Actual Size/ Resize to Fit: 
|
Scales the original to the maximum size to fit within the |
W i r e l e s s |
margins of the selected paper size for copying. |
6 Start Copy Black: 
Starts a black-and-white copy job. Press this button multiple times to specify multiple black copies.
7Start Copy Color: 
Starts a color copy job. Press this button multiple times to specify multiple color copies.
8Number of Copies LCD: 
Displays the number of copies to be made. Also displays a warning when the device is out of paper.
9Ink Level lights: 

Show approximate ink level information for each print cartridge. Ink level warnings and indicators provide estimates for planning purposes only.
10 Attention light: 
Amber light flashes if there is an error or if some user action is required.
11 Wireless indicator light: 
Blue light indicates that the wireless radio is on.
12 Wireless button: 
Turns the wireless radio on or off. Press and hold the button to initiate WPS.
Note: All buttons, except Power, act as Resume button for carriage or paper jam errors.

About networking
Change the HP Deskjet from a USB connection to a network connection
If you first install the HP Deskjet with a USB connection, you can later change to a wireless network connection.
To change a USB connection to an integrated wireless WLAN 802.11 connection
Windows
1.Unplug the USB connection from the back of the product.
2.Insert the product CD in the computer CD-ROM drive.
3.Select Add a Device, and then follow the onscreen instructions for a wireless network installation.
Mac
1.Unplug the USB connection from the back of the product.
2.Press the Wireless button to turn on the wireless radio.
3.Turn on Airport and establish a connection with the device.
4.Insert the product CD in the computer CD CD-ROM drive.
5.On the desktop, open the CD-ROM and then double-click HP Installer and follow the onscreen instructions.
English
Connect to additional computers on a network
You can connect the HP Deskjet to more than one computer on a small network of computers.
If the HP Deskjet is already connected to a computer on a network, for each additional computer you must install the HP Photosmart Software. During installation of a wireless connection, the software will automatically discover the product on the network. Once you have set up the HP Deskjet on the network you will not need to configure it again when you add additional computers.
Wireless setup tips
•Insert the software CD and follow the animated setup guide.
•If you have a WPS (WiFi Protected Setup) router, then you can use Push Button Method. After the printer has been powered on, just press and hold the WPS button on the router to establish a secure wireless connection to your printer.
•When a wireless connection between the printer and the router has been established, the blue indicator light on the wireless button will automatically light up.

English
Find more information
All other product information can be found in the electronic Help and Readme. The electronic Help is automatically installed during printer software installation. Electronic Help includes instructions on product features and troubleshooting. It also provides product specifications, legal notices, environmental, regulatory, and support information. The Readme file contains HP support contact information, operating system requirements, and the most recent updates to your product information.
Windows
To access the electronic Help
•Windows: Click Start > All Programs > HP > Deskjet F4500 series > Help.
Find Readme
Before software installation, insert the software CD, click Readme when the option appears onscreen. After software installation, click Start
> All Programs > HP > Deskjet F4500 series > Readme.
Windows 7
Windows 7 support information is available online: www.hp.com/go/windows7.
Mac
To access the electronic Help
•Mac OS X v10.4: Click Help > Mac Help, Library > HP Product Help.
•Mac OS X v10.5: Click Help > Mac Help. In the Help Viewer, hold down the Home button, and then select HP Product Help from the pop-up menu.
Find Readme
You can access the Readme file by inserting the software CD, then double-clicking the Read Me folder located at the top-level of the software CD.
Ink usage
Note: Ink from the cartridges is used in the printing process in a number of different ways, including in the initialization process, which prepares the device and cartridges for printing, and in printhead servicing, which keeps print nozzles clear and ink flowing smoothly. In addition, some residual ink is left in the cartridge after it is used. For more information see www.hp.com/go/inkusage.
Power specifications:
Power adapter: 0957-2269
Input voltage: 100-240Vac (+/- 10%)
Input frequency: 50/60 Hz (+/- 3Hz)
Power consumption: 20 watts maximum (average printing)
Note: Use only with the power adapter supplied by HP.

Installation troubleshooting
Windows
If you are unable to print make sure the product is set as your default printing device:
•Windows Vista: On the Windows taskbar, click Start, click Control Panel, and then click
Printers.
•Windows XP: On the Windows taskbar, click Start, click Control Panel, and then click
Printers and Faxes.
Make sure that your product has a check mark in the circle next to it. If your product is not selected as the default printer, right-click the printer icon and choose “Set as default printer” from the menu.
If you are still unable to print, or the Windows software installation fails:
1.Remove the CD from the computer’s CD-ROM drive, and then disconnect the USB cable from the computer.
2.Restart the computer.
3.Temporarily disable any software firewall and close any anti-virus software. Restart these programs after the product software is installed.
4.Insert the product software CD in the computer’s CD-ROM drive, then follow the onscreen instructions to install the product software. Do not connect the USB cable until you are told to do so.
5.After the installation finishes, restart the computer.
Mac
If you are unable to print, uninstall and reinstall the software:
Note: The uninstaller removes all of the HP software components that are specific to the device. The uninstaller does not remove
components that are shared by other products or programs.
To uninstall the software:
1.Disconnect the HP Deskjet from your computer.
2.Open the Applications: Hewlett-Packard folder.
3.Double-click HP Uninstaller. Follow the onscreen instructions.
To install the software:
1.To install the software, insert the HP software CD into your computer’s CD drive.
2.On the desktop, open the CD and then double-click HP Installer.
3.Follow the onscreen instructions.
English

English
Network troubleshooting
The product cannot be found during software installation
If the HP software is unable to find your product on the network during software installation, try the following troubleshooting steps. If you have a wireless connection, start with step 1 and proceed through step 4 as necessary.
Wireless connections
1: Determine if the product is connected to the network by running the Wireless Network Test and following any instructions provided.
To run the Wireless Network Test
Press and hold the Scan button to initiate the wireless test and print the wireless network test and network configuration pages.
2: If you determined in Step 1 that the product is not connected to a network and this is the first time you are installing the product, you will need to follow the onscreen instructions during software installation to connect the product to the network.
To connect the product to a network
1.Insert the product Software CD in the computer CD-ROM drive.
2.Follow the instructions on the screen. When you are prompted, connect the product to the computer using the USB setup cable included in the box. The product will attempt to connect to the network. If the connection fails, follow the prompts to correct the problem, and then try again.
3.When the setup is finished, you will be prompted to disconnect the USB cable and test the wireless network connection. Once the product connects successfully to the network, install the software on each computer that will use the product over the network.
If the device is unable to join your network, check for these common issues:
•You may have picked the wrong network or typed in your network name (SSID) incorrectly. Check these settings to ensure they are correct.
•You may have typed in your WEP key or your WPA encryption key incorrectly (if you are using encryption).
Note: If the network name or the WEP/WPA keys are not found automatically during installation, and if you don’t know them, you can download an application from www.hp.com/go/networksetup that may help you locate them. This application works for only Windows Internet Explorer and is only available in English.
•You may have a router problem. Try restarting both the product and the router by turning the power for each of them off, and then on again.

Network troubleshooting
3: Check for and resolve the following possible conditions: |
|
|
• |
Your computer may not be connected to your network. Make sure that the computer is connected to the |
|
|
same network to which the HP Deskjet is connected. If you are connected wirelessly, for example, it is |
|
|
possible that your computer is connected to a neighbor’s network by mistake. |
|
• |
Your computer may be connected to a Virtual Private Network (VPN). Temporarily disable the VPN before |
English |
proceeding with the installation. Being connected to a VPN is like being on a different network; you will need to disconnect the VPN to access the product over the home network.
• Security software may be blocking communication. Security software (firewall, anti-virus, anti-spyware) installed on your computer may be blocking communication between the product and the computer. An HP diagnostic runs automatically during installation and can provide messaging about what may be blocked by the firewall. Try temporarily disabling your firewall, anti-virus, or anti-spyware applications to see if you can successfully finish the installation.
You can re-enable your firewall application after installation is complete. Make sure the following files are included in the exceptions list of the firewall:
•C:\Program Files\Hp\Digital Imaging\bin\hpqtra08.exe.
•C:\Program Files\Hp\Digital Imaging\bin\hpiscnapp.exe.
•C:\Program Files\Hp\Digital Imaging\bin\hpqdstcp.exe.
•C:\Program Files\Hp\Digital Imaging\bin\hpqkygrp.exe.
•C:\Program Files\Hp\Digital Imaging\bin\hpqste08.exe.
•C:\Windows\System32\hpzinw12.exe.
•C:\Windows\System32\hpzipm12.exe.
Tip: Configure your firewall software to allow communication over UDP port 427.
4: Use the advanced search feature.
1.Press and hold the Scan button to initiate the wireless test and print the network configuration page.
2.Identify the IP address of the HP Deskjet from the network configuration report. Check to make sure that the Product IP address is in the same range as the PC and router.
3.Use the advanced search option available during software installation, then click on Search by IP address and enter the product’s IP address.
Windows only
Other network problems after software installation
If the HP Deskjet has been successfully installed, and you are experiencing problems such as not being able to print, try the following:
•Turn off the router, product, and computer, and then turn them back on in this order: router first, then the product, and finally the computer. Sometimes, cycling the power will recover a network communication issue.
•If the previous step does not solve the problem and you have successfully installed the HP Photosmart Software on your computer, run the Network Diagnostic tool.
To run the Network Diagnostic tool
> In the Solution Center, click Settings, click Other Settings, and then click Network Toolbox. On the Utilities tab, click Run Network Diagnostics.

HP printer limited warranty statement


 W i r e l e s s
Tout-en-un HP Deskjet série F4500
Commencez ici
Important !
NE CONNECTEZ PAS le câble USB tant que vous n’y êtes pas invité à l’écran par le logiciel!
•Insérez le CD du logiciel pour commencer. Pour les ordinateurs non équipés d’un lecteur de CD/DVD, visitez le site www.hp.com/support pour télécharger et installer le logiciel d’imprimante.
•Suivez les instructions du guide de configuration animé durant l’installation du logiciel.
•Le guide de configuration animé contient des informations importantes sur la configuration de l’imprimante, notamment sur la méthode PBC (Push Button).
•Pour mieux exploiter les fonctionnalités de votre produit, prenez le temps d’enregistrer celui-ci sur le site : http://www.register.hp.com
Cartouche d’encre noire |
121/121XL |
Cartouche trichromique |
121/121XL |

Français
Panneau de commande
1Marche/arrêt : 
Permet de mettre l’appareil Tout-en-un HP sous tension et hors tension. Lorsque l’appareil HP Tout-en-un est hors tension, il continue à recevoir une quantité minimale de courant. Mettez le périphérique hors tension et débranchez le cordon d’alimentation pour couper entièrement l’alimentation électrique de l’appareil HP Tout-en-un.
|
|
|
|
|
|
|
|
|
|
2 |
Annuler : |
||
|
|
|
|
|
|
|
|||||||
|
|
|
|
|
|
|
|||||||
|
|
|
|
|
|
|
|
|
|
|
|
|
Interrompt l’opération en cours. |
|
|
|
3 |
||||||||||
|
|
Numériser (USB uniquement) : |
|||||||||||
|
|
||||||||||||
|
|
||||||||||||
|
|
|
|
|
|
|
|
|
|
|
|
|
Pour pouvoir utiliser le bouton Numériser (USB uniquement), |
|
|
|
|
|
|
|
|
|
|
|
|
|
vous devez mettre l’ordinateur sous tension et le relier à l’appareil HP |
|
|
|
|
|
|
|
|
|
|
|
|
|
|
|
|
|
|
|
|
|
|
|
|
|
|
|
tout-en-un par un câble USB. Pour effectuer la numérisation sans fil sous |
|
|
|
|
|
|
|
|
|
|
|
|
|
Windows, cliquez sur l’icône du Centre de solutions HP sur le bureau de |
|
|
|
|
|
|
|
|
|
|
|
|
|
l’ordinateur, puis cliquez sur Numériser. Pour lancer la numérisation sans |
|
|
|
|
|
|
|
|
|
|
|
|
|
|
|
|
|
|
|
|
|
|
|
|
|
|
|
|
|
|
|
|
|
|
|
|
|
|
|
|
|
|
|
4 |
fil sur le Mac, ouvrez l’utilitaire HP Scan, puis cliquez sur Numériser. |
|||||||||||
|
Sélection du papier : |
||||||||||||
|
|
|
|
|
|
|
|
|
|
|
|
|
Modifie le paramétrage du type de papier ordinaire/ |
|
|
|
|
|
|
|
|
|
|
|
|
|
|
|
|
|
|
|
|
|
|
|
|
|
|
|
photo pour la copie. Les voyants Sélection du papier |
|
|
|
|
|
|
|
|
|
|
|
|
|
|
|
|
|
|
|
|
|
|
|
|
|
|
|
indiquent le format et le type de papier actuellement |
|
|
|
|
|
|
|
|
|
|
|
|
|
sélectionnés. Le type de papier par défaut est Ordinaire. |
|
5 |
Taille réelle/Redimensionner pour ajuster : |
|||||||||||
|
|
|
|
W i r e l e s s |
Redimensionne l’original selon la taille maximale correspondant |
||||||||
|
|
|
|
|
|
|
|
|
|
|
|
|
aux marges du format de papier sélectionné pour la copie. |
|
6 |
Copier, Noir : |
|||||||||||
Permet de lancer une copie en noir et blanc. Appuyez plusieurs fois sur ce bouton pour spécifier plusieurs copies en noir et blanc.
7Démarrer copie couleur : 
Permet de lancer une copie en couleur. Appuyez plusieurs fois sur ce bouton pour spécifier plusieurs copies couleur.
8Nombre de copies LCD : 
Affiche le nombre de copies à effectuer. Affiche également un avertissement lorsque le périphérique est à court de papier.
9Voyants de niveau d’encre : 

Indiquent le niveau d’encre approximatif contenu dans chaque cartouche d’impression. Les avertissements et indicateurs de niveau d’encre fournissent des estimations à des fins de planification uniquement.
10 Voyant Avertissement : 
Ce voyant s’allume et est de couleur orange en cas d’erreur ou si l’intervention de l’utilisateur est requise.
11 Indicateur de réseau sans fil : 
Un voyant bleu indique que la radio sans fil est activée.
12 Bouton de liaison sans fil : 
Permet d’activer ou désactiver la radio sans fil. Appuyez en maintenant la pression sur le bouton pour initialiser la configuration WPS.
Remarque : Tous les boutons, à l’exception du bouton Marche/arrêt, fonctionnent comme le bouton Reprise en cas de bourrage papier ou d’erreur liée au chariot d’impression.
10
 Loading...