


df300

HP df300 Series
Digital Picture Frame
數位相框
デジタル・ピクチャ・フレーム
User Manual
使用說明書
ユーザー・マニュアル
Revision 1.0a

2
ENGLISH
3
FCC Compliance Statement
Note: This equipment has been tested and found to comply with the limits for
a Class B digital device, pursuant to Part 15 of the FCC Rules. These limits
are designed to provide reasonable protection against harmful interference
in a residential installation. This equipment generates, uses, and can radiate
radio frequency energy and, if not installed and used in accordance with the
instructions, may cause harmful interference to radio communications. However,
there is no guarantee that interference will not occur in a particular installation.
If this equipment does cause harmful interference to radio or television
reception, which can be determined by turning the equipment off and on, the
user is encouraged to try to correct the interference by one of the following
measures:
- Reorient or relocate the receiving antenna.
- Increase the separation between the equipment and receiver.
- Connect the equipment into an outlet on a circuit dif ferent from that to which
the receiver is connected.
- Consult the dealer or an experienced radio/TV technician for help.
FCC Caution: To assure continued compliance, only use shielded interface
cables when connecting to computer or peripheral devices. Any changes or
modifications not expressly approved by the p arty responsible for compliance
could void the user’s authority to operate this equipment.
This device complies with Part 15 of the FCC Rules. Operation is subject to the
following two conditions: (1) this device may not cause harmful interference,
and (2) this device must accept any interference received, including interference
that may cause undesired operation.

3
ENGLISH
Table of Contents
FCC Compliance Statement
What’s in the Box?
Getting Started
Initial Setup
Setup Menu
Key Features
Picture Options
Specifications
Frequently Asked Questions
Cleaning and Care Tips
Getting Help
2
4
5
7
9
11
12
17
18
19
20

4
ENGLISH
5
Qty Item Image
1 3.5” Digital Picture Fram e
1
Universal Power Adapter
(5V, 0.5A, 100/240 switching)
1 USB 2.0 Cable
1 User Manual
1 Warrant y Document
IMPOR TANT: Pleas e keep t his
docume nt for t echnic al supp ort c ontac t
inform ation.
What’s in the Box?
5
ENGLISH
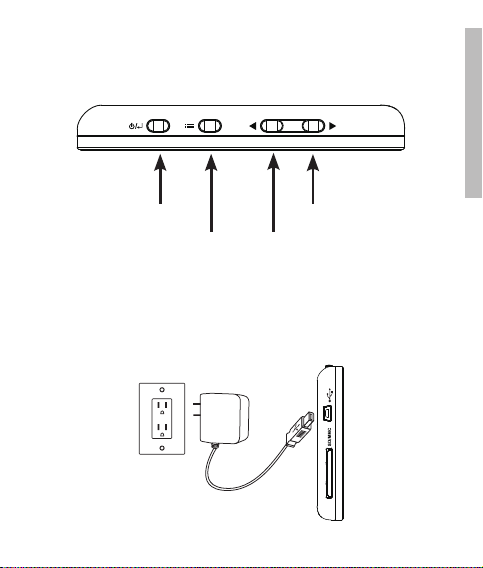
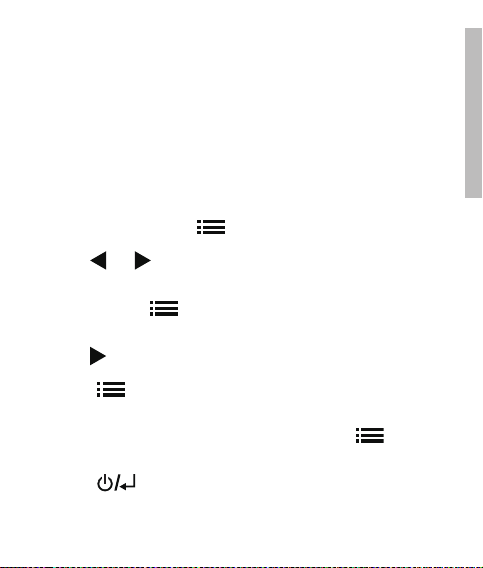
1. The digital picture frame has basic co ntrol buttons on the top of the frame
as illustrated below.
2. Unfold the attached stand to it s extended position. Attach the USB cab le
to the AC adapter. Connect the mini connector of the cable to the digital
picture frame, and plug the adapter into a wall power outlet as illustrated
below. The picture frame will automatically power on and begin charging
the internal bat ter y. Please allow 2 to 3 hours for a full internal battery
charge.
Power
Options Left/Previous
Right/Next
Getting Started
6
ENGLISH
7
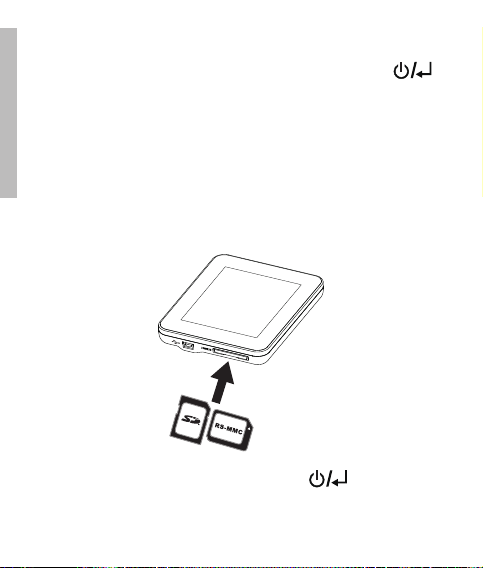
3. If the frame did not automatically power on, press and hold the
button on the top of the frame for 3 to 5 se conds. The df300 Digital
Picture Frame is preloaded with pic tures that illustrate the b asic features of
this product and a slideshow will begin in a few seconds. If you wish to
eventually delete the se pictures from the internal memory, please reference
the PICTURE OPTIONS section of this manual.
4. If you wish to immediate ly view your own pictures, insert a SD memory
card containing desired pictures into the card slot. In a few seconds,
a slide show of your pictures will begin. Note: Memory card must be
orientated correctly as illustrated below. Push the memory card into the
slot until it is locked into position.
5. To turn the picture frame off, press and hold the button for 3 to 5
seconds.
7
ENGLISH
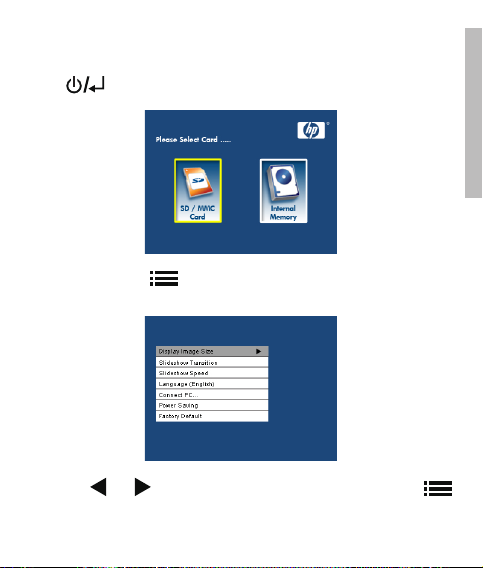
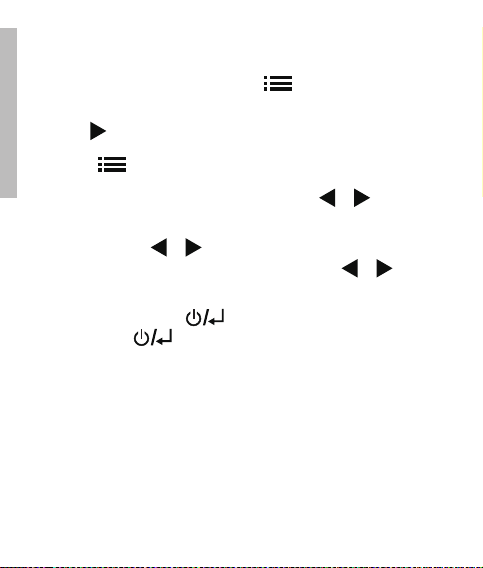
1. Power on the picture frame and allow the picture slideshow to begin. Press
the button to view the Memory Source Screen as illustrated below.
2. Press and hold the button until the SETUP MENU is displayed as
illustrated below.
3. Use the and buttons to highlight the desired setting. Press the
button to select the setting options.
Initial Setup

8
ENGLISH
9
4. Continue to use the and buttons to highlight the desired option.
Press the button to select the desired option.
5. Press the
button to return to th e SETUP MENU. Press the
button again to exit the SETUP MENU and re turn to the Memory Source
Screen.
6. Use the
and buttons to highlight the desired memor y source. Pre ss
the button to sel ect the de sired memory source. This will begin a
slideshow with pictures from the selected memor y source.

9
ENGLISH
Option Description
Display Image Size
Select “ORIGINAL” to display pictures with their
original properties. Display picture in full height
in normal aspect ratios. Some picture may not fill
the screen, and leave space on both sides. Select
“OPTIMAL” to allow the frame to display pictures
with optimized proper ties. Picture(s) will enlarge to
fit the full width of the screen.
The factory default option is “ORIGINAL”.
Slideshow Transition
Choose from 6 options and select the preferred
transition. Options are: Normal, Random,
Top_Bottom, Curtain, Open_ Door, and Cross_Comb.
The default option is set to “RANDOM”.
Slideshow Speed
Select the desired picture display length. Options
are: 5 seconds, 10 seconds, 30 seconds.
The default option is 5 seconds.
Language
Choose from 7 On Screen Display languages.
Options are: English, German, French, Spanish,
Portuguese, Italian, and Dutch.
The factory default is English .
Setup Menu

10
ENGLISH
11
Option Description
Connect to PC
Select this option when the frame is connected to the PC
to switch to file transfer mode. In this mode, you will be
able to access the SD/SDHC/MMC card.
Power Saving
This feature will automatically turn off the LCD on the
HP digital picture frame to save valuable energy. You
can choose from 4 settings. Options are: 5 minutes, 10
minutes, 30 minutes, or No Power Saving.
If you want to turn on the LCD, press any key on the photo
frame.
The factory default is set to No Power Saving.
Factory Default
If you wish to restore ALL the settings to the factory
default, press the button.

11
ENGLISH
Feature
Picture slideshow
• Automatic picture transition with 6 dif ferent variations.
Multiple picture viewing options
• View individual pictures in Browse mode (see later section)
• Copy pictures from an SD to internal memory without a PC connection
• Zoom and rotate individual pictures
Brightness, contrast, tint, and color adjustments in photo browse mode.
Add pictures from a SD card to the internal memor y.
Rechargeable internal battery power for portable viewing.
• Recharge by AC adapter or PC/Laptop USB connection
• Up to 2 hours of battery power between charges.
Power saving mode
• Choose between 4 different settings.
Key Features

12
ENGLISH
13
Slideshow modes
Slideshow mo de will begin automatically a few seconds after the frame is
powere d on or when an external memory card is inser ted.
Browse mode
To exit slideshow mode, press the button on ce. A pause symbol will
be briey displayed in the upper right of the screen. This allows forward and
previous picture viewing by pre ssing the and arrow buttons.
Thumbnail mode
To view pictures in a thumbnail mode, press the but ton t wice when in
slideshow or once when in browse mode. See illustrated below for thumbnail
example.
Use the and buttons to navigate to a picture. Press the button to
view the selecte d picture.
Picture Options
13
ENGLISH
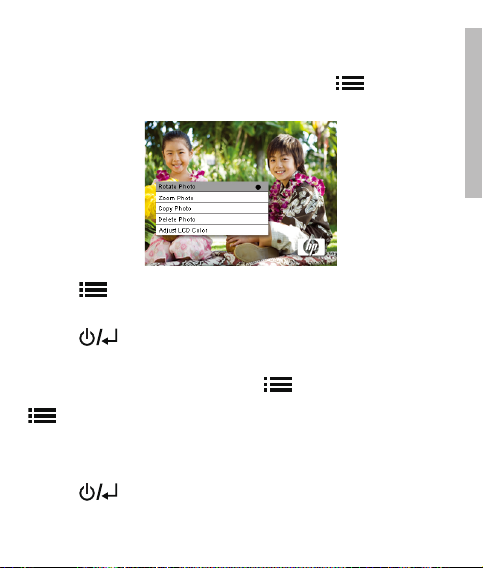
Picture Rotation
While in slideshow o r browse mode, press and hol d the button until the
PICTURE OPTIONS menu is displaye d as illustrated below.
Press the button to rotate the displayed picture. Each press of this button
will rotate the pic ture by 90 de gree s in a clockwise motion.
Press the but ton to remove the PICTURE OPTIONS menu.
Picture Zoom
While in browse mod e, press and hold the button until the PI CTURE
OPTIONS menu is displayed. Picture s can b e zoomed to 4X by pressing the
button. Each press of this button will increase the zoom by 1X until 4X.
At 4X, press this button once to return to the original view. Note: if a picture
is zoom ed while in slideshow mode, the frame will automatically enter into
photo browse mode.
Press the but ton to remove the PICTURE OPTIONS menu.

14
ENGLISH
15
Copying pic tures ont o internal memory
Pictures can only be copied onto the df300 frame’s internal mem ory from a
Secure Digital (SD or SDHC) or MMC memory card.
1. Insert an SD/SDHC/MMC memor y card with the desired pictures into the
frame’s memor y card slot.
2. Power on the picture frame and a slideshow from the SD/SDHC/MMC
memory card will automatically begin in a few seconds. Press the
button to switch to browse mode or thumbnail mo de.
3. Use the or arrow buttons to navigate to the picture you wish to
copy.
4. Press and hold the but ton until the PIC TURE OPTI ONS menu is
displayed.
5. Use the arrow but ton to highlight the COPY PHOTO option.
6. Press the
button to begin copying the picture to internal memory.
Once the picture has been copied, an Ok text box will b e briefly
displayed.
7. Press the
button to remove the PI CTURE OPTIONS menu.
8. If you wish to copy more pictures, simply repeat the above steps until
finished.
15
ENGLISH
Deleting pictures from internal memor y
Pictures can only be deleted from the df300 frame’s internal memor y.
1. Power down the picture frame.
2. If applicable, remove the memory card from the slot. This is done by
pushing the card further into the slot until the card l atch mechanism is
released. The card is now in an unlocked position. Remove the memory
card.
3. Turn on the frame and allow the slideshow of pictures on the internal
memory to begin. Press the button once to stop the slide show.
4. Use the
and arrow buttons to navigate the picture you wish to
delete.
5. Press and hold the
button until the PICTURE OPTIONS menu is
displayed.
6. Use the
arrow b utton to highlight the DELETE PHOTO option.
7. Press the
button to delete the picture from the internal memor y. Once
the picture has been deleted, an Ok tex t box will be briey displayed.
8. If you wish to delete the next displayed image, press the
button
again. Repeat this step until nished
9. Press the
button to remove the PI CTURE OPTIONS menu.
10. If you wish to delete more pictures, simply repe at the above steps until
nished.
16
ENGLISH
17
Adjust LCD Color
While in browse mod e, press and hold the button until the PI CTURE
OPTIONS menu is displayed.
1. Use the arrow button to highlight the Adjust LCD Color option.
2. Press the
button to display the Adjustment options.
3. The Brightness option will be highlighted. Use the or arrow buttons
to adjust screen brightness. Adjust to the desired level.
4. Press and hold the or arrow button until the next option is
highlighted (Contrast, Color, and Tint). Again, use the or arrow
buttons to adjust the selected option.
5. When finished, press the button to return to the PIC TURE OPTI ONS
menu. Press the button again to return to Browse mode.

17
ENGLISH
Panel Specification
Screen Size 3.5”
Frame Dimension 95 x 77 x 13 (mm)
Aspect ratio 4:3
Resolution 320x240 pixels
Power
External AC Power Adapter +5V, 0.5A
Connectivity
USB Ports
1- Mini USB 2.0 for recharging the internal
battery via AC adapter or PC/Laptop USB
connection.
Stora ge/Media
Internal memor y Up to 45 photos
Supporte d Memory cards
Memory cards slot Secure Digital (SD 2.0, SDHC) and MMC
Media Files Supported
Picture file formats JPEG - (Base line only)
Supporte d Languag es
On-Screen Display
English, French, Spanish, Italian, German,
Dutch, & Portuguese
Specifications

18
ENGLISH
19
Question Answer
Why can’ t I display som e of my Pi cture s?
Some pi cture/im age fil e form ats are not
suppo rted. Pleas e refer to the specification s.
Why is my p icture frame not res ponding
to any bu tton selec tions?
Use a sm all pap er clip or other tool to pre ss
the RESE T button located o n the b ack of t he
frame under the fold ing sta nd.
How lon g does it take t o fully charge the
Digital Pictur e Frame’s int ernal batt ery?
Approximatel y 3 hours.
How lon g will th e internal battery sup ply
power to the frame?
Up to 2 hours.
Can I ove rcharg e the in terna l bat tery? No
How lon g will th e internal battery las t? Up to 2 years
Can I re place the internal b attery if it
expires?
No
Can I de lete p icture s from a SD memo ry
card using the d f300 Digi tal Pic ture
Frame?
No. Only pictur es on t he inte rnal m emor y
can be d elete d.
Can I de lete p icture s from i ntern al
memor y?
Yes, refer to the Picture Option s section of
this do cument.
How can I switch t o the in terna l memory?
Remove t he external m emor y card o r
refere nce th e Initia l Setup secti on of th is
manual.
How can I find th e late st info rmatio n/
FAQs abou t my HP Digital Pi cture F rame?
Visit w ww.hp.com/supp ort fo r more detail s
and the lates t infor matio n.
Frequently Asked Questions
 Loading...