


 Loading...
Dell™ OptiPlex™ Systems
Setup and Quick Reference
Guide
Guide de configuration et de référence rapide
Setupund schnellreferenzhandbuch
Guida di installazione e consultazione rapida
Guía de instalación y de referencia rápida
Kurulum ve Hızlı Referans Kılavuzu
Models DHS, DHP, and DHM
w w w . d e l l . c o m | s u p p o r t . d e l l . c o m

Dell™ OptiPlex™ Systems
Setup and Quick Reference
Guide
w w w . d e l l . c o m | s u p p o r t . d e l l . c o m

Notes, Notices, and Cautions
NOTE: A NOTE indicates important information that helps you make better use of your computer.
NOTICE: A NOTICE indicates either potential damage to hardware or loss of data and tells you how to avoid the problem.
 CAUTION: A CAUTION indicates a potential for property damage, personal injury, or death.
____________________
Information in this document is subject to change without notice. © 2000-2002 Dell Computer Corporation. All rights reserved.
Reproduction in any manner whatsoever without the written permission of Dell Computer Corporation is strictly forbidden.
Trademarks used in this text: Dell, OptiPlex, and the DELL logo are trademarks of Dell Computer Corporation; Microsoft and Windows are registered trademarks of Microsoft Corporation.
Other trademarks and trade names may be used in this document to refer to either the entities claiming the marks and names or their products. Dell Computer Corporation disclaims any proprietary interest in trademarks and trade names other than its own.
August 2002 P/N 51FMX Rev. A06

Contents
About This Guide . . . . . . . . . . . . . . . . . . . . . . . . . . |
5 |
Finding Information for Your Computer . . . . . . . . . . . . . . |
5 |
Solving Problems . . . . . . . . . . . . . . . . . . . . . . . . . . |
8 |
Using the Drivers and Utilities CD . . . . . . . . . . . . . . . . |
9 |
Running the Dell Diagnostics . . . . . . . . . . . . . . . . . . . |
9 |
Running the Dell IDE Hard Drive Diagnostics . . . . . . . . . |
10 |
CAUTION: Safety Instructions . . . . . . . . . . . . . . . . . . |
11 |
General . . . . . . . . . . . . . . . . . . . . . . . . . . . . |
11 |
When Using Your Computer . . . . . . . . . . . . . . . . . . . . |
12 |
When Working Inside Your Computer . . . . . . . . . . . . . |
13 |
Regulatory Information . . . . . . . . . . . . . . . . . . . . . . |
14 |
Contents 3

4 Contents

About This Guide
This document contains solving problems and safety and regulatory information about your Dell™ OptiPlex™ computer.
To obtain the latest versions of the documents on your hard drive, go to the
Dell support website at support.dell.com.
Regulatory model numbers appear throughout this document; their chassis type equivalents are shown below:
Regulatory Model Numbers and Chassis Types
DHS = small desktop (SD) chassis
DHP = small form-factor (SF) chassis
DHM = small mini-tower (SMT) chassis
Finding Information for Your Computer
What Are You Looking For? |
Find it Here |
|
|
• A diagnostic program for my computer |
D r i v e r s a n d U t i l i t i e s C D ( a l s o k n o w n a s t h e |
• Drivers for my computer |
R e s o u r c e C D ) |
• My computer documentation |
|
• My device documentation |
|
You can use this CD to access documentation, reinstall drivers, or run diagnostics tools.
Setup and Quick Reference Guide |
5 |
w w w . d e l l . c o m | s u p p o r t . d e l l . c o m
What Are You Looking For? |
Find it Here |
||||||
|
|
|
|
|
|
|
|
• Express Service Code and Service Tag |
E x p r e s s S e r v i c e C o d e a n d P r o d u c t Ke y |
||||||
Number |
|
|
|
|
|
|
|
• Microsoft® Windows® License Label |
|
|
|
|
|
|
|
(Product Key) |
|
|
|
|
|
|
|
|
|
|
|
|
|
|
|
|
|
|
|
|
|
|
|
|
|
|
|
|
|
|
|
|
|
|
|
|
|
|
|
|
|
|
|
|
|
|
|
|
Located on your computer. |
|
|
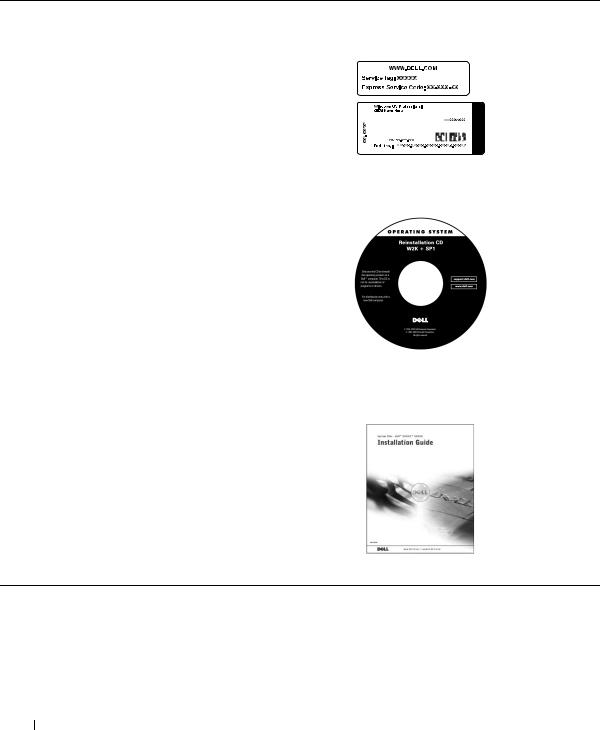
• How to reinstall my operating system |
O p e r a t i n g S y s t e m C D a n d I n s t a l l a t i o n G u i d e |
If you reinstall your operating system, use the Drivers and Utilities CD to reinstall drivers for the devices that came with your computer.
6 Setup and Quick Reference Guide

What Are You Looking For? |
Find it Here |
|
|
• How to remove and replace parts |
U s e r ’ s G u i d e i c o n |
•Technical specifications
•How to configure system settings
•How to troubleshoot and solve problems
|
Depending on your operating system, double-click the User’s Guides |
|
|
icon on your desktop or click the Start button and then click Help and |
|
|
Support to access the electronic documentation stored on your |
|
|
hard drive. |
|
|
|
|
• Latest drivers for my computer |
D e l l S u p p o r t w e b s i t e |
|
• Answers to technical service and |
|
|
support questions |
|
|
• Online discussions with other users and |
|
|
technical support |
The Dell Support website provides several online tools, including: |
|
• Documentation for my computer |
• Knowledge Base — hints, tips, and online courses |
|
|
• Customer Forum — online discussion with other Dell customers |
|
|
• Upgrades — upgrade information for components, such as memory, |
|
|
the hard drive, and the operating system |
|
|
• Customer Care — contact information, order status, warranty, and |
|
|
repair information |
|
|
• Downloads — drivers, patches, and software updates |
|
|
• Reference — computer documentation, product specifications, and |
|
|
white papers |
|
|
|
|
• Service call status |
D e l l P r e m i e r S u p p o r t w e b s i t e |
|
• Top technical issues for my computer |
|
|
• Frequently asked questions |
|
|
• File downloads |
The Dell Premier Support website is customized for corporate, |
|
• Details on my computer’s configuration |
||
government, and education customers. This site may not be available in |
||
• Service contract for my computer |
||
all regions. |
||
|
||
|
|
|
• How to use Windows XP |
W i n d o w s X P H e l p a n d S u p p o r t C e n t e r |
|
• Documentation for my computer |
1 Click the Start button, and then click Help and Support. |
|
and devices |
2 Type a word or phrase that describes your problem, and then click |
|
|
the arrow icon. |
|
|
3 Click the topic that describes your problem. |
|
|
4 Follow the instructions shown on the screen. |
|
|
|
Setup and Quick Reference Guide |
7 |

w w w . d e l l . c o m | s u p p o r t . d e l l . c o m
Solving Problems
Dell provides a number of tools to help you if your system does not perform as expected. For the latest troubleshooting information available for your system, see the Dell support website at support.dell.com. You can also find descriptions of Dell troubleshooting tools in the section titled "Getting Help" in your online User’s Guide.
If computer problems occur that require help from Dell, write a detailed description of the error, beep codes, or diagnostics light patterns; record your Express Service Code and Service Tag Number below; and then contact Dell from the same location as your computer.
See "Finding Information for Your Computer" on page 5 for an example of the express service code and service tag numbers.
Express Service Code: ___________________________
Service Tag Number: ___________________________
Your computer includes the following tools that can help you solve a problem:
DELL DIAGNOSTICS — The Dell Diagnostics test various components in your computer and help to identify the cause of computer problems. For more information, see "Running the Dell Diagnostics" on page 9.
SYSTEM LIGHTS — Located on the front of the computer, these lights can help troubleshoot a computer problem. For more information, see your
User’s Guide.
DIAGNOSTIC LIGHTS — Located on the back of the computer, these lights can help troubleshoot a computer problem. For more information, see your
User’s Guide.
SYSTEM MESSAGES — The computer reports these messages to warn you of current or possible failure. For more information, see your User’s Guide.
BEEP CODES — A series of audible beep codes emitted by your computer can help identify a problem. For more information, see your User’s Guide.
8 Setup and Quick Reference Guide

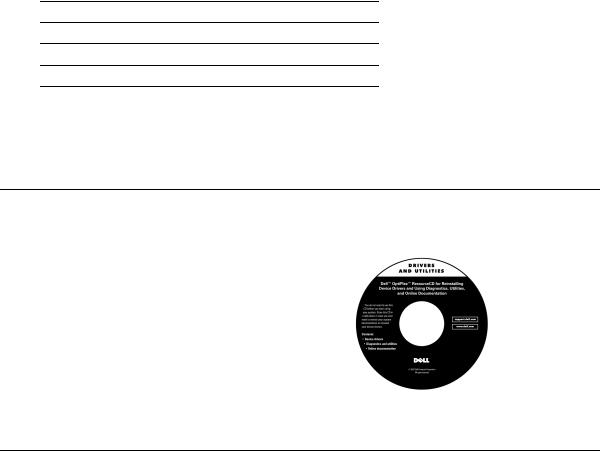
Using the Drivers and Utilities CD
To use the Drivers and Utilities CD (also known as the ResourceCD) while you are running the Microsoft Windows operating system, perform the following steps:
1Turn on the computer and allow it to boot to the Windows desktop.
2Insert the Drivers and Utilities CD into the CD drive.
If you are using the Drivers and Utilities CD for the first time on this computer, the ResourceCD Installation window opens to inform you that the Drivers and Utilities CD is about to begin installation.
3Click OK to continue.
To complete the installation, respond to the prompts offered by the installation program.
4Click Next at the Welcome Dell System Owner screen.
5Choose the appropriate System Model, Operating System, Device Type, and Topic.
Drivers for Your Computer
To display a list of device drivers for your computer, perform the following steps:
1Click My Drivers in the Topic pull-down menu.
The Drivers and Utilities CD scans your computer’s hardware and operating system, and then a list of device drivers for your system configuration is displayed on the screen.
2Click the appropriate driver and follow the instructions to download the driver to your computer.
To view all available drivers for your computer, click Drivers from the Topic pull-down menu.
Running the Dell Diagnostics
The Dell Diagnostics is a program that tests various components in your computer. Run this program whenever you have a computer problem to help you identify the source of the problem.You can run the Dell Diagnostics from your hard drive or the Drivers and Utilities CD.
NOTE: To access device drivers and user documentation, you must use the Drivers and Utilities CD while you are running Windows.
Setup and Quick Reference Guide |
9 |
w w w . d e l l . c o m | s u p p o r t . d e l l . c o m
NOTE: This feature changes the boot sequence for one time only. On the next start-up, the computer boots according to the devices specified in system setup.
NOTICE: If your hard drive fails, run the Dell IDE Hard Drive Diagnostics (see "Running the Dell IDE Hard Drive Diagnostics" on page 10).
1Turn on your computer (if your computer is already on, restart it).
2When F2 = Setup appears in the upper-right corner of the screen, press <Ctrl><Alt><F10>.
The diagnostics initialization begins immediately; then the
Diagnostics Menu appears.
3Select the appropriate diagnostic option for your computer. To use the diagnostics, follow instructions on the screen.
Changing the Boot Sequence
To run the Dell Diagnostics from the Drivers and Utilities CD, perform the following steps to enable your computer to boot from the CD:
1Insert the Drivers and Utilities CD into the CD drive.
2Turn on (or restart) your computer.
3When F2 = Setup appears in the upper-right corner of the screen, press <Ctrl><Alt><F8>.
The Boot Device Menu appears.
If you wait too long and the Windows logo appears, continue to wait until you see the Windows desktop. Then shut down your computer and try again.
4Select the CD-ROM Device option.
Running the Dell IDE Hard Drive Diagnostics
The Dell IDE Hard Drive Diagnostics is a utility that tests the hard drive to troubleshoot or confirm a hard drive failure.
1Turn on your computer (if your computer is already on, restart it).
2When F2 = Setup appears in the upper-right corner of the screen, press <Ctrl><Alt><D>.
3Follow the instructions on the screen.
If a failure is reported, see "Hard Drive Problems" in your User’s Guide.
10 Setup and Quick Reference Guide
 CAUTION: Safety Instructions
Use the following safety guidelines to help ensure your own personal safety and to help protect your computer and working environment from potential damage.
General
•Do not attempt to service the computer yourself unless you are a trained service technician. Always follow installation instructions closely.
•To help prevent electric shock, plug the computer and device power cables into properly grounded electrical outlets. These cables are equipped with 3-prong plugs to help ensure proper grounding. Do not use adapter plugs or remove the grounding prong from a cable. If you must use an extension cable, use a 3-wire cable with properly grounded plugs.
•To help avoid the potential hazard of electric shock, do not use your computer during an electrical storm.
•To help avoid the potential hazard of electric shock, do not connect or disconnect any cables or perform maintenance or reconfiguration of this product during an electrical storm.
•If your computer includes a modem, the cable used with the modem should be manufactured with a minimum wire size of 26 American wire gauge (AWG) and an FCC-compliant RJ-11 modular plug.
•Before you clean your computer, disconnect the computer from the electrical outlet. Clean your computer with a soft cloth dampened with water. Do not use liquid or aerosol cleaners, which may contain flammable substances.
•To help avoid possible damage to the system board, wait 5 seconds after turning off the computer before disconnecting a device from the computer.
•To avoid shorting out your computer when disconnecting a network cable, first unplug the cable from the network adapter on the back of your computer, and then from the network jack. When reconnecting a network cable to your computer, first plug the cable into the network jack, and then into the network adapter.
Setup and Quick Reference Guide |
11 |
w w w . d e l l . c o m | s u p p o r t . d e l l . c o m
 CAUTION: Safety Instructions (continued)
•To help protect your computer from sudden, transient increases and decreases in electrical power, use a surge suppressor, line conditioner, or uninterruptible power supply (UPS).
•Ensure that nothing rests on your computer’s cables and that the cables are not located where they can be stepped on or tripped over.
•Do not push any objects into the openings of your computer. Doing so can cause fire or electric shock by shorting out interior components.
•Keep your computer away from radiators and heat sources. Also, do not block cooling vents. Avoid placing loose papers underneath your computer; do not place your computer in a closed-in wall unit or on a bed, sofa, or rug.
•Do not spill food or liquids on your computer. If the computer gets wet, consult your
User’s Guide.
When Using Your Computer
As you use your computer, observe the following safe-handling guidelines.
 CAUTION: Do not operate your computer with any cover(s) (including computer covers, bezels, filler brackets, front-panel inserts, and so on) removed.
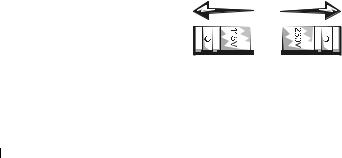
•Your computer is equipped with one of the following:
–A fixed-voltage power supply — Computers with a fixed-voltage power supply do not have a voltage selection switch on the back panel and operate at only one voltage (see the regulatory label on the outside of the computer for its operating voltage).
–An auto-sensing voltage circuit — Computers with an auto-sensing voltage circuit do not have a voltage selection switch on the back panel and automatically detect the correct operating voltage.
–A manual voltage selection switch — Computers with a voltage selection switch on the back panel must be manually set to operate at the correct operating voltage.
12 Setup and Quick Reference Guide

When Using Your Computer (continued)
NOTICE: To help avoid damaging a computer with a manual voltage selection switch, set the switch for the voltage that most closely matches the AC power available in your location. For Japan, the voltage selection switch must be set to the 115-V position even though the AC power available in Japan is 100 V. Also, ensure that your monitor and attached devices are electrically rated to operate with the AC power available in your location.
Before working inside the computer, unplug the computer to help prevent electric shock or system board damage. Certain system board components continue to receive power any time the computer is connected to AC power.
When Working Inside Your Computer
Before you open the computer cover, perform the following steps in the sequence indicated.
 CAUTION: Do not attempt to service the computer yourself, except as explained in your online Dell documentation or in instructions otherwise provided to you by Dell. Always follow installation and service instructions closely.
NOTICE: To help avoid possible damage to the system board, wait 5 seconds after turning off the computer before removing a component from the system board or disconnecting a device from the computer.
1Perform an orderly computer shutdown using the operating system menu.
2Turn off your computer and any devices connected to the computer.
3Ground yourself by touching an unpainted metal surface on the chassis, such as the metal around the card-slot openings at the back of the computer, before touching anything inside your computer.
While you work, periodically touch an unpainted metal surface on the computer chassis to dissipate any static electricity that might harm internal components.
4Disconnect your computer and devices, including the monitor, from their electrical outlets. Also, disconnect any telephone or telecommunication lines from the computer.
Doing so reduces the potential for personal injury or shock.
Setup and Quick Reference Guide |
13 |

w w w . d e l l . c o m | s u p p o r t . d e l l . c o m
When Using Your Computer (continued)
In addition, take note of these safety guidelines when appropriate:
•When you disconnect a cable, pull on its connector or on its strain-relief loop, not on the cable itself. Some cables have a connector with locking tabs; if you are disconnecting this type of cable, press in on the locking tabs before disconnecting the cable. As you pull connectors apart, keep them evenly aligned to avoid bending any connector pins. Also, before you connect a cable, ensure that both connectors are correctly oriented and aligned.
•Handle components and cards with care. Do not touch the components or contacts on a card. Hold a card by its edges or by its metal mounting bracket. Hold a component such as a microprocessor chip by its edges, not by its pins.
 CAUTION: There is a danger of a new battery exploding if it is incorrectly installed. Replace the battery only with the same or equivalent type recommended by the manufacturer. Do not dispose of the battery along with household waste. Contact your local waste disposal agency for the address of the nearest battery deposit site.
Regulatory Information
Electromagnetic Interference (EMI) is any signal or emission, radiated in free space or conducted along power or signal leads, that endangers the functioning of a radio navigation or other safety service or seriously degrades, obstructs, or repeatedly interrupts a licensed radio communications service.
Your Dell computer system is designed to comply with applicable regulations regarding EMI. Changes or modifications not expressly approved by Dell could void the user’s authority to operate the equipment.
NOTE: Additional regulatory information regarding your system can be found in your
User’s Guide.
14 Setup and Quick Reference Guide

Systèmes Dell™ OptiPlex™
Guide de configuration et de référence rapide
w w w . d e l l . c o m | s u p p o r t . d e l l . c o m

Remarques, avis et précautions
REMARQUE : Une REMARQUE indique des informations importantes qui vous permettent de mieux utiliser votre ordinateur.
AVIS : Un AVIS vous avertit d’un risque de dommage matériel ou de perte de données et vous indique comment éviter le problème.
 PRÉCAUTION : Une PRÉCAUTION indique un risque de dommage matériel, de blessure ou de mort.
____________________
Les informations contenues dans ce document sont sujettes à modification sans préavis. © 2000-2002 Dell Computer Corporation. Tous droits réservés.
Toute reproduction, sous quelque forme que ce soit, sans l'autorisation écrite de Dell Computer Corporation, est strictement interdite.
Marques utilisées dans ce texte : Dell, OptiPlex et le logo DELL sont des marques de Dell Computer Corporation ; Microsoft et Windows sont des marques déposées de Microsoft Corporation.
D'autres marques et noms commerciaux peuvent être utilisés dans ce document pour faire référence aux entités se réclamant de ces marques et de ces noms ou à leurs produits. Dell Computer Corporation dénie tout intérêt propriétaire vis-à-vis des marques et des noms commerciaux autres que les siens.
Août 2002 P/N 51FMX Rev. A06
Table des matières
À propos de ce guide . . . . . . . . . . . . . . . . . . . . . . . |
19 |
Obtention d'informations concernant votre ordinateur . . . . . . |
19 |
Résolution de problèmes . . . . . . . . . . . . . . . . . . . . . |
22 |
Utilisation du CD Drivers and Utilities . . . . . . . . . . . . . |
23 |
Exécution des Diagnostics Dell . . . . . . . . . . . . . . . . . |
24 |
Exécution des diagnostics de lecteur de disque |
|
dur IDE Dell . . . . . . . . . . . . . . . . . . . . . . . . . . |
25 |
PRÉCAUTION : Consignes de sécurité . . . . . . . . . . . . . . |
26 |
Généralités . . . . . . . . . . . . . . . . . . . . . . . . . . . |
26 |
Lors de l'utilisation de votre ordinateur . . . . . . . . . . . . . . |
28 |
Interventions à l'intérieur de l'ordinateur . . . . . . . . . . . . |
29 |
Informations réglementaires . . . . . . . . . . . . . . . . . . . |
30 |
Table des matières |
17 |

18 Table des matières
À propos de ce guide
Ce document contient des informations concernant la résolution de problèmes, la sécurité et les réglementations de votre ordinateur Dell™ OptiPlex™.
Pour obtenir les versions les plus récentes des documents sur votre disque dur, allez sur le site Web de support Dell à l'adresse support.dell.com.
Des numéros de modèle réglementaires apparaissent tout au long de ce document ; les types de châssis qui y correspondent sont présentés ci-dessous :
Numéros de modèle réglementaires et types de châssis
DHS = châssis SD (Small Desktop [petit châssis de bureau])
DHP = châssis SF (Small Factor [compact])
DHM = châssis SMT (Small Mini-Tower [micro-tour])
Obtention d'informations concernant votre ordinateur
Que cherchez-vous ? |
Vous le trouverez ici |
|
|
• Un programme de diagnostic pour mon |
C D D r i v e r s a n d U t i l i t i e s ( a p p e l é a u s s i C D |
ordinateur |
R e s o u r c e C D ) |
•Des pilotes pour mon ordinateur
•La documentation de mon ordinateur
•La documentation de mes périphériques
Vous pouvez utiliser ce CD pour accéder à la documentation, réinstaller des pilotes ou exécuter les outils de diagnostic.
Guide de configuration et de référence rapide |
19 |
w w w . d e l l . c o m | s u p p o r t . d e l l . c o m
Que cherchez-vous ? |
Vous le trouverez ici |
|
|
• Le code de service express et le numéro de |
C o d e d e s e r v i c e ex p r e s s e t c o d e c l é d u p r o d u i t |
service |
|
• L'étiquette de licence (code clé du produit) de Microsoft® Windows®
|
Situés sur votre ordinateur. |
|
|
• Comment réinstaller mon système |
C D d u s y s t è m e d ' ex p l o i t a t i o n e t G u i d e |
d'exploitation |
d ' i n s t a l l a t i o n |
Si vous réinstallez votre système d'exploitation, utilisez le CD Drivers and Utilities pour réinstaller les pilotes des périphériques fournis avec votre ordinateur.
20 Guide de configuration et de référence rapide

Que cherchez-vous ? |
Vous le trouverez ici |
|
|
|
|
• Comment retirer des pièces et les remettre |
Î c o n e d u G u i d e d ' u t i l i s a t i o n |
|
en place |
|
|
• Les spécifications techniques |
|
|
• Comment configurer les paramètres du |
|
|
système |
|
|
• Comment identifier et résoudre les |
|
|
problèmes |
|
|
|
En fonction de votre système d'exploitation, double-cliquez sur l'icône |
|
|
User's Guides (Guides d'utilisation) de votre bureau ou cliquez sur le |
|
|
bouton Start (Démarrer) puis sur Help and Support (Aide et support) |
|
|
pour accéder à la documentation électronique stockée sur votre |
|
|
disque dur. |
|
|
|
|
• Les derniers pilotes pour mon ordinateur |
S i t e We b S u p p o r t D e l l |
|
• Des réponses à mes questions concernant |
|
|
les services et l'assistance techniques |
|
|
• Des discussions en lignes avec d'autres |
|
|
utilisateurs et le support technique |
Le site Web Support Dell fournit plusieurs outils en ligne, y compris : |
|
• La documentation pour mon ordinateur |
• Une base de connaissances : des idées, des astuces et des cours |
|
|
en ligne |
|
|
• Un forum pour les clients : des discussions en ligne avec d'autres |
|
|
clients Dell |
|
|
• Des mises à niveau : des informations sur la mise à niveau des |
|
|
composants, tels que la mémoire, le disque dur et le système |
|
|
d'exploitation |
|
|
• Un service clientèle : les informations de contact, le suivi de |
|
|
commande, les garanties et des informations sur les réparations |
|
|
• Des téléchargements : des pilotes, des correctifs et des mises à jour |
|
|
de logiciel |
|
|
• Des références : de la documentation sur les ordinateurs, des |
|
|
spécifications pour les produits et des livres blancs |
|
|
|
|
• Le suivi de l'appel de service |
S i t e We b D e l l P r e m i e r S u p p o r t |
|
• Les problèmes techniques principaux |
|
|
concernant mon ordinateur |
|
|
• Une foire aux questions |
|
|
• Des téléchargements de fichiers |
Le site Web Dell Premier Support est conçu pour les grandes |
|
• Des détails sur la configuration de mon |
entreprises, les gouvernements et les institutions d'enseignement. |
|
Ce site n'est pas disponible partout. |
||
ordinateur |
||
|
||
• Un contrat de service pour mon ordinateur |
|
|
|
|
Guide de configuration et de référence rapide |
21 |

w w w . d e l l . c o m | s u p p o r t . d e l l . c o m
Que cherchez-vous ? |
Vous le trouverez ici |
|
|
• Comment utilisez Windows XP |
C e n t r e d ' a i d e e t d e s u p p o r t W i n d o w s X P |
• La documentation de mon ordinateur et de |
1 Cliquez sur le bouton Démarrer, puis sur Aide et support. |
mes périphériques |
2 Tapez un mot ou une phrase décrivant votre problème, puis cliquez |
|
sur l'icône en forme de flèche. |
|
3 Cliquez sur la rubrique qui décrit votre problème. |
|
4 Suivez les instructions qui s'affichent à l'écran. |
|
|
Résolution de problèmes
Dell met à votre disposition plusieurs outils d'aide si votre système ne fonctionne pas comme prévu. Pour obtenir les toutes dernières informations de dépannage disponibles pour votre système, allez sur le site Web Dell Support à l'adresse support.dell.com. Vous trouverez également une description des outils de dépannage Dell dans la section intitulée
« Obtention d'aide » de votre Guide d'utilisation en ligne.
Si vous avez des problèmes d'ordinateur qui requièrent l'intervention de Dell, décrivez en détails les erreurs, les codes sonores et les voyants de diagnostic ; notez le code de service express et le numéro de service en dessous, puis placez-vous près de votre ordinateur pour contacter Dell.
Consultez la section « Obtention d'informations concernant votre ordinateur », page 19, pour obtenir un exemple de code de service express et de numéro de service.
Code de service express : ___________________________
Numéro de service : ___________________________
22 Guide de configuration et de référence rapide

Votre ordinateur dispose des outils suivants pour vous aider à résoudre les problèmes :
DIAGNOSTICS DELL — Les Diagnostics Dell servent à tester divers composants de votre ordinateur et vous aident à identifier la source des problèmes de l'ordinateur. Pour des informations supplémentaires, consultez la section « Exécution des Diagnostics Dell », page 24.
VOYANTS DU SYSTÈME — Situés à l'avant de l'ordinateur, ces voyants peuvent aider à identifier un problème de l'ordinateur. Pour des informations supplémentaires, consultez votre
Guide d'utilisation.
VOYANTS DE DIAGNOSTIC — Situés à l'arrière de l'ordinateur, ces voyants peuvent aider à identifier un problème de l'ordinateur. Pour des informations supplémentaires, consultez votre Guide d'utilisation.
MESSAGES DU SYSTÈME — L'ordinateur affiche ces messages pour vous alerter de pannes en cours ou potentielles. Pour des informations supplémentaires, consultez votre Guide d'utilisation.
CODES SONORES — Une série de codes sonores émis par votre ordinateur peut vous aider à identifier un problème. Pour des informations supplémentaires, consultez votre Guide d'utilisation.
Utilisation du CD Drivers and Utilities
Pour utiliser le CD Drivers and Utilities (appelé aussi ResourceCD) sous le système d'exploitation Microsoft Windows, effectuez les étapes suivantes :
1Allumez l'ordinateur et attendez que le bureau Windows ait démarré.
2Insérez le CD Drivers and Utilities dans le lecteur de CD.
Si c'est la première fois que vous utilisez le CD Drivers and Utilities sur cet ordinateur, la fenêtre ResourceCD Installation (Installation de ResourceCD) s'ouvre pour vous prévenir que le CD Drivers and Utilities va commencer l'installation.
3Cliquez sur OK pour continuer.
Pour terminer l'installation, répondez aux invites du programme d'installation.
REMARQUE : Pour accéder aux pilotes de périphériques et à la documentation d'utilisation, vous devez utiliser le CD Drivers and Utilities sous Windows.
Guide de configuration et de référence rapide |
23 |

w w w . d e l l . c o m | s u p p o r t . d e l l . c o m
4Cliquez sur Next (Suivant) dans l'écran Welcome Dell System Owner (Bienvenue au propriétaire du système Dell).
5Sélectionnez les System Model (Modèle du système), Operating System (Système d'exploitation), Device Type (Type de périphérique) et Topic (Rubrique) appropriés.
Pilotes pour votre ordinateur
Pour afficher une liste des pilotes de périphériques pour votre ordinateur, effectuez les étapes suivantes :
1Cliquez sur My Drivers (Mes pilotes) dans le menu déroulant Rubrique.
Le CD Drivers and Utilities examine le matériel et le système d'exploitation de votre ordinateur, puis une liste des pilotes de périphériques correspondant à la configuration de votre système apparaît à l'écran.
2Cliquez sur le pilote qui convient et suivez les instructions pour télécharger le pilote sur votre ordinateur.
Pour afficher tous les pilotes disponibles pour votre ordinateur, cliquez sur
Drivers (Pilotes) dans le menu déroulant Rubrique.
Exécution des Diagnostics Dell
Les Diagnostics Dell constituent un programme qui sert à tester divers composants de votre ordinateur. Exécutez ce programme chaque fois que vous avez un problème avec votre ordinateur pour vous permettre d'en identifier la source. Vous pouvez exécuter les Diagnostics Dell à partir de votre disque dur ou du CD Drivers and Utilities.
AVIS : Si votre lecteur de disque dur tombe en panne, exécutez les Diagnostics de lecteur de disque dur IDE Dell (consultez la section « Exécution des diagnostics de lecteur de disque dur IDE Dell », page 25).
1Allumez votre ordinateur (s'il l'est déjà, redémarrez-le).
2Quand F2 = Setup (F2 = Installation) apparaît dans le coin supérieur droit de l'écran, appuyez sur <Ctrl><Alt><F10>.
L'initialisation des diagnostics commence immédiatement, puis le
Diagnostics Menu (Menu des diagnostics) apparaît.
3Sélectionnez l'option de diagnostic qui correspond à votre ordinateur.
Pour utiliser les diagnostics, suivez les instructions qui s'affichent à l'écran.
24 Guide de configuration et de référence rapide

Modification de la séquence d'amorçage
Pour exécuter les Diagnostics Dell à partir du CD Drivers and Utilities, effectuez les étapes suivantes pour que votre ordinateur démarre sur le CD :
1Insérez le CD Drivers and Utilities dans le lecteur de CD.
2Allumez (ou redémarrez) votre ordinateur.
3Quand F2 = Setup (F2 = Installation) apparaît dans le coin supérieur droit de l'écran, appuyez sur <Ctrl><Alt><F8>.
Le Boot Device Menu (Menu des périphériques d'amorçage) apparaît.
Si vous attendez trop longtemps et que le logo Windows apparaît, patientez jusqu'à ce que le bureau de Windows apparaisse. Éteignez ensuite votre ordinateur et essayez de nouveau.
4Sélectionnez l'option CD-ROM Device (Lecteur de CD-ROM).
Exécution des diagnostics de lecteur de disque dur IDE Dell
Les diagnostics de lecteur de disque dur IDE Dell représentent un utilitaire qui teste votre lecteur de disque dur pour identifier ou confirmer une panne de ce lecteur.
1Allumez votre ordinateur (s'il l'est déjà, redémarrez-le).
2Quand F2 = Setup (F2 = Installation) apparaît dans le coin supérieur droit de l'écran, appuyez sur <Ctrl><Alt><D>.
3Suivez les instructions qui s'affichent à l'écran.
Si une panne est signalée, consultez la section « Problèmes de lecteur de disque dur » de votre Guide d'utilisation.
REMARQUE : Cette fonction modifie la séquence d'amorçage pour un seul démarrage. Au démarrage suivant, l'ordinateur démarre en fonction des périphériques spécifiés dans la configuration du système.
Guide de configuration et de référence rapide |
25 |

w w w . d e l l . c o m | s u p p o r t . d e l l . c o m
 PRÉCAUTION : Consignes de sécurité
Respectez les consignes de sécurité suivantes afin d’assurer votre propre sécurité et de protéger votre ordinateur et votre environnement de travail contre d'éventuels dommages.
Généralités
•N'essayez pas de réviser votre ordinateur vous-même si vous n'êtes pas un technicien de service qualifié. Suivez toujours les instructions d'installation à la lettre.
•Pour éviter les décharges électriques, branchez les câbles d'alimentation de l'ordinateur et des périphériques dans des prises de terre. Ces câbles sont équipés de prises à trois broches pour assurer une bonne mise à la terre. N'utilisez pas de prises adaptatrices et ne retirez pas la broche de mise à la terre d'un câble. Si vous devez utiliser une rallonge, utilisez une rallonge à 3 fils avec prises de terre.
•Pour éliminer les risques de décharge électrique, n'utilisez pas votre ordinateur pendant un orage.
•Pour éliminer les risques de décharge électrique, ne branchez et ne débranchez aucun câble, et ne procédez pas à l'entretien ou à la reconfiguration de ce produit pendant un orage.
•Si votre ordinateur comporte un modem, le câble utilisé avec le modem doit être fabriqué avec un fil de calibre de 26 AWG (American Wire Gauge [norme américaine des dimensions de fils]) minimal et une prise modulaire RJ-11
conforme aux normes FCC.
•Avant de nettoyer votre ordinateur, débranchez-le de sa prise de courant. Nettoyez votre ordinateur avec un chiffon légèrement humide. N'utilisez pas de nettoyant liquide ou en bombe, car il pourrait contenir des produits inflammables.
26 Guide de configuration et de référence rapide
 PRÉCAUTION : Consignes de sécurité (suite)
•Pour ne pas endommager la carte système, patientez 5 secondes après avoir éteint l'ordinateur avant de déconnecter un périphérique de l'ordinateur.
•Pour éviter de court-circuiter votre ordinateur en débranchant un câble de réseau, débranchez d'abord le câble de la carte réseau à l'arrière de votre ordinateur, puis de la prise de réseau. Pour rebrancher un câble de réseau à votre ordinateur, branchez d'abord le câble à la prise du réseau, puis dans la carte réseau.
•Afin de protéger votre ordinateur des augmentations et diminutions soudaines et passagères de courant, utilisez un limiteur de surtension, un onduleur ou un UPS (Uninterruptible Power Supply [système d'alimentation sans coupure]).
•Ne posez rien sur les câbles de votre ordinateur et placez les câbles de telle sorte que l'on ne puisse pas marcher ou trébucher dessus.
•N’insérez pas d’objets dans les ouvertures de votre ordinateur. Cela risquerait de courtcircuiter des composants internes et de provoquer un incendie ou une décharge électrique.
•Placez l'ordinateur à l'écart des radiateurs et des autres sources de chaleur. Ne bloquez pas les ouvertures de refroidissement. Évitez de placer des feuilles de papier sous votre ordinateur ; ne placez pas votre ordinateur dans un meuble sans ventilation, sur un lit, un canapé ou un tapis.
•Ne renversez ni aliments ni liquides sur votre ordinateur.Si l'ordinateur a été mouillé, consultez votre Guide d'utilisation.
Guide de configuration et de référence rapide |
27 |

w w w . d e l l . c o m | s u p p o r t . d e l l . c o m
Lors de l'utilisation de votre ordinateur
Lorsque vous utilisez votre ordinateur, respectez les consignes de sécurité suivantes concernant la manipulation.
 PRÉCAUTION : N'utilisez pas votre ordinateur si l'un des panneaux (y compris les capots de l'ordinateur, les cadres, les languettes métalliques, les caches du panneau avant, etc.) est retiré.
•Votre ordinateur est équipé d'un des éléments suivants :
–Un bloc d'alimentation à tension fixe : les ordinateurs dotés d'un bloc d'alimentation
àtension fixe n'ont pas de sélecteur de tension sur le panneau arrière et ne fonctionnent qu'à une tension (consultez l'étiquette réglementaire à l'extérieur de l'ordinateur pour connaître sa tension de fonctionnement).
–Un circuit de tension à sélection automatique : les ordinateurs qui ont un circuit de tension à sélection automatique n'ont pas de sélecteur de tension sur le panneau arrière et détectent automatiquement la tension de fonctionnement correcte.
–Un sélecteur de tension manuel : les ordinateurs équipés d'un sélecteur de tension sur le panneau arrière de l'ordinateur doivent être réglés manuellement pour fonctionner
àla tension de fonctionnement adéquate.
AVIS : Pour éviter d'endommager un ordinateur muni d'un sélecteur de tension manuel, réglez le sélecteur sur la tension qui se rapproche le plus de l'alimentation en CA disponible là où vous vous trouvez. Au Japon, le sélecteur de tension doit être réglé sur 115 V bien que la tension du CA soit de 100 V. Assurez-vous aussi que votre moniteur et les périphériques connectés sont approuvés pour fonctionner avec le CA disponible là où vous vous trouvez.
•Avant d'intervenir à l'intérieur de votre ordinateur, débranchez l'ordinateur pour éviter les décharges électriques et ne pas endommager la carte système. Certains composants de la carte système continuent à être alimentés tant que le système est connecté à une source d'alimentation en CA.
28 Guide de configuration et de référence rapide
Loading...