


Daikin ATXC20BV1B, ATXC25BV1B, ATXC35BV1B, ATXC50BV1B, ATXC60BV1B Operation manuals
...DAIKIN ROOM AIR CONDITIONER
OPERATING MANUAL
MODELS
ATXC20BV1B
ATXC25BV1B
ATXC35BV1B
ATXC50BV1B
ATXC60BV1B
ATXC71BV1B
Operating Manual |
English |
|
Handset Wireless |
||
|
||
Manuale operativo |
Italiano |
|
Portatile Wireless |
||
|
||
Bedienungshandbuch |
Deutsch |
|
Handgerät Drahtlos |
||
|
||
Manual De Instrucciones |
Español |
|
Auricular Inalámbrico |
||
|
||
Mode D’emploi |
Français |
|
Combiné sans fil |
||
|
||
Kullanım Kılavuzu |
Türkçe |
|
Kablosuz Kumanda |
||
|
||
Руководство по эксплуатации |
Русский |
|
Беспроводная трубка |
|
|
Εγχειρίδιο λειτουργιών |
Еλληνικă |
|
Ασύρματο τηλεχειριστήριο |
|
|
Gebruikershandleiding |
Dutch |
|
Draadloze handset |
||
|
||
Manual de funcionamento |
Portuguese |
|
Controlo remoto sem fios |
||
|
||
Instrukcja obsługi |
Polish |
|
Pilot bezprzewodowy |
||
|
2P553313-1

CONTENTS
READ BEFORE OPERATION |
|
Safety Precautions.............................................. |
2 |
Remote controller overview ................................ |
6 |
Preparation Before Operation ............................. |
7 |
OPERATION |
|
AUTO · COOL · DRY · FAN · HEAT Operation ...... |
10 |
Adjusting the Airflow Direction .......................... |
13 |
ECO+ Operation ............................................... |
14 |
SLEEP Operation.............................................. |
15 |
POWERFUL Operation ..................................... |
16 |
QUIET Operation .............................................. |
17 |
LED Operation .................................................. |
18 |
TIMER Operation .............................................. |
19 |
Fault Diagnosis ................................................. |
21 |
CARE AND CLEANING |
24 |
TROUBLESHOOTING |
28 |
Note :
Illustrations in this manual are for explanation to user only. And may differ from the actual machine. Are subject to change without prior notice. For the development of future products.
1-1
<![endif]>Handset Wireless ENGLISH
<![if ! IE]><![endif]>Operating Manual
Safety Precautions
Read the precautions in this manual carefully before operating the unit.
This appliance is filled with R32.
•After reading, keep this manual in a convenient place so that you can refer to it whenever necessary. If the equipment is transferred to a new user, be sure also to hand over the manual.
•Keep this manual where the operator can easily find them.
•Read all safety precautions in this manual carefully before operating the unit.
•For safety reason the operator must read the following cautions carefully.
•The precautions described herein are classified as WARNING and CAUTION. They both contain important information regarding safety. Be sure to observe all precautions without fail.
 WARNING
Failure to follow these instructions properly may result in personal injury or loss of life.
 CAUTION
Failure to observe these instructions properly may result in property damage or personal injury, which may be serious depending on the circumstances.
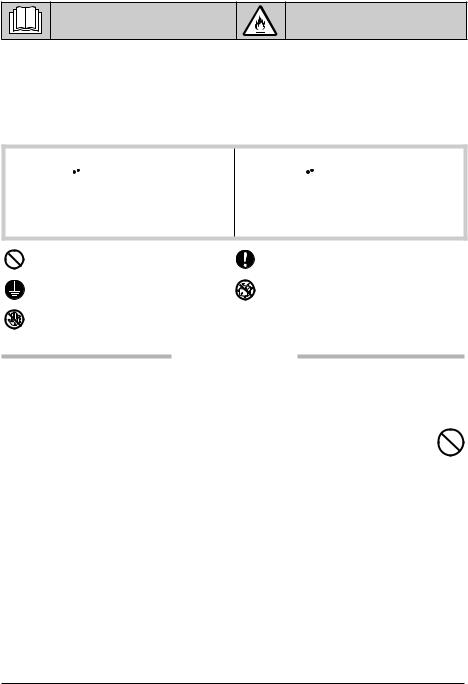
Never attempt.
Be sure to establish an earth connection.
Never touch the air conditioner nor the remote controller with wet hands.
Be sure to follow the instructions.
Never wet the air conditioner nor the remote controller with water.
 WARNING
•The appliance must be stored in a room without continuously operating ignition sources (for example: open flames, an operating gas appliance or an operating electric heater).
•Do not pierce or burn.
•Be aware that refrigerants may not contain an odour.
•In order to avoid fire, explosion or injury, do not operate the unit when harmful, among which flammable or corrosive gases, are detected near the unit.
•It is not good for health to expose your body to the air flow for a long time.
•Do not place objects, including rods, your fingers, etc., in the air inlet or outlet. Product malfunctioning, product or injury damage may result due to contact with the air conditioner’s high-speed fan blades.
•Do not attempt to repair, dismantle reinstall or modify the air conditioner yourself as this may result in water leakage, electric shocks or fire hazards.
•Do not attempt to install or repair the air conditioner yourself. Improper workmanship may result in water leakage, electric shocks or fire hazards. Please contact your local dealer or qualified personnel for installation and maintenance work.
•Do not use flammable spray near the air conditioner, or otherwise fire may result.
•Do not place flammable items, such as spray cans, within 1 meter of the air outlet.
•The spray cans may explode as a result of hot air from the indoor or outdoor units.
•When the air conditioner is malfunctioning (giving off a burning odour, etc.) turn off power of the unit and contact your local dealer. Continued operation under such circumstances may result in a failure, electric shocks or fire hazards.
•Do not use a refrigerant other than the one indicated on the outdoor unit (R32) when installing, moving or repairing. Using other refrigerant may cause trouble or damage to the unit, and personal injury.
1-2

• The refrigerant used in the air conditioner is safe. Although leaks should not occur, if for |
|
|
|
||
some reason any refrigerant happens to leak into the room, make sure it does not come |
<![if ! IE]> <![endif]>ENGLISH |
|
• If the air conditioner is not cooling properly, the refrigerant may be leaking, so call your dealer. |
||
in contact with any flame as of gas heaters, kerosene heaters or gas range. |
|
|
When carrying out repairs accompanying adding refrigerant, check the content of the repairs |
|
|
with our service staff. |
|
|
• Do not wash the air conditioner with water, as this may result in electric shocks or fire. |
|
|
• Be sure to install an earth leakage breaker. Failure to install an earth leakage breaker may result |
|
|
in electric shocks or fire. |
|
|
• Only connect the air conditioner to the specified power supply circuit. Power suppliers other than |
|
|
the one specified may result in electric shocks, overheating and fires. |
|
|
|
|
|
• Be sure to earth the unit. Do not earth the unit to a utility pipe, lightning conductor |
|
|
or telephone earth lead. Imperfect earthing may resul t in electric shocks. |
|
|
 CAUTION
•Be aware that prolonged, direct exposure to cool or warm air from the air conditioner, or to air that is too cool or too warm can be harmful to your physical condition and health.
•Do not use the air conditioner for purposes other than those for which it is intended.
Do not use the air conditioner for cooling precision instruments, food, plants, animals or works of art as this may adversely affect the performance, quality and/or longevity of the object concerned.
•Do not expose plants or animals directly to airflow from the unit as this may cause adverse effects.
•Do not place appliances that produce naked flames in places exposed to the air flow from the unit as this may impair combustion of the burner.
•Do not block air inlets nor outlets. Impaired air flow may result in insufficient performance or trouble.
•Beware of fire in case of refrigerant leakage. If the air conditioner is not operating correctly, i.e. not generating cool or warm air refrigerant leakage could be the cause. Consult your dealer for assistance. The refrigerant within the air conditioner is safe and normally does not leak. However, in the event of a leakage, contact with a naked burner, heater or cooker may result in generation of noxious gas. Do not longer use air conditioner until a qualified service person confirms that the leakage has been repaired.
•Do not sit or place objects on the outdoor unit. Falling yourself or falling objects could cause injury.
•Do not place objects that are susceptible to moisture directly beneath the indoor or outdoor units.
Under certain conditions, condensation on the main unit or refrigerant pipes, air filter dirt or drain blockage may cause dripping, resulting in fouling or failure of the object concerned.
•After prolonged use, check the unit stand and its mounts for damage. If left in a damaged condition, the unit may fall and cause injury.
•To avoid injury, do not touch the air inlet or aluminium fins of the indoor or outdoor units.
•The appliance is not intended for use by unattended young children or infirm persons. Impairment of bodily functions and harm to health may result.
•Children should be supervised to ensure that they do not play with the unit or its remote controller. Accidental operation by a child may result in impairment of bodily functions and harm health.
•Do not sit on the outdoor unit. Put things on the unit, or pull the unit. Doing so may cause accidents, such as falling or toppling down, thus resulting in injury, product malfunctioning, or product damage.
1-3
•Do not give impact to the indoor and outdoor units, or otherwise product damage may result.
•Do not place objects around the indoor unit. Doing so may have an adverse influence on the performance, product quality, and life of the air conditioner.
•Be careful not to let pets urinate on the air conditioner. Urination on the air conditioner may result in electric shocks or fire.
•Do not sit or hang on the up and down panel. The up and down panel may fall, and injury or product malfunctioning may result.
•Do not sway the up and down panel. The up and down panel may hit people or objects, and injury or property damage may result.
•Do not let children play around the up and down panel. Injury or property damage may result.
•Do not pull the wires. The wires may be broken and the up and down panel may fall, and injury or property damage may result.
•Do not locate obstacles in the up and down route. The up and down panel may fall, and injury or property damage may result.
•Do not bend or damage the wires. The wires may be broken and the up and down panel may fall, and injury or property damage may result.
•Do not put objects on the up and down panel, or otherwise production malfunctioning may result.
•Do not use an unstable stand at the time of operating or maintaining the air conditioner, or otherwise you may topple over or injury youself.
•Locate the remote controller in places out of reach of children. The wrong operation of the remote controller may result in injury.
•To avoid oxygen depletion, ensure that the room is adequately ventilated if equipment such as a burner is used together with the air conditioner.
•Before cleaning, be sure to stop unit operation, turn the breaker off or remove the power cord.
•Otherwise, an electric shock and injury may result.
•Do not connect the air conditioner to a power supply different from the one as specified. It may cause trouble or fire.
•Depending on the environment, an earth leakage breaker must be installed. Lack of an earth leakage breaker may result in electric shocks.
•Arrange the drain hose to ensure smooth drainage. Incomplete draining may cause wetting of the building, furniture etc.
•Do not place objects in direct proximity of the outdoor unit and do not let leaves and other debris accumulate around the unit.
Leaves are a hotbed for small animals which can enter the unit.
Once in the unit, such animals can cause malfunctions, smoke or fire when making contact with electrical parts.
•To avoid electric shocks, do not operate with wet hands.
•Do not wash the indoor unit with excessive water, only use a slightly wet cloth.
•Do not place things such as vessels containing water or anything else on top of the unit.
Water may penetrate into the unit and degrade electrical insulations, resulting in an electric shock.
1-4
Installation site.
To install the air conditioner in the following types of environments, consult the dealer.
•Places with an oily ambient or where steam or soot occurs.
•Salty environment such as coastal areas.
•Places where sulfide gas occurs such as hot springs.
•Places where snow may block the outdoor unit.
•The indoor unit is at least 1m away from any television or radio set (unit may cause interference with the picture or sound).
•The drain from the outdoor unit must be discharged to a place of good drainage.
Consider nuisance to your neighbours from noises.
Also pay attention to operating noise.
•Select the following kinds of location:
A.A place that can sufficiently withstand the weight of the air conditioner with less running noises and vibrations.
B.A place where warm airflow from the air outlet of the outdoor unit and operating noise do not cause a nuisance to neighbours.
•Be sure there are no obstructions near the air outlet of the outdoor unit.
•Obstructions may result in poor performance and increased operating noise. If abnormal noise occur, ask your dealer for advise.
Electrical work.
• For power supply, be sure to use a separate power circuit dedicated to the air conditioner.
System relocation.
• Consult your Daikin dealer about remodelling and relocation.
Note is valid for Turkey only: The lifetime of our products is ten (10) years
<![endif]>ENGLISH
1-5

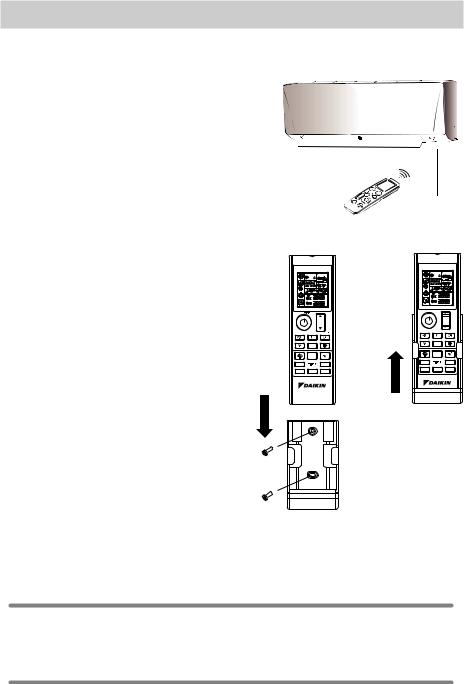
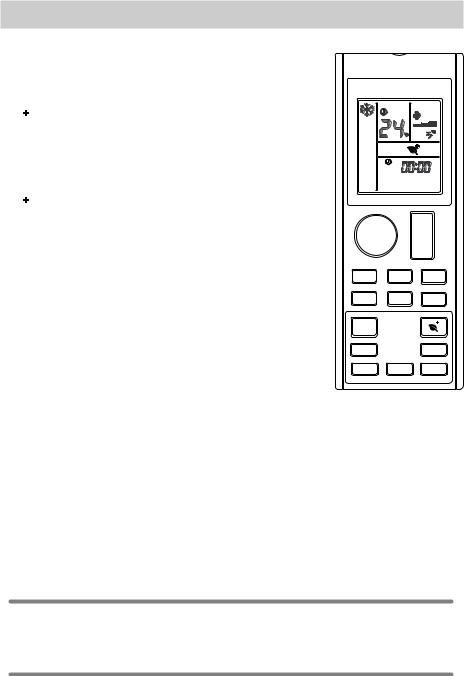
REMOTE CONTROLLER OVERVIEW
Display (LCD)
•Display the current settings.
(This illustration shows the full display of the LCD panel, including functions for applicable remote controller models only).
ON/OFF Button
• Start/Stop the operation.
FAN Button
•Changes the operating fan speed.
QUIET Button
•Enable / Disable QUIET function.
Mode Button
•Change between the available operating modes.
LED Button
•Change the indication display.
ON Timer Button
•Enable / Disable and change ON Timer setting.
IR Signal Transmitter
• To enable signal transmission, direct the transmitter to the indoor unit.
Note that in condition where there is an obstacle that blocks between the
transmitter and the indoor
unit, signal transmission might not be successful.
ON/OFF
TEMP
FAN POWERFUL SWING
QUIET MODE SLEEP
LED |
|
ECO+ |
|
TIMER |
|
ON |
|
OFF |
CANCEL |
CLOCK |
CANCEL |
Temperature Setting
Button
•Increase / Decrease the temperature setting.
POWERFUL Button
•Enable / Disable
POWERFUL function.
UP-DOWN SWING
Button
•Direct the air flow in updown direction.
SLEEP Button
•Enable / Disable SLEEP function.
ECO+ Button
•Enable / Disable ECO + function.
OFF Timer Button
•Enable / Disable and change OFF Timer setting.
CLOCK Button
• Changes RTC setting.
1-6
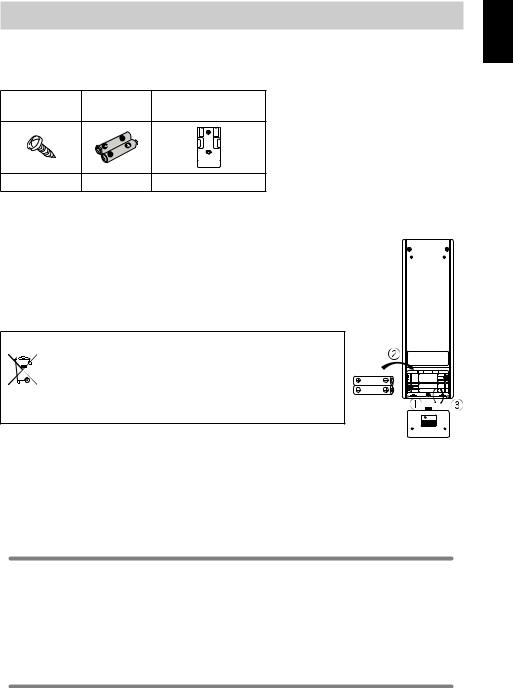
Preparation Before Operation
Accessories
The following accessories are included.
Drywall screw |
Battery |
Remote Controller |
|||||
Holder |
|||||||
|
|
||||||
|
|
|
|
|
|
|
|
|
|
|
|
|
|
|
|
|
|
|
|
|
|
|
|
|
|
|
|
|
|
|
|
|
|
|
|
|
|
|
|
|
|
|
|
|
|
|
|
2 |
2 |
1 |
To set the batteries
1.Release the battery cover at the back of the remote controller.
2.Insert two dry batteries (LR03:AAA).
3.Set the battery cover as before.
Disposal Requirements
The batteries supplied with the controller are marked with this symbol.
This means that the batteries shall not be mixed with unsorted household waste.
If a chemical symbol is printed beneath the symbol, this chemical symbol means that the battery contains a heavy metal above a certain concentration.
Possible chemical symbols are:Pb: lead (>0,004%)
Waste batteries must be treated at a specialized treatment facility for re-use. By ensuring correct disposal, you will help to prevent potential negative consequences for the environment and human health. Please contact your local authority for more information.
<![endif]>ENGLISH
Remove batteries if the air conditioner is not in use for a long period of time. Use 3 -AAA- 15V Batteries.
OPEN
About batteries
•Remove the batteries from the remote controller if the air conditioner will not be used for an extended period of time.
•When replacing the batteries, it is advised to replace the both batteries together with batteries of the same type.
•Batteries should be replaced once a year, However, if the display of remote controller started to fade or there is a noticeable degradation in performance, replace both batteries with new AAA:LR03 batteries.
•The attached batteries are provided for initial use of the air conditioner. The usage period of these batteries depends on the manufactured date of the air conditioner.
1-7
Preparation Before Operation
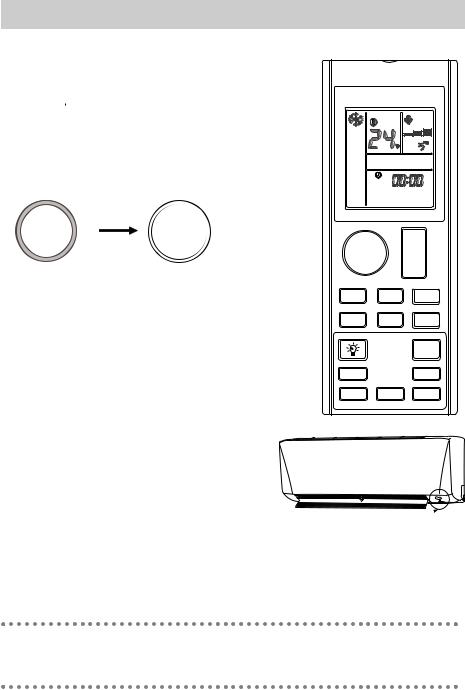
To operate the remote controller
•Aim the transmitter of the remote controller at the receiver of the indoor unit.
•Ensure there is no blockage such as curtain between the indoor unit and the remote controller, signal transmission will be unsuccessful.
•The maximum distance for successful communication is about 7m.
To fix the remote controller holder on the wall
1. |
Choose a location where signal is able to reach the unit. |
|
|
2. |
Fix the holder onto a wall, a pillar or etc with the screws |
|
|
3. |
supplied with the holder. |
ON/ |
|
Place the remote controller on the holder. |
|
TEMP |
|
|
|
FAN |
POWERFU SWIN |
|
|
QUIE |
MODE SLEE |
|
|
LED |
ECO+ |
|
|
ON |
OFF |
CANCEL CLOCK CANCEL
Receiver
ON/
TEMP
FAN POWERFU SWIN
SWIN
QUIE MODE SLEE
LED ECO+
ON OFF
CANCEL CLOCK CANCEL
About remote controller
•Do not drop nor wet the remote controller.
•Never expose the remote controller under direct sunlight.
•Dust on the transmitter lense cover will reduce the sensitivity.
•Signal communication may be affected if the air conditioner is being installed near an electronic- starter-type fluorescent lamp (such as inverter-type lamp) in the room.
1-8
Preparation Before Operation
To set the clock
1. Press and hold CLOCK button to set the clock time.
•  blinks.
• For example, present time is 8 o’clock in the morning,  will be displayed.
CLOCK
1
<![endif]>ENGLISH
Note
•Remote controller is automatically in clock setting mode upon battery insertion. Users are advised to complete the clock setting before operation.
1-9
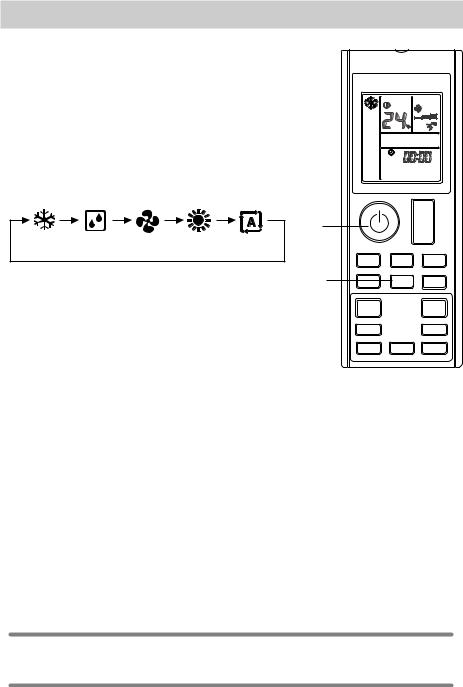
AUTO ● COOL ● DRY ● FAN ● HEAT Operation
To start operation
1. Press  button to start the unit operation.
2. Press MODE button to choose the desired operation mode.
•Each pressing on the button advances the available operating mode in sequence below:
1, 3
COOL |
DRY |
FAN |
HEAT |
AUTO |
MODE
2
To stop operation
3. Press  button again to stop the unit operation.
• Note
Operating Mode |
Description |
COOL |
The air conditioner cools down the room by releasing the heat to outdoor |
|
unit. |
DRY |
The air conditioner operates to control the room humidity by regulating the |
|
indoor unit fan speed. Therefore, manual adjustment of the fan speed in |
|
DRY mode is not available. |
FAN |
The air conditioner indoor unit will run in fan only. |
|
|
HEAT |
The air conditioner heats up a room to be temperature setpoint. |
AUTO |
The air conditioner cools down or heats up a room to the temperature |
|
setpoint. It automatically switches between cooling and heating if necessary. |
Notes on the operating conditions
•The air conditioner will always consume a small amount of electricity even in standby mode.
•Ensure that the power supply / breaker is switch off if the air conditioner is not going to be used for an extended period of time.
1-10

To change temperature setting
4. Press TEMP button.
• The temperature segments on LCD display shall change whenever
or button is pressed.
Operating Mode |
COOL |
HEAT |
AUTO |
DRY & FAN |
|
Set Temperature |
18°C - 32°C 10°C - 30°C 18°C - 30°C Not applicable 4 |
TEMP |
|||
Range |
|
|
|
|
|
•Press simultaneously on and to change the temperature display unit in Celcius (°C) or Fahrenheit (°F).
• For example,
Tips for energy saving
•Keeps the temperature setting at a moderate level (do not over-cool the room).
•Clean the air filters to prevent clogging that could contribute to inefficient operation and energy wastage.
** Recommended to clean the filter once every 2 weeks for regular user.
<![endif]>ENGLISH
1-11
To change fan speed setting
5. Press  button.
•Each pressing on the button advances the fan speed mode in sequence.
•In COOL & HEAT mode:
LOW FAN MEDIUM FAN HIGH FAN AUTO FAN
• In FAN mode: |
|
|
|
|
5 |
LOW FAN |
MEDIUM FAN |
HIGH FAN |
• Fan speed setting not available in DRY mode.
FAN
Notes on fan speed setting
•When fan speed is set to AUTO fan speed, the air flow rate will adjust automatically based on the room temperature and temperature setting selected by user.
•Cooling and heating effect will be affected at lower air flow rate.
1-12
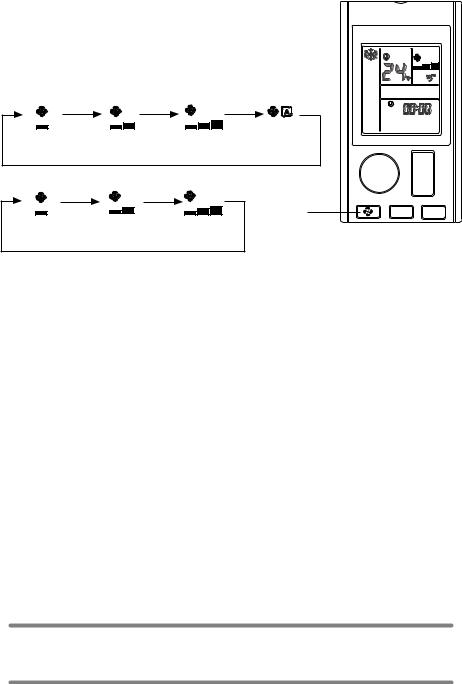
Adjusting the Airflow Direction
To change the air flow in up-down direction (UP-DOWN swing)
1. Press  button.
•To distribute the air to a specific direction, press the  button and wait until the louver move to the desired direction and press the button once again.
<![endif]>ENGLISH
SWING
1-13
ECO+ Operation
To start ECO+ operation
1. Press  button.
•  will be displayed on the LCD.
To cancel ECO+ operation
2. Press  button.
• will disappear from the LCD. The previous setting used before ECO+ operation will be resumed.
ECO+
Notes on ECO+ operation
•This operation adjust the operating condition to energy saving level by limiting the maximum power consumption of the air conditioner unit.
•ECO+ operation will be stopped if SLEEP operation is activated.
•ECO+ only available in COOL and HEAT mode.
1-14
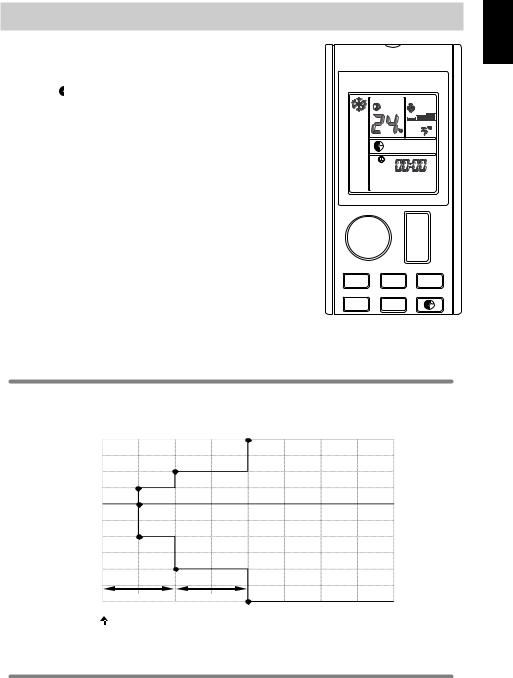
SLEEP Operation
To start SLEEP operation
1. Press  button.
•  will be displayed on the LCD.
• LED Indication lights of unit will be dimmed down.
To cancel SLEEP operation
2. Press  button.
•  will disappear from the LCD. The previous setting used before SLEEP operation will be resumed.
SLEEP
Notes on SLEEP operation
•This operation automatically adjust the set temperature of the air conditioner to provide a comfort sleeping environment.
Set Temperature
+2.0°C
+1.0°C
+0.5°C
-1.0°C |
|
|
|
|
|
|
|
-2.0°C |
|
|
|
|
|
|
|
-3.0°C 0 |
1 hour |
|
1 hour |
|
|
|
|
0.5 |
1 |
1.5 |
2 |
3 |
4 |
5 |
Enable SLEEP function
•SLEEP only available in COOL, HEAT and AUTO mode.
•SLEEP operation will be stopped if ECO+ operation is activated
<![endif]>ENGLISH
1-15
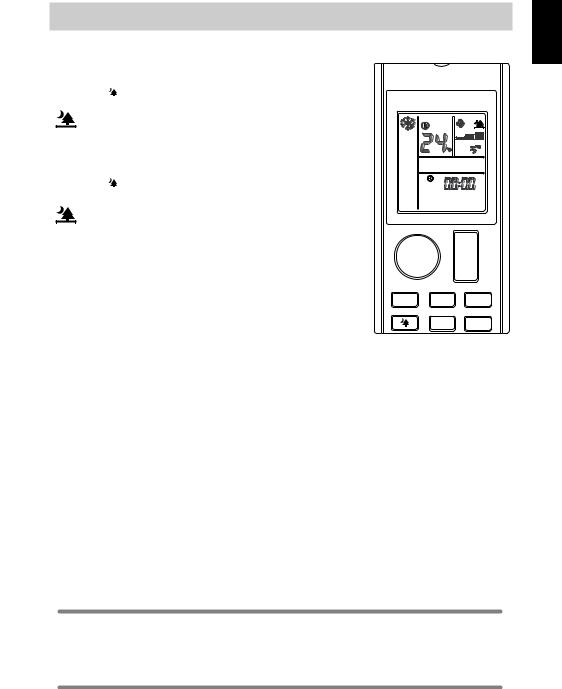
POWERFUL Operation
To start POWERFUL operation
1. Press  button.
• will be displayed on the LCD.
•POWERFUL operation ends in 20 minutes. The previous setting used before POWERFUL operation will be resumed.
To cancel POWERFUL operation
2. Press  button.
• will disappear from the LCD. The previous setting used before POWERFUL operation will be resumed.
Notes on POWERFUL operation
POWERFUL
•This operation cannot operate with QUIET.
•In condition where POWERFUL is started, it will temporarily override the operation of other functions for 20 minutes.
•POWERFUL operation will be stopped if fan speed is adjusted. Priority will be given to the last button pressed.
•Indoor unit operating sound will appear to be louder during POWERFUL operation.
•POWERFUL operation will not increase the capacity of air conditioner if the air conditioner is already operating in its maximum capacity.
•POWERFUL only available in COOL and HEAT mode.
1-16
QUIET Operation
To start QUIET operation
1. Press  button.
• will be displayed on the LCD.
To cancel QUIET operation
2. Press  button.
• will disappear from the LCD. The previous setting used
before QUIET operation will be resumed.
QUIET
Notes on QUIET operation
•Indoor unit operating sound will appear to be lower during QUIET operation.
•The cooling and heating effect will be lower in QUIET operation.
•QUIET operation will be stopped if fan speed is adjusted or POWERFUL operation is activated.
•Priority will be given to the last button pressed.
•QUIET only available in COOL and HEAT mode.
<![endif]>ENGLISH
1-17
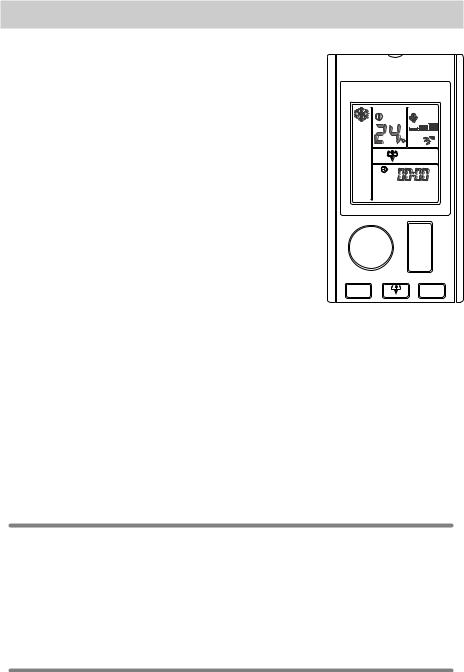
LED Operation
To change or switch off the indication display on the indoor unit
1. Press  button.
• Press and hold the button changes the indication display on the
indoor unit.
• For example,
Indication light ON |
Indication lights OFF |
LED
LED INDICATION LIGHTS
Notes on indoor unit indication display
For operating mode status indication display:
•COOL mode: Light blue
•HEAT mode: Red
•FAN mode: Yellow
1-18
TIMER Operation
To use OFF TIMER operation
•Ensure the clock setting is set to present time (refer to method to set the clock under preparation before operation).
1. Press  button.
OFF
• 


 will be displayed on the LCD.
2. Press OFF to set the off timer setting.
•Set the desired off time by pressing the OFF TIMER button continuously.
To cancel OFF TIMER operation
3. Press CANCEL button to cancel the OFF TIMER.
1, 2 |
TIMER |
OFF |
3
CANCEL
<![endif]>ENGLISH
1-19

To use ON TIMER operation
•Ensure the clock setting is set to present time (refer to method to set the clock under preparation before operation).
1. Press |
button. |
|
ON |
• 


 will be displayed on the LCD.
2. Press |
to set the on timer setting. |
|
ON |
•Set the desired off time by pressing the ON TIMER button continuously. If timer is set to 7.30am, the air conditioner will turn on at 7.30am sharp.
To cancel ON TIMER operation
3. Press  button to cancel the ON TIMER.
CANCEL
1, 2 |
TIMER |
|
|
|
ON |
3
CANCEL
Notes on TIMER setting
•ON TIMER setting is sharing the same segment with CLOCK setting on the LCD display.
•LCD will display only the TIMER setting once ON TIMER and/or OFF TIMER is set.
•TIMER setting will auto exit if no button press after blink for 3s.
1-20
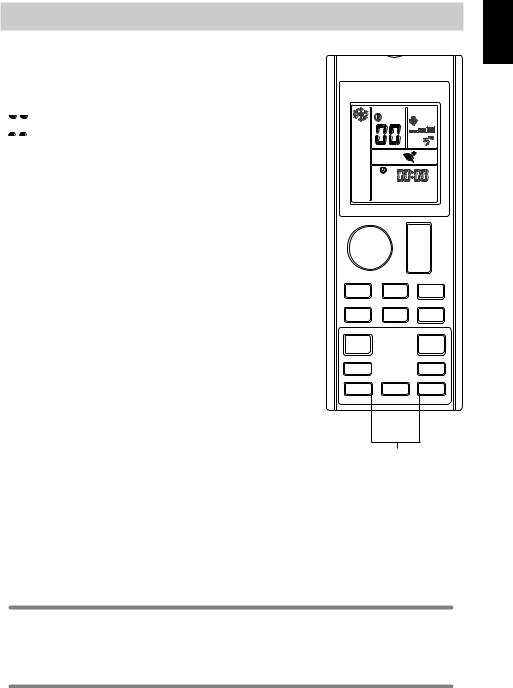
Fault Diagnosis
To perform error code diagnosis
ON OFF
1. Press and hold  or
or  button for 5 seconds.
CANCEL CANCEL
• 

 blinks.
ON OFF
2. Press  or
or  to check on the error code.
CANCEL CANCEL
•Press on the button repeatedly until a long "beep" acknowledgement heard from the indoor unit.
To exit from error code diagnosis
ON OFF
3. Press and hold  or
or  button for 5 seconds.
CANCEL CANCEL
• The code display will cancel itself if the button is not pressed for 1 minute.
|
TIMER |
ON |
OFF |
CANCEL |
CANCEL |
1, 2, 3
<![endif]>ENGLISH
Note
•A short "beep" and two consecutive "beep" acknowledgement from the indoor unit indicates a non-corresspondence error code.
•User shall not attempt to repair or modify the air conditioner as any incorrect work may result in electric shock or fire.
•Consult the service personnel in case the air conditioner is found to be faulty.
1-21
Error code definition
Error Code |
Meaning |
00 |
Normal |
|
|
A1 |
Indoor PCB error |
A3 |
Drain pump abnormal |
|
|
A5 |
Antifreeze |
A6 |
Indoor fan motor abnormal |
|
|
AH |
Electrical air cleaner abnormal |
|
|
C4 |
Indoor heat exchanger (1) thermistor short / open |
C5 |
Indoor heat exchanger (2) thermistor short / open |
|
|
C7 |
Louver limit switch error |
C9 |
Indoor room thermistor short / open |
|
|
E1 |
Outdoor PCB error |
E3 |
High pressure protection |
|
|
E4 |
Low pressure protection |
|
|
E5 |
Compressor motor lock / compressor overload |
E6 |
Compressor start-up error |
|
|
E7 |
Outdoor DC fan motor lock |
E8 |
AC input overcurrent |
|
|
E9 |
EXV error |
EA |
4 way valve error |
|
|
F3 |
Discharge pipe overheat |
|
|
F6 |
Heat exchanger overheat |
H0 |
Compressor sensor system error |
|
|
H3 |
High pressure switch error |
H6 |
Compressor feedback detection error |
|
|
H7 |
Fan motor overload / overcurrent / sensor abnormal |
H8 |
AC current sensor error |
|
|
1-22

Error Code |
Meaning |
|
<![if ! IE]> <![endif]>ENGLISH |
J1 |
Pressure sensor error |
|
|
H9 |
Outdoor air thermistor short/open |
|
|
|
|
|
|
J3 |
Compressor discharge pipe thermistor short / open / misplaced |
|
|
|
|||
|
|
|
|
J5 |
Suction pipe thermistor short / open |
|
|
|
|
|
|
J6 |
Outdoor heat exchanger thermistor short / open |
|
|
|
|
|
|
J7 |
Subcooling heat exchanger thermistor short / open |
|
|
J8 |
Liquid pipe thermistor short / open |
|
|
|
|
|
|
J9 |
Gas pipe thermistor short / open |
|
|
L1 |
Inverter outdoor PCB error |
|
|
|
|
|
|
L3 |
Outdoor control box overheat |
|
|
L4 |
Heat sink overheat |
|
|
|
|
|
|
L5 |
IPM error / IGBT error |
|
|
|
|
|
|
L8 |
Inverter compressor overcurrent |
|
|
L9 |
Compressor overcurrent prevention |
|
|
|
|
|
|
LC |
Communication error (outdoor control PCB and inverter PCB) |
|
|
P1 |
Open phase or voltage unbalance |
|
|
|
|
|
|
P4 |
Heat sink thermistor short / open |
|
|
PJ |
Capacity setting error |
|
|
|
|
|
|
U0 |
Insufficient gas |
|
|
U2 |
DC voltage out of range |
|
|
U4 |
Communication error |
|
|
|
|
|
|
U7 |
Commmunication error (outdoor control PCB and IPM PCB) |
|
|
UA |
Installation error |
|
|
|
|
|
|
UF |
Piping & wiring installation mismatch / wrong wiring / insufficient gas |
|
|
UH |
Antifreeze (other rooms) |
|
|
|
|
|
|
Note
After connecting to wireless LAN adapter, remote controller settings prevail over WLAN apps setting.
1-23
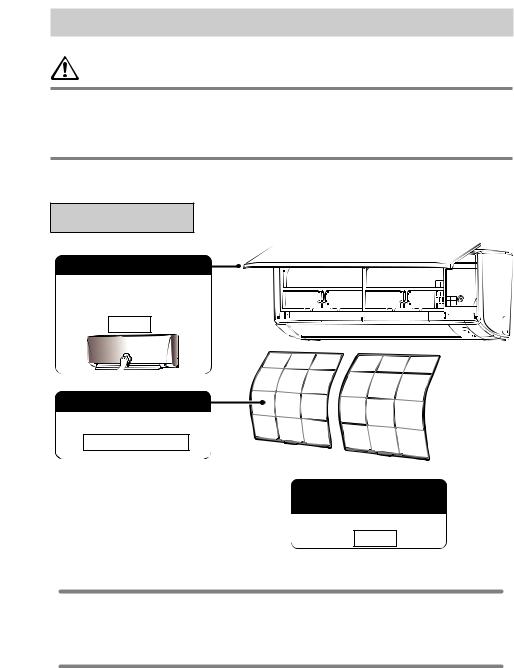
Care and Cleaning
CAUTION
•Before cleaning, be sure to stop the operation and turn off the circuit breaker.
•Do not touch the aluminium fins of the indoor unit. If you touch those parts, this may cause an injury.
•Avoid direct contact of any coil treatment cleaners on plastic part. This may cause plastic part to deform as a result of chemical reaction.
Quick reference
Cleaning parts
Front panel
• Wipe it with a soft damp cloth.
• Only neutral detergent may be used.
If dirty
Air filter
• Vacuum dust or wash the filter.
Once every 2 weeks
Indoor unit, outdoor unit and remote controller
• Wipe them with a soft cloth.
If dirty
Note
For cleaning, do not use any of the following :
•Water hotter than 40°C/104°F
•Volatile liquid such as benzene, gasoline and thinner
•Polishing compounds
•Rough materials such as a scrubbing brush
1-24
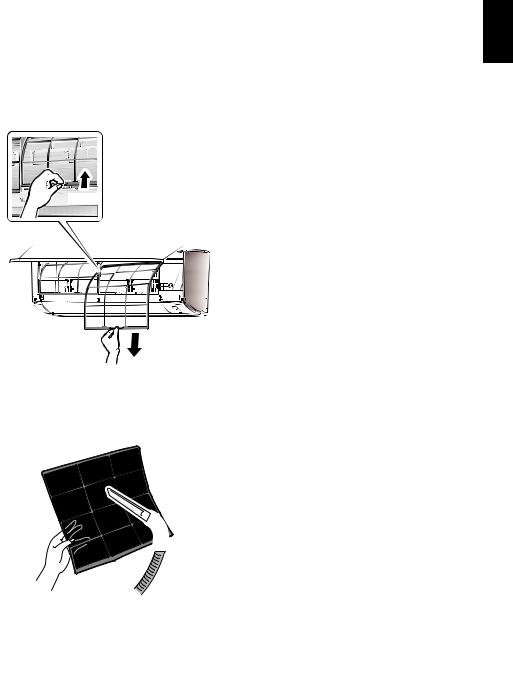
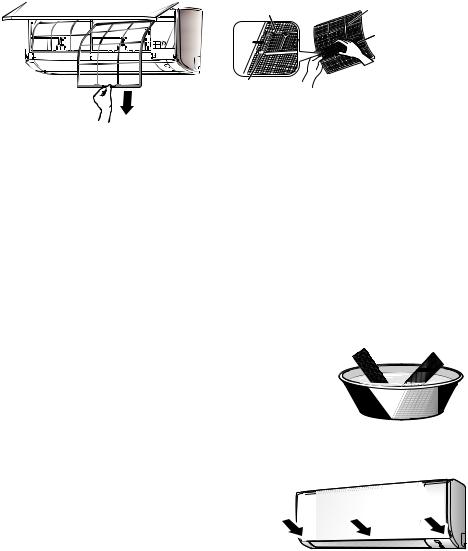
Air filter
1.Pull out the air filters.
•Open the front panel
•Push the filter tab at the centre of each air filter a little upwards, then pull it down.
1) Push
2) Pull down
2.Wash the air filters with water or clean them with vacuum cleaner.
•It is recommended to clean the air filters every 2 weeks.
<![endif]>ENGLISH
If the dust does not come off easily
•Wash the air filters with neutral detergent thinned with lukewarm water, then dry them up in the shade.
•Be sure to remove the titanium apatite deodorizing filter. Refer to "Titanium apatite deodorizing filter" on the next page.
3.Set the filters as they were and close the front panel slowly.
•Press the front panel at both side and the center.
*Appearance of the indoor unit may differ from some models.
 CAUTION
• Do not touch the aluminum fins by bare hand at the time of dismounting or mounting the filter.
1-25
Titanium apatite deodorizing filter
The titanium apatite deodorizing filter can be renewed by washing it with water once every 6 months. We recommend replacing it once every 3 years.
1.Take off the titanium apatite deodorizing filter
•Open the front panel and pull out the air filter.
•Remove titanium apatite deodorizing filter from the back of air filter.
Filter frame |
Air filter |
|
|
|
Titanium apatite |
|
deodorizing filter |
Tab |
|
2.Clean or replace the titanium apatite deodorizing filter.
[Maintenance]
2-1 Vacuum dusts, and soak in lukewarm water or water for about 10 to 15 minutes if dirt is heavy.
2-2 After washing, shake off remaining water and dry in the shade.
[Replacement]
Remove filter from the back of air filter.
• Dispose of the old filter as non-flammable waste.
3.Set the filters as they were and close the front panel.
•Press the front panel at both sides and the center.
*Appearance of the indoor unit may differ from some models.
1-26

How to open Front Panel |
|
1. Open the front panel. |
|
• Hold the panel at the recesses on the main |
Indentations on |
unit (2 recesses on right and left sides) and |
|
lift it until it stops. |
the main unit |
|
|
2. Remove the front panel. |
|
• While lifting the front panel further, slide it |
|
to the right and pull it to the front side. The |
|
left rotating shaft is detached. Slide the right |
|
rotating shaft to the left and pull it to the front |
|
side to remove it. |
|
|
Front panel shaft |
3. Attach the front panel. |
|
• Align the right and left rotating shafts of the |
|
front panel with the grooves and push them |
|
all the way in. |
|
• Gently close the front panel. (Push both |
|
ends and the center on the front panel.) |
|
 CAUTION
•Don’t touch the metal parts of the indoor unit. It may cause an injury.
•When removing or attaching the front panel, support the panel securely with hand to prevent it from falling.
•For cleansing, do not use hot water above 40°C, benzene, gasoline, thinner, nor other volatile oils, polishing compound, scrubbing brushes, nor other hand stuff.
•After cleaning, make sure that the front panel is securely fixed.
When The Unit Is Not To Be Used For An Extended Long Period Of Time
Operate the unit for 2 hours with the following setting.
Operating mode : cool Temperature : 30°C/86°F
Remove the power plug. If you are using an independent electric circuit for your unit, cut off the circuit.
Remove the batteries in the remote control.
<![endif]>ENGLISH
1-27

TROUBLESHOOTING
For any enquiries on spare part please contact your authorized dealer. If any malfunction of the air conditioner unit is noted, immediately switch off the power supply to the unit. Check the following fault conditions and causes for some simple troubleshooting tips.
|
Fault |
Causes / Action |
|
|
|
1. |
The compressor does not operate 3 |
– Protection against frequent starting. Wait for |
|
minutes after the air conditioner unit is |
3 to 4 minutes for the compressor to start |
|
started. |
operating. |
2. |
The air conditioner unit does not operate. |
– Power failure, or the fuse need to be |
|
|
replaced. |
|
|
– The power plug is disconnected. |
|
|
– It is possible that your delay timer has been |
|
|
set incorrectly. |
|
|
– If the fault persist after all these verifications, |
|
|
please contact the air conditioner unit |
|
|
installer. |
3. |
The air flow is too low. |
– The air filter is dirty. |
|
|
– The doors or windows are open. |
|
|
– The air suction and discharge are clogged. |
|
|
– The regulated temperature is not high |
|
|
enough. |
4. |
Discharge air flow has bad odour. |
– Odours may be caused by cigarettes, smoke |
|
|
particles, perfume etc. which might have |
|
|
adhered onto the coil. |
5. |
Condensation on the front air grille of the |
– This is caused by air humidity after an |
|
indoor unit. |
extended long period of operation. |
|
|
– The set temperature is too low, increase the |
|
|
temperature setting and operate the unit at |
|
|
high fan speed. |
6. |
Water flowing out from the air conditioner |
– Switch off unit and call dealer. |
|
unit. |
|
If the fault persists, please call your local dealer / serviceman.
1-28
 Loading...