


3-058-432-11 (1)
Video Cassette
Recorder
Operating Instructions
PAL NTSC 4.43
SLV-EZ44AZ/EZ22AZ
SLV-EZ11AZ
© 2000 by Sony Corporation

WARNING
To prevent fire or shock hazard, do not expose the unit to rain or moisture.
To avoid electrical shock, do not open the cabinet. Refer servicing to qualified personnel only.
The mains lead must only be changed at a qualified service shop.
Precautions
Safety
•This unit operates on 220-240 V AC, 50 Hz. Check that the unit’s operating voltage is identical with your local power supply.
•If anything falls into the cabinet, unplug the unit and have it checked by qualified personnel before operating it any further.
•The unit is not disconnected from the mains as long as it is connected to the mains, even if the unit itself has been turned off.
•Unplug the unit from the mains if you do not intend to use it for an extended period of time. To disconnect the lead, pull it out by the plug, never by the lead.
Installing
•Allow adequate air circulation to prevent internal heat buildup.
•Do not place the unit on surfaces (rugs, blankets, etc.) or near materials (curtains, draperies) that may block the ventilation slots.
•Do not install the unit near heat sources such as radiators or air ducts, or in a place subject to direct sunlight, excessive dust, mechanical vibration or shock.
•Do not install the unit in an inclined position. It is designed to be operated in a horizontal position only.
•Keep the unit and cassettes away from equipment with strong magnets, such as microwave ovens or large loudspeakers.
•Do not place heavy objects on the unit.
•If the unit is brought directly from a cold to a warm location, moisture may condense inside the VCR and cause damage to the video head and tape. When you first install the unit, or when you move it from a cold to a warm location, wait for about four hours before operating the unit.
Caution
Television programmes, films, video tapes and other materials may be copyrighted. Unauthorized recording of such material may be contrary to the provisions of the copyright laws. Also, use of this recorder with cable television transmission may require authorization from the cable television transmitter and/or programme owner.
Compatible colour systems
•This VCR is designed to record and play back using the PAL (B/G) colour system. Recording of video sources based on other colour systems cannot be guaranteed.
•Tapes recorded with NTSC colour system can be played back on this VCR using a TV or a colour monitor for the PAL colour system.
2 Introduction

Table of contents
|
Getting Started |
|
|
4 |
Step 1: Unpacking |
|
|
5 |
Step 2: Setting up the remote commander |
Getting |
|
8 |
Step 3: Connecting the VCR |
||
|
|||
10 |
Step 4: Tuning your TV to the VCR |
|
|
12 |
Step 5: Setting the clock |
Started |
|
14 |
(SLV-EZ44AZ/EZ22AZ only) |
||
Step 6: Presetting channels with the EASY G-CODE SET UP function |
|
||
16 |
Presetting channels |
|
|
23 |
Setting up the G-CODE* system manually (SLV-EZ44AZ/EZ22AZ only) |
|
|
26 |
Changing/disabling programme positions (SLV-EZ44AZ/EZ22AZ only) |
|
|
|
|
|
Basic Operations
30 Playing a tape
34 Recording TV programmes
37Recording TV programmes using the Easy Timer function
43Recording TV programmes using the G-CODE system (SLVEZ44AZ/EZ22AZ only)
46 Setting the timer manually
Additional Operations
48Playing/searching at various speeds
49Setting the recording duration time
50Checking/changing/cancelling timer settings
52Searching the beginning of an Easy Timer recorded programme
53Searching using the index function
55Adjusting the picture
56Changing menu options
57Editing with another VCR
Additional Information
59 Troubleshooting
62Specifications
63Index to parts and controls
Back cover
Index
*G-CODE is a registered trademark of Gemstar Development Corporation. The G-CODE system is manufactured under license from Gemstar Development Corporation.
Introduction 3
Getting Started
Step 1
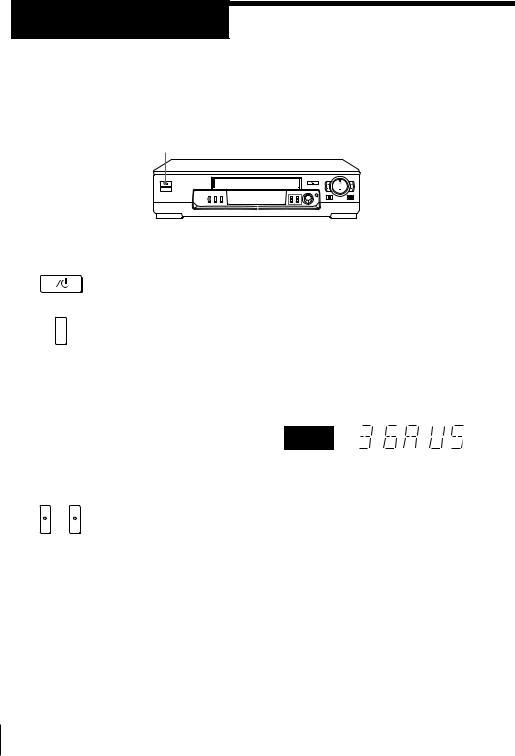
Unpacking
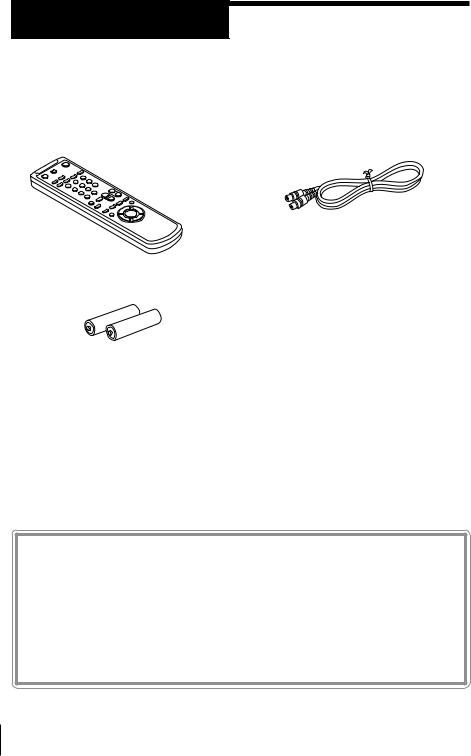
Check that you have received the following items with the VCR:
• Remote commander • Aerial cable
• R6 (size AA) batteries
Checking your model name
The instructions in this manual are for the 3 models : SLV-EZ44AZ, EZ22AZ and EZ11AZ. Check your model number by looking at the rear panel of your VCR. The SLV-EZ44AZ is the model used for illustration purposes. Any difference in operation is clearly indicated in the text, for example, “SLV-EZ44AZ only.”
4 Getting Started
Step 2
Setting up the remote commander
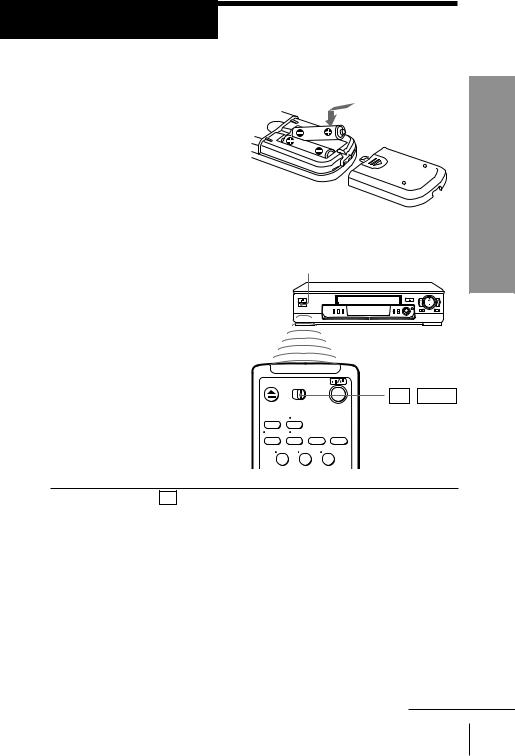
Inserting the batteries
Insert two R6 (size AA) batteries by matching the + and – on the batteries to the diagram inside the battery compartment.
Insert the negative (–) end first, then push in and down until the positive (+) end clicks into position.
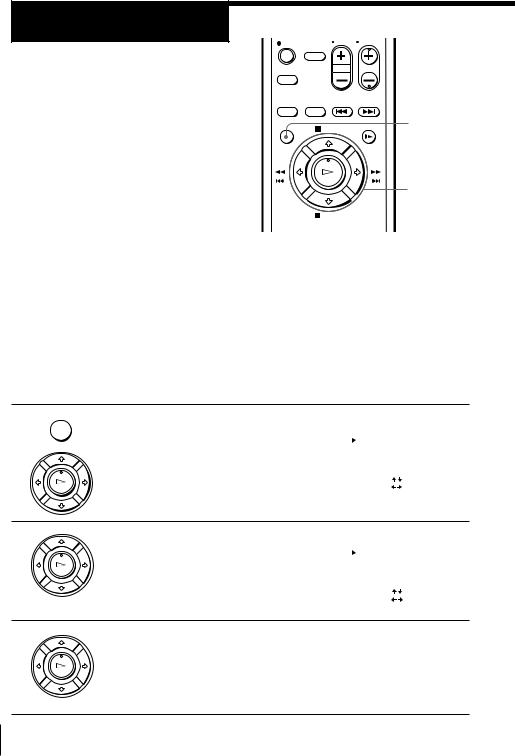
Using the remote commander |
Remote sensor |
You can use this remote |
|
commander to operate this |
|
VCR and a Sony TV. Buttons |
|
on the remote commander |
|
marked with a dot (•) can be |
|
used to operate your Sony TV. |
|
If the TV does not have the g |
|
symbol near the remote sensor, |
|
this remote commander will |
TV / VIDEO |
not operate the TV. |
|
Started Getting
1 2 3
To operate |
Set TV / |
VIDEO |
to |
||
|
|
|
|
|
|
|
|
|
|
||
the VCR |
VIDEO |
and point at the remote sensor on the VCR |
|||
|
|
|
|
|
|
|
|
|
|||
a Sony TV |
TV |
and point at the remote sensor on the TV |
|||
|
|
|
|
|
|
Notes
•The TV/VIDEO button selects an input source of the TV from either aerial in or line in. The button does not control this VCR.
•With normal use, the batteries should last about three to six months.
•If you do not use the remote commander for an extended period of time, remove the batteries to avoid possible damage from battery leakage.
•Do not use a new battery with an old one.
•Do not use different types of batteries.
continued
Getting Started 5
Step 2: Setting up the remote commander (continued)
Controlling other TVs with the remote commander (SLV-EZ44AZ/EZ22AZ only)
The remote commander is preprogrammed to control non-Sony TVs. If your TV is listed in the table below, set the appropriate manufacturer’s code number.
1Set TV / VIDEO at the top of the remote commander to TV .
2Hold down ?/1, and enter your TV’s code number(s) using the programme number buttons. Then release ?/1.
Now you can use the ?/1, VOL +/–, PROG +/–, programme number buttons, ? (ten’s digit) and TV/VIDEO buttons to control your TV. You can also use the buttons marked with a dot (•) to control a Sony TV. To control the VCR, reset TV / VIDEO to VIDEO .
Code numbers of controllable TVs
If more than one code number is listed, try entering them one at a time until you find the one that works with your TV.
Manufacturer |
Code number |
Sony |
01*1,02 |
|
|
Akai |
68 |
|
|
Blaupunkt |
10 |
|
|
Ferguson |
52 |
|
|
Grundig |
11*1 |
|
|
Hitachi |
24 |
|
|
ITT/Nokia |
15,16,69*3 |
|
|
JVC |
33* |
|
|
Loewe |
45 |
|
|
Mivar |
09, 70 |
|
|
NEC |
66 |
|
|
Panasonic |
17*1,49 |
|
|
Manufacturer |
Code number |
Philips |
06*1,07*1,08*1 |
|
|
Saba |
12,13 |
|
|
Samsung |
22,23 |
|
|
Sanyo |
25 |
|
|
Sharp |
29 |
|
|
Telefunken |
36 |
|
|
Thomson |
43*2 |
Toshiba |
38 |
|
|
6 Getting Started

You can use the WIDE button after entering a code number with any of the following marks;
*1: Press WIDE to switch the wide picture mode on or off.
*2: Press WIDE, then press VOL +/– to select the wide picture mode you want.
*3: Press WIDE. The menu appears on the TV screen. Then, press M/m/</ , to select the wide picture you want and press OK.
Notes
•If the TV uses a different remote control system from the one programmed to work with the VCR, you cannot control your TV with the remote commander.
•You may not be able to use some buttons to control non-Sony TVs due to the remote commander’s signal limitations.
•If you enter a new code number, the code number previously entered will be erased.
•When you replace the batteries of the remote commander, the code number may automatically reset to 01 (Sony). If your TV is not a Sony, it is recommended to manually set the appropriate code number every time you replace the batteries.
•If you set your TV’s code number correctly while the TV is turned on, the TV turns off automatically.
Started Getting
Getting Started 7
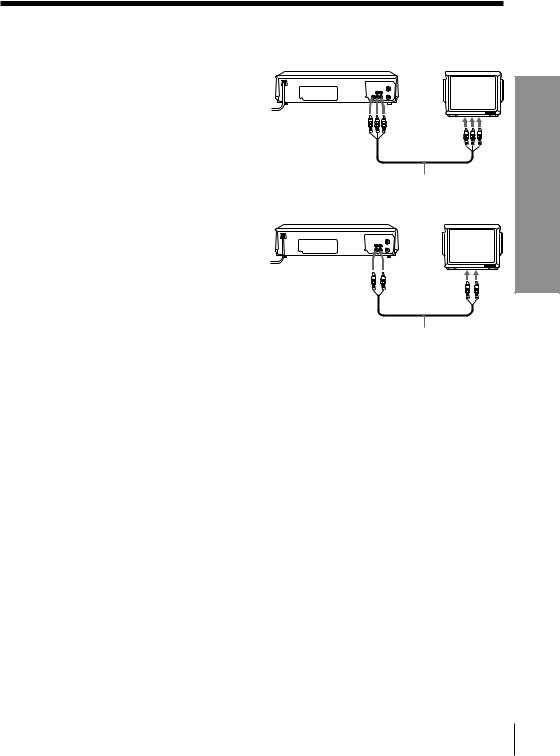
Step 3
Connecting the VCR
Connect the aerial to your VCR and TV as shown below to watch TV programmes and VCR pictures on your TV. In addition, if your TV has audio/video (A/V) input jacks, we recommend you connect the VCR to your TV using an audio/video cable to get a better picture and sound.
Connecting the aerial
|
|
AERIAL IN |
|
|
AERIAL OUT |
|
Mains lead |
|
to mains |
|
AERIAL IN |
|
|
|
|
: Signal flow |
Aerial cable (supplied) |
|
|
1
2
Disconnect the aerial cable from your TV |
|
and connect it to AERIAL IN on the rear |
AERIAL |
panel of the VCR. |
IN |
|
|
|
OUT |
|
AERIAL |
Connect AERIAL OUT of the VCR and the
IN
aerial input of your TV using the supplied
OUT
aerial cable.
3 |
Connect the mains lead to the mains. |
8 Getting Started
Additional connections
To a TV that has audio/video input jacks
This additional connection improves picture and sound quality. Connect the TV as shown on the right.
If you want to use the Trinitron TV Synchro Play function (see page 33), this connection is necessary. (If your TV has two or more inputs, connect the audio/video cable to the VIDEO IN 1 jacks.)
e.g. SLV-EZ44AZ
LINE-1 |
|
OUT |
LINE IN |
Audio/video cable (not supplied)
e.g. SLV-EZ22AZ/EZ11AZ
LINE-1 OUT
LINE IN
Audio/video cable (not supplied)
Started Getting
Getting Started 9
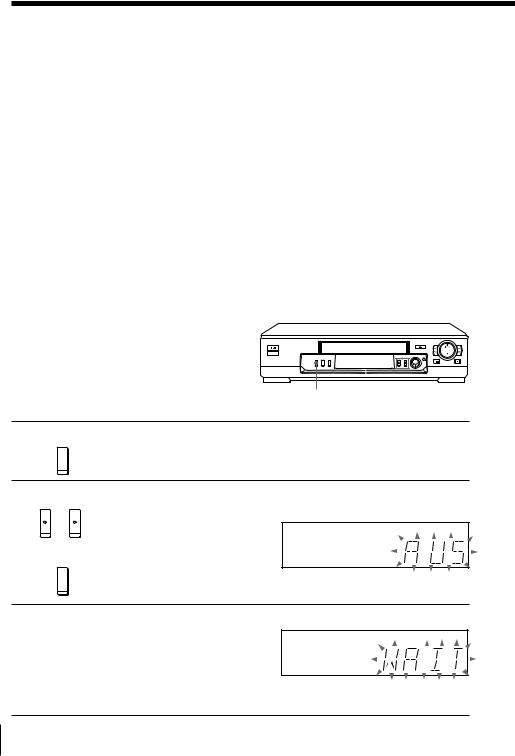
Step 4
Tuning your TV to the VCR
If you have connected your VCR to the TV using the audio/video cable, skip this step.
1/u ON/STANDBY
|
|
|
|
|
|
|
|
|
|
|
|
|
|
|
|
|
|
|
|
|
|
|
|
|
|
|
|
|
|
|
|
|
RF CHANNEL PROGRAM +/– |
||||||
|
|
|
|
|
|
|
|
|
|
1 ON/STANDBY |
Press 1/u ON/STANDBY to turn on the VCR. |
||||||||
|
|
|
|
|
|
|
|
|
|
|
|
|
|
|
|
|
|
|
|
2 |
|
|
Press RF CHANNEL on the VCR. |
||||||
|
|
|
The factory-preset RF channel flashes in the display window for |
||||||
|
|
|
|||||||
RF CHANNEL |
about three seconds. |
||||||||
|
|
|
Press RF CHANNEL again while the RF channel is flashing. |
||||||
|
|
|
The VCR signal is output through this channel to the TV. |
||||||
|
|
|
|
|
|
|
|
||
|
|
|
|
|
|
|
SP |
||
|
|
|
|
|
|
|
|
|
APC |
|
|
|
|
|
|
|
|
|
|
|
|
|
|
|
|
|
|
|
|
3 |
– |
+ |
Press PROGRAM +/– to select the suitable RF channel, depending |
|
|
PROGRAM |
|
||
|
|
|
|
on the area you live in. |
|
|
|
|
You can select Australia channels from 28 AUS to 69 AUS or New |
|
|
|
|
Zealand channels from 28 NZ to 69 NZ. |
|
|
|
|
The Australia and New Zealand channels appear in the display |
|
|
|
|
window in alternate sequence. |
|
|
|
|
|
4 |
|
|
|
Turn on your TV and select a programme position for the VCR |
|
|
|
|
picture. |
This channel will now be referred to as the video channel.
Some TV has the programme position, such as 0, that is reserved for a VCR. In this case, select that programme position for the VCR picture. Refer to the instruction manual of your TV for details.
10 Getting Started
5 |
|
Tune the TV to the same channel as that |
|
|
RECORDER |
|
|||
|
|
shown in the display window so that |
|
|
|
|
|
SONY VIDEO CASSETTE |
|
|
|
the picture on the right appears on the |
|
|
|
|
TV screen. |
|
|
|
|
Refer to your TV manual for tuning |
|
|
|
|
instructions. |
|
|
|
|
If the picture does not appear clearly, |
|
|
|
|
see “To obtain a clear picture from the |
|
|
|
|
VCR” below. |
|
|
|
|
|
|
|
6 |
|
Press RF CHANNEL. |
|
|
|
|
You have now tuned your TV to the VCR. From now on, whenever |
|
|
|
|
|
||
RF CHANNEL |
you want to play a tape, set the TV to the video channel. |
|
|
|
|
To obtain a clear picture from the VCR
If the picture does not appear clearly in step 5 above, press PROGRAM +/– in step 5, so that another RF channel appears. Then tune the TV to the new RF channel until a clear picture appears.
To set another RF channel number on the VCR, select a channel number that does not receive a broadcast signal in your area and is clear of interference from other channels.
If you cannot obtain a clear picture after performing this procedure, we recommend you connect the VCR and TV using an audio/video cable (see “To a TV that has audio/video input jacks” on page 9). If the same symptom persists, consult your nearest Sony dealer.
Started Getting
Getting Started 11

Step 5
Setting the clock
You must set the time and date on the VCR to be able to use the timer recording features properly.
Before you start…
•Turn on your TV and set it to the video channel.
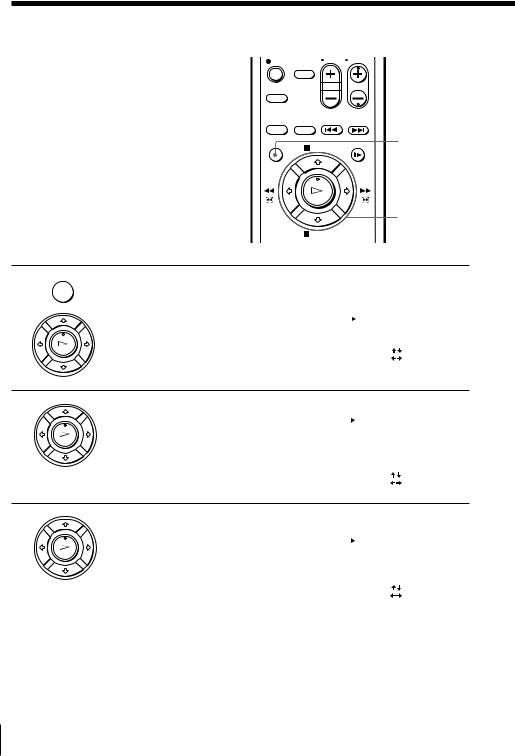
?/1
1 2 3
4 5 6
7 8 9
0
 MENU
MENU
OK
M/m/</,
1• ]/1 Press ?/1 (on/standby) to turn on the VCR.
2MENU
PLAY
OK
Press MENU, then press >/. to move the cursor (”) to CLOCK SET and press OK.
CLOCK SET |
|
|
|
1 . 1 . 2 0 0 0 SA |
0 : 0 0 |
||
SELECT |
: [ |
] |
|
SET |
: [ |
] |
|
END |
: [ OK ] |
|
|
|
|
|
|
12 Getting Started
3
PLAY
OK
Press M/m to set the date.
The day of the week is set automatically.
CLOCK SET |
|
|
|
2 5 . 1 . 2 0 0 0 TU |
0 : 0 0 |
||
SELECT |
: [ |
] |
|
SET |
: [ |
] |
|
END |
: [ OK ] |
|
|
|
|
|
|
4 |
Press , to flash the month and set the |
|
month using M/m. |
|
PLAY |
OK
CLOCK SET
2 5 . 1 2 . 2 0 0 0 MO 0 : 0 0
SELECT |
: [ |
] |
SET |
: [ |
] |
END |
: [ OK ] |
|
5
PLAY
OK
Set the year, hour and minute in sequence, using , to flash the item to be set, and M/m to select the digits.
CLOCK SET
2 5 . 1 2 . 2 0 0 0 MO 1 5 : 3 0
SELECT |
: [ |
] |
SET |
: [ |
] |
END |
: [ OK ] |
|
6 |
Press OK to start the clock. |
PLAY
OK
Tip
•To change the digits during setting, press < to return to the item to be changed, and select the digits using M/m.
Note
•The menu disappears automatically if you do not proceed for more than a few minutes.
Started Getting
Getting Started 13
Step 6
Presetting channels with the EASY G-CODE SET UP function (SLVEZ44AZ/EZ22AZ only)
The EASY G-CODE SET UP function is a feature that simplifies the channel presetting and the G-CODE guide channel setting. Just choose your local area in the EASY G-CODE SET UP menu, and the VCR will automatically preset the TV channels and the G-CODE guide channels for your area.
MENU
OK
M/m/</,
At the factory the VCR has been preset for Sydney. If you live in this area, you can use the VCR without setting the channels and G-CODE system.
Before you start…
•Turn on the VCR and the TV.
•Set the TV to the video channel.
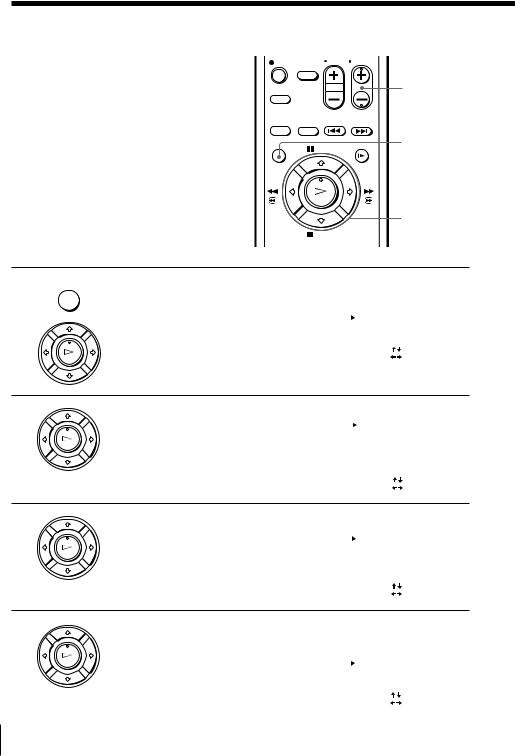
1 MENU
Press MENU, then press M/m to move the cursor (B) to EASY G-CODE SET UP and press OK.
PLAY
OK
EASY G–CODE SET UP |
PAGE |
||
C I T Y / AREA SELECT |
1 / 4 |
||
SYDNEY |
|
|
|
MELBOURNE |
|
|
|
BRISBANE |
|
|
|
PERTH |
|
|
|
ADELAIDE |
|
|
|
SELECT |
: [ |
] |
|
NZ |
: [ |
] |
|
SET |
: [ OK ] |
|
|
2
PLAY
OK
Press </, to display the local areas of either AUS (Australia) or NZ (New Zealand), depending on the country you live in.
EASY G–CODE SET UP |
PAGE |
||
C I T Y / AREA SELECT |
1 / 3 |
||
AUCKLAND |
|
|
|
WAI KATO |
|
|
|
ROTORUA |
|
|
|
BAY OF PLENTY |
|
||
HAWKES |
BAY |
|
|
SELECT |
: [ |
] |
|
AUS |
: [ |
] |
|
SET |
: [ OK ] |
|
|
3
PLAY
OK
Press M/m to move the cursor (B) to your local area, then press OK to confirm the setting. To display other pages for areas, press M/m repeatedly.
The TV channels and G-CODE guide channels for your local area are set up automatically.
14 Getting Started

To check if the channels are preset correctly
Set the TV to the video channel and press PROGRAM +/– on the VCR. If the TV screen changes to a different programme each time you press PROGRAM +/–, the channels are preset correctly.
To check the guide channel setting
Press MENU, then press M/m to move the cursor (B) to SET UP CH AND G-CODE and press OK. The guide channels for your local area are displayed on the screen.
Tips
•If your area is not listed in the EASY G-CODE SET UP menu, preset the TV channels using the One Touch Tuning function or the TUNER PRESET menu (see “Presetting channels” on page 16). Then set up the G-CODE guide channels manually if you want to record TV programmes using the G-CODE numbers (see “Setting up the G-CODE system manually” on page 23).
•If you want to record satellite broadcast using the G-CODE numbers, see page 25.
Started Getting
Getting Started 15
Presetting channels
(For SLV-EZ44AZ/EZ22AZ only)
If you can receive no channels or only a few channels after performing the EASY G-CODE SET UP function (page 14), preset all receivable channels automatically using the One Touch Tuning function or the TUNER PRESET menu.
If some channels could not be preset automatically when using the EASY G-CODE SET UP function, One Touch Tuning function or TUNER PRESET menu, preset them manually; if there are any unwanted channels among the preset ones, you can disable the channels.
(For SLV-EZ11AZ only)
First, we recommend that you preset the receivable channels in your area using the One Touch Tuning function or the AUTO PRESET in the TUNER PRESET menu. Then, if some channels could not be preset automatically, set them manually; if there are any unwanted channels among the preset ones, you can disable the channels.
Presetting all receivable channels using the One Touch Tuning function
PROGRAM +/–
ONE TOUCH
TUNING
1ONE TOUCHTUNING
Press and hold ONE TOUCH TUNING on the VCR for more than three seconds.
2PROGRAM
–+
ONE TOUCH
TUNING
1Press PROGRAM +/– on the VCR so that the indicator for your country (AUS or NZ) appears in the display window.
SP
APC
2 Press ONE TOUCH TUNING.
The VCR starts presetting the channels.
SP
 APC
APC
The WAIT indicator goes off when all the receivable channels are preset.
16 Getting Started

To check if the channels are preset correctly
Set the TV to the video channel and press PROGRAM +/– on the VCR. If the TV screen changes to a different programme each time you press PROGRAM +/–, the channels are preset correctly.
Tip
•To stop the One Touch Tuning function, press ONE TOUCH TUNING or p STOP on the VCR during the setting.
Started Getting
continued
Getting Started 17
Presetting channels (continued)
Presetting all receivable channels automatically
|
MENU |
Before you start… |
|
• Turn on the VCR and the TV. |
OK |
• Set the TV to the video channel. |
M/m/</, |
1 MENU
Press MENU, then press M/m to move the cursor (B) to TUNER PRESET and press OK.
PLAY
OK
TUNER PRESET |
|
PROG 1 |
|
COUNTRY |
• AUS |
NZ |
|
NORMAL / CATV • NORM |
CATV |
||
AUTO PRESET |
|
||
CHANNEL SET |
1 |
|
|
ADD / ERASE |
• ADD |
ERASE |
|
AFT |
|
• ON |
OFF |
FINE TUNING |
|
|
|
SELECT |
: [ |
] |
|
SET |
: [ |
] |
|
2
PLAY
OK
Press M/m/</, to move the cursor (B) to COUNTRY, then select either AUS (Australia) or NZ (New Zealand), depending on the country you live in.
TUNER PRESET |
|
PROG 1 |
|
COUNTRY |
• AUS |
NZ |
|
NORMAL / CATV • NORM |
CATV |
||
AUTO PRESET |
|
||
CHANNEL SET |
1 |
|
|
ADD / ERASE |
• ADD |
ERASE |
|
AFT |
|
• ON |
OFF |
FINE TUNING |
|
|
|
SELECT |
: [ |
] |
|
SET |
: [ |
] |
|
|
|
|
|
3
PLAY
OK
Press M/m/</, to move the cursor (B) to NORMAL/CATV, then select NORM.
To preset CATV channels, select CATV.
TUNER PRESET |
|
PROG 1 |
|
COUNTRY |
• AUS |
NZ |
|
NORMAL / CATV • NORM |
CATV |
||
AUTO PRESET |
|
||
CHANNEL SET |
1 |
|
|
ADD / ERASE |
• ADD |
ERASE |
|
AFT |
|
• ON |
OFF |
FINE TUNING |
|
|
|
SELECT |
: [ |
] |
|
SET |
: [ |
] |
|
18 Getting Started
4
PLAY
OK
Press M/m to move the cursor (B) to AUTO PRESET, then press OK.
All receivable channels are preset in numerical sequence. When no more receivable channels can be found, presetting stops and the picture from the lowest numbered channel is displayed on the TV screen.
TUNER PRESET |
|
PROG 0 |
COUNTRY |
• AUS |
NZ |
NORMAL / CATV |
• NORM |
CATV |
AUTO PRESET |
|
|
CHANNEL SET |
1 |
|
ADD / ERASE |
• ADD |
ERASE |
AFT |
• ON |
OFF |
FINE TUNING |
|
|
PLEASE WAIT |
|
|
|
|
|
Started Getting
continued
Getting Started 19
Presetting channels (continued)
Presetting channels manually
|
PROG +/– |
Before you start… |
|
• Turn on the VCR and the TV. |
MENU |
• Set the TV to the video channel. |
|
|
OK |
|
M/m/</, |
1MENU
PLAY
OK
Press MENU, then press M/m to move the cursor (B) to TUNER PRESET and press OK.
TUNER PRESET |
|
PROG10 |
COUNTRY |
• AUS |
NZ |
NORMAL / CATV |
• NORM |
CATV |
AUTO PRESET |
|
|
CHANNEL SET |
21 |
|
ADD / ERASE |
• ADD |
ERASE |
AFT |
• ON |
OFF |
FINE TUNING |
|
|
SELECT |
|
|
SET |
|
|
|
|
|
2
PLAY
OK
Press >/./?// to move the cursor (”) to COUNTRY, then select either AUS (Australia) or NZ (New Zealand), depending on the country you live in.
TUNER PRESET |
|
PROG10 |
||
COUNTRY |
|
• AUS |
NZ |
|
NORMAL / CATV |
• NORM |
CATV |
||
AUTO PRESET |
|
|
||
CHANNEL SET |
21 |
|
||
ADD / ERASE |
|
• ADD |
ERASE |
|
AFT |
|
|
• ON |
OFF |
FINE TUNING |
|
|
|
|
SELECT |
: [ |
] |
|
|
SET |
: [ |
] |
|
|
|
|
|
|
|
3
PLAY
OK
Press M/m/</, to move the cursor (B) to NORMAL/CATV, then select NORM.
To preset CATV channels, select CATV.
TUNER PRESET |
|
PROG10 |
||
COUNTRY |
|
• AUS |
NZ |
|
NORMAL / CATV |
• NORM |
CATV |
||
AUTO PRESET |
|
|
||
CHANNEL SET |
21 |
|
||
ADD / ERASE |
|
• ADD |
ERASE |
|
AFT |
|
|
• ON |
OFF |
FINE TUNING |
|
|
|
|
SELECT |
: [ |
] |
|
|
SET |
: [ |
] |
|
|
|
|
|
|
|
4 |
Press M/m to move the cursor (B) to |
|
CHANNEL SET. |
|
PLAY |
OK
TUNER PRESET |
|
PROG10 |
COUNTRY |
• AUS |
NZ |
NORMAL / CATV |
• NORM |
CATV |
AUTO PRESET |
|
|
CHANNEL SET |
21 |
|
ADD / ERASE |
• ADD |
ERASE |
AFT |
• ON |
OFF |
FINE TUNING |
|
|
SELECT |
|
|
SET |
|
|
|
|
|
20 Getting Started
5 • PROG |
Press PROG +/– to select the programme |
Selected programme |
||||||
|
|
|
position. |
position |
|
|
||
|
|
|
|
TUNER PRESET |
|
PROG14 |
||
|
|
|
|
COUNTRY |
|
• AUS |
NZ |
|
|
|
|
|
|
||||
|
|
|
|
NORMAL / CATV |
• NORM CATV |
|||
|
|
|
|
AUTO PRESET |
|
|
||
|
|
|
|
CHANNEL SET |
21 |
|
||
|
|
|
|
ADD / ERASE |
|
• ADD |
ERASE |
|
|
|
|
|
AFT |
|
|
• ON |
OFF |
|
|
|
|
FINE TUNING |
|
|
|
|
|
|
|
|
SELECT |
: [ |
] |
|
|
|
|
|
|
SET |
: [ |
] |
|
|
6
PLAY
OK
Press / repeatedly until the channel you want is displayed. Pressing ? goes back to the previous channels.
The channels are scanned in the following order:
TUNER PRESET |
|
PROG14 |
||
COUNTRY |
|
• AUS |
NZ |
|
NORMAL / CATV |
• NORM |
CATV |
||
AUTO PRESET |
|
|
||
CHANNEL SET |
35 |
|
||
ADD / ERASE |
|
• ADD |
ERASE |
|
AFT |
|
|
• ON |
OFF |
FINE TUNING |
|
|
|
|
SELECT |
: [ |
] |
|
|
SET |
: [ |
] |
|
|
Channel coverage |
COUNTRY is set to AUS |
COUNTRY is set to NZ |
|
|
|
VHF |
AS0 to AS12, AS5A, AS9A |
NZ1 to NZ11 |
|
|
|
UHF |
AS28 to AS69 |
E21 to E69 |
|
|
|
CATV |
S1 to S41, S01 to S05 |
S1 to S41, S01 to S05 |
(TV distribution) |
|
|
If you know the number of the channel you want, press the programme number buttons. For example, for channel 5, first press “0” and then press “5”. To set channel 5A or 9A, press / after pressing “0” and “5” or “0” and “9” (When COUNTRY is set to AUS).
7 |
To allocate another channel to another programme position, repeat |
|
steps 5 and 6. |
8 |
Press OK. |
|
PLAY |
|
OK |
continued
Getting Started
Started Getting
21
 Loading...