


Player Disc Compact FM/MW/LW
3-227-675-21 (2)
FM/MW/LW
Compact Disc
Player
Operating Instructions |
|
GB |
||||
|
|
|
|
|||
Manual de instrucciones |
|
|
ES |
|||
|
|
|
|
|
|
|
Bruksanvisning |
|
|
|
|
|
SE |
|
|
|
|
|
||
Manual de instruções |
|
|
|
|
PT |
|
|
|
|
|
|||
Oδηγίες Λειτυργίας |
|
|
|
GR |
||
|
|
|
||||
Инструкция по эксплуатации |
|
RU |
||||
For installation and connections, see the supplied installation/connections manual.
Para obtener información sobre la instalación y las conexiones, consulte el manual de instalación/conexiones suministrado.
Vi hänvisar till det medföljande häftet angående montering/anslutningar.
Para a instalação e as ligações, consulte o manual de instalação/ligações fornecido.
Για την εγκατάσταση και τις συνδέσεις, δείτε τ συνδευτικ εγειρίδι Εγκατάσταση/ Συνδέσεις.
Перед установкой и подсоединениями прочитайте прилагаемую инструкцию по установке и подсоединению.
CDX-CA650X CDX-CA650V
CDX-CA650
© 2001 Sony Corporation

Welcome!
Thank you for purchasing this Sony Compact Disc Player. You can enjoy its various features even more with:
•Optional CD/MD units (both changers and players)*1.
•CD TEXT information (displayed when a CD TEXT disc*2 is played on a connected optional CD unit with the CD TEXT function).
•Optional controller accessories
Rotary commander RM-X4S
Card remote commander RM-X114
*1 This unit works with Sony products only.
*2 A CD TEXT disc is an audio CD that includes information such as the disc name, artist name, and track names. This information is recorded on the disc.
This label is located on the bottom of the chassis.
CAUTION INVISIBLE LASER RADIATION WHEN OPEN DO NOT STARE INTO BEAM OR
VIEW DIRECTLY WITH OPTICAL INSTRUMENTS
This label is located on the drive unit’s internal chassis.
2

Table of Contents
Location of controls. . . . . . . . . . . . . . . . . . . . 4 Precautions . . . . . . . . . . . . . . . . . . . . . . . . . . 6 Notes on discs . . . . . . . . . . . . . . . . . . . . . . . . 6
Getting Started
Resetting the unit . . . . . . . . . . . . . . . . . . . . . . 7 Detaching the front panel . . . . . . . . . . . . . . . 8 Setting the clock . . . . . . . . . . . . . . . . . . . . . . 9
CD Player
CD/MD Unit (optional)
Playing a disc. . . . . . . . . . . . . . . . . . . . . . . . . 9 Display items . . . . . . . . . . . . . . . . . . . . . . . . 10 Playing tracks repeatedly
— Repeat Play . . . . . . . . . . . . . . . . . . . . 11 Playing tracks in random order
— Shuffle Play . . . . . . . . . . . . . . . . . . . . 11 Labelling a CD
— Disc Memo*. . . . . . . . . . . . . . . . . . . . 11 Locating a disc by name
— List-up* . . . . . . . . . . . . . . . . . . . . . . . 12 Selecting specific tracks for playback
— Bank* . . . . . . . . . . . . . . . . . . . . . . . . . 13
* Functions available with optional CD/MD unit
Radio
Storing stations automatically
— Best Tuning Memory (BTM). . . . . . . 14 Receiving the stored stations . . . . . . . . . . . . 14 Storing only the desired stations . . . . . . . . . 15 Tuning in a station through a list
— List-up . . . . . . . . . . . . . . . . . . . . . . . . 15
RDS
Overview of RDS . . . . . . . . . . . . . . . . . . . . 16 Automatic retuning for best reception results
— AF function . . . . . . . . . . . . . . . . . . . . 16 Receiving traffic announcements
— TA/TP . . . . . . . . . . . . . . . . . . . . . . . . 17 Presetting RDS stations with AF and TA
setting . . . . . . . . . . . . . . . . . . . . . . . . . . . 18 Tuning in stations by programme type
— PTY . . . . . . . . . . . . . . . . . . . . . . . . . . 18 Setting the clock automatically
— CT . . . . . . . . . . . . . . . . . . . . . . . . . . . 19
Other Functions
Using the rotary commander. . . . . . . . . . . . 20 Adjusting the sound characteristics . . . . . . 21 Quickly attenuating the sound . . . . . . . . . . 21 Changing the sound and display settings
— Menu . . . . . . . . . . . . . . . . . . . . . . . . . 22 Selecting the sound position
— My Best sound Position (MBP) . . . . 23 Setting the equalizer . . . . . . . . . . . . . . . . . . 23
Additional Information
Maintenance . . . . . . . . . . . . . . . . . . . . . . . . 24 Removing the unit. . . . . . . . . . . . . . . . . . . . 25 Specifications . . . . . . . . . . . . . . . . . . . . . . . 26 Troubleshooting . . . . . . . . . . . . . . . . . . . . . 27 Error displays/Messages . . . . . . . . . . . . . . . 28
3

Location of controls
Refer to the pages listed for details.
CD/MD : During Playback RADIO : During radio reception MENU : During menu mode
1
 MBP
MBP
EQ 7
4
2 |
3 |
|
REP |
|
SOURCE |
|
MODE |
|
SHUF |
5 |
6 |
|
PTY |
|
S |
|
|
|
D |
|
|
OPEN |
||
DISPLAY |
SCROLL |
|
|||
|
R |
|
|
|
|
|
|
|
|
|
|
|
/P E |
|
|
||
|
ISC |
|
SE |
|
|
|
D |
|
|
T |
|
MENU |
|
|
|
|
LIST |
SEEK |
|
|
|
|
SEEK |
SOUND |
|
|
|
|
ENTER |
AF |
TA |
OFF |
|
|
CDX-CA650X/CA650V/CA650
a Volume control dial 17 b MBP button 23
cZ(eject) button (located on the front side of the unit, behind the front panel) 9
dSOURCE (Power on/Radio/CD/MD) button 8, 9, 10, 12, 14, 15, 17, 23
e Display window
fReceptor for the card remote commander
g MENU button 9, 11, 12, 13, 14, 18, 19, 22, 23, 24
hDISPLAY/PTY (display mode change/ programme type) button 10, 12, 16, 19
i S (SCROLL) button 10 j OPEN button 8, 9
kLIST button
CD/MD 12
RADIO 15
l EQ7 button 23
mRESET button (located on the front side of the unit, behind the front panel) 7
n Number buttons
CD/MD
(3) REP 11
(6) SHUF 11
RADIO 14, 15, 17, 18
oMODE button
CD/MD 10, 12
RADIO 14, 15, 17
p SOUND button 21, 23 q AF button 16, 18
r TA button 17, 18
s OFF (Stop/Power off) button* 8, 9 t ENTER button
CD/MD 12
RADIO 15, 19
MENU 9, 11, 12, 13, 14, 18, 19, 22, 23, 24
*Warning when installing in a car without an ACC (accessory) position on the ignition switch
After turning off the ignition, be sure to press (OFF) on the unit for 2 seconds to turn off the clock display.
Otherwise, the clock display does not turn off and this causes battery drain.
4

PTY |
|
|
S |
|
|
||
D |
|
|
OPEN |
||||
DISPLAY |
SCROLL |
||||||
|
|||||||
|
R |
|
|
|
|||
|
|
|
|
|
|
||
|
|
/P E |
|
|
|||
|
|
ISC |
|
SE |
|
||
|
D |
|
|
T |
|
||
MENU |
|
|
|
|
|
LIST |
|
SEEK |
|
|
|
|
|
SEEK |
|
SOUND |
|
|
|
|
|
ENTER |
|
AF |
TA |
|
OFF |
|
|||
|
|
|
|
||||
|
(DISC/PRESET) |
|
(+): to select upwards |
(SEEK) |
(SEEK) |
(–): to select |
(+): to select |
leftwards/ |
rightwards/ |
.
 >
>
(DISC/PRESET)
(–): to select downwards
In menu mode, the currently selectable button (s) of these four are indicated with a “ M” in the display.
uDISC/PRESET buttons (+/–)
CD/MD 10, 12
RADIO 14, 15, 19
MENU 9, 11, 12, 13, 14, 18, 19, 22, 23,
24
v SEEK buttons (–/+)
CD/MD |
9 |
RADIO |
14, 15, 16 |
MENU |
9, 11, 13, 19, 21, 22, 23 |
Card remote commander RM-X114 (optional)
DSPL |
|
MODE |
|
PRESET + |
|
MENU |
DISC + |
LIST |
SEEK– |
SOURCE |
SEEK+ |
|
||
SOUND |
DISC – |
ENTE |
|
|
R |
|
PRESET – |
|
OFF |
+ |
ATT |
|
VOL |
|
|
– |
|
The corresponding buttons of the card remote commander control the same functions as those on this unit.
a DSPL button b MENU button c SOURCE button
d SEEK (</,) buttons e SOUND button
f OFF button
g VOL (–/+) buttons h MODE button
i LIST button
j DISC/PRESET(M/m) buttons k ENTER button
l ATT button
Note
If the unit is turned off by pressing (OFF) for 2 seconds, it cannot be operated with the card remote commander unless (SOURCE) on the unit is pressed, or a disc is inserted to activate the unit first.
Tip
Refer to “Replacing the lithium battery” for details on how to replace the batteries (page 25).
5

Precautions
•If your car was parked in direct sunlight, allow the unit to cool off before operating it.
•Power aerials will extend automatically while the unit is operating.
If you have any questions or problems concerning your unit that are not covered in this manual, please consult your nearest Sony dealer.
Moisture condensation
On a rainy day or in a very damp area, moisture condensation may occur inside the lenses and display of the unit. Should this occur, the unit will not operate properly. In such a case, remove the disc and wait for about an hour until the moisture has evaporated.
To maintain high sound quality
Be careful not to splash juice or other soft drinks onto the unit or discs.
Notes on discs
•To keep the disc clean, do not touch the surface. Handle the disc by its edge.
•Keep your discs in their cases or disc magazines when not in use.
Do not subject the discs to heat/high temperature. Avoid leaving them in parked cars or on dashboards/rear trays.
•Do not attach labels, or use discs with sticky ink/residue. Such discs may stop spinning when used, causing a malfunction, or may ruin the disc.
•Discs with non-standard shapes (e.g., heart, square, star) cannot be played on this unit. Attempting to do so may damage the unit. Do not use such discs.
•You cannot play 8cm CDs.
•Before playing, clean the discs with a commercially available cleaning cloth. Wipe each disc from the centre out. Do not use solvents such as benzine, thinner, commercially available cleaners, or antistatic spray intended for analog discs.
6
Notes on CD-R discs
•You can play CD-Rs (recordable CDs) designed for audio use on this unit.
Look for this mark to distinguish CD-Rs for audio use.
This mark denotes that a disc is not for audio use.
•Some CD-Rs (depending on the equipment used for its recording or the condition of the disc) may not play on this unit.
•You cannot play a CD-R that is not finalized*.
* A process necessary for a recorded CD-R disc to be played on the audio CD player.
Getting Started
Resetting the unit
Before operating the unit for the first time or after replacing the car battery, you must reset the unit.
Remove the front panel and press the RESET button with a pointed object, such as a ballpoint pen.
RESET button
Note
Pressing the RESET button will erase the clock setting and some stored contents.
7
Detaching the front panel
You can detach the front panel of this unit to protect the unit from being stolen.
Caution alarm
If you turn the ignition switch to the OFF position without removing the front panel, the caution alarm will beep for a few seconds.
If you connect an optional amplifier and do not use the built-in amplifier, the beep sound will be deactivated.
1 Press (OFF)*.
CD/MD playback or radio reception stops (the key illumination and display remain on).
*If your car has no ACC position on the ignition switch, be sure to turn the unit off by pressing (OFF) for 2 seconds to avoid car battery drain.
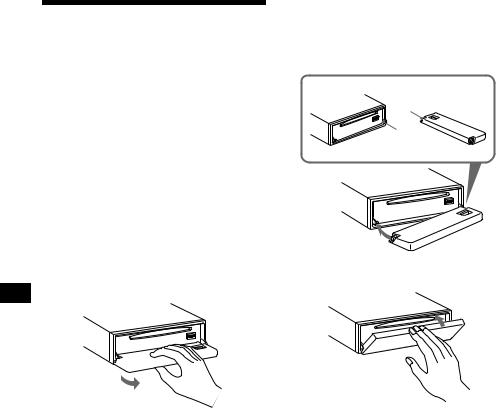
2 Press (OPEN), then slide the front panel to the right, and gently pull out the left end of the front panel.
1

2
Notes
•If you detach the panel while the unit is still turned on, the power will turn off automatically to prevent the speakers from being damaged.
•Do not drop or put excessive pressure on the front panel and its display window.
•Do not subject the front panel to heat/high temperature or moisture. Avoid leaving it in parked cars or on dashboards/rear trays.
Tip
When carrying the front panel with you, use the supplied front panel case.
Attaching the front panel
Place hole A of the front panel onto the spindle B on the unit, then lightly push the left side in. Press (SOURCE) (or insert a CD) to operate the unit.
A
B
x
Note
Do not put anything on the inner surface of the front panel.
8
Setting the clock
The clock uses a 24-hour digital indication.
Example: To set the clock to 10:08
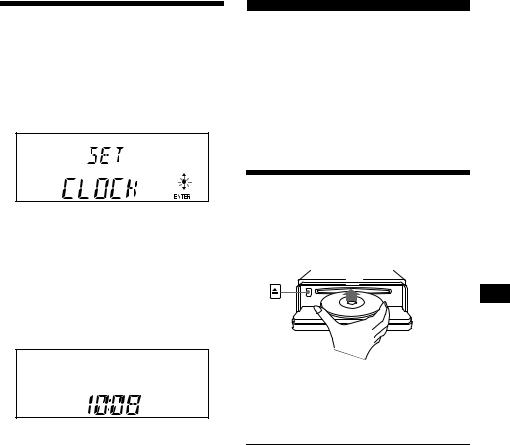
1 Press (MENU), then press either side of (DISC/PRESET) repeatedly until
“CLOCK” appears.
1Press (ENTER).
The hour indication flashes.
2Press either side of (DISC/PRESET) to set the hour.
3Press the (+) side of (SEEK).
The minute indication flashes.
4Press either side of (DISC/PRESET) to set the minute.
2 Press (ENTER).
The clock starts. After the clock setting is completed, the display returns to normal play mode.
Tips
•You can set the clock automatically with the RDS feature (page 19).
•When D.INFO mode is set to ON, the time is always displayed (page 22).
CD Player
CD/MD Unit (optional)
In addition to playing a CD with this unit, you can also control external CD/MD units.
Note
If you connect an optional CD unit with the CD TEXT function, the CD TEXT information will appear in the display when you play a CD TEXT disc.
Playing a disc
(With this unit)
1 Press (OPEN) and insert the disc
(labelled side up).
2 Close the front panel.
Playback starts automatically.
If a disc is already inserted, press (SOURCE) repeatedly until “CD” appears to start playback.
To |
Press |
Stop playback |
(OFF) |
|
|
Eject the disc |
(OPEN) then Z |
|
|
Skip tracks |
(SEEK) (./>) |
– Automatic |
[once for each track] |
Music Sensor |
|
|
|
Fast-forward/ |
(SEEK) (m/M) |
reverse |
[hold to desired point] |
– Manual Search |
|
|
|
Notes
•When the last track on the disc is over, playback restarts from the first track of the disc.
•With optional unit connected, playback of the same source will continue on to the optional CD/MD unit.
continue to next page t
9
(With optional unit)
1 Press (SOURCE) repeatedly to select
“CD” or “MD.”
2 Press (MODE) repeatedly until the desired unit appears.
Playback starts.
|
|
To |
Press |
|
|
Skip discs |
(DISC/PRESET) (+/–) |
|
|
– Disc selection |
|
|
|
|
|
|
|
|
|
|
|
|
|
Display items
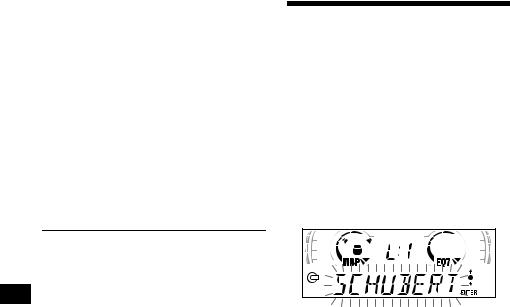
When the disc/track changes, any prerecorded title*1 of the new disc/track is automatically displayed (if the Auto Scroll function is set to “ON,” names exceeding 8 characters will be scrolled (page 22)).
Displayable items
•Music source
•Clock
•Function
Displayable items
•Elapsed playback time
•Disc name*1/artist name*2
•Track title*1
To |
Press |
Switch display |
(DISPLAY/PTY) |
item |
|
Scroll display item (S) (SCROLL)
*1 “NO NAME” indicates there is no Disc Memo (page 11) or prerecorded name to display.
*2 Only for CD TEXT discs with the artist name.
Notes
•Some characters cannot be displayed.
•For some CD TEXT discs with very many characters, information may not scroll.
•This unit cannot display the artist name for each track of a CD TEXT disc.
Tip
When Auto scroll is set to OFF and the disc/track name is changed, the disc/track name does not scroll.
10
Playing tracks repeatedly
— Repeat Play
The disc in the main unit will repeat a track or the entire disc when it reaches the end. For repeat play, you can select:
•REP-1 — to repeat a track.
•REP-2* — to repeat a disc.
*Available only when one or more optional CD/MD units are connected.
During playback, press (3) (REP) repeatedly until the desired setting appears in the display.
Repeat Play starts.
To return to normal play mode, select “REPOFF.”
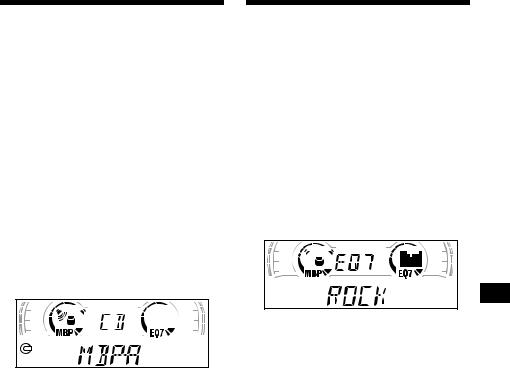
Labelling a CD
— Disc Memo (For a CD unit with the CUSTOM FILE function)
You can label each disc with a custom name (Disc Memo). You can enter up to 8 characters for a disc. If you label a CD, you can locate the disc by name (page 12).
1 Start playing the disc you want to label.
2 Press (MENU), then press either side of (DISC/PRESET) repeatedly until
“NAMEEDIT” appears.
3 Press (ENTER).
Playing tracks in random order
— Shuffle Play
You can select:
•SHUF-1 — to play the tracks on the current disc in random order.
•SHUF-2*1 — to play the tracks in the current optional CD (MD) unit in random order.
•SHUF-ALL*2 — to play all the tracks in all the connected CD (MD) units (including this unit) in random order.
The unit will repeat the disc during the labelling procedure.
4 Enter the characters.
1Press the (+)*1 side of (DISC/PRESET) repeatedly to select the desired character.
A t B t C ... t 0 t 1 t 2 ... t + t – t * ... t _*2 t A
*1 Available only when one or more optional CD (MD) units are connected.
*2 Available only when one or more optional CD units, or two or more optional MD units are connected.
During playback, press (6) (SHUF) repeatedly until the desired setting appears in the display.
Shuffle Play starts.
To return to normal play mode, select “SHUFOFF.”
Note
“SHUF-ALL” will not shuffle tracks between a CD player and an MD player.
*1 For reverse order, press the (–) side of
(DISC/PRESET).
*2 (blank space)
2Press the (+) side of (SEEK) after locating the desired character.
If you press the (–) side of (SEEK), you can move back to the left.
3Repeat steps 1 and 2 to enter the entire name.
5 To return to normal CD play mode, press (ENTER).
continue to next page t
11
Tips
•Simply overwrite or enter “_” to correct or erase a name.
•There is another way to start labelling a CD: Press (LIST) for 2 seconds instead of performing steps 2 and 3. You can also complete the operation by pressing (LIST) for 2 seconds instead of step 5.
•You can label CDs on a unit without the CUSTOM FILE function if that unit is connected along with a CD unit that has the function. The Disc Memo will be stored in the memory of the CD unit with the CUSTOM FILE function.
Note
REP-1/shuffle play is suspended until the Name Edit is complete.
Viewing the Disc Memo
As a display item, the Disc Memo always takes priority over any original CD TEXT information.
To |
Press |
View |
(DISPLAY/PTY) during CD/ |
|
CD TEXT disc playback |
|
|
Tip
To find out about other items that can be displayed, see page 10.
Erasing the Disc Memo
1 Press (SOURCE) repeatedly to select
“CD.”
2 Press (MODE) repeatedly to select the
CD unit storing the Disc Memo.
3 Press (MENU), then press either side of (DISC/PRESET) repeatedly until
“NAME DEL” appears.
4 Press (ENTER).
The stored names will appear in order from the earliest entered.
5 Press either side of (DISC/PRESET) repeatedly to select the disc name you want to erase.
The stored names will appear from the earliest ones entered.
6 Press (ENTER) for 2 seconds.
The name is erased.
Repeat steps 5 and 6 if you want to erase other names.
7 Press (MENU) twice.
The unit returns to normal CD play mode.
Notes
•When the Disc Memo for a CD TEXT disc is erased, the original CD TEXT information is displayed.
•If you cannot find the Disc Memo you want to erase, try selecting a different CD unit in step 2.
Locating a disc by name
— List-up (For a CD unit with the CD TEXT/ CUSTOM FILE function, or an MD unit)
You can use this function for discs that have been assigned custom names*1 or for CD TEXT discs*2.
*1 Locating a disc by its custom name: when you assign a name for a CD (page 12) or an MD.
*2 Locating discs by the CD TEXT information: when you play a CD TEXT disc on a CD unit with the CD TEXT function.
1 Press (LIST).
The name assigned to the current disc appears in the display.
2 Press either side of (DISC/PRESET) repeatedly until you find the desired disc.
3 Press (ENTER) to play the disc.
Note
Some letters cannot be displayed (exception: Disc Memo).
12

Selecting specific tracks for playback
— Bank (For a CD unit with the CUSTOM FILE function)
If you label the disc, you can set the unit to skip or play the tracks of your choice.
1 Start playing the disc you want to label.
2 Press (MENU), then press either side of (DISC/PRESET) repeatedly until
“BANK SEL” appears.
3 Press (ENTER).
4 Label the tracks.
1Press either side of (SEEK) repeatedly to select the track you want to label.
2Press (ENTER) repeatedly to select
“PLAY” or “SKIP.”
5 Repeat step 4 to set “PLAY” or “SKIP” for all the tracks.
6 Press (MENU) twice.
The unit returns to normal CD play mode.
Notes
•You can set “PLAY” and “SKIP” for up to 24 tracks.
•You cannot set “SKIP” for all the tracks on a CD.
Playing specific tracks only
You can select:
•“BANK-ON” — to play the tracks with the “PLAY” setting.
•“BANK-INV” (Inverse) — to play the tracks with the “SKIP” setting.
1 During playback, press (MENU), then press either side of (DISC/PRESET) repeatedly until “BANK-ON,” “BANKINV,” or “BANK-OFF” appears.
2 Press the (+) side of (SEEK) repeatedly until the desired setting appears.
3 Press (ENTER).
Playback starts from the track following the current one.
To return to normal play mode, select “BANKOFF” in step 2.
13

Radio
The unit can store up to 6 stations per band (FM1, FM2, FM3, MW, and LW).
Caution
When tuning in stations while driving, use Best Tuning Memory to prevent accidents.
Storing stations automatically
— Best Tuning Memory (BTM)
The unit selects the stations with the strongest signals within the selected band, and stores them in the order of their frequency.
1 Press (SOURCE) repeatedly to select the radio.
2 Press (MODE) repeatedly to select the band.
3 Press (MENU), then press either side of (DISC/PRESET) repeatedly until
“BTM” appears.
4 Press (ENTER).
A beep sounds when the setting is stored.
Notes
•If only a few stations can be received due to weak signals, some number buttons will retain their former settings.
•When a number is indicated in the display, the unit starts storing stations from the one currently displayed.
Receiving the stored stations
1 Press (SOURCE) repeatedly to select the radio.
2 Press (MODE) repeatedly to select the band.
3 Press the number button ((1) to (6)) on which the desired station is stored.
Tip
Press either side of (DISC/PRESET) to receive the stations in the order they are stored in the memory (Preset Search function).
If preset tuning does not work
Press either side of (SEEK) to search for the station (automatic tuning).
Scanning stops when the unit receives a station. Repeat until the desired station is received.
Tips
•If automatic tuning stops too frequently, turn on the Local Seek to limit seek to stations with stronger signals (page 22).
•If you know the frequency of the station you want to listen to, press and hold either side of (SEEK) to locate the approximate frequency, then press (SEEK) repeatedly to fine adjust to the desired frequency (manual tuning).
If FM stereo reception is poor
Select monaural reception mode (page 22).
The sound improves, but becomes monaural (“ST” disappears).
14

Storing only the desired stations
You can manually preset the desired stations on any chosen number button.
1 Press (SOURCE) repeatedly to select the radio.
2 Press (MODE) repeatedly to select the band.
3 Press either side of (SEEK) to tune in the station that you want to store.
4 Press the desired number button ((1) to (6)) for 2 seconds until “MEM” appears.
The number button indication appears in the display.
Note
If you try to store another station on the same number button, the previously stored station will be erased.
Tuning in a station through a list
— List-up
1 During radio reception, press (LIST) momentarily.
The frequency or the name assigned to the station currently tuned in flashes.
2 Press either side of (DISC/PRESET) repeatedly until you find the desired station.
If no name is assigned to the selected station, the frequency appears in the display.
3 Press (ENTER) to tune in the desired station.
15
RDS
Overview of RDS
FM stations with Radio Data System (RDS) service send inaudible digital information along with the regular radio programme signal. For example, one of the following will be displayed upon receiving a station with RDS capability.
Displayable items
•Music source
•Clock
•Function
Displayable items
•Station name (frequency)
•Programme type
To |
Press |
Switch display |
(DISPLAY/PTY) |
item |
|
|
|
RDS services
RDS data offers you other conveniences, such as:
•Automatic retuning of a programme, helpful during long-distance drives. — AF t page 16
•Receiving traffic announcements, even when enjoying another programme/source. — TA t page 17
•Selecting stations by the type of programme it broadcasts. — PTY t page 18
•Automatic clock time setting. — CT t page 19
Notes
•Depending on the country or region, not all of the RDS functions are available.
•RDS may not work properly if the signal strength is weak or if the station you are tuned to is not transmitting RDS data.
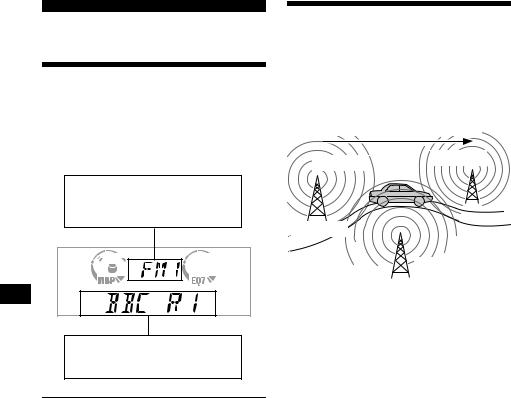
Automatic retuning for best reception results
— AF function
The alternative frequencies (AF) function allows the radio to always tune into the area’s strongest signal for the station you are listening to.
Frequencies change automatically.
96.0 MHz
98.5 MHz
Station
102.5 MHz
1 Select an FM station (page 14).
2 Press (AF) repeatedly until “AF-ON” appears.
The unit starts searching for an alternative frequency with a stronger signal in the same network.
If “NO AF” flashes, the currently tuned into station does not have an alternative frequency.
Note
When there is no alternative frequency in the area or when you do not need to search for one, turn the AF function off by selecting “AF-OFF.”
For stations without alternative frequencies
Press either side of (SEEK) while the station name is flashing (within 8 seconds).
The unit starts searching for another frequency with the same PI (Programme Identification) data (“PI SEEK” appears). If the unit cannot find the same PI, the unit returns to the previously selected frequency.
Staying with one regional programme
When AF function is on: this unit’s factory-set setting restricts reception to a specific region, so you won’t be switched to another regional station with a stronger frequency.
If you leave this regional programme’s reception area or would like to take advantage of the whole AF function, select “REG-OFF” from the MENU (page 22).
16

Note
This function does not work in the United Kingdom and in some other areas.
Local Link function (United Kingdom only)
This function enables you to select other local stations in the area, even if they are not stored on your number buttons.
1 Press a number button ((1) to (6)) that has a local station stored on it.
2 Within 5 seconds, press the number button of the local station again.
3 Repeat this procedure until the desired local station is received.
Receiving traffic announcements
— TA/TP
By activating the Traffic Announcement (TA) and Traffic Programme (TP), you can automatically tune in an FM station broadcasting traffic announcements. These settings function regardless of the current FM programme/source, CD/MD; the unit switches back to the original source when the bulletin is over.
Press (TA) repeatedly until “TA-ON” appears.
The unit starts searching for traffic information stations.
“TP” indicates reception of such stations, and “TA” flashes during an actual traffic announcement. The unit will continue searching for stations available with TP if “NO TP” is indicated.
To cancel all traffic announcements, select “TAOFF.”
To |
Press |
Cancel current |
(TA) |
announcement |
|
|
|
Tip
You can also cancel the current announcement by pressing (SOURCE) or (MODE).
Presetting the volume of traffic announcements
You can preset the volume level of the traffic announcements so you won’t miss hearing them.
1 Turn the volume control dial to adjust the desired volume level.
2 Press (TA) for 2 seconds.
“TA” appears and the setting is stored.
Receiving emergency announcements
If either AF or TA is on, the unit will switch to emergency announcements, if one comes in while listening to an FM station or CD/MD.
17

Presetting RDS stations with AF and TA setting
When you preset RDS stations, the unit stores each station’s AF/TA setting (on/off) as well as its frequency. You can select a different setting (for AF, TA, or both) for individual preset stations, or the same setting for all preset stations. If you preset stations with “AF-ON” the unit automatically stores stations with the strongest radio signal.
Presetting the same setting for all preset stations
1 Select an FM band (page 14).
2 Press (AF) and/or (TA) to select “AF-
ON” and/or “TA-ON.”
Note that selecting “AF-OFF” or “TA-OFF” stores not only RDS stations, but also nonRDS stations.
3 Press (MENU), then press either side of (DISC/PRESET) repeatedly until
“BTM” appears.
4 Press (ENTER) until “BTM” flashes.
Presetting different settings for each preset station
1 Select an FM band, and tune in the desired station (page 15).
2 Press (AF) and/or (TA) to select “AF-
ON” and/or “TA-ON.”
3 Press the desired number button ((1) to (6)) until “MEM” appears.
Repeat from step 1 to preset other stations.
Tuning in stations by programme type
— PTY
You can tune in a station by selecting the type of programme you would like to listen to.
Programme types |
Display |
News |
NEWS |
|
|
Current Affairs |
AFFAIRS |
|
|
Information |
INFO |
|
|
Sports |
SPORT |
|
|
Education |
EDUCATE |
|
|
Drama |
DRAMA |
|
|
Culture |
CULTURE |
|
|
Science |
SCIENCE |
|
|
Varied |
VARIED |
|
|
Popular Music |
POP M |
|
|
Rock Music |
ROCK M |
|
|
Easy Listening |
EASY M |
|
|
Light Classical |
LIGHT M |
|
|
Classical |
CLASSICS |
|
|
Other Music Type |
OTHER M |
|
|
Weather |
WEATHER |
|
|
Finance |
FINANCE |
|
|
Children’s Programmes |
CHILDREN |
|
|
Social Affairs |
SOCIAL A |
|
|
Religion |
RELIGION |
|
|
Phone In |
PHONE IN |
|
|
Travel |
TRAVEL |
|
|
Leisure |
LEISURE |
|
|
Jazz Music |
JAZZ |
|
|
Country Music |
COUNTRY |
|
|
National Music |
NATION M |
|
|
Oldies Music |
OLDIES |
|
|
Folk Music |
FOLK M |
|
|
Documentary |
DOCUMENT |
|
|
Note
You cannot use this function in some countries where no PTY (Programme Type selection) data is available.
18
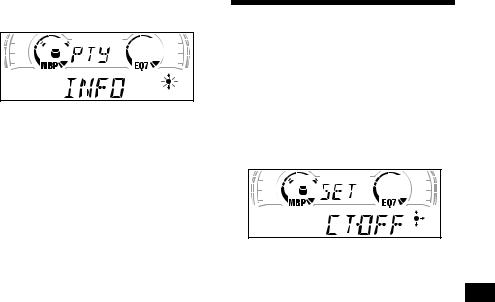
1 Press (DISPLAY/PTY) during FM reception until “PTY” appears.
The current programme type name appears if the station is transmitting the PTY data. “--------” appears if the received station is not an RDS station, or if the RDS data is not received.
2 Press (DISC/PRESET) repeatedly until the desired programme type appears.
The programme types appear in the order shown in the table.
“--------” appears if the programme type is not specified in the RDS data.
3 Press (ENTER).
The unit starts searching for a station broadcasting the selected programme type.
Setting the clock automatically
— CT
The CT (Clock Time) data from the RDS transmission sets the clock automatically.
1 During radio reception, press (MENU), then press either side of (DISC/ PRESET) repeatedly until “CT-OFF” appears.
2 Press the (+) side of (SEEK) repeatedly until “CT-ON” appears.
The clock is set.
3 Press (ENTER) to return to the normal display.
To cancel the CT function, select “CT-OFF” in step 2.
Notes
•The CT function may not work even though an RDS station is being received.
•There might be a difference between the time set by the CT function and the actual time.
19
Other Functions
You can also control the unit (and optional CD/ MD units) with a rotary commander (optional).
*1 Only if the corresponding optional equipment is connected.
*2 If your car has no ACC (accessory) position on the ignition key switch, be sure to press (OFF) for 2 seconds to turn off the clock indication after turning off the ignition.
By rotating the control
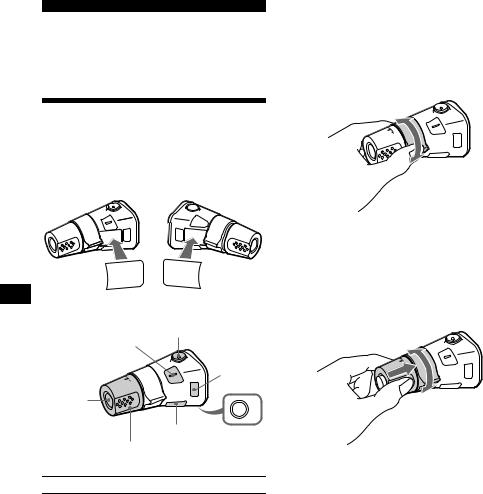
Using the rotary commander |
|
|
First, attach the appropriate label depending on |
|
|
how you want to mount the rotary commander. |
|
|
The rotary commander works by pressing |
SEEK/AMS |
|
buttons and/or rotating controls. |
||
control |
SOUND |
DSPL |
MODE |
MODE |
DSPL |
SOUND |
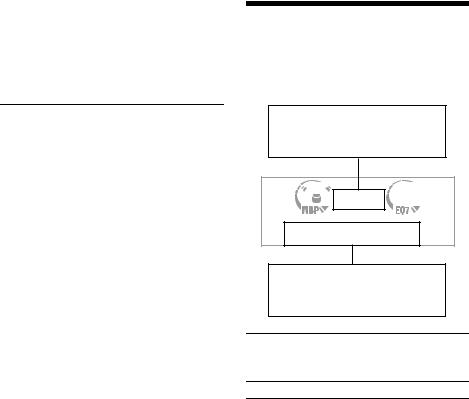
By pressing buttons
|
(ATT) |
|
|
(SOUND) |
|
|
|
(MODE) |
(SOURCE) |
OFF |
|
|
|
|
|
(DSPL) |
(OFF) |
|
|
|
|
Rotate the VOL control |
|
|
to adjust the volume. |
|
Press |
To |
|
(SOURCE) |
Change source |
|
(radio/CD/MD*1) |
||
|
||
|
Change operation |
|
(MODE) |
(radio band/CD unit/ MD*1 |
|
|
unit) |
|
|
|
|
(ATT) |
Attenuate sound |
|
|
|
|
(OFF)*2 |
Stop playback or radio |
|
reception |
||
|
||
|
|
|
(SOUND) |
Adjust the sound menu |
|
|
|
|
(DSPL) |
Change the display item |
|
|
|
Rotate and release to:
–Skip tracks.
–Tune in stations automatically.
Rotate, hold, and release to:
–Fast-forward/reverse a track.
–find a station manually.
By pushing in and rotating the control
PRESET/
DISC control
Push in and rotate the control to:
–Receive preset stations.
–Change the disc*.
* When an optional CD/MD unit is connected.
20
Changing the operative direction
The operative direction of controls is factory-set as shown below.
To increase
To decrease
If you need to mount the rotary commander on the right hand side of the steering column, you can reverse the operative direction.
Press (SOUND) for 2 seconds while pushing the VOL control.
Tip
You can also change the operative direction of these controls with the unit (page 22).
Adjusting the sound characteristics
You can adjust the bass, treble, balance, and fader.
The bass and treble levels can be stored independently for each source.
1 Select the item you want to adjust by pressing (SOUND) repeatedly.
Each time you press (SOUND), the item changes as follows:
BAS (bass) t TRE (treble) t BAL (leftright) t FAD (front-rear)
2 Adjust the selected item by pressing either side of (SEEK).
When adjusting with the rotary commander, press (SOUND) and rotate the VOL control.
Note
Adjust within 3 seconds after selecting the item.
Quickly attenuating the sound
(With the rotary commander or the card remote commander)
Press (ATT) on the rotary commander or card remote commander.
After “ATT-ON” momentarily appears, the “ATT” appears in the display.
To restore the previous volume level, press (ATT) again.
Tip
When the interface cable of a car telephone is connected to the ATT lead, the unit decreases the volume automatically when a telephone call comes in (Telephone ATT function).
21

Changing the sound and display settings
— Menu
The following items can be set:
SET (Set Up)
•CLOCK (page 9)
•CT (Clock Time) (page 19)
•BEEP — to turn the beeps on or off.
•RM (Rotary Commander) — to change the operative direction of the controls of the rotary commander.
–Select “NORM” to use the rotary commander as the factory-set position.
–Select “REV” when you mount the rotary commander on the right side of the steering column.
DSPL (Display)
•D.INFO (Dual Information) — to display the clock and the play mode at the same time (on).
•AMBER/GREEN — to change the illumination colour to amber or green (CDXCA650 only).
•DIM (Dimmer) — to change the brightness of the display (CDX-CA650V only).
–Select “ON” to dim the display.
–Select “OFF” to deactivate the Dimmer.
•M.DSPL (Motion Display) — to select the Motion Display mode from “1,” “2,” and “OFF.”
–Select “1” to show decoration lines in the display and activate Demo display.
–Select “2” to show decoration lines in the display and deactivate Demo display.
–Select “OFF” to deactivate the Motion Display.
•A.SCRL (Auto Scroll)
–Select “ON” to scroll all automatically displayed names exceeding 8 characters.
–When Auto scroll is set to off and the disc/ track name is changed, the disc/track name does not scroll.
SND (Sound)
•LOUD (Loudness) — to enjoy bass and treble even at low volumes. The bass and treble will be reinforced.
P/M (Play Mode)
•LOCAL-ON/OFF (Local seek mode) (page 14)
–Select “ON” to only tune into stations with stronger signals.
•MONO-ON/OFF (Monaural mode) (page 14)
–Select “ON” to hear FM stereo broadcast in monaural. Select “OFF” to return to normal mode.
•REG-ON/OFF (Regional) (page 16)
1 Press (MENU).
To set A.SCRL, press (MENU) during CD/ MD Playback.
2 Press either side of (DISC/PRESET) repeatedly until the desired item appears.
3 Press the (+) side of (SEEK) to select the desired setting (Example: ON or OFF).
4 Press (ENTER).
After the mode setting is completed, the display returns to normal play mode.
Note
The displayed item will differ depending on the source.
Tip
You can easily switch among categories (“SET,” “DSPL,” “SND,” “P/M,” and “EDIT”) by pressing either side of (DISC/PRESET) for 2 seconds.
22
Selecting the sound position
— My Best sound Position (MBP)
When you drive without passengers, you can enjoy the most comfortable sound environment with “My Best sound Position.”
“My Best sound Position” has two presets, which adjust the sound level of balance and fader. You can select one very easily with the MBP button.
Display |
Balance Level |
Fader Level |
||
window |
Right |
Left |
Front |
Rear |
|
|
|
|
|
MBP-A |
– 4dB |
0 |
0 |
– 4dB |
|
|
|
|
|
MBP-B |
0 |
– 4dB |
0 |
– 4dB |
|
|
|
|
|
MBP-OFF |
0 |
0 |
0 |
0 |
|
|
|
|
|
Press (MBP) repeatedly for the desired listening position.
The mode of “My Best sound Position” is shown in the display in order of the table.
After one second, the display goes back to the normal playback mode.
If you want to adjust the sound level of balance and fader more precisely, you can do it using the (SOUND) button (page 21).
Notes
•When the BAL (balance) or FAD (fader) in “Adjusting the sound characteristics” (page 21) is adjusted, the MBP setting returns OFF.
•When MBP is set to OFF, the BAL and FAD setting is activated.
Setting the equalizer
You can select an equalizer curve for seven music types (VOCAL, CLUB, JAZZ, NEW AGE, ROCK, CUSTOM, and XPLOD).
You can store and adjust the equalizer settings for frequency and level.
Selecting the equalizer curve
1 Press (SOURCE) to select a source
(radio, CD/MD).
2 Press (EQ7) repeatedly until the desired equalizer curve.
Each time you press (EQ7), the item changes.
.
To cancel the equalizing effect, select “OFF.” After three seconds, the display returns to the normal playback mode.
Adjusting the equalizer curve
1 Press (MENU).
2 Press either side of (DISC/PRESET) repeatedly until “EQ7 TUNE” appears, then press (ENTER).
3 Press either side of (SEEK) to select the desired equalizer curve, then press (ENTER).
Each time you press (SEEK), the item changes.
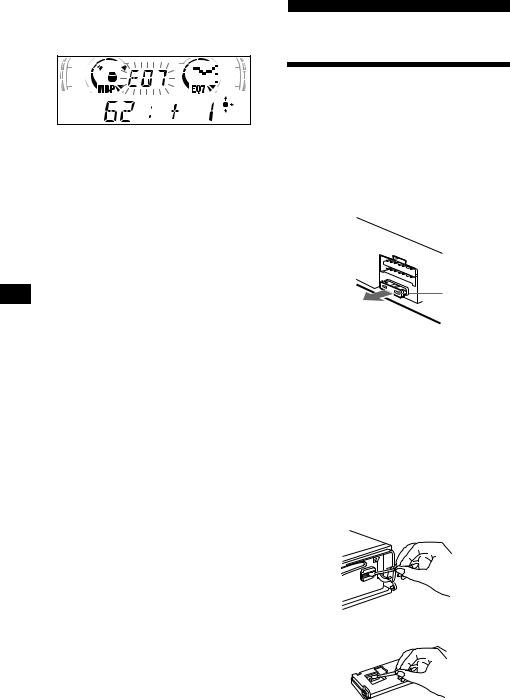
4 Select the desired frequency and level.
1Press either side of (SEEK) to select the desired frequency.
Each time you press (SEEK), the frequency changes.
62 (Hz) y 157 (Hz) y 396 (Hz) y
1k (Hz) y 2.5k (Hz) y 6.3k (Hz) y
16k (Hz)
continue to next page t
23
2Press either side of (DISC/PRESET) to adjust the desired volume level.
The volume level is adjustable by 1 dB steps from –10 dB to +10 dB.
To restore the factory-set equalizer curve, press (ENTER) for 2 seconds.
5 Press (MENU) twice.
When the effect setting is complete, the normal playback mode appears.
Additional Information
Maintenance
Fuse replacement
When replacing the fuse, be sure to use one matching the amperage rating stated on the original fuse. If the fuse blows, check the power connection and replace the fuse. If the fuse blows again after replacement, there may be an internal malfunction. In such a case, consult your nearest Sony dealer.
Fuse (10 A)
Warning
Never use a fuse with an amperage rating exceeding the one supplied with the unit as this could damage the unit.
Cleaning the connectors
The unit may not function properly if the connectors between the unit and the front panel are not clean. In order to prevent this, detach the front panel (page 8) and clean the connectors with a cotton swab dipped in alcohol. Do not apply too much force. Otherwise, the connectors may be damaged.
Main unit
Back of the front panel
24
Notes
•For safety, turn off the ignition before cleaning the connectors, and remove the key from the ignition switch.
•Never touch the connectors directly with your fingers or with any metal device.
Replacing the lithium battery
Under normal conditions, batteries will last approximately 1 year. (The service life may be shorter, depending on the conditions of use.) When the battery becomes weak, the range of the card remote commander becomes shorter. Replace the battery with a new CR2025 lithium battery.
x
+ side up
Notes on lithium battery
•Keep the lithium battery out of the reach of children. Should the battery be swallowed, immediately consult a doctor.
•Wipe the battery with a dry cloth to assure a good contact.
•Be sure to observe the correct polarity when installing the battery.
•Do not hold the battery with metallic tweezers, otherwise a short-circuit may occur.
WARNING
Battery may explode if mistreated.
Do not recharge, disassemble, or dispose of in fire.
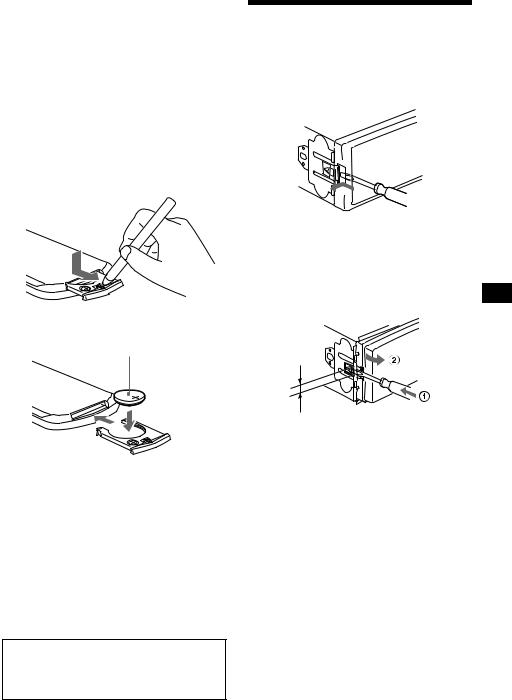
Removing the unit
1 Remove the front cover
1Detach the front panel (page 8).
2Press the clip inside the front cover with a thin screwdriver.
3Repeat step 2 for the other side.
2 Remove the unit
1Use a thin screwdriver to push in the clip on the left side of the unit, then pull out the left side of the unit until the catch clears the mounting.
4mm
2Repeat step 1 for the right side.
3Slide the unit out of its mounting.
25

Specifications
CD Player section
Signal-to-noise ratio |
90 dB |
Frequency response |
10 – 20,000 Hz |
Wow and flutter |
Below measurable limit |
Tuner section
FM
|
Tuning range |
87.5 – 108.0 MHz |
|
Aerial terminal |
External aerial connector |
|
Intermediate frequency |
10.7 MHz/450 kHz |
|
Usable sensitivity |
8 dBf |
|
Selectivity |
75 dB at 400 kHz |
|
Signal-to-noise ratio |
66 dB (stereo), |
|
|
72 dB (mono) |
|
Harmonic distortion at 1 kHz |
|
|
|
0.6 % (stereo), |
|
|
0.3 % (mono) |
|
Separation |
35 dB at 1 kHz |
|
Frequency response |
30 – 15,000 Hz |
|
MW/LW |
|
|
Tuning range |
MW: 531 – 1,602 kHz |
|
|
LW: 153 – 279 kHz |
|
|
|
|
Aerial terminal |
External aerial connector |
|
Intermediate frequency |
10.7 MHz/450 kHz |
|
Sensitivity |
MW: 30 µV |
|
|
LW: 40 µV |
Power amplifier section
Outputs |
Speaker outputs |
|
(sure seal connectors) |
Speaker impedance |
4 – 8 ohms |
Maximum power output |
50 W × 4 (at 4 ohms) |
General
Outputs |
Audio outputs |
|
|
|
Power aerial relay control |
||
|
lead |
|
|
|
Power amplifier control lead |
||
Inputs |
Telephone ATT control lead |
||
|
Remote controller imput |
||
|
connector |
|
|
|
Aerial input connector |
||
Tone controls |
Bass ±8 dB at 100 Hz |
||
|
Treble ±8 dB at 10 kHz |
||
Power requirements |
12 V DC car battery |
||
|
(negative earth ) |
|
|
Dimensions |
Approx. 178 × |
50 × |
177 mm |
|
(w/h/d) |
|
|
Mounting dimensions |
Approx. 182 × |
53 × |
161 mm |
|
(w/h/d) |
|
|
Mass |
Approx. 1.2 kg |
|
|
Supplied accessories |
Parts for installation and |
||
|
connections (1 set) |
|
|
|
Front panel case (1) |
|
|
Optional accessories |
Rotary commander |
|
|
|
RM-X4S |
|
|
|
Card remote commander |
||
|
RM-X114 |
|
|
|
BUS cable (supplied with |
||
|
an RCA pin cord) |
|
|
|
RC-61 (1 m), RC-62 (2 m) |
||
Optional equipment |
CD changer (10 discs) |
||
|
CDX-848X, CDX-646 |
||
|
CD changer (6 discs) |
||
CDX-T68X, CDX-T67
MD changer (6 discs)
MDX-65
Source selector
XA-C30
Note
This unit cannot be connected to a digital preamplifier or an equalizer.
Design and specifications are subject to change without notice.
26

Troubleshooting
The following checklist will help you remedy problems you may encounter with your unit. Before going through the checklist below, check the connection and operating procedures.
General
No sound.
•Rotate the volume control dial clockwise to adjust the volume.
•Cancel the ATT function.
•Set the fader control to the centre position for a 2-speaker system.
The contents of the memory have been erased.
•The RESET button has been pressed. tStore again into the memory.
•The power cord or battery has been disconnected.
•The power connecting cord is not connected properly.
No beep sound.
The beep sound is cancelled (page 22).
Indications disappear from/do not appear in the display.
•The clock display disappears if you press (OFF) for 2 seconds.
tPress (OFF) again for 2 seconds to
display the clock.
•Remove the front panel and clean the connectors. See “Cleaning the connectors” (page 24) for details.
Stored stations and correct time are erased. The fuse has blown.
Makes noise when the ignition key is in the ON, ACC, or OFF position.
The leads are not matched correctly with the car’s accessory power connector.
No power is being supplied to the unit.
•Check the connection. If everything is in order, check the fuse.
•The car does not have an ACC position.
tPress (SOURCE) (or insert a disc) to turn
on the unit.
The power is continuously supplied to the unit.
The car does not have an ACC position.
The power aerial does not extend.
The power aerial does not have a relay box.
CD/MD playback
A disc cannot be loaded.
•Another CD is already loaded.
•The CD is forcibly inserted upside down or in the wrong way.
Playback does not begin.
•Defective MD or dirty CD.
•CD-R that is not finalized.
•You tried to playback a CD-R not designed for audio use.
•Some CD-Rs may not play due to its recording equipment or the disc condition.
A disc is automatically ejected.
The ambient temperature exceeds 50°C.
CD will not be ejected.
The operation buttons do not function.
Press the RESET button.
The sound skips from vibration.
•The unit is installed at an angle of more than 60°.
•The unit is not installed in a sturdy part of the car.
The sound skips.
Dirty or defective disc.
Cannot turn off the “-------- |
” indication. |
You entered the name edit mode. tPress (LIST) for 2 seconds.
Radio reception
Preset tuning is not possible.
•Store the correct frequency in the memory.
•The broadcast signal is too weak.
The stations cannot be received. The sound is hampered by noises.
•Connect a power aerial control lead (blue) or accessory power supply lead (red) to the power supply lead of a car’s aerial booster. (Only when your car has built-in FM/MW/ LW aerial in the rear/side glass.)
•Check the connection of the car aerial.
•The auto aerial will not go up.
tCheck the connection of the power aerial control lead.
•Check the frequency.
Automatic tuning is not possible.
•The local seek mode is set to “ON.”
tSet the local seek mode to “OFF.” (page 22)
•The broadcast signal is too weak. tPerform manual tuning.
continue to next page t
27

The “ST” indication flashes.
•Tune in the frequency accurately.
•The broadcast signal is too weak.
tSet to the monaural reception mode (page 22).
A programme broadcast in stereo is heard in monaural.
The unit is in monaural reception mode.
tCancel monaural reception mode (page 22).
RDS
The SEEK starts after a few seconds of listening.
The station is non-TP or has weak signal.
tPress (AF) or (TA) repeatedly until “AFOFF” or “TA-OFF” appears.
No traffic announcements.
•Activate “TA.”
•The station does not broadcast any traffic announcements despite being TP.
tTune in another station.
|
|
|
|
|
|
--------PTY displays “ |
.” |
•The current station is not an RDS station.
•RDS data has not been received.
•The station does not specify the programme type.
Error displays/Messages
Error displays
(For this unit and optional CD/MD changers)
The following indications will flash for about 5 seconds, and an alarm sound will be heard.
BLANK*1
No tracks have been recorded on an MD.*2 tPlay an MD with recorded tracks on it.
ERROR*1
•A CD is dirty or inserted upside down.*2 tClean or insert the CD correctly.
•A CD/MD cannot play because of some problem.*2
tInsert another CD/MD.
HI TEMP
The ambient temperature is more than 50°C.
tWait until the temperature goes down below 50°C.
NO DISC
No disc is inserted in the CD/MD unit. tInsert discs in the CD/MD unit.
NO MAG
The disc magazine is not inserted in the CD/ MD unit.
tInsert the magazine in the CD/MD unit.
NOTREADY
The lid of the MD unit is open or the MDs are not inserted properly.
tClose the lid or insert the MDs properly.
RESET
The CD/MD unit cannot be operated because of some problem.
tPress the RESET button on the unit.
*1 When an error occurs during playback of a CD or MD, the disc number of the CD or MD does not appear in the display.
*2 The disc number of the disc causing the error appears in the display.
If these solutions do not help improve the situation, consult your nearest Sony dealer.
Messages
L.SEEK +/–
The Local Seek mode is on during automatic tuning (page 14).
NO AF
There is no alternative frequency for the current station.
“


 ” or “


 ”
”
You have reached the beginning or the end of the disc and you cannot go any further.
28

¡Bienvenido!
Gracias por adquirir este reproductor de discos compactos Sony. Disfrutará incluso más de sus distintas funciones con:
•Unidades opcionales de CD/MD (cambiadores y reproductores)*1.
•Información CD TEXT (mostrada al reproducir discos CD TEXT*2 en una unidad opcional de CD conectada con la función CD TEXT).
•Accesorios de controlador opcionales
Mando rotativo RM-X4S
Mando a distancia de tarjeta RM-X114
*1 Esta unidad funciona solamente con productos Sony.
*2 Un disco CD TEXT es un CD de audio que incluye información, como el nombre del disco, el nombre del artista y los nombres de las pistas. Esta información está grabada en el disco.
Esta etiqueta está situada en la parte inferior del chasis.
CAUTION INVISIBLE LASER RADIATION WHEN OPEN DO NOT STARE INTO BEAM OR
VIEW DIRECTLY WITH OPTICAL INSTRUMENTS
Esta etiqueta está situada en el chasis interno de la unidad de activación.
2
 Loading...