


2-696-856-21 (1)
FM/AM
Compact Disc Player
Operating Instructions Mode d’emploi
Owner’s Record
US
FR
The model and serial numbers are located on the bottom of the unit. Record the serial number in the space provided below.
Refer to these numbers whenever you call upon your Sony dealer regarding this product.
Model No. CDX-GT110 Serial No.
To cancel the demonstration (DEMO) display, see page 8.
Pour annuler l’affichage de démonstration (DEMO), reportez-vous à la page 8.
CDX-GT110
© 2006 Sony Corporation

For installation and connections, see the supplied installation/connections manual.
Warning
This equipment has been tested and found to comply with the limits for a Class B digital device, pursuant to Part 15 of the FCC Rules. These limits are designed to provide reasonable protection against harmful interference in a residential installation. This equipment generates, uses, and can radiate radio frequency energy and, if not installed and used in accordance with the instructions, may cause harmful interference to radio communications. However, there is no guarantee that interference will not occur in a particular installation. If this equipment does cause harmful interference to radio or television reception, which can be determined by turning the equipment off and on, the user is encouraged to try to correct the interference by one or more of the following measures:
–Reorient or relocate the receiving antenna.
–Increase the separation between the equipment and receiver.
–Connect the equipment into an outlet on a circuit different from that to which the receiver is connected.
–Consult the dealer or an experienced radio/TV technician for help.
You are cautioned that any changes or modifications not expressly approved in this manual could void your authority to operate this equipment.
CAUTION
The use of optical instruments with this product will increase eye hazard.
Warning if your car’s ignition has no ACC position
Be sure to set the Auto Off function (page 8). The unit will shut off completely and automatically in the set time after the unit is turned off, which prevents battery drain.
If you do not set the Auto Off function, press and hold (OFF) until the display disappears each time you turn the ignition off.
2

Table of Contents
Welcome ! . . . . . . . . . . . . . . . . . . . . . . . . . . . . . 4
Getting Started
Setting the clock . . . . . . . . . . . . . . . . . . . . . . . . 4 Detaching the front panel . . . . . . . . . . . . . . . . . 4 Attaching the front panel . . . . . . . . . . . . . . . 5
Location of controls and basic operations
Main unit. . . . . . . . . . . . . . . . . . . . . . . . . . . . 6
Radio
Storing and receiving stations . . . . . . . . . . . . . . 7 Storing automatically — BTM . . . . . . . . . . . 7 Storing manually. . . . . . . . . . . . . . . . . . . . . . 7 Receiving the stored stations . . . . . . . . . . . . 7 Tuning automatically . . . . . . . . . . . . . . . . . . 7
Other functions
Changing the sound settings . . . . . . . . . . . . . . . 8 Adjusting the balance and fader
— BAL/FAD . . . . . . . . . . . . . . . . . . . . . . . . 8 Customizing the equalizer curve
— EQ lite . . . . . . . . . . . . . . . . . . . . . . . . . . . 8 Adjusting setup items — SET . . . . . . . . . . . . . 8 Using optional equipment. . . . . . . . . . . . . . . . . 9 Auxiliary audio equipment. . . . . . . . . . . . . . 9
Additional Information
Precautions . . . . . . . . . . . . . . . . . . . . . . . . . . . 10 Notes on discs . . . . . . . . . . . . . . . . . . . . . . 10 Maintenance . . . . . . . . . . . . . . . . . . . . . . . . . . 10 Removing the unit. . . . . . . . . . . . . . . . . . . . . . 11 Specifications . . . . . . . . . . . . . . . . . . . . . . . . . 11 Troubleshooting . . . . . . . . . . . . . . . . . . . . . . . 12 Error displays/Messages. . . . . . . . . . . . . . . 13
3

Welcome !
Thank you for purchasing this Sony Compact Disc Player. You can enjoy your drive with the following functions.
•CD playback
You can play CD-DA (also containing CD TEXT*) and CD-R/CD-RW for audio use.
•Radio reception
–You can store up to 6 stations per band (FM1, FM2, FM3, AM1 and AM2).
–BTM (Best Tuning Memory): the unit selects strong signal stations and stores them.
•Sound adjustment
–EQ lite: You can choose any one of 6 preset equalizer curves.
•Auxiliary equipment connection
An AUX input jack on the front of the unit allows connection of a portable audio device.
*A CD TEXT disc is a CD-DA that includes information such as disc, artist and track name.
Getting Started
Setting the clock
The clock uses a 12-hour digital indication.
1Press and hold the select button.
The setup display appears.
2Press the select button repeatedly until “CLOCK-ADJ” appears.
3Press (SEEK) +.
The hour indication flashes.
4Rotate the volume control dial to set the hour and minute.
To move the digital indication, press (SEEK) –/+.
5Press the select button.
The setup is complete and the clock starts.
To display the clock, press (DSPL). Press (DSPL) again to return to the previous display.
Detaching the front panel
You can detach the front panel of this unit to prevent theft.
Caution alarm
If you turn the ignition switch to the OFF position without detaching the front panel, the caution alarm will sound for a few seconds. The alarm will only sound if the built-in amplifier is used.
1Press (OFF).
The unit is turned off.
2Press  , then pull it off towards you.
Notes
•Do not drop or put excessive pressure on the front panel and display window.
•Do not subject the front panel to heat/high temperature or moisture. Avoid leaving it in a parked car or on a dashboard/rear tray.
4
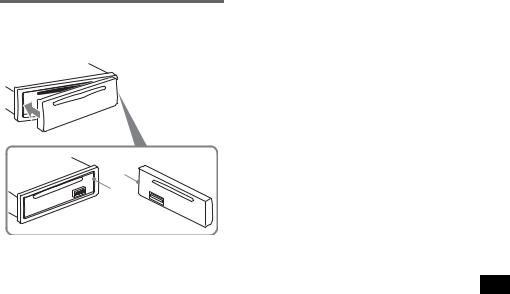
Attaching the front panel
Engage part A of the front panel with part B of the unit, as illustrated, and push the left side into position until it clicks.
A
B
Note
Do not put anything on the inner surface of the front panel.
5

Location of controls and basic operations
Main unit
12 3 |
4 |
|
5 |
6 |
|
7 8 |
OFF |
|
|
|
|
|
|
|
PUSH SELECT |
|
|
|
|
|
EQ |
SOURCE |
|
|
|
|
AUX |
SEEK |
SEEK |
|
|
|
|
|
|
|
|
|
|
||
DIM |
|
|
|
|
|
|
DSPL |
MODE |
|
|
|
|
|
|
|
|
REP |
SHUF |
|
PAUSE |
|
1 |
2 |
3 |
4 |
5 |
6 |
9 q; qa qs
Refer to the pages listed for details.
AOFF button
To power off; stop the source.
BEQ (equalizer) button 8
To select an equalizer type (XPLOD, NATURAL, HARD, UPBEAT, VOCAL, CUSTOM or OFF).
CVolume control dial/select button 8
To adjust volume (rotate); select setup items (press and rotate).
DSOURCE button
To power on; change the source (Radio/CD/ AUX).
EDisc slot
To insert the disc (label side up). Playback starts automatically.
F Display window
GAUX input jack 9
To connect a portable audio device.
HZ (eject) button
To eject the disc.
I  (front panel release) button 4
JDSPL (display)/DIM (dimmer) button
To change display items (press); change the display brightness (press and hold).
CDX-GT110
qd
KSEEK –/+ buttons
CD:
To skip tracks (press); skip tracks continuously (press, then press again within about 1 second and hold); reverse/fastforward a track (press and hold).
Radio:
To tune in stations automatically (press); find a station manually (press and hold).
LMODE button 7
To select the radio band (FM/AM).
M Number buttons
CD:
(3): REP
To play the current track repeatedly.
(4): SHUF
To play the tracks in random order.
(6): PAUSE
To pause playback. To cancel, press again.
Radio:
To receive stored stations (press); store stations (press and hold).
6

Radio
Storing and receiving stations
Caution
When tuning in stations while driving, use Best Tuning Memory (BTM) to prevent an accident.
Storing automatically — BTM
1Press (SOURCE) repeatedly until
“TUNER” appears.
To change the band, press (MODE) repeatedly. You can select from FM1, FM2, FM3, AM1 or AM2.
2Press and hold the select button.
The setup display appears.
3Press the select button repeatedly until “BTM” appears.
4Press (SEEK) +.
The unit stores stations in order of frequency on the number buttons.
A beep sounds when the setting is stored.
Storing manually
1While receiving the station that you want to store, press and hold a number button ((1) to (6)) until
“MEMORY” appears.
The number button indication appears in the display.
Note
If you try to store another station on the same number button, the previously stored station will be replaced.
Receiving the stored stations
1Select the band, then press a number button ((1) to (6)).
Tuning automatically
1Select the band, then press (SEEK) –/+ to search for the station.
Scanning stops when the unit receives a station. Repeat this procedure until the desired station is received.
Tip
If you know the frequency of the station you want to listen to, press and hold (SEEK) –/+ to locate the approximate frequency, then press (SEEK) –/+ repeatedly to fine adjust to the desired frequency (manual tuning).
7
Other functions
Changing the sound settings
Adjusting the balance and fader
— BAL/FAD
1Press the select button repeatedly until “BAL” or “FAD” appears.
The item changes as follows:
LOW*1 t HI*1 tBAL (left-right) t
FAD (front-rear) tAUX*2
*1 When EQ lite is activated (page 8).
*2 When AUX source is activated (page 9).
2Rotate the volume control dial to adjust the selected item.
After 3 seconds, the setting is complete and the display returns to normal play/reception mode.
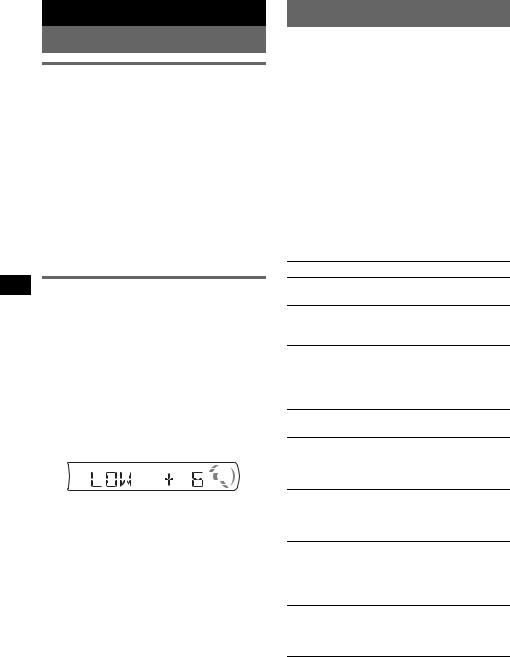
Customizing the equalizer curve
— EQ lite
“CUSTOM” of EQ lite allows you to make your own equalizer settings.
1Select a source, then press (EQ) repeatedly to select “CUSTOM.”
2Press the select button repeatedly until “LOW” or “HI” appears.
3Rotate the volume control dial to adjust the selected item.
The volume level is adjustable in 1 dB steps, from –10 dB to +10 dB.
Repeat steps 2 and 3 to adjust the equalizer curve.
To restore the factory-set equalizer curve, press and hold the select button before the setting is complete.
After 3 seconds, the setting is complete and the display returns to normal play/reception mode.
Tip
Other equalizer types are also adjustable.
Adjusting setup items — SET
1Press and hold the select button.
The setup display appears.
2Press the select button repeatedly until the desired item appears.
3Rotate the volume control dial to select the setting (example “ON” or “OFF”).
4Press and hold the select button.
The setup is complete and the display returns to normal play/reception mode.
Note
Displayed items will differ, depending on the source and setting.
The following items can be set (follow the page reference for details):
“z” indicates the default settings.
CLOCK-ADJ (Clock Adjust) (page 4)
BEEP
To set “BEEP-ON” (z) or “BEEP-OFF.”
AUX-A*1 (AUX Audio)
To turn the AUX source display “AUX-A-ON” (z) or “AUX-A-OFF” (page 9).
A.OFF (Auto Off)
To shut off automatically after a desired time when the unit is turned off: “A.OFF-NO” (z), “A.OFF-30S (Seconds),” “A.OFF-30M (Minutes)” or “A.OFF-60M (Minutes).”
DEMO*1 (Demonstration)
To set “DEMO-ON” (z) or “DEMO-OFF.”
DIM (Dimmer)
To change the brightness of the display.
–“DIM-ON”: to dim the display.
–“DIM-OFF” (z): to deactivate the dimmer.
M.DSPL (Motion Display)
–“M.DSPL-ON” (z): to show moving patterns.
–“M.DSPL-OFF”: to deactivate the Motion Display.
A.SCRL (Auto Scroll)
To scroll long displayed item automatically when the track is changed.
–“A.SCRL-ON” (z): to scroll.
–“A.SCRL-OFF”: to not scroll.
LOCAL (Local Seek Mode)
–“LOCAL-ON”: to only tune into stations with stronger signals.
–“LOCAL-OFF” (z): to tune normal reception.
8
MONO*2 (Monaural Mode)
To improve poor FM reception, select monaural reception mode.
–“MONO-ON”: to hear stereo broadcast in monaural.
–“MONO-OFF” (z): to hear stereo broadcast in stereo.
LOUD (Loudness)
To allow you to listen clearly at low volume levels.
–“LOUD -ON”: to reinforce bass and treble.
–“LOUD -OFF” (z): to not reinforce bass and treble.
BTM (page 7)
*1 When the unit is turned off.
*2 When FM is received.
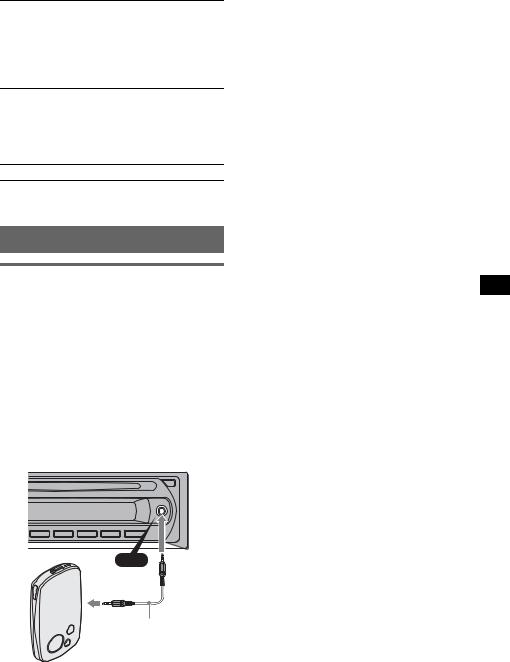
Using optional equipment
Auxiliary audio equipment
By connecting an optional portable audio device to the AUX input jack (stereo mini jack) on the unit and then simply selecting the source, you can listen on your car speakers. The volume level is adjustable for any difference between the unit and the portable audio device. Follow the procedure below:
Connecting the portable audio device
1Turn off the portable audio device.
2Turn down the volume on the unit.
3Connect to the unit.
AUX
AUX
Connecting cord*
(not supplied)
* Be sure to use a straight type plug.
Adjust the volume level
Be sure to adjust the volume for each connected audio device before playback.
1Turn down the volume on the unit.
2Press (SOURCE) repeatedly until “AUX” appears.
“FRONT IN” appears.
3Start playback of the portable audio device at a moderate volume.
4Set your usual listening volume on the unit.
5Press the select button repeatedly until “AUX” appears, and rotate the volume control dial to adjust the input level (–8 dB to +18 dB).
9
 Loading...