


EQ.7

å
EQ.7
TK7

en
. ........................................................2
fr
. ......................................................22
it
. ......................................................43
nl
. ......................................................64
ru
. ......................................................85
A
5a
5b
5c
34
2
3 4 5 6 4 7 8
15 16 17
18
12
11
19
20
21
10
9
22
23
1
33
27-31
B
13
14
11
32
10.a
. b
. c.
. d
DC
28 27
31
3029
E
I
25
26
II
24b......24a24
III IV

deen
Table of Contents
Overview...................................................24
Before using for the rst time....................25
Controls. ....................................................26
−.Power.on/off.switch.O./.I. .......................26
−.a.button. ................................................26
−.Rotary.knob. ...........................................26
−.Selection.buttons.<.and.>. ..................26
−.Display. ..................................................27
−.
start
.button. ............................................29
−.°C.button................................................29
−.j.button.and.settings. .............................30
−.Adjusting.the.grinding.unit. .....................30
−.Cup.warming. .........................................30
Menu.settings. ...........................................31
− Language. ..............................................31
− Water hardness. .....................................31
−.Descale. .................................................31
−.Clean. .....................................................31
−.Calc‘n‘Clean. ..........................................31
−.Show.clock. ............................................32
−.Time.mode.............................................32
−.Set.clock................................................32
−.Cup.warmer.on.(TK76F09.only). ............32
−.Cup.warmer.off.in. ..................................32
− Auto.off.after. ..........................................32
− Water lter. .............................................32
−.Contrast.................................................33
−.Factory.settings. .....................................33
Preparation.using.coffee.beans. ................33
Preparation.using.ground.coffee...............34
Preparing.milk.froth.and.warm.milk. ..........35
Dispensing.hot.water. ................................35
Maintenance.and.daily.cleaning. ...............35
−.Cleaning.the.milk.system. ......................36
−.Cleaning.the.brewing.unit......................36
Storing.accessories. ..................................37
Tips.on.energy.saving...............................37
Service.Programmes.. ...............................37
−.Descaling. ..............................................38
−.Cleaning. ................................................38
−.Calc‘n‘Clean. ..........................................39
Frost.protection.........................................40
Disposal. ....................................................40
Accessories. ..............................................40
Guarantee.................................................40
Simple.troubleshooting. .............................41
Safety instructions
Please read the operating instructions
carefully and keep them for future
reference.
This automatic espresso machine is
designed for domestic use and not
commercial use.
! Risk of electric shock
Connect.and.operate.the.appliance.only.in.
accordance with the specications on the
rating.label..
Do.not.use.if.either.the.power.cord.or.the.
appliance.is.damaged..
Use.indoors.at.room.temperature.only..
This.appliance.is.not.intended.for.use.by.
persons.(including.children).with.reduced.
physical,.sensory.or.mental.capabilities,.or.
lack.of.experience.and.knowledge,.unless.
they.have.been.given.supervision.or.
instruction.concerning.use.of.the.appliance.
by.a.person.responsible.for.their.safety.
Keep.children.away.from.the.appliance..
Children.should.be.supervised.to.ensure.
that.they.do.not.play.with.the.appliance.
In.the.event.of.malfunction,.unplug.the.
appliance.immediately..
To.avoid.potential.hazards,.repairs.such.as.
replacing.a.damaged.cord.should.only.be.
performed.by.our.service.personnel..
Never.immerse.the.appliance.or.power.cord.
in.water..
Do.not.reach.into.the.grinding.unit.
! Risk of scalding
The.milk.frother.for.milk.and.hot.water.gets.
very hot. After use, allow to cool down rst
before.touching.
2

deen
Dear.Coffee.Connoisseur,.
Congratulations.on.purchasing.this.fully.
automatic.espresso.machine.from.Siemens.
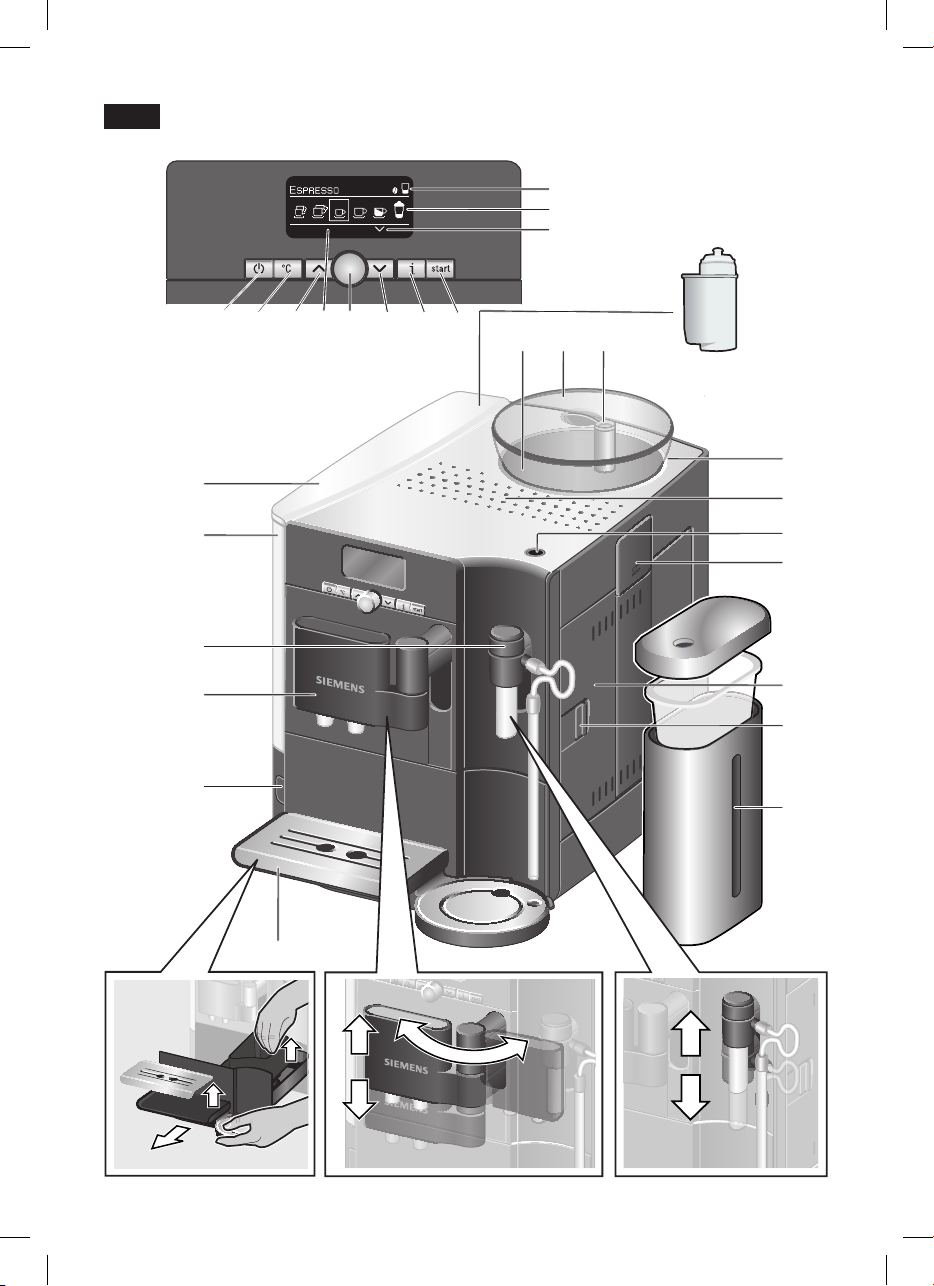
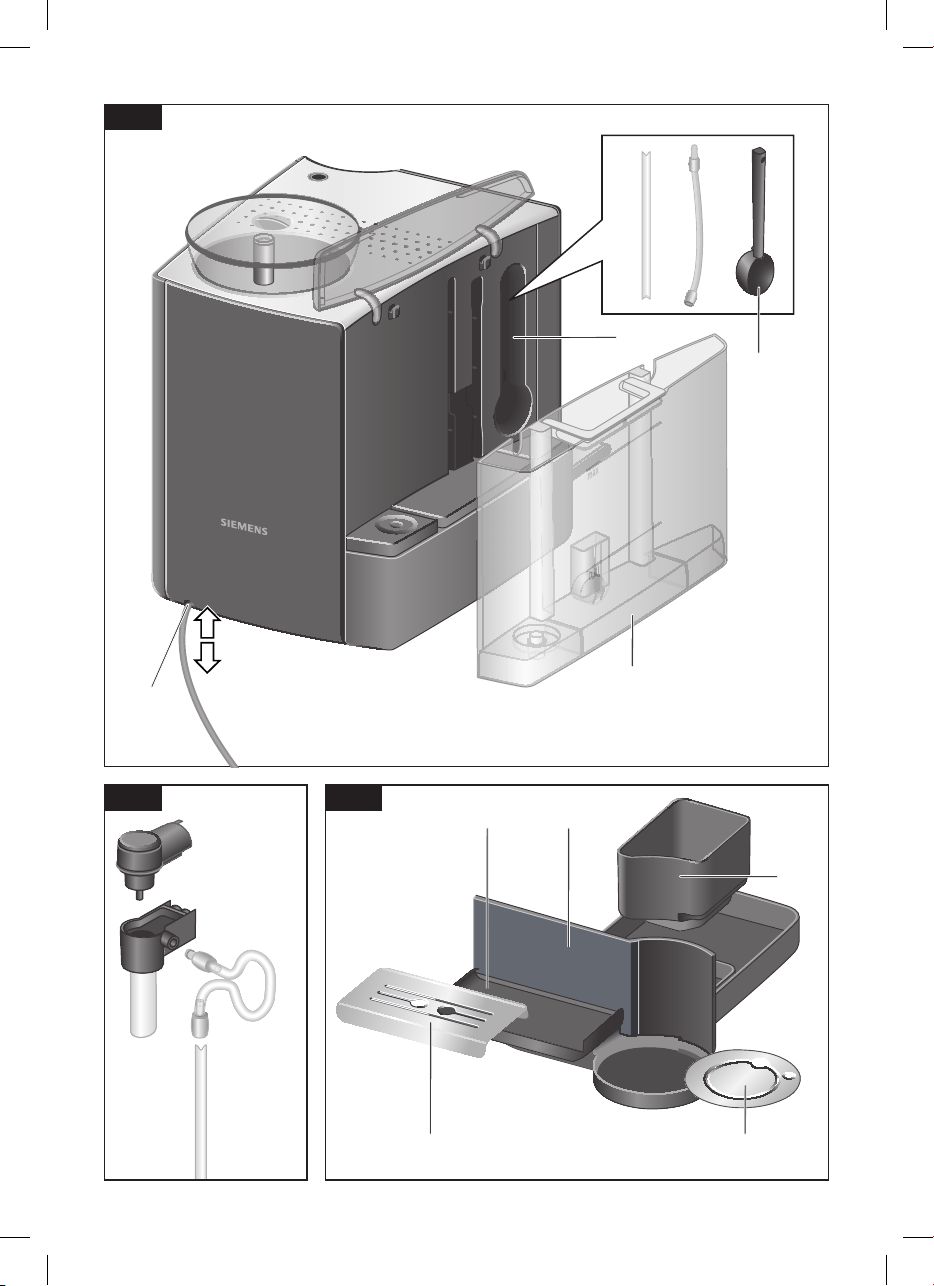
Overview
Figures A, B, C, D and E
. 1.Power.on/off.switch.O./.I
a.button
2.
. 3.
°C
.button.(temperature./.child-proof.lock).
. 4.Selection.buttons.<.>
5.Display
. .a).Status.line
. .b).Selection.line
. .c).Navigation.line
. 6 Rotary.knob.for.display.settings
. 7..Info.menu.button.j
. 8. .
start
button.(drinks./.programmes)
. 9. .Coffee.outlet,.height-adjustable.and.
swivelling
.10. .Milk.frother,.height-adjustable..
(milk./.hot.water)
. .a).Upper.part
. .b) Lower part
. .c).Tube
. .d).Milk.pipe
.11.Removable.water.tank
12 Lid for water tank
13. .Storage.compartments.
(measuring.spoon.and.milk.frother.
accessories)
.14. .Measuring.spoon..
(insertion aid for water lter)
.15.Bean.container
.16.Aroma.cover
.17.Selector.for.grind.setting
.18.Illuminated.ring
19.Cup.warming
These.instructions.describe.various.models.
with.different.features.
Please.also.note.the.enclosed.quick.
reference.guide..It.can.be.kept.in.the.
special.storage.compartment.25.until.it.is.
needed.
20. .Button.for.cup.warming.function,.
illuminated
21. .Drawer..
(ground.coffee./.cleaning.tablet)
22.Door.to.brewing.unit
23.Door.opener.
24.Brewing.unit.
. .a).Sliding.button.
. .b) Lock
25. .Storage.compartment.for.quick.
reference.guide
26.Cover.of.storage.compartment
27.Drip.tray.panel
2
8.Drip.tray.for.coffee.outlet
29.Grate.for.coffee.outlet
30.Grate.for.milk.frother
31.Coffee.grounds.container
32.Cable.storage.compartment
33.Milk.container.(insulated)
34 Water lter
3
deen
Before using
for the rst time
General
Fill.the.water.tank.with.fresh,.uncarbonated.
water.only,.and.preferably.use.only.beans.
for.fully.automatic.coffee.and.espresso.
machines..Do.not.use.coffee.beans.that.
have.been.glazed,.caramelised.or.treated.
with.other.additives.containing.sugar,.since.
they.will.block.the.brewing.unit..
The.water.hardness.setting.can.be.adjusted.
on.this.appliance..The.factory.default.setting.
for.the.water.hardness.is.4..Check.the.
water.hardness.with.the.enclosed.test.strip..
If.a.value.other.than.water.hardness.4.is.
displayed,.change.the.setting.on.the.
appliance.accordingly.after.switching.on.
(see.“Menu.settings.Water hardness”).
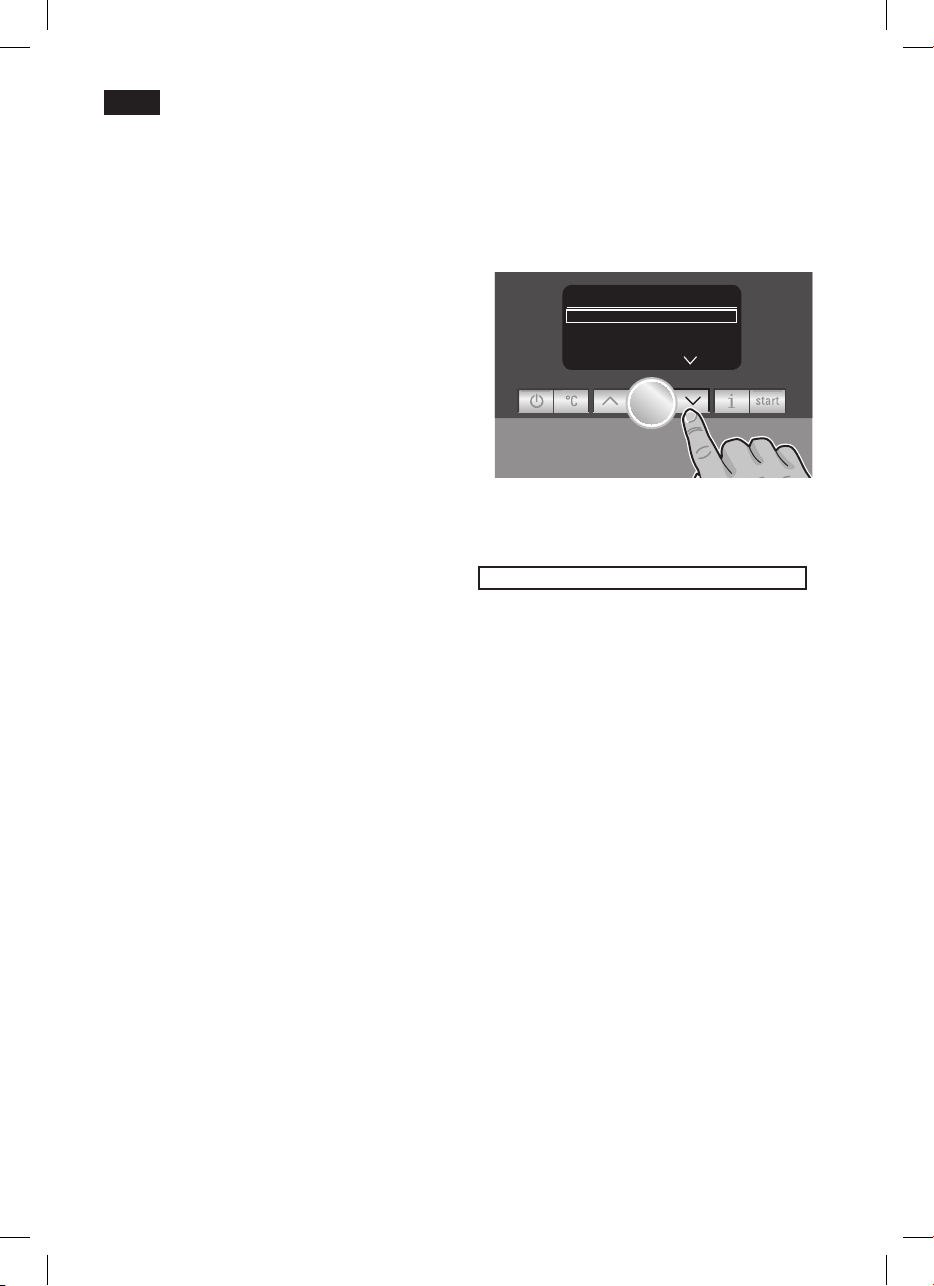
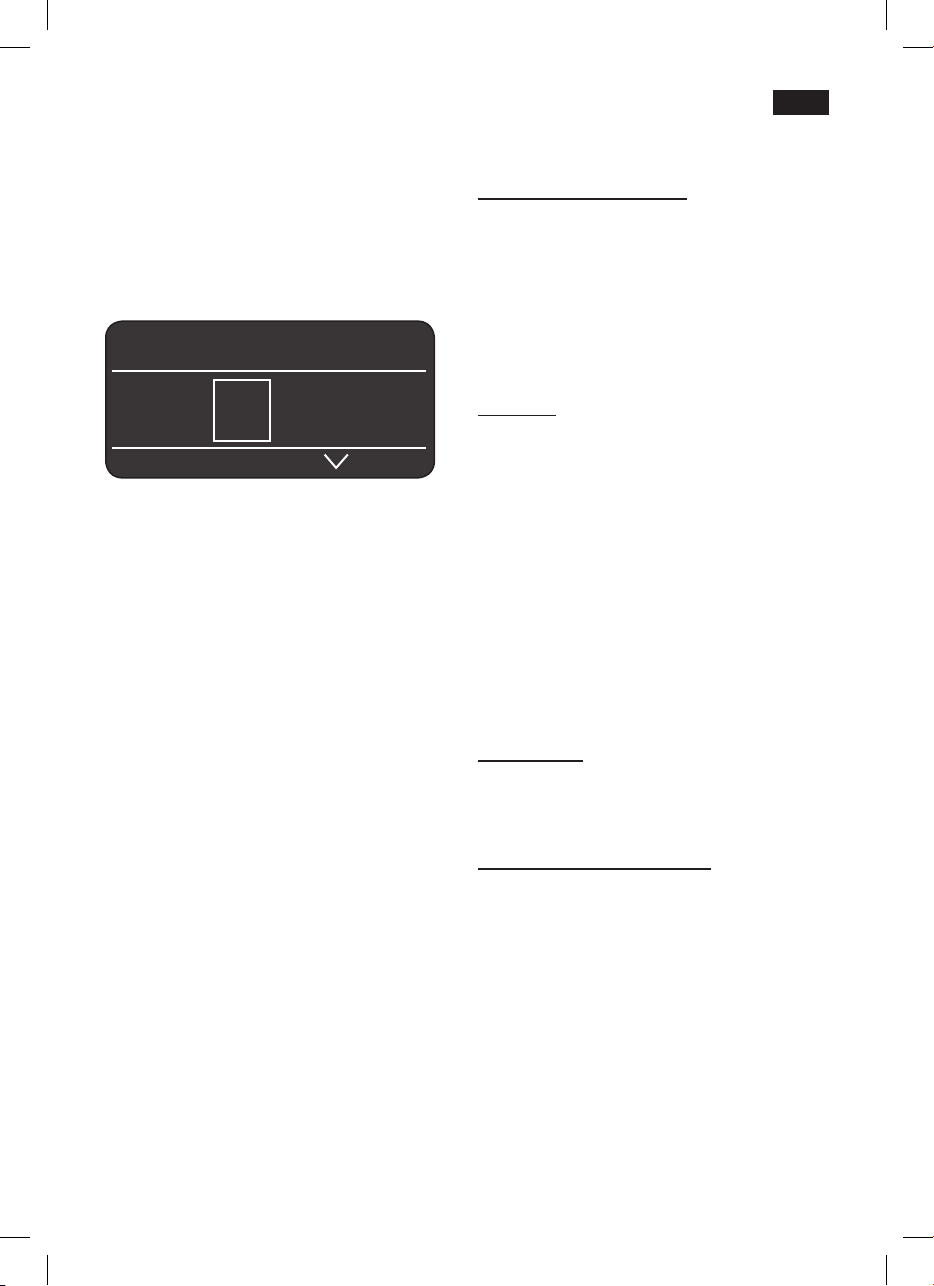
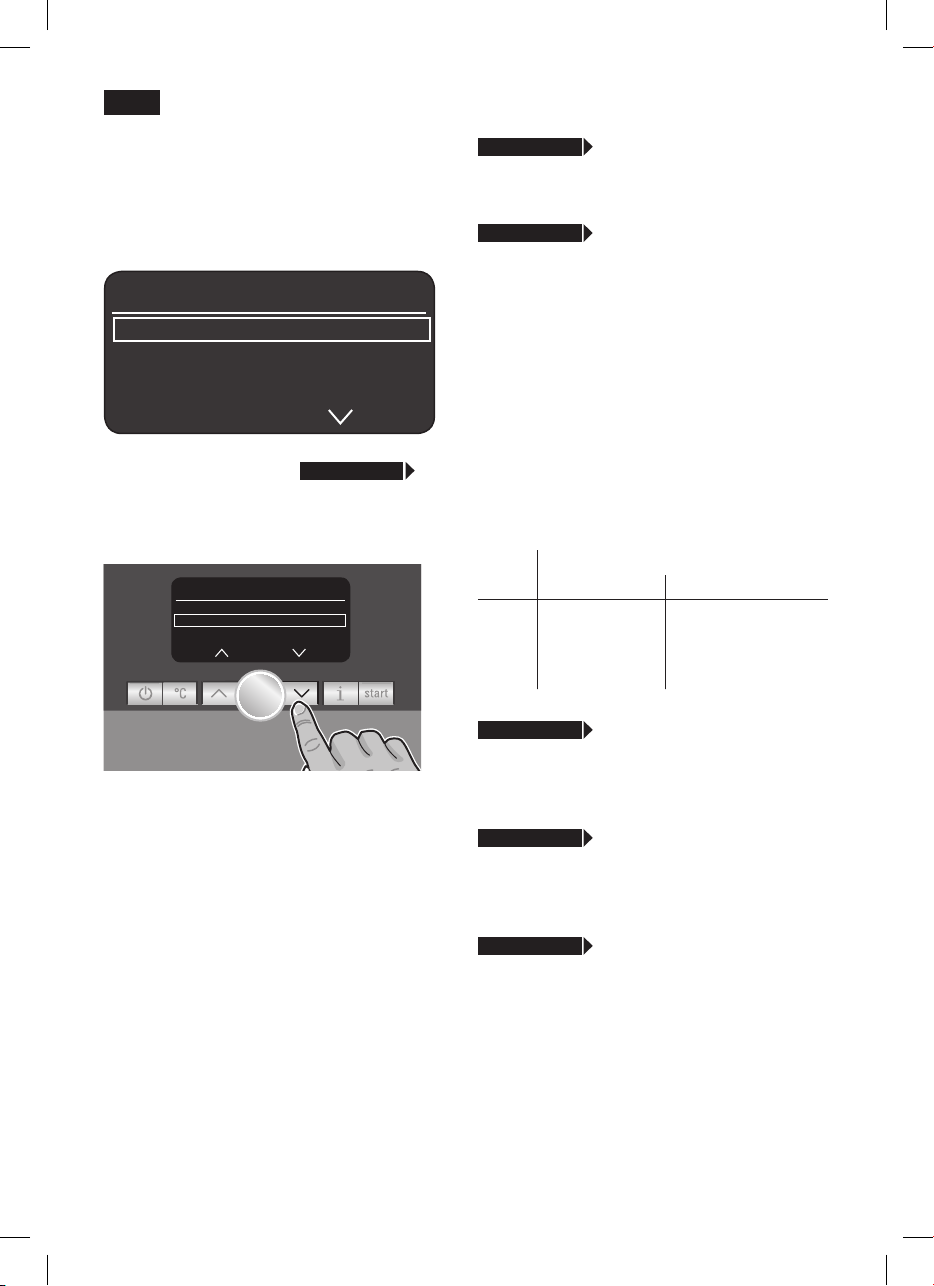
●
Press.the.power.switch.1.O./.I..The.
button.8.lights.up.and.the.different.
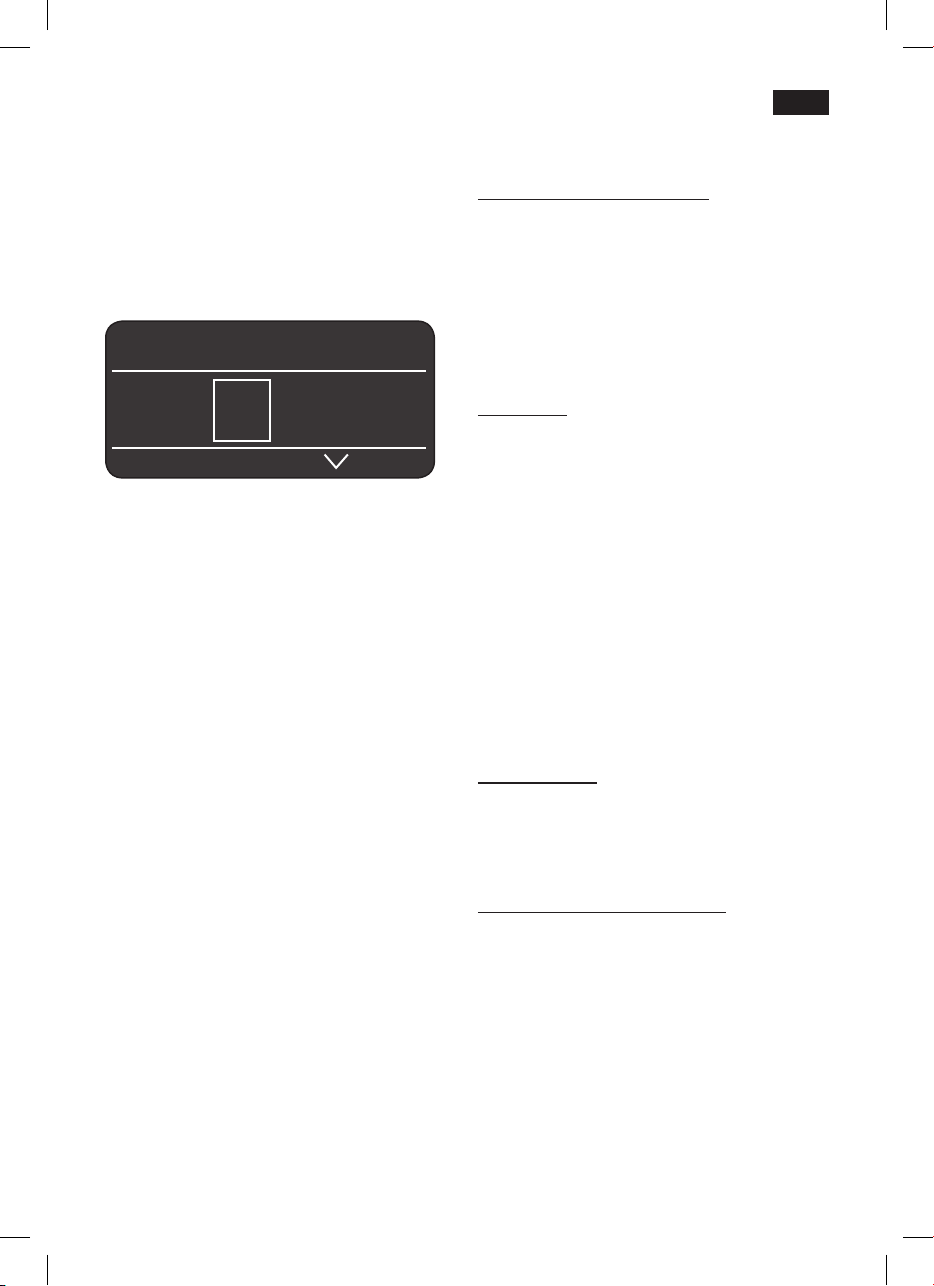
languages.appear.in.the.display.5.
Use.the.buttons.
●
language.in.which.you.want.the.display.
texts.to.appear...
.
.
.
.
.
.
.
.
.
. The.selected.language.is.highlighted.by.a.
frame..The.following.languages.can.be.
selected:.
<.and.>.4.to.select.the.
Language
engLish
Pycckий
nederLands
star t
start
.
Switching on the appliance
Place.the.fully.automatic.espresso.
●
machine on a at surface that can take its
weight..
Note: The.appliance.has.four.runners.under.
its.base.and.can.be.moved.sideways.in.an.
arc.to.make.operation.and.positioning.
easier.
Pull.the.power.cord.out.of.the.storage.
●
compartment.32.and.plug.in..Adjust.the.
length.of.the.cable.by.pushing.it.back.in.
or.pulling.it.out..The.easiest.way.to.do.
this.is.to.place.the.appliance.so.that.its.
back is ush with the edge of the counter
and.either.pull.the.cable.downward.or.
push.it.upward.
Lift the lid of the water tank 12.
●
Remove.and.rinse.the.water.tank.11.and.
●
ll it with fresh cold water. .
Do not ll above the “max”.mark.
Replace.the.water.tank.11 and.push.it.
●
rmly downward into place.
Close.the.lid.of.the.water.tank.12.again.
●
Fill.the.bean.container.15.with.coffee.
●
beans.
engLish
P
ycckий
n
ederLands
F
rançais
i
taLiano
s
venska
e
sPañoL
P
oLski
● Press the
you.selected.is.saved.and.the.
lights.up.
start
.button.8..The.language.
a.button.2.
4
deen
● Press the
lights.up.in.the.display.5..The.appliance.
now.heats.up.and.rinses..Some.water.will.
run.out.of.the.coffee.outlet.9..The.
appliance.is.ready.for.use.when.the.
symbols.for.selecting.the.type.of.coffee.
preparation.appear.in.the.display.5..
a.button.2..The.brand.logo.
esPresso Ë Í
 à À Á Ä Å
Note: The.factory.settings.of.the.fully.
automatic.espresso.machine.are.
programmed.for.optimal.performance..The.
appliance.switches.to.“energy.saving.mode”.
automatically.after.1.hour.(see.“Menu.
settings.auto oFF aFter”).
Tip: If.the.appliance.is.being.used.for.the.
rst time or has not been operated for a
long period, the rst cup of coffee will not
have.the.full.aroma.
When using the espresso machine for the
first.time,.you.will.achieve.a.suitably.thick.
and.stable.“crema”.only.after.the.first.few.
cups.have.been.dispensed.
Controls
Power on/off switch O / I
The.power.switch.1.O./.I is.used.to.switch.
the.appliance.to.“energy.saving.mode”.or.to.
switch.it.off.completely..In.“energy.saving.
mode”.only.the.a.button.2.lights.up.
Important: Do not switch the appliance off
at the power on/off switch 1 until it is in
energy saving mode, so that the automatic
rinse process can take place.
a button
The.appliance.is.switched.on.(ready.for.
use).or.put.into.“energy.saving.mode”.with.
the.a.button.2.
The.
a.button.2 ashes while the appliance
is.rinsing..
The.appliance.does.not.rinse.if:
it.is.still.warm.when.switched.on
●
no.coffee.was.dispensed.before.it.was.
●
switched.to.“energy.saving.mode”.
The.appliance.is.ready.for.use.when.the.
start
symbols.for.drink.selection.and.the.
button.8.light.up.on.the.display.5.
Rotary knob
Turn.the.knob.6.to.the.left.or.right.to.
navigate.through.the.display.5,.or.to.adjust.
parameters.in.the.menu.
Selection buttons
Press.the.selection.buttons.<.and.>.4.to.
navigate.up.and.down.through.the.menu.
levels.(navigation.line.5c).
< and >
.
5

deen
Display
The.display.5.uses.symbols.to.indicate.the.
selection.options,.coffee.strength.and.percup.quantity,.and.uses.texts.to.indicate.
settings,.ongoing.processes.and.messages..
The.rotary.knob.6.and.selection.buttons.4.
can.be.used.to.change.settings..The.
selected.setting.is.highlighted.by.a.frame.
esPresso ËË Í
5a
 à À Á Ä Å
The.status.line.5a.in.the.display.shows.the.
name.of.the.type.of.drink,.along.with.the.
strength.setting,.e.g..
quantity,.e.g..
shows.symbols.for.drink.selection.
The.arrows.in.the.navigation.line.5c.indicate.
the.direction.in.which.more.menu.levels.can.
be.found.
�
55.and.per-cup.
..The.selection.line.5b.
Display messages
Various.messages.are.shown.on.the.
display.5.
Information:.
Water tank aLmost emPty
Bean container aLmost emPty
PLease Wait
Prompts:
reFiLL Water tank
rePLace Water tank
check Water tank
b
rePLace driP tray
emPty driP tray
c
reFiLL Bean container
Position sWiveL arm
set uP miLk Frother
rePLace BreWing unit
c
Lose door
PLease check BreWing unit
FiLL draWer With PoWder
cLose draWer
service - change FiLter
service - descaLe
service - cLean
service - caLc‘n‘cLean
insuFFicient temPerature
PLease Wait
high or LoW voLtage
6
my coFFee ËË Í
Á Ä Å Æ Ç È
Selection options
. 2 x esPresso.
Â
. esPresso. Á.coFFee
À
Ã
deen
.2 x coFFee
my coFFee Ë Í
5 55 555
. .
my coFFee Ë Í
� Ð Ò
Ä. White coFFee.
miLk system
Coffee strength
(only for coffee drinks)
. caPPuccino.
Æ
. miLk F roth.
È
. hot Water.
Ê
. macchiato
Å
my coFFee
Ç
Warm miL k
É
Ì
s
hort rinse For
5 5 5 5 5 5
. mild. regular. strong
Per-cup quantity
(only for coffee drinks)
� Ð Ò
. small. medium. large
my coFFee Ë Í
esPresso miLk
40%
In.addition.to.selecting.the.coffee.
strength.and.per-cup.quantity.you.
can.choose.the.exact.mix.of.
espresso.and.milk.for.your.own.
coffee.setting.my coFFee Ç..The.
setting can be dened in 20% steps
by.turning.the.rotary.knob.6.
7
deen
Start button
Press.the.
preparation.or.to.start.a.service.programme..
Press.the.
preparation.to.cut.the.dispensing.process.
short.
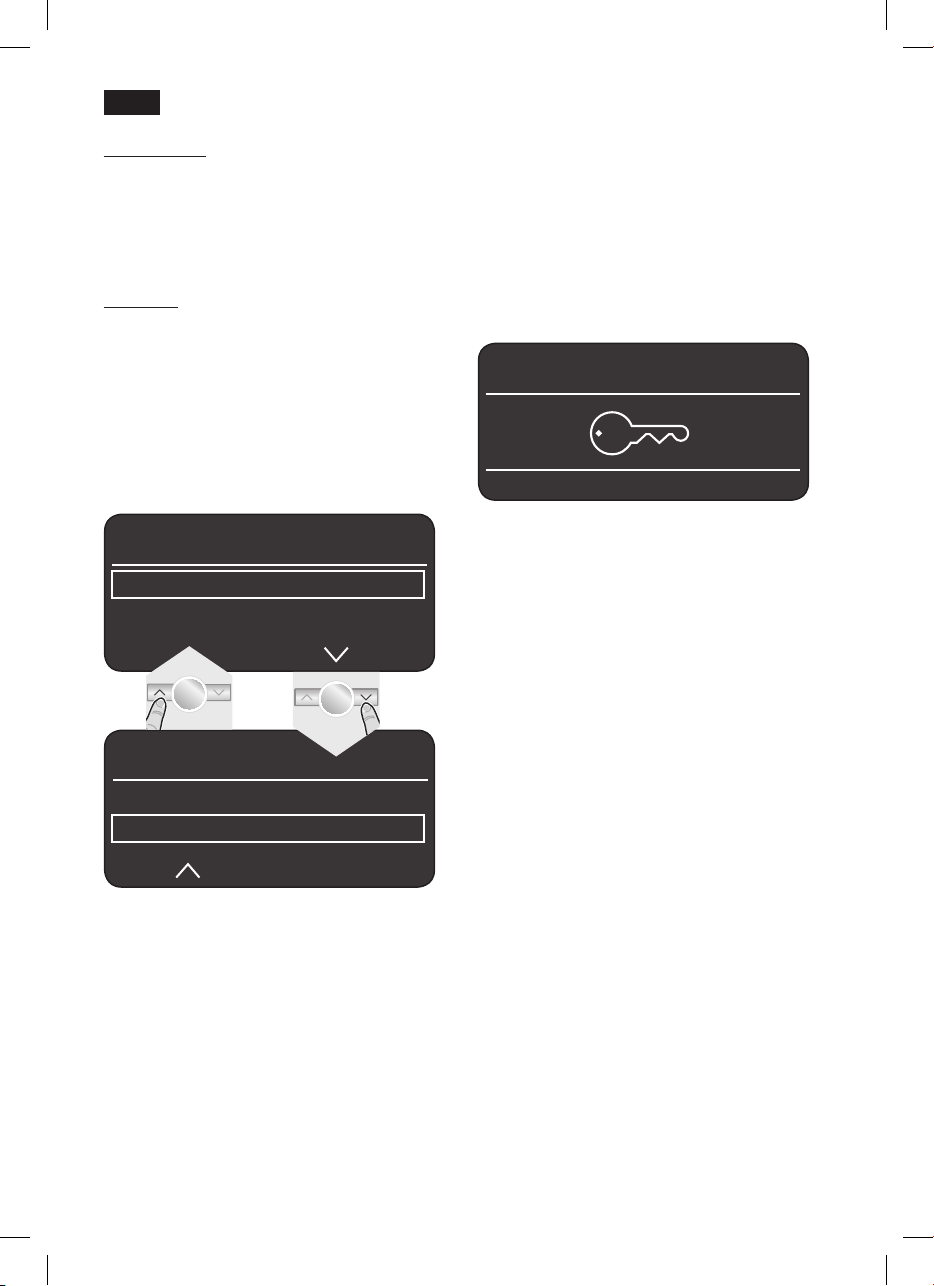
°C button
Use.the.°C.button.3.to.set.the.temperature.
for coffee and tea water (press briey) and
to.switch.the.child-proof lock.on.or.off.
(hold.down.for.at.least.3.seconds).
Setting the temperature:
Press.the.°C.button.3 briey and enter the
settings.with.the.<.and.>.buttons.4.and.
the.rotary.knob.6.
start
.button.8.to.begin.drink.
start
.button.8.again.during.drink.
temPerature
coFFee
normaL
hot Water
Child-proof lock
The.appliance.can.be.locked.to.protect.
children.from.scalding.and.burning.
● Hold down the
seconds..The.display.5.shows.a.key:.the.
child-proof.lock.is.activated..
It.is.no.longer.possible.to.operate.the.
appliance.and.the.cup.warmer.19.is.
switched.off.
°C
.button.3.for.at.least.3.
esPresso Ë Í
● To deactivate the child-proof lock, hold
down.the.°C.button.3.for.at.least.5.
seconds..The.key.disappears.from.the.
display.5.
temPerature
coFFee
hot Water
Press.the.C°.button.3.again.to.save.the.
settings.and.return.to.drink.selection.
These.settings.are.automatically.effective.
for.all.types.of.coffee.preparation.
8
<90°c
deen
j button and settings
Use.the.j.button.7.to.display information.
(press briey) and adjust settings.(hold.
down.for.at.least.3.seconds).
Displaying information
The.following.information.can.be.displayed.
in.the.Info.menu:
–
how.many.drinks.have.been.dispensed.
since.the.espresso.machine.was.switched.
on
–
when.should.the.next.service.be.
completed.
● Press the
with.the.<.and.>.buttons.4.
j.button.7 briey and navigate
inFo
descaLe aFter xxx cuPs
cLean aFter xxx cuPs
no FiLter
change FiLter in xxx cuPs *
inFo
no. oF coFFees xx
no. oF miLk mixes xx
amount hot Water xL
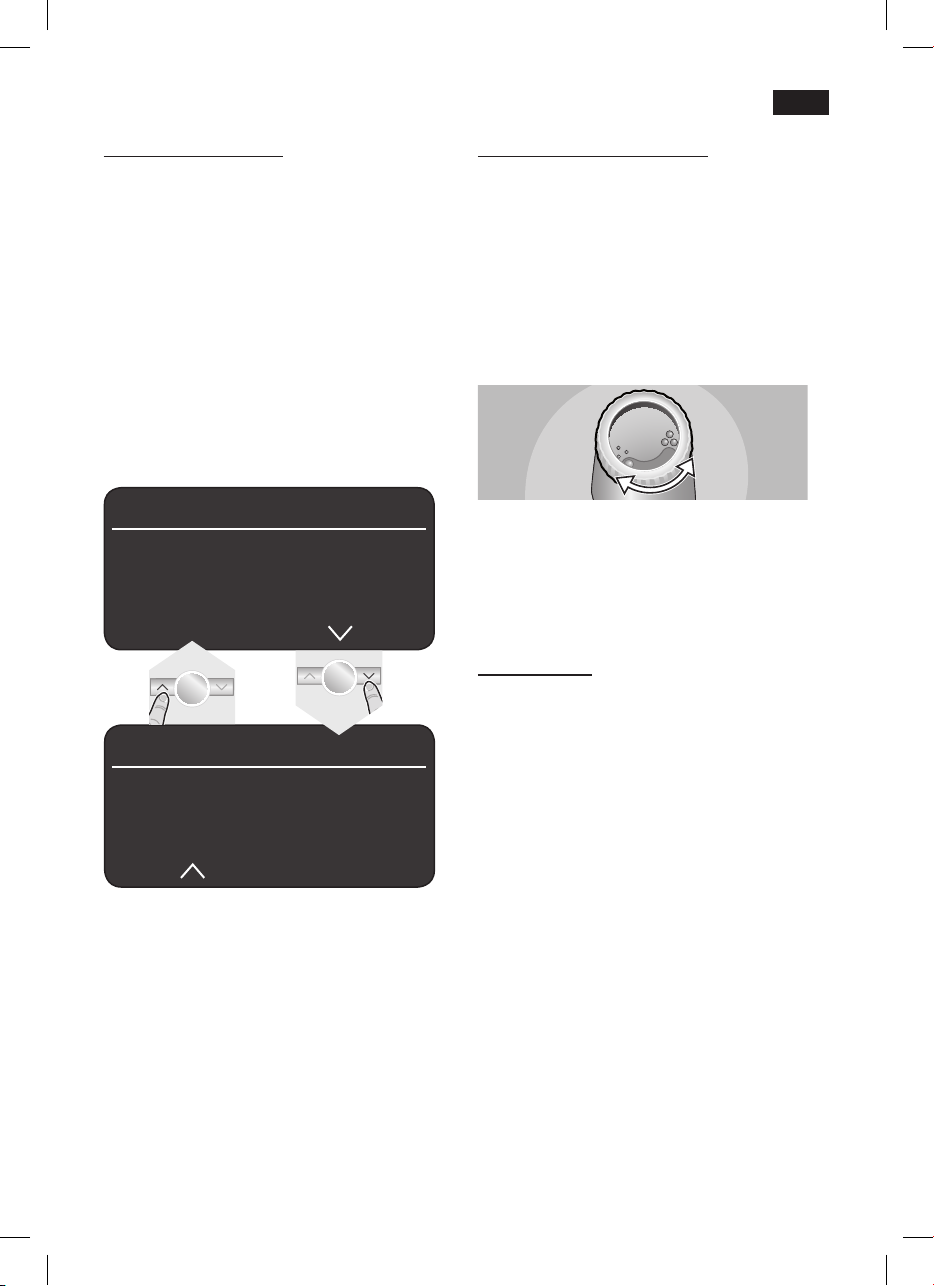
Adjusting the grinding unit
The.rotary.selector.17.adjusts.the.grind.
settings from coarse to ne.
Warning
Adjust the grinding unit only while it is
running! Otherwise the appliance may be
damaged.
● While the grinding unit is running, adjust
the.rotary.selector.17 from ne • • • to
coarse ● ● ● as required.
Note: The.new.setting.will.not.become.
apparent.until.after.the.second.cup.of.
coffee.
Tip: For.dark.roast.coffee.beans,.choose.a.
ner grind, for lighter beans a coarser grind.
Cup warming
! Warning:.The cup warmer 19
becomes very hot.
The.fully.automatic.espresso.machine.has.a.
cup.warmer.19.that.can.be.switched.on.or.
off.manually.with.button.20. When the cup
warmer.19.is.on,.button.20.lights.up.
Tip:.For.optimal.cup.warming,.place.the.
base.of.the.cups.on.the.cup.warmer.19.
*appears only if the lter is activated.
Press.the.j.button.7 again briey to return
to.drink.selection..If.no.button.is.pressed.for.
about.10.seconds.the.appliance.
automatically.switches.back.to.drink.
selection.mode.
Adjusting settings
(see.“Menu.settings”).
TK76F09 only
The.cup.warming.function.can.also.be.preprogrammed.(see.“Menu.settings.cuP
Warmer on”).
9
deen
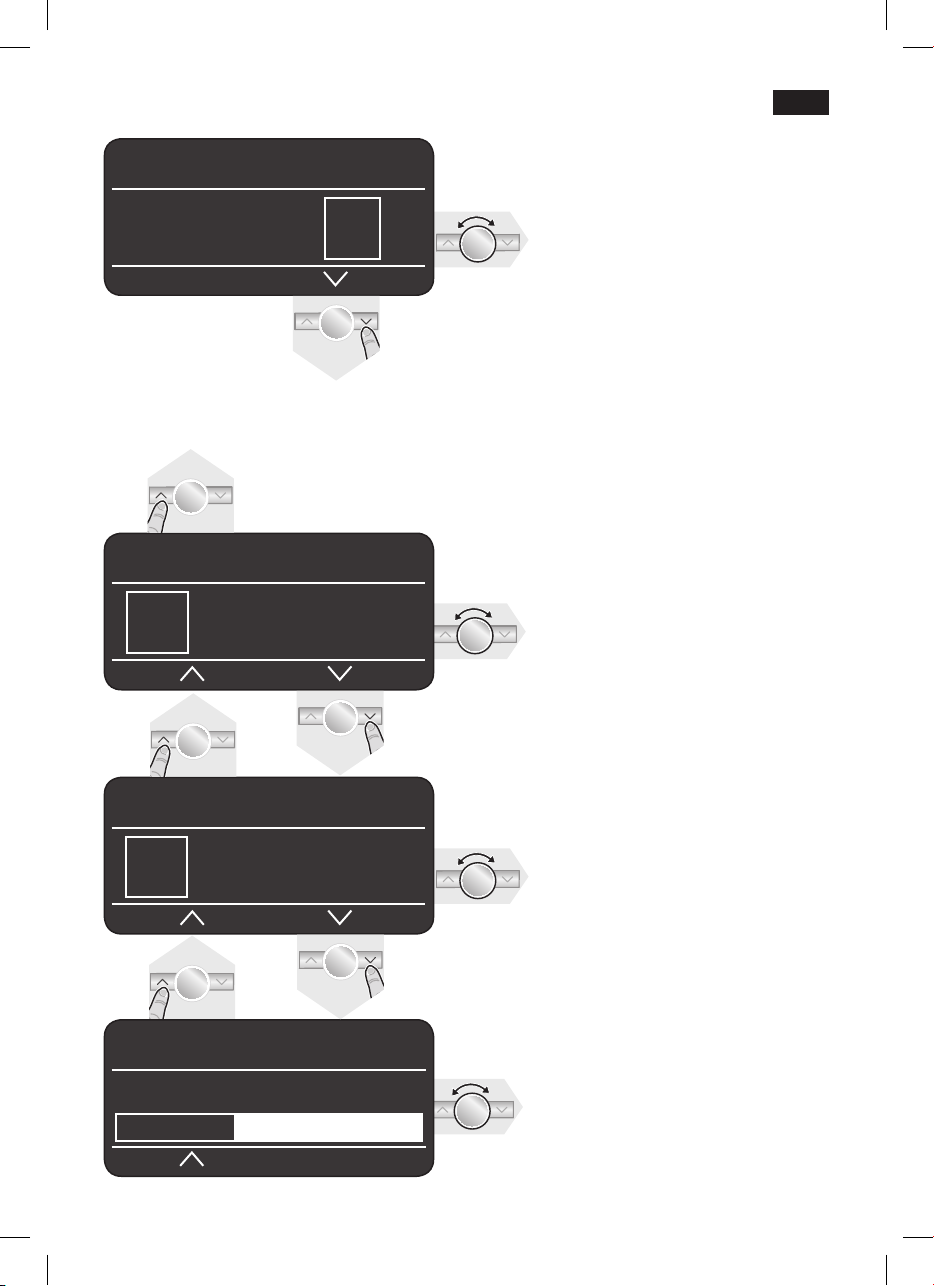
Menu settings
● Hold the j.button.down.for.at.least.3.
seconds.
The.different.setting.options.are.now.
displayed.
settings
Language engLish
Water hardness
descaLe
In.the.following.operating.instructions,.each.
new.setting.begins.with..
followed.by.an.exact.description.
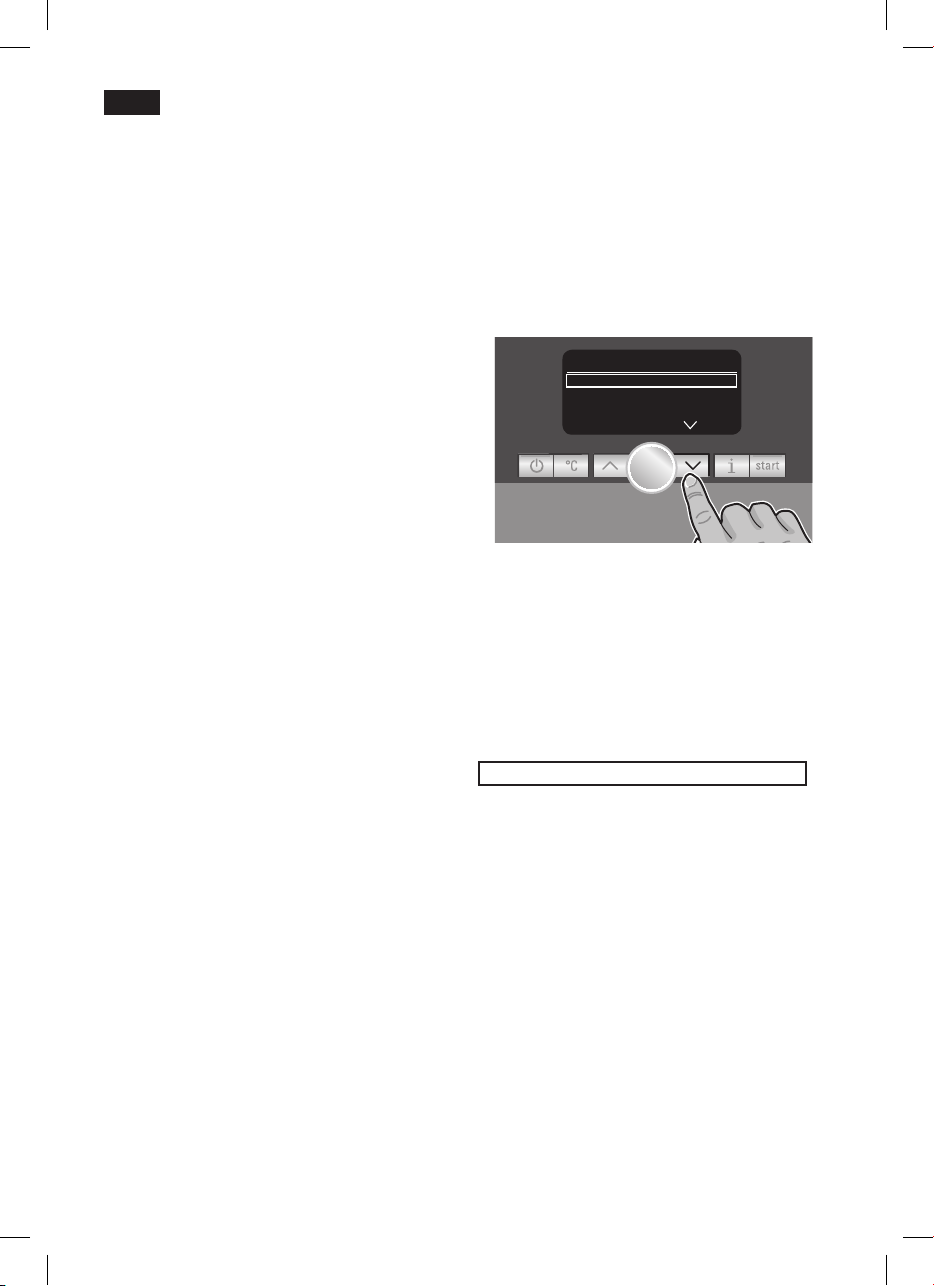
The.different.setting.options.can.be.
selected.with.the.<.and.>.buttons.4.
settin gs
Water hardness
descaLe
cLean
j 3.sec. + >
star t
j 3.sec. + >
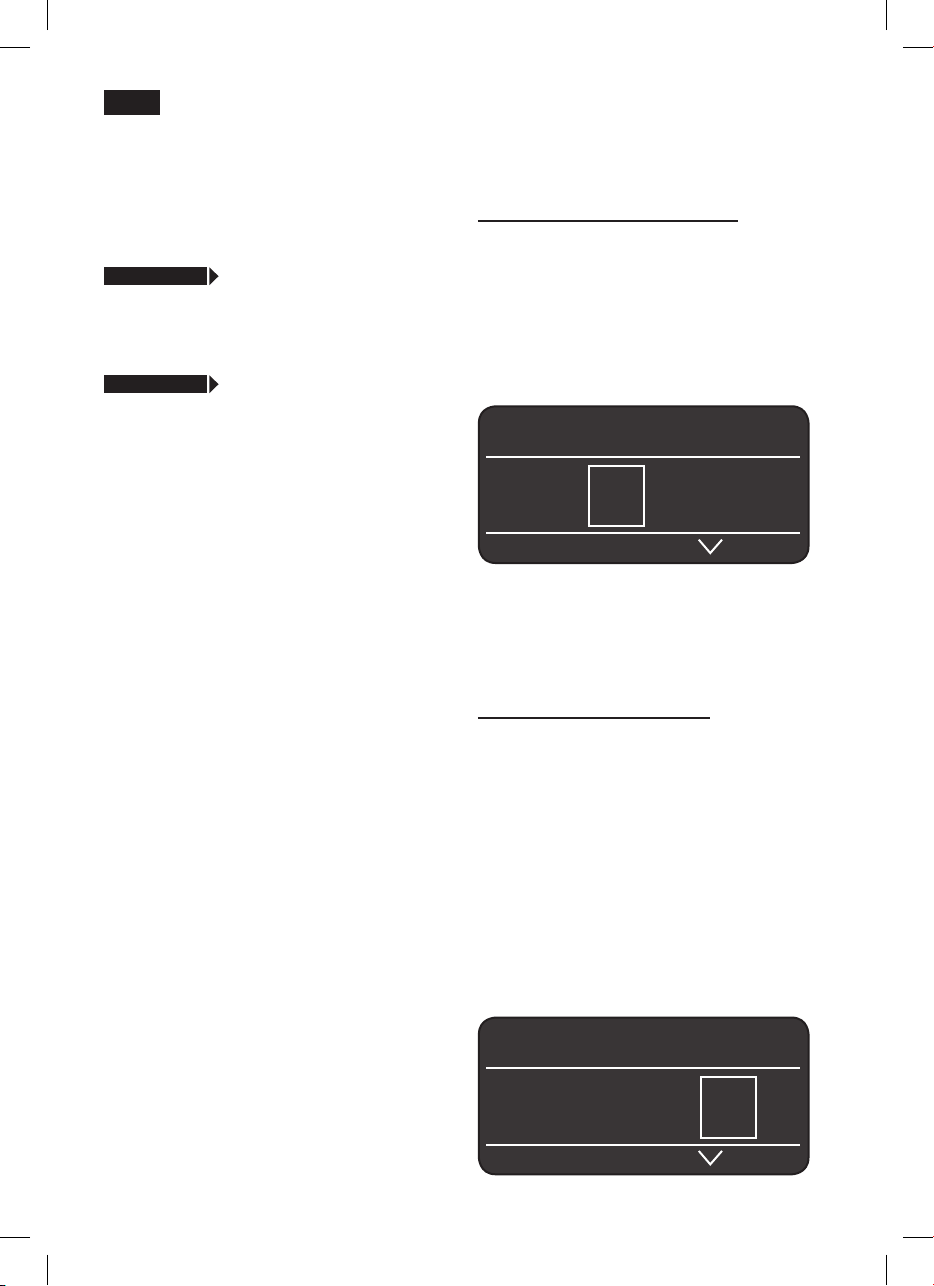
● Turn the knob 6.to.select.the.required.
language
j 3.sec. + >
● Turn the knob 6.to.select.the.required.
water.hardness.1,2,3.or.4.
Note: It.is.important.to.set.the.water.
hardness.correctly,.so.that.the.appliance.
indicates.accurately.when.the.descaling.
programme.should.be.run..The.factory.
setting.for.the.water.hardness.is.4..
You.can.check.the.water.hardness.using.
the.enclosed.test.strip.or.by.asking.your.
local.water.supplier..
● Dip the test strip in the water briey and
check.the.result.after.1.minute.
Level Water hardness
1
2
3
4
Language.
Water hardness
German (°dH) French (°fH)
1-7
8-14
15-21
22-30
1-13
14-25
26-38.
39-54
N.B.:.The.changes.you.have.made.are.
saved.automatically..
It is not necessary to conrm them
additionally.
.
10
j 3.sec. + >
● If you want to descale the appliance,
press.the.
descaling.programme.(see.“Descaling”).
j 3.sec. + >
● If you want to clean the appliance, press
the.
start
programme.(see.“Cleaning”).
j 3.sec. + >
● If you want to descale and clean the
appliance,.press.the.
run.the.Calc‘n‘Clean.programme.(see.
“Calc‘n‘Clean”).
descaLe
start
.button.8.and.run.the.
cLean
.button.8.and.run.the.cleaning.
caLc‘n‘cLean
start
.button.8.and.
deen
j 3.sec. + >
With this function you can set the clock to
show.the.time.in.the.display.5.during.energy.
saving.mode.
● Turn the knob 6.to.switch.the.clock.
display.on.= yes or.off.=.no.
Note: You.must.already.have.set.the.time.
as.shown.in.set cLock.
j 3.sec. + >
In.time.mode.you.can.turn.the.knob.6.to.
●
set.the.time.format.to.12h.or.24h..
j 3.sec. + >
● Turn the knob 6.to.set.the.current.time,.
e.g..08:25. The gure that can be set is
always.backlit;.the.backlighting.switches.
automatically.between.the.hours.and.
minutes.
TK76F09 only
(programmable cup warmer)
j 3.sec. + >
With this additional function the cup warmer
19.switches.on.automatically.at.a.
programmable.time,.irrespective.of.whether.
the.appliance.is.in.“energy.saving.mode”.or.
is.ready.for.use.
Note: You.must.already.have.set.the.time.
under.set cLock
Set.the.required.time.by.turning.the.knob.
●
6..If.oFF.is.selected,.the.function.is.
deactivated.
shoW cLock
time mode
set cLock
cuP Warmer on
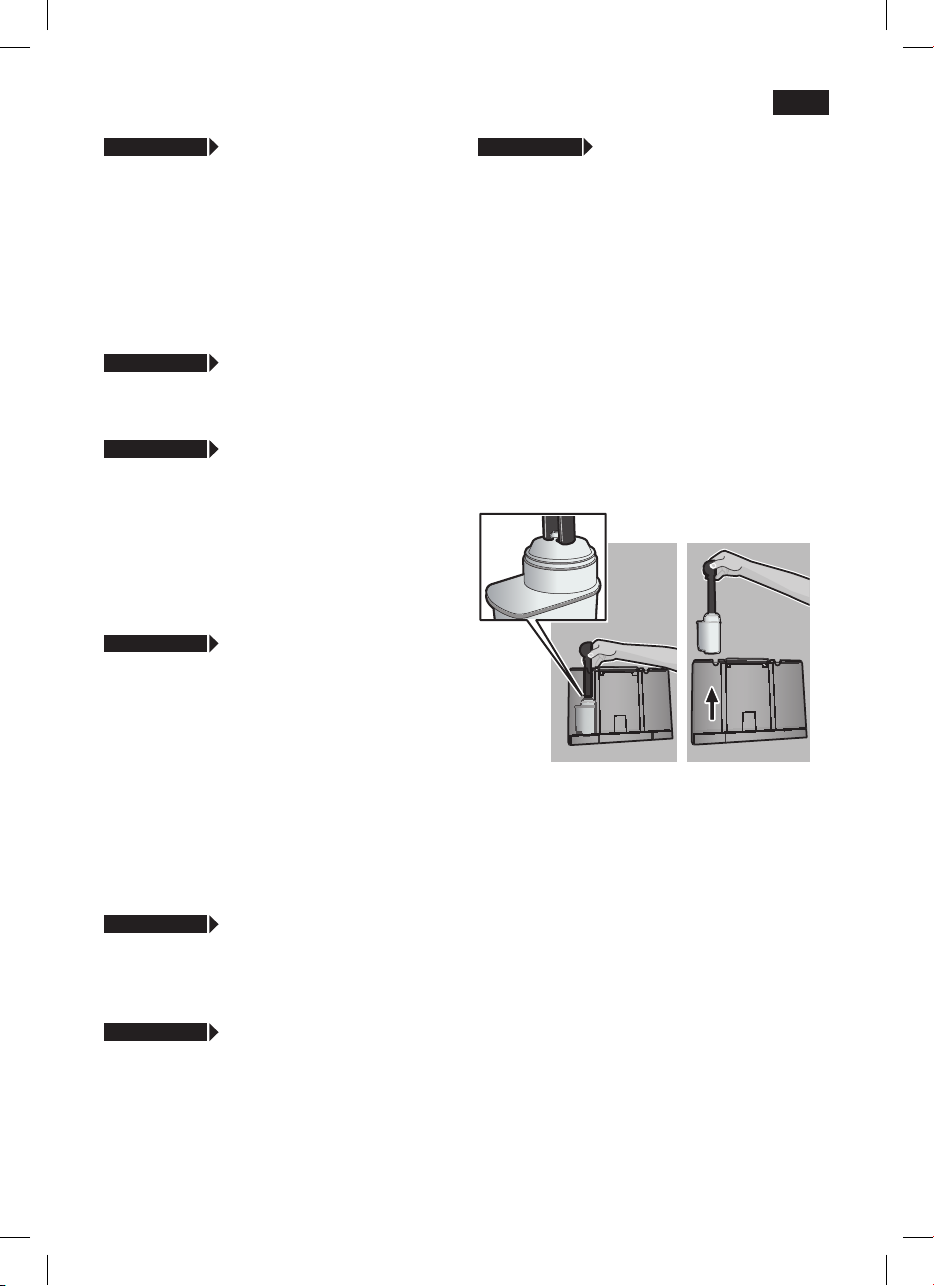
j 3.sec. + >
Before a new water lter 34.is.used,.it.must.
be.rinsed..
To do this, press the water lter 34 rmly
●
into.the.water.tank.11.with.the.aid.of.the.
measuring.spoon.14..Fill.the.water.tank.
with.water.up.to.the.“max”.mark..
Turn.the.knob.6.to.select.start.and.
●
press.the.
● PLace 0.5 L container under miLk
Frother
Place.a.container.with.a.capacity.of.0.5.
●
litres.under.the.milk.frother.10.
Press.the.
●
ow through the lter 34.to.rinse.it.
Next,.empty.the.container..The.appliance.
●
is.ready.to.use.once.more.
Note: Rinsing the lter 34.simultaneously.
activates the setting for the “change lter”
display..
You can nd detailed information about the
water lter in the enclosed lter instructions.
Water FiLter
start
.button.8.
start
start
.button.8. Water will now
j 3.sec. + >
Here you can set the time span after which
the.cup.warmer.19.switches.off.again.
automatically.
j 3.sec. + >
Turn.the.knob.6.to.enter.the.time.span.
●
after.which.the.appliance.should.
automatically.switch.to.“energy.saving.
mode”.following.drink.preparation.
A.time.between.5.minutes.and.8.hours.can.
be.set.
cuP Warmer oFF in
auto oFF aFter.
The lter 34.is.no.longer.effective.when.the.
change FiLter display.appears,.or.at.the.
latest.after.2.months..It.needs.to.be.
replaced.for.reasons.of.hygiene.and.so.that.
there.is.no.build-up.of.limescale.(this.could.
damage.the.appliance).
Replacement lters can be obtained from
retailers.(TZ70003).or.from.customer.
service (467873). If no new lter 34.is.used,.
turn.the.Water FiLter.setting.to.no.
11
deen
Note: If.the.appliance.has.not.been.used.
for.a.prolonged.period.(e.g..vacation).the.
lter 34.should.be.rinsed.before.the.
appliance.is.used.again..To.do.this,.simply.
dispense.a.cup.of.hot.water.
j 3.sec. + >
The.display.contrast.can.be.set.from.–20.
to.+20..The.factory.setting.is.+0.
Enter.the.required.setting.with.the.knob.6.
●
j 3.sec. + >
You.can.cancel.your.own.settings.and.
reactivate.the.factory.settings.
To.activate.the.factory.settings,.press.the.
●
start
.button.8.
Note:.The.appliance.can.also.be.reset.to.
the.factory.settings.using.a.combination.of.
buttons..The.appliance.must.be.switched.off.
fully.
Hold down the <.and.>.buttons.4.and.
●
the.on/off.switch.1.O./.I.at.the.same.time.
for.at.least.5.seconds..Press.the.
button.8..The.factory.settings.are.now.
reactivated.
contrast
Factory settings
start
.
Preparation
using coffee beans
This.fully.automatic.espresso.machine.
grinds.beans.freshly.for.each.brew..If.
possible,.use.only.beans.for.fully.automatic.
coffee.and.espresso.machines..For.optimal.
quality,.deep-freeze.the.beans.or.store.in.a.
cool.place.in.sealed.containers..Coffee.
beans.can.be.ground.while.frozen.
Important:.Fill.the.water.tank.11.with.fresh.
water.every.day..The.tank.should.always.
contain sufcient water for operating the
appliance.
Different.coffee.drinks.can.be.prepared.
quite.simply.at.the.press.of.a.button..
Drink preparation without milk
The.appliance.must.be.ready.for.use.
Place.the.pre-warmed.cup(s).under.the.
●
coffee.outlet.9..
Select.the.required.espresso.or.coffee.by.
●
turning.the.knob.6..The.display.5.shows.
the.selected.drink.along.with.the.setting.
for.coffee.strength.and.the.per-cup.
quantity.for.this.drink.
esPresso Ë Í
 à À Á Ä Å
The.settings.can.be.altered.(see.“Controls”).
Press.the.
●
The.coffee.is.brewed.and.then.dispensed.
into.the.cup(s).
Drink preparation with milk
The.appliance.must.be.ready.for.use.
● Place the pipe 10d.of.the.milk.frother.10.
deep.in.the.milk.container.33.
Swivel.the.coffee.outlet.9.to.the.right.until.
●
it.clicks.into.place.
Place.the.pre-warmed.cup.or.glass.under.
●
the.coffee.outlet.9.and.milk.frother.10.
Select.the.required.Macchiato.Å,.
●
Cappuccino.Æ, White coffee Ä.or.My.
coffee.Ç.by.turning.the.knob.6..The.
display.5.shows.the.selected.drink.along.
with.the.setting.for.coffee.strength.and.
the.per-cup.quantity.for.this.drink..
caPPuccino Ë Í
start
.button.8.
Tip:.Pre-warm.cups,.especially.small,.thick.
espresso.cups,.on.the.cup.warmer.19.
12
À Á Ä Å Æ Ç

deen
The.settings.can.be.altered.(see.“Controls”).
Press.the.
●
delivered.into.the.cup.or.glass..Then.the.
coffee.is.brewed.and.dispensed.into.the.
cup.or.glass.
Important: Dried milk residue is difcult to
remove,.so.clean.the.milk.frother.10.with.
lukewarm.water.immediately.after.use.
(see.“Cleaning.the.milk.system”).
start
.button.8..First.milk.is.
Preparation using
ground coffee
This.fully.automatic.espresso.machine.can.
also.be.operated.with.ground.coffee.(not.
instant.coffee.powder).
Drink preparation without milk
Select.À.or.Á.by.turning.the.knob.6.
●
Place.the.pre-warmed.cup(s).under.the.
●
coffee.outlet.9..
Open.the.drawer.21.by.pressing.
●
Pour.in.no.more.than.2.level.measuring.
●
spoons.14.of.ground.coffee.
Warning:.Do.not.use.whole.beans.or.
instant.coffee.
Close.the.drawer.21.
●
Press.the.
●
The.coffee.is.brewed.and.then.dispensed.
into.the.cup(s)..
.
N.B.:.Repeat.the.procedure.for.another.cup.
of.coffee..If.no.coffee.is.taken.within.90.
seconds,.the.brewing.chamber.empties.
automatically to avoid overlling. The appliance.rinses..
start
.button.8.
Drink preparation with milk
Turn.the.knob.6 to select White coffee Ä,.
●
Macchiato.Å,.Cappuccino.Æ.or..
My.coffee.Ç.
Place.the.pipe.10d.of.the.milk.frother.10.
●
in.the.milk.container.33.
Swivel.the.coffee.outlet.9.to.the.right.until.
●
it.clicks.into.place.
Place.the.pre-warmed.cup.or.glass.under.
●
the.coffee.outlet.9.and.milk.frother.10..
Open.the.drawer.21.by.pressing.
●
Pour.in.no.more.than.2.level.measuring.
●
spoons.14.of.ground.coffee.
Warning:.Do.not.use.whole.beans.or.
instant.coffee.
Close.the.drawer.21.
●
Press.the.
●
delivered.into.the.cup.or.glass..After.that.
the.ground.coffee.is.brewed.and.
dispensed.into.the.cup.or.glass.
Important: Dried milk residue is difcult to
remove,.so.clean.the.milk.frother.10.with.
lukewarm.water.immediately.after.use.(see.
“Cleaning.the.milk.system”).
N.B.:.Repeat.the.procedure.for.another.
coffee./.milk.drink..If.no.coffee.is.taken.
within.90.seconds,.the.brewing.chamber.
empties automatically to avoid overlling.
The.appliance.rinses..
start
.button.8..First.milk.is.
13

deen
Preparing milk froth
and warm milk
! Risk of burns
The.milk.frother.10.gets.very.hot..After.use,.
allow to cool down rst before touching.
The.appliance.must.be.ready.for.use.
Place.the.pipe.10d.of.the.milk.frother.10.
●
in.the.milk.container.33..
Place.the.pre-warmed.cup.or.glass.under.
●
the.outlet.of.the.milk.frother.10..
Select.the.required.setting..
●
“Milk.froth”.
turning.the.knob.6..
Press.the.
●
warm milk ows from the outlet of the milk
frother.10 for.about.40.or.60.seconds.
respectively..
Press.the.
●
process.short.
Note: When preparing warm milk you may
hear.a.whistling.sound..This.is.caused.by.
the.milk.frother.10.for.technical.reasons.
Tip: For.optimal.milk.froth.quality,.use.cold.
low-fat milk (1.5% fat) if possible.
or “Warm milk”
È
start
.button.8..Milk.froth.or.
start
.button.8.again.to.cut.the.
É
.by.
Dispensing hot water
!...Risk of burns
The.milk.frother.10.gets.very.hot..After.use,.
allow to cool down rst before touching.
The.appliance.must.be.ready.for.use.
Place.the.pre-warmed.cup.or.glass.under.
●
the.outlet.of.the.milk.frother.10..
Select.the.required.setting.for.hot.water.
●
.by.turning.the.knob.6..
Ê
Press.the.
●
out.of.the.milk.frother.outlet.10.for.about.
40.seconds.
Press.the.
●
process.short.
N.B.:.It.is.possible.to.set.the.temperature.of.
the.hot.water.(see.“Controls,.°C.button”).
start
.button.8. Hot water runs
start
.button.8.again.to.cut.the.
Maintenance and daily
cleaning
! Risk of electric shock
Unplug the appliance before cleaning it.
Never immerse the appliance in water.
Do not use a steam cleaner.
Important: Dried milk residue is difcult to
remove,.so.clean.the.milk.frother.10.with.
lukewarm.water.immediately.after.use.(see.
“Cleaning.the.milk.system”).
14
Wipe the outside of the appliance with a
●
soft,.damp.cloth..Do.not.use.abrasive.
cloths.or.cleaning.agents.
Rinse.the.water.tank.11.and.the.brewing.
●
unit.24.with.water.only.
The.cover.of.the.storage.compartment.
●
26,.the.drip.tray.panel.27.and.the.
insulating.cover.of.the.milk.container.33.
should.only.be.wiped.gently.with.a.damp.
cloth..Do not put them in the
dishwasher.
Remove.the.grate.for.the.coffee.outlet.29,.
●
and.the.grate.for.the.milk.frother.30..Take.
out.the.drip.tray.for.coffee.outlet.28.with.
the.coffee.grounds.container.31.by.pulling.
them.out.forward,.empty.and.clean..All
these parts can also be cleaned in the
dish washer.

deen
●
Clean.the.measuring.spoon.14,.aroma.
cover.16.and.the.inside.of.the.milk.
container.33.by.hand.or.in.the.dish.
washer.
●
Wipe out the inside of the appliance (tray
holders).
Important: Drip.tray.28.should.be.emptied.
and.cleaned.daily.to.prevent.mould.from.
developing.
N.B.:.If.the.appliance.is.cold.when.switched.
on.with.the.
mode.after.brewing.coffee,.it.rinses.
automatically,.in.other.words.the.system.
cleans.itself.
Cleaning the milk system
Clean the milk system 10 immediately after
use!
The.milk.system.10.can.be.pre-cleaned.
automatically.
Select.the.Ì.symbol.in.the.display.5.and.
●
press.the.
a.button.2,.or.if.it.is.set.to.a.
start
.button.8.
PLace emPty gLass under Frother,
P
Lace suction PiPe in gLass.
Place.an.empty.glass.under.the.milk.
●
system.10.and.put.the.end.of.the.pipe.
10d.in.the.glass.
Press.the.
●
now lls the glass automatically with
water.and.draws.it.in.again.through.the.
pipe.10d.for.cleaning..The.rinse.
procedure.stops.automatically.after.about.
1.minute.
Now.empty.the.glass.and.clean.the.pipe.
●
10d.
In.addition.to.this,.clean.the.milk.system.
thoroughly.at.regular.intervals.(by.hand.or.
in.the.dishwasher).
start
.button.8..The.appliance.
.start
Rinse.all.parts.with.clear.water.and.dry.
●
them.
Reassemble.all.the.parts.and.replace.fully.
●
in.the.appliance.
Note: All.the.parts.of.the.milk.frother.10.can.
also.be.put.in.the.dishwasher.
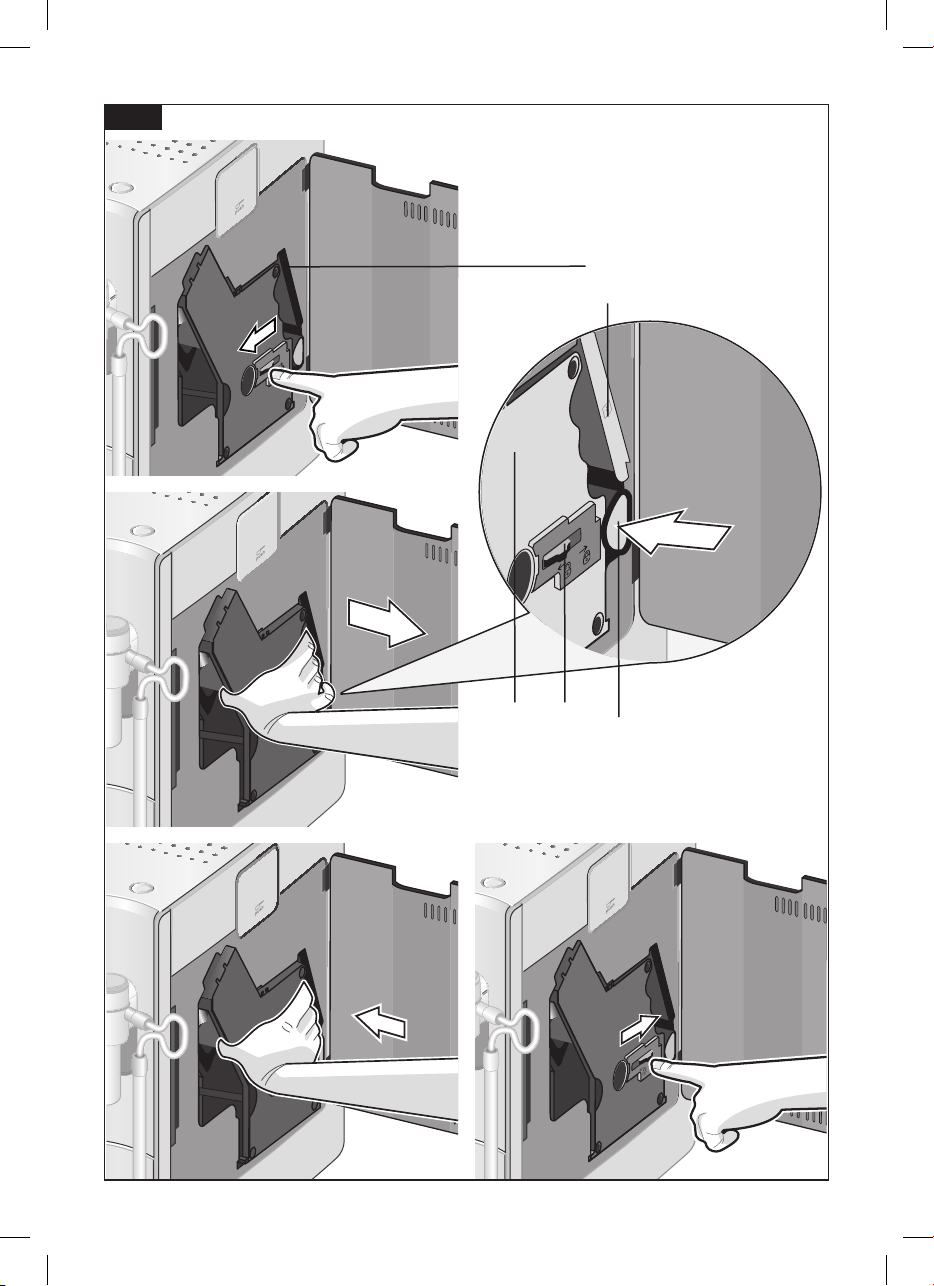
Cleaning the brewing unit
(refer also to the quick reference guide)
In.addition.to.the.automatic.cleaning.programme,.the.brewing.unit.24.should.be.
removed.regularly.for.cleaning.
Switch.to.the.“energy.saving.mode”.with.
●
the.a.button.2.
Switch.the.appliance.off.completely.at.the.
●
power.on/off.switch.1 O./.I;.no.buttons..
are.lit.
Slide.the.door.opener.23.to.the.right.and.
●
open.the.door.22.to.the.brewing.unit.24.
Slide.the.red.lock.24b.on.the.brewing.unit.
●
24.completely.to.the.left.
Press.the.red.button.24a,.grasp.the.
●
brewing.unit.24.by.the.recessed.grips.
(Fig. E).and.remove.carefully.
Rinse.the.brewing.unit.24.under.running.
●
water.
Important: Clean.without.detergent.and.do.
not.place.in.the.dishwasher.
Wipe out the inside of the appliance with
●
a.damp.cloth.
Allow.the.brewing.unit.24.and.the.inside.
●
of.the.appliance.to.dry.
Reinsert.the.brewing.unit.24.fully.into.the.
●
appliance.
Slide.the.red.lock.24b.fully.to.the.right.
●
and.close.the.door.22.
Dismantling the milk system 10 for
cleaning:
Pull.the.milk.system.10.forward.out.of.the.
●
appliance.
Clean.the.individual.parts.(Fig. C).with.a.
●
detergent.solution.and.a.soft.brush.
15

deen
Storing accessories
The.espresso.machine.has.special.compartments.for.storing.the.accessories.and.
quick.reference.guide.inside.the.appliance.
To.store.the.measuring.spoon.14,.milk.
●
pipe.10d.and.tube.10c,.remove.the.water.
.tank.11.and.insert.the.parts.in.the.shaped.
recesses.13.
The.quick.reference.guide.has.its.own.
compartment.by.the.brewing.unit.24.
Open.the.door.22.to.the.brewing.unit.
●
Grasp.the.red.cover.26.to.the.storage.
●
compartment.25.by.the.tab.and.remove.
Stow.away.the.quick.reference.guide,.
●
replace.the.cover.26.and.close.the.door.
to.the.brewing.unit.22.
Tips on energy saving
The.fully.automatic.espresso.machine.
–
switches.to.“energy.saving.mode”.
automatically.after.one.hour.(factory.
setting)..The.appliance.uses.very.little.
power.in.“energy.saving.mode”..The.
default.time.of.one.hour.can.be.altered:.
(see.Menu.settings,.“auto oFF aFter”)...
If.the.appliance.is.not.being.used,.switch.
–
it.off.at.the.power.on/off.switch.1.O./.I on.
the.front.
If.possible,.do.not.interrupt.coffee.or.milk.
–
froth.dispensing..Cutting.the.coffee.or.
milk.froth.dispensing.process.short.
results.in.higher.energy.consumption.and.
in.more.residual.water.collecting.in.the.
drip.tray.
Descale.the.appliance.regularly.to.avoid.a.
–
build-up of limescale. Limescale residue
results.in.higher.energy.consumption.
Service Programmes
Tip:.Refer.also.to.the.quick.reference.guide.
in.the.storage.compartment 25.
At.regular.intervals,.the.display.5.shows.the.
following.texts:.
service - descaLe or
s
ervice - cLean.or..
service - caLc‘n‘cLean..
The.appliance.should.be.cleaned.or.descaled.immediately.using.the.corresponding.
programme..You.also.have.the.option.of.
combining.both.processes.with.thethe.
Calc‘n‘Clean.function.(see.“Calc‘n‘Clean”)..
If.the.service.programme.is.not.run.as.
instructed,.the.appliance.may.be.damaged.
Warning
Each time you run the service programme,
you should follow the instructions for using
the descaling and cleaning agents.
Never interrupt the service programme!
Do not drink the liquids!
Never use vinegar, vinegar-based products,
citric acid or citric acid-based products!
Never put descaling tablets or other
descaling agents in the ground coffee
drawer or the drawer for cleaning tablets!
For descaling, use only the descaling
tablets included with the appliance. They
have been developed specially for this coffee
machine to optimise the descaling process.
Specially developed descaling and
cleaning tablets are available from
retailers or customer service.
Order.number Retail Customer.
service
Cleaning..
tablets
Descaling.
tablets
Important: If there is a lter 34.in.the.water.
tank.11,.it.needs.to.be.removed.before.the.
service.programme.is.run.
TZ60001 310575
TZ60002 310967
16

deen
Descaling
esPresso Ë Í
service - descaLe
i - Button 3 sec.
The.
start
.button.8 ashes while the different
descaling.processes.are.running.
The gures on the top right indicate the
progress.of.the.programme.
Hold the j.button.7.down.for.at.least.3.
●
seconds.
descaLestart
Press.the.
●
guide.you.through.the.programme.
emPty driP tray
r
ePLace driP tr ay
Empty.drip.tray.28.and.replace.them.
●
PLace 0.5 L container under miLk
Frother
Place.a.container.with.a.capacity.of.0.5.
●
litres.under.the.milk.frother.10.
Press.the.
●
start
.button.8;.the.display.5.will.
start
start
.button.8..
not enough descaLing
FLuid. reFiLL FLuid
Note: If.there.is.not.enough.descaling.
solution.in.the.water.tank.11,.the.
corresponding.prompt.is.displayed..Pour.in.
descaling.solution.and.press.
start
8.again.
cLean and reFiLL Water tank start
Rinse.the.water.tank.11 and rell it with
●
fresh.water.up.to.the.“max”.mark.
Press.the.
●
programme.now.runs.for.about.1.minute.
and.rinses.the.appliance.
start
.button.8..The.descaling.
descaLing
e
mPty driP t ray.
rePLace driP tray
Empty.drip.tray.28.and.replace.them.
●
The.appliance.has.completed.descaling.and.
is.ready.for.use.again.
Cleaning
esPresso Ë Í
service - cLean
i - Button 3 sec.
Note: If the water lter 34.is.activated,.the.
display will prompt you to remove the lter
34,.then.press.the.
start
.button.8.again.
remove FiLter start
add 0.5 L Water and descaLer
start
Pour.lukewarm.water.into.the.empty.
●
water.tank.11.up.to.the.“0.5”.litre.mark.
and.dissolve.2.Siemens.descaling.tablets.
in.it.
Press.the.
●
programme.will.now.run.for.about.20.
minutes.
start
.button.8..The.descaling.
descaLing
The.
start
.button.8 ashes while the different
cleaning.processes.are.running.
The gures on the top right indicate the
progress.of.the.programme.
Fill.the.water.tank.11.up.to.the.“max”.
●
mark.
Hold the j.button.7.down.for.at.least.3.
●
seconds.
cLeanstart
Press.the.
●
guide.you.through.the.programme.
start
.button.8;.the.display.5.will.
17

deen
emPty driP tray
r
ePLace driP tr ay
Empty.drip.tray.28.and.replace.them..The.
●
appliance.rinses.twice.
Position sWiveL arm
Swivel.the.coffee.outlet.9.to.the.left.until.it.
●
clicks.into.place.
cLeaning
oPen draWer
Open.the.drawer.21.by.pressing.
●
insert siemens cLeaning taBLet and
cLose draWer
Drop.a.Siemens.cleaning.tablet.in.the.
●
drawer.21 and.close.
Press s tart
Press.the.
●
programme.will.now.run.for.about.7.
minutes.
start
.button.8..The.cleaning.
cLeaning
e
mPty driP t ray
r
ePLace driP tr ay
Empty.drip.tray.28.and.replace.them.
●
The.appliance.is.ready.for.use.again.
Calc‘n‘Clean
Calc‘n‘Clean.combines.the.separate.
functions.of.descaling.and.cleaning..If.both.
programmes.are.due.to.be.run.soon,.the.
espresso.machine.automatically.suggests.
this.service.programmes.
esPresso Ë Í
service - caLc‘n‘cLean
i - Button 3 sec.
The.
start
.button.8 ashes while the different
Calc‘n‘Clean.processes.are.running..The.
gures on the top right indicate the progress
of.the.programmes.
Hold the j.button.7.down.for.at.least.3.
●
seconds.
caLc‘n‘cLean start
Press.the.
●
guide.you.through.the.programme.
start
.button.8;.the.display.will.
emPty driP tray
rePLace driP tray
Empty.drip.tray.28.and.replace.them.
●
Swivel.the.coffee.outlet.9.to.the.right.until.
●
it.clicks.into.place.
Place.a.container.with.a.capacity.of.at.
●
least.1.litre.under.the.milk.frother.10.
Press.the.
●
rinses.twice.
start
.button.8..The.appliance.
cLeaning
o
Pen draWer
Open.the.drawer.21.by.pressing.
●
insert siemens cLeaning taBLet and
cLose draWer
Drop.a.Siemens.cleaning.tablet.in.the.
●
drawer.21.and.close.
Note: If the water lter 34.is.activated,.the.
display.5 will prompt you to remove the lter
34 and.press.the.
start
.button.8.again.
remove FiLterstart
add 0.5 L Water and descaLer
start
Pour.lukewarm.water.into.the.empty.
●
water.tank.11.up.to.the.“0.5”.litre.mark.
and.dissolve.2.Siemens.descaling.tablets.
in.it.
Press.the.
●
programme.now.runs.for.about.20.
minutes.
start
.button.8..The.descaling.
descaLing
not enough descaLing
FLuid. reFiLL FLuid
Note: If.there.is.not.enough.descaling.
solution.in.the.water.tank.11,.the.
18

deen
corresponding.prompt.is.displayed..Pour.in.
start
descaling.solution.and.press.
.8.again.
cLean and reFiLL Water tank
start
Rinse.the.water.tank.11 and rell it with
●
fresh.water.up.to.the.“max”.mark.
Press.the.
●
programme.now.runs.for.about.1.minute.
more,.followed.by.the.cleaning.
programme.for.about.7.minutes,.and.
rinses.the.appliance.
start
.button.8..The.descaling.
descaLing
cLeaning
emPty driP tray
r
ePLace driP tr ay
Empty.drip.tray.28.and.replace.them.
●
The.appliance.has.completed.descaling.and.
cleaning.and.is.ready.for.use.again.
Important:.If.one.of.the.service.
programmes.is.interrupted,.e.g..by.a.power.
outage,.proceed.as.follows:
Rinse.the.water.tank.11 and rell it with
●
fresh.water.up.to.the.“max”.mark.
Press.the.
●
programme.now.runs.for.about.3.minutes,.
and.rinses.the.appliance.
start
.button.8..The.cleaning.
cLeaning
emPty driP tray
r
ePLace driP tr ay
Empty.drip.tray.28.and.replace.them.
●
The.appliance.is.ready.for.use.again.
Select.the.“Milk.froth”.
●
release.steam.for.about.15.seconds.
Switch.the.appliance.off.at.the.power.on/
●
off.switch.1.O./.I..
Empty.the.water.tank.11.and.the.drip.tray.
●
28.
Disposal
This.appliance.is.labelled.in.accordance.
with.the.European.Directive.2002/96/EG.
relating.to.waste.electrical.and.electronic.
equipment – WEEE. The directive provides
the.framework.for.the.EU-wide.take-back.
and.disposal.of.end-of-life.appliances.
Please.ask.your.specialist.retailer.about.
current.disposal.facilities.
A
.setting,.start.and.
È
Accessories
The.following.accessories.can.be.obtained.
from.retailers.and.customer.service.
Order..
number
Cleaning.
tablets
Descaling.
tablets
Water filters TZ70003 467873
Retail Customer.
service
TZ60001 310575
TZ60002 310967
Frost protection
! .To avoid damage from low tempera-
tures during transport and storage, the
appliance must be completely emptied
rst.
Note:.The.appliance.must.be.ready.for.use.
and.the.water.tank.11 lled.
Place.a.large,.narrow.receptacle.under.
●
the.milk.frother.10.
Guarantee
The.guarantee.conditions.for.this.appliance.
are as dened by our representative in the
country.in.which.it.is.sold..Details.regarding.
these.conditions.can.be.obtained.from.the.
dealer.from.whom.the.appliance.was.purchased..The.bill.of.sale.or.receipt.must.be.
produced.when.making.any.claim.under.the.
terms.of.this.guarantee.
Right of modication reserved.
19

deen
Simple troubleshooting
Problem Cause Solution
Display.shows
reFiLL Bean container.
although.the.bean.container.
15.is.full,.or.the.grinding.unit.
does.not.grind.the.beans.
No.hot.water.dispensed. The.milk.frother.10.or.its.
Too.little.or.no.milk.froth.
or.
The.milk.frother.10.does.not.
draw.the.milk.in.
Coffee.dispensing.slows.to.
a.trickle.or.stops.completely.
Beans.are.not.falling.into.
the.grinding.unit.
(beans.too.oily).
holder.is.soiled.
The.milk.frother.10.or.its.
holder.is.soiled.
Milk.unsuitable.for.frothing. Use low-fat milk (1.5 % fat).
The.milk.frother.10.is.not.
correctly.assembled.
Coffee is ground too nely.
Pre-ground.coffee.is.too.
ne.
Build-up.of.limescale.in.the.
appliance.
Gently.tap.the.bean.
container.15.
Change.the.type.of.coffee.if.
necessary.
When the bean container 15.
is.empty,.wipe.it.with.a.dry.
cloth.
Clean.the.milk.frother.10.or.
its.holder.
Clean.the.milk.frother.10.or.
its.holder.
Assemble.the.milk.frother.10.
correctly.
Adjust.the.grinding.unit.to.a.
coarser.setting..Use.coarser.
pre-ground.coffee.
Descale.the.appliance.
Coffee.has.no.“crema”. Unsuitable.type.of.coffee. Change.type.of.coffee.used.
The.beans.are.no.longer.
fresh.
The.grinding.setting.is.not.
suitable.for.the.beans.
Coffee.is.too.“acidic”. The.grinding.setting.is.too.
coarse.or.the.pre-ground.
fee.is.too.coarse.
cof
Unsuitable.type.of.coffee Use.a.darker.roast.
Coffee.is.too.“bitter”. The.grinding.setting.is.too.
ne or the pre-ground.
coffee is too ne.
Unsuitable.type.of.coffee. Change.type.of.coffee.used.
Display.shows.
P
Lease contact hotLine.
If you are unable to solve the problem, please call the hotline.
20
error
The.appliance.has.a.fault. Please.call.the.hotline.
Use.fresh.beans.
Adjust.grinding.setting.to.
ne.
Adjust.the.grinding.unit.to.a.
ner setting or use ner pre-
ground.coffee.
Adjust.the.grinding.unit.to.a.
coarser.setting.or.use.
coarser.pre-ground.coffee.

Simple troubleshooting
Problem Cause Solution
The.water.filter.34.does.not.
stay.in.position.in.the.water.
tank.11.
The.coffee.grounds.are.not.
compact.and.are.too.wet.
Display.shows..
PLease check BreWing
unit
Coffee.or.milk.froth.quality.
varies.considerably..
Water dripped onto the inner
floor.of.the.appliance.when.
the.drip.tray.was.removed.
If you are unable to solve the problem, please call the hotline.
The.water.filter.34.is.not.
correctly.engaged.
The.grind.setting.is.too.fine.
or.too.coarse,.or.you.are.
not.using.enough.preground.coffee.
Brewing.unit.is.soiled. Clean.brewing.unit.
Too.much.pre-ground.
coffee.in.the.brewing.unit.
Build-up.of.limescale.in.the.
appliance.
Drip.tray.removed.too.early. Wait a few seconds after
Press.the.water.filter.34.
firmly.into.the.tank.
attachment.until.you.feel.it.
engage.
Adjust.the.grinding.unit.to.a.
coarser.or.finer.setting,.or.
use.2.level.measuring.
spoons.of.ground.coffee.
Clean.brewing.unit..
(Pour.in.no.more.than.2.
level.measuring.spoons.of.
ground.coffee).
Descale.the.appliance.with.
two.descaling.tablets.as.
described.in.the.instructions.
the.last.drink.was.dispensed.
before.removing.the.drip.
tray.
deen
21

defr
Sommaire
Présentation..............................................44
Avant.la.première.utilisation......................45
Eléments.de.commande. ...........................46
−.Interrupteur.électrique.O./.I. ...................46
−.Touche.a. ...............................................46
−.Bouton.rotatif. .........................................46
−.Touches.de.sélection.<.et.>................46
−.Ecran. .....................................................47
−.Touche.
−.Touche.°C. ..............................................49
−.Touche.j.réglages. .................................50
− Régler la nesse de la mouture. ............50
−.Chauffe-tasses. ......................................50
Réglages.menu.........................................51
− Langue. ..................................................51
− Dureté eau. ............................................51
−.Détartrage. .............................................51
−.Nettoyage. ..............................................51
−.Calc‘n‘Clean. ..........................................51
− Afcher heure. ........................................52
−.Mode. .....................................................52
−.Régler.heure. .........................................52
−.Chauffe-tasses.MA.(TK76F09). ..............52
−.AR.chauf-tasse......................................52
− AR auto dans. ........................................52
−.Filtre.eau. ...............................................52
−.Contraste...............................................53
−.Réglage.usine. .......................................53
Préparation.avec.du.café.en.grains. ..........53
Préparation.à.partir.de.café.moulu.. ..........54
Préparer.de.la.mousse.de.lait.et.du.lait.
chaud. ........................................................55
Préparer.de.l’eau.chaude. .........................55
Entretien.et.nettoyage.quotidien. ...............56
−.Nettoyage.du.mousseur.du.lait. .............56
−.Nettoyer.l‘unité.de.percolation...............56
Rangement.des.accessoires.. ...................57
Conseils.pour.économiser.l’énergie..........57
Programmes.de.maintenance...................57
−.Détartrage. .............................................58
−.Nettoyage. ..............................................59
−.Calc‘n‘Clean. ..........................................60
Protection.contre.le.gel. .............................61
Accessoires. ..............................................61
Mise.au.rebut.et.Garantie. .........................61
Eliminer soi-même les problèmes simples.62
start
. ..........................................49
Consignes de sécurité
Lire attentivement le mode d’emploi,
se conformer à ses indications et le
conserver à portée de la main !
Cette machine à café est destinée à un
usage ménager, dans des quantités
généralement consommées à domicile
et en aucun cas pour une utilisation
commerciale.
! Risque de choc électrique !
Pour.le.raccordement.et.l‘utilisation.de.la.
machine,.respecter.impérativement.les.
indications gurant sur la plaque signaléti-
que..N’utiliser.la.machine.que.si.le.cordon.
électrique.et.la.machine.ne.présentent.
aucun.dommage..
N’utiliser.la.machine.qu’à.l’intérieur.de.locaux,.à.température.ambiante..
Ne pas coner l’appareil à des enfants ou à
des.personnes.aux.capacités.sensorielles.
ou.intellectuelles.diminuées.ou.ne.disposant.pas.d’une.expérience.ou.d’une.
connaissance sufsante, sauf si elles le font
sous surveillance ou si elles ont bénécié
préalablement.d’une.information.à.propos.
de.la.manipulation.de.l’appareil.de.la.part.
de.la.personne.responsable.de.leur.sécurité.
Bien surveiller les enfants an de les empêcher.de.jouer.avec.l’appareil.
En.cas.de.défaut,.débrancher.immédiate-
ment le cordon électrique. Les réparations
sur.la.machine,.par.ex..le.remplacement.du.
cordon électrique, doivent être effectuées
uniquement.par.notre.Service.après-vente.
an d‘éliminer tous les risques. Ne jamais
plonger.la.machine.ou.le.cordon.électrique.
dans.l’eau..
Ne.pas.glisser.les.doigts.à.l’intérieur.du.
moulin.
! Risque de brûlure !
La buse Eau chaude / Vapeur devient
brûlante..Après.utilisation,.bien.laisser.
refroidir.la.buse.avant.de.la.saisir.
22

defr
Chère.amatrice.de.café,..
cher.amateur.de.café,
.
Félicitation.pour.avoir.choisi.la.cafetière.
Siemens.
Présentation
Figures A, B, C, D et E
. 1.Interrupteur.électrique.O./.I
2.Touche.a
. 3.Touche.°C.(température./.sécurité..
. .enfants).
. 4.Touches.de.sélection.<.>
5.Ecran
. .a) Ligne d‘état
. .b) Ligne de sélection
. .c) Ligne de navigation
. 6 Bouton.rotatif.pour.réglages.à.l’écran
. 7..Touche.j.(menu.Info)
. 8.Touche.
. 9. .Bec.verseur.du.café,.réglable.en.
hauteur.et.pivotant
.10. .Mousseur.lait,.réglable.en.hauteur..
(production.de.mousse.de.lait./.eau.
chaude)
. .a).partie.supérieure
. .b).partie.inférieure
. .c) exible
. .d).tube.mousseur
.11 Réservoir.d’eau.amovible
12.Couvercle.du.réservoir.d’eau
13 Logements.
(cuillère-dose.et.accessoire.mousseur.
lait)
.14.Cuillère-dose.(sert.de.poignée.pour..
placer le ltre d‘eau)
.15.Bac.à.café
.16.Couvercle.préservateur.d’arôme
17 Sélecteur de réglage de nesse de
. .mouture.
start
(boissons./.programmes)
Ce.mode.d’emploi.décrit.différents.modèles.
qui.se.différencient.par.leur.niveau.
d’équipement.
Veuillez.également.tenir.compte.du.
Mémento.fourni..
Un.logement.25.a.été.prévu.pour.le.
conserver.à.portée.de.main.dans.la.
machine.
18.Anneau.lumineux
19.Chauffe-tasses
20.Bouton.de.commande.pour.chauffe-.
. .tasses.éclairé
21. .Tiroir.à.café..
(café.en.poudre./.pastille.de.nettoyage)
22.Volet.de.la.chambre.de.percolation
23..Ouvre-volet.
24..Unité.de.percolation.
. .a).Bouton.poussoir.
. .b).Verrouillage
25 Logement du Mémento
26.Verrouillage.logement
27.Panneau.des.bacs.collecteurs
28.Bac.collecteur.du.bec.verseur.du.café
29.Grille.bec.verseur.du.café
30.Grille.mousseur.de.lait
31.Récipient.pour.marc.de.café
32 Logement du cordon électrique
33.Réservoir.de.lait.(isolé)
34.Filtre.eau
23
defr
Avant la première
utilisation
Généralités
Utiliser.uniquement.de.l’eau.pure,.sans.gaz.
carbonique.et.de.préférence.du.café.en.
grain.pour.espresso.ou.pour.percolateur..
Ne.pas.employer.des.grains.de.café.avec.
glaçage,.des.grains.caramélisés.ou.enrobés.d’une.substance.sucrée.quelconque.;.
ils.encrassent.et.obturent.l’unité.de.
.passage..
Sur.cette.machine,.il.existe.un.réglage.de.la.
dureté.de.l’eau..En.usine,.la.machine.est.
réglée.sur.la.dureté.4..Se.servir.de.la.bandelette.fournie.pour.déterminer.la.dureté.de.
l’eau.
Si.la.dureté.est.différente.de.la.valeur.4,.
programmer.la.machine.en.conséquence.
après.la.mise.en.route.(voir.point.
«. . Réglages.menu.dureté eau. . »).
Mise en service de la machine
Placer.la.machine.sur.une.surface.plane.
●
et.capable.de.supporter.son.poids..
Info : la.machine.à.café.est.équipée.de.
quatre roulettes en dessous ; elle peut être
positionnée en forme d’arc an de faciliter
la.commande.et.l’accès.
Extraire.du.logement.32.la.longueur.de.
●
cordon.électrique.nécessaire.et.brancher.
dans.une.prise..Pour.ajuster.la.longueur.
du cordon, il suft de le tirer ou de le
repousser.à.l’intérieur..Pour.cela,.placer.
la.machine.sur.un.bord.de.table,.par.ex.,.
et.tirer.le.câble.vers le bas.ou.le.pousser.
vers le haut..
Rabattre.vers.le.haut.le.couvercle.du.
●
réservoir.d'eau.12.
Retirer.le.réservoir.d'eau.11,.le.rincer.et.le.
●
remplir.d’eau.froide..Ne.pas.dépasser.le.
repère.«. . max. . ».
Placer.le.réservoir.d'eau.11 bien.vertical.
●
et.appuyer.pour.le.faire.descendre.
Refermer.le.couvercle.du.réservoir..
●
d'eau.12.
Remplir.de.café.en.grains.le.bac..
●
à.café.15.
Appuyer.sur.l'interrupteur.électrique.1
●
O./.I,.la.touche.8.
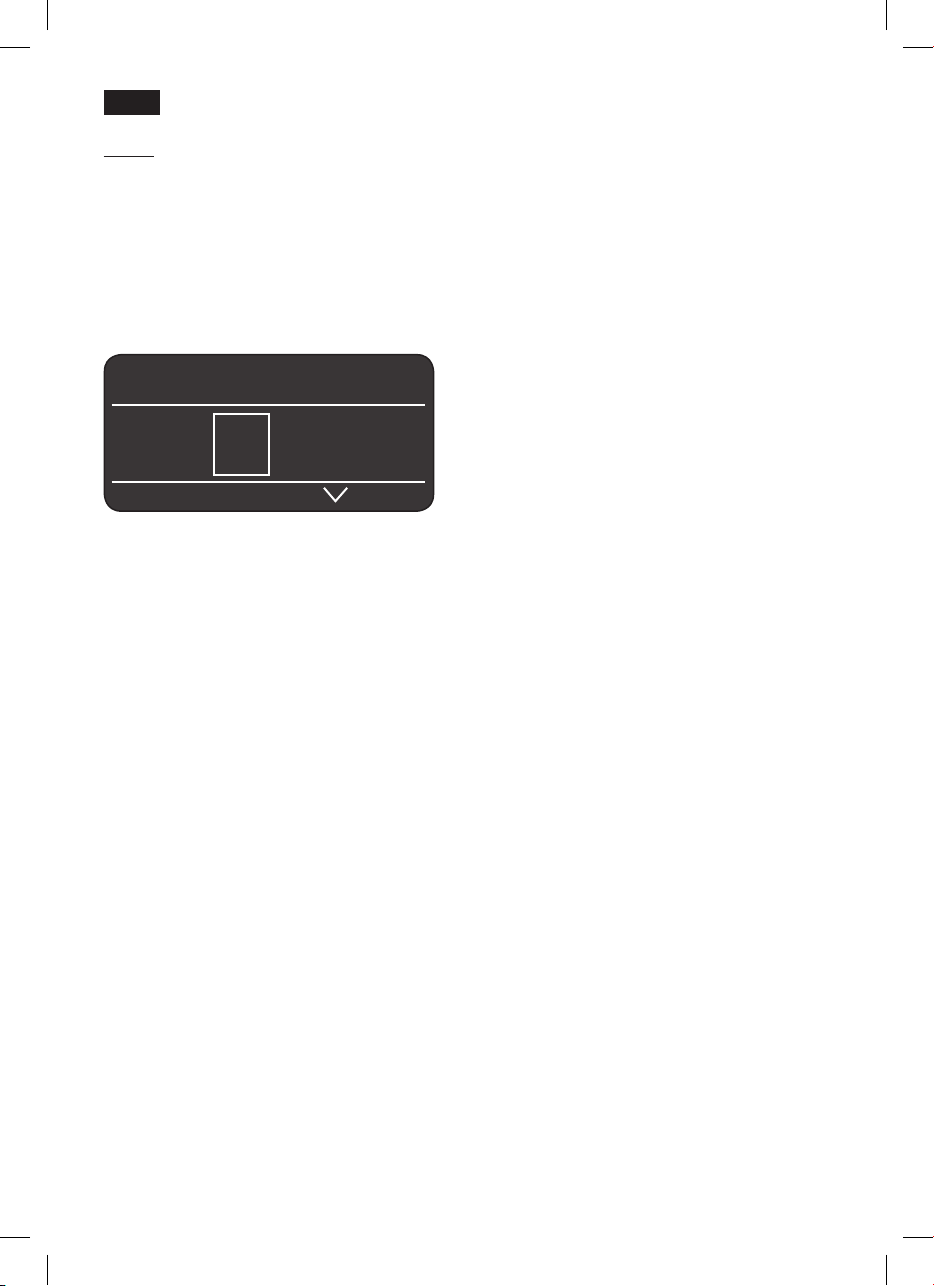
l’écran.5, s’afchent différentes langues.
A.l’aide.des.touches.de.sélection.4..
●
start
.s’allume.et,.à.
<.et.>.choisir.la.langue.souhaitée.;.tous.
les textes écrans s’afcheront ensuite
dans.cette.langue...
.
.
.
.
.
.
.
.
.
La langue sélectionnée est identiée par
un.cadre..Vous.avez.le.choix.entre.les.
langues.suivantes.:.
Language
engLish
Pycckий
nederLands
star t
engLish
P
ycckий
n
ederLands
F
rançais
i
taLiano
s
venska
e
sPañoL
P
oLski
● Appuyer sur la touche 8
sélectionnée.est.enregistrée,.la.touche.2.
start
,.la.langue.
a.s’allume.
.
24
defr
● Appuyer sur la touche 2
marque.s’allume.à.l’écran.5. La machine
se.met.à.chauffer.et.à.effectuer.un.
rinçage.;.un.peu.d’eau.s’écoule.du.bec.
verseur.du.café.9. Lorsque les symboles
de.sélection.de.la.préparation.apparaissent.à.l’écran.5 la machine est prête à
fonctionner..
a,.le.logo.de.la.
esPresso Ë Í
 à À Á Ä Å
Info : la.machine.à.café.est.programmée.en.
usine.de.manière.à.fonctionner.de.manière.
optimale..Au.bout.de.1.heure,.la.machine.se.
place.automatiquement.en.«. . mode.Eco. . ».
(voir.point.«. . Réglages.menu.ar auto
dans. . »).
Conseil pratique : lors.de.la.première.
utilisation ou après une période d’arrêt
prolongée,.la.première.tasse.de.café.n’a.
pas.tout.l’arôme.désiré.
Eléments de commande
Interrupteur électrique O / I
L’interrupteur électrique 1.O / I permet.
d‘activer.ou.de.désactiver.entièrement.le.
«. . mode.Eco. . ».de.la.machine..En.«. . mode.
Eco. . »,.seule.la.touche.2.a.est.allumée.
Important : ne couper l’alimentation que
lorsque la machine est en « mode Eco »
afin que le rinçage automatique soit
effectué.
Touche a
La touche 2.a.place.la.machine.en.position.
marche (prête à fonctionner) ou la replace
en.«. . mode.Eco. . ».
La touche 2.a.clignote.tant.que.la.machine.
effectue.son.rinçage..
La machine n’effectue pas de rinçage
lorsque.:
elle.est.encore.chaude.au.moment.de.la.
●
mise.en.marche.
il.n’a.pas.été.préparé.de.café.avant.le.
●
passage.en.«. . mode.Eco. . ».
La machine est prête à fonctionner lorsque
les.symboles.de.sélection.de.boisson.et.la.
touche.8
start
sont.allumés.à.l’écran.5..
Une.fois.effectuée.la.mise.en.service.de.la.
machine,.la.présence.d‘une.mousse.dense.
et ne sur le café n‘est obtenue qu‘après
avoir.préparé.plusieurs.tasses.
Bouton rotatif
Le bouton rotatif 6.sert.à.naviguer.dans.
l‘écran.5.en.tournant.vers.la.gauche.et.la.
droite ; il permet aussi de modier certains
paramètres.dans.le.menu.
Touches de sélection < et >
L’activation des touches de sélection 4.<.et.
> permet de naviguer à l’écran (Ligne de
navigation.5c).vers.le.bas.et.vers.le.haut.
25
defr
Ecran
A.l‘aide.des.symboles.Boissons.au.café,.
Arôme.et.Quantité.ainsi.que.des.textes.de.
réglage,.l‘écran.5 afche en permanence
les opérations en cours et les messages. Le
bouton.rotatif.6.et.les.touches.de.sélection.
4 servent à effectuer les réglages. Le
réglage sélectionné est identié par un
cadre.
esPresso ËË Í
5a
 à À Á Ä Å
La ligne d‘état 5a.de.l‘écran.5.indique.le.
nom.de.la.boisson,.ainsi.que,.pour.les.
boissons.au.café,.l‘arôme.réglé,.par.ex..55.
et.la.quantité,.par.ex..�..Sur.la.ligne.de.
sélection.5b gurent les symboles pour le
choix.des.boissons.
Les èches de la ligne de navigation 5c.
indiquent.la.direction.où.se.trouvent.encore.
des.niveaux.de.menu.
Messages à l’écran :
L’écran 5 afche différents messages.
Informations :.
rés. eau Presque vide
Bac à caFé Presque vide
Patientez svP
Invitations à agir :
remPLir Le réservoir d‘eau
PLacer Le réservoir d‘eau
contrôLer Le réservoir d‘eau
PLacer Le Bac coLLecteur
b
vider Le Bac coLLecteur
remPLir Le Bac à caFé
c
P
ivoter Le Bec verseur
PLacer L‘ emBout Pour mousse
remPLacer L‘unité de Passage
Femer Le voLet
contrôLer L‘unité de Passage
mettre du caFé
Fermer Le tiroir
changer Le FiLtre
détartrer svP
n
ettoyer svP
c
aLc‘n‘cLean
26
temPérat ur e troP Basse
Patientez svP
s
urtension ou sous-tension
 Loading...