


 Loading...
Sharp MX-4501N, MX-4500N, MX-3501N, MX-3500N, MX-2300G User Manual
...MODEL: MX-2300G MX-3500N
MX-2300N MX-3501N
MX-2700G MX-4500N
MX-2700N MX-4501N
Copier Guide

TABLE OF CONTENTS
ABOUT THIS MANUAL . . . . . . . . . . . . . . . . . . . . . . . . 3
• MANUALS PROVIDED WITH THE MACHINE . . . 3
BASIC PROCEDURE FOR MAKING 1 COPIES
BASE SCREEN OF COPY MODE . . . . . . . . . . . . . . . . 5 COPYING SEQUENCE . . . . . . . . . . . . . . . . . . . . . . . . 8 MAKING COPIES . . . . . . . . . . . . . . . . . . . . . . . . . . . . 11
• USING THE AUTOMATIC DOCUMENT
FEEDER TO MAKE COPIES . . . . . . . . . . . . . . . . 11
• MAKING A COPY USING THE DOCUMENT GLASS . . . . . . . . . . . . . . . . . . . . . . . . . . . . . . . . . 12
AUTOMATIC 2-SIDED COPYING . . . . . . . . . . . . . . . 15
• USING THE AUTOMATIC DOCUMENT
FEEDER TO MAKE 2-SIDED COPIES . . . . . . . . 15
• AUTOMATIC 2-SIDED COPYING USING THE DOCUMENT GLASS . . . . . . . . . . . . . . . . . . . . . . 18
COPY COLOUR MODES . . . . . . . . . . . . . . . . . . . . . . 21
• SELECTING THE COLOUR MODE. . . . . . . . . . . 21
CHANGING THE EXPOSURE AND EXPOSURE MODE . . . . . . . . . . . . . . . . . . . . . . . . . . . . . . . . . . . . . 23
• AUTOMATIC ADJUSTMENT OF THE
EXPOSURE AND EXPOSURE MODE . . . . . . . . 23
• SELECTING THE EXPOSURE MODE AND MANUALLY ADJUSTING THE EXPOSURE
LEVEL . . . . . . . . . . . . . . . . . . . . . . . . . . . . . . . . . 23
REDUCTION/ENLARGEMENT/ZOOM . . . . . . . . . . . 26
• AUTOMATIC RATIO SELECTION (Auto
Image) . . . . . . . . . . . . . . . . . . . . . . . . . . . . . . . . . 26
• MANUALLY SELECTING THE RATIO (Preset
ratios/Zoom) . . . . . . . . . . . . . . . . . . . . . . . . . . . . . 27
• ENLARGING/REDUCING THE LENGTH AND
WIDTH SEPARATELY (XY Zoom). . . . . . . . . . . . 30
ORIGINAL SIZES . . . . . . . . . . . . . . . . . . . . . . . . . . . . 33
• CHECKING THE ORIGINAL SIZE . . . . . . . . . . . . 33
• SPECIFYING THE ORIGINAL SIZE . . . . . . . . . . 35
• STORING FREQUENTLY USED ORIGINAL
SIZES . . . . . . . . . . . . . . . . . . . . . . . . . . . . . . . . . . 36
OUTPUT . . . . . . . . . . . . . . . . . . . . . . . . . . . . . . . . . . . 42
• OUTPUT MODES. . . . . . . . . . . . . . . . . . . . . . . . . 43
MAKING COPIES USING THE BYPASS TRAY (Copying on special papers) . . . . . . . . . . . . . . . . . . 46
INTERRUPTING A COPY RUN (Interrupt copy) . . . 48
JOB STATUS SCREEN . . . . . . . . . . . . . . . . . . . . . . . 49
• JOB QUEUE SCREEN AND COMPLETED
JOB SCREEN. . . . . . . . . . . . . . . . . . . . . . . . . . . . 49
• WHEN THE DOCUMENT FILING FUNCTION
IS USED . . . . . . . . . . . . . . . . . . . . . . . . . . . . . . . . 53
2 CONVENIENT COPY FUNCTIONS
SPECIAL MODES . . . . . . . . . . . . . . . . . . . . . . . . . . . 54
• [Image Edit] KEY AND [Colour Adjustments] KEY. . 57
ADDING MARGINS (Margin Shift) . . . . . . . . . . . . . . 59
ERASING PERIPHERAL SHADOWS (Erase) . . . . . . . . 61
COPYING EACH FACING PAGE OF A BOUND DOCUMENT (Dual Page Copy). . . . . . . . . . . . . . . . . 63
MAKING COPIES IN PAMPHLET FORMAT
(Pamphlet Copy) . . . . . . . . . . . . . . . . . . . . . . . . . . . . 65
COPYING A LARGE NUMBER OF ORIGINALS
AT ONCE (Job Build) . . . . . . . . . . . . . . . . . . . . . . . . 69
USING TWO MACHINES TO COPY A LARGE
NUMBER OF ORIGINALS (Tandem Copy) . . . . . . . . . . . 71
USING A DIFFERENT PAPER TYPE FOR
COVERS (Covers/Inserts). . . . . . . . . . . . . . . . . . . . . 74
• INSERTING COVERS IN COPIES (Cover
Settings) . . . . . . . . . . . . . . . . . . . . . . . . . . . . . . . . 75
• INSERTING INSERT SHEETS IN COPIES
(Insert Settings) . . . . . . . . . . . . . . . . . . . . . . . . . . 78
• CHANGING COVER/INSERT SETTINGS
(Page Layout) . . . . . . . . . . . . . . . . . . . . . . . . . . . . 81
ADDING INSERTS WHEN COPYING ON
TRANSPARENCY FILM (Transparency Inserts) . . . 85
COPYING MULTIPLE PAGES ONTO ONE
SHEET OF PAPER (Multi Shot) . . . . . . . . . . . . . . . . 88
COPYING A PAMPHLET (Book Copy). . . . . . . . . . . 91
COPYING CAPTIONS ONTO TAB PAPER (Tab
Copy) . . . . . . . . . . . . . . . . . . . . . . . . . . . . . . . . . . . . . 95
• RELATION BETWEEN THE ORIGINALS AND
THE TAB PAPER . . . . . . . . . . . . . . . . . . . . . . . . . 95
COPYING BOTH SIDES OF A CARD ON ONE
SHEET OF PAPER (Card Shot) . . . . . . . . . . . . . . . . 99
PRINTING THE DATE AND A STAMP ON
COPIES (Stamp) . . . . . . . . . . . . . . . . . . . . . . . . . . . 102
• ADDING THE DATE TO COPIES (Date) . . . . . . 103
• STAMPING COPIES (Stamp) . . . . . . . . . . . . . . 107
• PRINTING PAGE NUMBERS ON COPIES
(Page Numbering) . . . . . . . . . . . . . . . . . . . . . . . 110
• PRINTING TEXT ON COPIES (Text). . . . . . . . . 116
1
CHECKING THE STAMP LAYOUT (Layout) . . . . . 122
REPEATING PHOTOS ON A COPY (Photo
Repeat) . . . . . . . . . . . . . . . . . . . . . . . . . . . . . . . . . . . 124
CREATING A LARGE POSTER (Multi-Page
Enlargement) . . . . . . . . . . . . . . . . . . . . . . . . . . . . . . 127
REVERSING THE IMAGE (Mirror Image). . . . . . . . 130
COPYING A3 (11" x 17") SIZE ORIGINAL WITHOUT CUTTING OFF THE EDGES (A3
(11x17) Full Bleed) . . . . . . . . . . . . . . . . . . . . . . . . . 132
COPYING IN THE CENTRE OF THE PAPER (Centring) . . . . . . . . . . . . . . . . . . . . . . . . . . . . . . . . . 135
REVERSING BLACK AND WHITE IN A COPY (B/W
Reverse) . . . . . . . . . . . . . . . . . . . . . . . . . . . . . . . . . . . . . 137
ADJUSTING RED/GREEN/BLUE IN COPIES
(RGB Adjust) . . . . . . . . . . . . . . . . . . . . . . . . . . . . . . 139
ADJUSTING THE SHARPNESS OF AN IMAGE (Sharpness) . . . . . . . . . . . . . . . . . . . . . . . . . . . . . . . . . . 141
WHITENING FAINT COLOURS IN COPIES (Suppress
Background) . . . . . . . . . . . . . . . . . . . . . . . . . . . . . . . . . 143
ADJUSTING THE COLOUR (Colour Balance). . . . 145
ADJUSTING THE BRIGHTNESS OF A COPY (Brightness) . . . . . . . . . . . . . . . . . . . . . . . . . . . . . . . 147
ADJUSTING THE INTENSITY OF A COPY
(Intensity) . . . . . . . . . . . . . . . . . . . . . . . . . . . . . . . . . 149
CHECKING COPIES BEFORE PRINTING (Proof
Copy) . . . . . . . . . . . . . . . . . . . . . . . . . . . . . . . . . . . . 151
COPYING ORIGINALS OF DIFFERENT SIZES
(Mixed Size Original). . . . . . . . . . . . . . . . . . . . . . . . 154
COPYING THIN ORIGINALS (Slow Scan Mode) . . 157
STORING COPY OPERATIONS (Job Programs) . 159
• STORING A JOB PROGRAM . . . . . . . . . . . . . . 160
• DELETING A JOB PROGRAM. . . . . . . . . . . . . . 161
APPENDIX . . . . . . . . . . . . . . . . . . . . . . . . . . . . . . . . 163
2
ABOUT THIS MANUAL
Please note
•Where this manual shows the "MX-2300/2700 series" or the "MX-3500/4500 series", the following models are indicated: MX-2300/2700 series: MX-2300G, MX-2300N, MX-2700G, MX-2700N
MX-3500/4500 series: MX-3500N, MX-3501N, MX-4500N, MX-4501N
•This manual contains references to the fax function. However, please note that the fax function is not available in some countries and regions.
•Considerable care has been taken in preparing this manual. If you have any comments or concerns about the manual, please contact your dealer or nearest authorised service representative.
•This product has undergone strict quality control and inspection procedures. In the unlikely event that a defect or other problem is discovered, please contact your dealer or nearest authorised service representative.
•Aside from instances provided for by law, SHARP is not responsible for failures occurring during the use of the product or its options, or failures due to incorrect operation of the product and its options, or other failures, or for any damage that occurs due to use of the product.
Warning
•Reproduction, adaptation or translation of the contents of the manual without prior written permission is prohibited, except as allowed under copyright laws.
•All information in this manual is subject to change without notice.
Illustrations and the operation panel and touch panel shown in this manual
The peripheral devices are generally optional, however, some models include certain peripheral devices as standard equipment. The explanations in this manual assume that a right tray and stand/2 x 500 sheet paper drawer are installed on the MX-2700N (equipped standard with an automatic document feeder).
To further explain certain functions and uses, some explanations assume that additional peripheral devices are installed.
The display screens, messages, and key names shown in the manual may differ from those on the actual machine due to product improvements and modifications.
MANUALS PROVIDED WITH THE MACHINE
Printed manuals and manuals stored in PDF format on the machine's hard drive are provided with the machine. When using the machine, read the appropriate manual for the feature you are using.
Printed manuals
Manual name |
Contents |
|
|
|
|
Safety Guide |
This manual contains instructions for using the machine safely and lists the specifications of the machine |
|
and its peripheral devices. |
||
|
||
|
|
|
Software Setup |
This manual explains how to install the software and configure settings to use the machine as a printer or |
|
Guide |
scanner. |
|
|
|
|
Quick Start Guide |
This manual provides easy-to-understand explanations of all the functions of the machine in a single volume. |
|
Detailed explanations of each of the functions can be found in the manuals in PDF format. |
||
|
||
|
|
|
Troubleshooting |
This manual explains how to remove paper misfeeds and provides answers to frequently asked questions regarding |
|
the operation of the machine in each mode. Refer to this manual when you have difficulty using the machine. |
||
|
||
|
|
|
Facsimile Quick |
This manual explains the basic procedures for using the fax function of the machine, and provides an |
|
overview of the features of the fax function, troubleshooting procedures, and specifications. |
||
Reference Guide |
For detailed information on using the fax function and the system settings for fax, see the "Facsimile |
|
|
Guide" in PDF format. |
|
|
|
3
Operation manuals in PDF format
The manuals in PDF format provide detailed explanations of the procedures for using the machine in each mode. To view the PDF manuals, download them from the hard drive in the machine. The procedure for downloading the manuals is explained in "How to download the manuals in PDF format" in the Quick Start Guide.
Manual name |
Contents |
|
|
|
|
User's Guide |
This manual provides information, such as basic operation procedures, how to load paper, and machine |
|
maintenance. |
||
|
||
|
|
|
Copier Guide |
This manual provides detailed explanations of the procedures for using the copy function. |
|
(This manual) |
|
|
|
|
|
Printer Guide |
This manual provides detailed explanations of the procedures for using the printer function. |
|
|
|
|
Facsimile Guide |
This manual provides detailed explanations of the procedures for using the fax function and the "System |
|
Settings" that are related to fax. |
||
|
||
|
|
|
Scanner Guide |
This manual provides detailed explanations of the procedures for using the scanner function and the |
|
Internet fax function. |
||
|
||
|
|
|
Document Filing |
This manual provides detailed explanations of the procedures for using the document filing function. The |
|
document filing function allows you to save the document data of a copy or fax job, or the data of a print |
||
Guide |
||
job, as a file on the machine's hard drive. The file can be called up as needed. |
||
|
||
|
|
|
System Settings |
This manual explains the "System Settings", which are used to configure a variety of parameters to suit |
|
the aims and the needs of your workplace. Current settings can be displayed or printed out from the |
||
Guide |
||
"System Settings". |
||
|
||
|
|
Icons used in the manuals
The icons in the manuals indicate the following types of information:
This alerts you to a situation where there is a risk of machine damage or failure.
This provides a supplemental explanation of a function or procedure.
This explains how to cancel or correct an operation.
This indicates the name of a system setting and a provides a brief explanation of the setting. For detailed information on each system setting, see the System Settings Guide.
When "System Settings:" appears:
A general setting is explained.
When "System Settings (Administrator):" appears:
A setting that can only be configured by an administrator is explained.
4
1 BASIC PROCEDURE FOR MAKING COPIES
This chapter explains the basic procedures for making copies, including selection of the copy ratio and other copy settings.
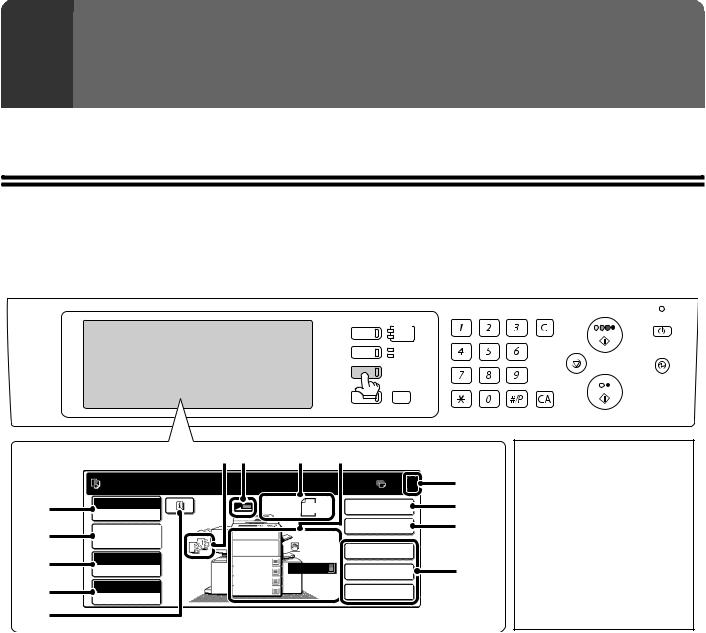
BASE SCREEN OF COPY MODE
When the [COPY] key is pressed on the operation panel, the base screen of copy mode appears.
The base screen shows messages and keys necessary for copying, and settings that have been selected. Selections are made by touching the displayed keys.
DOCUMENT |
||
READY |
||
FILING |
DATA |
|
IMAGE SEND |
LINE |
|
DATA |
||
COPY |
SYSTEM |
|
JOB STATUS |
||
SETTINGS |
LOGOUT
|
(6) |
(7) |
|
(8) |
(9) |
|||
|
Ready to scan for copy. |
|
|
|
|
|
0 |
|
|
|
|
|
|
|
|
||
(1) |
Full Colour |
|
|
Original |
A4 |
2-Sided Copy |
||
Colour Mode |
|
|
||||||
|
|
|
|
|
|
|
||
(2) |
Job Detail |
|
|
|
|
Plain |
Output |
|
|
|
|
|
|
||||
Settings |
|
|
|
|
|
|||
|
|
|
|
A4 |
|
|||
|
|
|
|
|
|
Special Modes |
||
|
Auto |
|
A4 |
|
|
|
||
(3) |
1. |
|
5. |
A4 |
|
|||
Exposure |
2. |
A4R |
File |
|||||
|
|
|
||||||
|
100% |
3. |
B4 |
|
|
|
|
|
(4) |
4. |
A3 |
|
|
|
Quick File |
||
Copy Ratio |
|
|
|
|||||
|
|
|
|
|
|
|||
(5) |
|
|
|
|
|
|
|
|
•The screen at left shows the machine with the saddle stitch
(10)finisher, stand/2 x 500 sheet
(11)
paper drawer, large capacity tray and right tray installed.
(12)The image will vary depending on the equipment installed.
• The indicators of the
(13)
operation panel and screen may differ depending on the country and region.
(1)[Colour Mode] key
Touch this to change the colour mode.
COPY COLOUR MODES (page 21)
(2)[Job Detail Settings] key
Touch this key to select original settings, paper settings, and special modes.
[Job Detail Settings] key (page 6)
(3)[Exposure] key
This shows the current copy exposure and exposure mode settings. Touch this key to change the exposure or exposure mode setting.
CHANGING THE EXPOSURE AND EXPOSURE MODE (page 23)
(4)[Copy Ratio] key
This shows the current copy ratio. Touch this key to adjust the copy ratio.
REDUCTION/ENLARGEMENT/ZOOM (page 26)
(5) key
key
This key appears when a special mode is selected. Touch this key to display a list of the selected modes and settings.
Checking which special modes are selected (page 58)
(6)Output display
When one or more output functions such as sort, group, staple sort, or saddle stitch have been selected, this shows the icons of the selected functions.
OUTPUT (page 42)
(7)Original feed display
This appears when an original has been inserted in the document feeder tray.
(8)Original size display
This shows the size of the original.
When the original size is set manually, the display shows "Manual". When an original is not placed, nothing appears.
ORIGINAL SIZES (page 33)
5
(9)Paper select display
This shows the size of paper loaded in each tray.
In the bypass tray area, the paper type appears above the paper size.
The selected tray is highlighted.
The approximate amount of paper in each tray is indicated by  . To display the paper tray selection screen for a tray, touch the tray.
(10)Number of copies display
This shows the number of copies set.
(11)[2-Sided Copy] key
Touch this to make 2-sided copies.
AUTOMATIC 2-SIDED COPYING (page 15)
(12)[Output] key
Touch this to select an output function such as sort, group, offset, staple sort, saddle stitch, or punch.
OUTPUT (page 42)
(13)Customized keys
These 3 keys can be changed to show any 3 settings or functions that you like. The keys are changed in "Customize Key Setting" in the system settings (administrator). Normally the following keys appear:
Customizing displayed keys (page 7)
•[Special Modes] key
This is the same [Special Modes] key that appears when the [Job Detail Settings] key is touched.
SPECIAL MODES (page 54)
•[File] key, [Quick File] key
Touch either key to use the Quick File or File of the document filing functions. These are the same [File] and [Quick File] keys that appear when the [Special Modes] key is touched. For information on the document filing function, see the Document Filing Guide.
When the system settings screen is displayed, the base screen of copy mode will not appear even if the [COPY] key is pressed.
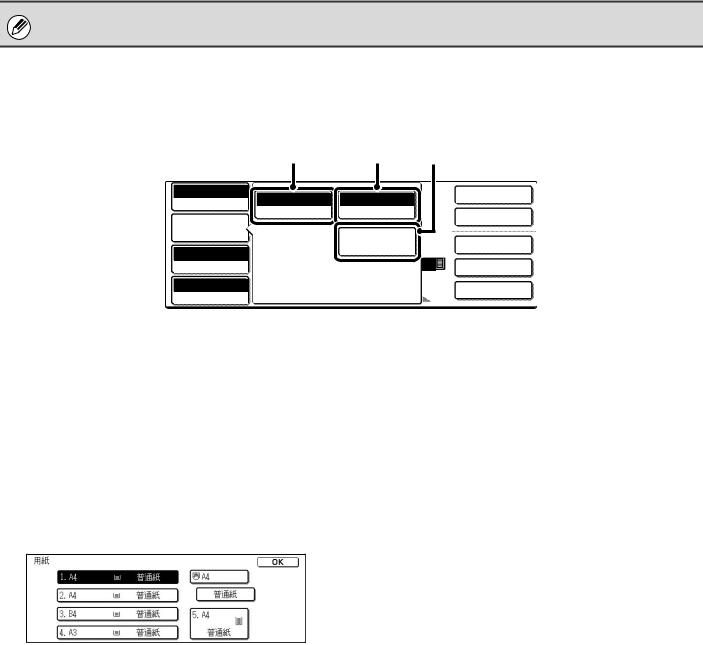
[Job Detail Settings] key
When the [Job Detail Settings] key is touched, keys for selecting the original size and paper settings appear. The [Special Modes] key also appears to allow the selection of special modes. To close the job detail settings screen and return to the base screen, touch the [Job Detail Settings] key once again.
|
(1) |
|
Full Colour |
Auto |
|
Colour Mode |
||
Original |
||
Job Detail |
||
|
||
Settings |
|
|
Auto |
|
|
Exposure |
|
|
100% |
|
|
Copy Ratio |
|
(2) |
|
(3) |
Auto |
A4 |
|
Paper Select |
|
|
|
Plain |
|
Special Modes |
A4 |
|
|
A4 |
|
2-Sided Copy
Output
Special Modes
File
Quick File
(1)[Original] key
Touch this key to select the original size setting.
ORIGINAL SIZES (page 33)
(2)[Paper Select] key
Touch this key to change the paper (tray) that is used. When the key is touched, each tray and the size and type of paper in that tray will appear . Touch the key of the paper tray that you wish to use and then touch the [OK] key.
The paper size and paper type settings for trays 1 to 5 are configured in the system settings.
System Settings Guide "Paper Tray Settings"
For information on the paper size and paper type settings for the bypass tray, see the "MAKING COPIES USING THE BYPASS TRAY (Copying on special papers)" (page 46).
Paper Select |
|
|
|
|
|
OK |
||
|
|
|
|
|
|
|
||
|
A4 |
|
Plain |
|
|
A4 |
|
|
(3)[Special Modes] key
Touch this key to select special modes such as Margin Shift, Edge Erase, and Dual Page Copy.
SPECIAL MODES (page 54)
A4R |
|
Plain |
|
|
Plain |
|
|||
|
|
|
|
|
|
|
|
|
|
|
|
|
|
|
|
|
|
|
|
|
|
|
|
|
|
|
|
|
|
B4 |
|
Plain |
|
|
A4 |
|
|
||
|
|
|
|
|
|
|
|
||
A3 |
|
Plain |
|
|
|
Plain |
|
||
6

Customizing displayed keys
Keys of convenient functions (such as special modes) can be displayed in the lower right corner of the screen. Set these keys to functions that you frequently use to access the functions with a single touch. The functions that are shown in the keys are selected with "Customize Key Setting" in the system settings (administrator).
The screen when the customized keys are set to [Special Modes], [Margin Shift], and [Brightness]
Full Colour |
|
|
|
|
|
|
|
|
|
Colour Mode |
|
|
|
|
|
|
|
|
|
|
|
|
|
|
|
|
|
|
|
Job Detail |
|
|
|
|
|
|
|
Plain |
|
Settings |
|
|
|
|
|
|
|
||
|
|
|
|
|
|
|
|
|
|
|
|
|
|
|
|
|
A4B5 |
||
|
|
|
|
|
|
|
|
||
|
|
|
|
|
|||||
|
|
|
|
|
|
|
|
|
|
|
|
|
|
|
|
|
|
|
|
Auto |
|
|
|
|
|
|
|
|
|
|
|
1. |
A4 |
|
|
|
|
|
|
Exposure |
|
|
|
5. A4 |
|
||||
|
2. |
A4R |
|||||||
|
|
|
|
|
|||||
|
|
|
|
|
|
|
|
||
|
|
3. |
B4 |
|
|
|
|
|
|
100% |
|
|
|
|
|
||||
4. |
A3 |
|
|
|
|
|
|||
|
|
|
|
|
|
||||
Copy Ratio
2-Sided Copy
Output
Special Modes
Margin Shift 
Brightness
These 3 keys can be changed as desired.
System Settings (Administrator): Customize Key Setting
This is used to select the customized keys that appear in the base screen.
For the procedure for configuring "Customize Key Setting", see the System Settings Guide.
7

COPYING SEQUENCE
Select settings in the order shown below to ensure that the copy operation takes place smoothly. For detailed procedures for selecting the settings, see the explanation of each setting in this guide.
 1
1
Place the original.
Place the original in the document feeder tray of the automatic document feeder, or on the document glass.
*Depending on the copy functions used, there are also cases where functions are selected before the original is placed.
Basic copy settings
Full Colour |
|
|
|
|
|
|
|
|
|
2-Sided Copy |
|
Auto |
|
Auto |
A4 |
|
|
||||
Colour Mode |
|
|
|
|
|
|||||
|
|
|
||||||||
|
Original |
|
Paper Select |
|
|
|
||||
|
|
|
|
|
Output |
|||||
Job Detail |
|
|
|
|
|
|
|
|
|
|
|
|
|
|
|
|
|
|
|
||
|
|
|
|
|
|
|
Plain |
|
|
|
|
|
|
|
|
|
|
|
|
||
Settings |
|
|
|
|
|
|
|
|
|
|
|
|
|
|
|
|
|
|
|
||
|
|
|
|
|
|
|
|
|
|
|
|
|
|
Special Modes |
|
A4 |
|
|
|||
|
|
|
|
|
|
Special Modes |
||||
|
|
|
|
|
|
|||||
|
|
|
|
|
|
|
|
|
|
|
|
|
|
|
|
|
|
|
|
|
|
Auto |
|
|
|
|
|
|
|
|
|
|
|
|
|
|
|
|
|
|
|
|
|
|
|
|
|
|
|
|
|
|
|
|
Exposure |
|
|
|
|
|
|
|
|
|
File |
|
|
|
|
|
|
|
|
|
|
|
|
|
|
|
|
|
|
|
|
|
|
100% |
|
|
|
|
|
|
|
|
|
Quick File |
|
|
|
|
|
|
|
|
|
|
|
Copy Ratio
Select the basic copy settings.
The main settings are as follows:
•Colour mode COPY COLOUR MODES (page 21)
•Exposure and exposure mode
CHANGING THE EXPOSURE AND EXPOSURE MODE (page 23)
•Copy ratioREDUCTION/ENLARGEMENT/ZOOM (page 26)
•Original size ORIGINAL SIZES (page 33)
•Paper settings
2-sided copy settings
2-Sided Copy |
|
OK |
|
|
|
|
|
|
Select settings as needed for 2-sided copying and 2-sided scanning of the original.
AUTOMATIC 2-SIDED COPYING (page 15)
8
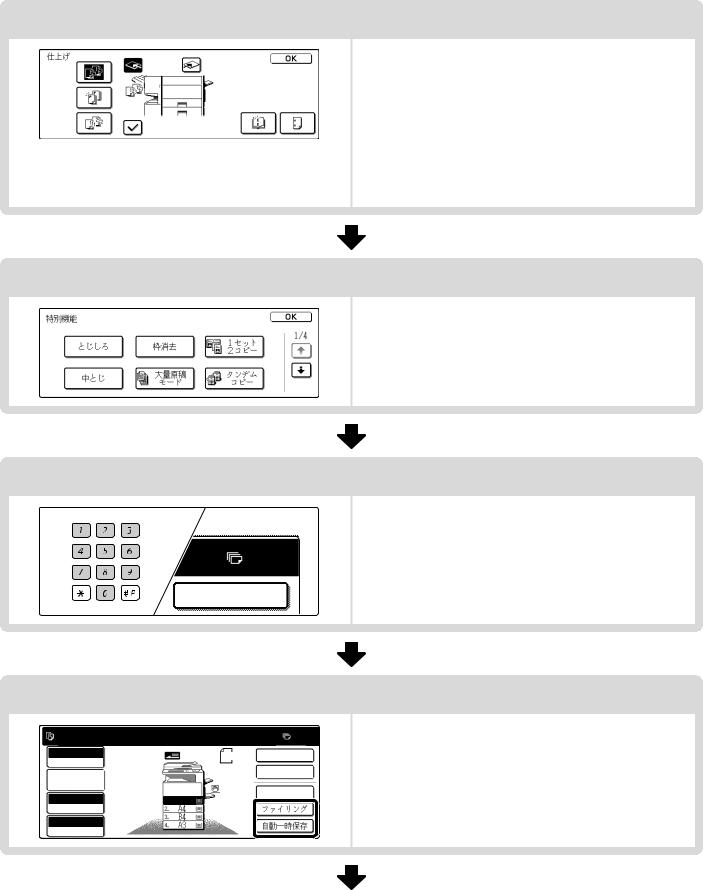
Output settings
Output |
Offset |
|
OK |
|
Right Tray |
||
|
Tray |
||
Sort
Staple
Sort
Saddle
Stitch Punch
Group |
Offset |
|
Select copy output settings.
The main settings are as follows:
•Sort mode Sort mode (page 43)
•Group mode Group mode (page 43)
•Offset mode Offset function (page 43)
•Staple sort mode
Staple sort function / Saddle stitch function (page 44)
•Punch function Punch function (page 45)
•Pamphlet staple function
Staple sort function / Saddle stitch function (page 44)
Special mode settings
Special Modes |
|
|
|
|
|
|
|
OK |
|
||
|
|
|
|
|
|
|
|
|
|
||
|
|
|
|
|
|
|
|
|
|
||
|
|
|
|
|
|
|
|
|
1/4 |
|
|
|
|
|
|
|
|
|
|||||
|
Margin Shift |
|
|
Erase |
|
Dual Page |
|
|
|
||
|
|
|
|
|
|
|
|||||
|
|
|
|
Copy |
|
|
|
|
|||
|
|
|
|
|
|
|
|
|
|||
|
|
|
|
|
|
|
|
|
|
||
|
|
|
|
|
|
|
|
|
|
||
|
Pamphlet Copy |
|
|
|
Job |
|
Tandem |
|
|
||
|
|
|
|
Build |
|
Copy |
|
|
|
|
|
|
|
|
|
|
|
|
|
||||
Select special modes such as "Margin Shift" and "Erase".SPECIAL MODES (page 54)
Number of copies (sets) setting
Set the number of copies (number of sets).
7
2-Sided Copy
Ready to scan for copy.
Full Colour
Colour Mode
Job Detail
Settings
Auto
Exposure
100% Copy Ratio
Document filing settings
0
Original A4 |
2-Sided Copy |
Output
Plain
A4
Special Modes
1.A4
|
2. |
A4R |
|
File |
|
|
|
|
|
|
3. |
B4 |
|
|
|
|
|||
|
4. |
A3 |
|
Quick File |
|
|
|||
Select document filing settings.
For more information on the document filing function, see the Document Filing Guide.
9
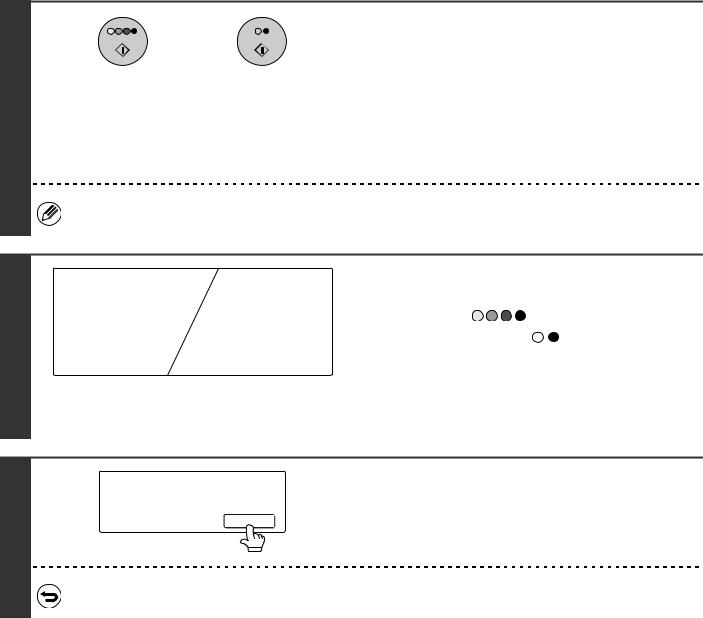
Start copying.
Start scanning the original(s) and making copies.
Start colour copying. Start black and white copying.
When one or more special modes are selected, the  key appears in the base screen. Touch the
  key to display a list of the selected special modes. This lets you check what special modes are selected and the settings of each mode.
To cancel all settings, press the [CLEAR ALL] key ( ).
).
When the [CLEAR ALL] key (  ) is pressed, all settings selected to that point are cleared and you will return to the base screen.
To stop scanning of the original and copying, press the [STOP] key ( ).
).
When the [STOP] key (  ) is pressed, a message will appear asking you if you want to cancel the job. Touch the [Yes] key in the message screen.
10

MAKING COPIES
USING THE AUTOMATIC DOCUMENT FEEDER TO MAKE COPIES
This section explains how to make copies (1-sided copies of 1-sided originals) using the automatic document feeder.
Indicator
line
1
 1
1
Place the originals face up in the document feeder tray with the edges aligned evenly.
Place the originals face up. Insert the originals all the way into the document feeder tray. The stack must not be higher than the indicator line.
Ready to scan for copy. |
|
|
|
0 |
|
|
|
|
|
Full Colour |
|
Original |
A4 |
2-Sided Copy |
Colour Mode |
|
|||
|
|
|
|
|
Job Detail |
|
|
Plain |
Output |
|
|
|
||
Settings |
|
|
|
|
|
|
A4 |
|
|
|
|
|
Special Modes |
|
Auto |
|
|
|
|
1. |
A4 |
|
|
|
Exposure |
|
File |
||
2. |
A4R |
|
||
100% |
3. |
B4 |
|
|
4. |
A3 |
|
Quick File |
|
Copy Ratio |
|
|||
|
|
|
|
(A)
Make sure that the automatically selected paper size is the same size as the original.
The selected tray is highlighted. You can also copy onto paper that is a different size than the original.
2 |
• Depending on the size of the placed original, there may be cases where the same size of paper as the original is not |
selected automatically. In this event, change the paper size manually. |
•To change the paper size selection, touch the [Job Detail Settings] key and then the [Paper Select] key, or touch the paper size display (A).
The following screen appears when the [Paper Select] key or the paper size display (A) is touched. Touch the tray key that has the desired paper size and then touch the [OK] key.
Paper Select |
|
OK |
A4 |
Plain |
A4 |
A4R |
Plain |
Plain |
B4 |
Plain |
|
A3 |
Plain |
|
Ready to scan for copy.
|
Full Colour |
|
|
Colour Mode |
|
|
Job Detail |
|
|
Settings |
|
|
Auto |
|
3 |
Exposure |
|
100% |
||
|
||
|
Copy Ratio |
0
Original A4 |
2-Sided Copy |
Output
Plain
A4
Special Modes
1.A4
2. |
A4R |
File |
3. |
B4 |
|
4. |
A3 |
Quick File |
Check the colour mode.
The currently selected colour mode appears.
To change the colour mode, touch the [Colour Mode] key, touch the [Full Colour] key, [Auto] key, [Single Colour] key or [2 Colour] key, and touch the [OK] key.
COPY COLOUR MODES (page 21)
Full Colour: The original is copied in full colour.
Auto: Colour or black and white is automatically selected when the original is scanned.
Single Colour: The original is copied in the selected colour only. 2 Colour: Only the red areas of the original are changed to the
selected colour; colours other than red are scanned in black.
11

Set the number of copies (sets) with the numeric keys.
7
2-Sided Copy
4
• Up to 999 can be set.
• A single copy can be made even if "0" appears for the number of copies.
If an incorrect number of copies is set...
Press the [CLEAR] key (  ) and then enter the correct number.
|
|
Press the [COLOUR START] key ( |
) |
|
or |
or the [BLACK & WHITE START] key |
|
|
|
( ). |
|
5 |
Even if a colour mode is selected, copying will take place in black and white if the [BLACK & WHITE START] key |
|
|
|
( ) is pressed. |
|
|
To cancel scanning of the original and copying...
Press the [STOP] key (  ).
).
MAKING A COPY USING THE DOCUMENT GLASS
To make a copy of a book or other thick original that cannot be fed through the automatic document feeder, open the automatic document feeder and place the original on the document glass. This section explains how to make a copy (1-sided copy of a 1-sided original) using the document glass.
Original size  detector
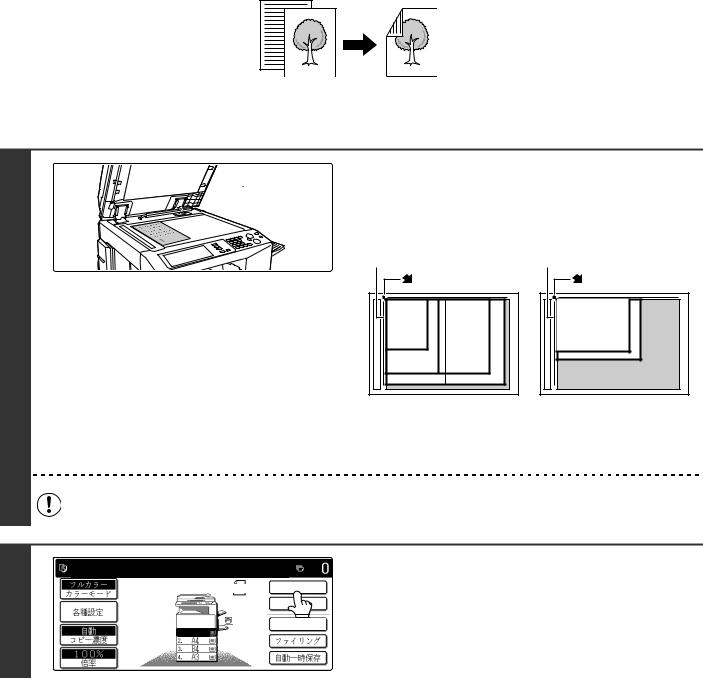
Open the automatic document feeder, place the original face down on the document glass, and then gently close the automatic document feeder.
Document glass scale
mark |
1 |
A5 or |
5-1/2" x 8-1/2" |
B4 or
B5 8-1/2" x 14"
A4 or 8-1/2" x 11" A3 or 11" x 17"
Document glass scale
mark |
B5R
A4R or 8-1/2" x 11"R
•Align the corner of the original with the tip of the arrow mark  on the document glass scale.
•Place the original in the appropriate position for its size as shown above.
Do not place any objects under the original size detector. Closing the automatic document feeder with an object underneath may damage the original size detector plate and prevent correct detection of the document size.
12

Ready to scan for copy. |
|
|
|
0 |
|
|
|
|
|
Full Colour |
|
Original |
A4 |
2-Sided Copy |
Colour Mode |
|
|||
|
|
|
|
|
Job Detail |
|
|
Plain |
Output |
|
|
|
||
Settings |
|
|
|
|
|
|
A4 |
|
|
|
|
|
Special Modes |
|
Auto |
|
|
|
|
1. |
A4 |
|
|
|
Exposure |
|
File |
||
2. |
A4R |
|
||
100% |
3. |
B4 |
|
|
4. |
A3 |
|
Quick File |
|
Copy Ratio |
|
|||
|
|
|
|
(A)
Make sure that the automatically selected paper size is the same size as the original.
The selected tray is highlighted. You can also copy onto paper that is a different size than the original.
2 |
• Depending on the size of the placed original, there may be cases where the same size of paper as the original is not |
selected automatically. In this event, change the paper size manually. |
•To change the paper size selection, touch the [Job Detail Settings] key and then the [Paper Select] key, or touch the paper size display (A).
The following screen appears when the [Paper Select] key or the paper size display (A) is touched. Touch the tray key that has the desired paper size and then touch the [OK] key.
Paper Select |
|
OK |
A4 |
Plain |
A4 |
A4R |
Plain |
Plain |
B4 |
Plain |
|
A3 |
Plain |
|
Ready to scan for copy. |
|
0 |
|
|
|
Full Colour |
Original A4 |
2-Sided Copy |
|
Colour Mode
|
Job Detail |
|
|
Plain |
Output |
|
|
|
|
||
|
Settings |
|
|
|
|
|
|
|
A4 |
|
|
|
|
|
|
Special Modes |
|
|
Auto |
|
|
|
|
|
1. |
A4 |
|
|
|
|
Exposure |
|
File |
||
|
2. |
A4R |
|
||
3 |
100% |
3. |
B4 |
|
|
4. |
A3 |
|
Quick File |
||
Copy Ratio |
|
||||
|
|
|
|
||
|
|
|
|
|
Check the colour mode.
The currently selected colour mode appears.
To change the colour mode, touch the [Colour Mode] key, touch the [Full Colour] key, [Auto] key, [Single Colour] key or [2 Colour] key, and touch the [OK] key.
COPY COLOUR MODES (page 21)
Full Colour: The original is copied in full colour.
Auto: Colour or black and white is automatically selected when the original is scanned.
Single Colour: The original is copied in the selected colour only. 2 Colour: Only the red areas of the original are changed to the
selected colour; colours other than red are scanned in black.
Set the number of copies (sets) with the numeric keys.
7
2-Sided Copy
4
• Up to 999 can be set.
• A single copy can be made even if "0" appears for the number of copies.
If an incorrect number of copies is set...
Press the [CLEAR] key (  ) and then enter the correct number.
13
Press the [COLOUR START] key (


 )
)
or |
or the [BLACK & WHITE START] key |
(
 ).
).
Scanning begins.
If group copy is selected, copying begins.
5 If you are using the sort function or other function that requires all originals to be scanned before the copies are printed, you must use the same [START] key that you used to scan the first original to scan each of the remaining originals.
Even if a colour mode is selected, copying will take place in black and white if the [BLACK & WHITE START] key ( 
 ) is pressed.
|
|
Remove the original and place the next |
|
|
|
original, and then press the [COLOUR |
|
|
or |
START] key ( |
) or the [BLACK & |
|
WHITE START] key ( ). |
||
6 |
|
||
|
If you are using the sort function or other function that requires |
||
all originals to be scanned before the copies are printed, you must use the same [START] key that you used to scan the first original to scan each of the remaining originals.
Repeat this step until all originals have been scanned.
Place next original. Press [Start]. When finished, press [Read-End].
Read-End
Touch the [Read-End] key.
7
To cancel scanning of the original and copying...
Press the [STOP] key ( ).
).
14

AUTOMATIC 2-SIDED COPYING
USING THE AUTOMATIC DOCUMENT FEEDER TO MAKE 2-SIDED COPIES
The following 2-sided copying can be performed automatically. The originals and paper are turned over automatically, allowing easy 2-sided copying.
|
|
Originals |
|
Copies |
|
|
|
|
Originals |
|
|
|
|
Copies |
|
|
|
|
Originals |
|
|
Copies |
|
|
||||||||||||||||||||||||||||||||||||||||
|
|
|
|
|
|
|
|
|
|
|
|
|
|
|
|
|
|
|
|
|
|
|
|
|
|
|
|
|
|
|
|
|
|
|
|
|
|
|
|
|
|
|
|
|
|
|
|
|
|
|
|
|
|
|
|
|
|
|
|
|
|
|
|
|
Automatic 2-sided copying of 1-sided |
Automatic 2-sided copying of 2-sided |
1-sided copying of 2-sided originals |
originals |
originals |
|
Indicator
line
1
 1
1
Place the originals face up in the document feeder tray with the edges aligned evenly.
Place the originals face up. Insert the originals all the way into the document feeder tray. The stack must not be higher than the indicator line.
Ready to scan for copy.
|
Full Colour |
|
|
Colour Mode |
|
2 |
|
|
Job Detail |
||
Settings |
||
|
||
|
|
|
|
Auto |
|
|
Exposure |
|
|
|
|
|
100% |
|
|
Copy Ratio |
|
Touch the [2-Sided Copy] key. |
|
0 |
||
|
Original A4 |
2-Sided Copy |
Output
Plain
A4
Special Modes
1.A4
2. |
A4R |
|
File |
|
|
|
|
3. |
B4 |
|
|
|
|||
4. |
A3 |
|
Quick File |
|
|
|
|
|
|
|
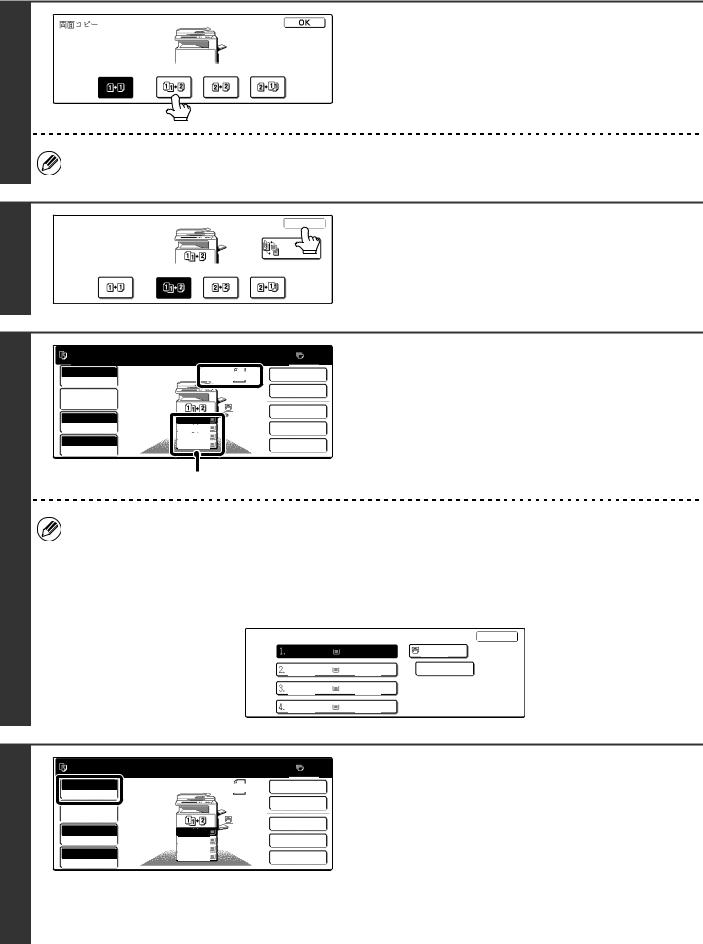
Select the 2-sided copy mode. |
|
|
|
OK |
||
2-Sided Copy |
||||
|
|
|||
|
|
|
Touch the key of the 2-sided copy mode that you wish to use. |
|
|
|
|
: Automatic 2-sided copying of 1-sided originals |
|
|
|
|
: Automatic 2-sided copying of 2-sided originals |
|
|
|
|
: 1-sided copying of 2-sided originals |
3 When making automatic 2-sided copies of a 1-sided A3 (11" x 17") or B4 (8-1/2" x 14") size portrait original, or when
you wish to vertically invert the reverse side of a 2-sided original, touch the [Binding Change] key.Using the [Binding Change] key (page 17)
2-Sided Copy |
OK |
|
Binding
Change
15
2-Sided Copy |
OK |
|
Binding
Change
4
Touch the [OK] key.
Ready to scan for copy. |
|
|
|
0 |
|
|
|
|
|
Full Colour |
|
Original |
A4 |
2-Sided Copy |
Colour Mode |
|
|||
|
|
|
|
|
Job Detail |
|
|
Plain |
Output |
|
|
|
||
Settings |
|
|
|
|
|
|
A4 |
|
|
|
|
|
Special Modes |
|
Auto |
|
|
|
|
1. |
A4 |
|
|
|
Exposure |
|
|
||
2. |
A4R |
|
File |
|
100% |
3. |
B4 |
|
|
4. |
A3 |
|
Quick File |
|
Copy Ratio |
|
|||
|
|
|
|
|
|
|
(A) |
|
|
Make sure that the automatically selected paper size is the same size as the original.
The selected tray is highlighted. You can also copy onto paper that is a different size than the original.
• The 2-sided copy setting appears at the top of the paper size display (A).
5 |
• Depending on the size of the placed original, there may be cases where the same size of paper as the original is not |
|
|
|
selected automatically. In this event, change the paper size manually. |
•To change the paper size selection, touch the [Job Detail Settings] key and then the [Paper Select] key, or touch the paper size display (A).
The following screen appears when the [Paper Select] key or the paper size display (A) is touched. Touch the key of the tray that has the desired paper size and then touch the [OK] key.
Paper Select |
|
OK |
A4 |
Plain |
A4 |
A4R |
Plain |
Plain |
B4 |
Plain |
|
A3 |
Plain |
|
Ready to scan for copy.
|
Full Colour |
|
|
Colour Mode |
|
|
Job Detail |
|
|
Settings |
|
|
Auto |
|
|
Exposure |
|
6 |
100% |
|
Copy Ratio |
||
|
0
Original A4 |
2-Sided Copy |
Output
Plain
A4
Special Modes
1.A4
2. |
A4R |
File |
3. |
B4 |
|
4. |
A3 |
Quick File |
Check the colour mode.
The currently selected colour mode appears.
To change the colour mode, touch the [Colour Mode] key, touch the [Full Colour] key, [Auto] key, [Single Colour] key or [2 Colour] key, and touch the [OK] key.
COPY COLOUR MODES (page 21)
Full Colour: The original is copied in full colour.
Auto: Colour or black and white is automatically selected when the original is scanned.
Single Colour: The original is copied in the selected colour only. 2 Colour: Only the red areas of the original are changed to the
selected colour; colours other than red are scanned in black.
16
Set the number of copies (sets) with the numeric keys.
7
2-Sided Copy
7
• Up to 999 can be set.
• If you are only making a single copy, the copy can be made with the copy number display showing "0".
If an incorrect number of copies is set...
Press the [CLEAR] key (  ) and then enter the correct number.
or
8
To cancel scanning of the original and copying...
Press the [STOP] key ( ).
).
Press the [COLOUR START] key (


 ) or the [BLACK & WHITE START] key
(
 ).
).
Using the [Binding Change] key
Originals |
Binding Change is used |
Binding Change is not used |
||
|
|
|
|
|
|
|
The reverse side |
|
The reverse side |
|
A |
is upside down. |
A |
is not upside |
|
|
down. |
||
A
|
|
|
Select this when |
|
Select this when |
|
|
A |
the pages will be |
|
the pages will be |
1 |
2 |
bound into a |
A |
bound into a |
|
|
|
|
tablet. |
booklet. |
|
|
|
|
|
||
|
|
|
3 |
|
|
17
AUTOMATIC 2-SIDED COPYING USING THE DOCUMENT GLASS
The following 2-sided copying can be performed automatically. The paper is turned over automatically, allowing easy 2-sided copying.
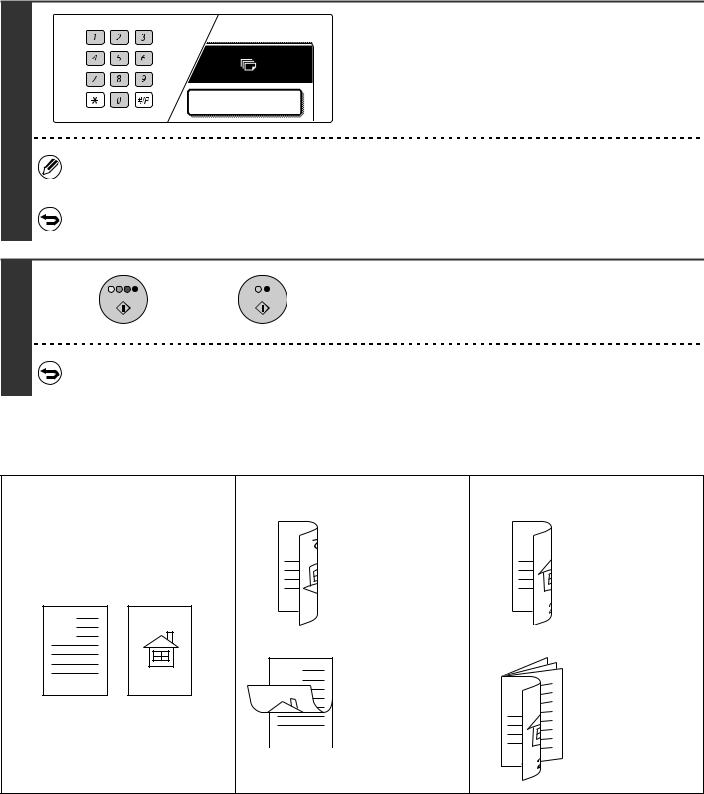
Originals Copies
Automatic 2-sided copying of 1-sided originals
Original size  detector
Open the automatic document feeder, place the original face down on the document glass, and then gently close the automatic document feeder.
Document glass scale
mark |
1 |
A5 or |
5-1/2" x 8-1/2" |
B4 or
B5 8-1/2" x 14"
A4 or 8-1/2" x 11" A3 or 11" x 17"
Document glass scale
mark |
B5R
A4R or 8-1/2" x 11"R
•Align the corner of the original with the tip of the arrow mark  on the document glass scale.
•Place the original in the appropriate position for its size as shown above.
Do not place any objects under the original size detector. Closing the automatic document feeder with an object underneath may damage the original size detector plate and prevent correct detection of the document size.
Ready to scan for copy.
|
Full Colour |
|
|
Colour Mode |
|
2 |
|
|
Job Detail |
||
Settings |
||
|
||
|
|
|
|
Auto |
|
|
Exposure |
|
|
|
|
|
100% |
|
|
Copy Ratio |
|
Touch the [2-Sided Copy] key. |
|
0 |
||
|
Original A4 |
2-Sided Copy |
Output
Plain
A4
Special Modes
1.A4
2. |
A4R |
|
File |
|
|
|
|
3. |
B4 |
|
|
|
|||
4. |
A3 |
|
Quick File |
|
|
|
|
18
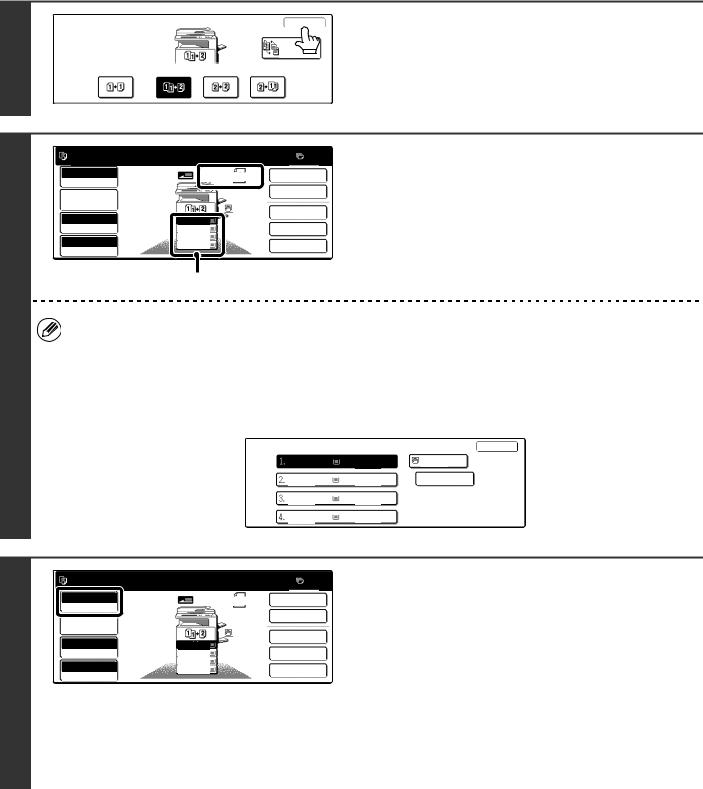
2-Sided Copy |
|
OK |
|
|
|
|
|
|
3
Touch the [1-Sided to 2-Sided] key.
The [2-Sided to 2-Sided] key and [2-Sided to 1-Sided] key cannot be used when copying from the document glass.
2-Sided Copy |
OK |
Binding
Change
4
Touch the [OK] key.
Ready to scan for copy. |
|
|
|
0 |
|
|
|
|
|
Full Colour |
|
Original |
A4 |
2-Sided Copy |
Colour Mode |
|
|||
|
|
|
|
|
Job Detail |
|
|
Plain |
Output |
|
|
|
||
Settings |
|
|
|
|
|
|
A4 |
|
|
|
|
|
Special Modes |
|
Auto |
|
|
|
|
1. |
A4 |
|
|
|
Exposure |
|
|
||
2. |
A4R |
|
File |
|
100% |
3. |
B4 |
|
|
4. |
A3 |
|
Quick File |
|
Copy Ratio |
|
|||
|
|
|
|
|
|
|
(A) |
|
|
Make sure that the automatically selected paper size is the same size as the original.
The selected tray is highlighted. You can also copy onto paper that is a different size than the original.
5 |
• The "1-Sided to 2-Sided" copy setting appears at the top of the paper size display (A). |
• Depending on the size of the placed original, there may be cases where the same size of paper as the original is not |
selected automatically. In this event, change the paper size manually.
•To change the paper size selection, touch the [Job Detail Settings] key and then the [Paper Select] key, or touch the paper size display (A).
The following screen appears when the [Paper Select] key or the paper size display (A) is touched. Touch the tray key that has the desired paper size and then touch the [OK] key.
Paper Select |
|
OK |
A4 |
Plain |
A4 |
A4R |
Plain |
Plain |
B4 |
Plain |
|
A3 |
Plain |
|
Ready |
to scan for copy. |
|
0 |
|
|
|
|
||
Full Colour |
Original A4 |
2-Sided Copy |
||
Colour |
Mode |
|||
|
|
|||
|
Job Detail |
|
|
Output |
|
|
|
|
Plain |
||
|
Settings |
|
|
||
|
|
|
A4 |
||
|
|
|
|
||
|
Auto |
|
|
Special Modes |
|
6 |
1. |
A4 |
|
||
Exposure |
|
||||
2. |
A4R |
File |
|||
100% |
3. |
B4 |
|
||
4. |
A3 |
Quick File |
|||
Copy Ratio |
|||||
|
|
|
|
Check the colour mode.
The currently selected colour mode appears.
To change the colour mode, touch the [Colour Mode] key, touch the [Full Colour] key, [Auto] key, [Single Colour] key or [2 Colour] key, and touch the [OK] key.
COPY COLOUR MODES (page 21)
Full Colour: The original is copied in full colour.
Auto: Colour or black and white is automatically selected when the original is scanned.
Single Colour: The original is copied in the selected colour only. 2 Colour: Only the red areas of the original are changed to the
selected colour; colours other than red are scanned in black.
19
Set the number of copies (sets) with the numeric keys.
7
2-Sided Copy
7
• Up to 999 can be set.
• A single copy can be made even if "0" appears for the number of copies.
If an incorrect number of copies is set...
Press the [CLEAR] key (  ) and then enter the correct number.
|
|
Press the [COLOUR START] key ( |
) |
|
or |
|
or the [BLACK & WHITE START] key |
|
|
8 |
|
( ). |
|
|
|
Scanning begins. |
|
|
|
|
|
|
|
|
|
|
If you are using the sort function or other function that requires |
||
|
|
all originals to be scanned before the copies are printed, you |
|
|
|
|
must use the same [START] key that you used to scan the first |
||
|
|
original to scan each of the remaining originals. |
|
|
|
|
Remove the original and place the next |
|
|
|
|
original, and then press the [COLOUR |
|
|
|
or |
START] key ( |
) or the [BLACK & |
|
|
WHITE START] key ( ). |
|
||
9 |
|
|
||
|
If you are using the sort function or other function that requires |
|||
all originals to be scanned before the copies are printed, you must use the same [START] key that you used to scan the first original to scan each of the remaining originals.
Repeat this step until all originals have been scanned.
Place next original. Press [Start]. When finished, press [Read-End].
Read-End
Touch the [Read-End] key.
10
To cancel scanning of the original and copying...
Press the [STOP] key ( ).
).
20
COPY COLOUR MODES
This section explains how to select the colour mode. For a colour original, set the colour mode to Full Colour.
If colour originals and black and white originals are mixed together, set the colour mode to Auto.
Full Colour |
The original is copied in full colour. |
|
|
The original is copied in the selected colour only.
Single Colour All colours in the original are changed to the selected colour, which can be selected from red, green, blue, cyan, magenta, or yellow.
Only the red areas of the original are changed to the selected colour; colours other than red are 2 Colour copied in black. This lets you make copies that are more expressive than black and white copies.
Red, green, blue, cyan, magenta, or yellow can be selected.
A colour original is normally copied in Full Colour mode when the [COLOUR START] key (
 ) is pressed.
Auto
However, if colour originals and black and white originals are mixed together, follow the steps below to set the colour mode to [Auto].
The discrimination point for detecting whether originals are colour or black and white can be set using "Detect Standard in Auto Colour Mode" in the system settings (administrator).
SELECTING THE COLOUR MODE
1
 1
1
Place the original.
Place the original face up in the document feeder tray, or face down on the document glass.
Ready to scan for copy.
|
Full Colour |
|
|
Colour Mode |
|
2 |
Job Detail |
|
Settings |
||
|
||
|
Auto |
|
|
Exposure |
|
|
100% |
|
|
Copy Ratio |
|
Touch the [Colour Mode] key. |
|
0 |
||
|
Original |
|
A4 |
|
2-Sided Copy |
Output
Plain
A4
Special Modes
1.A4
|
2. |
A4R |
|
File |
|
|
|
|
|
|
3. |
B4 |
|
|
|
|
|||
|
4. |
A3 |
|
Quick File |
|
|
|||
Colour Mode
Full Colour |
Single Colour |
Auto |
2 Colour |
3 |
(1) |
|
OK Set the colour mode.
(1) Select the colour mode.
(2) Touch the [OK] key.
(2)
When auto mode is used, there may be some originals for which the mode is not correctly switched between full colour mode and black and white mode. In this event, press the [COLOUR START] key (


 ) or the [BLACK & WHITE START] key (
 ) as appropriate to manually switch between colour copying and black and white copying.
21

4
To cancel scanning of the original and copying...
Press the [STOP] key ( ).
).
Press the [COLOUR START] key (


 ).
).
Scanning begins.
•If the originals were placed in the document feeder tray, the originals are copied.
•If you are using the document glass, copy each page one page at a time.
Even if a colour mode is selected, copying will take place in black and white if the [BLACK & WHITE START] key ( 
 ) is pressed.
System Settings (Administrator): Detect Standard in Auto Colour Mode
When the colour mode is set to auto, the discrimination point for detecting whether originals are colour or black and white can be set to one of 5 levels.
Selecting single colour copying
When [Single Colour] is selected for the colour mode, the following screen appears. Touch the desired colour and touch the [OK] key.
Colour Mode |
|
|
|
|
|
|
|||
|
|
|
|
|
OK |
||||
|
|
|
|
|
|
|
|
|
|
|
|
|
|
|
|
|
|
|
|
|
Single Colour |
|
|
|
|
|
OK |
||
|
|
|
|
|
|
|
|
||
|
|
|
|
|
|
|
|
|
|
|
|
|
|
|
|
|
|
|
|
|
|
R(Red) |
|
G(Green) |
|
|
B(Blue) |
|
|
|
|
|
|
|
|
|
|
|
|
|
|
C(Cyan) |
|
M(Magenta) |
|
|
Y(Yellow) |
|
|
Selecting 2 colour copying
When [2 Colour] is selected for the colour mode, the following screen appears. Touch the desired colours and touch the [OK] key.
Colour Mode |
|
|
|
|
|
|
|||
|
|
|
|
|
OK |
||||
|
|
|
|
|
|
|
|
|
|
|
|
|
|
|
|
|
|
|
|
|
2 Colour |
|
|
|
|
|
OK |
||
|
|
|
|
|
|
|
|
||
|
|
|
|
|
|
|
|
|
|
|
Select a colour other than black. |
|
|
|
|
||||
|
|
|
|
|
|
|
|
|
|
|
|
R(Red) |
|
G(Green) |
|
|
B(Blue) |
|
|
|
|
|
|
|
|
|
|
|
|
|
|
C(Cyan) |
|
M(Magenta) |
|
|
Y(Yellow) |
|
|
22

CHANGING THE EXPOSURE AND EXPOSURE MODE
The exposure level and exposure mode can be selected to obtain a clear copy.
AUTOMATIC ADJUSTMENT OF THE EXPOSURE AND EXPOSURE MODE
Automatic exposure adjustment operates by default to automatically adjust the exposure level and mode as appropriate for the original being copied. ("Auto" is displayed.)
When a black and white or full colour copy is made, the exposure is automatically adjusted to obtain the best image quality.
Ready to scan for copy.
Full Colour
Colour Mode
Job Detail
Settings
Auto
Exposure
100% Copy Ratio
0
Original |
|
A4 |
|
2-Sided Copy |
Output
Plain
A4
Special Modes
1.A4
|
2. |
A4R |
|
File |
|
|
|
|
|
|
3. |
B4 |
|
|
|
|
|||
|
4. |
A3 |
|
Quick File |
|
|
|||
SELECTING THE EXPOSURE MODE AND MANUALLY ADJUSTING THE EXPOSURE LEVEL
To select the exposure mode, or to manually adjust the exposure level, follow the steps below.
1
 1
1
Place the original.
Place the original face up in the document feeder tray, or face down on the document glass.
|
Full Colour |
|
Original A4 |
2-Sided Copy |
|
Colour Mode |
|
||
|
|
|
|
|
|
Job Detail |
|
Plain |
Output |
|
|
|
||
|
Settings |
|
|
|
2 |
|
A4 |
|
|
|
|
Special Modes |
||
Auto |
|
|
||
1. |
A4 |
|
||
Exposure |
2. |
A4R |
File |
|
|
100% |
3. |
B4 |
|
|
4. |
A3 |
Quick File |
|
|
Copy Ratio |
|||
|
|
|
|
Touch the [Exposure] key.
23
Exposure |
|
OK |
|
|
Auto |
1/2 |
|
|
Text |
||
Manual |
Text/ |
Text/Photo |
|
Prtd.Photo |
|||
|
|||
|
Printed |
Photo |
|
|
Photo |
||
|
|
Exposure |
|
|
|
|
|
OK |
|
|||
|
|
|
|
|
|
|
|
|
||
|
|
|
|
|
|
|
|
2/2 |
|
|
|
|
|
|
Map |
|
Light |
|
|
||
|
|
|
|
|
Original |
|
|
|
||
|
|
|
|
|
|
|
|
|
||
|
|
|
|
|
|
|
|
|
|
|
|
Manual |
|
|
|
|
|
|
|
|
|
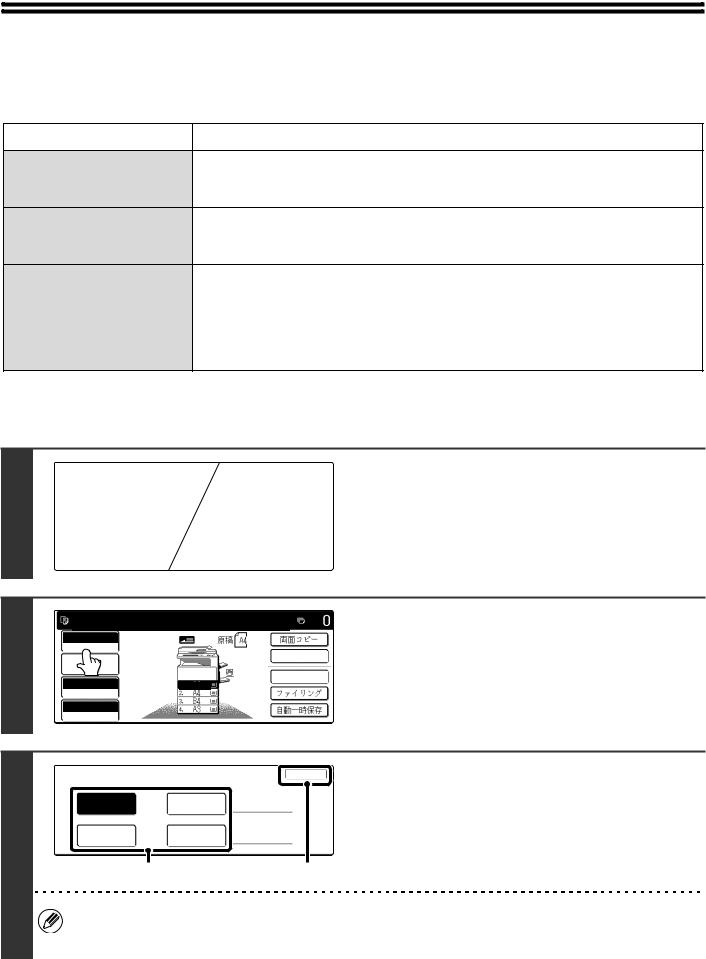
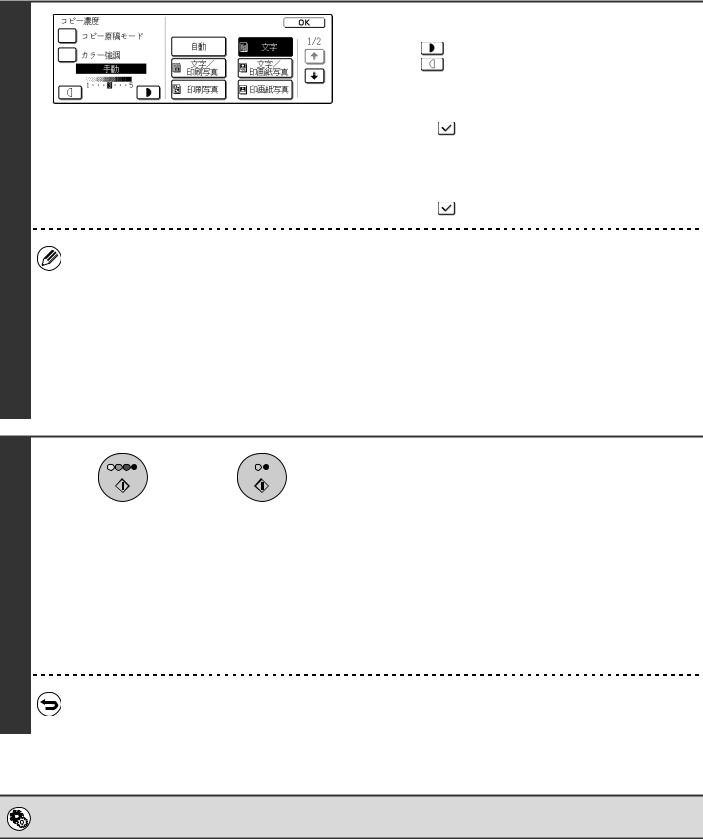
Select the exposure mode.
Touch the appropriate original type key to select the exposure mode.
● Selecting the exposure mode
|
Mode |
Description |
3 |
Auto |
Normally this setting is selected. When a black and white or full colour copy is made, the |
|
exposure is automatically adjusted to obtain the best image quality. |
|
|
|
|
|
Text |
Use this mode for regular text documents. |
|
|
|
|
Text/Prtd. Photo |
This mode provides the best balance for copying an original which contains both text and |
|
|
printed photographs, such as a magazine or catalogue. |
|
|
|
|
Text/Photo |
This mode provides the best balance for copying an original which contains both text and |
|
|
photographs, such as a text document with a photo pasted on. |
|
|
|
|
Printed photo |
This mode is best for copying printed photographs, such as photos in a magazine or |
|
|
catalogue. |
|
|
|
|
Photo |
Use this mode to copy photos. |
|
|
|
|
Map |
This mode is best for copying the light colour shading and fine text found on most maps. |
|
|
|
|
Light Original |
Use this mode for originals with light pencil writing. |
|
|
|
If [Auto] is selected but the darkness or lightness of the image does not seem quite right...
If the image seems too light or too dark when [Auto] is selected, the exposure level can be adjusted using "Copy Exposure Adjustment" in the system settings (administrator).
24
|
Exposure |
|
|
|
|
|
|
|
OK |
|
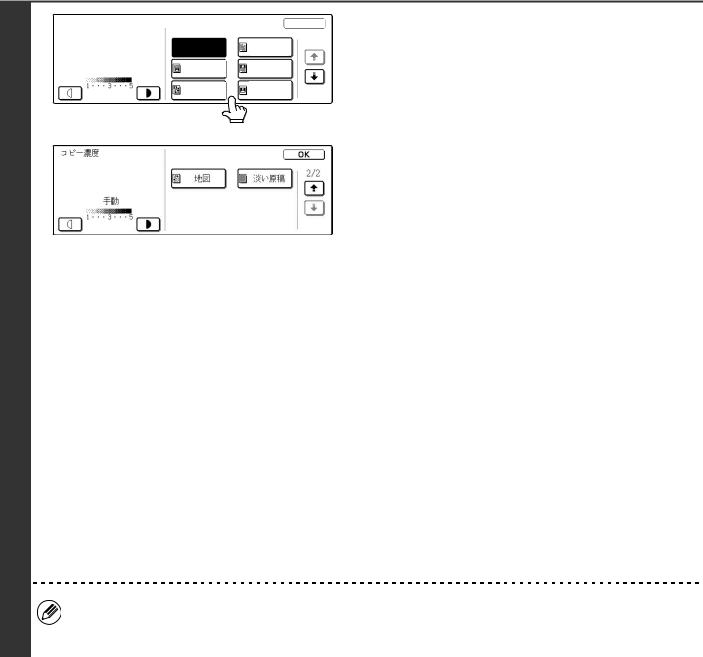
Adjust the exposure level. |
||||||
|
|
|
|
|
|
|
|
|
|
|
|
|
|
|
|
||
|
|
Copy of Copy |
|
|
|
|
|
|
|
|
|
|
|
|
|||
|
|
|
|
|
|
|
|
|
|
|
|
1/2 |
|
Touch the |
key to make the copy darker. |
||
|
|
|
Auto |
|
|
Text |
|
|
|
||||||||
|
|
|
|
|
|
|
|
|
|
|
|
||||||
|
|
|
|
|
|
|
|
|
|
|
|
|
|||||
|
|
Colour Tone |
|
|
|
|
|
|
|
|
|||||||
|
|
Enhancement |
|
|
|
|
|
|
|
|
|
|
|
Touch the |
key to make the copy lighter. |
||
|
|
|
|
|
|
|
Text/ |
|
Text/Photo |
|
|
|
|||||
|
|
|
|
|
|
|
|
|
|
|
|||||||
|
|
Manual |
|
|
|
|
|
|
|||||||||
|
|
|
|
|
|
|
Prtd.Photo |
|
|
|
|
|
|
|
|
• Using a copy or printed page as an original |
|
|
|
|
|
|
|
|
|
|
|
|
|
|
|
|
|
||
|
|
|
|
|
|
|
|
|
|
|
|
|
|
|
|
||
|
|
|
|
|
|
|
Printed |
|
|
Photo |
|
|
|
||||
|
|
|
|
|
|
|
Photo |
|
|
|
|
|
When using a copy or printed page from the machine as an |
||||
|
|
|
|
|
|
|
|
|
|
|
|
|
|
|
|||
|
|
|
|
|
|
|
|
|
|
|
|
|
|
|
|
||
|
|
|
|
|
|
|
|
|
|
|
|
|
|
|
|
original, touch the [Copy of Copy] checkbox so that a |
|
|
|
|
|
|
|
|
|
|
|
|
|
|
|
|
|
checkmark |
appears. |
|
|
|
|
|
|
|
|
|
|
|
|
|
|
|
|
When [Copy of Copy] is selected, only [Text], [Printed Photo], |
|
|
|
|
|
|
|
|
|
|
|
|
|
|
|
|
|
or [Text/Prtd.Photo] can be selected for the exposure mode. |
|
|
|
|
|
|
|
|
|
|
|
|
|
|
|
|
|
• To enhance the colour of a colour copy... |
|
|
|
|
|
|
|
|
|
|
|
|
|
|
|
|
|
Touch the [Colour Tone Enhancement] checkbox so that a |
|
4 |
|
|
|
|
|
|
|
|
|
|
|
|
|
|
|
checkmark |
appears. |
|
|
|
|
|
|
|
|
|
|
|
|
|
|
|
|
|
|
• Exposure levels when [Text] is selected:
1 to 2: Dark originals such as a newspaper 3: Normal density originals
4 to 5: Originals written in pencil or light coloured text
•Restrictions when Colour Tone Enhancement is selected
When [Colour Tone Enhancement] is selected in step 4, the following functions cannot be used:
•[Copy of Copy]
•[Auto] or [Light Original] exposure
•[Intensity] in the special modes
•[2 colour] or [Single Colour] in the colour mode
or
5
To cancel scanning of the original and copying...
Press the [STOP] key ( ).
).
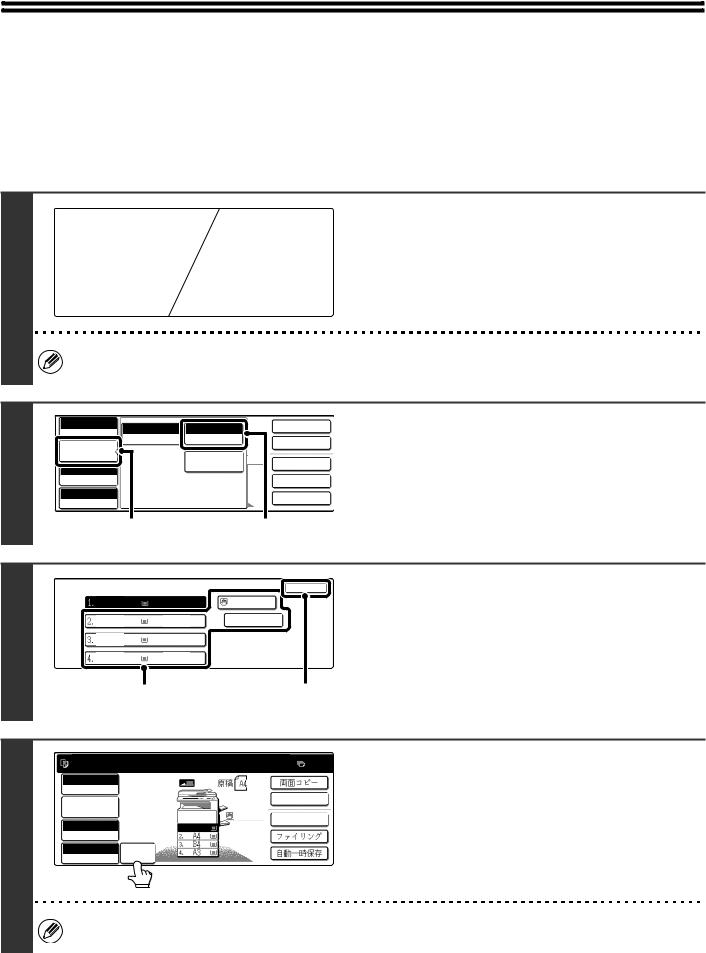
Press the [COLOUR START] key (


 ) or the [BLACK & WHITE START] key
(
 ).
).
Scanning begins.
•If the originals were placed in the document feeder tray, the originals are copied.
•If you placed the original on the document glass, scan each page one page at a time. If you are using the sort function or other function that requires all originals to be scanned before the copies are printed, you must use the same [START] key that you used to scan the first original to scan each of the remaining originals.
System Settings (Administrator): Copy Exposure Adjustment
The exposure level used for automatic exposure adjustment can be adjusted.
25
REDUCTION/ENLARGEMENT/ZOOM
AUTOMATIC RATIO SELECTION (Auto Image)
This section explains the automatic ratio selection function (Auto Image), which automatically selects the ratio to match the paper size.
The reduction or enlargement ratio is selected automatically based on the original size and the selected paper size.
 1
1
1
Place the original.
Place the original face up in the document feeder tray, or face down on the document glass.
Automatic ratio selection cannot be used if the original size or paper size is a non-standard size. If the original size is a non-standard size, automatic ratio selection cannot be used unless the original size is entered manually.
Full Colour |
Auto |
Auto |
A4 |
|
Colour Mode |
|
|||
Original |
Paper Select |
|
||
Job Detail |
|
|||
|
|
Plain |
||
Settings |
|
|
||
|
Special Modes |
A4 |
||
|
|
|||
Auto
2 Exposure
100% Copy Ratio
(1) |
(2) |
2-Sided Copy
Output
Special Modes
File
Quick File
Open the paper settings screen.
(1)Touch the [Job Detail Settings] key.
(2)Touch the [Paper Select] key.
|
Paper Select |
|
A4 |
|
A4R |
3 |
B4 |
A3 |
(1) |
|
OK |
Plain |
A4 |
Plain |
Plain |
Plain
Plain
(2)
Set the paper size.
(1)Touch the tray that has the desired paper size.
(2)Touch the [OK] key.
When the [OK] key is touched, you will return to the job detail setting screen. Touch the [Job Detail Settings] key to return to the base screen of copy mode.
|
Ready to scan for copy. |
|
|
Full Colour |
|
|
Colour Mode |
|
|
Job Detail |
|
|
Settings |
|
|
Auto |
|
4 |
Exposure |
|
100% |
Auto |
|
Copy Ratio |
Image |
|
|
||
0
Original |
|
|
2-Sided Copy |
|
|
A4 |
|
||
Output
Plain
A4
Special Modes
1.A4
2. |
A4R |
|
File |
|
|
|
|
3. |
B4 |
|
|
|
|||
4. |
A3 |
|
Quick File |
|
|
|
|
Touch the [Auto Image] key.
A suitable ratio for the original size and the selected paper size will be selected. (The selected ratio will appear in the ratio display.)
If the message "Rotate original from  to
to  " is displayed, change the orientation of the original as indicated in the message.
26
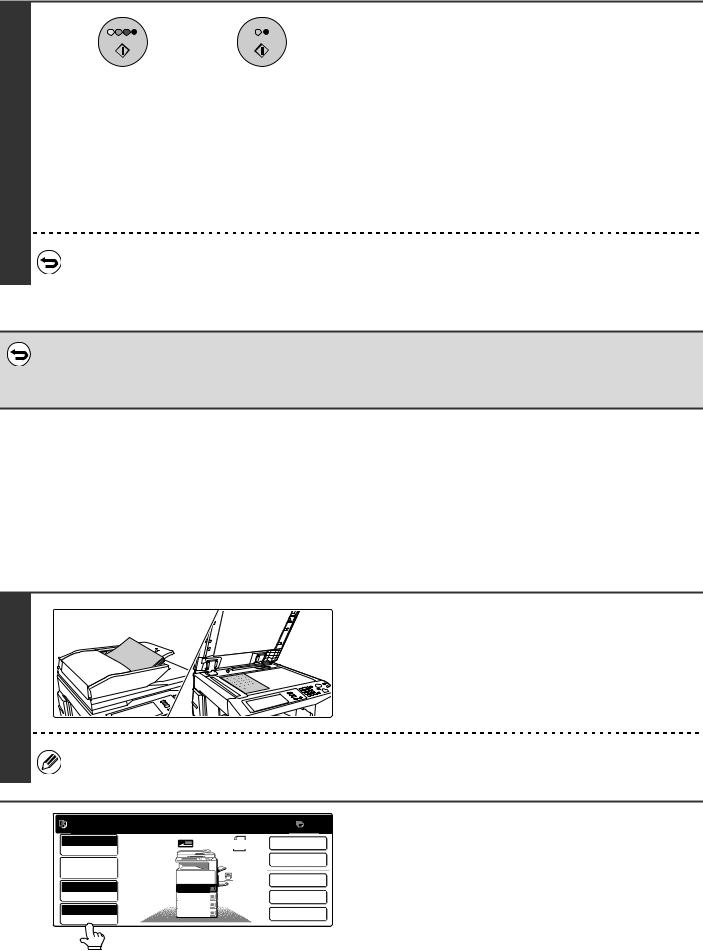
Press the [COLOUR START] key (


 )
)
or |
or the [BLACK & WHITE START] key |
(
 ).
).
5
To cancel scanning of the original and copying...
Press the [STOP] key ( ).
).
Scanning begins.
•If the originals were placed in the document feeder tray, the originals are copied.
•If you placed the original on the document glass, scan each page one page at a time. If you are using the sort function or other function that requires all originals to be scanned before the copies are printed, you must use the same [START] key that you used to scan the first original to scan each of the remaining originals.
•To cancel automatic ratio selection...
Touch the [Auto Image] key so that it is no longer highlighted.
•To return the ratio to 100%...
To return the ratio setting to 100%, touch the [Copy Ratio] key to display the ratio menu and then touch the [100%] key.
MANUALLY SELECTING THE RATIO (Preset ratios/Zoom)
The enlargement and reduction keys can be used to select five preset ratios each (from a maximum of 400% to a minimum of 25%).
In addition, the zoom keys can be used to select any ratio from 25% to 400% in increments of 1%.
 1
1
1
Place the original.
Place the original face up in the document feeder tray, or face down on the document glass.
When the automatic document feeder is used, the ratio selection range is 25% to 200%.
|
Ready to scan for copy. |
|
Full Colour |
|
Colour Mode |
|
Job Detail |
2 |
Settings |
Auto |
|
Exposure |
|
|
100% |
|
Copy Ratio |
|
|
0 |
Touch the [Copy Ratio] key. |
Original A4 |
2-Sided Copy |
Output
Plain
A4
Special Modes
1.A4
2. |
A4R |
File |
3. |
B4 |
|
4. |
A3 |
Quick File |
27

|
|
|
|
|
|
|
|
Touch the [Menu] key to select copy |
||
|
|
|
|
|
|
|
|
ratio menu " |
" or " |
". |
|
|
|
|
|
|
|
|
● Menu |
|
|
Copy Ratio |
|
100 % |
|
|
OK |
• Enlarge keys: |
|
|
||
B4 |
B5 |
70% |
|
B5 |
A4 |
115% |
115%, 122% and 141% (for the AB system). |
|||
A3 |
A4 |
|
|
Zoom |
B4 |
A3 |
|
121% and 129% (for the inch system). |
||
B5 |
A5 |
|
|
A5 |
B5 |
|
||||
81% |
|
|
122% |
|||||||
B4 |
A4 |
|
|
A4 |
B4 |
• Reduction keys: |
|
|
||
A4 |
B5 |
86% |
|
100% |
B5 |
B4 |
141% |
|
|
|
A3 |
B4 |
|
|
A4 |
A3 |
70%, 81% and 86% (for the AB system). |
||||
|
|
|
|
|
|
|
|
|||
|
Auto Image |
Menu |
1 |
2 |
XY Zoom |
77% and 64% (for the inch system). |
||||
|
|
|
|
|
|
|
|
|||
|
|
|
|
|
|
|
|
• Full size key: 100% |
|
|
3
Copy Ratio |
|
|
|
|
|
|
|
|
|
|
|
|
|
|
|
|
|
|
|
OK |
||||
|
|
|
|
|
100 |
|
|
|
|
|
|
|
|
|
|
|||||||||
|
|
|
|
|
|
|
|
|
% |
|
|
|
|
|
|
|
|
|
|
|||||
|
|
|
|
|
|
|
|
|
|
|
|
|
|
|
|
|
|
|
|
|
|
|
|
|
|
25% |
|
50% |
|
|
|
|
|
Zoom |
|
|
|
|
|
|
200% |
|
|
|
400% |
|
|
||
|
|
|
|
|
|
|
|
|
|
|
|
|
|
|
|
|
|
|
|
|
|
|
|
|
|
|
|
|
|
|
|
|
|
|
|
|
|
|
|
|
|
|
|
|
|
|
|
|
|
|
|
|
|
|
|
|
|
|
|
|
|
|
|
|
|
|
|
|
|
|||||
|
|
|
|
|
|
|
|
|
|
|
|
|
|
|
|
|
|
|
||||||
|
75% |
|
150% |
|
|
|
|
100% |
|
|
|
|
|
|
|
300% |
|
|
350% |
|
|
|||
|
|
|
|
|
|
|
|
|
|
|
|
|
|
|
|
|
|
|
|
|
|
|
|
|
|
|
|
|
|
|
|
|
|
|
|
|
|
|
|
|
|
|
|
|
|
|
|
|
|
|
Auto Image |
|
|
Menu |
|
|
|
1 |
|
|
|
|
2 |
|
|
XY Zoom |
|
|||||||
● Menu 
•Enlargement keys (2 to 4 ratios) 200%, 400%, any ratio (max. of two)
•Reduction keys (2 to 4 ratios) 25%, 50%, any ratio (max. of two)
•Full size key 100%
(A)
Keys marked (A)
The keys marked (A) can be set to show any ratio using "Add or Change Extra Preset Ratios" in the system settings (administrator).
Copy Ratio |
70 % |
|
|
OK |
||
B4 |
B5 |
70% |
B5 |
A4 |
115% |
|
A3 |
A4 |
Zoom |
B4 |
A3 |
||
B5 |
A5 |
|
A5 |
B5 |
|
|
81% |
|
122% |
||||
B4 |
A4 |
|
A4 |
B4 |
||
A4 |
B5 |
86% |
100% |
B5 |
B4 |
141% |
A3 |
B4 |
|
A4 |
A3 |
Auto Image |
Menu |
1 |
2 |
XY Zoom |
Touch a preset ratio key and zoom key to select the desired ratio and touch the [OK] key.
After touching the [OK] key, make sure that a paper size suitable for the ratio is selected.
4 |
• To quickly select a ratio, touch a reduction or enlargement key to select a ratio close to the desired ratio and then |
|
use the zoom keys for fine adjustment. |
•The zoom keys can be used to select any ratio from 25% to 400% in increments of 1%.
•Touch the  key to increase the ratio, or the
  key to decrease the ratio. (If you continue to touch the
 /
/  key, the ratio will change automatically. After 3 seconds, the ratio will change rapidly.)
•If the message "Image is larger than the copy paper." appears when an enlargement ratio is selected, the image may not fit on the paper.
|
|
(B) |
|
|
Full Colour |
Auto |
Auto |
A4 |
|
Colour Mode |
||||
Original |
Paper Select |
|||
|
||||
5 |
Job Detail |
Plain |
||
Settings |
||||
Special Modes |
A4 |
|||
|
||||
Auto
Exposure
70% Copy Ratio
2-Sided Copy
Output
Special Modes
File
Quick File
Touch the [Job Detail Settings] key and make sure that a suitable paper size is selected for the ratio.
If "Auto" appears in the [Paper Select] key (B), auto paper selection is enabled. If auto paper selection is not enabled, select the paper size manually.
28
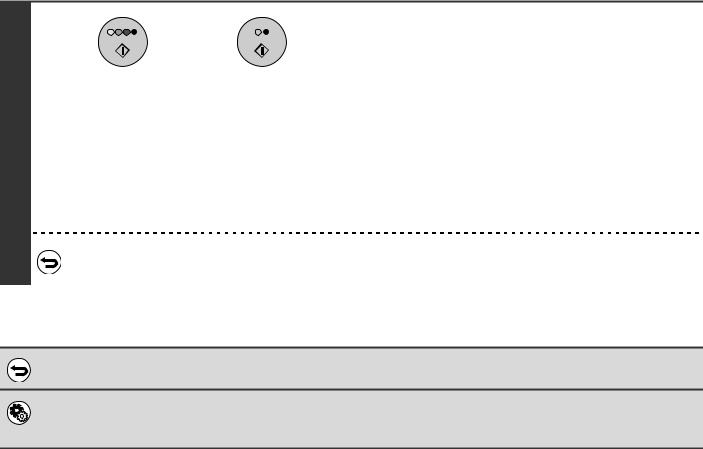
Press the [COLOUR START] key (


 )
)
or |
or the [BLACK & WHITE START] key |
(
 ).
).
6
To cancel scanning of the original and copying...
Press the [STOP] key ( ).
).
Scanning begins.
•If the originals were placed in the document feeder tray, the originals are copied.
•If you placed the original on the document glass, scan each page one page at a time. If you are using the sort function or other function that requires all originals to be scanned before the copies are printed, you must use the same [START] key that you used to scan the first original to scan each of the remaining originals.
To return the ratio to 100%...
To return the ratio setting to 100%, touch the [Copy Ratio] key to display the ratio menu and then touch the [100%] key.
System Settings (Administrator): Add or Change Extra Preset Ratios
Two enlargement preset ratios (101% to 400%) and two reduction preset ratios (25% to 99%) can be added. An added preset ratio can also be changed.
29
Loading...