


MODEL: MX-C250E
MX-C250F
MX-C250FE
MX-C300E
MX-C300W
MX-C300WE
DIGITAL FULL COLOUR
MULTIFUNCTIONAL SYSTEM
OPERATION GUIDE

INTRODUCTION
This manual describes MX-C250E/MX-C250F/MX-C250FE/MX-C300E/MX-C300W/MX-C300WE Digital full colour multifunctional system.
|
|
• |
Where "MX-XXXX" appears in this manual, please substitute the name of your model for "XXXX". For the |
|
Note |
|
name of your model, see p.8. |
|
• |
The screen images and procedures that appear in this manual are mainly for Windows 7. With other versions |
|
|
|
||
|
|
|
of Windows, some screen images may be different from those in this manual. |
|
|
• |
For information on using your operating system, refer to your operating system's manual or online Help. |
|
|
|
|
The display screens, messages, and key names shown in the manual may differ from those on the actual machine due to product improvements and modifications.
2

CONTENTS |
|
INTRODUCTION ................................................ |
2 |
USING THE MANUAL ....................................... |
7 |
● ABOUT THE MANUALS ................................... |
7 |
● CONVENTIONS USED IN THIS MANUAL....... |
7 |
DIFFERENCES BETWEEN MODELS............... |
8 |
1 BEFORE USING THE MACHINE |
|
PART NAMES AND FUNCTIONS ..................... |
9 |
● OPERATION PANEL ...................................... |
11 |
DISPLAY .......................................................... |
13 |
● LEFT MENU AND RIGHT MENU ................... |
13 |
● HOW TO USE THE DISPLAY ........................ |
14 |
POWER ON AND OFF..................................... |
15 |
● POWER ON .................................................... |
15 |
● POWER OFF .................................................. |
15 |
● POWER SAVE MODES.................................. |
15 |
● DEFAULT SETTINGS..................................... |
15 |
LOADING PAPER............................................ |
16 |
● PAPER............................................................ |
16 |
● PRINT SIDE FACE UP OR FACE DOWN ...... |
17 |
● LOADING PAPER........................................... |
19 |
● TRAY SETTINGS ........................................... |
22 |
USER AUTHENTICATION MODE................... |
23 |
● USING USER AUTHENTICATION MODE ..... |
23 |
ENTERING CHARACTERS............................. |
24 |
● CHARACTERS THAT CAN BE ENTERED .... |
24 |
2 COPY FUNCTIONS |
|
NORMAL COPYING ........................................ |
26 |
● PLACING THE ORIGINAL ............................. |
27 |
● MAKING A COPY DARKER OR LIGHTER ... |
28 |
● SELECTING THE TRAY ................................ |
28 |
● SETTING THE NUMBER OF COPIES .......... |
28 |
● SELECTING THE ORIGINAL SIZE ............... |
29 |
● USING THE BYPASS TRAY TO COPY A |
|
SPECIAL SIZE ORIGINAL............................. |
29 |
● REDUCING OR ENLARGING A COPY......... |
29 |
● AUTOMATIC DUPLEX COPYING ................. |
30 |
CONVENIENT COPY FUNCTIONS................. |
31 |
● SORT COPY .................................................. |
31 |
● ID CARD COPY ............................................. |
32 |
● RESOLUTION SETTINGS............................. |
33 |
SPECIAL MODES............................................ |
34 |
●COPYING MULTIPLE ORIGINALS ONTO A SINGLE SHEET OF PAPER (2 IN 1 / 4 IN 1
COPY)............................................................ |
34 |
● CARD SHOT .................................................. |
35 |
● ADJUSTING RED/GREEN/BLUE IN COPIES |
|
(RGB Adjust) .................................................. |
35 |
● ADJUSTING THE SHARPNESS OF AN IMAGE |
|
(Sharpness) ................................................... |
36 |
● WHITENING FAINT COLOURS IN COPIES |
|
(Suppress Background) ................................. |
36 |
FREQUENTLY USED SETTINGS (PROGRAMS) .. 37 |
|
3
3 |
PRINTER |
|
● PRINTER FUNCTION OF THE MACHINE ..... |
39 |
|
PRINTING FROM WINDOWS.......................... |
40 |
|
● PRINTER DRIVER PROPERTIES WINDOW .... |
40 |
|
● BASIC PRINTING PROCEDURE...................... |
41 |
|
● PRINTING WHEN THE USER AUTHENTICATION |
||
|
FUNCTION IS ENABLED ................................. |
43 |
● VIEWING PRINTER DRIVER HELP.................. |
44 |
|
● SAVING FREQUENTLY USED PRINT SETTINGS........ |
45 |
|
● CHANGING THE PRINTER DRIVER DEFAULT |
||
|
SETTINGS ....................................................... |
47 |
PRINTING FROM A MACINTOSH .................. |
48 |
|
● BASIC PRINTING PROCEDURE...................... |
48 |
|
● PRINTING WHEN THE USER AUTHENTICATION |
||
|
FUNCTION IS ENABLED ................................. |
51 |
FREQUENTLY USED FUNCTION................... |
52 |
|
● SELECTING THE COLOUR MODE .................. |
52 |
|
● SELECTING A PRINT MODE SETTING ........... |
54 |
|
● TWO-SIDED PRINTING ................................... |
55 |
|
● FITTING THE PRINT IMAGE TO THE PAPER ...... |
56 |
|
● PRINTING MULTIPLE PAGES ON ONE PAGE .... |
57 |
|
CONVENIENT PRINTING FUNCTIONS.......... |
59 |
|
● CONVENIENT FUNCTIONS FOR CREATING |
|
|
|
PAMPHLETS AND POSTERS .......................... |
59 |
● FUNCTIONS TO ADJUST THE SIZE AND |
|
|
|
ORIENTATION OF THE IMAGE ....................... |
62 |
● COLOUR MODE ADJUSTMENT FUNCTION.... |
64 |
|
● FUNCTIONS THAT COMBINE TEXT AND |
|
|
|
IMAGES.............................................................. |
68 |
● PRINT FUNCTIONS FOR SPECIAL PURPOSES....... |
71 |
|
● CONVENIENT PRINTER FUNCTIONS............. |
72 |
|
PRINTING WITHOUT THE PRINTER DRIVER... |
74 |
|
● DIRECTLY PRINTING A FILE IN USB MEMORY ....... |
75 |
|
● DIRECTLY PRINTING FROM A COMPUTER............. |
76 |
|
● CANCELLING A PRINT JOB FROM THE MACHINE ....... |
76 |
|
● CHANGE THE MACHINE TO OFFLINE MODE...... |
76 |
|
APPENDIX ....................................................... |
77 |
|
● PRINTER DRIVER SPECIFICATION LIST.............. |
77 |
|
|
|
|
|
|
|
|
|
4 |
FAX FUNCTIONS |
|
|
|
|
|
|
|
|
|
|
TO USE THIS PRODUCT CORRECTLY AS A |
|
|
|
FACSIMILE ...................................................... |
79 |
||
POINTS TO CHECK AND PROGRAM AFTER |
|
|
|
INSTALLATION ............................................... |
80 |
||
● FAX MODE (BASE SCREEN) ....................... |
81 |
||
ORIGINALS ..................................................... |
82 |
||
● ORIGINALS THAT CAN BE FAXED.............. |
82 |
|
|
CONVENIENT DIALLING METHODS (AUTO- |
|
|
|
DIALLING) ....................................................... |
83 |
||
FAX TRANSMISSION METHODS................... |
84 |
||
● ADDRESS REVIEW FUNCTION ................... |
84 |
|
|
SENDING A FAX ............................................. |
85 |
||
● BASIC PROCEDURE FOR SENDING FAXES............ |
85 |
||
● TRANSMISSION BY AUTO-DIALLING (SPEED |
|||
DIALLING AND GROUP DIALLING) ............. |
87 |
||
● SEARCHING FOR A PROGRAMMED DESTINATION (USING THE [ADDRESS] KEY
( ))................................................................ |
87 |
● FAXING A TWO-SIDED ORIGINAL............... |
88 |
● HOW TO SELECT THE RESOLUTION......... |
92 |
● CHANGING THE EXPOSURE....................... |
92 |
● CANCELLING A FAX TRANSMISSION ........ |
93 |
RECEIVING FAXES......................................... |
95 |
● RECEIVING A FAX ........................................ |
95 |
● MANUAL FAX RECEPTION .......................... |
96 |
FUNCTION KEY .............................................. |
97 |
● FAX PRINT HOLD FUNCTION...................... |
97 |
● AUTOMATIC TRANSMISSION AT A |
|
SPECIFIED TIME .......................................... |
98 |
●SENDING THE SAME DOCUMENT TO MULTIPLE DESTINATIONS IN A SINGLE
OPERATION .................................................. |
99 |
● SENDING OPTIONS ................................... |
100 |
● POLLING MEMORY .................................... |
101 |
● STORING, EDITING, AND DELETING AUTO- |
|
DIAL NUMBERS (SPEED DIAL NUMBERS, |
|
AND GROUP DIALS)................................... |
103 |
● STORING, EDITING AND DELETING |
|
PROGRAMS ................................................ |
107 |
PRINTING LISTS OF PROGRAMMED |
|
INFORMATION AND SETTINGS .................. |
109 |
● INCLUDING SENDER INFORMATION ON |
|
FAXES (OWN NUMBER SENDING) ........... |
109 |
● FORWARDING FUNCTION......................... |
110 |
● USING THE FORWARDING FUNCTION .... |
111 |
USING SETTINGS STORED AS A PROGRAM 112 |
|
● USING A PROGRAM................................... |
112 |
4

FORWARDING RECEIVED DATA TO A NETWORK |
|
ADDRESS (INBOUND ROUTING SETTINGS) ..... |
113 |
● CONFIGURING THE BASIC SETTINGS ..... |
113 |
● SETTINGS THE DESTINATION................... |
115 |
SENDING A FAX DIRECTLY FROM A |
|
COMPUTER (PC-Fax) ....................................... |
116 |
CONNECTING AN EXTENSION PHONE.......... |
117 |
● CONNECTING AN EXTENSION PHONE .... |
117 |
● USING AN EXTENSION PHONE ................. |
118 |
WHEN A TRANSACTION REPORT IS PRINTED ..120
● INFORMATION APPEARING IN THE TYPE/ |
||
|
NOTE COLUMN ........................................... |
120 |
REPORT AT REGULAR INTERVALS |
|
|
(COMMUNICATION ACTIVITY REPORT).............. |
121 |
|
WHEN AN ALARM SOUNDS AND A WARNING |
|
|
MESSAGE IS DISPLAYED ..................................... |
121 |
|
● SELF-DIAGNOSTIC FUNCTION.................. |
122 |
|
● MESSAGES DURING NORMAL OPERATION .... |
122 |
|
5 |
SCANNER FUNCTIONS |
|
ABOUT THE SCANNER FUNCTIONS.......... |
123 |
|
● THE BASE SCREEN OF SCANNER MODE ... |
125 |
|
SENDING AN IMAGE .................................... |
126 |
|
● BASIC TRANSMISSION PROCEDURE....... |
126 |
|
● SELECTING A DESTINATION (USING THE |
||
|
[ADDRESS] KEY ( )) .................................. |
128 |
● TRANSMITTING A TWO-SIDED ORIGINAL ... |
129 |
|
STORING SCANNING SETTINGS ................ |
130 |
|
● SETTING THE SCANNING SIZE ................. |
130 |
|
● SELECTING THE RESOLUTION ................. |
130 |
|
● SELECTING THE FILE FORMAT................. |
131 |
|
● ADJUSTING THE GREYSCALE OF BLACK & |
||
|
WHITE MODE............................................... |
131 |
● ADJUSTING THE SCANNING EXPOSURE .... |
132 |
|
● ENABLING SCANNING MARGINS (VOID |
|
|
|
AREA) ........................................................... |
132 |
● WHITENING FAINT COLOURS IN COPIES |
|
|
|
(SUPPRESS BACKGROUND) ..................... |
132 |
● ADJUSTING THE SHARPNESS OF AN IMAGE |
||
|
(SHARPNESS) ............................................. |
132 |
● SCANNING BUSINESS CARDS (BUSINESS |
||
|
CARD SCAN)................................................ |
133 |
● IMAGE ORIENTATION AND STANDARD |
|
|
|
ORIGINAL PLACEMENT ORIENTATION .... |
133 |
● STORING AND EDITING/DELETING A |
|
|
|
PROGRAM ................................................... |
134 |
● USING STORED SETTINGS (PROGRAM)..134 |
||
SCANNING FROM YOUR COMPUTER (PC |
|
|
SCAN) ............................................................ |
135 |
|
● SCANNING FROM A TWAIN-COMPLIANT |
|
|
|
APPLICATION .............................................. |
135 |
USB MEMORY SCAN.................................... |
139 |
|
● USING THE USB MEMORY SCAN FUNCTION .. 139 |
||
6 |
TROUBLESHOOTING |
|
TROUBLESHOOTING................................... |
141 |
|
● NETWORK PROBLEMS.............................. |
143 |
|
● MACHINE/COPYING PROBLEMS .............. |
143 |
|
● PRINTING AND SCANNING PROBLEMS .. |
146 |
|
● FAX PROBLEMS ......................................... |
149 |
|
INDICATORS AND DISPLAY MESSAGES .. |
151 |
|
IF YOUR E-MAIL IS RETURNED .................. |
152 |
|
MISFEED REMOVAL.......................................... |
153 |
|
● MISFEED IN THE DOCUMENT FEEDER ... |
153 |
|
● MISFEED IN THE BYPASS TRAY .............. |
155 |
|
● MISFEED IN THE MACHINE....................... |
156 |
|
● MISFEED IN THE PAPER TRAY 1.............. |
159 |
|
● MISFEED IN THE PAPER TRAY 2.............. |
159 |
|
REPLACING THE TONER CARTRIDGE ...... |
160 |
|
REPLACING THE TONER COLLECTION |
|
|
CONTAINER .................................................. |
161 |
|
7 |
ROUTINE MAINTENANCE |
|
CHECKING THE TOTAL OUTPUT COUNT AND |
||
TONER REMAINING ...................................... |
163 |
|
ROUTINE MAINTENANCE............................ |
163 |
|
● CLEANING THE DOCUMENT GLASS AND |
||
|
DOCUMENT FEEDER................................. |
163 |
● CLEANING THE ORIGINAL SCANNING |
|
|
|
GLASS (ONLY WHEN AN DOCUMENT |
|
|
FEEDER IS INSTALLED) ............................ |
164 |
● CLEANING THE BYPASS TRAY PAPER FEED |
||
|
ROLLER....................................................... |
164 |
● CLEANING THE AUTOMATIC DOCUMENT |
||
|
FEEDER ROLLERS..................................... |
164 |
● CLEANING THE MAIN CHARGER OF THE |
|
|
|
PHOTOCONDUCTIVE DRUM..................... |
165 |
● CLEANING THE LASER UNIT .................... |
166 |
|
ADJUSTING THE DISPLAY CONTRAST ........ |
167 |
|
5

8 SYSTEM SETTINGS |
|
PURPOSE OF THE SYSTEM SETTINGS ...... |
168 |
● PROGRAMS RELATED TO ALL FUNCTIONS |
|
OF THE MACHINE ....................................... |
168 |
● PROGRAMMING AN ADMINISTRATOR |
|
PASSWORD ................................................. |
168 |
PROGRAMMING AN ADMINISTRATOR |
|
PASSWORD................................................... |
169 |
SYSTEM SETTINGS LIST.............................. |
170 |
USING THE SYSTEM SETTINGS .................. |
175 |
● Change Admin PW ....................................... |
176 |
● Default Settings............................................. |
176 |
● Network......................................................... |
176 |
● User Control.................................................. |
178 |
● Device Control .............................................. |
179 |
● Registration Adjustment................................ |
179 |
● Energy Save ................................................. |
180 |
● List Print ........................................................ |
181 |
● AutoColourCalib............................................ |
181 |
● Security Settings ........................................... |
182 |
● Copier ........................................................... |
182 |
● Printer ........................................................... |
183 |
● Fax ................................................................ |
183 |
● Scanner......................................................... |
189 |
9 WEB FUNCTIONS IN THE MACHINE
ABOUT THE WEB PAGES ............................ |
190 |
● HOW TO ACCESS THE WEB PAGE .......... |
190 |
ABOUT THE WEB PAGES (FOR USERS) .... |
191 |
CONFIGURING THE PRINTER CONDITION |
|
SETTINGS...................................................... |
192 |
● HOW TO CONFIGURE THE SETTINGS..... |
192 |
● PRINTER CONDITION SETTING MENU .... |
193 |
● PRINTER CONDITION SETTINGS ............. |
193 |
CONFIGURING THE SCANNER CONDITION |
|
SETTINGS...................................................... |
195 |
● STORING DESTINATIONS ......................... |
195 |
● BASIC SETTINGS FOR NETWORK SCAN |
|
(FOR THE ADMINISTRATOR) .................... |
201 |
ABOUT THE WEB PAGES (FOR THE |
|
ADMINISTRATOR)......................................... |
202 |
CONFIGURING SMTP, DNS AND LDAP |
|
SERVER SETTINGS ...................................... |
203 |
PROTECTING INFORMATION PROGRAMMED |
|
IN THE WEB PAGE ([Passwords]) ............... |
204 |
ADMINISTRATOR SETTINGS ....................... |
205 |
● CONFIGURING A SETTING IN THE |
|
ADMINISTRATOR SETTINGS .................... |
205 |
● ADMINISTRATOR SETTINGS .................... |
205 |
E-MAIL STATUS AND E-MAIL ALERT |
|
SETTINGS...................................................... |
206 |
● INFORMATION SETUP ............................... |
206 |
● SMTP SETUP .............................................. |
206 |
● STATUS MESSAGE SETUP ....................... |
207 |
● ALERTS MESSAGE SETUP ....................... |
207 |
TRADEMARK ACKNOWLEDGMENTS ......... |
209 |
6

USING THE MANUAL
This machine has been designed to provide convenient copying features in a minimum amount of office space and with maximum operational ease. To get full use of all machine features, be sure to familiarise yourself with this manual and the machine. For quick reference during machine use, SHARP recommends printing out this manual and keep it in a handy location.
ABOUT THE MANUALS
The manuals for the machine are as follows:
Start Guide
This manual explains:
•Specifications
•Cautions for using the machine in safety
Operation Guide (on the accessory CD-ROM)
This manual explains:
How to use the machine and what to do if trouble occurs.
Software Setup Guide (on the accessory CD-ROM)
This manual explains:
How to install software to operate the machine from your computer.
CONVENTIONS USED IN THIS MANUAL
The icons in the manuals indicate the following types of information:
|
Warning |
Warns the user that injury may result if the contents of the warning are not properly followed. |
|
|
Cautions the user that damage to the machine or one of its components may result if the contents |
|
|
|
|
Caution |
|
|
of the caution are not properly followed. |
|
|
Note |
Notes provide information relevant to the machine regarding specifications, functions, |
|
performance, operation and such, that may be useful to the user. |
7

DIFFERENCES BETWEEN MODELS
This manual covers the following models.
Model |
Copy Speed |
Wireless LAN |
FAX Function |
Document Feeder |
|
MX-C300W |
30CPM |
Yes |
|
2-sided |
|
|
|
||||
MX-C300WE |
Yes |
||||
|
|
|
|||
|
|
|
|
||
MX-C250F |
25CPM |
|
1-sided |
||
|
|
||||
|
|
|
|||
MX-C250FE |
No |
|
|||
|
|
|
|||
|
|
|
|
||
MX-C250E |
25CPM |
No |
1-sided |
||
|
|||||
|
|
|
|
||
MX-C300E |
30CPM |
|
2-sided |
||
|
|
||||
|
|
|
|
|
AB series (metric) and inch series references
Both specifications are quoted where applicable. For example:
Page 4: A4 and B5 (8-1/2" x 11" and 5-1/2" x 8-1/2")
Start Guide: 50%, 70%, 81%, 86%, 100%, 115%, 122%, 141%, 200% (50%, 64%, 77%, 95%, 100%, 121%, 129%, 141%, 200%)
Although AB series size indications are shown on the operation panel of this manual, inch series indications are displayed on the inch series machines.
8

1 BEFORE USING THE MACHINE
This chapter contains basic information that should be read before using the machine.
PART NAMES AND FUNCTIONS
(1) 
(8)
(2) |
(9) |
|
(3) |
|
(11) |
(4) |
(10) |
(12) |
(5) |
|
(13) |
|
|
(4)
(14)
(6) 
(7) 
 (17)
(17)
(15) |
(18) |
(16)
 (19)
(19)
(4) |
(1)Document glass
Place an original that you wish to scan face down here. (p.27)
(2)Power switch
Press to turn the machine power on and off.
(3)Centre tray extensions
When you eject the paper of A4 size or more, you can use open to the outside.
(4)Handles
Use to move the machine. When attaching tray 2, use the handle at the bottom.
The main unit is extremely heavy, and thus two  Note people are required to do the work. When lifting
the main unit, grasp the handles on each side firm
(5)Centre tray
Copies and printed pages are output to this tray.
(6)Tray 1
Tray 1 can hold approximately 250 sheets of copy paper (80 g/m2 (21 lbs.)). For restrictions on paper types, sizes, and weights, refer to "PAPER" (p.16).
(7)Tray 2 (Option)
Tray 2 can hold approximately 500 sheets of copy paper (80 g/m2 (21 lbs.)). For restrictions on paper types, sizes, and weights, refer to "PAPER" (p.16).
(8)Operation panel
Contains operation keys and indicator lights.
(9)USB 2.0 port (Type A)
This is used to connect a USB device such as USB memory to the machine.
(10)Front cover
Open to replace the toner cartridge etc.
(11)Side cover handle
Pull to open the side cover.
(12)Side cover
Open to remove misfed paper.
(13)Bypass tray guides
Adjust to the width of the paper when using the bypass tray.
(14)Bypass tray
Special paper (heavy paper or transparency film) can be fed from the bypass tray.
(15)Extension phone socket
The line from an extension phone can be connected to this socket to use the telephone function.
(16)Telephone line socket
When the fax function of the machine is used, the telephone line is connected to this socket.
(17)USB 2.0 port (Type B)
Connect to your computer to this port to use the printer function.
(18)LAN connector
Connect the LAN cable to this connector when the machine is used on a network.
(19)Bypass tray extension
Open this tray when loading paper in the bypass tray.
9

BEFORE USING THE MACHINE
(28)
(21)
(20) |
(22) |
(20)Toner cartridge (Y/M/C/Bk)
Contains toner. When the toner runs out in a cartridge, the cartridge of the colour that ran out must be replaced.
(21)Document feeder tray
(23)(24)
(25)
(26)
(27)
(30)
(29)
(32)
(33)
(31)
(30)Fusing unit release levers
Push down these levers to release the pressure when removing misfed paper from inside the fusing area or when feeding an envelope from the bypass tray.
Place the original(s) that you wish to scan face up here.
(22)Toner collection container
This collects excess toner that remains after printing.
(23)Feeding roller cover
Open to remove misfed originals.
(24)Original guides
Adjust to the size of the originals.
(25)Feeding roller tray
Open to place the originals.
(26)Extension tray
Open this when you scan a long original.
(27)Exit area
Originals exit the machine here after copying/scanning when the document feeder is used.
(28)Fusing unit paper guide
Open to remove misfed paper.
(29)Peep Hole
Use the peep hole (see the illustration at right) to check the position of the original.
(Models with the one-sided scanning function only)
Warning |
• The fusing unit is hot. Do not touch |
the fusing unit when removing |
|
|
misfed paper. Doing so may cause |
|
a burn or injury. |
|
• When pushing down the levers, |
|
pinch the levers with your thumb |
|
and index finger while pushing |
|
down slowly. If you push the levers |
|
strongly, the levers may hit your |
|
fingers. |
(31)Roller rotating knob
Rotate to remove misfed paper.
(32)Paper tray right side cover
Open this to remove a paper misfeed in trays.
(33)Duplex conveyor cover
Open this cover to remove a misfeed.
Do not to block the exhaust slots of the machine by placing something in front of them or setting the machine closely Note attached to the wall.
10
BEFORE USING THE MACHINE
OPERATION PANEL
(1) |
(2) |
|
(3) (4) |
|
(5) |
(6) |
(7) |
(8) |
(9) (10) |
(11) |
(12) |
(13) |
|||||||||
|
|
|
|
|
|
|
|
|
|
|
|
|
|
|
|
|
|
|
|
|
|
|
|
|
|
|
|
|
|
|
|
|
|
|
|
|
|
|
|
|
|
|
|
|
|
|
|
|
|
|
|
|
|
|
|
|
|
|
|
|
|
|
|
|
|
|
|
|
|
|
|
|
|
|
|
|
|
|
|
|
|
|
|
|
|
|
|
|
|
|
|
|
|
|
|
|
|
|
|
|
|
|
|
|
|
|
|
|
|
|
|
|
|
|
|
|
|
|
|
|
|
|
|
|
|
|
|
|
|
|
|
|
|
|
|
|
|
|
|
|
|
|
|
|
|
|
|
|
|
|
|
|
|
|
|
|
|
|
|
|
|
|
|
|
|
|
|
|
|
|
|
|
|
|
|
|
|
|
|
|
|
|
|
|
|
|
|
|
|
|
|
|
|
|
|
|
|
|
|
|
|
|
|
|
|
|
|
|
|
|
|
|
|
|
|
|
|
|
|
|
|
|
|
|
|
|
|
|
|
|
|
|
|
|
|
|
|
|
|
|
|
|
|
|
|
|
|
|
|
|
|
|
|
|
|
|
|
|
|
|
|
|
|
|
|
|
|
|
|
|
|
|
|
|
|
|
|
|
|
|
|
|
|
|
|
|
|
|
|
|
|
|
|
|
|
|
|
|
|
|
|
|
|
|
|
|
|
|
|
|
|
|
|
|
|
|
|
|
|
|
|
|
|
|
|
|
|
|
|
|
|
|
|
|
|
|
|
|
|
|
|
|
|
|
|
|
|
|
|
|
|
|
|
|
|
|
|
|
|
|
|
|
|
|
|
|
|
|
|
|
|
|
|
(14)
(1)Display
Shows various messages. (p.13, 81, 125)
(2)[FAX] key / indicator ( )
)
Press to select fax mode.
(3)[PROGRAM 1 / PROGRAM 2] key (


 )
)
Press to use the scanner settings already stored. (p.134)
(4)[SCAN] key / indicator (  )
)
Press to select scan mode.
(5)[ZOOM] key (  )
)
Press to select a reduction or enlargement copy ratio. (p.29)
(6)[COPY] key / indicator ( )
)
Press to select copy mode.
(7)[ID CARD COPY] key ( )
)
Enable ID Card Copy.
(8)Arrow keys
Press to move the highlighting (which indicates that an item is selected) in the display.
(9)[OK] key
Press to enter the selected setting.
(15)(16)
(10)[EXPOSURE] key ( )
)
Use to select the exposure mode. (p.28)
(11)[ENERGY SAVE] key / indicator ( )
)
Press to enter the energy save mode.
(12)[BACK] key ( )
)
Press to return the display to the previous screen.
(13)[SPECIAL FUNCTION] key ( )
)
Press to select special functions.
(14)[C] key
Press to clear the set number of copies or stop a copy run.
(15)[ADDRESS] key ( )
)
Used to search for address, numbers and other contact information stored for auto dialling. (p.87)
(16)[DUPLEX] key ( )
)
Select the duplex copy/fax/scan mode.
11

BEFORE USING THE MACHINE
|
|
|
|
|
|
|
|
|
|
|
|
|
|
|
|
|
|
|
|
|
|
(17) (18) |
(19) |
(20) |
|
(21) |
|
|
|
(22) |
(23) |
||||||||||||
|
|
|
|
|
|
|
|
|
|
|
|
|
|
|
|
|
|
|
|
|
|
|
|
|
|
|
|
|
|
|
|
|
|
|
|
|
|
|
|
|
|
|
|
|
|
|
|
|
|
|
|
|
|
|
|
|
|
|
|
|
|
|
|
|
|
|
|
|
|
|
|
|
|
|
|
|
|
|
|
|
|
|
|
|
|
|
|
|
|
|
|
|
|
|
|
|
|
|
|
|
|
|
|
|
|
|
|
|
|
|
|
|
|
|
|
|
|
|
|
|
|
|
|
|
|
|
|
|
|
|
|
|
|
|
|
|
|
|
|
|
|
|
|
|
|
|
|
|
|
|
|
|
|
|
|
|
|
|
|
|
|
|
|
|
|
|
|
|
|
|
|
|
|
|
|
|
|
|
|
|
|
|
|
|
|
|
|
|
|
|
|
|
|
|
|
|
|
|
|
|
|
|
|
|
|
|
|
|
|
|
|
|
|
|
|
|
|
|
|
|
|
|
|
|
|
|
|
|
|
|
|
|
|
|
|
|
|
|
|
|
|
|
|
|
|
|
|
|
|
|
|
|
|
|
|
|
|
|
|
|
|
|
|
|
|
|
|
|
|
|
|
|
|
|
|
|
|
|
|
|
|
|
|
|
|
|
|
|
|
|
|
|
|
|
|
|
|
|
|
|
|
|
|
|
|
|
|
|
|
|
|
|
|
|
|
|
|
|
|
|
|
|
|
|
|
|
|
|
|
|
|
|
|
|
|
|
|
|
|
|
|
|
|
|
|
|
|
|
|
|
|
|
|
|
|
|
|
|
|
|
|
|
|
|
|
|
|
|
|
|
|
|
|
(24) |
(25) |
(26) |
(27) (28) |
(29) |
(30) |
(17)[COMM. SETTING] key (  )
)
This is used to switch between memory transmission and direct transmission, and to switch between automatic reception and manual reception. (p.89)
(18)[SPEED] key (  )
)
This is used to dial by Speed dialling. (p.83)
(19)[FAX STATUS] key (  )
)
This is used to cancel a fax transmission or a stored fax transmission. (p.93)
(20)[SPEAKER] key (  )
)
This is used to dial without lifting an extension phone connected to the machine. (p.83)
(21)[REDIAL/PAUSE] key ( )
)
This is used to redial the last number dialled, and enter a pause when entering a fax number. (p.83, p.85)
(22)[COLOUR START] key / indicator
Press this key to copy or scan an original in colour. This key cannot be used for fax.
(23)[BLACK & WHITE START] key / indicator
Press this key to copy or scan an original in black and white. This key is also used to send a fax in fax mode.
(24)[LOGOUT] key (  )
)
Press this key to log out after you have logged in and used the machine. When using the fax function, this key can also be pressed to send tone signals on a pulse dial line.
(25)Numeric keys
Enter characters/numbers.
(26)[READ-END] key (  )
)
When copying in sort mode from the document glass, press this key when you have finished scanning the original pages and are ready to start copying.
(27)[CA] key
Clears all selected settings and returns the machine to the default settings. (p.15)
(28)[STOP] key ( )
)
Press this key to stop a copy job or scanning of an original.
(29)FAX mode indicators (  )
)
• LINE indicator ( )
Lights up when a fax is being sent or received.
•DATA indicator (  )
)
Blinks when a fax cannot be printed because there is no paper or otherwise. Lights steadily when there is an unsent fax.
(30)Printer mode indicators ( )
)
•ONLINE indicator ( )
)
Print data can be received when this lamp is lit.
•DATA indicator ( )
)
Blinks when print data is being received. Lights steadily during printing.
The content of the operation panel varies by Note model.
12

BEFORE USING THE MACHINE
DISPLAY
This section explains how to use the display.
LEFT MENU AND RIGHT MENU
The display on the machine has a right menu containing frequently used settings and a left menu for display of the settings and setting screens of each function.
Left Menu
Left Menu (Example: Copy mode)
(1) |
|
(2) |
(6) |
(3)
(4)
(5)
(1)Message display
Messages are displayed regarding machine status and operation.
(2)Special function icon display
Icons of enabled special functions will appear.
1-sided to 2-sided copy
2-sided to 2-sided copy
(Models with the two-sided scanning function only)
2-sided to 1-sided copy
(Models with the two-sided scanning function only)
Sort function
\
RGB Adjust
Suppress BG
2 in 1 copy
4 in 1 copy
Right Menu
(3)Paper size display
Displays the selected paper size.
(4)Exposure display
Indicates the selected exposure mode.
(5)Copy ratio display
Displays the copy ratio for reduction or enlargement.
(6)Original size display
When the original size is specified in "Original Size" in the right menu, this shows the specified size.
The following icons appear when the original is placed.
None: Document Glass
 : Automatic document feeder (one-sided scanning)
 : Automatic document feeder (two-sided scanning)
(Models with the two-sided scanning function)
Card shot
ID card copy
Sharpness
13
BEFORE USING THE MACHINE
Right Menu
(7)(8)
(9)
(7)Connection status display
(Models with the wireless LAN function only) Displayed when wireless LAN is on.
Wireless infrastructure mode:
Connecting
Wireless infrastructure mode:
Not connected
Wired + wireless access point mode:
With handset connected
Wired + wireless access point mode:
Without handset connected
Connection failure of wireless LAN device inside machine
(8)Number of copies display
Shows the number of copies set.
(9)Function display
Shows the basic functions of each mode.
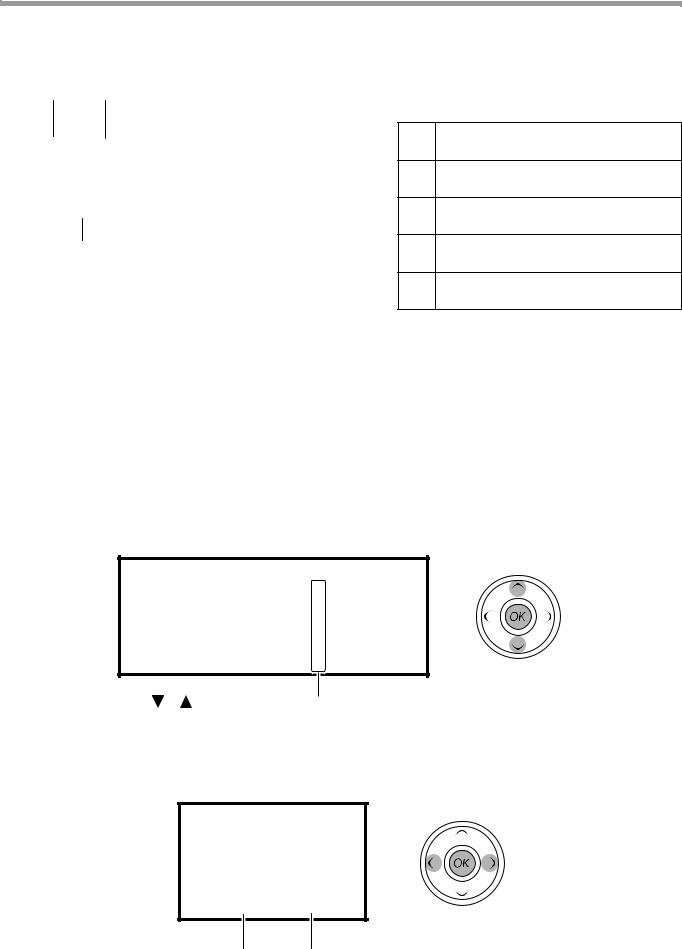
HOW TO USE THE DISPLAY
Selecting an item with the direction keys (up/down)
Use the up/down direction keys (indicated in this manual by [ ] [
] [ ]) to move to and select (highlight) a setting item in the selection screen. Press the [OK] key to display the screen of the selected setting item. Press [OK] in the setting screen to save your settings.
The [ ] [ ] icons appear in the selection screen of settings that use the up/down direction keys.
Selecting an item with the direction keys (left/right)
The left/right direction keys (indicated in this manual by [ ] [
] [ ]) are used to set the exposure and numbers in setting screens. Press the [OK] key to save your settings.
The [ ] [
] [ ] icons appear in setting screens that use the left/right direction keys.
Use the [BACK] key ( ) to return to the previous setting screen.
14
BEFORE USING THE MACHINE
POWER ON AND OFF
The power switch is located on the left side of the machine.
POWER ON
Turn the power switch to the "ON" position.
While the machine is warming up, the message "Warming Up" will appear in the message display.
POWER OFF
Make sure that the machine is not in operation and then turn the power switch to the "OFF" position.
If the power switch is turned off while the machine is in operation, a misfeed may occur and the job that was in progress will be cancelled.
• The machine reverts to the initial settings when it is first turned on, when the [CA] key is pressed, or when no  Note keys are pressed for the preset "Auto clear" time following the end of a copy job. When the machine reverts to the initial settings, all settings and functions selected to that point are cancelled. The "Auto clear" time can be
changed in the system settings. (p.179)
•The machine is initially set to automatically enter power save mode if not used for copying or printing, for a preset period of time. This setting can be changed in the system settings. (p.180)
•Before using fax mode, read the following sections and then turn on the power. "TO USE THIS PRODUCT CORRECTLY AS A FACSIMILE" (p.79)
"POINTS TO CHECK AND PROGRAM AFTER INSTALLATION" (p.80)
POWER SAVE MODES
The machine has two power save modes to reduce overall power consumption thereby reducing the cost of operation. In addition, these modes conserve natural resources and help reduce environmental pollution. The two power save modes are "Preheat mode" and "Auto power shut-off mode".
Preheat mode
This function automatically switches the machine to a low power consumption state if the duration of time set in the system settings elapses without the machine being used when the power is on. In preheat mode the display turns off. Normal operation automatically resumes when a key on the operation panel is pressed, an original is placed, or a print job or fax is received.
Auto power shut-off mode
This function automatically switches the machine to a state that consumes even less power than preheat mode if the duration of time set in the system settings elapses without the machine being used when the power is on. During auto power shut-off, only the [ENERGY SAVE] indicator ( ) blinks. To restore the machine to normal operation, press the [ENERGY SAVE] key ( ). Normal operation also resumes automatically when a print job or fax is received or scanning is begun from a computer. While auto power shut-off is in effect, pressing a key other than the [ENERGY
SAVE] key ( |
) will have no effect. |
Note |
The preheat activation time and the "Auto power shut-off timer" can be changed using system settings. |
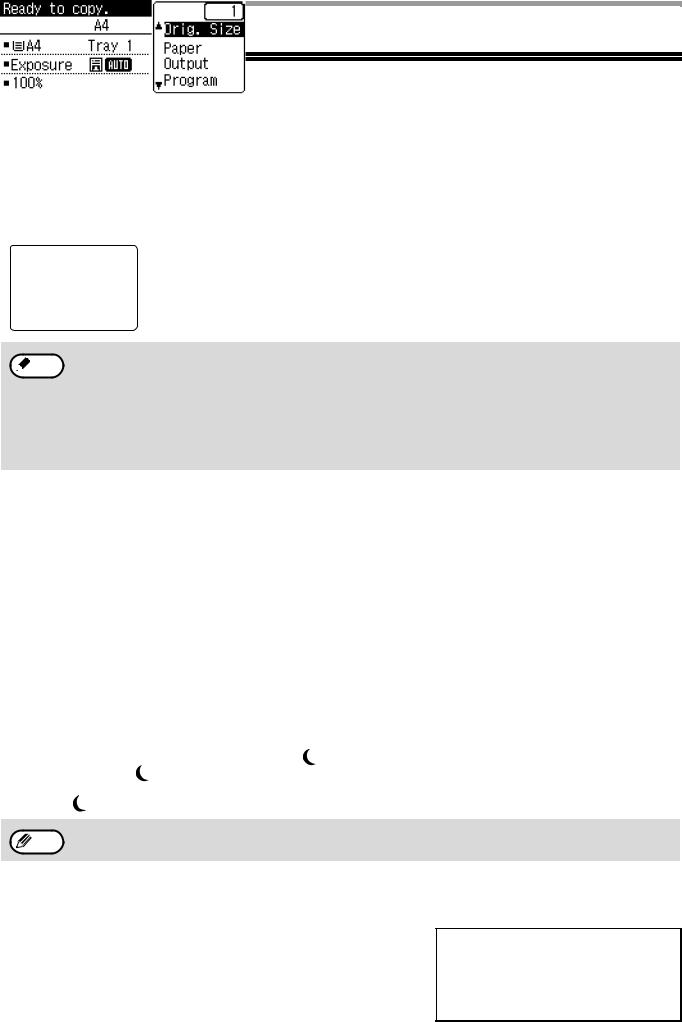
DEFAULT SETTINGS
The machine is set at the factory to return all settings to the default settings one minute after a copy job is finished (auto clear function) or when the [CA] key is pressed. When the settings return to the default settings, any functions that were selected are cancelled.
The auto clear time can be changed in the system settings. (p.179)
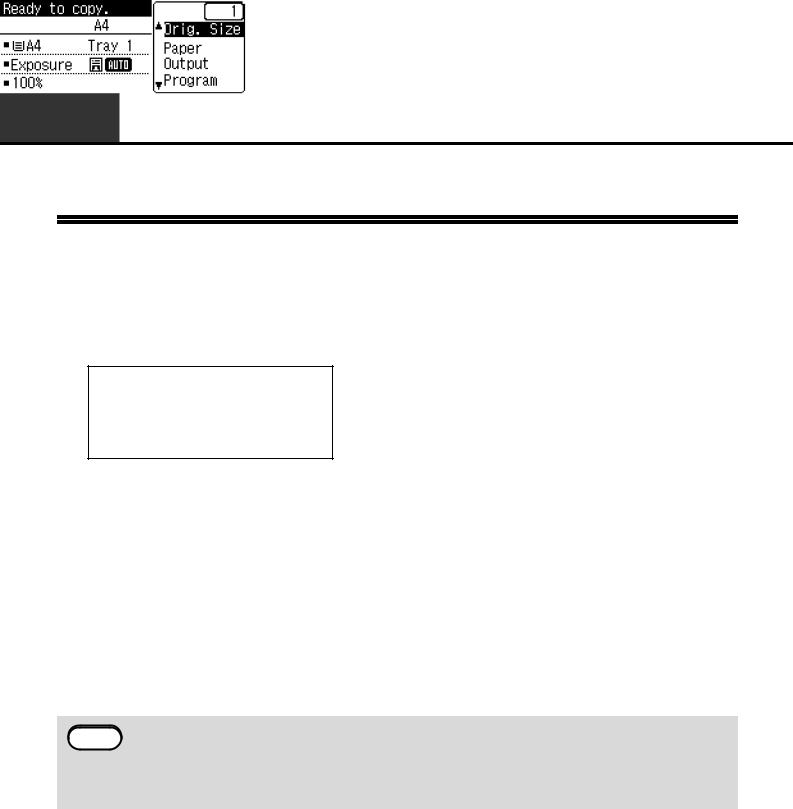
In the default state the display shown below appears. The default state of the display may vary depending on settings in the system settings.
15

BEFORE USING THE MACHINE
LOADING PAPER
The message "TRAY< >:Add paper." will be displayed when there is no copy paper in the selected paper tray. (<
 > is the tray number.) Load paper in the indicated paper tray.
PAPER
For best results, use only SHARP recommended paper.
Paper tray type |
Paper type |
Size |
Weight |
Capacity*1 |
|
Tray 1 |
Plain paper |
A4, B5, A5, 16K, |
60 g/m2 to 105 g/m2 |
250 sheets |
|
|
Recycled paper |
8-1/2" x 11", |
(16 lbs. to 28 lbs.) |
|
|
Tray 2 (Option) |
500 sheets |
||||
Colour |
5-1/2" x 8-1/2", |
|
|||
|
Letter head |
7-1/4" x 10-1/2" |
|
|
|
|
Pre-printed |
|
|
|
|
|
Pre-punched |
|
|
|
|
|
|
|
|
|
|
Bypass tray |
Plain paper |
A4, B5, A5, A6, 16K, |
55 g/m2 to 105 g/m2 |
50 sheets |
|
|
Recycled paper |
8-1/2" x 11", |
(13 lbs. to 28 lbs.) |
|
|
|
Colour |
5-1/2" x 8-1/2", |
|
|
|
|
Letter head |
7-1/4" x 10-1/2", |
|
|
|
|
Pre-printed |
8-1/2" x 14", |
|
|
|
|
Pre-punched |
8-1/2" x 13-1/2", |
|
|
|
|
|
8-1/2" x 13-2/5", |
|
|
|
|
Labels |
106 g/m2 to 220 g/m2 |
1 sheet |
||
|
8-1/2" x 13" |
||||
|
|
(28 lbs. to 80 lbs.) |
|
||
|
Transparency film |
|
10 sheets |
||
|
|
|
|||
|
|
|
|
|
|
|
Heavy paper |
|
|
20 sheets |
|
|
|
|
|
|
|
|
Glossy Paper |
|
|
1 sheet |
|
|
|
|
|
|
|
|
Envelopes*2 |
International DL |
|
10 sheets |
|
|
|
(110 mm x 220 mm) |
|
|
|
|
|
International C5 |
|
|
|
|
|
(162 mm x 229 mm) |
|
|
|
|
|
Monarch |
|
|
|
|
|
(98 mm x 191 mm) |
|
|
|
|
|
Commercial 10 |
|
|
|
|
|
(105 mm x 241 mm) |
|
|
|
|
|
|
|
|
|
|
Custom |
Horizontal: 140 to 356 mm |
|
|
|
|
|
(5-1/2" to 14") |
|
|
|
|
|
Vertical: 90 to 216 mm |
|
|
|
|
|
(3-5/8" to 8-1/2") |
|
|
|
|
|
|
|
|
*1 The number of sheets of the paper which can be set changes with the weight of a paper. The paper must not be higher than the indicator line.
*2 When feeding an envelope, push down the fusing unit release levers to release the pressure. "Loading the bypass tray" (p.20)
PLAIN PAPER, SPECIAL MEDIA
Plain paper that can be used
•SHARP standard plain paper (80 g/m2 (21 lbs.)). For paper specifications, see the specifications in the Start Guide.
•Plain paper other than SHARP standard paper (60 g/m2 to 105 g/m2 (16 lbs. to 28 lbs.))
Recycled paper, coloured paper and pre-punched paper must meet the same specifications as plain paper. Contact your dealer or nearest authorised service representative for advice on using these types of paper.
* The "g/m2" (lbs.) units used in these explanations indicate the weight of the paper.
16

BEFORE USING THE MACHINE
PRINT SIDE FACE UP OR FACE DOWN
Paper is loaded with the print side face up or face down depending on the paper type and tray.
The loading orientation of punched paper, letterhead paper, and pre-printed paper differs from that of other paper. For details, see "Example: Placement orientations of punched paper, letter head paper, and pre-printed paper" (p.17).
Trays 1 to 2
Load the paper with the print side face up.
However, if the paper type is "Pre-Punched", "Letter Head" or "Pre-Printed", load the paper with the print side face down.
Bypass tray
Load the paper with the print side face down.
However, if the paper type is "Pre-Punched", "Letter Head" or "Pre-Printed", load the paper with the print side face up.
Example: Placement orientations of punched paper, letter head paper, and pre-printed paper
Document feeder tray |
Original glass |
A |
A |
Pre-punched (Left binding)


 A
A
Tray 1 to 2
Load the paper print side down with the punch holes to the front and the top edge to the right.


 A
A
Bypass tray
Load the paper print side up with the punch holes to the front and the top edge to the left.
Letter head |
|
|
ABC |
ABC |
A |
|
Load the paper print side down with the letter head (top edge) to the right.
ABC
ABC |
A |
Load the paper print side up with the letter head (top edge) to the left.
Pre-printed
-1- |
A |
|
|
|
-1- |
Load the paper print side (pre-printed side) down with the top edge to the right.
|
|
|
|
|
|
|
-1- |
|
A |
||||
|
|
|
|
|
|
-1- |
Load the paper print side (pre-printed side) up with the top edge to the left.
17

BEFORE USING THE MACHINE
Paper that cannot be used
•Special media for inkjet printers (fine paper, glossy paper, glossy film, etc.)
•Carbon paper or thermal paper
•Pasted paper
•Paper with clips
•Paper with fold marks
•Torn paper
•Oil-feed transparency film
•Thin paper less than 55 g/m2 (13 lbs.)
•Paper that is 220 g/m2 (80 lbs. index) or heavier
•Irregularly shaped paper
•Stapled paper
•Damp paper
•Curled paper
•Paper on which either the print side or the reverse side has been printed on by another printer or multifunction device.
•Paper with a wave-like pattern due to moisture absorption
Non-recommended paper
• Iron-on transfer paper |
• Perforated paper |
|
• Japanese paper |
|
|
• |
Various types of plain paper and special media are sold. Some types cannot be used with the machine. Contact |
|
Note |
your dealer or nearest authorised service representative for advice on using these types of paper. |
|
•The image quality and toner fusibility of paper may change due to ambient conditions, operating conditions, and paper characteristics, resulting in image quality inferior to that of SHARP standard paper. Contact your dealer or nearest authorised service representative for advice on using these types of paper.
•The use of non-recommended or prohibited paper may result in skewed feeding, misfeeds, poor toner fusing (the toner does not adhere to the paper well and can be rubbed off), or machine failure.
•The use of non-recommended paper may result in misfeeds or poor image quality. Before using non-recommended paper, check if printing can be performed properly.
Paper that can be used for automatic 2-sided printing
Paper used for automatic duplex printing must meet the following conditions.
Paper type: |
Plain paper (special paper cannot be used.) |
Paper size: |
Standard sizes (A4, B5, A5, 16K, 8-1/2" x 14", 8-1/2" x 13", 8-1/2" x 11") |
Paper weight: |
60 g/m2 to 105 g/m2 (16 lbs. to 28 lbs.) |
Special papers
Follow these guidelines when using special papers.
•Use SHARP recommended transparency film and label sheets. Using other than SHARP recommended paper may result in misfeeds or smudges on the output. If other than SHARP recommended media must be used, feed each sheet one at a time using the bypass tray (do not attempt continuous copying or printing).
•There are many varieties of special paper available on the market, and some cannot be used with this machine. Before using special paper, contact your authorised service representative.
•Before using other than SHARP recommended paper, make a test copy to see if the paper is suitable.
18

BEFORE USING THE MACHINE
LOADING PAPER
Make sure that the machine is not copying or printing, and then follow these steps to load paper.
Loading the paper tray
1 Gently lift and pull out the paper tray until it stops.
2 Push the pressure plate down, and adjust the plates in the tray to the length and width of the paper.
(2) (1)
(2)

(2)
Plate B |
Plate A |
(1)Push the centre of the pressure plate down until it locks into place.
(2)The plate A and B are slide-type guides. Grasp the locking knob on the guide and slide the guides until the width that the paper can be loaded properly.
3 Load paper into the tray.
Line on |
the guide |
Roller
Protrusion
•Open the package of the paper and load it without fanning the paper.
•Make sure the stack of paper is straight before loading it.
•After loading the paper, close the guides to the paper width not to leave the gap from the guides.
• Do not load paper higher than the line on the guide (up to 250 sheets).  Note • Do not add paper to the loaded paper. It may cause multiple feed of
paper.
• The loaded paper should not go higher than the protrusion of the plate A.
4 Gently push the paper tray into the machine.
Push the tray in completely.
• If you loaded a different size of paper than was loaded previously in  Note the tray, go to "CHANGING THE PAPER SIZE SETTING OF A TRAY"
(p.22).
• When misfeed occurs, rotate the paper 180 degrees and reload it.
• Straighten curled paper before using it.
19

BEFORE USING THE MACHINE
Loading the bypass tray
To feed an envelope, first press down the fixing unit release levers (2 places) to release the pressure, and then follow the steps below.
1 Unfold the bypass tray.
Open out the bypass tray extension.
2 Push the centre of the pressure plate down until it locks into place.
3 Set the paper guides to the copy paper width.
4 Insert the paper (print face down) all the way into the bypass tray.
To prevent a misfeed, verify once more that the paper guides are adjusted to the width of the paper.
Warning |
After feeding an envelope, be sure to press up and return the fixing unit release levers (2 places) to their original positions.
Note |
If you loaded paper in the bypass tray, press the [SPECIAL FUNCTION] key ( |
) and select "Paper Select" to |
select the bypass tray. |
|
|
|
|
20
BEFORE USING THE MACHINE
Important points when inserting paper in the bypass tray
•Up to 50 sheets of standard copy paper can be set in the bypass tray.
•Be sure to place A6, B6 or 5-1/2" x 8-1/2" size paper or envelopes horizontally as shown in the following diagram. (When using the printer: Same as the direction for the A4 size paper, etc)
Available Not
available
•When loading envelopes, make sure that they are straight and flat and do not have loosely glued construction flaps (not the closure flap).
•Special papers except SHARP recommended transparency film, labels, and envelopes must be fed one sheet at a time through the bypass tray.
•When adding paper, first remove any paper remaining in the tray, combine it with the paper to be added and then reload as a single stack. The paper to be added must be the same size and type as the paper already in the tray.
•Use SHARP-recommended transparency film.
•Do not use paper that is smaller than the original. This may cause smudges or unclean images.
•Do not use paper that has already been printed on by a laser printer or plain paper fax machine. This may cause smudges or unclean images.
Important points when using envelopes
Envelopes that cannot be used
Do not use the following envelopes. Envelopes misfeed, and smudges may result.
• Envelopes with metal clasps, plastic hooks, or ribbon |
• Envelopes with an incorrectly aligned corner gluing |
|
hooks |
position on the back cannot be used as creasing |
|
• Envelopes closed with string |
may result. |
|
• Envelopes with windows or backing |
|
|
• Envelopes with an uneven front surface due to |
|
|
embossing |
|
|
• Double-layer envelopes |
|
|
• Envelopes with an adhesive for sealing |
Can be used |
|
• Hand-made envelopes |
||
• Envelopes with air inside |
|
|
• Envelopes with creases, fold marks, torn or |
Cannot be |
|
damaged envelopes |
||
used |
||
|
Print quality on envelopes
•Print quality is not guaranteed in the area 10 mm (13/32") around the edges of the envelope.
•Print quality is not guaranteed on parts of envelopes where there is a large step-like change of thickness, such as on four-layer parts or parts less than three layers.
•Print quality is not guaranteed on envelopes with adhesive for sealing.
21
BEFORE USING THE MACHINE
Inserting transparency film
•Use SHARP-recommended transparency film.
•Do not touch the print side of transparency film.
•When loading multiple sheets of transparency film in the bypass tray, be sure to fan the sheets several times before loading.
•When printing on transparency film, be sure to remove each sheet as it exits the machine. Allowing sheets to stack in the output tray may result in curling.
TRAY SETTINGS
These programs are used to change the paper size setting of a tray, and auto tray switching.
CHANGING THE PAPER SIZE SETTING OF A TRAY
If the size of the loaded paper is different from the size shown in the display, follow the steps below to change the paper size setting of the tray.
The paper size setting cannot be changed during copying, printing, fax printing (when the fax option is installed), or when a misfeed has occurred. However, if the machine is out of paper or out of toner, the paper size setting can be changed during copying, printing, and fax printing.
See "PAPER" (p.16) for information on the specifications for the types and sizes of paper that can be loaded in the paper trays.
Press the [SPECIAL FUNCTION] key (  ), and press the [
  ] or [
  ] key to select "Paper Size Set".
Press the [ ] or [
 ] key to select the paper tray for which the paper size is being changed. Press the [
  ] key to select the paper size.
Press the [OK] key.
Note |
: |
Shows tray "1". |
: |
Shows tray "2". |
|
|
: |
Shows Bypass tray. |
For the paper trays and tray numbers, see "PAPER" (p.16).
DISABLING (ENABLING) AUTO TRAY SWITCHING
When auto tray switching is enabled and paper runs out during copying or printing, the job will continue using paper from a different tray if that tray has the same size of paper in the same type. (This function does not operate when using the bypass tray or when a fax is being printed.)
This function has been enabled at the factory. If you prefer to disable the function, follow the steps below.
Press the [SPECIAL FUNCTION] key ( ), select "Paper Size", and press the [
  ] key repeatedly until "Auto Tray Switching" appears.
To re-enable auto tray switching, press the [OK] key that a checkmark appears.
22

BEFORE USING THE MACHINE
CHANGING THE PAPER TYPE OF A TRAY
To change the paper type setting for a tray, follow the steps below.
Press the [SPECIAL FUNCTION] key (  ), select "Paper Type", select the tray with the [
 ] or [
  ] key, and press the [OK] key. Select the desired paper type and press the [OK] key.
See "PAPER" (p.16) for information on the specifications for the types and sizes of paper that can be loaded in the paper trays.
USER AUTHENTICATION MODE
When user authentication mode is enabled, a count is kept of the pages printed by each account. The page counts can be viewed in the display. Users that can transmit faxes (up to 30) can be established and transmission time and other information can be tracked for each account. The Acc. Usage List (p.181) can be printed out which shows the time used for transmission and pages transmitted by each account.
This function is enabled in the system settings. ("User Registration" (p.178)) Up to 30 can be stored.
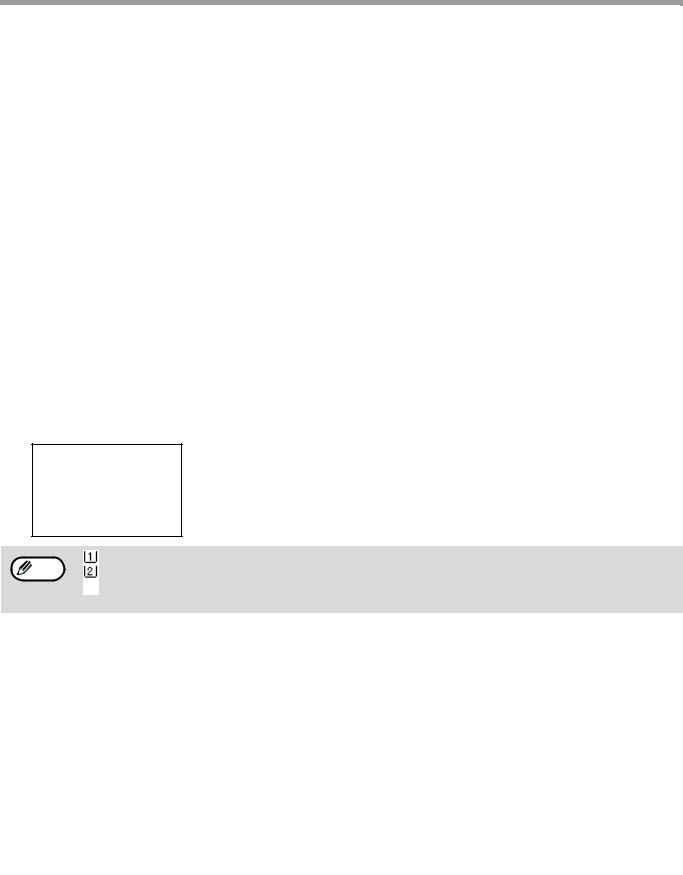
USING USER AUTHENTICATION MODE
When user authentication mode is turned on, the account number entry screen is displayed. Enter your account number (five-digit identification number) as explained below before performing a copy, fax, or scan operation.
1
2
Enter your account number (five digits) with the numeric keys.
As the account number is entered, the hyphens (-) change to asterisks ( ). If you enter an incorrect digit, press [C] key and re-enter the correct digit.
When the copy job is finished, press the [LOGOUT] key (  ).
).
• When a valid account number is entered, the current count of Note the account will appear in the message display of the base
screen. After 6 seconds
(factory default setting), the base screen appears. (p.15)
*In copy mode, the number of sheets remaining until the limit is reached is also shown if "Function Limit Setting" (p.178) is enabled in the system settings.
•If you enter a user number for copy mode has also been programmed for fax mode, you can change to fax mode after completing the copy operation and continue with the fax operation without re-entering your user
number. If you enter a user number for copy mode that has not been programmed for fax mode, enter your user number for fax mode after you press the [FAX] key ( ) to change to fax mode.
•If an invalid account number is entered in step 1, the account number entry screen reappears.
•When "A Warning when Login Fails" (p.178) in the system settings is enabled, a warning message will appear and operation will not be permitted for 1 minute if an invalid account number is entered 3 times in a row.
23

BEFORE USING THE MACHINE
ENTERING CHARACTERS
This section explains how to enter and edit characters for names of rapid dial numbers, Speed Dial numbers, and group keys, as well as account names, program names, and search characters for the address list.
CHARACTERS THAT CAN BE ENTERED
Characters that can be entered for names
The following characters can be entered:
•Up to 36 characters can be entered for a name.
However, up to 18 characters can be entered for an account name or sender's name.
•Upper case alphabet, lower case alphabet, numbers, special characters, symbols.
Characters that can be used for search characters
The following characters can be used:
•Up to 10 characters can be entered for search characters.
•Upper case alphabet, lower case alphabet, numbers, special characters.
Note |
• |
Search characters are normally the first 10 characters of the name entered for a destination. |
• |
Search characters are used when storing and using auto dial keys and numbers. |
•When a destination name includes a symbol, the symbol cannot be stored as a search character.
•Search characters can be edited.
24

BEFORE USING THE MACHINE
Characters are entered by pressing the numeric keys on the operation panel. The letters entered with each numeric key are shown below.
Characters that can be entered
Key |
Characters that can be entered for |
Characters that can be used for |
names |
search characters |
|
|
|
|
1 |
1 Space - |
1 Space - |
|
|
|
2 |
A B C 2 a b c |
A B C 2 a b c |
|
|
|
3 |
D E F 3 d e f |
D E F 3 d e f |
|
|
|
4 |
G H I 4 g h i |
G H I 4 g h i |
|
|
|
5 |
J K L 5 j k l |
J K L 5 j k l |
|
|
|
6 |
M N O 6 m n o |
M N O 6 m n o |
|
|
|
7 |
P Q R S 7 p q r s |
P Q R S 7 p q r s |
|
|
|
8 |
T U V 8 t u v |
T U V 8 t u v |
|
|
|
9 |
W X Y Z 9 w x y z |
W X Y Z 9 w x y z |
|
|
|
|
*}{][?>=;:,+)('&%$"!/_-.@# |
|
|
|
|
0 |
0 |
0 |
|
|
|
|
Use to enter special characters. |
Use to enter special characters. |
|
|
|
Note |
To enter two characters in succession that require the same key, press the [ ] key to move the cursor after |
entering the first character. |
|
|
Example: Entering "ab" (when directly entering an e-mail address) |
|
Press the [2] key once, press the [ ] key once to move the cursor, and then press the [2] key twice. |
|
|
25
2 COPY FUNCTIONS
This chapter explains how to use the copy functions.
NORMAL COPYING
This section explains how to make a regular copy.
If "User authentication" has been enabled (p.178), enter your 5-digit account number.
1
2
Make sure that the operation panel shows the copy screen.
If the machine is not in copy mode, press the [COPY] key ( ).
).
Place the original on the document glass or in the automatic document feeder.
To place the original, see "Place the original on the document glass." (p.27)" or "Place the original in the automatic document feeder." (p.27).
To specify the original size, see "SELECTING THE ORIGINAL SIZE" (p.29).
3 Set copy settings for each function as needed.
For the functions and settings, see "MAKING A COPY DARKER OR LIGHTER" (p.28) to page "WHITENING FAINT COLOURS IN COPIES (Suppress Background)" (p.36).
4
5
Enter the number of copies with the numeric keys.
To make a colour copy, press the [COLOUR START] key. To make a black & white copy, press the [BLACK & WHITE START] key.
• About one minute after copying ends, "Auto Clear" (p.179) activates and restores the copy settings to the  Note default settings. The setting for "Auto clear" can be changed in the system settings.
•When selecting settings for copying, press the [CA] key if you need to cancel the settings.
•To stop copying in the middle of a run, press the [STOP] key ( ). If you find it difficult to remove the original from the document feeder tray, open the feeding roller cover before removing the original. If you pull out the original without opening the feeding roller cover, the original may become dirty.
26

COPY FUNCTIONS
PLACING THE ORIGINAL
Place the original on the document glass.
Open the document feeder and place the original face down on the document glass.
A5 |
(5-1/2" x 8-1/2") |
B5 |
|
A4 |
(8-1/2" x 11") |
Align the upper left-hand corner of the original with the tip of the  mark.
mark.
*An original up to A4 (8-1/2" x 11") can be placed on the document glass.
Copying books or originals with folds or creases
Press down on the document feeder while copying as shown. If the document feeder is not completely closed, shadows may appear on the copy or it may be fuzzy. Straighten originals with folds or creases well before placing.
• Close the automatic document feeder  Note slowly. Abruptly closing the automatic
document feeder may damage it.
•Take care that your fingers are not pinched when closing the automatic document feeder.
•Do not press hard on the automatic document feeder. This may cause failure.
Place the original in the automatic document feeder.
Open the extension tray in the original exit, and open the original feeder tray.
Models with the one-sided scanning function
Set the originals face up in the document feeder tray. Use the peep hole (see the illustration at right) to check the position of the
original.
There is an original top edge mark  in the peep hole. Align the top edge of the original with this mark.
Originals that can be used in the document feeder
Originals that are A5 to A4 (5-1/2" x 8-1/2" to 8-1/2" x 14") and 50 g/m2 to 105 g/m2 (15 lbs. to 24 lbs.) can be used. A maximum of 50 pages can be placed at once.
•Models with the two-sided scanning function
A maximum of 50 page can be placed at once
•Models with the one-sided scanning function
A maximum of 35 page can be placed at once
• Make sure that there are no paper clips or  Note staples on the original.
•Straighten curled originals before placing them in the document feeder tray. Curled original may cause misfeeds.
•When you set multiple sheets of thick original, if the original is not fed, reduce the number of the set originals.
Originals that cannot be used in the document feeder
The following originals cannot be used. These may cause misfeeds or smudging and unclear images.
•Transparencies, tracing paper, other transparent or translucent paper, and photographs.
•Carbon paper, thermal paper.
•Originals that are creased, folded, or torn.
•Glued originals, cut-out originals.
•Original with filing holes other than 2 holes, 3 holes, 4 holes, or 4-hole wide.
•Originals printed using an ink ribbon (thermal transfer printing), originals on thermal transfer paper.
Original Guides |
Adjust the original guides |
|
to the size of the |
||
|
||
|
original(s). |
|
|
Set the original(s) face up |
|
|
in the feeding roller tray. |
27

COPY FUNCTIONS
• Specify the original size after placing the original. (p.29)
 Note • Do not place originals of different sizes together in the document feeder tray. This may cause misfeeds.
•The following icons appear when the original is placed. None: Document Glass
 : Automatic document feeder (one-sided scanning).
 : Automatic document feeder (two-sided scanning) (Models with the two-sided scanning function)
MAKING A COPY DARKER OR LIGHTER
Press the [EXPOSURE] key ( ) on the operation panel to display the copy exposure screen.
The copy exposure can be adjusted as needed to the original.
Three exposure modes are available: "Text", "Text/Print Photo" and "Photo". Depending on the settings, set "Auto" or one of five levels for the exposure.
Select the original type with the [ ][
][ ]keys, adjust the exposure if needed with the [
 ][
][ ] keys, and press the [OK] key.
SELECTING THE TRAY
When you want to use the paper in the bypass tray, or tray 2 is installed and you want to change the tray that is used, select "Paper" in the right menu of the base screen of copy mode and press the [OK] key.
The tray changes each time you press the [OK] key.
SETTING THE NUMBER OF COPIES
Press the numeric keys to set the number of copies.
The set number of copies appears in the display. A maximum of 999 copies (factory default setting) can be set.
Note |
• |
If you enter the wrong number, press the [C] key and enter the correct number. |
• |
The limit for the number of copies can be changed in the system settings. (p.183) |
28

COPY FUNCTIONS
SELECTING THE ORIGINAL SIZE
When you want to change the original size, select "Original Size" on the right menu and press the [OK] key.
Select AB or inch with the [ ][
][ ] keys, and select the size with the [
 ][
][ ] keys.
Press the [OK] key. You will return to the base copy screen.
USING THE BYPASS TRAY TO COPY A SPECIAL SIZE ORIGINAL
Select "Original Size" in the right menu of the base screen of copy mode and press the [OK] key.
Select "Size Input" in the original size selection screen and press the [OK] key to display the size entry (mm) screen.
Select "X" (width) with the [ ] or [
 ] key and enter the width with the [
 ] or [
 ] key, then do the same for the length (Y), and press the [OK] key.
REDUCING OR ENLARGING A COPY
Place the original, and press the [ZOOM] key (  ) on the operation panel to change to the ratio selection screen.
Specifying a ratio from 25% to 400%: Preset ratios/zoom.
(When the document feeder is being used, the zoom copy ratio range is 25% to 200%.)
Select the ratio with the [ ][
][ ] keys. You can fine adjust with the [
 ][
][ ] keys (increments of 1%). Press the [OK] key to enter the ratio.
29

COPY FUNCTIONS
AUTOMATIC DUPLEX COPYING
Two originals placed on the document glass can be copied onto each side of a single sheet of paper. In addition, a document feeder (Models with the two-sided scanning function) can be used to copy two originals onto one sheet of paper, or one duplex original onto two sheets of paper, or one duplex original onto each side of one sheet of paper. This function is convenient for making copies for identification purposes and helps save paper.
|
|
|
|
|
|
|
|
|
|
|
|
|
|
Original → Paper |
|
|
|
|
|
|
|
|
|
|
|
|
Usable paper |
||||||||||||||||
|
|
|
|
|
|
|
|
|
|
One-sided original → Two sides |
|
||||||||||||||||||||||||||||||||
Document |
|
|
|
|
|
|
|
|
|
|
|
|
|
|
|
|
|
|
|
|
|
|
|
|
|
|
|
|
|
|
|
|
|
|
|
|
|
|
|
|
|
|
A4, B5, A5 |
|
|
|
|
|
|
|
|
|
|
|
|
|
|
|
|
|
|
|
|
|
|
|
|
|
|
|
|
|
|
|
|
|
|
|
|
|
|
|
|
|
|
||
|
|
|
|
|
|
|
|
|
|
|
|
|
|
|
|
|
|
|
|
|
|
|
|
|
|
|
|
|
|
|
|
|
|
|
|
|
|
|
|
|
|
||
glass |
|
|
|
|
|
|
|
|
|
|
|
|
|
|
|
|
|
|
|
|
|
|
|
|
|
|
|
|
|
|
|
|
|
|
|
|
|
|
|
|
|
|
(8-1/2" x 11", 5-1/2" x 8-1/2") |
|
|
|
|
|
|
|
|
|
|
|
|
|
|
|
|
|
|
|
|
|
|
|
|
|
|
|
|
|
|
|
|
|
|
|
|
|
|
|
|
|
|
||
|
|
|
|
|
|
|
|
|
|
|
|
|
|
|
|
|
|
|
|
|
|
|
|
|
|
|
|
|
|
|
|
|
|
|
|
|
|
|
|
|
|
|
|
|
|
|
|
|
|
|
|
|
|
|
|
|
|
|
|
|
|
|
|
|
|
|
|
|
|
|
|
|
|
|
|
|
|
|
|
|
|
|
|
|
|
|
|
|
|
|
|
|
|
|
|
|
|
|
|
|
|
|
|
|
|
|
|
|
|
|
|
|
|
|
|
|
|
|
|
|
|
|
|
|
|
|
|
|
|
|
|
|
|
|
|
|
|
|
|
|
|
|
|
|
|
|
|
|
|
|
|
|
|
|
|
|
|
|
|
|
|
|
|
|
|
|
|
|
|
|
|
|
|
|
|
|
|
|
|
|
|
|
|
|
|
|
|
|
|
|
|
|
|
|
|
|
|
|
|
|
|
|
|
|
|
|
|
|
|
|
|
|
|
|
|
|
|
|
|
|
|
|
|
|
|
|
|
|
|
|
|
|
|
|
|
|
|
|
|
|
|
|
|
|
|
|
|
|
|
|
|
|
|
|
|
|
|
|
|
|
|
|
|
|
|
|
|
|
|
|
|
|
|
|
|
|
|
|
|
|
|
|
|
|
|
|
|
|
|
|
|
|
|
|
|
|
|
|
|
|
|
|
|
|
|
|
|
|
|
|
|
|
|
|
|
|
|
|
|
|
|
|
|
|
|
|
|
|
|
|
|
|
|
|
|
|
|
|
|
|
|
|
|
|
|
|
|
|
|
|
|
Document |
|
|
|
|
|
|
|
|
|
One-sided original → Two sides |
|
||||||||||||||||||||||||||||||||
feeder |
|
|
|
|
|
|
|
|
|
|
|
|
|
|
|
|
|
|
|
|
|
|
|
|
|
|
|
|
|
|
|
|
|
|
|
|
|
|
|
|
|
|
|
(Models with |
|
|
|
|
|
|
|
|
|
|
|
|
|
|
|
|
|
|
|
|
|
|
|
|
|
|
|
|
|
|
|
|
|
|
|
|
|
|
|
|
|
|
|
|
|
|
|
|
|
|
|
|
|
|
|
|
|
|
|
|
|
|
|
|
|
|
|
|
|
|
|
|
|
|
|
|
|
|
|
|
|
|
|
|
|
|
|
the one-sided |
|
|
|
|
|
|
|
|
|
|
|
|
|
|
|
|
|
|
|
|
|
|
|
|
|
|
|
|
|
|
|
|
|
|
|
|
|
|
|
|
|
|
|
|
|
|
|
|
|
|
|
|
|
|
|
|
|
|
|
|
|
|
|
|
|
|
|
|
|
|
|
|
|
|
|
|
|
|
|
|
|
|
|
|
|
|
|
scanning |
|
|
|
|
|
|
|
|
|
|
|
|
|
|
|
|
|
|
|
|
|
|
|
|
|
|
|
|
|
|
|
|
|
|
|
|
|
|
|
|
|
|
|
|
|
|
|
|
|
|
|
|
|
|
|
|
|
|
|
|
|
|
|
|
|
|
|
|
|
|
|
|
|
|
|
|
|
|
|
|
|
|
|
|
|
|
|
|
|
|
|
|
|
|
|
|
|
|
|
|
|
|
|
|
|
|
|
|
|
|
|
|
|
|
|
|
|
|
|
|
|
|
|
|
|
|
|
|
|
|
|
|
|
|
|
|
|
|
|
|
|
|
|
|
|
|
|
|
|
|
|
|
|
|
|
|
|
|
|
|
|
|
|
|
|
|
|
|
|
|
|
|
|
|
|
|
|
|
|
|
|
|
|
|
|
|
|
|
|
|
|
|
|
|
|
|
|
|
|
|
|
|
|
|
|
|
|
|
|
|
|
|
|
|
|
|
|
|
|
function) |
|
|
|
|
|
|
|
|
|
|
|
|
|
|
|
|
|
|
|
|
|
|
|
|
|
|
|
|
|
|
|
|
|
|
|
|
|
|
|
|
|
|
A4, B5, A5 |
|
|
|
|
|
|
|
|
|
|
|
|
|
|
|
|
|
|
|
|
|
|
|
|
|
|
|
|
|
|
|
|
|
|
|
|
|
|
|
|
|
|
||
|
|
|
|
|
|
|
|
|
|
|
|
|
|
|
|
|
|
|
|
|
|
|
|
|
|
|
|
|
|
|
|
|
|
|
|
|
|
|
|
|
|
||
|
|
|
|
|
|
|
|
|
|
|
|
|
|
|
|
|
|
|
|
|
|
|
|
|
|
|
|
|
|
|
|
|
|
|
|
|
|
|
|
|
|
|
(8-1/2" x 14", 8-1/2" x 13-1/2", |
|
|
|
One-sided original |
|
|
Duplex original |
|
|
|
Duplex original |
|||||||||||||||||||||||||||||||||
Document |
|
|
|
|
|
|
|
8-1/2" x 13-2/5", 8-1/2" x 13", |
|||||||||||||||||||||||||||||||||||
|
|
→ Two sides |
|
|
|
|
|
|
|
→ Two sides |
|
|
|
|
→ One side |
||||||||||||||||||||||||||||
|
|
|
|
|
|
|
|
|
|
|
|
|
8-1/2" x 11", 5-1/2" x 8-1/2") |
||||||||||||||||||||||||||||||
feeder |
|
|
|
|
|
|
|
|
|
|
|
|
|
||||||||||||||||||||||||||||||
|
|
|
|
|
|
|
|
|
|
|
|
|
|
|
|
|
|
|
|
|
|
|
|
|
|
|
|
|
|
|
|
|
|
|
|
|
|
|
|
|
|
|
|
(Models with |
|
|
|
|
|
|
|
|
|
|
|
|
|
|
|
|
|
|
|
|
|
|
|
|
|
|
|
|
|
|
|
|
|
|
|
|
|
|
|
|
|
|
|
the two-sided |
|
|
|
|
|
|
|
|
|
|
|
|
|
|
|
|
|
|
|
|
|
|
|
|
|
|
|
|
|
|
|
|
|
|
|
|
|
|
|
|
|
|
|
scanning |
|
|
|
|
|
|
|
|
|
|
|
|
|
|
|
|
|
|
|
|
|
|
|
|
|
|
|
|
|
|
|
|
|
|
|
|
|
|
|
|
|
|
|
|
|
|
|
|
|
|
|
|
|
|
|
|
|
|
|
|
|
|
|
|
|
|
|
|
|
|
|
|
|
|
|
|
|
|
|
|
|
|
|
|
|
|
|
|
|
|
|
|
|
|
|
|
|
|
|
|
|
|
|
|
|
|
|
|
|
|
|
|
|
|
|
|
|
|
|
|
|
|
|
|
|
|
|
|
|
|
|
function) |
|
|
|
|
|
|
|
|
|
|
|
|
|
|
|
|
|
|
|
|
|
|
|
|
|
|
|
|
|
|
|
|
|
|
|
|
|
|
|
|
|
|
|
|
|
|
|
|
|
|
|
|
|
|
|
|
|
|
|
|
|
|
|
|
|
|
|
|
|
|
|
|
|
|
|
|
|
|
|
|
|
|
|
|
|
|
|
|
|
|
|
|
|
|
|
|
|
|
|
|
|
|
|
|
|
|
|
|
|
|
|
|
|
|
|
|
|
|
|
|
|
|
|
|
|
|
|
|
|
|
|
|
|
|
|
|
|
|
|
|
|
|
|
|
|
|
|
|
|
|
|
|
|
|
|
|
|
|
|
|
|
|
|
|
|
|
|
|
|
|
|
|
|
|
|
|
|
|
|
|
|
|
|
|
|
|
|
|
|
|
|
|
|
|
|
|
|
|
|
|
|
|
|
|
|
|
|
|
|
|
|
|
|
|
|
|
|
|
|
|
|
|
|
|
|
|
|
|
|
|
|
|
|
|
|
|
|
|
|
|
|
|
|
|
|
|
|
|
|
|
|
|
|
|
|
|
|
|
|
|
|
|
|
|
|
|
|
|
|
|
|
|
|
|
|
|
|
|
|
|
|
|
|
|
|
|
|
|
|
|
|
|
|
|
|
|
|
|
|
|
|
|
|
|
|
|
|
To change to the 2-sided copy screen, press the [DUPLEX] key ( ) on the operation panel with the base screen of copy mode displayed.
There are restrictions on the paper that can be used for automatic duplex copying. See "Paper that can be used Note for automatic 2-sided printing" (p.18).
Select "1 to 2", "2 to 2", or "2 to 1" with the [ ][
][ ] keys and press the [OK] key.
When scanning the original on the document glass, press the [START] key after scanning the front side, turn the original over on the glass, and press the [COLOUR START] key or [BLACK & WHITE START] key. Duplex copying starts.
To change the orientation of the copy image on the front and back sides of the paper, set "Binding Change" to "On" with the [ ][
][ ] keys.
portrait original |
|
|
1 |
1 |
Orientation of the |
2 |
placed original |
Normal automatic |
If the orientation of |
duplex copying |
duplex copying is |
|
changed |
2 |
|
The top and bottom of |
The top and bottom of |
the images on the front |
the images on the front |
and back are reversed. |
and back are the same. |
30
 Loading...