


DIGITAL MEDIA RECEIVER
RÉCEPTEUR NUMÉRIQUE MULTIMÉDIA RICEVITORE MULTIMEDIALE DIGITALE RECEPTOR DE MEDIOS DIGITALES DIGITALER MEDIA RECEIVER
DIGITALE MEDIA-RECEIVER
MVH-S120UI MVH-S120UIG MVH-S12UI MVH-S120UB MVH-S120UBG MVH-S120UBA MVH-S120UBW
Operation Manual Mode d’emploi Manuale d’istruzioni Manual de instrucciones Bedienungsanleitung Bedieningshandleiding
Nederlands Deutsch Español Italiano Français English

Table of Contents |
|
Getting Started ........................................................................................ |
3 |
Radio.......................................................................................................... |
6 |
USB/iPod®/AUX ........................................................................................ |
8 |
App Mode .............................................................................................. |
11 |
Spotify® .................................................................................................. |
12 |
Using Pioneer ARC APP ....................................................................... |
13 |
Settings .................................................................................................. |
15 |
FUNCTION settings ............................................................................... |
15 |
AUDIO settings ...................................................................................... |
17 |
SYSTEM settings .................................................................................... |
18 |
ILLUMINATION settings........................................................................ |
20 |
Additional Information ....................................................................... |
21 |
About this manual: |
|
•In the following instructions, a USB memory or USB audio player are referred to as “USB device”.
•In this manual, iPod and iPhone® are referred to as “iPod”.
English
- 2 -
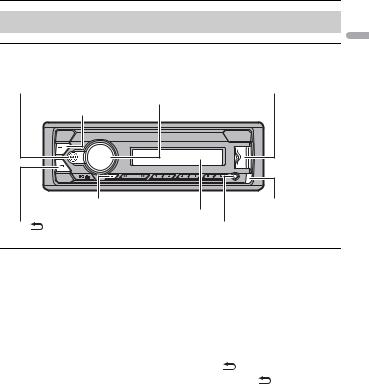
 Getting Started
Basic operation
MVH-S120UI/S120UIG/S12UI/S120UB/S120UBG/S120UBA/ S120UBW
BASS |
USB port |
M.C. (multi-control) dial |
SRC (source)/OFF |
DISP (display) |
Detach button |
|
Display window |
BAND/ |
AUX input jack (3.5 mm stereo jack) |
Frequently used operations
Purpose |
Operation |
|
|
Turn on the power* |
Press SRC/OFF to turn on the power. |
||
|
Press and hold SRC/OFF to turn off the |
||
|
power. |
|
|
|
|
|
|
Adjust the volume |
Turn the M.C. dial. |
|
|
|
|
|
|
Select a source |
Press SRC/OFF repeatedly. |
|
|
|
|
|
|
Change the display information |
Press DISP repeatedly. |
|
|
|
|
|
|
Return to the previous display/list |
Press BAND/ |
. |
|
|
|
|
|
Return to the normal display from the menu |
Press and hold BAND/ |
. |
|
|
|
|
|
Boost the bass level |
Press BASS. |
|
|
|
• You can select the bass level in [BASS |
||
|
BOOST] (page 18). |
|
|
|
|
|
|
English
- 3 -

*When this unit’s blue/white lead is connected to the vehicle’s auto-antenna relay control terminal, the vehicle’s antenna extends when this unit’s source is turned on. To retract the antenna, turn the source off.
Display indication
Indication Description
Appears when a lower tier of the menu or folder exists.
Appears when the BASS button is pressed and held.
Appears when the local seek tuning function is set (page 16).
Appears when a traffic program is received.
Appears when the TA (traffic announcements) function is set (page 16).
Appears when the sound retriever function is set (page 17).
Appears when the iPod control function is set (page 10).
Detaching the front panel
Detach the front panel to prevent theft. Remove any cables and devices attached to the front panel and turn off the unit before detaching it.
Detach |
Attach |
 Important
•Avoid subjecting the front panel to excessive shock.
•Keep the front panel out of direct sunlight and high temperatures.
•Always store the detached front panel in a protective case or bag.
Setup menu
When you turn the ignition switch to ON after installation, [SET UP :YES] appears in the display.
1 Press the M.C. dial.
English
- 4 -

The setup menu disappears after 30 seconds of no operation. If you prefer not to set at this time, turn the M.C. dial to select [NO], then press to confirm.
2Turn the M.C. dial to select the options, then press to confirm.
To proceed to the next menu option, you need to confirm your selection.
Menu Item |
Description |
LANGUAGE |
Select the language to display the text information from a |
[ENG](English), |
compressed audio file. |
|
|
[РУС](Russian), |
|
[TUR](Turkish) |
|
|
|
CLOCK SET |
Set the clock. |
|
|
FM STEP |
Select the FM tuning step from 100 kHz or 50 kHz. |
[100], [50] |
|
|
|
3[QUIT :YES] appears when all the settings have been made.
To return to the first item of the setup menu, turn the M.C. dial to select [QUIT :NO], then press to confirm.
4 Press the M.C. dial to confirm the settings.
NOTES
•You can cancel the menu setting by pressing SRC/OFF.
•These settings can be made at any time from the SYSTEM settings (page 18) and INITIAL settings (page 5).
Canceling the demonstration display (DEMO OFF)
1 Press the M.C. dial to display the main menu.
2 Turn the M.C. dial to select [SYSTEM], then press to confirm.
3 Turn the M.C. dial to select [DEMO OFF], then press to confirm.
4 Turn the M.C. dial to select [YES], then press to confirm.
INITIAL settings
1 Press and hold SRC/OFF until the unit turns off.
2 Press and hold SRC/OFF to display the main menu.
3 Turn the M.C. dial to select [INITIAL], then press to confirm.
4 Turn the M.C. dial to select an option, then press to confirm.
English
- 5 -

NOTE
The options vary depending on the unit.
Menu Item |
Description |
|
FM STEP |
Select the FM tuning step from 100 kHz or 50 kHz. |
|
[100], [50] |
|
|
|
|
|
SP-P/O MODE |
Select when there is a full-range speaker connected to the rear |
|
|
[REAR/SUB.W] |
speaker output leads and there is a subwoofer connected to the |
|
RCA output. |
|
|
|
|
|
|
|
|
[SUB.W/SUB.W] |
Select when there is a passive subwoofer connected directly to |
|
|
the rear speaker output leads and there is a subwoofer |
|
|
connected to the RCA output. |
|
|
|
|
[REAR/REAR] |
Select when there are full-range speakers connected to the rear |
|
|
speaker output leads and RCA output. If there is a full-range |
|
|
speaker connected to the rear speaker output leads, and the |
|
|
RCA output is not used, you may select either [REAR/SUB.W] or |
|
|
[REAR/REAR]. |
|
|
|
S/W UPDATE |
Select to confirm the latest system information on the unit. |
|
|
[SYSTEM INFO] |
|
|
|
|
|
[SYSTEM UPDATE] |
Select to update the unit to the latest software and initialize the |
|
|
unit settings. For details on the latest software and updating, |
|
|
visit our website. |
|
|
|
SYSTEM RESET |
Select [YES] to initialize the unit settings. The unit will be |
|
|
[YES], [NO] |
restarted automatically. |
|
(Some of the settings may be retained even after resetting the |
|
|
|
|
|
|
unit.) |
|
|
|
 Radio
Radio
The tuner frequencies on this unit are allocated for use in Western Europe, Asia, the Middle East, Africa and Oceania. Use in other areas may result in poor reception. The RDS (radio data system) function only works in areas that broadcast RDS signals for FM stations.
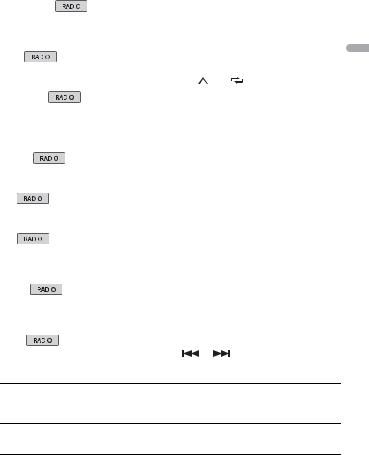
Receiving preset stations
1 Press SRC/OFF to select [RADIO].
2Press BAND/  to select the band from [FM1], [FM2], [FM3], [MW] or [LW].
-6 -
English

3 Press a number button (1/  to 6/
to 6/  ).
).
TIP
The  /
/  buttons can be also used to select a preset station when [SEEK] is set to [PCH] in the FUNCTION settings (page 16).
Best stations memory (BSM)
The six strongest stations are stored on the number buttons (1/  to 6/
to 6/  ).
).
1 After selecting the band, press the M.C. dial to display the main menu.
2 Turn the M.C. dial to select [FUNCTION], then press to confirm.
3 Turn the M.C. dial to select [BSM], then press to confirm.
To seek a station manually
1After selecting the band, press  /
/  to select a station.
Press and hold  /
/  then release to seek an available station. Scanning stops when the unit receives a station. To cancel seek tuning, press
  /
/  .
.
NOTE
[SEEK] needs to be set to [MAN] in the FUNCTION settings (page 16).
To store stations manually
1While receiving the station you want to store, press and hold one of the number buttons (1/  to 6/
to 6/  ) until it stops flashing.
Using PTY functions
The unit searches for a station by PTY (program type) information.
1 Press and hold BASS during FM reception.
2Turn the M.C. dial to select a program type from [NEWS/INFO], [POPULAR], [CLASSICS] or [OTHERS].
3Press the M.C. dial.
The unit begins to search for a station. When it is found, its program service name is displayed.
NOTES
•To cancel the search, press the M.C. dial.
•The program of some stations may differ from that indicated by the transmitted PTY.
-7 -
English

•If no station is broadcasting the type of program you searched for, [NOT FOUND] is displayed for about two seconds and then the tuner returns to the original station.
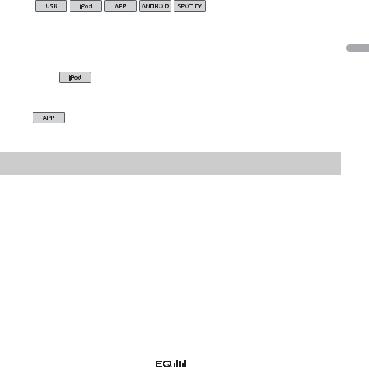
 USB/iPod®/AUX
NOTE
iPod function is not available for MVH-S120UB/S120UBG/S120UBA/S120UBW.
Playing back
Disconnect headphones from the device before connecting it to the unit.
USB devices (including Android™)/iPod
1 Open the USB port cover.
2 Plug in the USB device/iPod using an appropriate cable.
NOTE
To automatically switch to [USB] source when a USB device/iPod is connected to the unit, set [USB AUTO] to [ON] in the SYSTEM settings (page 19).
 CAUTION
Use a USB cable (sold separately) to connect the USB device as any device connected directly to the unit will protrude out from the unit, which could be dangerous.
Before removing the device, stop playback.
AOA connections
For details on AOA connection, see page 14.
MTP connection
A device installed with Android OS 4.0 or most of later versions can be connected to the unit via MTP, using the cable supplied with the device. However, depending on the connected device, OS version or the numbers of the files in the device, audio files/songs may not be able to be played back via MTP.
Note that MTP connection is not compatible with WAV and FLAC file formats.
NOTE
If you use an MTP connection, [ANDROID WIRED] needs to be set to [MEMORY] in the SYSTEM settings (page 19).
AUX
1 Insert the stereo mini plug into the AUX input jack.
2 Press SRC/OFF to select [AUX] as the source.
English
- 8 -

NOTE
If [AUX] is set to [OFF] in the SYSTEM settings, [AUX] cannot be selected as a source (page 19).
Operations
You can make various adjustments in the FUNCTION settings (page 15).
Note that the following operations do not work for an AUX device. To operate an AUX device, use the device itself.
Purpose |
Operation |
|
|
|
|
Select a folder/album*1 |
Press 1/ |
or 2/ . |
|
||
|
|
|
|
|
|
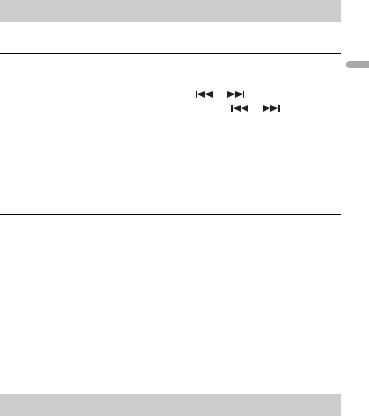
Select a track/song (chapter) |
Press |
or |
. |
|
|
|
|
|
|
||
Fast forward or reverse*2 |
Press and hold |
or |
. |
||
|
|
|
|||
Search for a file from a list |
1 |
Press and hold BASS to display the list. |
|||
|
2 |
Turn the M.C. dial to select the desired |
|||
|
|
file (folder) name or category, then press |
|||
|
|
to confirm. |
|
|
|
|
3 |
Turn the M.C. dial to select the desired |
|||
|
|
file, then press to confirm. |
|
||
|
|
Playback starts. |
|
|
|
|
|
||||
View a list of the files in the selected folder/ |
Press the M.C. dial when a folder/category |
||||
category*1 |
is selected. |
|
|
|
|
|
|
||||
Play a song in the selected folder/ |
Press and hold the M.C. dial when a folder/ |
||||
category*1 |
category is selected. |
|
|||
|
|
|
|||
Alphabetical search (iPod only) |
1 |
Press and hold BASS to display the list. |
|||
|
2 |
Turn the M.C. dial to select the desired |
|||
|
|
category list, then press and hold BASS |
|||
|
|
to enter the alphabetical search mode. |
|||
|
|
(Turning the M.C. dial twice also enters |
|||
|
|
the alphabetical search mode.) |
|||
|
3 |
Turn the M.C. dial to select a letter, then |
|||
|
|
press to display the alphabetical list. |
|||
|
To cancel alphabetical search, press BAND/ |
||||
|
|
. |
|
|
|
|
|
|
|
|
|
Repeat play |
Press 6/ |
. |
|
|
|
|
|
|
|
|
|
Random/shuffle play |
Press 5/ |
. |
|
|
|
|
|
|
|
||
Shuffle all play (iPod only) |
Press and hold 5/ |
. |
|
||
|
|
|
|
||
Pause/resume playback |
Press 4/PAUSE. |
|
|
||
|
|
|
|
|
|
English
- 9 -

Purpose |
Operation |
|
Sound retriever |
Press 3/S.Rtrv. |
|
|
[1]: Effective for low compression rates |
|
|
[2]: Effective for high compression rates |
|
|
|
|
Return to root folder (USB only)*1 |
Press and hold 1/ . |
|
|
|
|
Change drives in USB device |
Press BAND/ |
. |
(Devices that support the USB mass storage |
|
|
device class protocol only) |
|
|
|
|
|
*1 Compressed audio files only
*2 When you use the fast forward or reverse function while playing a VBR file, the playback time may be not correct.
Useful functions for iPod
Link play mode
You can access songs based on the artist, album, or genre currently playing.
1 While listening to a song, press and hold 4/PAUSE to enter the link play mode.
2Turn the M.C. dial to select the mode ([ARTIST], [ALBUM], [GENRE]), then press to confirm.
The selected song/album will be played after the currently playing song.
NOTE
The selected song/album may be canceled if you use functions other than those from the link play mode (e.g. fast forward and reverse).
iPod control
You can control the unit via a connected iPod.
The following iPod models are not compatible with this function.
–iPod nano 1st generation, iPod with video
1 Press BAND/  during playback, then select the control mode.
[CONTROL iPod]: The unit’s iPod function can be operated from the connected iPod. [CONTROL AUDIO]: The unit’s iPod function can only be operated by the buttons on the unit or supplied remote control. In this mode, the connected iPod cannot be turned on or off.
NOTES
•Pressing iPod can also switch the control mode (only for MVH-S120UI/S120UIG/S12UI).
•Switching the control mode to [CONTROL iPod] pauses song playback. Use the connected iPod to resume playback.
•The following operations are still accessible from the unit, even if the control mode is set to [CONTROL iPod].
-10 -
English
– Pause, fast forward/reverse, song/chapter selection
•The volume can only be adjusted from the unit.
 App Mode
(APP mode is not available for MVH-S120UB/S120UBG/S120UBA/S120UBW.)
You can enjoy listening to an application on an iPhone via the unit. In some cases, you can control an application by using the unit.
For details on compatible devices, visit our website.
 Important
Use of third party apps may involve or require the provision of personally identifiable information, whether through the creation of a user account or otherwise, and for certain applications, the provision of geolocation data.
ALL THIRD PARTY APPS ARE THE SOLE RESPONSIBILITY OF THE PROVIDERS, INCLUDING WITHOUT LIMITATION COLLECTION AND SECURITY OF USER DATA AND PRIVACY PRACTICES. BY ACCESSING THIRD PARTY APPS, YOU AGREE TO REVIEW THE TERMS OF SERVICE AND PRIVACY POLICIES OF THE PROVIDERS. IF YOU DO NOT AGREE WITH THE TERMS OR POLICIES OF ANY PROVIDER OR DO NOT CONSENT TO THE USE OF GEOLOCATION DATA WHERE APPLICABLE, DO NOT USE THAT THIRD PARTY APP.
For iPhone users
This function is compatible with iPhone and iPod touch® installed with iOS 5.0 or later.
NOTE
PIONEER IS NOT LIABLE FOR ANY THIRD PARTY APPS OR CONTENT, INCLUDING WITHOUT LIMITATION THEIR ACCURACY OR COMPLETENESS. THE CONTENT AND FUNCTIONALITY OF SUCH APPS ARE THE SOLE RESPONSIBILITY OF THE APP PROVIDER.
Playback of an application via the unit
1Connect this unit with the mobile device.
• iPhone via USB (page 8)
2 Press SRC/OFF to select [APP].
3 Operate the mobile device to start up the application.
Basic operations
You can make various adjustments in the FUNCTION settings (page 15).
Purpose |
Operation |
|
|
|
Select a track |
Press |
or |
. |
|
|
|
|
|
|
Fast forward or reverse |
Press and hold |
or |
. |
|
|
|
|
|
|
English
- 11 -

Purpose |
Operation |
|
Pause/resume playback |
Press BAND/ |
. |
|
|
|
 Spotify®
(MVH-S120UI/S120UIG/S12UI is only compatible with Spotify installed on iPhone.) Spotify is a music streaming distribution service not affiliated with Pioneer. More information is available at http://www.spotify.com.
The Spotify application is available for compatible smartphones, please visit https:// support.spotify.com/ for the latest compatibility information.
To enjoy Spotify as you drive, first download the Spotify app to your iPhone. You can download it on the iTunes App Store. Choose a free account or a paid Premium account, either in the app or at spotify.com. A Premium account gives you more features, like offline listening.
 Important
•This product incorporates Spotify software which is subject to 3rd party licenses found here: www.spotify.com/connect/third-party-licenses.
•For information on the countries and regions where Spotify can be used, take a look at https:// spotify.com/us/select-your-country/.
Listening to Spotify
Update the firmware of the Spotify application to the latest version before use.
1Connect this unit with the mobile device.
• iPhone via USB (page 8)
2 Press SRC/OFF to select [SPOTIFY].
3 Launch the Spotify application on the mobile device and start playback.
Basic operations
You can make various adjustments in the FUNCTION settings (page 15).
NOTE
The available operations may vary according to the type of contents (track/album/artist/playlist/radio) you want to play.
Purpose |
Operation |
|
|
Skip a track |
Press |
or |
. |
|
|
|
|
English
- 12 -

Purpose |
Operation |
|
|
|
Search for a track from a list |
1 |
Press and hold BASS to display the list. |
||
|
2 |
Turn the M.C. dial to select the desired |
||
|
|
category, then press to confirm. |
||
|
3 |
Turn the M.C. dial to select the desired |
||
|
|
file, then press to confirm. |
||
|
|
Playback starts. |
|
|
|
|
|
||
Pause/resume playback |
Press 4/PAUSE. |
|
||
|
|
|
||
Thumbs Up (Only for radio) |
Press 1/ . |
|
||
|
|
|
||
Thumbs Down (Only for radio) |
Press 2/ . |
|
||
|
|
|
|
|
Random play (Only for track/album/artist/ |
Press 5/ |
. |
|
|
playlist) |
|
|
|
|
|
|
|
|
|
Repeat play (Only for track/album/artist/ |
Press 6/ |
. |
|
|
playlist) |
|
|
|
|
|
|
|
|
|
Start a radio channel based on the song |
1 |
Press and hold 5/ |
to start a radio. |
|
currently being played. |
2 |
Press the M.C. dial. |
|
|
|
• This function may not be available |
|||
|
|
depending on the selected song. |
||
|
|
|
||
Store the information about the song |
1 |
Press and hold 3/S.Rtrv. |
||
currently being played. |
|
[SAVE]/[UNSAVE] appears. |
||
Remove the song information stored. |
2 |
Press the M.C. dial. |
|
|
|
|
|
|
|
NOTE
Some functions of Spotify may not be operated from the unit.
 Using Pioneer ARC APP
(Pioneer ARC APP for iPhone is not available for MVH-S120UB/S120UBG/S120UBA/ S120UBW.)
You can operate the unit from Pioneer ARC APP installed on an iPhone/Android device. In some cases, you can control aspects of the application, such as source selection, pause, etc., by using the unit.
For details on what operations are available on the application, see the application’s help section.
 WARNING
Do not attempt to operate the application while driving. Make sure to pull off the road and park your vehicle in a safe location before attempting to use the controls on the application.
English
- 13 -

For iPhone users
This function is compatible with iPhones (iPhone 5 or later) and iPod touches installed with iOS 8.0 or later.
You can download Pioneer ARC APP on iTunes App Store.
For Android device users
This function is compatible with a phone that runs Android 4.1 up to 7.1.2 and also supports AOA (Android Open Accessory) 2.0, but the compatibility depends on the smartphone.
You can download Pioneer ARC APP on Google Play™.
NOTE
Some Android devices connected via AOA 2.0 may not work properly or emit sounds due to their own software design, regardless of the OS version.
Making a connection with Pioneer ARC APP
When making a connection with an Android device
1 Press the M.C. dial to display the main menu.
2 Turn the M.C. dial to select [SYSTEM], then press to confirm.
3 Turn the M.C. dial to select [ANDROID WIRED], then press to confirm.
4 Turn the M.C. dial to select [APP CONTROL], then press to confirm.
5 Turn the M.C. dial to select [P.APP AUTO ON], then press to confirm.
6 Turn the M.C. dial to select [ON], then press to confirm.
7Connect this unit with the Android device via USB.
Pioneer ARC APP on the Android device starts automatically.
NOTE
If Pioneer ARC APP has not been installed on your Android device yet, a message that prompts you to install the application will appear on your Android device. Select [OFF] in [P.APP AUTO ON] to clear the message (page 19).
When making a connection with an iPhone
1 Connect this unit with the iPhone via USB.
2 Press SRC/OFF to select any source.
3Press and hold the M.C. dial.
Pioneer ARC APP on the iPhone starts.
NOTE
If the connection fails, launch Pioneer ARC APP on the iPhone.
English
- 14 -
Listening to music on Android
1 Press SRC/OFF to select [ANDROID].
Basic operations
Purpose |
Operation |
|
|
|
Select a track |
Press |
or |
. |
|
|
|
|
|
|
Fast forward or reverse |
Press and hold |
or |
. |
|
|
|
|
|
|
Pause/resume playback |
Press 4/PAUSE. |
|
|
|
|
|
|
|
|
Sound retriever |
Press 3/S.Rtrv. |
|
|
|
|
[1]: Effective for low compression rates |
|||
|
[2]: Effective for high compression rates |
|||
|
|
|
|
|
 Settings
You can adjust various settings in the main menu.
1 Press the M.C. dial to display the main menu.
2Turn the M.C. dial to select one of the categories below, then press to confirm.
•FUNCTION settings (page 15)
•AUDIO settings (page 17)
•SYSTEM settings (page 18)
•ILLUMINATION settings (page 20)
3 Turn the M.C. dial to select the options, then press to confirm.
NOTES
•iPod-related menu items in the following tables are not available for MVH-S120UB/S120UBG/ S120UBA/S120UBW.
•APP mode-related menu items in the following tables are not available for MVH-S120UB/S120UBG/ S120UBA/S120UBW.
FUNCTION settings
The menu items vary according to the source.
English
- 15 -
Menu Item |
Description |
|
|
||||||||||||||||
FM SETTING |
|
|
|
|
|
||||||||||||||
|
|
|
|
||||||||||||||||
|
|
|
|
||||||||||||||||
[TALK], [STANDARD], [MUSIC] |
Match the sound quality level with the broadcast |
||||||||||||||||||
|
|
|
|
|
|
|
|
|
|
|
|
|
|
|
|
|
signal conditions of the FM band signal. |
||
|
|
|
|
|
|
|
|
|
|
|
|
|
|
|
|
|
(Available only when FM band is selected.) |
||
|
|
|
|
|
|
|
|
|
|
|
|
|
|
|
|
|
|
|
|
BSM |
|
|
|
|
|
|
|
|
|
|
Store the six strongest stations on the number |
||||||||
|
|||||||||||||||||||
|
|||||||||||||||||||
|
|
|
|
|
|
|
|
|
|
|
|
|
|
|
|
|
|||
|
|
|
|
|
|
|
|
|
|
|
|
|
|
|
|
|
buttons (1/ |
to 6/ |
) automatically. |
|
|
|
|
|
|
|
|
|
|
|
|
|
|
|
|
|
|
|
|
REGIONAL |
|
|
|
|
|
||||||||||||||
|
|
|
|
||||||||||||||||
|
|
|
|
||||||||||||||||
[ON], [OFF] |
Limit the reception to the specific regional |
||||||||||||||||||
|
|
|
|
|
|
|
|
|
|
|
|
|
|
|
|
|
programs when AF (alternative frequencies |
||
|
|
|
|
|
|
|
|
|
|
|
|
|
|
|
|
|
search) is selected. (Available only when FM |
||
|
|
|
|
|
|
|
|
|
|
|
|
|
|
|
|
|
band is selected.) |
|
|
|
|
|
|
|
|
|
|
|
|
|
|
|
|
|
|
|
|
|
|
LOCAL |
|
|
|
|
|
||||||||||||||
|
|
|
|
||||||||||||||||
|
|
|
|
||||||||||||||||
FM: [OFF], [LV1], [LV2], [LV3], [LV4] |
Restrict the tuning station according to the |
||||||||||||||||||
MW/LW: [OFF], [LV1], [LV2] |
signal strength. |
|
|||||||||||||||||
|
|
|
|
|
|
|
|
|
|
|
|
|
|
|
|
|
|
|
|
TA |
|
|
|
|
|
|
|
|
|
|
|
||||||||
|
|
|
|
|
|||||||||||||||
|
|
|
|
|
|||||||||||||||
[ON], [OFF] |
Receive current traffic information if available. |
||||||||||||||||||
|
|
|
|
|
|
|
|
|
|
|
|
|
|
|
|
|
(Available only when FM band is selected.) |
||
|
|
|
|
|
|
|
|
|
|
|
|
|
|
|
|
|
|
|
|
AF |
|
|
|
|
|
|
|
|
|
||||||||||
|
|
|
|
||||||||||||||||
|
|
|
|
||||||||||||||||
[ON], [OFF] |
Allow the unit to retune to a different frequency |
||||||||||||||||||
|
|
|
|
|
|
|
|
|
|
|
|
|
|
|
|
|
providing the same station. (Available only when |
||
|
|
|
|
|
|
|
|
|
|
|
|
|
|
|
|
|
FM band is selected.) |
|
|
|
|
|
|
|
|
|
|
|
|
|
|
|
|
|
|
|
|
|
|
NEWS |
|
|
|
|
|
||||||||||||||
|
|
|
|
||||||||||||||||
|
|
|
|
||||||||||||||||
[ON], [OFF] |
Interrupt the currently selected source with |
||||||||||||||||||
|
|
|
|
|
|
|
|
|
|
|
|
|
|
|
|
|
news programs. (Available only when FM band is |
||
|
|
|
|
|
|
|
|
|
|
|
|
|
|
|
|
|
selected.) |
|
|
|
|
|
|
|
|
|
|
|
|
|
|
|
|
|
|
|
|
|
|
SEEK |
|
|
|
|
|
||||||||||||||
|
|
|
|
||||||||||||||||
|
|
|
|
||||||||||||||||
[MAN], [PCH] |
Assign |
or |
buttons to seek the stations |
||||||||||||||||
|
|
|
|
|
|
|
|
|
|
|
|
|
|
|
|
|
one by one (manual tuning) or select a station |
||
|
|
|
|
|
|
|
|
|
|
|
|
|
|
|
|
|
from the preset channels. |
||
SAVE 
Store the information about the song currently being played to your music list on Spotify.
UNSAVE 
Remove the song information stored in [SAVE].
English
- 16 -
Menu Item |
Description |
||
S.RTRV |
|
|
|
|
|
|
|
|
|
|
|
[1] (effective for low compression |
Enhance compressed audio and restore rich |
||
rates), |
sound. |
||
[2] (effective for high |
Not available when the FLAC file is played back. |
||
compression rates), |
|
|
|
[OFF] |
|
|
|
|
|
|
|
AUDIO BOOK |
|
|
|
[FASTER], [NORMAL], [SLOWER] |
Change the playback speed. (Not available when |
||
|
[CONTROL iPod] is selected in the control mode.) |
||
|
|
|
|
PAUSE |
|
|
|
|
Pause or resume playback. |
||
|
|
|
|
AUDIO settings
Menu Item |
Description |
FADER*1 |
|
|
Adjust the front and rear speaker balance. |
|
|
BALANCE |
|
|
Adjust the left and right speaker balance. |
|
|
EQ SETTING |
|
[SUPER BASS], [POWERFUL], |
Select or customise the equalizer curve. |
[DYNAMIC], [NATURAL], [VOCAL], |
[CUSTOM1] can be set separately for each source. |
[VIVID], [CUSTOM1], [CUSTOM2], |
However, each of the below combinations are set |
[FLAT] |
to the same setting automatically. |
Select an equalizer band and |
• USB, iPod, ANDROID, SPOTIFY, and APP |
(iPhone) |
|
level for further customising. |
[CUSTOM2] is a shared setting used for all |
Equalizer band: [80HZ], [250HZ], |
sources. |
[800HZ], [2.5KHZ], [8KHZ] |
You can also switch the equalizer by pressing |
Equalizer level: [+6] to [–6] |
repeatedly (Only for MVH-S120UB/ |
|
S120UBG/S120UBA/S120UBW). |
|
|
LOUDNESS |
|
[OFF], [LOW], [MID], [HI] |
Compensate for clear sound at low volume. |
|
|
SUB.W*2 |
|
[NOR], [REV], [OFF] |
Select the subwoofer phase. |
|
|
English
- 17 -

Menu Item |
Description |
SUB.W CTRL*2*3 |
|
Cut-off frequency: [50HZ], |
Only frequencies lower than those in the |
[63HZ], [80HZ], [100HZ], [125HZ], |
selected range are output from the subwoofer. |
[160HZ], [200HZ] |
|
Output level: [–24] to [+6] |
|
Slope level: [–12], [–24] |
|
|
|
BASS BOOST |
|
[0] to [+6] |
Select the bass boost level. |
|
|
HPF SETTING |
|
Cut-off frequency: [OFF], [50HZ], |
Only frequencies higher than the high-pass filter |
[63HZ], [80HZ], [100HZ], [125HZ], |
(HPF) cutoff are output from the speakers. |
[160HZ], [200HZ] |
|
Slope level: [–12], [–24] |
|
|
|
SLA |
|
[+4] to [–4] |
Adjust the volume level for each source except |
|
FM. |
|
Each of the below combinations are set to the |
|
same setting automatically. |
|
• USB, iPod, ANDROID, SPOTIFY, and APP |
|
(iPhone) |
|
|
*1 Not available when [SUB.W/SUB.W] is selected in [SP-P/O MODE] in the INITIAL settings (page 6). *2 Not available when [REAR/REAR] is selected in [SP-P/O MODE] in the INITIAL settings (page 6). *3 Not available when [OFF] is selected in [SUB.W].
SYSTEM settings
You can also access to these menus when the unit is turned off.
Menu Item |
Description |
LANGUAGE |
|
[ENG](English), [РУС](Russian), |
Select the language to display the text |
[TUR](Turkish) |
information from a compressed audio file. |
|
|
CLOCK SET |
|
|
Set the clock (page 5). |
|
|
12H/24H |
|
[12H], [24H] |
Select the time notation. |
|
|
English
- 18 -

Menu Item |
Description |
SCROLL SET |
|
[ONCE], [LOOP], [OFF] |
Select the way to scroll the text in the display |
|
window. |
|
|
AUTO PI |
|
[ON], [OFF] |
Search for a different station with the same |
|
programming, even if using a preset station. |
|
|
AUX |
|
[ON], [OFF] |
Set to [ON] when using an auxiliary device |
|
connected to the unit. |
|
|
SPOTIFY |
|
[ON], [OFF] |
Set to [ON] when using the Spotify function. |
MUTE MODE (Only for MVH-S120UI/S120UIG/S12UI)
[MUTE], [20dB ATT], [10dB ATT] |
Mute or attenuate sound automatically when a |
|
signal from equipment with a mute function is |
|
received. |
|
|
PW SAVE* |
|
[ON], [OFF] |
Reduce the battery power consumption. |
|
Turning on the source is the only operation |
|
allowed when this function is on. |
|
|
ANDROID WIRED |
|
[MEMORY], [APP CONTROL] |
Select the appropriate connection method for an |
|
Android device. |
|
|
P.APP AUTO ON |
|
[ON], [OFF] |
Select [ON] to automatically launch Pioneer ARC |
|
APP when an Android device is connected to the |
|
unit via AOA. (Not available when [MEMORY] is |
|
selected in [ANDROID WIRED].) |
|
|
USB AUTO |
|
[ON], [OFF] |
Select [ON] to automatically switch to [USB] |
|
source when a USB device/iPod is connected to |
|
the unit. |
|
Select [OFF] when a USB device/iPod is being |
|
connected to the unit just for charging. |
|
|
*[PW SAVE] is canceled if the vehicle battery is disconnected and will need to be turned back on once the battery is reconnected. When [PW SAVE] is off, depending on connection methods, the unit may continue to draw power from the battery if your vehicle’s ignition does not have an ACC (accessory) position.
-19 -
English

ILLUMINATION settings
Menu Item |
Description |
DIM SETTING |
|
[SYNC CLOCK], [MANUAL] |
Select the way to change the display brightness. |
|
|
BRIGHTNESS |
|
[1] to [10] |
Change the display brightness. |
|
The available setting ranges differ depending on |
|
[DIM SETTING]. |
|
|
English
- 20 -
 Additional Information
Troubleshooting
The display automatically returns to the normal display.
→No operations have been made for about 30 seconds.
– Perform an operation.
The repeat play range changes unexpectedly.
→Depending on the repeat play range, the selected range may change when another folder or track is being selected or during fast forwarding/reversing.
– Select the repeat play range again.
A subfolder is not played back.
→Subfolders cannot be played when [FLD] (folder repeat) is selected.
– Select another repeat play range.
The sound is intermittent.
→You are using a device, such as a cellular phone, that may cause audible interference.
–Move electrical devices that may be causing the interference away from the unit.
Error messages
Common
AMP ERROR
→This unit fails to operate or the speaker connection is incorrect.
→The protective circuit is activated.
–Check the speaker connection.
–Turn the ignition switch OFF and back to ON again. If the message remains, contact your dealer or an authorized Pioneer Service Station for assistance.
NO XXXX (NO TITLE, for example)
→There is no embedded text information.
–Switch the display or play another track/file.
USB device/iPod
FORMAT READ
→Sometimes there is a delay between the start of playback and when you start to hear any sound.
–Wait until the message disappears and you hear sound.
NO AUDIO
→There are no songs.
–Transfer the audio files to the USB device and connect.
→The connected USB device has security enabled.
–Follow the USB device instructions to disable the security.
SKIPPED
→The connected USB device contains DRM protected files.
– The protected files are skipped.
PROTECT
→All the files on the connected USB device are embedded with DRM.
– Replace the USB device.
N/A USB
→The connected USB device is not supported by this unit.
–Disconnect your device and replace it with a compatible USB device.
HUB ERROR
→The USB device connected via a USB hub is not supported by this unit.
–Connect the USB device directly to this unit using a USB cable.
English
- 21 -

CHECK USB
→The USB connector or USB cable has short-circuited.
–Check that the USB connector or USB cable is not caught in something or damaged.
→The connected USB device consumes more than maximum allowable current.
–Disconnect the USB device and do not use it. Turn the ignition switch OFF and back to ACC or ON. Connect only compliant USB devices.
ERROR-19
→Communication failed.
–Perform one of the following operations, then return to the USB source.
•Disconnect the USB device.
•Change to a different source.
→iPod failure.
–Disconnect the cable from the iPod. Once the iPod’s main menu is displayed, reconnect the iPod and reset it.
ERROR-23
→USB device was not formatted properly.
–Format the USB device with FAT12, FAT16 or FAT32.
ERROR-16
→The iPod firmware version is old.
–Update the iPod version.
→iPod failure.
–Disconnect the cable from the iPod. Once the iPod’s main menu is displayed, reconnect the iPod and reset it.
STOP
→There are no songs in the current list.
– Select a list that contains songs.
NOT FOUND
→No related songs.
– Transfer songs to the iPod.
APP
START UP APP
→The application has not started running yet.
–Operate the mobile device to start up the application.
Spotify
CHECK APP
→Connection to the Spotify application failed.
–Follow the instructions that appear on the screen.
Handling guidelines
USB storage device
•Connections via USB hubs are not supported.
•Firmly secure the USB storage device before driving. Do not let the USB storage device fall onto the floor, where it may become jammed under the brake or accelerator pedal.
•Depending on the USB storage device, the following problems may occur.
–Operations may vary.
–The storage device may not be recognized.
–Files may not be played back properly.
–The device may cause audible interference when you are listening to the radio.
iPod
•Do not leave the iPod in places with high temperatures.
•Firmly secure the iPod when driving. Do not let the iPod fall onto the floor, where it may become jammed under the brake or accelerator pedal.
•The settings of the iPod such as the equalizer and repeat play are changed
English
- 22 -

automatically when the iPod is connected to the unit. Once the iPod is disconnected, those settings will return to the original settings.
•Incompatible text saved on the iPod will not be displayed by the unit.
Compressed audio compatibility
•Only the first 32 characters can be displayed as a file name (including the file extension) or a folder name.
•The unit may not work properly depending on the application used to encode WMA files.
•There may be a slight delay at the start of the playback of audio files embedded with image data, or audio files stored on a USB device with numerous folder hierarchies.
•Russian text to be displayed on this unit should be encoded in one of the following character sets:
–Unicode (UTF-8, UTF-16)
–A character set other than Unicode that is used in a Windows environment and is set to Russian in the multi-language setting
 CAUTION
•Pioneer cannot guarantee compatibility with all USB mass storage devices, and assumes no responsibility for any loss of data on media players, smartphones, or other devices while using this product.
•Do not leave discs or a USB storage device in any place that is subject to high temperatures.
WMA files
File extension |
.wma |
Bit rate |
48 kbps to 320 kbps |
|
(CBR), 48 kbps to 384 |
|
kbps (VBR) |
Sampling frequency |
32 kHz, 44.1 kHz, 48 |
|
kHz |
|
|
Windows Media™ |
Not compatible |
Audio Professional, |
|
Lossless, Voice/DRM |
|
Stream/Stream with |
|
video |
|
|
|
MP3 files
File extension |
.mp3 |
Bit rate |
8 kbps to 320 kbps |
|
(CBR), VBR |
Sampling frequency |
8 kHz to 48 kHz (32 |
|
kHz, 44.1 kHz, 48 kHz |
|
for emphasis) |
|
|
Compatible ID3 tag |
1.0, 1.1, 2.2, 2.3, 2.4 |
version |
(ID3 tag Version 2.x is |
|
given priority over |
|
Version 1.x.) |
|
|
M3u playlist |
Not compatible |
|
|
MP3i (MP3 |
Not compatible |
interactive), mp3 PRO |
|
WAV files
•WAV file formats cannot be connected via MTP.
File extension |
.wav |
Quantization bits |
8 and 16 (LPCM) |
|
|
Sampling frequency |
16 kHz to 48 kHz |
|
(LPCM) |
|
|
FLAC files
•FLAC file formats cannot be connected via MTP.
•FLAC files may not be playable, depending on the encoder.
File extension |
.flac |
Sampling frequency |
8/11.025/12/16/22.05/ |
|
24/32/44.1/48 kHz |
Quantization bit rate |
16 bit |
|
|
English
- 23 -

Channel mode |
1/2 ch |
USB device
•There may be a slight delay when starting playback of audio files on a USB storage device with numerous folder hierarchies.
Playable folder |
Up to eight tiers (A |
hierarchy |
practical hierarchy is |
|
less than two tiers.) |
Playable folders |
Up to 500 |
Playable files |
Up to 15 000 |
Playback of copyright- |
Not compatible |
protected files |
|
|
|
Partitioned USB |
Only the first partition |
device |
can be played. |
|
|
iPod compatibility
This unit supports only the following iPod models. Older versions may not be supported. Made for
–iPod touch (1st through 6th generation)
–iPod classic®
–iPod nano® (3rd through 7th generation)
–iPhone 6s
–iPhone 6s Plus
–iPhone 6
–iPhone 6 Plus
–iPhone 5s
–iPhone 5c
–iPhone 5
–iPhone 4s
–iPhone 4
–iPhone 3GS
–iPhone 3G
–iPhone
•Operations may vary depending on the generation and/or software version of the iPod.
•Users of iPod with the Lightning® Connector should use the Lightning to USB Cable (supplied with iPod).
•Users of iPod with the Dock Connector should use the CD-IU51. For details, consult your dealer.
•Refer to the iPod manuals for information about the file/format compatibility.
•Audiobook, Podcast: Compatible
CAUTION |
English |
lost on the iPod, even if that data is lost |
|
Pioneer accepts no responsibility for data |
|
while this unit is used. |
|
Sequence of audio files
The user cannot assign folder numbers and specify playback sequences with this unit. Sequence of audio file depends on the connected device.
Note that the hidden files in a USB device cannot be played back.
Example of a hierarchy
 Folder
Compressed |
audio file |
01 to 05: Folder number
 to
to  : Playback sequence
- 24 -
Russian character chart
D: Display C: Character
Copyright and trademark
iTunes
Apple and iTunes are trademarks of Apple Inc., registered in the U.S. and other countries.
WMA
Windows Media is either a registered trademark or trademark of Microsoft Corporation in the United States and/or other countries.
This product includes technology owned by Microsoft Corporation and cannot be used or distributed without a license from Microsoft Licensing, Inc.
FLAC
Copyright © 2000-2009 Josh Coalson
Copyright © 2011-2013 Xiph.Org Foundation
Redistribution and use in source and binary forms, with or without modification, are permitted provided that the following conditions are met:
–Redistributions of source code must retain the above copyright notice, this list of conditions and the following disclaimer.
–Redistributions in binary form must reproduce the above copyright notice, this list of conditions and the following disclaimer in the documentation and/or other materials provided with the distribution.
–Neither the name of the Xiph.org Foundation nor the names of its contributors may be used to endorse or promote products derived from this software without specific prior written
permission.
THIS SOFTWARE IS PROVIDED BY THE COPYRIGHT HOLDERS AND CONTRIBUTORS “AS IS” AND ANY EXPRESS OR IMPLIED WARRANTIES, INCLUDING, BUT NOT LIMITED TO, THE IMPLIED WARRANTIES OF MERCHANTABILITY AND FITNESS FOR A PARTICULAR PURPOSE ARE DISCLAIMED. IN NO EVENT SHALL THE FOUNDATION OR CONTRIBUTORS BE LIABLE FOR ANY DIRECT, INDIRECT, INCIDENTAL, SPECIAL, EXEMPLARY, OR CONSEQUENTIAL DAMAGES (INCLUDING, BUT NOT LIMITED TO, PROCUREMENT OF SUBSTITUTE GOODS OR SERVICES; LOSS OF USE, DATA, OR PROFITS; OR BUSINESS INTERRUPTION) HOWEVER CAUSED AND ON ANY THEORY OF LIABILITY, WHETHER IN CONTRACT, STRICT LIABILITY, OR TORT (INCLUDING NEGLIGENCE OR OTHERWISE) ARISING IN ANY WAY OUT OF THE USE OF THIS SOFTWARE, EVEN IF ADVISED OF THE POSSIBILITY OF SUCH DAMAGE.
English
- 25 -

iPhone, iPod and Lightning
Use of the Made for Apple badge means that an accessory has been designed to connect specifically to the Apple product(s) identified in the badge, and has been certified by the developer to meet Apple performance standards. Apple is not responsible for the operation of this device or its compliance with safety and regulatory standards.
Please note that the use of this accessory with an Apple product may affect wireless performance.
iPhone, iPod, iPod classic, iPod nano, iPod touch and Lightning are trademarks of Apple Inc., registered in the U.S. and other countries.
Google™, Google Play, Android
Google, Google Play and Android are trademarks of Google LLC.
Spotify®
SPOTIFY and the Spotify logo are among the registered trademarks of Spotify AB. Compatible mobile digital devices and premium subscription required, where available, see https://www.spotify.com.
Specifications
General
Power source: 14.4 V DC (10.8 V to 15.1 V allowable)
Grounding system: Negative type Maximum current consumption: 10.0 A Dimensions (W × H × D):
DIN
Chassis: 178 mm × 50 mm × 97 mm Nose: 188 mm × 58 mm × 17 mm D
Chassis: 178 mm × 50 mm × 97 mm Nose: 170 mm × 46 mm × 17 mm
Weight: 0.5 kg
Audio
Maximum power output:
•50 W × 4 ch/4 Ω (for no subwoofer)
•50 W × 2 ch/4 Ω + 70 W × 1 ch/2 Ω
(for subwoofer) Continuous power output:
22 W × 4 (50 Hz to 15 000 Hz, 5 % THD, 4 Ω load, both channels driven)
Load impedance: 4 Ω (4 Ω to 8 Ω allowable) Preout maximum output level: 2.0 V Loudness contour: +10 dB (100 Hz), +6.5
dB (10 kHz) (volume: –30 dB) Equalizer (5-Band Graphic Equalizer):
Frequency: 80 Hz/250 Hz/800 Hz/2.5 kHz/8 kHz
Equalization range: ±12 dB (2 dB step) Subwoofer (mono):
Frequency: 50 Hz/63 Hz/80 Hz/100 Hz/125 Hz/160 Hz/200 Hz
Slope: –12 dB/oct, –24 dB/oct Gain: +6 dB to –24 dB
Phase: Normal/Reverse
USB
USB standard specification: USB 2.0 full speed
Maximum current supply: 1 A USB Protocol:
MSC (Mass Storage Class) MTP (Media Transfer Protocol)
AOA (Android Open Accessory) 2.0 File system: FAT12, FAT16, FAT32
MP3 decoding format: MPEG-1 & 2 Audio Layer 3
WMA decoding format: Ver. 7, 8, 9, 9.1, 9.2 (2 ch audio)
FLAC decoding format: v1.3.0 (Free Lossless Audio Codec)
WAV signal format: Linear PCM (Noncompressed)
FM tuner
Frequency range: 87.5 MHz to 108.0 MHz Usable sensitivity: 11 dBf (1.0 μV/75 Ω,
mono, S/N: 30 dB)
Signal-to-noise ratio: 72 dB (IEC-A network)
English
- 26 -

MW tuner
Frequency range: 531 kHz to 1 602 kHz Usable sensitivity: 25 μV (S/N: 20 dB) Signal-to-noise ratio: 62 dB (IEC-A network)
LW tuner
Frequency range: 153 kHz to 281 kHz Usable sensitivity: 28 μV (S/N: 20 dB) Signal-to-noise ratio: 62 dB (IEC-A network)
NOTE
Specifications and the design are subject to modifications without notice.
English
- 27 -

Table des matières |
|
Mise en route............................................................................................ |
3 |
Radio.......................................................................................................... |
7 |
USB/iPod®/AUX ........................................................................................ |
8 |
Mode d’application.............................................................................. |
12 |
Spotify® .................................................................................................. |
13 |
Utilisation de Pioneer ARC APP ......................................................... |
15 |
Réglages................................................................................................. |
17 |
Réglages FUNCTION ............................................................................. |
17 |
Réglages AUDIO .................................................................................... |
19 |
Réglages SYSTEM .................................................................................. |
21 |
Réglages ILLUMINATION...................................................................... |
22 |
Informations complémentaires ......................................................... |
24 |
À propos de ce mode d’emploi : |
|
•Parmi les instructions suivantes, les clés USB ou les lecteurs audio USB sont collectivement désignés sous le nom de « périphérique USB ».
•Dans ce mode d’emploi, les iPod et les iPhone® sont collectivement désignés sous le nom d’« iPod ».
Français
- 2 -
 Mise en route
Fonctionnement de base
MVH-S120UI/S120UIG/S12UI/S120UB/S120UBG/S120UBA/ S120UBW
BASS |
Port USB |
Molette M.C. (multi-contrôle) |
Français |
|
SRC (source)/OFF |
||
|
||
DISP (affichage) |
Touche de retrait |
|
|
Fenêtre d’affichage |
BAND/ |
|
Prise d’entrée AUX (prise stéréo 3,5 mm) |
|
Opérations fréquemment utilisées
Objectif |
Opération |
|
|
Mettre l’appareil sous tension* |
Appuyez sur SRC/OFF pour mettre |
|
|
|
l’appareil sous tension. |
|
|
|
Appuyez longuement sur SRC/OFF pour |
||
|
mettre l’appareil hors tension. |
|
|
|
|
|
|
Régler le volume |
Tournez la molette M.C.. |
|
|
|
|
|
|
Sélectionner une source |
Appuyez plusieurs fois sur SRC/OFF. |
|
|
|
|
|
|
Modifier les informations d’affichage |
Appuyez plusieurs fois sur DISP. |
|
|
|
|
|
|
Revenir à l’affichage/la liste précédent(e) |
Appuyez sur BAND/ |
. |
|
|
|
|
|
Revenir à l’affichage normal à partir du |
Appuyez longuement sur BAND/ |
. |
|
menu |
|
|
|
|
|
|
|
Augmentez le niveau des basses |
Appuyez sur BASS. |
|
|
•Vous pouvez sélectionner le niveau des basse dans [BASS BOOST] (page 20).
- 3 -
*Si le fil bleu/blanc de l’appareil est relié à la borne de commande du relais d’antenne automatique du véhicule, l’antenne se déploie lorsque la source de cet appareil est mise en service. Pour rétracter l’antenne, mettez la source hors service.
Indication de l’affichage
Indication Description
Apparaît lorsqu’il existe un niveau inférieur de menu ou de dossier.
Apparaît lorsque vous appuyez longuement sur le bouton BASS.
Apparaît lorsque la fonction d’accord sur une station locale est en service (page 18).
Apparaît lorsqu’un programme d’informations routières est capté.
Apparaît lorsque la fonction TA (informations routières) est activée (page 18).
Apparaît lorsque le sound retriever (correcteur de son compressé) est en service (page 19).
Apparaît lorsque la fonction de commande d’iPod est en service (page 11).
Retrait de la face avant
Retirez la face avant pour empêcher tout vol. Débranchez tous les câbles et les périphériques branchés à la face avant et mettez l’appareil hors tension avant de le retirer.
Retirer |
Fixer |
 Important
•Évitez de soumettre la face avant à des chocs excessifs.
•Tenez la face avant à l’abri du soleil et des températures élevées.
•Stockez toujours la face avant détachée, dans un étui de protection ou un sac.
Français
- 4 -
 Loading...