


XC-P01-S/-K
CD RECEIVER SYSTEM
XC-P01DAB-S/-K
Discover the benefits of registering your product online at http://www.pioneer.co.uk
(or http://www.pioneer.eu).
Operating Instructions
CAUTION
TO PREVENT THE RISK OF ELECTRIC SHOCK, DO NOT REMOVE COVER (OR BACK). NO USER-SERVICEABLE PARTS INSIDE. REFER SERVICING TO QUALIFIED
SERVICE PERSONNEL.
D3-4-2-1-1_B1_En
WARNING
This equipment is not waterproof. To prevent a fire or shock hazard, do not place any container filled with liquid near this equipment (such as a vase or flower pot) or expose it to dripping, splashing, rain or moisture.
D3-4-2-1-3_A1_En
WARNING
To prevent a fire hazard, do not place any naked flame sources (such as a lighted candle) on the equipment.
D3-4-2-1-7a_A1_En
Operating Environment
Operating environment temperature and humidity: +5 °C to +35 °C (+41 °F to +95 °F); less than 85 %RH (cooling vents not blocked)
Do not install this unit in a poorly ventilated area, or in locations exposed to high humidity or direct sunlight (or strong artificial light).
D3-4-2-1-7c*_A2_En
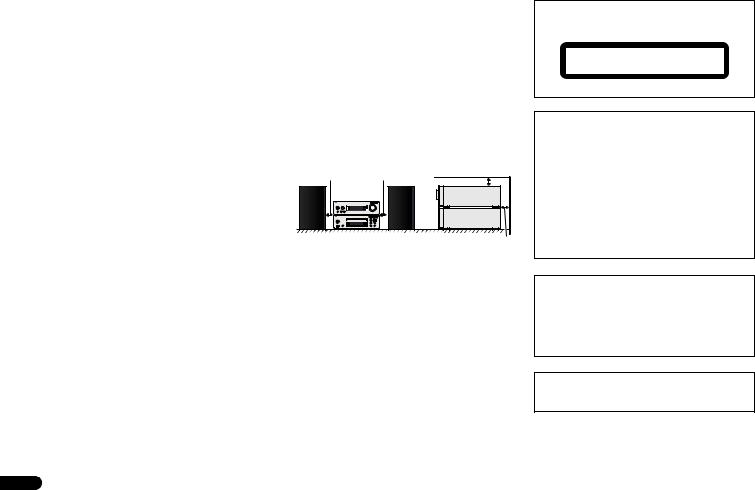
VENTILATION CAUTION
When installing this unit, make sure to leave space around the unit for ventilation to improve heat radiation (at least 10 cm at top, 10 cm at rear, and 10 cm at each side).
WARNING
Slots and openings in the cabinet are provided for ventilation to ensure reliable operation of the product, and to protect it from overheating. To prevent fire hazard, the openings should never be blocked or covered with items (such as newspapers, table-cloths, curtains) or by operating the equipment on thick carpet or a bed.
|
|
D3-4-2-1-7b*_A1_En |
10 cm |
10 cm |
10 cm |
|
10 cm
Do not install your speakers overhead on the ceiling or wall. The grill is designed to be detachable, and as such it may fall and cause damage or personal injury if installed overhead.
WARNING
Store small parts out of the reach of children and infants. If accidentally swallowed, contact a doctor immediately.
D41-6-4_A1_En
2
POWER-CORD CAUTION
Handle the power cord by the plug. Do not pull out the plug by tugging the cord and never touch the power cord when your hands are wet as this could cause a short circuit or electric shock. Do not place the unit, a piece of furniture, etc., on the power cord, or pinch the cord. Never make a knot in the cord or tie it with other cords. The power cords should be routed such that they are not likely to be stepped on. A damaged power cord can cause a fire or give you an electrical shock. Check the power cord once in a while. When you find it damaged, ask your nearest PIONEER authorized service center or your dealer for a replacement.
S002*_A1_En
CAUTION
This product is a class 1 laser product classified under the Safety of laser products, IEC 60825-1:2007.
CLASS 1 LASER PRODUCT
D58-5-2-2a_A1_En
CAUTION
The /I STANDBY/ON switch on this unit will not completely shut off all power from the AC outlet. Since the power cord serves as the main disconnect device for the unit, you will need to unplug it from the AC outlet to shut down all power. Therefore, make sure the unit has been installed so that the power cord can be easily unplugged from the AC outlet in case of an accident. To avoid fire hazard, the power cord should also be unplugged from the AC outlet when left unused for a long period of time (for example, when on vacation).
D3-4-2-2-2a*_A1_En
This product is for general household purposes. Any failure due to use for other than household purposes (such as long-term use for business purposes in a restaurant or use in a car or ship) and which requires repair will be charged for even during the warranty period.
K041_A1_En
Do not attach these speakers to the wall or ceiling, as they may cause injury in the event of a fall.
SGK007*_A1_En
En
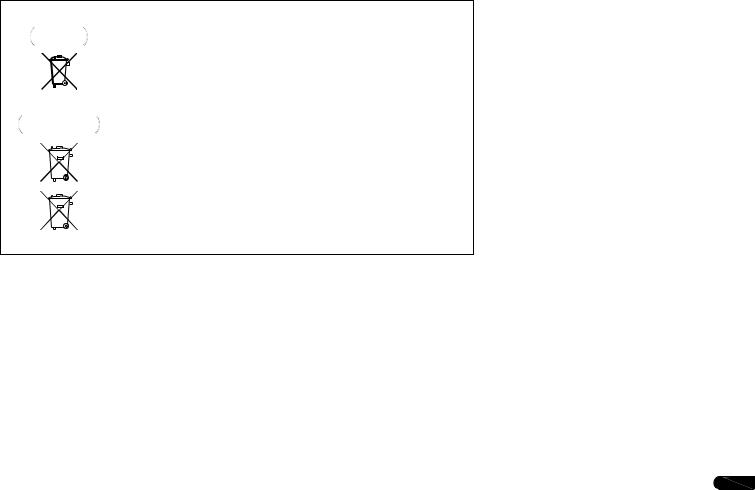
Information for users on collection and disposal of old equipment and used batteries
Symbol for |
These symbols on the products, packaging, and/or accompanying documents mean |
|||||||
equipment |
that used electrical and electronic products and batteries should not be mixed with |
|||||||
|
|
|
|
|
|
|
|
general household waste. |
|
|
|
|
|
|
|
|
|
|
|
|
|
|
|
|
|
For proper treatment, recovery and recycling of old products and used batteries, |
|
|
|
|
|
|
|
|
|
|
|
|
|
|
|
|
|
|
|
|
|
|
|
|
|
|
please take them to applicable collection points in accordance with your national |
|
|
|
|
|
|
|
|
legislation. |
|
|
|
|
|
|
|
|
By disposing of these products and batteries correctly, you will help to save valuable |
|
|
|
|
|
|
|
|
|
Symbol examples |
resources and prevent any potential negative effects on human health and the |
|||||||
for batteries |
environment which could otherwise arise from inappropriate waste handling. |
|||||||
|
|
|
|
|
|
|
|
For more information about collection and recycling of old products and batteries, |
|
|
|
|
|
|
|
|
please contact your local municipality, your waste disposal service or the point of sale |
|
|
|
|
|
|
|
|
where you purchased the items. |
|
|
|
|
|
|
|
|
These symbols are only valid in the European Union. |
|
|
|
|
|
|
|
|
For countries outside the European Union: |
|
|
|
|
|
|
|
|
If you wish to discard these items, please contact your local authorities or dealer and |
|
|
|
|
|
|
|
|
ask for the correct method of disposal. |
Pb
K058a_A1_En
Condensation
If the player is moved suddenly from a cold place into a warm room (in winter, for example) or if the temperature in the room in which the player is installed rises suddenly due to a heater, etc., water droplets (condensation) may form inside (on operating parts and the lens). When condensation is present, the player will not operate properly and playback is not possible. Let the player stand at room temperature for 1 or 2 hours with the power turned on (the time depends on the extent of condensation). The water droplets will dissipate and playback will become possible. Condensation can also occur in the summer if the player is exposed to the direct wind from an air-conditioner. If this happens, move the player to a different place.
S005_A1_En
3
En
Thank you for purchasing this PIONEER product. To obtain the best performance from this product, please read this manual carefully. It will guide you in operating your PIONEER product.
Contents
Accessories . . . . . . . . . . . . . . . . . . . . . . . . . . . . . 4
Before you start . . . . . . . . . . . . . . . . . . . . . . . . . 5
General . . . . . . . . . . . . . . . . . . . . . . . . . . . . . . . . . . . . . . . 5 Loading the batteries. . . . . . . . . . . . . . . . . . . . . . . . . . . . . 5
Controls . . . . . . . . . . . . . . . . . . . . . . . . . . . . . . . . 6
Remote control . . . . . . . . . . . . . . . . . . . . . . . . . . . . . . . . . 6 Front panel . . . . . . . . . . . . . . . . . . . . . . . . . . . . . . . . . . . . 9
Connecting your equipments . . . . . . . . . . . . . 10
Stereo receiver . . . . . . . . . . . . . . . . . . . . . . . . . . . . . . . . 10 CD player . . . . . . . . . . . . . . . . . . . . . . . . . . . . . . . . . . . . 12
Connecting the stereo receiver and CD player. . . . . . . . . 12
AC power connection . . . . . . . . . . . . . . . . . . . . . . . . . . . 12
General control . . . . . . . . . . . . . . . . . . . . . . . . . 13
To turn the power on . . . . . . . . . . . . . . . . . . . . . . . . . . . . 13 Setting the clock . . . . . . . . . . . . . . . . . . . . . . . . . . . . . . . 13 General functions . . . . . . . . . . . . . . . . . . . . . . . . . . . . . . 13
Listening to a CD or MP3/WMA disc . . . . . . . . 15
Disc playback . . . . . . . . . . . . . . . . . . . . . . . . . . . . . . . . . 15 Various disc functions. . . . . . . . . . . . . . . . . . . . . . . . . . . 16
Advanced CD or MP3/WMA disc playback . . . . . . . . . . . 16 MP3/WMA folder mode (only for MP3/WMA files). . . . . . 17
Listening to the iPod/iPhone/iPad mini . . . . . 19
Supported models. . . . . . . . . . . . . . . . . . . . . . . . . . . . . . 19
Connecting your iPod/iPhone/iPad mini . . . . . . . . . . . . . 19 Playing an iPod/iPhone/iPad mini . . . . . . . . . . . . . . . . . . 19
Listening to USB mass storage device/MP3
player . . . . . . . . . . . . . . . . . . . . . . . . . . . . . . . . 20
Connecting a USB device . . . . . . . . . . . . . . . . . . . . . . . . 20 Playing a USB device . . . . . . . . . . . . . . . . . . . . . . . . . . . 20
Listening to the FM radio . . . . . . . . . . . . . . . . 21
Tuning to a FM radio station . . . . . . . . . . . . . . . . . . . . . . 21
Using the Radio Data System (RDS) . . . . . . . . 22
Introduction to RDS . . . . . . . . . . . . . . . . . . . . . . . . . . . . 22
Listening to the DAB (XC-P01DAB only) . . . . . 23
Selecting DAB. . . . . . . . . . . . . . . . . . . . . . . . . . . . . . . . . 23
Timer and sleep operation . . . . . . . . . . . . . . . 25
Setting the wake-up timer. . . . . . . . . . . . . . . . . . . . . . . . 25 Sleep operation . . . . . . . . . . . . . . . . . . . . . . . . . . . . . . . 25
Additional information . . . . . . . . . . . . . . . . . . 26
Troubleshooting chart . . . . . . . . . . . . . . . . . . . . . . . . . . 26 Condensation . . . . . . . . . . . . . . . . . . . . . . . . . . . . . . . . . 26 If problem occurs . . . . . . . . . . . . . . . . . . . . . . . . . . . . . . 26
Factory reset, clearing all memory . . . . . . . . . . . . . . . . . 27 Before transporting the unit . . . . . . . . . . . . . . . . . . . . . . 27
Care of compact discs . . . . . . . . . . . . . . . . . . . . . . . . . . 27 Cleaning the cabinet. . . . . . . . . . . . . . . . . . . . . . . . . . . . 27
Caution for when the unit is installed in a rack with
a glass door . . . . . . . . . . . . . . . . . . . . . . . . . . . . . . . . . . 27
About playable music file formats . . . . . . . . . . . . . . . . . 28
Specifications. . . . . . . . . . . . . . . . . . . . . . . . . . . . . . . . . 28
About iPod/iPhone/iPad mini . . . . . . . . . . . . . . . . . . . . . 29 Disclaimer for Third Party Content . . . . . . . . . . . . . . . . . 29
XC-P01/XC-P01DAB CD Receiver System consists of a stereo receiver and CD player.
Accessories
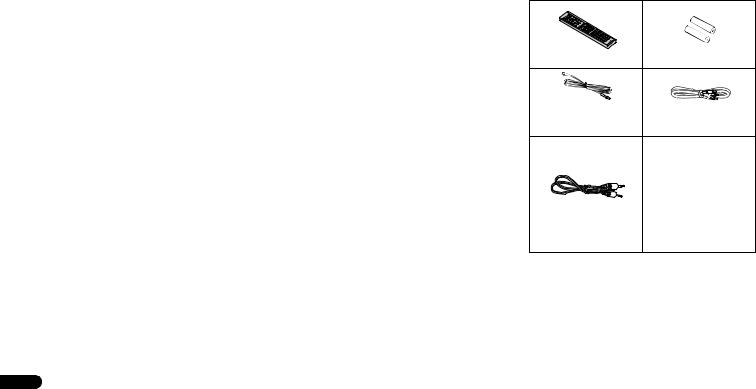
Please confirm that the following accessories are included.
Remote control x 1 |
“AAA” size battery x 2 |
FM aerial x 1 (XC-P01 only) |
RCA audio cable |
DAB/FM aerial x 1 |
(red/white plugs) |
|
|
(XC-P01DAB only) |
|
|
Power cord x 2 |
|
Speaker caution sheet |
|
Warranty card |
Remote control cable x 1 |
These operating instructions |
|
(CD-ROM) |
|
Quick Start Guide |
4
En
Before you start
Before you start
General
•Use the unit on a firm, level surface free from vibration.
•Keep the unit away from direct sunlight, strong magnetic fields, excessive dust, humidity and electronic/electrical equipment (home computers, facsimiles, etc.) which generate electrical noise.
•Do not place anything on top of the unit.
•Do not expose the unit to moisture, to temperatures higher than 60 °C (140 °F) or to extremely low temperatures.
•If your system does not work properly, disconnect the AC power lead from the wall socket. Plug the AC power lead back in, and then turn on your system.
•In case of an electrical storm, unplug the unit for safety.
•Hold the AC power plug by the head when removing it from the wall socket, as pulling the lead can damage internal wires.
•The AC power plug is used as a disconnect device and shall always remain readily operable.
•Do not remove the outer cover, as this may result in electric shock. Refer internal service to your local PIONEER service facility.
•The ventilation should not be impeded by covering the ventilation openings with items, such as newspapers, tablecloths, curtains, etc.
•No naked flame sources, such as lighted candles, should be placed on the apparatus.
•Attention should be drawn to the environmental aspects of battery disposal.
•The apparatus is designed for use in moderate climates.
•Do not touch this stereo receiver’s bottom panel while the power is on or just after it is turned off. The bottom panel becomes hot when the power is on (or right after it is turned off) and could cause burns.
 CAUTION
•The voltage used must be the same as that specified on this unit. Using this product with a higher voltage other than that which is specified is dangerous and may result in a fire or other type of accident causing damage.
PIONEER will not be held responsible for any damage resulting from use of this unit with a voltage other than that which is specified.
Loading the batteries
The batteries included with the unit are to check initial operations; they may not last over a long period. We recommend using alkaline batteries that have a longer life.
 CAUTION
•Incorrect use of batteries may result in such hazards as leakage and bursting. Observe the following precautions:
-Never use new and old batteries together.
-Insert the plus and minus sides of the batteries properly according to the marks in the battery case.
-Batteries with the same shape may have different voltages. Do not use different batteries together.
-When inserting the batteries, make sure not to damage the springs on the battery’s (–) terminals. This can cause batteries to leak or overheat.
-When disposing of used batteries, please comply with governmental regulations or environmental public institution’s rules that apply in your country/area.
 WARNING
•Do not use or store batteries in direct sunlight or other excessively hot place, such as inside a car or near a heater. This can cause batteries to leak, overheat, explode or catch fire. It can also reduce the life or performance of batteries.
5
En

Controls
Controls
Remote control
There are functions which can be operated only when the remote control is set in either of the stereo receiver control mode or CD player control mode, and functions which can be operated regardless of the mode of the remote control.
1
2
3
4
5
6


 6
6
 7
7
8 9 10


 11
11
12
 13
13 
 14
14
15
16
17
18
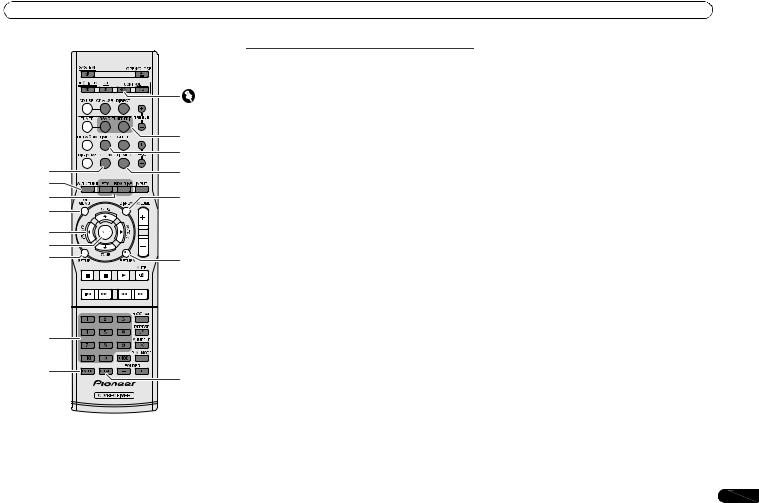
Buttons for general operations
The following functions are available regardless of the mode of the remote control.
1 SYSTEM
Press to turn on and off the stereo receiver and CD player (page 13).
2 RECEIVER
Press to turn on and off the stereo receiver (page 13).
3 CD
Press to turn on and off the CD player (page 13).
4 Input function buttons
Use to select the input source for the stereo receiver (page 14).
5 Playback control buttons
Use the buttons to control playback.
6 OPEN/CLOSE
Press to open or close the disc tray (page 15).
7Remote control mode selection buttons
CONTROL RCV − Press to operate the functions available only in the stereo receiver control mode.
CONTROL CD − Press to operate the functions available only in the CD player control mode.
8 CD USB
Press to select the CD or iPod/USB function for the CD player.
9 DIRECT
Use to listen to the sound source in the original sound quality (page 14).
10 TREBLE +/–
Press to adjust the treble (page 14).
11 SLEEP
Press to select the amount of time before the stereo receiver turns off (Off - 30 min. - 60 min. - 90 min.). You can check the remaining time by pressing the SLEEP button once (page 25).
12 BASS +/–
Press to adjust the bass (page 14).
13 CLOCK
Press to check the current time (page 13).
14 INPUT
Use to select the input source for the stereo receiver (page 14).
15 VOLUME +/–
Use to set the listening volume (page 13).
16 MUTE
Use to mute the volume (page 14).
17 REPEAT
Press to repeat the playback of track/file (pages 16, 19, 20).
18 SHUFFLE
Press to shuffle the playback order of tracks/files (pages 17, 19, 20).
En
Controls
|
9 |
|
10 |
1 |
11 |
2 |
|
3 |
12 |
4 |
|
5 |
|
6 |
|
7 |
13 |
8
6
14
Buttons available for the stereo receiver control mode
The following functions are available only when the remote control is in the stereo receiver control mode.
 Important
•Press the CONTROL RCV button before pressing the following buttons.
1 CLOCK
Press to set the clock (page 13).
2 AUTO TUNE
Press to start the DAB auto scan (XC-P01DAB only) (page 23).
3RDS function buttons
PTY − Use to search for RDS program types (page 22).
RDS DISP − Press to display the different types of RDS information available (page 22).
4 TOP MENU
Press to display the DAB setting menu (XC-P01DAB only) (page 24).
5 / / /
Use to select system setting and switch modes.
TUNE /− Use to find radio frequencies (pages 21, 23).
PRESET / − Use to select preset radio stations (pages 21, 22).
6 ENTER
Press to confirm actions.
7 SETUP
Press to access the setup menu (pages 14, 27).
8 Numeric buttons
Use to enter the number (page 21).
9Tuner control buttons
BAND − XC-P01:Switches between FM ST (stereo) and FM MONO radio bands (pages 21, 22).
XC-P01DAB: Switches between FM ST (stereo) and FM MONO, and DAB radio bands (pages 21, 22, 23).
TUNER EDIT − Use to memorize/name stations for recall (page 21).
10 TIMER
Press to set the wake-up timer or check the current setting (page 25).
11 DIMMER
Press to adjust the brightness of the display (page 13).
12 DISPLAY
Press to display information of the current mode (pages 22, 24).
13 RETURN
Press to exit the current menu screen.
14 CLEAR
Press to clear the specified settings.
7
En

Controls
 7
7

 8 1
8 1 


2
3
4

|
9 |
5 |
|
3 |
10 |
11 |
|
6 |
|
Buttons available for the CD player control mode
The following functions are available only when the remote control is in the CD player control mode.
 Important
•Press the CONTROL CD button before pressing the following buttons.
1 TOP MENU
Press to display the iPod/iPhone/iPad mini top menu (page 19).
2 / / /
Use to select system setting and switch modes.
3 ENTER
Press to confirm actions.
4 SETUP
Press to access the setup menu (pages 14, 27).
5 Numeric buttons
Use to enter the number (pages 16, 17, 20).
6 CLEAR
Press to clear a programmed track (page 17).
7 DIMMER
Press to adjust the brightness of the display (page 13).
8 DISPLAY
Press to display information of the current mode (pages 17, 18).
9 PROGRAM
Press to set programmed playback (page 17).
10 PLAY MODE
Press to enter the folder playback mode (page 18).
11 FOLDER +/–
Use to select a folder of a MP3/WMA disc or of a USB mass storage device (page 18).
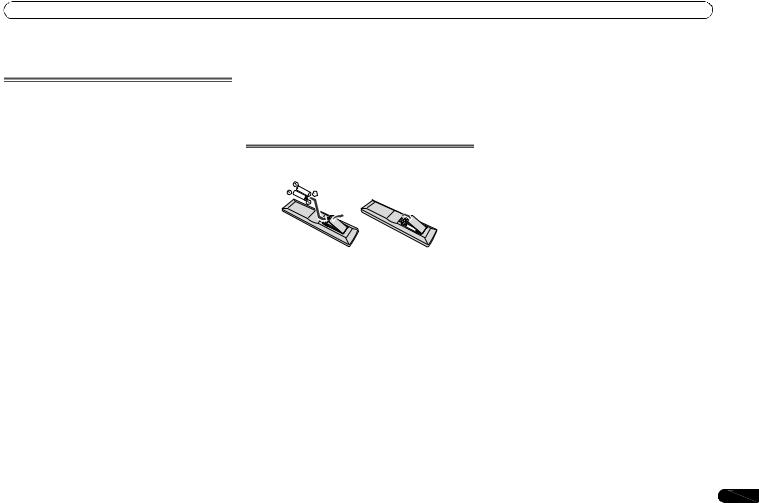
Test of the remote control
Check the remote control after checking all the connections.
Point the remote control directly at the remote sensor on the stereo receiver. The remote control can be used within the range shown below:
Remote sensor
7 m
8
En

Controls
Front panel
Stereo receiver
1 |
2 |
3 |
4 |
5 |
6 |
||||||
|
|
|
|
|
|
|
|
|
|
|
|
|
|
|
|
|
|
|
|
|
|
|
|
|
|
|
|
|
|
|
|
|
|
|
|
|
|
|
|
|
|
|
|
|
|
|
|
|
|
|
|
|
|
|
|
|
|
|
|
|
|
|
|
|
|
|
|
|
|
|
|
|
|
|
|
|
|
|
|
|
|
|
|
|
|
|
|
|
|
|
|
|
|
|
|
|
|
|
|
|
|
|
|
|
|
|
|
7 8 9
1 /I STANDBY/ON
Press to turn on and off the stereo receiver (page 13).
2 SOURCE
Use to select the input source for the stereo receiver (page 14).
3 DIRECT indicator
Lights when the DIRECT function is on (page 14).
4 TIMER indicator
Lights when the timer is set (page 25).
5 Remote sensor
Receives signals from the remote control.
6 VOLUME control
Use to set the listening volume (page 13).
7 PHONES (headphone) socket
Connect headphones. When the headphones are connected, there is no sound output from the speakers (page 14).
8 PRESET
Use to select preset radio stations (page 21).
9 DIRECT
Use to listen to the sound source in the original sound quality (page 14).
CD player
1 |
|
|
2 |
3 |
|||||
|
|
|
|
|
|
|
|
|
|
|
|
|
|
|
|
|
|
|
|
|
|
|
|
|
|
|
|
|
|
|
|
|
|
|
|
|
|
|
|
|
|
|
|
|
|
|
|
|
|
4 |
5 |
6 |
7 |
8 |
9 |
1 /I STANDBY/ON
Press to turn on and off the CD player (page 13).
2 Disc tray
Place a disc, label side up (page 15).
Use to open or close the disc tray (page 15).
4 iPod/iPhone/iPad mini/USB terminal
Connect your iPod/iPhone/iPad mini or USB mass storage as an audio source (pages 19, 20).
5 CD/USB
Press to select the CD or iPod/USB playback.
Use to stop the playback.
Use to select the desired track or folder to be played back.
Use to select the desired track or folder to be played back.
Use to play back or resume playback from the paused point.
9
En
 Loading...