


 Loading...
Advanced/Digital Super Hybrid System
User Guide for KX-TD7896
KX-TA1232/KX-TD308
Model KX-TD500/KX-TD816/KX-TD1232
HOLD |
|
|
1 |
2 |
|
4 |
||
5 |
||
7 |
||
8 |
||
|
||
RCL |
0 |
|
|
||
FLASH |
|
XFER 
 3
3 
 6
6 
 9
9
CLR
This manual is designed to be used with the KX-TD7896 Wireless PT (Wireless Proprietary Telephone) and a Panasonic KX-TA1232/TD series PBX (Business Telephone System).
Please read this guide before using and save for future reference.
Please use only the battery provided and charge the battery for about 7 hours before using the handset for the first time.

Table of Contents
Location of Controls ...................................................................................... |
3 |
Before Operating the Handset ...................................................................... |
5 |
Unsupported PBX Features ...................................................................................... |
5 |
Selecting the Display Language ............................................................................... |
5 |
Setting the Date and Time ........................................................................................ |
6 |
Enabling the Outgoing Call Log ................................................................................ |
6 |
Entering the Standby Display Name ......................................................................... |
7 |
Entering the Names of the Flexible Keys .................................................................. |
7 |
Adjusting the Ringer Volume .................................................................................... |
8 |
Adjusting the Vibrate Setting..................................................................................... |
9 |
Adjusting the Receiver/Speaker/Headset Volume .................................................... |
9 |
Handset Display ........................................................................................... |
10 |
Icons ....................................................................................................................... |
10 |
Soft Keys................................................................................................................. |
11 |
Operation Outline .................................................................................................... |
12 |
Operation for the KX-TA1232/TD308/500/816/1232 ................................... |
16 |
Making Calls ........................................................................................................... |
16 |
Receiving Calls ....................................................................................................... |
18 |
When the Dialed Extension is Busy/No Answer...................................................... |
19 |
During a Conversation ............................................................................................ |
20 |
Useful Features....................................................................................................... |
20 |
Making Use of the Voice Mail Service..................................................................... |
22 |
Using the Handset Phonebook ................................................................... |
23 |
Handset Phonebook ............................................................................................... |
23 |
Storing an Item in the Handset Phonebook ............................................................ |
23 |
Entering Characters ................................................................................................ |
25 |
Locking the Handset Phonebook ............................................................................ |
27 |
Deleting Stored Items .................................................................................. |
28 |
Deleting Stored Items in Handset Phonebook/Hot Key Dial/Incoming Call Log/ |
|
Outgoing Call Log ................................................................................................... |
28 |
Setting the Handset and Base Unit ............................................................ |
29 |
Setting the Handset and Base Unit ......................................................................... |
29 |
Troubleshooting and Error Messages ....................................................... |
35 |
Troubleshooting ...................................................................................................... |
35 |
Error Messages....................................................................................................... |
37 |
Important Information .................................................................................. |
38 |
Battery Information.................................................................................................. |
38 |
2

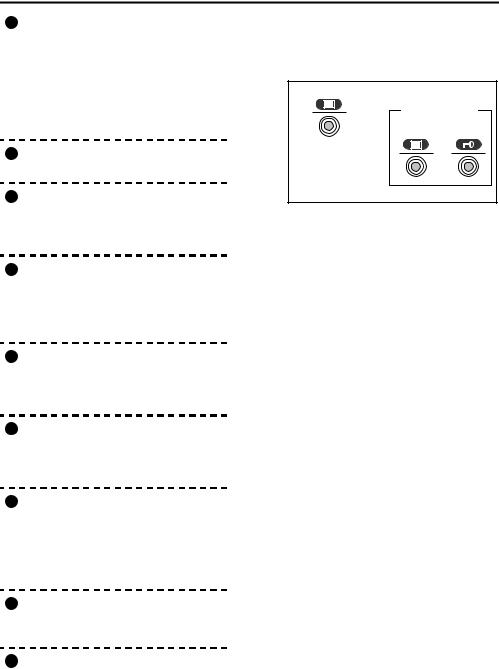
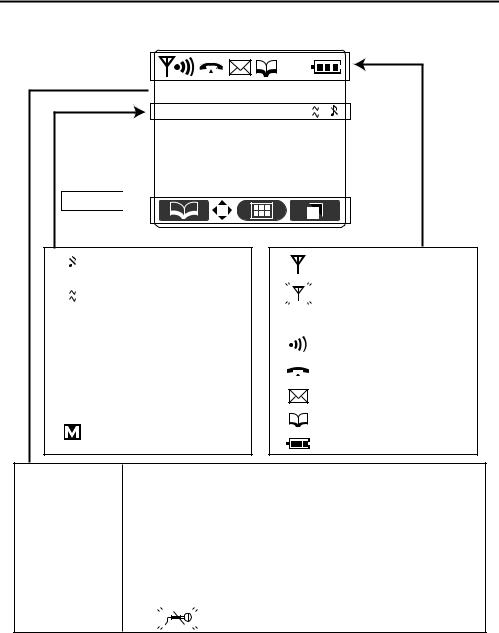
Location of Controls
 Handset
Ringing/Charge Indicator
Headset Jack
The headset is an option. Please use only a Panasonic KX-TCA86/KX-TCA88HA/ KX-TCA91/KX-TCA92 headset.
Open the cover.
Back View
Receiver
Speaker
Display
|
6 |
Power On |
|
|
Press POWER |
Standby mode |
|
5 |
for more than |
Power Off |
|
2 seconds. |
|||
|
|
Blank display
1 |
|
2 |
1 |
|
|
|
4 |
3 |
7 |
|
Charge Contact
4
Microphone


 2
2 

 5
5 

 8
8 

 0
0


 3
3 

 6
6 
 9
9
8
9
7 |
Up |
OK (Press Center.) |
Left |
|
Right |
Down
The joystick can be used to navigate through menus and to select items shown on the display.
3
Location of Controls
1TALK/SP-PHONE (Speakerphone) Key: Used to make or answer calls, or toggle between the two conversation modes (Receiver/Hands-free*) during a conversation.
*You can talk with the other party alternately through the speaker without holding the handset.
2HOLD Key:
Used to place a call on Hold.
3Meeting Mode Key:
Used to turn Meeting Mode on or off when pressed for more than two seconds in standby mode.
4RECALL/FLASH Key:
Used to disconnect the current call and make another call without hanging up, or answer a Call Waiting from the telephone company.
5Left/Right Soft Key:
Used to select the function displayed directly above each key. Functions displayed depend on the state of use.
6POWER/CANCEL Key:
Used to end calls, exit the Phonebook or Function mode, or turn the handset on or off.
7Joystick:
Used to adjust the ringer/receiver volume, select the Function mode and the function displayed directly above it, and move the cursor to select a desired item.
8TRANSFER/CLEAR Key:
Used to transfer a call to another party, or clear digits or characters.
9INTERCOM Key:
Used to make or answer intercom calls.
 Key Lock
You can lock all keys other than the Joystick while the handset is in standby mode.
<Displayed Icon>
Unlocked Locked
Press the Joystick for more than
2 seconds to lock/unlock.
 Meeting Mode
You can set the handset to prevent incoming calls from ringing. This can be useful in situations where you do not want to be disturbed, for example during a meeting.
• During Meeting Mode, functions are:
Function |
Status |
Microphone volume |
Up |
|
|
Low battery alarm |
Off |
Key tone |
Off |
Ringer/Voice Call/Paging/LCS |
Off |
Ring On Charger |
Off |
Vibrate |
On |
•During Meeting Mode or when Vibrate is set to Vib.& Ring and Vib. Ring, while handset is on charger:
Function |
Status |
Vibrate* |
Off |
|
|
Ringer |
User Setting |
|
|
*Please note that, if you set the handset on the charger while receiving an incoming call, vibration will stop. Once the vibration stops, the handset will not vibrate again for that call, even if the handset is lifted up again. (If Quick Answer is set, lifting up the handset will answer the call.)
4
Before Operating the Handset
 Unsupported PBX Features
The following PBX features are not supported when using a KX-TD7896:
1)Turning Background Music (BGM) on and off.
2)Switching displays between “date and time” and “self extension number”.
3)Confirming the current time service mode (day/night/lunch/break).
4)Entering PBX System Programming mode.
5)Calling back a caller using the Incoming Call Log.
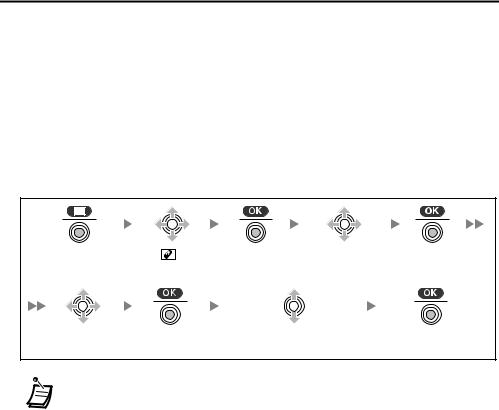
 Selecting the Display Language
You can select the desired language (English/Spanish/French).
Press the |
Select “ |
Setting Press the |
Select “Display |
Press the |
Joystick. |
Handset”. |
Joystick. |
Option”. |
Joystick. |
Select |
Press the |
Select the desired language. |
Press the |
“Language”. |
Joystick. |
(English/Español/FRANÇAIS) |
Joystick. |
• The display language of both the handset and PBX can be selected, and both should be set to the same language. For more information, refer to the user documentation for your PBX.
5
Before Operating the Handset
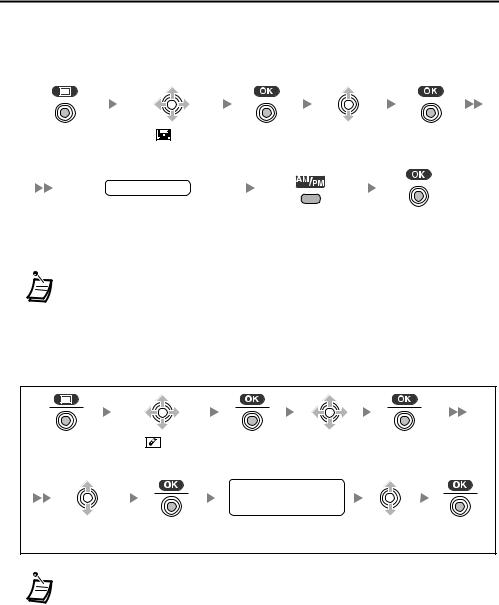
 Setting the Date and Time
If you selected “PBX Type-Type 2 (KX-TD series)” in the PBX Type setting, you should set a date and time.
|
|
|
|
|
|
|
|
|
|
|
|
|
|
Press the |
Select “ Setting |
Press the |
Select |
|
Press the |
||||||||
Joystick. |
Base”. |
Joystick. |
“Date&Time”. |
|
Joystick. |
||||||||
|
|
|
date & time |
|
|
|
|
|
|
|
|
|
|
|
|
|
|
|
|
|
|
|
|
|
|
|
|
|
|
|
|
|
|
|
|
|
|
|
|
|
|
|
|
|
|
|
|
|
|
|
|
|
|
|
|
|
Enter Day (01-31), Month (01-12), |
|
Press the Right |
Press the |
|||||||||
|
Year (00-99), Hour (00-12) |
|
Soft Key to select |
Joystick. |
|||||||||
|
and Minute (00-59) from the left. |
|
“AM” or “PM”. |
|
|
|
|
|
|||||
|
|
|
|
|
|
|
|
|
|
|
|
|
|
• Set the current date and time on the base unit. If you do not do so, the date and time of incoming calls will not be displayed correctly.
 Enabling the Outgoing Call Log
The default setting is “Off” for the Outgoing Call Log. You can enable the Outgoing Call Log if needed.
Press the |
Select “ |
Setting |
Press the |
Select “Other |
Press the |
Joystick. |
Handset”. |
Joystick. |
Option”. |
Joystick. |
|
|
|
|
Enter Password |
|
|
|
|
|
---- |
|
|
Select |
|
Press the |
Enter your password. |
Select “On”. Press the |
|
“Outgoing Log”. |
Joystick. |
(default: 1234) |
Joystick. |
||
• Only the numbers you dial, or numbers dialed using Hot Key Dial or Phonebook will be stored in the Outgoing Call Log.
6
Before Operating the Handset
 Entering the Standby Display Name
You can enter the name of the standby mode display of the handset.
Press the |
Select “ |
Setting |
Press the |
Select “Display Press the |
|
Joystick. |
Handset”. |
Joystick. |
Option”. |
Joystick. |
|
|
|
|
name |
|
|
Select “Standby |
Press the |
Enter a name. |
|
Press the |
|
Display”. |
|
Joystick. |
(max. 16 characters) |
Joystick. |
|
• To enter the name, see page 25.
 Entering the Names of the Flexible Keys
You can enter a name for each flexible key of the handset.
Press the |
Select |
Press the |
Select “Display Press the |
Select “F-Key |
|||
Joystick. |
“ |
Setting |
Joystick. |
Option”. |
Joystick. |
Name”. |
|
|
Handset”. |
|
|
|
|
|
|
|
|
|
|
|
|
name |
|
Press the |
|
Select the desired |
Press the |
Enter the name. |
Press the |
||
Joystick. |
|
flexible key. |
|
Joystick. |
(max. 12 characters) |
Joystick. |
|
• To enter the name, see page 25.
7

Before Operating the Handset
 Adjusting the Ringer Volume
Press the |
Select “ Ringer |
Press the |
Select the desired |
|
Joystick. |
Volume”. |
Joystick. |
setting. (Step Up/ |
|
|
|
|
|
Step Down/Level 1-6/Off) |
|
|
|
|
|
Press the
Joystick.
• For the ringer pattern, see page 31.
 Adjusting the Ringer Volume or Turning the Ringer Off While Ringing
While receiving a call
<To adjust the ringer volume>
Move the Joystick UP or DOWN to adjust the volume.* <To turn the ringer off>
OR
Press the Joystick. |
Press CANCEL. |
• * The adjusted volume level will also be used for subsequent calls.
• If you attach the headset while receiving an incoming call, the ring from the handset does not switch to the headset. If you attach the headset before receiving an incoming call, and headset tone is set to on, a tone will be heard from the headset. If Vibrate is set to on, the handset will vibrate whether a headset is attached or not.
8

Before Operating the Handset
 Adjusting the Vibrate Setting
Press the |
Select “ |
Press the |
Select “Incoming |
Press the |
Joystick. |
Setting Handset”. |
Joystick. |
Option”. |
Joystick. |
Select |
Press the |
Select the desired setting. |
Press the |
“Vibrate”. |
Joystick. |
(Vib.& Ring / Vib. Ring / Off) |
Joystick. |
• You can receive an intercom call by the caller’s voice instead of rings (Voice Call). For further information, refer to “Alternate Receiving—Ring/Voice” in the user documentation for your PBX.
•To set Vibrate only, without ringing, turn Meeting Mode on or set the Ringer Volume to off. (See page 8.)
 Adjusting the Receiver/Speaker/Headset Volume
During a conversation
Move the Joystick UP or DOWN to adjust the volume.
(Receiver Volume-Level 1-4, Speaker Volume-Level 1-6, Headset Volume-Level 1-4)
9
Handset Display
 Icons
Icons
 Anne
Anne
A.Ans Fwd
25.Jan 21:05
Soft Keys 
 (See page 11.)
Ringer Volume OFF (See page 8.)
Vibrate (See page 9.)
Fwd Call Forwarding
(See page 21.)
DND Do Not Disturb
(See page 21.)
A.Ans Auto Answer (For Hands-free
Answerback, see page 18.)
Meeting Mode (See page 4.)
Within range of a base unit
Out of range
If this icon flashes when making a call, move closer to the base unit and dial again.
Intercom Indicator
Off-hook Status
Message Waiting
Phonebook
Battery Indicator
<Standby Mode>
For “Entering the Standby Display Name”, see on page 7.
<While Off-hook/During a Conversation>
Talk
Speaker Phone
Headset
Headset(SP)
Displayed during a conversation using the receiver.
Displayed during a conversation using the speaker (Hands-free mode).
Displayed when a headset is attached.
Displayed when a headset is attached during Hands-free mode.
Mic Mute
Flashes when Mic Mute is on.
10
Handset Display
 Soft Keys
Icons and information shown on the display will vary depending on the state of use. To select an item shown on the display, press the corresponding soft keys.
Handset Phonebook
Opens the Phonebook. Pressing this key for more than 2 seconds locks the Phonebook.
Displayed when in Phonebook Lock. Pressing this key then entering the password (default: 1234), unlocks the Phonebook temporarily. Pressing for more than 2 seconds, then entering the password (default: 1234), unlocks the Phonebook.
Stores a new item in the Phonebook.
Searches for an item in the
Phonebook alphabetically.
Entering Characters
Displayed when in Alphabetic character entry mode. Pressing this key switches to Numeric character entry mode.
Displayed when in Numeric character entry mode. Pressing this key switches to Special character entry mode.
Displayed when in Special character entry mode. Pressing this key switches to
Alphabetic character entry mode.
Inserts a dialing pause.
Clears digits or characters.
Sounds
Turns the microphone mute on or off during a conversation.
 Turns the ringer off.
PBX Features
Establishes a multiple-party conversation (Conference).
Pressing while in PBX Station programming mode, moves
to the  (previous) or
  (next) display.
Others
Opens the main menu. Pressing this key for more than 2 seconds locks all keys.
Returns to the previous display.
Opens the list menu
(edit/delete in the Phonebook, etc.).
Confirms the entry.
Displayed when in Key Lock mode. Pressing this key for more than
2 seconds unlocks the keys.
Advances to the next display.
Displays the Outgoing Call Log.
Sets the display format of
Date&Time set in “Setting
Base”. (See page 6.)
Selects an item when in setting mode.
Displayed when there is no soft key icon.
Displayed when it is possible to use an arrow key to make a selection.
11
Handset Display
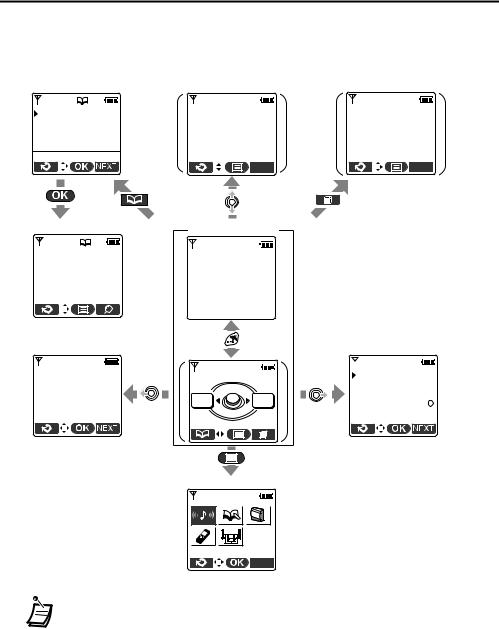
 Operation Outline
Handset functions are accessed through the display menu, and selected with the joystick and soft keys. The guidance display is shown in standby mode for easy operation.
<Phonebook> |
<Incoming Call Log> |
<Outgoing Call Log> |
|
*1 |
*2 |
Anne |
Incoming Log 1 |
Outgoing Log 1 |
Becky |
0921234567 |
Ext108 |
Charles |
||
David |
25.Jan 21:00 |
108 |
1234567890123456 |
No Answer /New |
|
|
|
<Phonebook Details>
Anne 1234567890123456
<PBX Feature Keys>
 1:Redial 2:Auto Dial 3:Fwd/DND 4:Message 5:Auto Answer
<In standby mode>
Anne
A.Ans Fwd 
25.Jan 21:05


 *
*
*The Outgoing Call Log soft key ( ) is displayed only when Outgoing
Log is enabled. (See page 6, 33.)
<PBX Flexible Keys>
*3
|
|
1:F-Key 01 |
|
|
|
2:F-Key 02 |
|
FUNC |
F-CO |
3:F-Key 03 |
|
4:F-Key 04 |
|||
|
|
||
|
|
5:F-Key 05 |
<Main Menu>
 Ringer Volume
•These functions cannot be accessed while in key lock mode.
•The displays marked with  are only shown when the following values have been set: *1 Setting Base:PBX Type →Type 2 (KX-TD series)/Date&Time/Incoming
Log (See page 34.) You cannot make a call using the Incoming Call Log. *2 Setting Handset → Other Option → Outgoing Log → On (See page 33.)
*3 Setting Handset → Display Option → Guidance → On (See page 33.)
12
Loading...